

Page 1
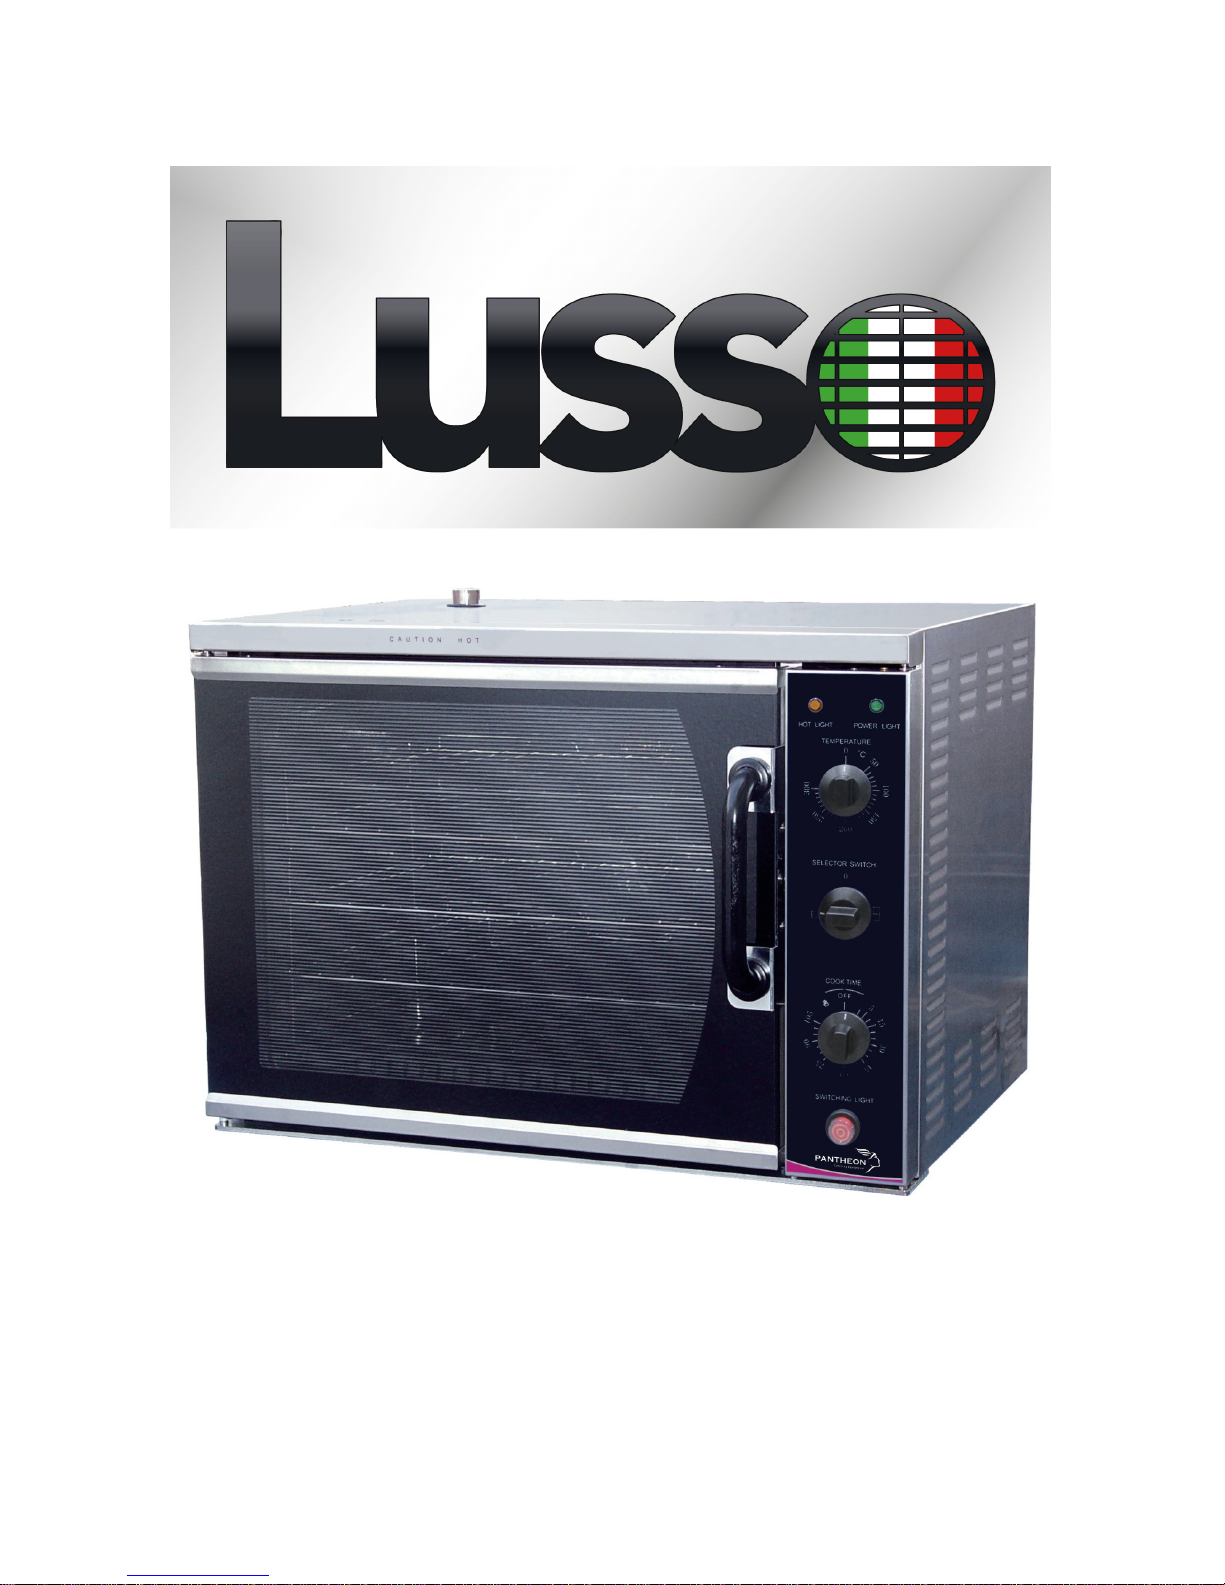
Heavy Duty Convection Oven
Lusso 3KW Operating Manual
Page 2

Introduction
In this booklet you will find instructions for safe operati
on so please read carefully
and retain for future reference.
Warnings and Precautions
The following warnings and precautions are important and must be observed:
• Ensure voltage and frequency power requirements for the convection
oven match that of the supply.
• The machine must be earthed when used. There is a danger of electric
shock if it is not earthed.
• In case of emergency, please turn off the power switch and unplug the
machine.
• If the electric wire becomes damaged, a qualified engineer or the
manufacturer must replace it.
• Be sure to follow the installation guidance correctly, to ensure the oven
is correctly positioned to prevent faults occurring.
Servall Catering Equipment is not responsible for any accidents or faults
caused by amendments made to the machine or improper use by the user.
Technical Data
Specifications:
Model: CO3HD
Voltage (V)
220-240V 50Hz
Power (W)
3000
Weight (Kg)
70
Internal Dimensions
552w x 430d x 418h
Dimensions (mm)
796w x 670d x 580h
Page 3

Installation
Out of the box:
Remove all packaging and protective plastic covering.
Ensure you have been supplied with four shelving racks. If not, contact your
local dealer or the manufacturer.
Positioning:
To ensure there is sufficient space for ventilation, please adhere to the
following clearances:
• Above: 200mm
• Rear: 25mm
• Left: 25mm
• Right: 25mm
Ensure there is enough space at the front of the oven to easily access the
control panel and remove the shelving racks.
Ensure the oven is placed on a solid surface or stand, which is strong enough to
support its weight. Also, ensure that the oven is level.
Before use:
Before operating the oven for the first time, turn the oven on for roughly one
hour at 200 C (400 F) to remove any fumes or odours which may be present.
Operating Instructions
Please refer to ‘figure 1’ and the instructions shown below to aid with the
operation of the heavy duty convection oven:
1. Plug the unit in and the green power light should illuminate.
2. The top temperature control knob is used to set the desired of the oven
between 50-300 C
Page 4
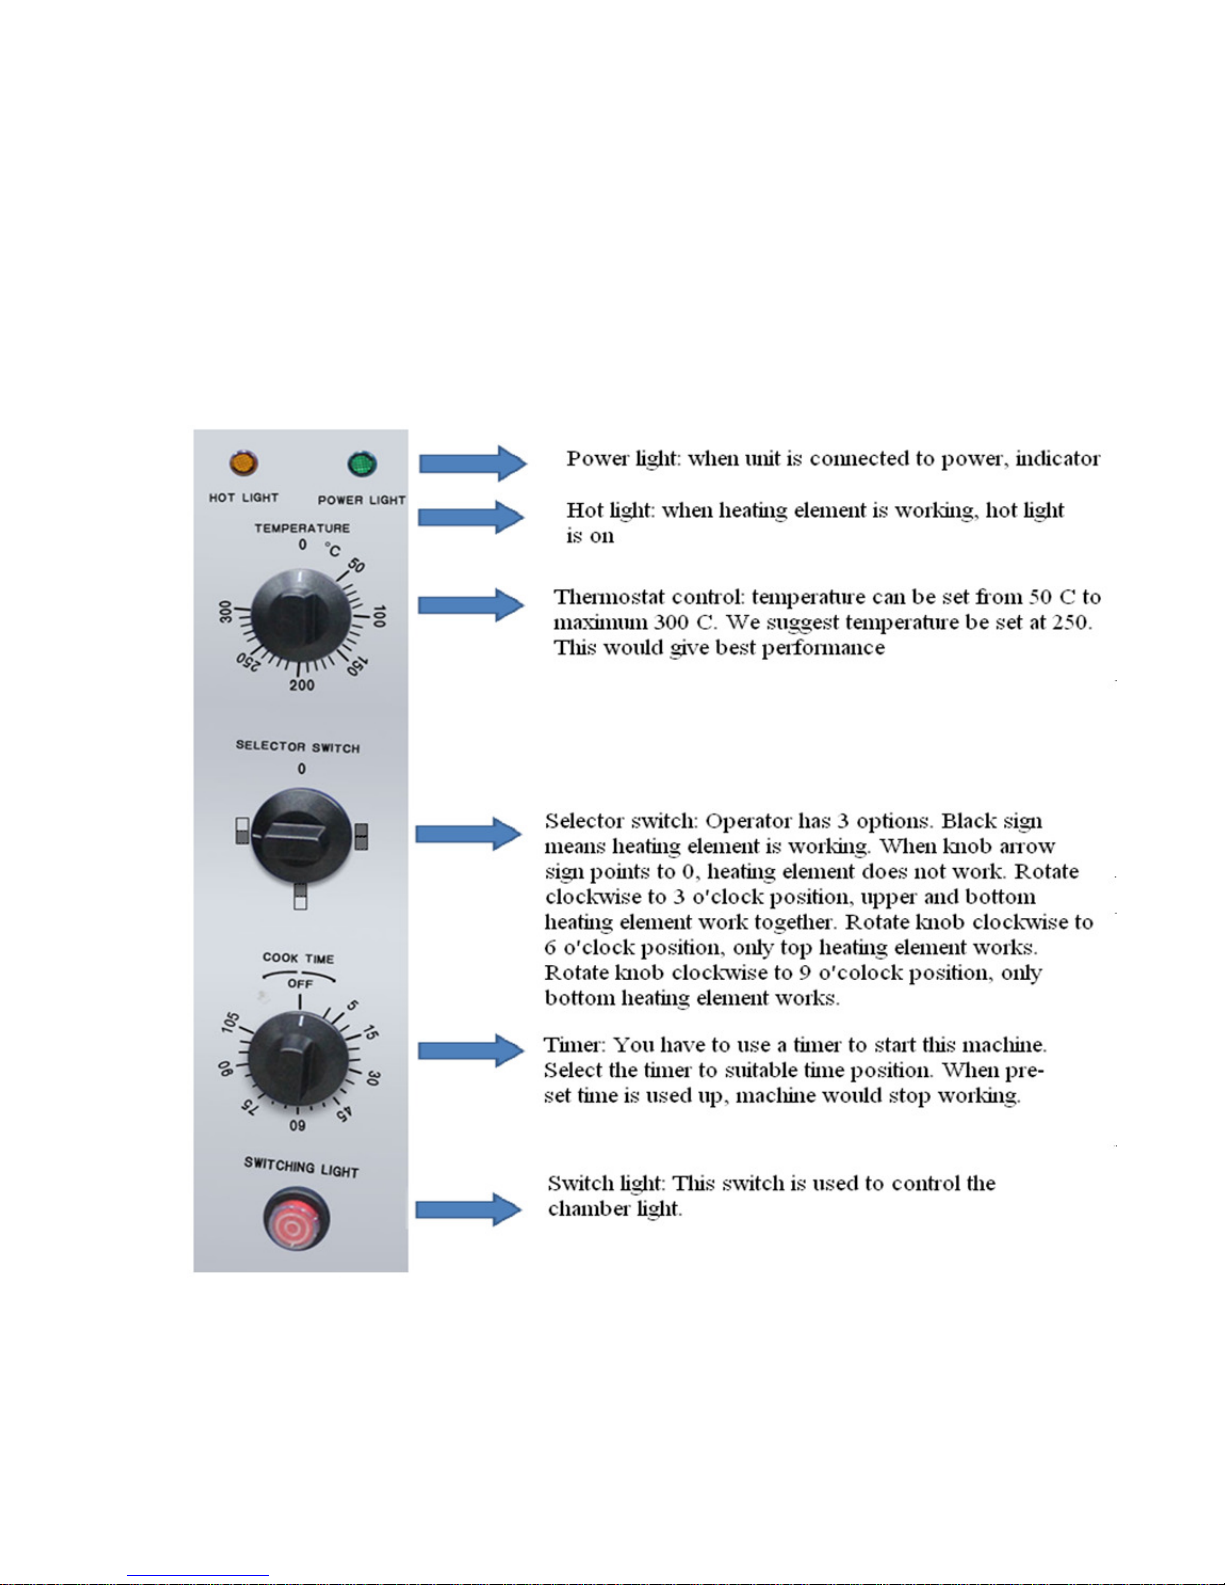
3. The middle selector switch is used to select which heating elements are
required, either: top, bottom or both.
4. The third knob is the timer. Select a suitable cooking time. Please be
aware that the cooker will only warm up when this timer is active, and
will then begin to cool down when the timer has run out.
5. Finally the bottom red push-button switch operates the internal light, to
turn it on or off.
Figure 1
Page 5

Maintenance
Please follow the guides below to clean the required part of the oven:
Interior:
Ensure that the oven chamber is cool. Using a damp cloth and a good quality
oven cleaner, wipe down all visibly dirty components. Take care not to damage
the fan or the element at the right side of the oven which controls the
thermostat.
Oven Racks:
Simply slide the oven racks out, and use a brillo pad ideally or damp cloth to
remove all grease and food. Ensure to rinse thoroughly and dry before placing
back inside the oven, to ensure no detergent is left on the racking.
Bottom Element Cover:
Simply lift out the cover, and similar to the oven racks, using a damp cloth or
brillo pad to remove all grease and food. Again ensuring to thoroughly rinse
and dry the cover before placing back inside the oven.
Door Seals:
Firstly, to remove them, hold at their center point and pull forward until they
unclip.
Be sure to remove the side seals first, then the top ones followed by the
bottom. The seals may be washed in the sink, but take care not to cut or
damage them.
When clean, to replace them, have the lip facing the oven opening. Fit the top
and bottom seals first, then the side seals.
Page 6
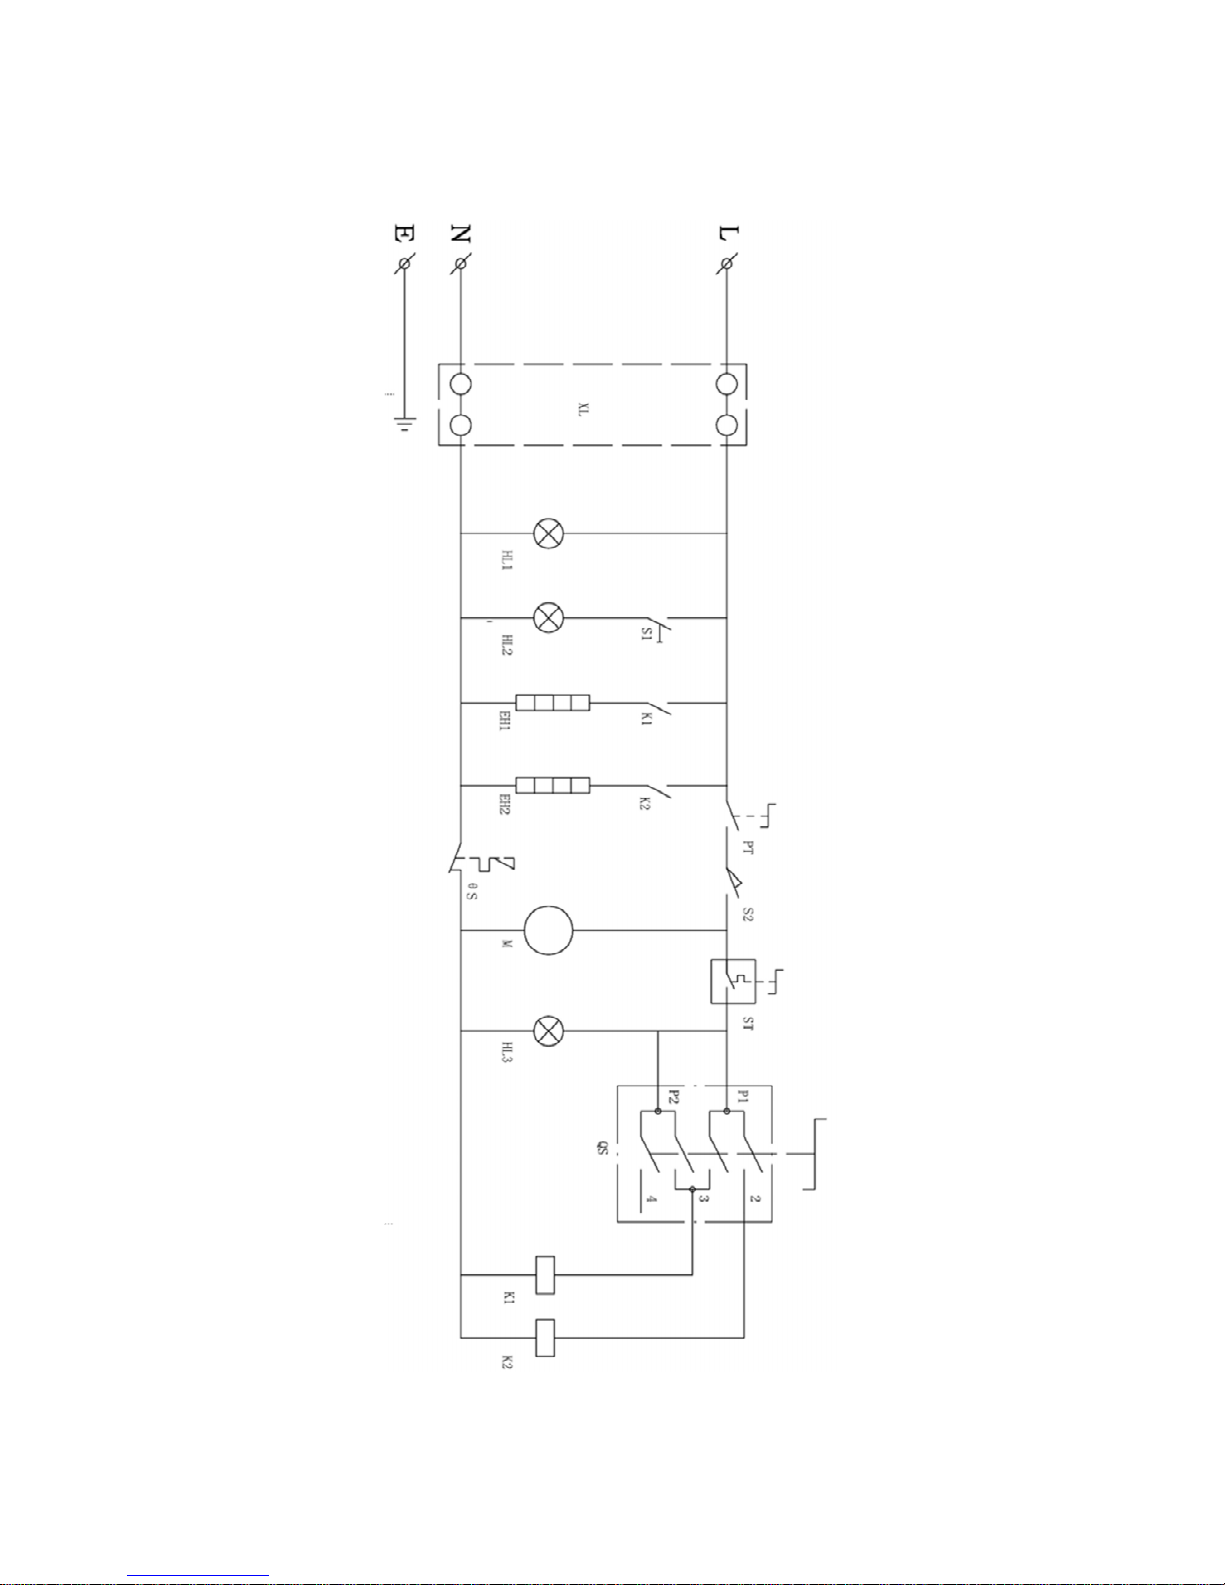
Circuit Diagram
Page 7
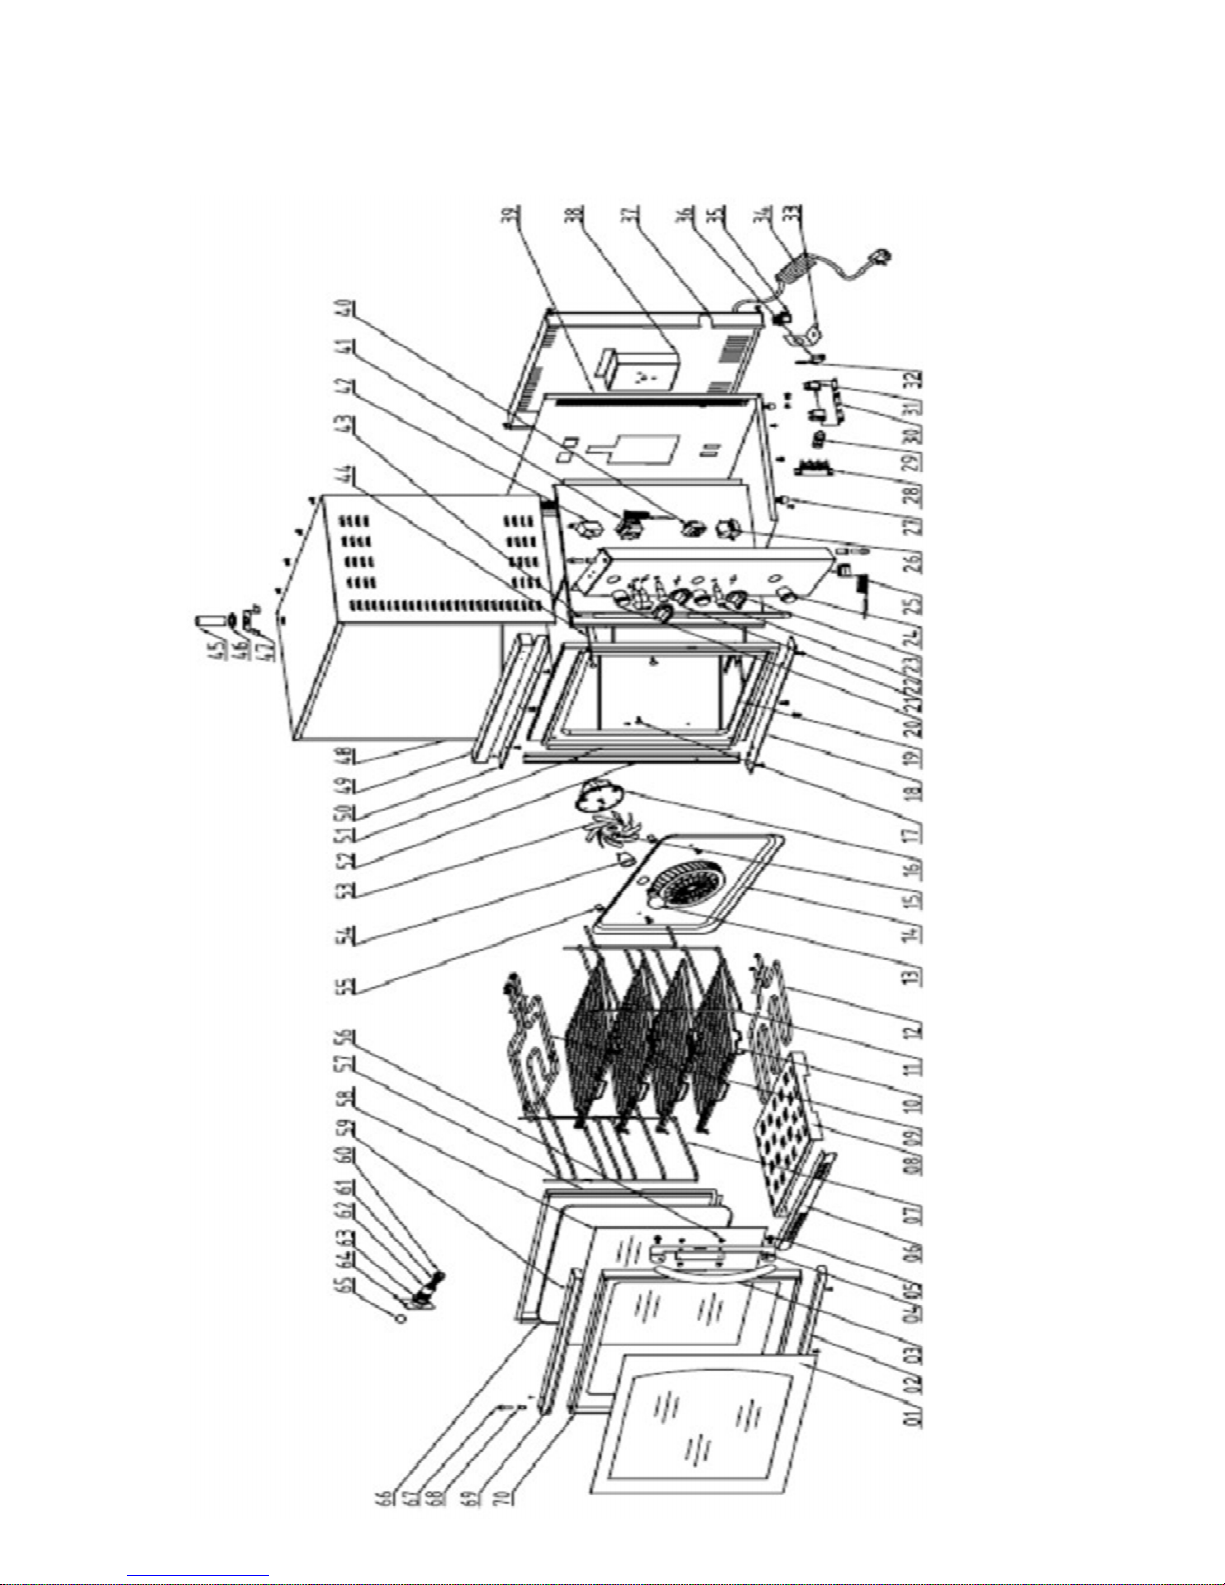
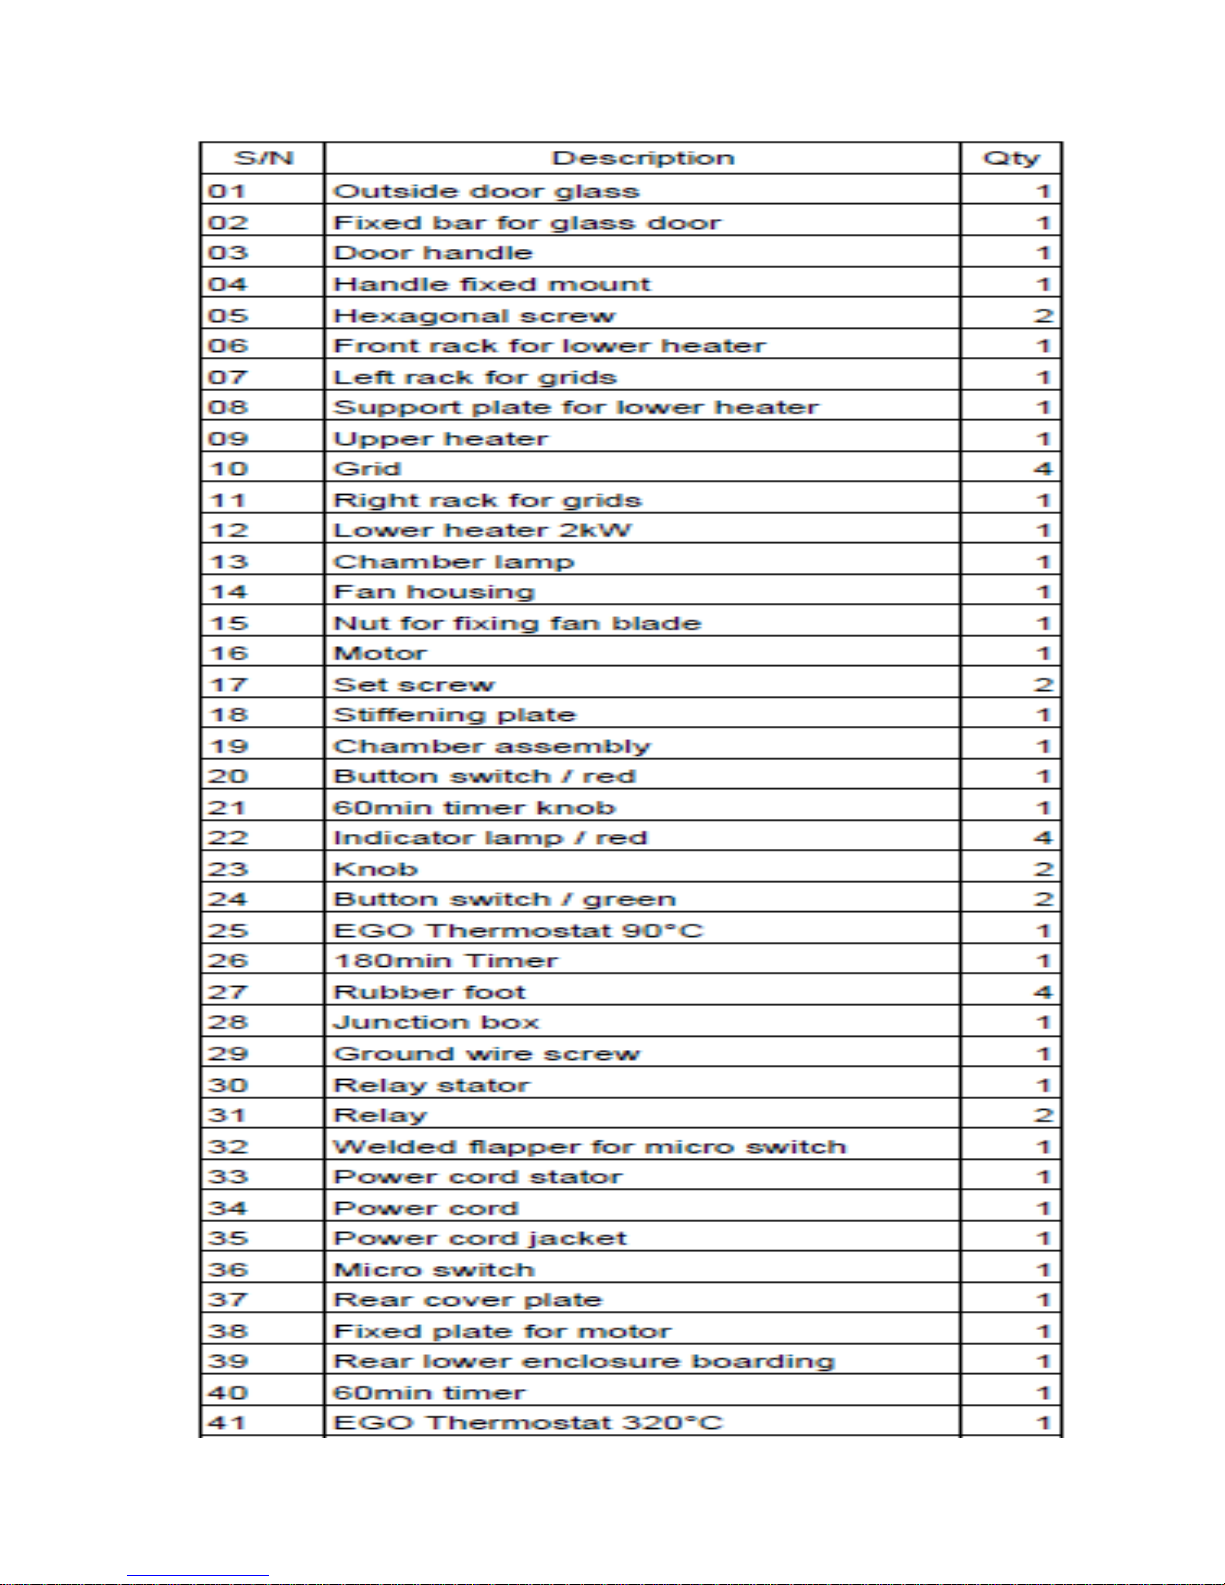
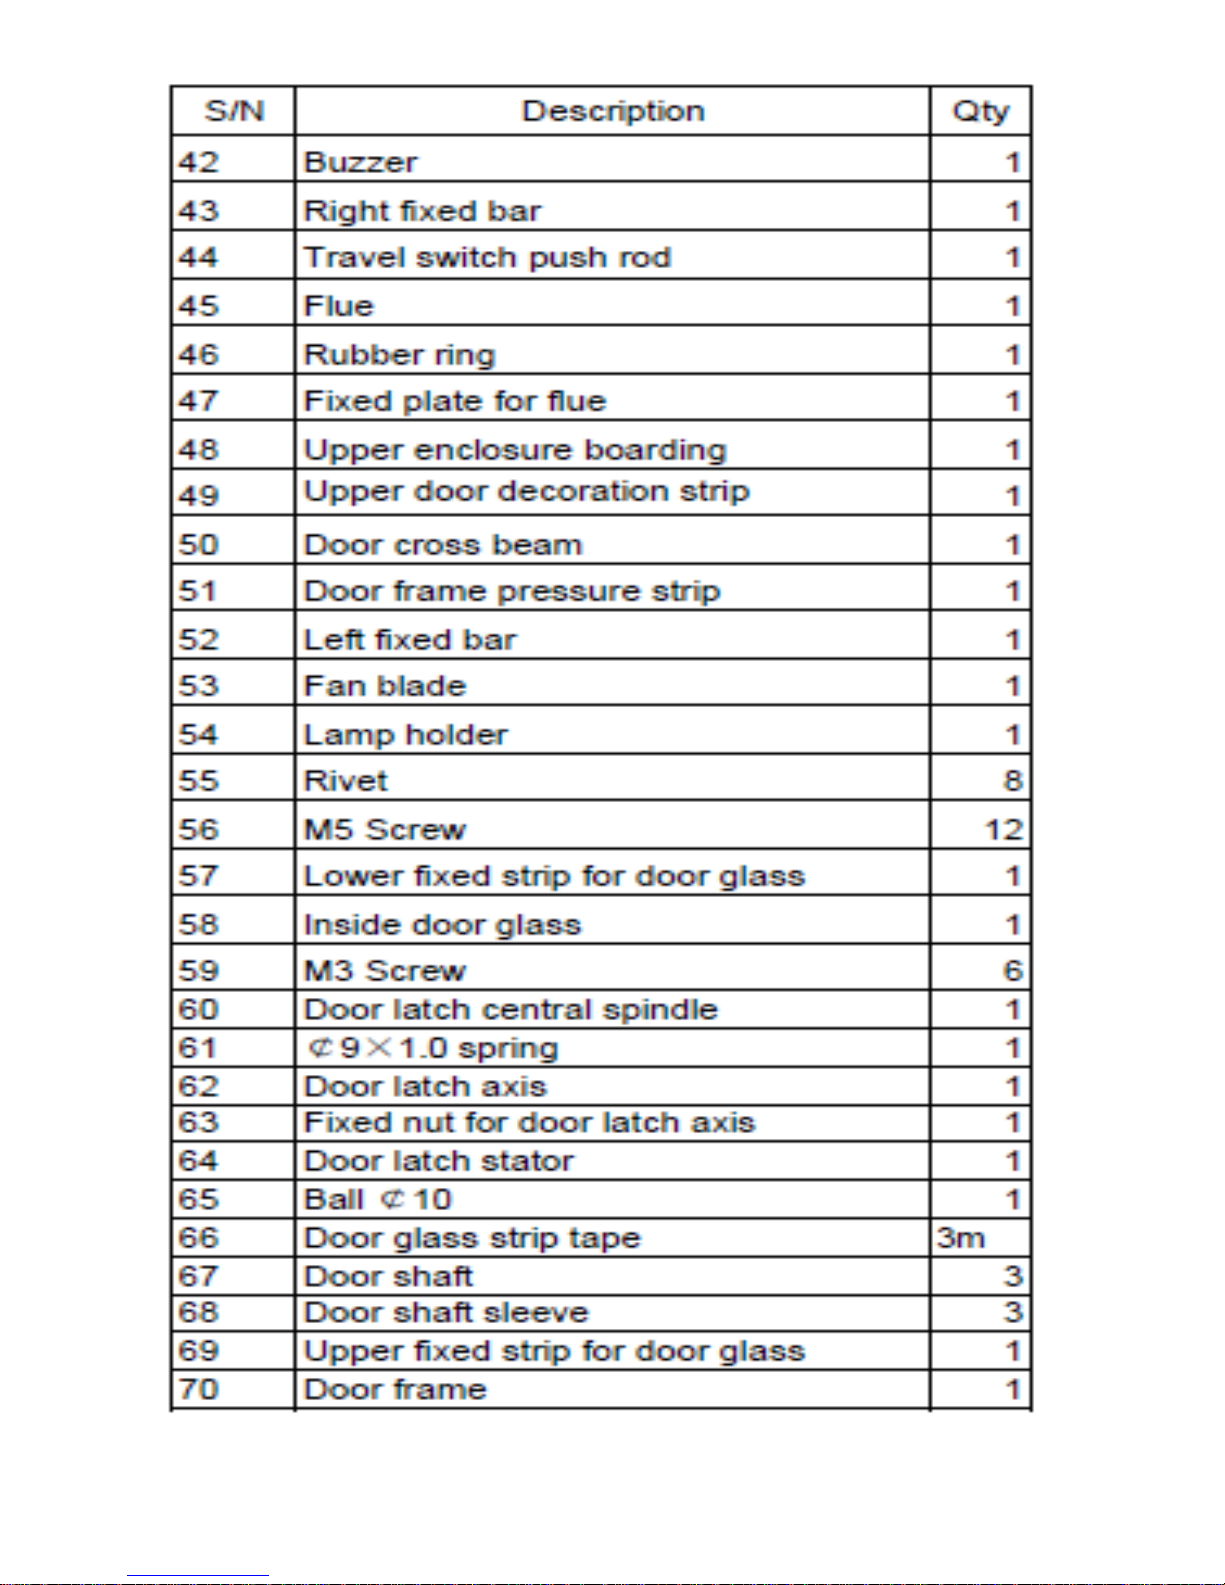
Parts Diagram
Page 8
Page 9
 Loading...