

Page 1

SL F StVZO
Page 2
Inhaltsverzeichnis / Index
Deutsch
Erst lesen, dann leuchten! 3
Montageanleitung 4-5
Bedienung Lampe 6-7
Erklärung Anzeige der Lampe 8
Bedienung SmartCore Akkus 9
Bluetooth Funksender 10-11
Pflege, Lagerung, Laden 12
Fehlerbehebung 13
Technische Daten 14-15
Letzte Hinweise 16
English
Read this manual before using 17
Mounting 18-19
Operation 20-21
Lamphead informations 22
Operation SmartCore Batteries 23
Bluetooth remote control 24-25
Care, Storage and Charging 26
Troubleshooting 27
Technical data 28-29
Miscellaneous 30
Sicherheitshinweise
Warnung!
Niemals absichtlich den Lichtstrahl in die eigenen oder in die Augen anderer Personen richten.
Falls ein Lichtstrahl in die Augen trifft, sind die Augen bewusst zu schließen und der Kopf aus dem
Lichtstrahl zu bewegen. Es dürfen keine optisch stark bündelnden Instrumente zur
Betrachtung des Lichtstrahls verwendet werden.
Bei gewerblicher Nutzung oder bei Nutzung im Bereich der öffentlichen Hand ist der Benutzer entsprechend der Unfallverhütungsvorschrift für Laserstrahlung zu unterweisen.
Dieses Gerät kann dann von Kindern ab 8 Jahren, von Personen mit eingeschränkten körperlichen,
sensorischen oder geistigen Fähigkeiten sowie von Personen ohne bisherige Erfahrung im Umgang
mit solchen Geräten bedient werden, wenn sie dabei von einer Person, die für ihre Sicherheit verantwortlich ist, beaufsichtigt werden.
Dieser Scheinwerfer könnte jederzeit ausfallen.
Deshalb ist es hilfreich, immer eine kleine Notlampe bereitzuhalten.
Wärmeentwicklung:
Das Gehäuse der SL kann heiß werden, achten Sie deshalb immer auf ausreichenden Abstand zu
brennbaren Materialien. Der ruhende Betrieb (also ohne Kühlung z. B. durch Fahrtwind) ist jederzeit möglich, er schadet dem Scheinwerfer nicht.
Verhalten bei Defekten:
Im Falle eines Defekts muss der Scheinwerfern bzw. Lichtquelle generell ersetzt werden.
Selbst dann wenn nur eine LED ausgefallen ist.
Im Falle einer äußeren Beschädigung des Akkus, oder eines internen Defektes, nicht selbst reparieren!
Wasserdicht?
Alle Komponenten der SL sind wasserfest und können auch unter den widrigsten Umständen
eingesetzt werden. Die Lampe erfüllt die IP Schutzklasse 68, ist jedoch für die Benutzung unter
Wasser NICHT geeignet.
Reinigung:
Verwenden Sie keinen starken Wasserstrahl oder scharfe Reinigungsmittel zum Reinigen der
Lampe.
Deutsch
SL A StVZO
SL AF StVZO
2
2
SL A StVZO
SL AF StVZO
3
3
Page 3
Montageanleitung
Montage Akkus
Akkutypen:
Der im Lieferumfang enthaltene Akku verfügt auf seiner Rückseite über eine Lasche und wird mit einem Klettband befestigt. Darüber hinaus verfügt er über eine Kapazitätsanzeige.
Für eine mittige Montage bei 50mm Vorbauten ist
das Vorbau Kit (Art. No.: 5355) erhältlich.
Positionieren Sie die SL mittig am Lenker. Schließen Sie nun die Schelle des Schnellspanners, sodass die
Lampe fest in Ihrer Position sitzt.
Wichtig: Der Lichtkegel muss mindestens so geneigt sein, dass seine Mitte in 5m Entfernung vor dem
Scheinwerfer nur halb so hoch liegt wie bei seinem Austritt aus dem Scheinwerfer. Dazu ist es ggf.
notwendig die Neigung der Halterarme anzupassen.
Höhe des Lichtkegels nach 5m:
Halbe Höhe wie bei Austritt
Zur Feinjustierung an dem Hebel des
Schnellspanners drehen.
1/2
5m:
SL AF StVZO
4
6.9Ah 3.5Ah
Akkumontage:
Je nach Rohrumfang ist zur Montage entweder das kurze oder das lange Klettband geeignet. Das Klettband
so um das Rohr legen, dass die Antirutschbeschichtung auf der Innenseite für zusätzlichen Halt sorgt.
SL AF StVZO
Deutsch
5
Page 4
Bedienung Lampe
Initialisierung:
Nach dem Anstecken des Scheinwerfers an den Akku durchläuft die Software einen Selbsttest.
Der Scheinwerfer, sowie der SL Schriftzug an der Rückseite des Lampenkopfes leuchten einmal kurz auf.
Einschalten:
Durch den ersten Tastendruck (am Funk oder Lampenkopf) startet der Scheinwerfer je nach Umgebungslicht
entweder im Abblendlicht oder im Tagfahrmodus.
Hinweis: Die Fernlichtfunktion kann nur bei aktiviertem Abblendlicht eingeschaltet werden.
Ausschalten:
Durch einen langen Tastendruck (am Funk oder Lampenkopf)
schalten Sie die Lampe aus.
Hinweis: Abhängig von der Außentemperatur wird die Maximalleistung
nur bei entsprechendem Fahrtwind realisiert. Ohne Kühlung wird die
Leistung stufenlos reduziert.
Helligkeitssensor
Leuchtprogramme:
Werksseitig sorgt der Helligkeitssensor für einen automatischen Wechsel zwischen Tagfahrmodus und Abblendlicht.
Helligkeitssensor
Der Sensor ist aktiviert.
Modus
(Werk)
SL AF StVZO
6
Bedienung des Funksenders
Großer Taster: Bei aktiviertem Abblendlicht, umschalten in die Fernlichtfunktion.
Kleiner Taster: Dimmen des Abblendlichts auf 5W.
Individuelle Einstellungen über den Taster des Lampenkopfes:
Taster gedrückt
halten (loslassen
zur Auswahl)
SL AF aufleuchtet
1x aufleuchtet
2x aufleuchtet
3x aufleuchtet
4x aufleuchtet
5x aufleuchtet
6x aufleuchtet
(Kombinierbar
mit allen anderen
Modi)
7x aufleuchtet
8x aufleuchtet
9x aufleuchtet
10x aufleuchtet
bis
Verfügbare Einstellungen
Verzögerung (3 Sek./16 Sek.)
Werkseinstellung: ca. 3 Sek.
Sensorkalibrierung
Nur im montierten Zustand!
Unsachgemäßes kalibrieren
kann die Lampe in ihrer
Funktion stark einschränken!
Kalibrieren nur im Freien. Nicht
bei künstlichem Licht oder vor
reflektierenden Gegenständen.
Werkseinstellung:
Fernlichtfunktion: 16W, Abblendlicht 10W, gedimmtes Abblendlicht: 5W, Tagfahrmodus: 1.5W
Fernlichtfunktion: 16W, Abblendlicht 16W, gedimmtes Abblendlicht: 8W, Tagfahrmodus: 1.5W
Fernlichtfunktion: 12W, Abblendlicht 10W, gedimmtes Abblendlicht: 5W, Tagfahrmodus: 1.5W
Im Unterschied zu allen anderen Leuchtprogrammen kein automatisch sensorgesteuerter
Wechsel zwischen Abblendlicht und Tagfahrmodus.
Funktionsbeschreibung: Über den kleinen Taster der Funkfernbedienung kann das
Abblendlicht gedimmt werden. Bei längerem Drücken des kleinen Tasters (ca. 2 sek.)
wird der Tagfahrmodus aktiviert. In der Dunkelheit kann bei aktiviertem Abblendlicht
in die Fernlichtfunktion geschaltet werden (Großer Taster der Funkfernbedienung). Ein
Ausschalten der Lampe ist nur über den großen Taster möglich.
Frühe „Akku Leer Warnung“
Späte „Akku Leer Warnung“
Bluetooth Connect
Auf Werkseinstellungen zurücksetzen
Erklärung
Das sensorgesteuerte Umschalten von Abblendlicht auf
Tagfahrmodus erfolgt wahlweise in 3 bzw. 16 Sek.
Speichert den gemessenen Helligkeitswert als Umschaltpunkt von Tagfahrmodus auf Abblendlicht. Bestätigt
wird die erfolgreiche Sensorkalibrierung durch ein kurzes
Leuchten des Tagfahrmodus.
Bedienung Lampe
SL AF StVZO
Deutsch
7
Page 5
Anzeigen der Lampe
Bedienung Smartcore Akku
am Lampenkopf:
Blauer SL Schriftzug am
Lampenkopf leuchtet blau
Lampe leuchtet in Fernlichtfunktion.
am Funksender:
Das Fernlichtsymbol des
großen Tasters leuchtet blau
Lampe leuchtet in Fernlichtfunktion.
Akkuwarnung am Lampenkopf während des Betriebs:
Scheinwerfer blinkt 1x:
Scheinwerfer blinkt:
1. Akkuwarnung, sehr geringe Restkapazität.
Warnung! Wenn der Akku leer ist, leuchtet der
Scheinwerfer mehrere Male auf. Sofort anhalten!
Die Lampe wird abgeschaltet!
Kapazitätsanzeige
Akustisch:
Zum Ablesen der Kapazität genügt ein kurzer Druck auf das Tastfeld. Zunächst erfolgt
ein akustisches Signal, welches eine schnelle, in 20% Stufen genaue Überprüfung der
Restkapazität ermöglicht.
5 x = 100%
4 x = 80 %
3 x = 60 %
2 x = 40 %
1 x = 20 %
Optisch:
Die optische LED-Anzeige erfolgt durch 5 rote Kontroll-LEDs. Die LEDs kennen dabei zwei
Betriebszustände: blinkend und dauerhaft leuchtend. Dabei gilt: eine dauerhaft leuchtende LED
steht für einen 20-%-Schritt, eine blinkende LED für einen 10-%-Schritt.
Beispiel: 3 LEDs (20%, 40%, 60%) leuchten
1 LED (80%) blinkt = 70% Restkapazität
Rücklicht-Funktion:
Zum Aktivieren des Rücklichts den Taster 2 Mal kurz hintereinander drücken. Im Anschluss leuchten alle 5
LEDs dauerhaft. Zum Ausschalten des Rücklichts den Taster erneut drücken.
Lauflicht-Funktion:
Durch 3 kurze Tastenklicks wird ein Lauflicht aktiviert, bei dem durchlaufend jeweils eine LED abwechselnd
leuchtet. Zum Ausschalten den Taster erneut drücken.
Hinweis: Die Kapazitätsanzeige erlischt nach wenigen Sekunden wieder von alleine. Ist dies nicht der Fall,
wurde eventuell das Rücklicht aktiviert.
Deutsch
SL AF StVZO
8
SL AF StVZO
9
Page 6
Bluetooth Funksender Bluetooth Funksender
Der Bluetooth Funksender wird zusammen mit dem passenden Peppi V5 Lenkerhalter geliefert. Beim Biken
ist der ideale Befestigungsort des Funksenders gleich neben dem Griff, damit hast du die volle Kontrolle und
musst die Hand nicht vom Lenker nehmen.
Peppi V5 auch für 32mm
erhältlich, Artikel Nummer:
d1086
Lampe mit Sender verbinden:
Von Werk aus ist die Lampe bereits mit dem Funksender verbunden.
Zur Anbindung mit einem Sender muss der Lampenkopf in den Empfangsmodus gesetzt werden.
Den Taster der Lampe solange gedrückt halten bis dieser 9x aufleuchtet, dann loslassen.
Der Empfänger ist nun für ca. 30 Sekunden empfangsbereit.
In diesem Zeitfenster hält man den großen Taster der Fernbedienung ca. 5 sek. gedrückt, bis der große Taster der
Fernbedienung zur Bestätigung blau aufleuchtet, � Sender sofort loslassen. Lampe und Sender sind nun miteinander gekoppelt.
Werkseinstellung:
Großer Taster: Ein- und Ausschalten
der Lampe. Bei aktiviertem Abblendlicht, umschalten in die Fernlichtfunktion.
Kleiner Taster: Bei aktiviertem
Abblendlicht, dimmen.
Manueller Modus:
(6x aufleuchten des Lampenkopfs):
Großer Taster: Ein- und Ausschalten
der Lampe. Bei Dunkelheit und aktiviertem
Abblendlicht, umschalten in die Fernlichtfunktion.
Kleiner Taster: Bei aktiviertem Abblendlicht,
dimmen. Für ca. 2 Sekunden gedrückt
halten: Umschalten in Tagfahrmodus.
Batteriewarnung Sender:
Bei voller Knopfzelle leuchten die LEDs am Sender kräftig, mit sinkender Spannung wird das Leuchten
schwächer. Auch extreme Kälte kann zu einer Absenkung der Batteriespannung führen. Ist die Knopfzelle
leer, wird dies durch ein rotes Leuchten dargestellt.
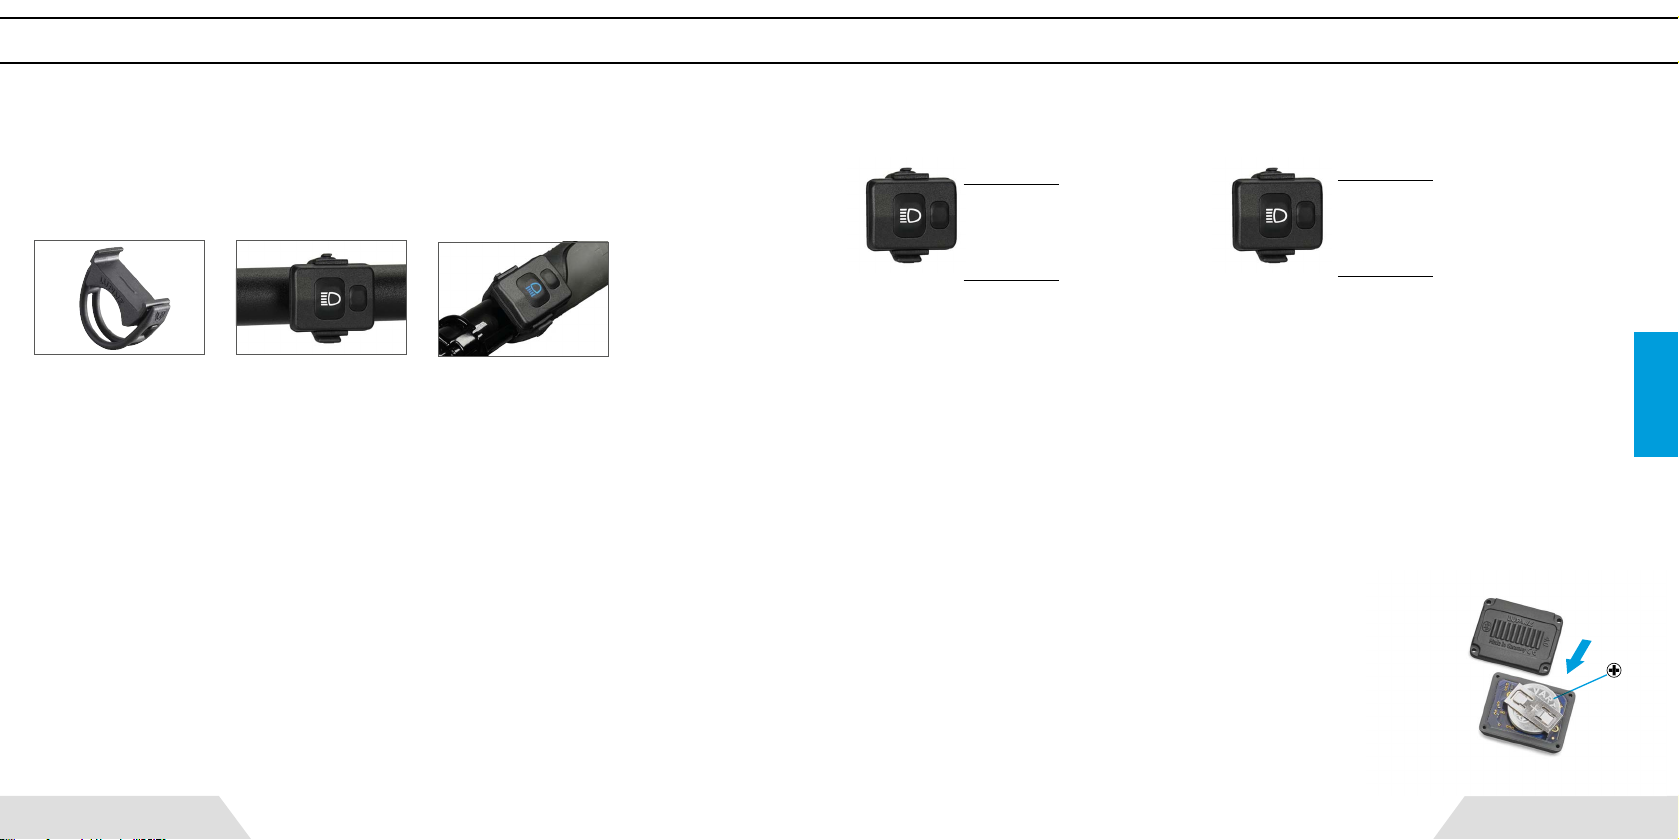
Batteriewechsel am Sender:
Zum Batteriewechsel alle 4 Schrauben auf der Unterseite des Senders mit
einem T5 Torxschraubendreher öffnen. Die neue CR 2032 Knopfzelle wie
abgebildet einlegen und das Gehäuse wieder verschließen. Die Schrauben
so fest anziehen, dass die blaue Dichtung sichtbar gepresst wird.
T5 Torxschraubendreher: (Artikel Nr. 137)
Deutsch
10
SL AF StVZO
SL AF StVZO
11
Page 7

Pflege, Lagerung und Laden
Fehlerbehebung
Pflege und Lagerung
Lampe:
Bei Verschmutzung, reinigen Sie den Scheinwerfer äußerlich mit warmem Wasser und etwas Spülmittel.
Achtung! Der SL Lampenkopf darf nicht geöffnet werden da damit die Wasserdichtigkeit und jeglicher
Garantieanpruch verloren geht. Bevor sie einen Fehler selbst beheben nehmen sie Kontakt mit unserem
Service auf.
Akku:
Vor längerem Nichtgebrauch laden Sie den Akku voll und lagern Sie diesen an einem möglichst kühlen,
trockenen Ort, wie z.B. Keller etc.
Laden des Akkus:
Stecken Sie das beiliegende Ladegerät Wiesel in Ihre Steckdose.
1. Verbinden Sie das Ladegerät mit dem Akku
2. Der Ladevorgang startet automatisch - die LED leuchtet rot
Ist der Ladevorgang beendet und der Akku voll leuchtet die LED grün.
Warnung! Mit diesem Ladegerät dürfen nur wiederaufladbare
Li-Ionen-Akkus aufgeladen werden. Es ist NICHT zum Laden von
Ni-MH-Akkus geeignet!
Keine Trockenbatterien verwenden! – Explosionsgefahr!
Dieses Ladegerät darf NUR vom Hersteller geöffnet werden!
Fehler
Lampe lässt sich nicht einschalten.
Power LEDs leuchten nicht.
Die Leuchtzeiten sind zu gering.
Der Smartcore Akku zeigt auch
nach dem Laden nur 20% an.
Der Sensor reagiert nicht.
Die Lampe reagiert nicht auf den
Sender.
Ursache
Tiefentladener Akku
Akku nicht oder fehlerhaft
am Scheinwerfer angesteckt
LED-Einsatz ist defekt
Der Akku ist leer
Der Akku ist alt
Sehr tiefe Temperaturen
Das Ladegerät ist defekt
Die Anzeige wurde zurück
gesetzt
Der Sensor liegt nicht frei
Lampenkopf und Sender sind
nicht miteinander gebunden.
Knopfzelle leer oder falsch
herum eingelegt.
Behebung
Akku laden
Alle Steckerkontakte
überprüfen
Austauschen bzw. Lupine
kontaktieren
Laden
Austauschen
Akku warm halten
Ladegerät austauschen
Akku mit der Lampe
vollständig entleeren und
wieder aufladen
Den Sensor von Dreck,
Schmutz usw. befreien
Siehe Kapitel Funksender.
Deutsch
12
SL AF StVZO
SL AF StVZO
13
Page 8

Technische Daten
Lichtleistung: Leuchtzeiten:
SL AF 4
16 W 1300 Lumen (Fernlichtfunktion)
10 W 850 Lumen (Abblendlicht)
5 W 450 Lumen
1.5 W Tagfahrmodus
Gewicht:
SL AF Lampenkopf: 100 g
SL AF 4 komplett mit Akku: 250 g
SL AF 7 komplett mit Akku: 360 g
1.5 h
2.5 h
5h
17h
SL AF 7
3 h
5 h
10 h
33 h
Ladezeiten:
SL AF 4: 3 Stunden
SL AF 7: 5:30 Stunden
Technische Daten
Stromverbrauch Abblendlicht
Stromverbrauch Tagfahrmodus
Bedienung
Leuchtmittel
Linsensystem
Baugröße LxBxH
Material
* Zur Einhaltung der StVZO Richtlinien leuchtet bei aktiviertem Tagfahrmodus das Abblendlicht leicht mit.
16 Watt Max.
1.5 Watt *
Am Lampenkopf oder Bluetooth Funkfernbedienung
18x Osram Compact CL
Dual Aspheric Lens System
49x50x48 mm
Aluminium 6061-T6, CNC gefräst
Deutsch
Akku-Kapazität/Nennspannung:
SL AF 4: 3.5 Ah / 7.2 V Li-Ion
SL AF 7: 6.9 Ah / 7.2 V Li-Ion
Ladegerät Wiesel:
Eingangsspannung: 100 – 240 V~, 50 – 60 Hz
Ladestrom: 1.2 A max.
Geeignete Akkus: Li-Ion 7.2 V
SL AF StVZO
14
Zulassung:
StVZO
K1552
Schutzklasse:
IP68
Einsatzbereich:
-25 °C bis +70 °C
Mehr Informationen unter www.lupine.de
EG Konformitätserklärung: www.lupine.de/ce/
SL AF StVZO
15
Page 9

Letzte Hinweise
Regelungen:
Die Verwendung dieses Beleuchtungssystems für bestimmte Zwecke kann in Europa von Land zu
Land unterschiedlich geregelt sein. Informieren Sie sich über die in Ihrem Land gültigen Bestimmungen.
Änderungen:
Weiterentwicklungen unserer Produkte und technische Änderungen vorbehalten.
Garantie:
Innerhalb der Garantiezeit von 24 Monaten umfasst die Gewährleistung alle Komponenten und
deckt fertigungsbedingte Mängel ab. Ausgenommen ist jedoch der Akku. Des Weiteren erlöschen
die Garantieansprüche bei nicht bestimmungsgemäßer Benutzung oder Veränderungen jeglicher Art.
Safety instructions
Warning!
Avoid looking directly into the light emitted by the light or shining the light into your own eyes or
the eyes of another person. If the light accidentally shines into your eyes, close your eyes and move
your head out of the light beam. Do not use any strongly focusing optical device to look at the light
beam.
In cases where the light is used in a public or commercial setting, users should be provided with training concerning the safety measures for laser light.
This device may then be used by children 8 years of age or older, persons with limited physical,
sensory or mental capabilities, as well as persons with no previous experience in handling such
devices, if they are supervised by a person responsible for their safety.
Carry a spare light with you at all times, as the product can potentially fail unexpectedly at any
time.
Defects:
Light source must be replaced in general if the light source (or one of the LEDs) is defective.
In the event of any physical or internal battery failure, do not attempt to repair.
No user-servicable parts!
Heat generation:
The housing of SL may heat up; so make sure that you always keep the light at a safe distance to
any combustible or flammable materials. Could cause fire or death! However, quiescent operation
(without cooling the light housing via airflow or the like) is possible at any time and will not damage
the product.
English
16
SL AF StVZO
Water resistance:
All SL components are waterproof and can of course be used under extremely severe
conditions. The lamp complies with IP protection class 68 but is NOT a diving lamp and is
NOT suitable for use under water.
Cleaning:
Do not use a strong water jet or heavy detergent to clean the lamp.
SL AF StVZO
17
Page 10

Assembly Instructions
Battery mounting
Battery type:
The battery is mounted with a velcro as shown here. They also come with a capacity indictaor.
For a centric montage at 50mm stems: SL AF
50mm stem kit (Art. No.: 5355) available.
Position the SL centric at the handlebar. Now close the bracket of the quickrelease so the SL is mounted
tight in its position.
Important: The beam must be at least inclined so that its center is only half as high as 5 m away from
the headlamp. For this, it may be necessary to adjust the inclination of the mounts.
Height of the light cone after
5m: Half height as outlet
For proper setup screw on the lever of
the quick release mount.
1/2
5m:
SL AF StVZO
18
6.9Ah 3.5Ah
Battery mounting:
Your battery is supplied with a velcro strap, coated with an anti-slip material to ensure a secure mount.
Use the strap which most closely matches your tube size.
SL AF StVZO
English
19
Page 11

Operation
Operation
Customizing the settings at the lamphead:
Initialization:
After connecting the lamp to the battery, the software runs a selftest; the lamp itself as well as the blue „SL“ on
the back of the lamp light up once.
Turn on:
By shortly pressing the button (lamphead or remote) you can turn on the light. Depending on the ambient light,
the SL starts lighting either with low beam or daytime running light. Note: Only when the low beam is activated,
it‘s possible to switch into high beam.
Turn off:
To turn off the lamp, keep the button (lamphead or remote) pressed.
Note: The light outputs the maximum amount of light only if airflow
lowers the temperature of the light sufficiently. If the light is not cooled
by airflow, its power is reduced incrementally to prevent the LEDs and
electronic elements from overheating.
Brightness sensor
Light mode:
A brightness sensor automatically switches between daytime- and nighttime running light.
Mode
(Factory)
Brightness sensor
The sensor is activated.
Operation of the remote control
Big Button: If low beam is activated, switching to high beam possible.
Small Button: Dimming the low beam to 5W.
Keep the button
pressed (let go to
select) until SL
lights up
Lights up 1x
Lights up 2x
Lights up 3x
Lights up 4x
Lights up 5x
Lights up 6x
(Combinable with
all other light
modes)
Lights up 7x
Lights up 8x
Lights up 9x
Lights up 10x
Available settings
Delay (3 sec / 16 sec.)
Factory setting: about 3 sec.
Sensor calibration
Only in the assembled state!
Improper calibration may
greatly affect the functionality
of the light! Calibrate only
outdoors. No artificial light or
close to reflective objects!
Factory setting:
High beam: 16W, Low beam: 10W, Dimmed low beam: 5W, Daytime running light: 1.5W
High beam: 16W, Low beam: 16W, Dimmed low beam: 8W, Daytime running light: 1.5W
High beam: 12W, Low beam: 10W, Dimmed low beam: 5W, Daytime running light: 1.5W
In contrast to all other light programs, there is no automatic sensor controlled change
between low beam and daytime running light.
By pushing the small button of the remote you can dim the low beam. By pushing the
small button a little longer (about 2 sec.) the daytime running light is activated. If low
beam is activated in the dark you can switch to high beam by pushing the big button
of the remote. You can only switch off the lamp by pushing the big button of the
remote control.
Early „battery low warning“
Late „battery low warning“
Bluetooth Connect
Reset to factory settings
Explanation
The sensor controlled switchover from night- to daytime
running light occurs as required in either 3 or 16 sec.
Saves the measured brightness value as a switching
point from daytime-to nighttime running light. The
successful sensor calibration is confirmed by a short
illumination of the daytime running light.
English
20
SL AF StVZO
SL AF StVZO
21
Page 12

Lamphead informations
Operation Smartcore battery
At the lamphead:
SL on the back of the lamp
lights up blue
High beam is activated.
At the remote:
The „high beam symbol“ of
the remote lights blue
High beam is activated.
Battery warning at the lamphead in operation:
Lamp lights up 1x:
Lamp lights up several times:
1. Battery Warning, low capacity remaining.
Warning!
The lamp flashes several times. Stop immediately!
The light will be switched off.
Capacity indicator
Audible:
To check the capacity, simply press the touch-pad once. At first an audible signal will
sound to give a quick reading in 20% steps.
5 x = 100%
4 x = 80 %
3 x = 60 %
2 x = 40 %
1 x = 20 %
Visible:
The visible indicator uses 5 red LEDs. The LEDs can operate in two different operating
states: blinking and continuous. LED meanings:
A blinking LED is indicating a 10% step and a continuously glowing LED a 20% step.
Example: 3 LEDs steady glow (20 %, 40 %, 60 %)
1 LED blinking (80 %) = 70 % remaining capacity
Taillight:
To run the taillight simply press the touch pad two times and the 5 LEDs will operate continuously.
To switch off the taillight, simply press the pad again.
Moving light:
Press the touch pad three times to activate the moving light. To switch it off
press the button another time.
English
22
SL AF StVZO
SL AF StVZO
23
Page 13

Bluetooth remote control Bluetooth remote control
The Bluetooth Remote comes together with the Peppi V5 barmount. On the bike, the best way to mount
the remote is directly next to your grips so you have full control and don't need to take off your hands while
riding.
Peppi V5 also available for
32mm, Art. No.: 1086
Connecting the transmitter to the light:
By default, your lamp has already been connected to the transmitter.
For establishing a connection, the receiving mode in the lamp has to be activated.
Keep the lamp’s button depressed until it lights up nine times, let the button go. The receiving mode is
active for 30 seconds.
During this time, press the remote control’s big button for about 5 seconds, until the remote confirms by
lighting up blue. Release the button immediately.
Factory setting: Manual mode:
(Lamp lights up 6x)
Big Button: Turning the lamp on and
off. When low beam is activated,
switch to high beam.
Small button: When low beam is
activated, possibility to dim it.
Big button: Turning the lamp on and off. In
the darkness, when low beam is activated,
switch to high beam.
Small button: When low beam is activated,
dimming. Keep pressed for about 2 sec.,
switch to daytime running light.
Low button cell:
With decreasing voltage, the remote control LEDs will shine less bright. Also cold temperature does reduce
the battery voltage. If the button cell is near empty, it's shown by a red light.
Transmitter battery change:
To change the transmitter button cell a T5 torx screw driver is needed.
Insert the new CR 2032 button cell as shown and close
the transmitter again.
Tighten the screws until the blue sealing is visibly squeezed.
T5 torx screw driver: (Art.No. 137)
English
24
SL AF StVZO
SL AF StVZO
25
Page 14

Product Care, Storage and Charging
Troubleshooting
Product Care and Storage
Light:
After use in dirty areas clean the lamp and the cables externally with warm water and some mild
detergent.
Important!
Because of the delicate sealings, we do not recommend to open the lamp.
A leakage in consequence of opening the light is excluded from warranty! Before you try to repair
something on your own get in touch with our helpful Service Team.
Battery:
If you intend not to use the lamp for a longer period of time, fully charge and store it at a cold and dry
place.
Charging batteries:
1. Plug the included Wiesel charger into an outlet
2. Connect the charger to the battery, charging starts automatically the LED turns red
3. When the battery is fully charged the LED on charger turns green
Warning! This charger is to be used to charge rechargeable Li-Ion batteries only.
It is NOT suitable for charging NiMH batteries!
Do NOT use non-rechargeable batteries. – Risk of explosion!
This charger may be opened ONLY by the manufacturer!
SL AF StVZO
26
Problem
The light does not come on
and the power LEDs do not
flash when the battery is
plugged into the lamp.
With the battery plugged in,
the power LEDs do not come
on, but the PCS LEDs flash.
The runtime is too short.
Even after charging only
the 20% LED will light up
at the Smartcore battery.
The sensor does not respond.
The lamp does not recognize
the transmitter.
Cause
Extremely discharged battery
Battery not plugged into the
light or not plugged in
properly
Faulty LED unit
Discharged or old battery
Old battery
Low ambient temperature
Faulty charger
Unsuitable battery
The indicator was reseted
The sensor is not exposed
Lamphead and transmitter
are not linked.
Button cell empty or wrong
side up.
Solution
Charge the battery
Check all plug contacts
LED units needs replacement
Get in touch with Lupine
Charge battery
Replace battery
Keep battery warm
Replace charger
Use original Lupine battery
Discharge the battery with
your light and fully charge it
afterwards
Make sure the sensor is free
from any dirt
See chapter operation
remote control.
SL AF StVZO
English
27
Page 15

Technical data
Light Output: Runtime:
SL AF 4
16 W 1300 Lumens (High beam)
10 W 850 Lumens (Low beam)
5 W 450 Lumens
1.5 W Daytime running light
Weight:
SL AF lamphead: 100 g
SL AF 4 with battery 250 g
SL AF 7 with battery: 360 g
1.5 h
2.5 h
5 h
17 h
SL AF 7
3 h
5 h
10 h
33 h
Charging time:
SL AF 4: 3 hours
SL AF 7: 5:30 hours
Technical data
High beam
Daytime running light
Operation
Lamp
Lens system
Dimensions LxWxH
Material
* To comply with the StVZO guidelines, the daytime running light is also supported by a slight low
beam.
16 Watt max.
1.5 Watt *
At lamphead or bluetooth remote control
18x Osram Compact CL
Dual Aspheric Lens System
49x50x48 mm
Aluminium 6061-T6, CNC machined
English
Battery capacity/nominal voltage:
SL AF 4: 3.5 Ah / 7.2 V Li-Ion
SL AF 7: 6.9 Ah / 7.2 V Li-Ion
Charger Wiesel:
Input voltage: 100 – 240 V~, 50 – 60 Hz
Charging current: 1.2 A max.
Compatible batteries: Li-Ion 7.2 V
SL AF StVZO
28
Approval:
StVZO
K1552
Protection class:
IP68
Operating temperature:
-25 °C to +70 °C
More informations at www.lupine.de
EC Declaration of Conformity: www.lupine.de/ce/
SL AF StVZO
29
Page 16

Miscellaneous
Declaration of confirmity
Regulations:
The laws governing the allowable application domain for this lighting system may vary from one
country to another. We recommend that you inform yourself about the relevant laws in this domain
in your country.
Changes:
Rights for improvements and modifications of our products reserved.
Warranty:
The product's two year warranty applies to all components, as well as any manufacturing defect.
The warranty does not include the battery, however. In addition, any modification or improper use
of the product will void the warranty.
Declaration of confirmity Canada:
This device complies with part 15 of the FCC Rules and Industry Canada license-exempt RSS standard(s).
Operation is subject to the following two conditions:
(1) This device may not cause harmful interference, and
(2) this device must accept any interference received,
including interference that may cause undesired operation.
Le présent appareil est conforme aux CNR d'Industrie Canada applicables aux appareils radio exempts de
licence. L'exploitation est autorisée aux deux conditions suivantes : (1) l'appareil ne doit pas produire de
brouillage, et (2) l'utilisateur de l'appareil doit accepter tout brouillage radioélectrique subi, même si le
brouillage est susceptible d'en compromettre le fonctionnement.
Declaration of confirmity USA:
This device complies with part 15 of the FCC Rules. Operation is subject to the following two conditions:
(1) This device may not cause harmful interference, and
(2) this device must accept any interference received, including interference that may cause undesired
operation.
Changes or modifications not expressly approved by the party responsible for compliance could void the
user's authority to operate the equipment.
30
30
SL AF StVZO
SL AF StVZO
31
Page 17

Lupine Lighting Systems GmbH
Im Zwiesel 9
92318 Neumarkt
Germany
SL A StVZO
32
Phone: +49 (0) 91 81 - 50 94 90
Fax: +49 (0) 91 81 - 50 94 915
E-mail: info@lupine.de
www.lupine.de
 Loading...