

Page 1
ROTLICHT
Owners Manual:
First charge the light!
Basics:
Double click = Turn on
Each additional click = Changes the light mode
Hold the button down = Turn o
Charging: Connect USB cable e.g. to a computer, red blinking = charging, green = full
Available light modes:
• Steady
• Blink
• Pulse
• Steady + Impulse
Adjust the brightness of each light mode:
Keep the button down until the little GREEN LED lights up
Let the button go and wait.
Rotlicht now runs through the 5 possible output levels.
Press the button at the output level you want.
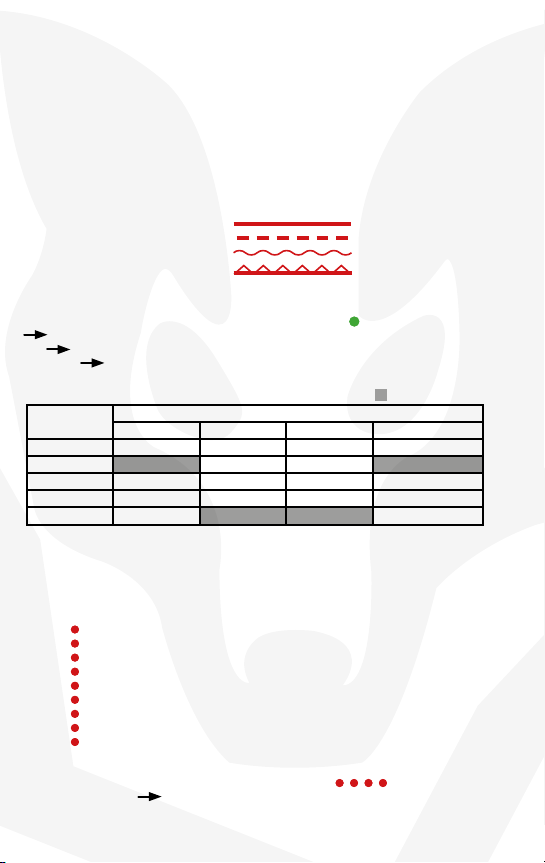
The following dim levels are adjustable:
Dim
Levels
0.1W 30h 60h - 25h
0.25W 12h 24h 24h 10h
0.5W 6h 12h 12h 5h
1W 3h 6h 6h 2:30h
2W 1:30h 3h 3h -
Changing the additional functions:
Keep the button pressed until the small RED LED next to the switch lights up.
Let the button go at the setting you want (also shown on the backside of the ROTLICHT).
Functions:
1x = Light sensor o
2x = Light sensor on – low sensitivity
3x = Light sensor o – high sensitivity
4x = Brake light o
5x = Brake light on – low sensitivity
6x = Brake light on – mid sensitivity
7x = Brake light on – high sensitivity
8x = Double click on/o
9x = RESET to factory settings
Example: To switch the brake sensor o
Keep the button down until the red LED blinks 4 times.
Let the button go Brake light function is now disabled.
Used capacity: After switching o, the red LED will blink 1x for each 100 mA.
Example: 4 x blinks of red LED= 400mA used = battery about half full
Steady Blink Puls Steady+Impulse
Runtime
Factory Settings
 Loading...