

Page 1

LUMIPro 2017
User’s Guide
Page 2

LUMIPro 2017
Congratulations, you now own the nest professional-grade lighting system in the virtual world—LUMIPro 2017! Obviously you’re ready to do
more than take snapshots, and with LUMIPro, you will soon discover just
how indispensable professional lighting is to any photographer looking
to achieve the very best rusults. To help you along the path, this User’s
Guide will give you not just a summary of the HUD and what all the buttons do, we’ll also show you some of the theory behind how it works, as
well as some useful information on using all the tools Second Life makes
available to get great shots.
We also have a group where members regularly share tips, great sims to
visit for creative shoots (because aer all, you can take LUMIPro anywhere!), and even how to make great chocolate cookies. Visit our blog
that features great training videos, quick tutorials, and more, and take
advantage of all the social media sites, where we encourage you to show
o your own creative work!
ere’s only one rule of LUMIPro: talk about LUMIPro! Happy shooting!
Page 3
LUMIPro 2017
3
Table of Contents
What’s New .................................................................................................. 4
Main HUD Overview ................................................................................ 5
Popouts Overview ...................................................................................... 6
e LCD Control Panel Overview ........................................................... 7
e Power Strip ...........................................................................................8
Lighting ........................................................................................................ 9
Wearable Lights .................................................................................. 9
Lighting Presets ................................................................................10
Moving Lights ...................................................................................11
Intensity .............................................................................................12
Radius ................................................................................................ 13
Fallo .................................................................................................14
e Toolbox and the Joystick ..................................................................15
Lighting Control ..............................................................................17
High Resolution Eye Gazer .............................................................18
Rezzable Eye Gazer ..........................................................................19
Sit Ball ................................................................................................20
Projector ............................................................................................21
Projectors-Rotation .........................................................................22
Projectors-Locking Rezzables ........................................................23
Projectors-e Anatomy of a Scene ..............................................24
Sliders and Colors .....................................................................................25
Mixing Light .....................................................................................25
Scene Presets .............................................................................................26
Saving.................................................................................................26
Restoring ...........................................................................................27
Preset Options Menu ....................................................................... 28
Managing Models .....................................................................................29
Poses ...........................................................................................................30
Hide, Give Lights, and Poses .......................................................... 30
Adding Poses ....................................................................................31
Cataloging Poses ..............................................................................32
Backup and Restoring ..............................................................................33
Backing Up Your HUD ...................................................................33
Backing Up Presets ..........................................................................33
Restoring ...........................................................................................33
APPENDICES
FAQs for New Users ...................................................................................ii
FAQs for Existing Users ............................................................................iii
Lighting Colors ........................................................................................... v
Projector Bulbs ..........................................................................................vi
Projector Gobos ........................................................................................vii
Tips & Hints ................................................................................................x
Zooming .............................................................................................. x
Adjusting Lights ................................................................................xi
Tidbits ................................................................................................xii
Credits ...................................................................................................... xiii
Version History ........................................................................................xiv
QUICK START GUIDE
Part I—Overview ........................................................................................ 1
Part II—Toolbox .........................................................................................2
Part III—Lights ...........................................................................................3
Part IV—Projector ...................................................................................... 4
Part V—Gazing ........................................................................................... 5
Part VI—Presets .........................................................................................6
Epilogue—Before & Aer..........................................................................7
Page 4

LUMIPro 2017
4
What’s New!
SO WHAT’S NEW???? As always, LUMIPro strives to exceed itself with every release, and LUMIPro 2017 is no exception. Here’s all things great and small that’s new or improved:
Scenes! If you’re not new to LUMIPro, you know the
older versions presets as well, and that remains the same
- only now they’re called Scenes. Nine handy slots in a
menu store your custom scenes for easy recall at a later
time. You can store your pose, your eye position, and
your camera position so you won’t have to tear your hair
out when you accidentally bump your mouse, knocking your carefully-craed scene into oblivion. No more
searching around for the menu. Click the Scene button,
and you’re ready to go: select Lights, Camera, and Pose
(or any combination of those; you can store just the
lights if that’s all you want), click a slot number, and
click Save. at’s it! Not only that, but Restore works the
same way: you can, for example, switch among several
saved poses and keep everything else the same by selecting only the Pose button, and then clicking Restore. e
lights and camera will not budge. en if you’ve decided
on a pose you like, and want to switch up the lights...just
enable Lights and disable Pose...now every slot is about
only the lights.
e nine scenes can be saved to the server, then restored
for a future shoot with a new model. is makes it very
easy for product and blog photographers to have a
reliable go-to system they can recall at any time for their
next product or post.
Updated HUD Interface! e main LCD window has
changed slightly, getting rid of some duplication, and
bringing “hidden” features to the forefront. e REZ
and DEREZ buttons have been removed from the LCD,
but they are still available on the Toolbox (see the pic on
the le of this page).
Presets has been renamed, and is now called “Scene,”
and is right where it used to be under its old name.
Pose Filter has been a feature of LUMIPro for a couple
years, but it’s always been buried away. If you ever typed
“/43 stands,” or something similar aer /43, you were
using the Pose Filter. Now, it’s front and center in the
LCD window: click Pose Filter, type any word that will
help you nd specic poses, and suddenly even a HUD
with 300+ poses in it becomes easily manageable.
NEW!
Look for this symbol on any page that
includes changed features or functions
HUD Control of Lights! You knew it was coming; that
one thing that would really make LUMIPro outstanding,
an unparalleled tool for every photographer in Second
Life. Now you can swing your lights around your model
without having to exit the scene you carefully set up,
cam into the model, un-hide and click on giant light
balls until you nally sort of get it kind of where you
maybe think it would work. How do we do this magic?
With the latest addition to the Toolbox: Light Control!
It’s really very intuitive, and works just like the other
Toolbox controls; clicking the arrows around the perimeter move the lights in the direction clicked, in an
arc around the selected model (or move them closer
or farther away with the Forward/Back arrows). Used
in conjunction with the Colors popout panel, you can
move individual worn lights, or all three lights at once.
is new feature is a huge time saver, and we know
you’re going to totally love it!
Page 5
LUMIPro 2017
5
e Toolbox
Sitting on top of the HUD is the Toolbox, where you’ll nd
four very important tools: the Ball Movement controller
(shown), High Resolution Eye Gazer, a sit-ball controller, and
a projector controller. Clicking the Flipper will rotate between
them.
Use the Rez button to get rezzable tools such as projectors,
sitballs, backup servers, and eye gazers. e Derez button on
the opposite side will remove all unlocked rezzables
Click here to jump to the Toolbox section to learn more.
e Model
Sitting directly below the Toolbox is the model controller. e
currently-selected model’s Username is shown in yellow, with
arrows on either side to select from up to 10 models (including yourself). Change or add models by clicking the yellow
text (or the Model button) to get a menu of all models within
20m. All functions on the HUD will apply to the currently
selected model, so all your lighting and pose setups for one
model won’t be aected by what you do with another model.
Click here to jump to the Models section to learn more.
e Lighting Presets
e main body of the HUD features four buttons—Buttery,
Rembrandt, Rim, and Split—that are classic lighting setups,
giving you great lighting right out of the box!
Click here for more info in the Lighting Presets section.
e Joystick
In the center of the Toolbox sits the Joystick area (where the
Ball Movement icon is showing here). Clicking inside this area
will move the selected tool relative to the center of the Joystick.
For example, with the Eye Gazer selected, clicking in the upper
le quadrant will move the model’s gaze up and le. Clicking
close to the center moves them a little, clicking at the edge
moves them a lot. Each tool moves in ways that make sense.
Click here to jump to the Joystick section to learn more.
LCD Control Panel
e LCD Control Panel gives you access to customizing lights
and colors, saving, loading, and managing all the rezzable
items inside LUMIPro. ere are two dierent LCD Control
Panel options; the Modern view is shown, and a click on the
gear icon ips the display to the legacy LCD panel for those
that prefer the old view.
Click here to jump to the LCD Panel section to learn more.
Hide, Give Lights, and the Wheelies
Topping the body section are the Hide button, which scoots
everything but the Hide button and the Wheelies o the
screen, and hides all rezzed items in-world. Give Lights sends
a set of lights and a projector to the current model that they
can wear, and you can control. e Wheelies step sequentially
through every pose stored in your HUD. Treat them kindly.
Click here to jump to the Hide, Give LIghts, and Pose section
to learn more.
e Power Strip
e bottom ve buttons do the following: Poses 1 and 2 give
you access to two groups of poses. You might assign group 1 to
female poses and group 2 to male poses, or maybe group 1 has
all standing poses while group 2 has all sitting poses. e red
X button stops all animation. e blue Power button icks the
switch on your wearable lights, turning them o, or back on
to exactly where they were set when you turned them o. e
green Help button opens the Help and Options menu for more
settings and controls.
Click here to jump to the Power Strip section.
Main HUD Overview
Page 6
LUMIPro 2017
6
Popouts Overview
Popout Menus
Preset lights are a great way to get started, both with LUMIPro, and
even when you’ve mastered LUMIPro and are just setting up a new
shoot. It’s useful to start from a good point, and then customize
lights and colors to achieve exactly the shot that is tickling your
imagination.
Sliders and Colors
e Sliders and Colors popout menus oer deep control of your
lighting setup, either on a per-light basis, or for all the lights at once.
Clicking on the Colors control panel button will pop out just the
color palette, where you can select which light or lights you will be
adding a preset color to, as well as letting you pick from an assortment of color sets, or any color at all from the color strip.
Clicking either the Advanced button at the top of the Colors menu
or clicking on the Sliders button in the control panel will display
both the Color Palette menu and the Sliders menu. Sliders let you
ne-tune the color using the RGB sliders at the top, and the character of the light using the Saturation, Intensity, Radius, and Fallo
sliders.
Click here to jump to the Sliders and Colors section to learn more.
Panel Options
ColorSet opens a menu list of palettes broken out by color
Le and Right arrows move you through the pages of each color set
When the white button is selected, all edits apply to all the lights
When the red, green, or blue buttons are selected, edits apply only to
the red, green, or blue light balls worn by the current model
e black ball edits apply to all unlocked projectors on a model.
Scene
e Scene Save/Restore menu, updated for LUMIPro 2017, lets you
instantly save up to 9 scenes, each one including the lighting setup,
camera position, and current pose. Even better, you can save and restore all parts or any single part of a scene. For example, you might
want to pull the pose from Preset 1, the lighting from Preset 2, and
the camera angle from Preset 3. e Scene Save/Restore system is a
fantastic way to manage product shoots, where you might want to
repeat the exact same set of poses/eye positions and camera location
with several dierent outts—long aer the original shoot! Click
here to jump to the Scene section to learn more.
NEW!
Page 7

LUMIPro 2017
7
e LCD Panel - Overview
SLIDERS: this opens up a menu that gives you a bank of sliders that
gives you unprecedented control over Color, Intensity, Radius, Fallo,
and Alpha of your lights.
COLORS: as with the Legacy Panel, this opens up a color-selection panel
that lets you choose either preset light colors, or mix your own.
SCENE...: opens up the Scene Save/Restore panel that lets you store up
to 9 scenes, saving lights, camera position, and pose for later recall.
SIZE: opens a menu that lets you adjust the size of the light balls.
ALPHA: toggles the alpha state of balls and rezzables, as set using the
ALPHA GEAR button.
OPTIONS: opens a menu where you can adjust global HUD settings,
backup and restore your HUD, and more.
POSE FILTER: lets you enter keywords to focus on particular poses.
Note: using /43 {descriptor} still works.
GEAR ICON: ips to the Legacy Panel
?: sends you a help notecard for quick reference
SOCIAL MEDIA BUTTONS: opens a menu that contains links to our
blog, Flickr, and Facebook pages.
Each of the buttons above open a menu that lets you choose a preset value. is is great for quick setup or to rough in a lighting scene. You can
then ne-tune your lights using the tools in the Modern Panel.
Each colored button represents the following:
White = all the model’s lights
Red = only the red light ball
Green = only the green light ball
Blue = only the blue light ball
Black = all unlocked projectors
COLOR: opens a color-selection panel where you can choose preset light
colors, or create your own color.
INTENSITY: opens a menu with settings ranging from 0 (o) to 1 (full)
RADIUS: opens a menu to set the radius of the light, from .25m to 20m
FALLOFF; opens a menu to set the fallo amount, from 0 (natural fall-
o) to 3 (rapid fallo)
ALPHA: opens a menu to set the transparency of the lights, and when
the white button is clicked, of rezzed objects as well.
SIZE: opens a menu that lets you adjust the size of the light balls
GEAR ICON: ips to the Modern Panel
e LCD Panel is where you access the control features and some of the deeper tools inside LUMIPro 2017. ere are two LCD screens, and while there is some crossover, they each have
unique features and methods of managing LUMIPro’s tools. Let’s look at a side-by-side comparison to get a feel for what’s available. e functions will be covered in greater detail in later
sections (just click on “Sliders” for example, to jump to the Sliders section below). Note: the icons at the top of the LCD do not do anything other than sit there and look good, because
let’s face it: LUMIPro 2017 is all about lookin’ good!
Modern Panel Legacy Panel
e gear icon ips between the Modern and
Legacy panels.
Page 8

LUMIPro 2017
8
e Power Strip
New for LUMIPro 2017 is the Power Strip. As part of the overall cleanup of the HUD, we decided to make things a little clearer, and to add a little more functionality to LUMIPro 2017.
Now you can work faster and more eciently, and still have time to go shopping at the end of a session!
Pose Groups 1 and 2. While not technically
“new,” the pose groups now make a little more
sense. Instead of making gender the default
choice, now you can divide up your poses into
any two groups that make sense to you and
how you work. Click button 1 or 2 to call up
the menu for all the poses in that group, or
click between them for the poses from both
groups. Click the red X button to stop the current pose, and new for LUMIPro 2017, the X
button will also release the camera lock.
e Power Button. New for LUMIPro 2017,
the power is a simple, elegant little tool. How
many times have you hit the stores aer a
shoot, only to realize your lights are still on?
You can turn the intensity to 0, or take them
o (which is a pain if your wearable lights includes a projector, which would be reset if you
took it o and then put it back on), but now
you don’t have to: one click of the blue Power
button, and your lights are turned o. One
more click, and they’re back on, all at the same
levels you le them.
e Help Button. is button gives you access
to the Help menus, and the Options menus.
Support opens a eld where you can enter a
question that will be sent to us via email.
Quick Help gives you a texture with an overview of the LUMIPro HUD.
Options opens the Options menu (shown at
le, under Pose Groups 1 and 2)
About gives you a texture with information
about this current release
Survey opens a quick Google form so that we
can learn more about you, how you use LUMIPro, and how we can improve!
Help Menu
Options Menu
Page 9

LUMIPro 2017
9
Lighting - Wearable Lights
LUMIPro is all about the lights. Rez them, wear them, and share them
to your heart’s content—you have the One HUD to control them all!
e rst thing you will want to do is give your model (or yourself) a
set of wearables. To get them, click the GIVE LIGHTS button on the
HUD (helpfully pointed out here by our friend Le Wheelie), and a
folder named LUMIPro Talent: Right-click ADD this folder will be
sent to the model displayed in yellow under the Toolbox.
e red ball is typically the primary light,
and replaces the standard face light. It is
usually positioned somewhere in front of
the head. Whether general or dramatic,
the red ball is your go-to light.
e green ball is the accent light, and is
generally used as a ll light or for balance. is is best seen in the Rembrandt
preset, where the green light highlights
the back and side of the neck and head.
e blue ball’s purpose in life is to add
general illumination to the body of the
avatar, adding enough light to bring out
details that might otherwise remain hidden with just one or two lights.
LUMIPro’s wearable lights use an invisible prim to attach to the avatar’s chin. ey come in three delicious avors: Cherry Red, Lime Green, and Berry Blue. You can also just call them
simply red, green, and blue balls. We don’t mind. While any light can be used to light your here, there, or everywhere, the standard setup uses the lights in the following way:
When you rst put them on, they may seem bigger than you expected. is makes them easy to move around when attached to your model, but might otherwise be in the way more oen
than you’d like. We recommend shrinking them down to a manageable size once they’re positioned the way you like. It doesn’t matter what size they are—the light always emanates from
the very center of the ball, uses the slider settings to determine what to illuminate.
You also have the option of wearing a Projector which delivers a shadow-casting beam of light onto your avatar, and features various bulb sizes, shutter and window shadows, and gobos—
solid shapes between you and the light that cast shadows
Wear either the LUMIPro 2017 Wearable Lights, the LUMIPro 2017
Wearable Projector, or both. Do note that because these are worn,
and not rezzed in-world, you can use LUMIPro even in no-rez zones.
ey will even function in no-script zones, as long as they are worn
before entering that zone. And remember: you can control the lights
for up to 10 models from one HUD (including yourself)!
e Red Ball e Green Ball e Blue Ball
Give Lights
Page 10

LUMIPro 2017
10
Lighting Presets
We know that the world of the photographer can sometimes be hectic, and there are times when you just need lights that look good
right now. To this end, we’ve created four lighting presets based on real-world professional and artistic lighting techniques, used by
masters of light for centuries. Now with one click, you can set your lights to one of these four instant solutions: Buttery, Rembrandt,
Rim, and Split. Here’s what they look like, and how you might use them:
Buttery Rembrandt
Rim Split
It’s said that this preset is called
“buttery” because of the shape of
the shadow under the nose. You
may or may not see that, but what
you are certain to see is a smooth
overall face light, with the face
well-dened, the hair backlit, and
the light on the lower torso given a
gentle boost to balance the overall
eect.
Because of the even lighting, this
makes for a great starting point.
Rembrandt was a master at capturing light, and this preset tries to
capture lighting characteristic to
his work. Here, the green light ball
is moved forward and made a little
brighter to add a glow to the shoulder and side of the face along the
jawline.
is preset is a very good starting
point for prole pictures and other
portrait work.
Sometimes, it’s not your face you
want to capture, and this is where
Rim comes into play. From the
rear, Rim highlights your backside,
adding shape and denition to your
posterior curvature.
From the front, Rim puts the model
in silhouette, which might be useful
for either a more noir approach, or
when using a projector to light the
front of the model.
Split tries to do it all, lighting front,
back, and sides as evenly as possible. It’s similar to Buttery, but the
lights are further from the model.
is oers both a little more even
lighting to what’s lit, and a little
more contrast in the parts that
aren’t.
If Buttery isn’t cutting it, give Split
a try—it just might do the trick!
Page 11

LUMIPro 2017
11
Moving Lights
In the old days, lights needed to be moved by clicking on
them in the direction you wanted them to go. Now, thanks
to the miracles of modern technology, and genius of Stefan Buscaylet, this quaint method of touching the balls to
move them is a thing of the past.
If you really want to, you can attach wearable lights from
earlier versions (because ball touching in 2017 is not supported), but we recommend the new, improved joystick
controller. See below for more info on how to use this
feature. You’ll be glad you did!
Page 12
LUMIPro 2017
12
LUMIPro 2017
Lighting - Intensity
Intensity is how bright a light is. It’s like wattage in RL: a 150-watt bulb is much brighter than a 25-watt bulb. SL doesn’t use “watts” to describe how bright a light is, it uses a sliding scale
from 1.0, which is full brightness, down to 0, which is the same thing as “o.” You’ve seen this in action many times, when somebody will come into a store and blind everybody in sight.
ey’ve got several lights on at once, and they’re all at full strength. With LUMIPro, you can set the intensity for each wearable light, and each projector individually. e images below
were taken based on the Buttery preset. In the rst image, the Intensity was set for the Red ball to 0.0. In the second image, the Intensity was set to 1.0. With the controls, you can set the
Intensity to any value between 0 and 1. is gives you great exibility in setting your scene, whether you want a bright, well-lit model or are going for something darker and moodier.
Intensity at minimum Intensity at maximum
Page 13

LUMIPro 2017
13
Lighting - Radius
e Radius of a light is how far out from the center it will shine. Keep in mind that the size of your wearable lights has no bearing on the actual radius of the light itself. e images below
will give you an idea of how much space is lit with a few dierent radii. Remember—this is the radius; the sphere itself will be double the radius in diameter: a .25 sphere is .5 meters in
diameter—the size of a newly-rezzed prim. If the Fallo is set to 0 (see the next section), light will be cast from the center of the light ball right up to the edge, with a very quick fallo after that. In the real world, the photons will keep moving until they’re absorbed or reected. In SL, the light keeps going only until it hits the radius limit. erefore, if you want to light just
your model’s face, keep the radius small and the light close to the face. If you want to light up the room (and everybody in it), make the radius large; you can set it up to 20 meters!
Radius at minimum Radius at maximum
Page 14

LUMIPro 2017
14
Lighting - Fallo
In the real world, light follows what’s called the Inverse Square Law—the intensity is inversely proportional to the square of the distance from the source. What that means in English is
that when your model is twice the distance from a light source, they will receive only 1/4 of the illumination; at three times the distance, they’ll receive 1/9th the illumination, and at four
times the distance, only 1/16 as much light. is is called “fallo.” In SL, just like your belly size, Fallo can be controlled with the ick of a slider. e images below show the model in the
center of 3 circles: the outer with a radius of 3m, the middle at 2m, and the inner at 1m. e red ball on the le is the light source, set to illuminate a radius of 5m, and the other balls are
there so you can see the extent of illumination based on the Fallo setting.
At a Fallo setting of 0, SL light pretty much obeys the laws of physics. You can see at the source, the light is very bright. By the time it’s traveled 3 meters, it’s lost most of its intensity. In
the second picture, with the fallo at 1.5, the light is barely illuminating the ball on the 1m ring. At a Fallo setting of 2.0, the light barely illuminates the ball on the 2m ring. Used in conjunction with Intensity and Radius, you have a great deal of control on the light reaching your model.
Intensity: 1.0
Radius: 5.0
Fallo: 0
Intensity: 1.0
Radius: 5.0
Fallo: 1.5
Page 15
LUMIPro 2017
15
e Toolbox and the Joystick
Sitting atop the LUMIPro HUD is the Toolbox. It features a large central virtual joystick surrounded by smaller positioning buttons, the Flipper that switches joystick modes from Ball
Movement to Eye Gazer to Sit Ball positioner to Projector controller, and back again. e REZ and DEREZ buttons open a menu to let you rez things in-world. Using these tools, you can
rez and position virtually unlimited projector lights and eye gazers, and add new dimensions to your virtual photography. is section will guide you through the basics of creating, editing, and positioning these gazers and projectors.
e Joystick
e large area in the center of the Toolbox is the Joystick.
Like a real joystick, things move in the direction you
point. It comes with four separate modes: Ball Movement, Eye Gazer, Sit Ball, and Projector ( shown above).
Use the Flipper button to step through each mode.
e Direction Buttons
Surrounding the Joystick are six direction buttons: Up,
Down, Le, Right, and at the 2:00 and 4:00 positions,
Forward and Back. How these act depend on which Joystick mode you’re in.
e Flipper
Click on this button to step forward through the various
Toolbox modes
e Rez and Derez buttons
e Rez button calls up a menu that gives you the option
to rez a new Sit Ball, a Projector, or a free-oating eye
gazing prim. You can also rez a backup server from here.
How the Direction Buttons Work
e Direction Buttons, while they perform similar tasks
in each mode, act slightly dierent depending on which
mode you are in.
Light Mode, Eye Gazer Mode & Projector Mode
When the Light mode, Eye Gazer mode or Projector
mode is active, the arrow buttons control the movement
of model-worn lights or tools created using the Rez
menu, including the rezzable eye gazer and projectors.
ey rotate the objects around a sphere centered on the
selected model, or move the objects closer in or further
away from the selected model.
Sit Ball Mode
e up and down arrow buttons will raise or lower the
sit ball, while the le and right buttons will rotate the sit
ball around the Z axis. e forward and back arrows will
move the sit ball accordingly.
Eye GazerBall Movement Sit Ball Projector
Page 16

LUMIPro 2017
16
e Toolbox and the Joystick
e original LUMIPro tool is the Eye Gazer.
By rezzing a controllable prim, controllable
by the HUD, photographers were able to
position a model’s eyes anywhere. With the
advent of the High Resolution Gazer in version 3.4, it was no longer necessary to rez
a prim—especially useful on no-rez sims!
Now, the joystick area poses the model’s
eyes directly. With 121 possible positions in
the Joystick zone—far more than any other
eye gazer—you can nd the perfect look for
your model, whether gazing directly at the
camera, at another model, or anywhere else.
Note: you can still rez an Eye Gazer from
the REZ button, but it only works in areas
where you can rez objects.
New for LUMIPro 2017! Now you can con-
trol yours or your model’s lights right from
the HUD. Using the light selector buttons at
the bottom of the Colors panel (see below),
you can chose to move the red ball, the
green ball, the blue ball, or all the balls (the
white button).
Quick tip: to quickly select which light
you want to move for the selected model,
simply touch whichever light ball you want
to control, and the HUD will automatically
select that light for movement!
e Sit Ball is one of those tools that you
wonder how you ever lived without. Put
your model anywhere on your stage, and
they’ll be pinned right there as you nd
the perfect light and pose. You can use SL’s
Edit mode to put the into rough position,
then use a combination of the Direction
buttons and the Joystick to ne-tune the
position. When you click inside the Joystick
area for the Sit Ball, it will rotate around the
photographer—much like a projector will
rotate around a model. If you are both photographer and model, it will rotate around
a point about 2 meters from your center.
Note: the sit ball only works in areas where
you can rez objects.
e Projector is a powerful tool, a strong,
focused light that will cast shadows and
images onto the model. Clicking inside
the Joystick area will move the Projector
around an imaginary sphere centered on
the model. Note: you can only rez projectors in areas that allow you rez perms. For
those cases, you can choose the Wearable
Projectors.
Eye Gazer ModeLight Ball Mode Sit Ball Mode Projector Mode
NEW!
ProjectorSit Ball
Eye GazerWearable Lights
Page 17
LUMIPro 2017
17
Light Control
LUMIPro has always made it possible to adjust your model’s lights: by clicking in the direction you wanted them to move, you could position the lights to shine exactly where needed.
While this was a good solution, it still required the photographer to leave the set-up scene, and zoom in on the model — which prevented seeing how the lighting would look in context.
New with LUMIPro 2017, you can now adjust the lights directly from the HUD, without leaving your scene and without zooming in on the model. It’s all managed in a way you already
are familiar with: using the Joystick.
NEW!
Use the arrow buttons at 3:00 and 9:00 to
move the selected light to the le or right.
Clicking anywhere from the center of the
Joystick area up towards the arrow button
at 12:00 position will move the selected
light in an arc up and over the model’s head.
Clicking from the center down will move
the selected light in an arc downwards.
Use the Side Arrows to move the selected
light towards or away from the model.
Use the arrow buttons at 12:00 and 6:00 to
move the selected light vertically, up and
down along the Z axis.
Clicking from the center out towards the 3:00
or 9:00 arrow buttons will rotate the selected
light around the photographer.
Clicking anywhere inside the Joystick area
will move the selected light in that direction—up/le, up/right, bottom/le, or bottom/right. Also, the closer to the center you
click, the ner the adjustments in position
you’ll be able to make.
Selecting the active light. In most cases,
you’ll want to select individual lights to move.
is is done the same way adjusting colors
is done: rst select which light you want to
move, then use the Joystick to move that
light. Click one of the buttons at the bottom
of the Colors popout panel: white, for all
lights; red, green, or blue for the red, green,
or blue light balls. Alternately, you can just
click on the desired light ball to automatically
select it (and the model wearing it)!
e Light Control
Page 18
LUMIPro 2017
18
High Resolution Eye Gazer
LUMIPro’s High Resolution Eye Gazer was designed to let you adjust your model’s eyes anywhere, even on sims where rezzing is not permitted. is is a huge boon to the photographer
who likes to take their “studio” with them, and wants to take advantage of the abundance of beautiful sims available in Second Life. Accessing the High Resolution Gazer is simply a
matter of clicking the Flipper until the Gazer mode is activated. When the Gazer mode is activated, the outer arrows on the Joystick will control rezzed items like projectors. To adjust the
eyes, click anywhere inside the Joystick area in the direction you want your eyes looking. Note that there may be issues with some mesh heads; if the gazer doesn’t work as expected, turn
o the mesh head’s eye AO.
Look LeLook AheadLook Right
Page 19

LUMIPro 2017
19
Rezzable Eye Gazer
LUMIPro’s High Resolution Eye Gazer is very good at positioning your eyes. With 121 separate eye positions, you’re virtually assured of nding the right position for your model’s gaze,
and it’s especially useful on no-rez sims. ere are times, though, when even that’s not enough. If you are looking for more ne-tuned gazing, or perhaps want all the models looking at
the same thing , the Rezzable Eye Gazer is the solution. Start by selecting your model on the HUD, then rezzing an Eye Gazer from the Toolbox:
To ensure that your model’s gaze stays transxed on the Eye Gazer, even if she clicks elsewhere, take steps below. Make sure they’re using Firestorm or another full-featured viewer. If
they’re using the basic LL viewer, the following steps are not possible, and you’ll just have to make sure your model does not click on anything else during the course of the shoot.
1. Alt-Click on the gazer (it will have the model’s name in oating text above the Gazer prim).
2. Open the Preferences to the Privacy tab, click on Show look at targets, then on Don’t send
any look at targets at all, not even to myself. Click Apply, and close Preferences.
is will keep their gaze locked on the gazer, and visible so that you can ensure at any time
that they’re looking where they should be looking. If you’ve got multiple models looking the
same direction, have them follow the same procedure above.
Tip: the further away from the model the Eye Gazer is positioned, the more ne-tuned the
gaze will be. For very ne adjustments, move the Gazer out 5-10 meters from the model. is
will usually keep the look-at cross-hairs from being in your screen, as well.
Page 20
LUMIPro 2017
20
e Sit Ball
LUMIPro instituted the Sit Ball back in version 3.1, and it was a revolution for in-world photographers and models. No longer tied to the tyranny of the pose ball, LUMIPro users could
place their models anywhere, and position them freely. With the addition of the Sit Ball controller in LUMIPro 2016, photographers can now control the Sit Ball right from the HUD! No
more losing the shot because you had to cam out to nd and adjust the Sit Ball. Here’s how to control it from the HUD:
When selected from the REZ menu, a Sit Ball appears 2.5 meters in front of you, and adjusted to the height of the currently selected model. You can then use either Edit
mode or use the touch method to move the sit ball into position. To adjust the position of the Sit Ball, do the following:
Use the arrow buttons at 3:00 and 9:00 to
rotate the Sit Ball around the Z axis, spinning
them in a circle right where they’re sitting.
Clicking anywhere from the center of the
Joystick area up towards the arrow button
at 12:00 position will move the Sit Ball in
an arc up and over the photographer’s head.
Clicking from the center down will move
the Sit Ball in an arc downwards.
Use the Side Arrows to move the Sit Ball
towards or away from you. Note that the
direction the Sit Ball will move is relative to
the Sit Ball itself, not the photographer. In
practical terms, this means that sometimes
a Side Arrow will move the Sit Ball towards
the photographer, and sometimes it will
move away from the photographer.
Clicking anywhere inside the Joystick area will move the sitball that direction—up/le, up/right, bottom/le, or bottom/right. Also, the closer to
the center you click, the ner the adjustments in position you’ll make.
Use the arrow buttons at 12:00 and 6:00 to
move the Sit Ball vertically, up and down
along the Z axis
Clicking from the center out towards the 3:00
or 9:00 arrow buttons will rotate the Sit Ball
in a outward spiral around the photographer.
e Sit Ball
Page 21

LUMIPro 2017
21
Projectors
LUMIPro Projectors deliver focused, directional, shadow-casting light that can really make your pictures pop. LUMIPro 2017 gives you the option of letting you or your model wear projectors, or lets you rez them in-world. ey are both controllable with the HUD, and have the exact same feature set, but there are distinct advantages to each method. Worn projectors are
attached to the avatar’s nose, and will move with the model so they’ll never be out of the spotlight—a perfect choice, or example, on the catwalk, or perhaps doing a theatrical production.
Wearable projectors are also very useful in no-rez sims, giving your on-location lighting some much-needed exibility. Rezzed projectors also begin life centered on the model. However,
when the model moves, the projector stays put. is gives you the exibility of placing a projector anywhere in the scene, and when it’s locked, it will stay put. It also requires a sim that
permits rezzing, in order to function properly.
LUMIPro Projector Projector Control Panel Projector Menu
is is what the LUMIPro 2017 Projector looks like,
whether you wear it or rez it. Touching anywhere on
the body or lens of the projector will toggle the lock
state. If the projector is locked, a padlock will appear
below the lens, and none of the HUD controls will
have an eect on it. Clicking directly on the spotlight
is the only way to unlock it.
is is useful when you’ve created a spotlight setting
that you’re happy with, and are going to create or
modify existing spotlights.
To call up the Projector menu, click the projector
button on the HUD, or the control panel on the back
of the projector. Don’t worry about what to do with all
the buttons and LEDs; their only purpose in life is to
sit there and look good—which they do very well.
When you click the back of a projector (or the Spotlight Edit button on the HUD), you’ll see this menu,
with four options:
Lock: locks the spotlight, preventing any edits or
HUD-controlled movements
Model: opens the model picker menu, letting you assign the spotlight to a particular model. e spotlight
will reset its position to the default for that model.
Bulb: let’s you select the Bulb preset (see below)
Gobo: lets you select the gobo preset (see below)
Page 22
LUMIPro 2017
22
Projectors - Rotation
Projectors - Multiple Projectors
Rotation adds a new spin on your bulbs and gobos, by spinning it around at the speed of your choosing. is has a couple of clear advantages: when you’re trying to nd just the right
position for the light from a bulb to fall on the model the way you envision, and the stock projection isn’t where it needs to be, you can rotate it slowly until it’s in the perfect location. If
you’re making videos, adding rotation to your projectors adds a lot of dynamic motion to your scenes.
ere is no set limit to the number of Projectors you can rez, though each rezzed Projector has an LI of 14. ere are a few things to keep in mind when you’re rezzing and using Projectors. First, only two projectors at any given time—the two closest to the camera, not the model—can cast shadows. All others will continue to cast directional light. Second, when lighting
the combination of mesh bodies with SL heads, projected light can behave unpredictably. e mesh and system textures seem to handle light dierently, and while neck/head blenders
can solve most problems with general SL lighting, using them can actually make things worse. You may need to adjust the position of the model, or you may end up just having to x it in
Photoshop (or the graphic editor of your preference). e third consideration is managing multiple rezzed object, and is covered in the next section, Locking Rezzables.
Start by rezzing a Projector as described above, and from the menu that lets you
pick which bulb or gobo you want to use, you’ll see the Rotation button. Click that
to bring up the Rotation menu.
Click the +SLOW button to rotate the bulb clockwise (from the Projector’s perspective), and -SLOW to rotate counter-clockwise. Each successive click will speed up
the rotation in the chosen direction. SLOW speeds it up a little, MED a little more,
and FAST a lot more. If you’re rotating on the + side, clicking on the – side will slow
things down.
Note: due to a quirk in the LL engine, clicking OFF no longer stops the
rotation where it is. Instead, it resets the bulb rotation to 0,0,0. Gobos are
not aected by this issue, and will stop in mid-rotation when you click
the OFF button.
Page 23

LUMIPro 2017
23
Locking Rezzables
Any time you have more than one rezzable object, including multiple Projectors or Projectors and Eye Gazers, you need a way to isolate and control only the items that need adjusting. By
default, the HUD will control anything rezzed for the selected model. In either the Projector mode or the Eye Gazer mode in the Toolbox, clicking the Joystick arrows will move everything rezzed the same amount, in the same direction. To stop that from happening, LUMIPro uses a convenient locking mechanism: your mouse. For example, if you have two projectors
and an Eye Gazer rezzed, it might look something like this:
If you’ve directed your model to use the Eye Gazer, and then want to adjust the color of the
Projector on the le, you will need to lock both the Eye Gazer, and the Projector on the right.
To do this, click in the center of the object, and a lock will appear. Below, the Gazer and the
Projector are showing as locked, as indicated by the padlock.
Now, when you adjust the color of the remaining Projector, and change its
position, nothing else will be aected. To unlock a Gazer or a Projector,
click the object again, and the padlock will disappear.
Once you have your lights colored and positioned, you may want to adjust
your model’s eyes with the Eye Gazer. Simply lock both projectors, unlock
the Gazer, and adjust as necessary.
Note that clicking the DEREZ button on the HUD will remove only unlocked items,
Page 24

LUMIPro 2017
24
Projectors - e Anatomy of a Scene
ere are 6 lights in the scene below: two rezzed projectors—one inside the house casting the light that’s spilling through the door and adding a halo eect to the model; and another that’s
up high and to the le, out of the picture, with a faded blue light to simulate nighttime. It’s casting shadows from the tree, and is also using a tree branch gobo, making the tree shadows
beautifully complex. e model’s wearable lights have been positioned so that the red ball is in position at the le porch light, and green ball to the right. e blue ball is positioned behind and away from the model, with the same faded blue color as the tree projector, and whose level is set to just barely illuminate her back. Note that while you can rez as many projectors as you like, due to SL limitations, only the two projectors closest to the camera (not the model) will cast shadows.
Page 25

LUMIPro 2017
25
Sliders and Colors
In the original versions of LUMIPro, light levels, saturation, and other variables were set using buttons and menus (see Page 15, Panel 2 for details). Starting with LUMIPro 3.4, slider panels were added that lets you use intuitive slide controls to set the levels for Color, Intensity, Radius, Fallo, and Alpha (transparency) of your lights rezzables. We also feature a full selection of color palettes based on the Lee catalog (click here to see them all).
To access the Sliders panel, click on < Sliders in the Panel 1 of the
LCD control panel of the HUD. e panel below—including the
Slider panel and the Color panel—will pop out to the le
of the LUMIPro 2017 HUD. Clicking on <Colors will
pop out just the Color panel.
e Saturation strip will show you the color you’ve mixed
with the RGB sliders. Full saturation is the pure color
you’ve mixed. As you lower the saturation, that color is
diluted with white until there’s no color le. For example,
if you mix a rich blue, then lower the saturation, it may
give you something very much like moonlight.
e white, red, green, blue, and black buttons at the bottom indicate which light you’re modifying; the white bar
shows you the active light: the white button is all lights;
the red, green, and blue buttons are the red, green, and
blue balls, respectively, and the black button is all unlocked projectors. Use this control in conjuction with the
Joystick to determine which light will be controlled from
the HUD.
e Color Palette gives you a full range of color swatches
that have been designed with professional lighting in mind.
e initial card is a useful set of basic colors but more are
accessible a couple dierent ways:
Arrow Buttons move back and forth between swatches.
e ColorSet menu lets you pick from various sets for each of
the basic colors: Blues, Reds, Yellows, Oranges, Violets, Greens,
Neutrals (gray) and legacy colors from before LUMIPro 3.4.
e Rainbow Strip lets you grab a fully-saturated color with just
a click on the color of your desire. You can then use the various
sliders above to ne-tune your light output.
e Intensity, Radius, and Fallo sliders show you visually these
settings. Click here to see more details on these settings.
In many places on the LUMIPro HUD you will see a “?” symbol; click that to nd context-sensitive help delivered right to
your inventory.
When the panel opens the RGB sliders will be set to the existing light’s color, as marked by the vertical white marks. Click
each color strip to raise or lower the level of that color. Refer to
the example to the right for mixing light colors. All three colors
together make white when mixed equally at full strength, black
when set to 0, and shades of gray for everything in between.
When you add one light to another, the resulting light is
always brighter. Mixing red light and green light create a
yellow light. Green + blue makes cyan, while blue + red
make magenta. Add all the lights together at full intensity,
and you get white light.
Mixing Light
Page 26

LUMIPro 2017
26
Scene Presets—Saving
e Scene Save/Restore system lets you save up to 9 scenes including your lighting positions, the pose used, eye positions, and the position of the camera too. No other HUD does all this,
and looks so good doing it. ere are a lot of features here, so pay special attention to this section: it’s got lots of great information that will make these new capabilities indispensable!
NEW!
ere are three factors that all shoots have in common—from the old Daguerreotypes to today’s high-speed
digital lm—and there’s an iconic phrase to dene it: “Lights, camera, action!” LUMIPro 2017 gets in on
that action with the new Preset Save/Restore panel. Here’s how to use it:
Step 1: Select What To Save/Restore
You have three options: Lights, Camera, and/or Pose. Each button enables saving that part of the scene.
Storing Scenes
Step 2: Select Scene Number
By default, Preset Number 1 is selected. Once you’ve selected a Preset Number, that number will be
selected when you open the Scenes Panel next time. If the button label is red, that preset is empty and
ready to be used. If the button label is green, something is stored in that preset. You can still write over
it, but you may want to verify that it’s not a preset you care about losing.
When you rst open the Scenes panel, these buttons are white, indicating that nothing has been selected for saving. You can select any combination of functions to save, giving you lots of exibility. For
example, you could click on just the Lights button, or you could opt to store only the Camera, if you’re
doing a product shot, and have 2 or 3 dierent camera angles—front view, back view, closeup, for example—but don’t want to change either the lighting or the pose. Similarly, you might want to store dierent camera and pose combinations while keeping complete control of the lighting. As you select each
function you want to save, the label will turn red. Buttons with white labels will not be stored.
Lights will store the light positions for all three light balls in addition to all the slider values: color, intensity, saturation, radius, and fallo.
Camera will save the position of the camera with relation to the model. Note that due to SL lim-
itations, when using this in conjunction with Depth of Field settings you may need to do some minor
adjustments to re-focus the camera.
Pose, as the name suggests, will save the pose the model currently has loaded as well as the eye
position you may have set.
Step 1: Lights, Camera, & Pose Ready for selection
Step 2: Lights, Camera, Action, & Preset 1 Selected
Step 3: Select Action
Once you’re selected what to save and where to save it, there’s only one thing le to do: Save! When you
click the Save button, the activated text labels will turn green, indicating a successful save. When you
back up your HUD to the server all your preset information will be saved as well, so whether you wear
the HUD again tomorrow, next week, or even next year, all your scenes are ready to go!
Step 3: Preset 1 Saved
Page 27

LUMIPro 2017
27
Scene Presets—Restoring
NEW!
Restoring Presets
Once you’ve stored one or more presets, they’re available for recall at any time. You do this by following
the same 1-2-3 steps you took when saving your preset:
Step 1: Select What To Save/Restore
Because LUMIPro 2017 stores each component of a scene separately, you can choose to restore any or
all functions. If you loved the lights and camera from Scene 1 and the pose from Scene 2, you can restore just those components from Scene 1, then add just the pose from Scene 2. TIP: you might want to
then save that combination to an open scene, or overwrite an existing scene. In the example to the right,
the Lights and Camera functions from Scene 1 have been selected.
Step 2: Select Scene Number
If the currently selected scene is not the one you wish to restore, click the desired Scene Number. Remember, a scene with a green label has information stored, and a red label is empty.
e Lock Button
When you restore a camera setting, LUMIPro 2017 restores the position of your camera, and locks it
into place. You can still move your camera around freely, but when you press the Escape key—which
normally restores your camera to the default position behind your avatar—it restores to the stored camera position; in essence, it replaces your default camera position, for as long as the Lock button remains
in the locked position. It might seem odd the rst time you do it, but try it out before your next shoot,
and you nd it intuitive enough, and very useful.
ere are a couple things to be aware of when restoring camera positions, the rst being that there’s a
limit to how far you can move from your original position before LUMIPro needs to make some adjustments. If you’re within 2 meters of your position when you initially saved the camera, it will use the sim
coordinates to position itself. At 2 meters, the camera position will be relative to the currently selected
model instead (which may require some minor adjustments) At 20m from the original saved position,
the camera will not restore. at may seem like a lot to remember (and measure), but despair not, we’ve
got your back, with the Scene Options menu!
Step 3: Select Action
Click the Restore button, and the parts of the scene you’ve selected in Step 1 will be recalled. Once
you’ve done that, you will notice a couple changes: the rst is basic: the Restore button label will turn
green, letting you know the restore was successful. However, if you’ve restored the Camera setting,
you’ll notice the Lock icon has slid to the Locked position.
Ready to Restore Preset 1
Preset 1 Restored
Click to unlock the Camera and restore
freedom of movement!
Page 28

LUMIPro 2017
28
Scene Options Menu
NEW!
With as many features a panel like Scene Save/Restore oers, some way to mange those becomes very important. For this, we give you the Scene Options Menu that lets you perform a lot
of important and useful functions. To access this menu, click on the Gear icon as shown, and it will open the Scene Options menu below:
1. Clear all scenes; click on menu button 1 to reset all 9 scene locations, giving you a clean slate to begin
again.
2. Clear the selected scene; clicking on menu button 2 will clear only the currently-selected preset. In the
example show above, only Preset Number 1 would be cleared; all other presets would remain as they
were.
3. Teleport to the selected scene; this is a very powerful choice: it will let you return to where you were
when you saved the currently selected scene, regardless of where you were on the sim...or even what
sim you were on when you saved the scene! Click menu choice 3, and it will generate a link in open
chat that you can click on, and you’ll be back at your saved location (see above, right).
4. Backup scenes to backup server will back up just your scenes to your currently rezzed server. is
makes it easy to save countless setups for later recall. If you want to go back and re-shoot that gig from
last October, just load up that server, teleport to the original destination, and away you go!
5. Restore scenes from backup server will pull in all the scene information from your backup, and load
it into the current Scene Save/Restore panel.
Teleport to the selected scene
e Scene Options menu gives you the following choices:
Page 29
LUMIPro 2017
29
Managing Models
Once you have all your models loaded into the
HUD, you can select among them using these
forward and back arrows. As each model is
displayed, the HUD controls apply to that model
only. Also, anything you rez, whether it’s a Sit
Ball, a Projector, or an Eye Gazer, will be assigned to that model. is oers the professional
photographer a great amount of exibility and
control.
e second method is the old way, which is to
click the MODELS button on the HUD. Whichever method you use, you’ll be given a menu
that lets you choose from among the nearby
avatars (see example, right). NOTE: the dialog shows avatars’ user name, not their display
name. In many cases, these will be dierent.
When you attach a LUMIPro 2017 HUD, you are automatically selected as the default model. If you only take seles, you can skip right over this section. If you ever work with models,
though, you’ll be happy to know that you can manage up to 10 models (including yourself) at once (insert joke about herding cats here). at might be a lot to manage, but LUMIPro
2017 makes easy work of it; every control on the HUD applies to the currently selected model, so you always know who you’re lighting and posing and scooting across the set. Here’s how
to select them:
ere are two ways to add models to the HUD,
and both do exactly the same thing, though
we recommend using the rst method: click
the current model’s display name (as shown,
Lyrical).
Select Models menu
Page 30
LUMIPro 2017
30
Hide, Give, and Pose
Directly under the LCD panel are four very important buttons: the Hide button, which instantly hides all wearables, rezzables, and the HUD itself; the Give Lights button, which sends a
folder—containing wearable lights and a wearable projector—to the currently selected model; and the Pose Wheel, which is really two buttons side-by-side.
e Hide button is very basic: click once to hide all lights,
projectors, and wearables. When hidden, the LUMIPro
HUD doesn’t just become transparent, the entire HUD with
the exception of the Hide button and the Pose Wheel (which
is made partially invisible).
Clicking Hide again will make the HUD fully visible, but
whether or not it shows lights and rezzables depends on
your HUD settings. is will be covered in greater detail
later in the manual, but the short version is this: you can
elect to have the Hide button show and/or hide everything
with each click, or as we prefer, show/hide only the HUD,
letting you toggle the visibility of wearables and rezzables
separately.
Give Lights sends a folder to the currently selected model,
containing four items: LUMIPro 2017 Wearable Lights, LUMIPro 2017 Wearable Projector, an LM to LUMIPro’s world
headquarters, and a notecard from Stefan Buscaylet, creator
of LUMIPro. You can send as many lights as you want to
your models, so if they lose them in inventory—just give
them another set!
Have the model wear the Lights, the Projector, or both if
your shot calls for it, and tell them to accept any requests
from you to enable certain features and functions.
e Pose Wheel is your always-on, instant access button to
step through all the poses stored in your HUD. Flip forward
or backward, it doesn’t matter. is is great when you have
a HUD full of poses but aren’t sure what will work best for
your shot yet, and just let inspiration take you where it will.
Note the two characters on the wheel: Le Wheelie, and
Right Wheelie. Le Wheelie will take you backwards
through your list of poses, and Right Wheelie will take you
to the next pose in your list. When you’ve clicked the Hide
button, the Wheelies (along with most of the rest of the
HUD) will disappear, but the Pose Wheel becomes ghosted
at 85% transparency (so you can still see it, but it doesn’t
intrude on your visual space).
LCD Panel
LUMIPro Talent folder
Closed LUMIPro HUD
Page 31

LUMIPro 2017
31
Managing Poses - Adding Poses
Starting From Scratch
When you receive LUMIPro 2017, it comes stued with over 180 poses from some of Second Life’s most talented pose makers. It’s an incredible value, and if you’re starting from scratch,
it’s a great way to begin. However, most seasoned photographers will have hundreds, if not thousands of poses they’ve bought, been given, or have made, and up until now, accessing them
has been cumbersome at best. With LUMIPro 2017, the number of poses you can add to a HUD is technically unlimited, so the photographer’s life just got a whole lot simpler. In the next
couple pages, we’ll show you how to load, manage, save, and restore all your poses eciently.
e very rst thing you want to do when getting LUMIPro 2017 is make a backup copy. If you haven’t already done so, take a moment and do that now. We’ll wait. Done? Great! e
next thing we want to do is create an empty HUD. In your inventory, double-click the HUD you copied. is will attach the HUD to the right side of your screen, in the optimal position. With the HUD attached, follow these next steps:
When you want to load a new HUD with animations, follow the same procedure outlined above, only now you simply need to move a copy of
the empty HUD you created in steps 1 to 3 onto the ground. Next, we’ll cover how to catalog the poses you’ve loaded into LUMIPro 2017.
1. Click on Options... in the LCD Control Panel, then click on Clear Demos
2. Right-click on the LUMIPro 2017 HUD, and select Drop from the menu. is will place it on the ground in front of you.
3. Right-click on the dropped HUD, and select Take Copy from the menu. is will take a pristine, empty version into inventory for later
use.
4. With the HUD that’s still on the ground, right click on it and select Open from the menu
5. From your inventory, open the folder that contains your poses (usually the Animations folder), and select the poses you want to move
into the HUD. Some ideas and notes:
• Creator-based: move all poses from one maker into one HUD; a Purple Poses HUD, a Del May HUD, etc.
• Position-based: move all poses of one type into its own HUD: a Standing HUD; a Laying HUD, Dances, etc.
• Gender-based: all male poses in one HUD, and all female poses in other HUDs.
• You cannot add poseballs into the HUD, only individual animation les.
• While not a xed limit, you can add a massive number of poses to any one HUD. We’ve successfully tested over 1000 poses!
6. Copy the animations into the HUD. It’s best to purchase (or make) only animations that have copy perms; when you back up to a server,
no-copy poses are moved out of the HUD and into the backup server. Note: because of a quirk with LL, there can be issues with moving
large numbers of poses into the HUD at once: some poses may be skipped. We recommend moving no more than 10-20 poses at a time.
7. When you’re done loading poses, click on the Object tab, name your HUD.
8. Right-click on the HUD, and from the menu, select Put On > Wear. is will return your HUD to its default position on your screen,
ready for the next step in managing your poses.
Page 32
LUMIPro 2017
32
Managing Poses - Cataloging Poses
Filtering Poses
You may have a HUD that’s loaded with your favorite poses, but don’t want to ip through all of them every time you have a shoot. ere are a couple ways LUMIPro 2017 makes your
job simpler, and we’ll cover those next. e rst method is cataloging your poses. Simply put, it lets you assign poses to Group 1 or Group 2. If, for example, you have a HUD that’s loaded
with a similar number of male and female poses, assign the female poses to Group 1, and the male poses to Group 2. Similarly, if your poses are evenly split between standing poses and
sitting or laying poses, assign the standing poses to Group 1, and the other poses to Group 2. Here’s how to do that:
Caution: while the LUMIPro HUD can hold a massive number of poses, the catalog is only good for a couple hundred poses. Also, the catalog is cleared when you perform a backup,
restore, or deleting even a single animation.
You can also at a pose to a catalog at any time. If you’re in a pose, and decide to place it in Group 1, click on the Options... button on the LCD Control Panel, then click Make
Group 1 (or the group of your choice) to assign the current pose to that group.
New for LUMIPro 2017! Long hidden away in the arcane, command-line interface of LUMIPro, it’s nally time for the Pose Filter’s closeup! Right up front
on the LCD panel is the Pose Filter button, and one click pops up an entry eld that lets you type in tags such as “sitting,” “standing,” “kneeling,” or the names
of any pose makers you’ve installed in that HUD (presuming their name is part of the pose name). Enter the tag and hit the Return key, and instantly nd
all poses that have that word or part of word in their name. To maximize the power of this feature, consider spending some time renaming poses to give all
your poses tags that match what you personally search for. is can be “male” or “female,” “adult,” “pg,” “Del May,” “Purple,” etc.
Of course, you can always do it the old-fashioned way: in the Nearby Chat window, and type /43 followed by your tag word, then press the Enter key. By the
way, lter searches are not case sensitive.
1. Click on Options... in the LCD Control Panel, then click on Catalog. is will open the conrmation dialog. Open a local chat window before clicking Continue, as all
messages will be coming in that way. When ready, click Continue. You will be placed in the rst pose in your HUD - generally, the **AdjLights pose. In the chat window
there will be something similar to the following message: “Pose 1 of 84: **AdjLights. Touch Group1 or Group2.” Decide which group you want this pose to belong to by
clicking either Group 1, Group 2, or click between the two buttons to assign that pose to both groups.
2. As you assign each pose, you will automatically be placed in the next pose and again asked to assign the pose to the desired group. is will continue for all your poses, until at the end, the Pose menu will pop up for you to review your poses.
at’s it! Your poses are now cataloged. To use only Group 1, click the 1 button, and as you cycle through your poses, only
those from Group 1 will appear. You can switch to Group 2 or Both at any time by clicking the Group 2 button, or between
Group 1 and Group 2.
Click “1” to assign to Group 1
Click “2” to assign to Group 2
Click between “1” and “2” to assign to both
To halt the cataloging process, click the red
Stop button on the Power Strip
NEW!
Page 33
LUMIPro 2017
33
Backing Up and Restoring
Restoring
Backing Up Presets
Backing Up Your HUD
Once you’ve got your HUD loaded and ready, the very next thing you should do is create a backup! is will not only save your bacon if SL eats your HUD, it will also help you keep your
inventory under control—your backup will store all your poses in one place, so they won’t need to rattle around in folders. Don’t delete the original boxes the poses came in...they’re still
useful in case of emergency, but the individual animations are all stored in your HUD now. Backing up is fast, easy, and like oatmeal, “it’s the right thing to do.” Here’s how:
1. Click on Options... in the LCD Control Panel, then in the Options menu, click on Rez Server. is will rez a new, empty backup server about 3 meters in front of you. You
can also do this by clicking on the REZ button by the Joystick.
2. Right-click on the newly-rezzed server, choose Edit from the menu, and in the General tab change the name to something descriptive. Close the Edit window.
3. In the Options menu, click on Backup, and the backup process will begin. Status text will appear above the server and monitor the progress. When nished, take the server
back into your inventory.
Restoring the full HUD is just as easy. Locate the desired backup server in your inventory, and double-click on it. e camera will be attached to your right hand, ready to
go. Note that you can also rez it on the ground, or attach it to any other body part. Once attached, you have a couple ways to initiate the Restore cycle. e rst is to click
Options..., then click on Restore button in the Options menu shown above. e second way is to click on the Camera/server directly, then select Restore from the menu that
appears. e server will replace the contents of your HUD with the contents of the server, so make sure you’re restoring the right server into the right HUD
Note: do not rez or wear more than one server at a time. If you back up, it will back up to all servers at once!
When you back up your HUD, you backup everything: lights, poses,
presets, the works. You can also backup just the 9 Preset Save/Restore
scenes. Rez a server as described above, and then click on < Presets in
the LCD Control Panel to open the Preset Save/Restore panel.
Click the gear icon to open the Preset Menu at le. Click on Button 4 to
initiate the backup of each scene including light information and position, camera position, and the pose used for that preset.
To restore the presets, double-click to wear the server, then from the
Preset Options Menu click Button 5.
Backup Server
Page 34

LUMIPro 2017
i
Appendices
Page 35

LUMIPro 2017
ii
Tips and Hints - FAQs for New Users
Q: What makes LUMIPro a better choice than just rezzing a prim and creating your own light?
A: Convenience and control. If you want to be bathed in blue, with LUMIPro you simply open the Colors panel, click the white ball at the bottom, click on a blue swatch, set the
intensity, and that’s it: done. In that same amount of time, you might have the edit window for the rst light prim open. And when it comes to control, LUMIPro has no equal.
You can give a prim light to a model, but you cannot do a thing to it yourself once they’ve put it on; you’ll have to walk them through every step in the process, and hope they get
it right. If you have all the time and patience in the world, rezzing a prim might be OK. For the rest of us, it’s LUMIPro, or nothing at all.
Q: Does LUMIPro really work in no-rez and no-script areas?
A: Yes, it does, as long as you’re aware of a couple things. First, in no-rez sims, there are some functions that will not be available to you, specically rezzing gazers, sitballs, and
projectors. However, LUMIPro has you covered there: you can wear a projector, which is virtually identical to using a rezzed projector; and though you can’t rez an eye gazer,
LUMIPro’s advanced Eye Gazer system gives you 121 positions for your eyes, all without rezzing a single pixel. e only thing lacking is sitball capabilities, and for that we suggest
becoming friendly with the sim owner, and seeing if they’ll give you access to the land group temporarily. As for no-script sims, just make sure you are wearing your HUD, lights,
and projector before entering those sims. ey won’t work if you try to initialize them there, but if you put them on rst, and then TP in, you’re good to go.
Q: Do you oer discounts?
A: Yes. Aer you buy the rst one, every update is 100% free! ink of it as joining a really exclusive group (and LUMIPro’s group is amazing), and then getting your products
for free for life. ink about all the Lindens you spend at your favorite skin store, or your favorite mesh clothing store, and what do you get for free? A skin you’ll never wear, or
maybe a pair of boots that are from last year and don’t t any of the mesh bodies you have today. Add it up, and you’ll see: LUMIPro is an astounding bargain!
Q: I have seen a few dierent lighting and pose systems in SL. What makes LUMIPro the right choice?
A: Simply put, because LUMIPro is the best there is. Yes, there are some systems that let you store a few poses, and some that will control a couple lights. ere are even some that
have tried to copy LUMIPro. But nobody has the team that LUMIPro has: from pro developer and photographer Stefan Buscaylet, to our crack marketing and professional design
team, to the amazing group of professional SL photographers we enjoy as beta testers, nobody cares as much about you, the photographer, as the team at LUMIPro.
Q: Does LUMIPro support couples posing?
A: We believe every couple has the right to pose in any manner they wish, and fully support couples posing in every way...except through our HUD. Because of the vagaries of
Second Life’s posing system, there are signicant challenges involved that we will make happen when we can do it right. In the meantime, there is a workaround: place the couple’s
pose animations into your LUMIPro HUD, rez a sitball for avatar A, and a sitball for avatar B, then pose your models with the appropriate animation. Move the two sit balls as
you would any couple’s sit balls, until your models are joined at the hip, or whatever body parts are supposed to be joined for the pose. And lest we forget, for those adventurers
who consider couple animations just a “good start,” LUMIPro can manage up to 8 separate models (or close, personal friends) at once. ink of the possibilities, and then get your
LUMIPro 2017 on!
Q: I would love to learn more! Where can I try a demo or get more information?
A: We’re glad we’ve piqued your interest! LUMIPro is, without reservation, the best in-world lighting, posing, camera, and model management system available. We do not have
demos available, but we do have a wealth of online resources, including our blog, which includes a link to our manual; our in-world LUMIPro group where users ask questions,
get answers, and get to know each other; and we also have a Flickr page, where our users post their LUMIPro-lit works for all to enjoy. You can even contact anybody on our team
for a demonstration. Sign up for our group in world, and ask for Sammi, Lyrical, or Stefan, and somebody will make sure you have all your questions answered.
If you’re new to LUMIPro, you are going to have some questions. is is understandable when you’re about to plunk down a chunk of lindens, and want to make sure you’re not about to
get taken to the cleaners. We’ve listed below the questions we’ve been asked regularly, which can be summed up as “is it worth it?” e short answer to that, whether you ask us (we know
we’re biased) or anybody who has used LUMIPro, is a resounding “yes!”
Page 36

LUMIPro 2017
iii
Tips and Hints - FAQs for Existing Users
Q: I bought LUMIPro, but I didn’t get a folder full of stu. Where is it?
A: When you receive LUMIPro either from the Marketplace or inworld, you receive the actual HUD. Unlike a dress or a pair of boots, there’s no folder with rezzers, notecards,
alpha layers, landmarks, more notecards, read-me les, and 17 dierent appliers. Just a pure, clean, unadulterated pack of pixelated perfection: e LUMIPro 2017 HUD. Because
it’s the most important thing in your entire 275,287-item inventory, what we recommend is that you make your own folder called *LUMIPro or something similar so it sits right
at the very top of your folder list, and put your HUD in that. We also recommend immediately making a copy of the HUD so that you always have the original when you want to
start fresh.
Do you have questions? Good! We have answers! LUMIPro has lots of parts and pieces, and if you had no questions, that means either you’re a complete expert and we’d have to hire you
(or already have), a genius with a photographic memory who’s read the manual front to back, or just blissed out on taking pictures and is happy with LUMIPro presets, poses, and colors—and this is a wonderful place to be! If you’re like the rest of us, perfection is elusive, genius is overrated, and LUMIPro can sometimes leave you scratching your head or other conveniently-accessible body parts. But say what you will about us, we’re denitely here to help! Here are some answers to questions we are oen, even frequently, asked:
De-select Full Bright - Set Transparency to 0
Reset Scripts
Q: I can see shadows on my avatar, but I can’t see shadows on my background.
A: ere are 2 possibilities: the rst is that the background texture has been set to Full Bright. is might actually be desirable if the
shadow cast would give away the fact that you’re standing in front of a prim. If that’s not the case, turn it o! e other reason you may
not be casting a shadow is if the background you’re standing in front of has even 1% of transparency. Although the sun and moon will
shadowcast on anything that isn’t completely transparent, projectors—whether LUMIPro’s, or anybody else’s—cannot cast shadows on
anything that isn’t completely opaque.
Q: When I use the sliders it doesn’t aect the projector.
A: ere are a couple of possibilities here: the rst is that you haven’t selected the Projector button at the bottom of the Colors panel.
It’s small and black, so it’s easy to miss. Click on it so that the white line is in the middle of it. e other possibility is that your projector is locked. To test that, use the joystick to attempt to move the projector; if it doesn’t budge, that’s most likely the reason the sliders
don’t work: locking a projector locks everything. Click the side or back of the projector to unlock it, then edit to your heart’s content.
Enable the Projector here
Q: When I hide the projector the gobo stays. Why?
A: Gobos are like that, always overstaying their welcome. But that’s not why it’s staying visible when you hide the projector: in order to cast a shadow, a gobo must remain opaque. If
your scene needs to be shot in such a way that the gobo has to be in the picture, you can try making your own projector bulb. Click here to watch the tutorial video on this subject.
Q: Is there an easier way to locate an animation?
A: So glad you asked! Try typing /43 in local chat, followed by something descriptive. For example, if you have a HUD stued with a variety dierent pose maker’s anims, you might want to
limit your list to just Del May poses. When you type /43 DM (as she tags all her poses with), a menu will open up with only Del May poses listed. If you take the time to edit the names of all
your poses, like adding “sitting,” “standing,” “laying,” etc., you can search on a variety of tags.
Q: I click the buttons on my HUD and they don’t work. What is going on?
A: Your scripts got discombobulated somehow, and need to be reset. Try simply re-logging, as that can x a variety of problems. If
that doesn’t work, you can reset the scripts in the HUD. Enter Edit mode and click your HUD to enable it for editing. Go to the
Build menu, and select Build > Scripts > Reset Scripts. Give it a few seconds for the viewer to do its thing and when it’s nished,
your HUD should work ne.
Caution: resetting scripts has one downside: all your presets will be cleared, as well as the Alpha Button settings on the LCD
panel, so use this as a last resort.
Page 37

LUMIPro 2017
iv
Tips and Hints - FAQs for Existing Users (continued)
Q: Second Life ate my HUD (or maybe I just accidentally deleted it); how can I get a new one?
A: Let this be a teaching moment: always start from a copy of your original HUD! Seriously, you have to back things up! en, if you accidentally eat your HUD, you simply grab a new
copy, load it with poses, and away you go. If worse comes to worse, contact us.
Q: I tried to attached my HUD to another spot on my screen, and it is now all distorted. HELP!
A: To make it so that LUMIPro behaves well when hidden (by not just making it one giant, invisible prim that gets in the way or worse), it
moves most of its parts out of the viewing area. If you’ve moved your HUD too far to the center, or o to the le side, you’ll see everything,
and it will make your screen a mess. But don’t panic! Simply go into Edit mode, and use the handles to move the HUD back to the right side
of the screen, or in the Edit mode, go to the Object tab and in the Position section, enter 0.17 in the eld to the right of the Y, and -0.5 in the
eld to the right of the X, as shown:
Q: Now that I own the HUD where can I get more information?
A: We have a wealth of online resources, including our blog, which includes a link to our manual; our in-world LUMIPro group where users ask questions, get answers, and get to know
each other; and we also have a Flickr page, where our users post their LUMIPro-lit works for all to enjoy. You can even contact Sammi, Stefan, or Lyrical directly for help. Don’t forget to
sign up for our group in world, and happy shooting!
Page 38
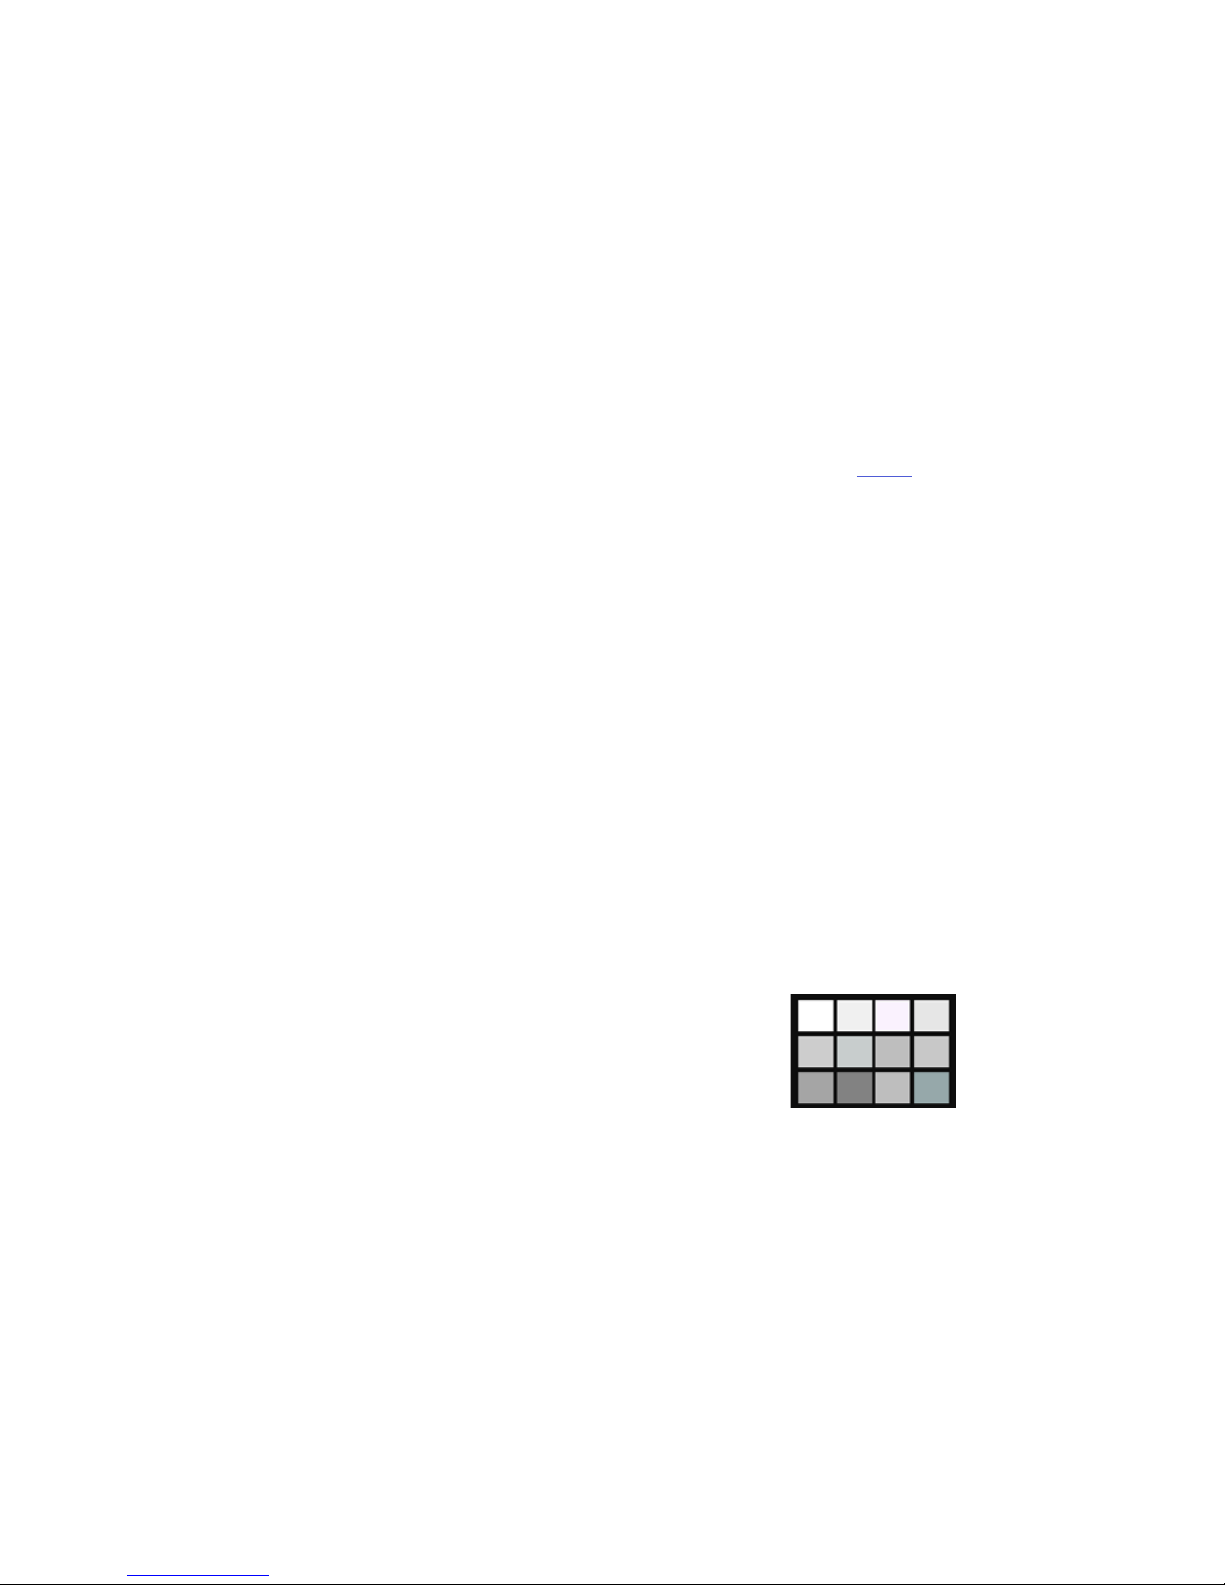
LUMIPro 2017
v
Lighting - Colors
Violet 1
Yellow 1
Red 1
Violet 2
Yellow 2
Red 2
Blue 1
Orange 1
Red 3
Blue 2
Orange 2
Legacy
Green 1
Orange 3
Neutrals
Green 2
Orange 4
All (rst page shown)
LUMIPro features eighteen dierent palettes that are preset and ready to use, based on professional lighting gel sets with such colorful names as “Oklahoma Yellow” or “Ice and a
Slice.” We’re quite comfortable using names like “red,” or maybe “orange” when we’re feeling frisky, but for those that like wander out in the Light Golden Straw, the Lee color gel
names for these presets appear above the sliders when the Advanced button is clicked. For a comprehensive reference guide to color, click here to check out the Lee Color Catalog.
ey’ve been working with lighting for over 50 years, and their page is a goldmine of information.
Page 39
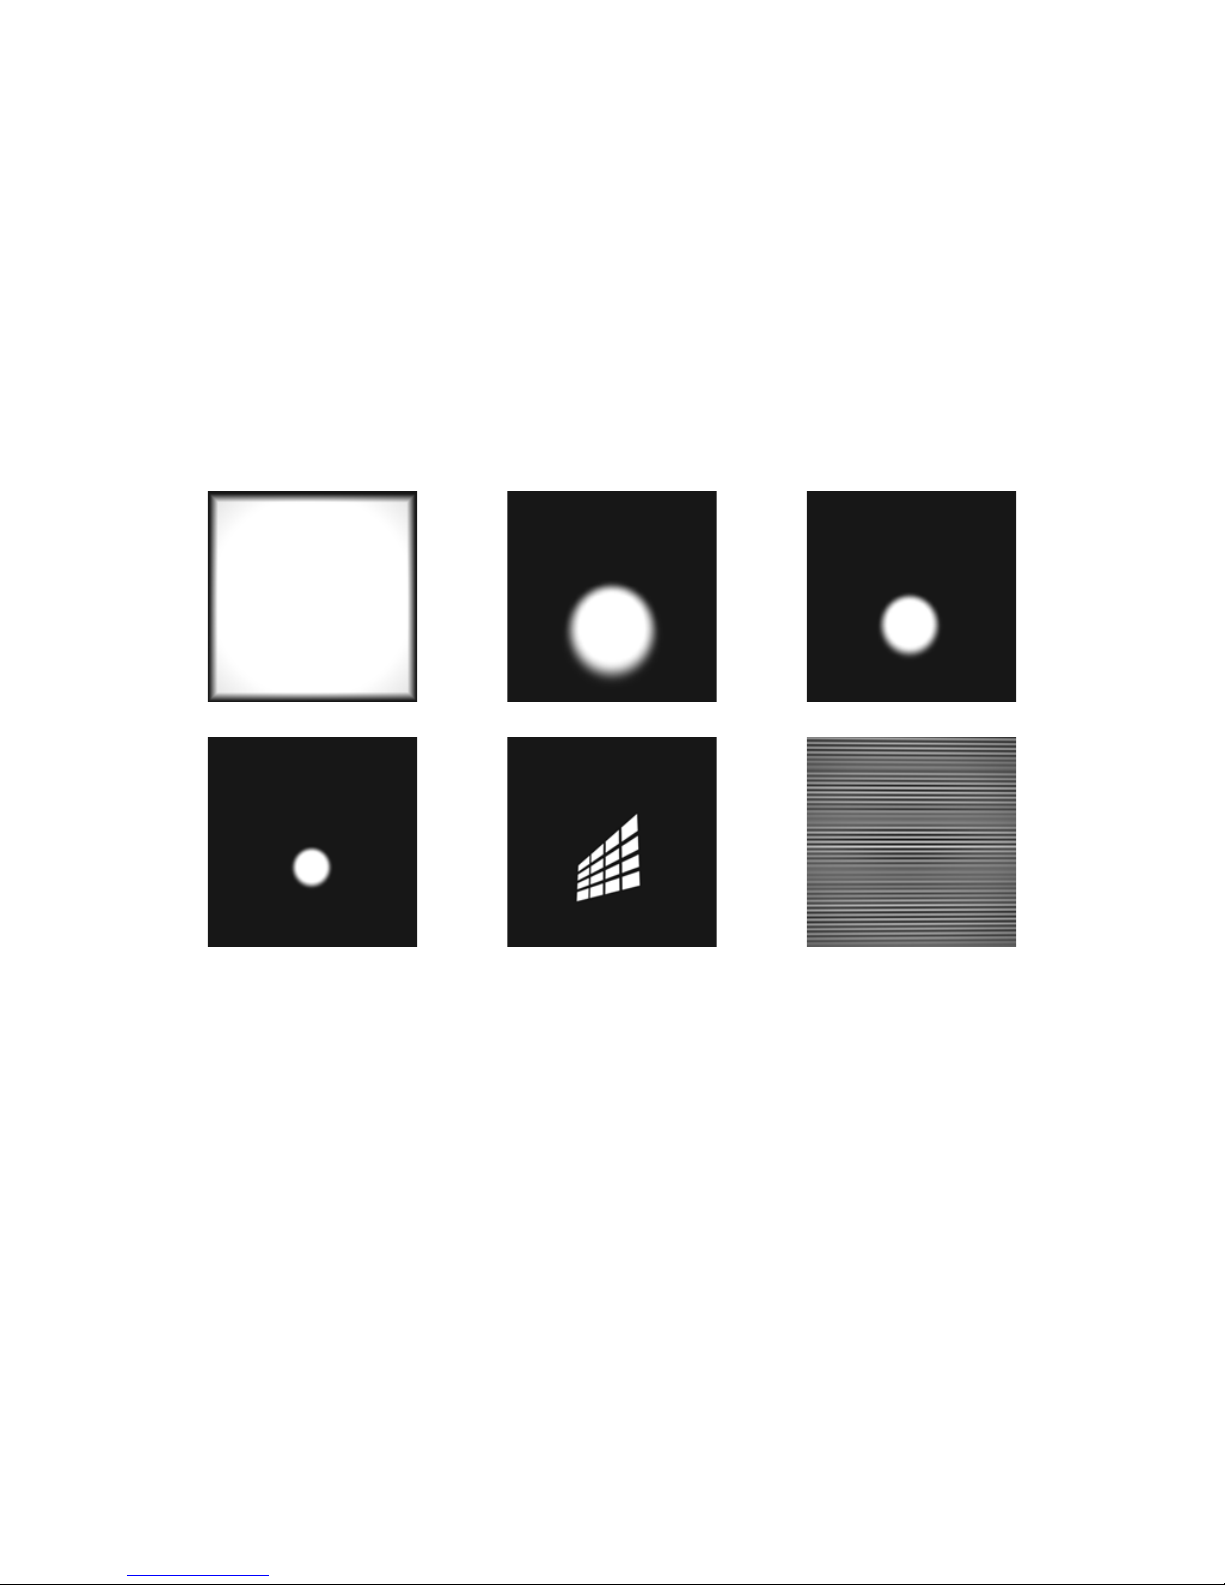
LUMIPro 2017
vi
Projectors - Bulbs
Worn or rezzed, projectors share a couple unique features: Bulbs and Gobos. ink of the Bulb like might think of a slide projector with several dierent slides. In both cases, a bright
light is shown through a lm, resulting in an image being projected on a screen. In LUMIPro 2017, each preset is the equivalent of one slide. Below are all the bulb choices available:
Bulbs
Projector Bulb 1
Projector Bulb 4
Projector Bulb 7
Projector Bulb 2
Projector Bulb 5
Projector Bulb 8
Projector Bulb 3
Projector Bulb 6
Projector Bulb 9
Page 40
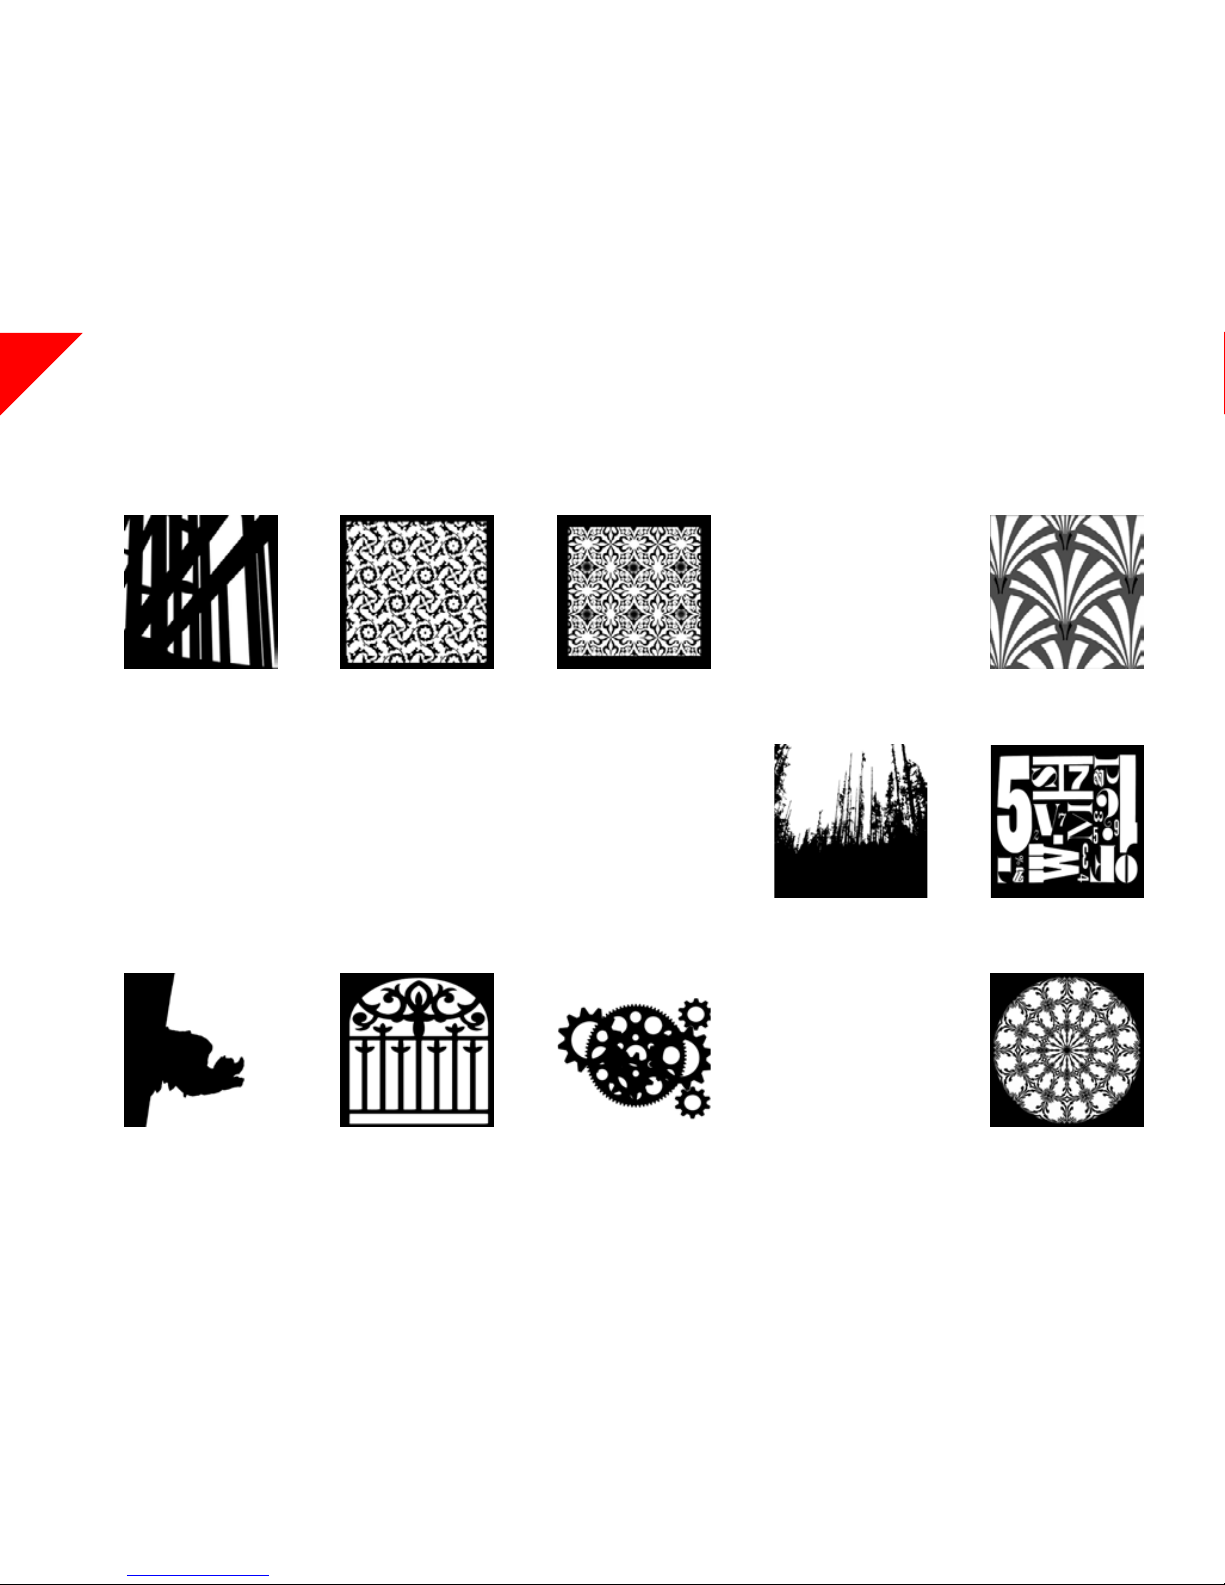
LUMIPro 2017
vii
Projectors - Gobos
Unlike a Bulb, which shines through a transparent texture, a Gobo is a solid pattern placed between the light and the screen, it’s sole purpose being to cast a shadow; think of it like somebody at the theater making bunny shadows on the screen. One thing to be aware of is that you can’t make a Gobo invisible: it needs to be opaque to block the light and create the shadow.
All the Gobo presets are shown on the next few pages.
NEW!
abstract
bamboo
gargoyle
arabesque 2
bay window
gate
arabesque 3
chain link
gears
arabesque art deco
dancing
glass
creepy
geodesic
Page 41
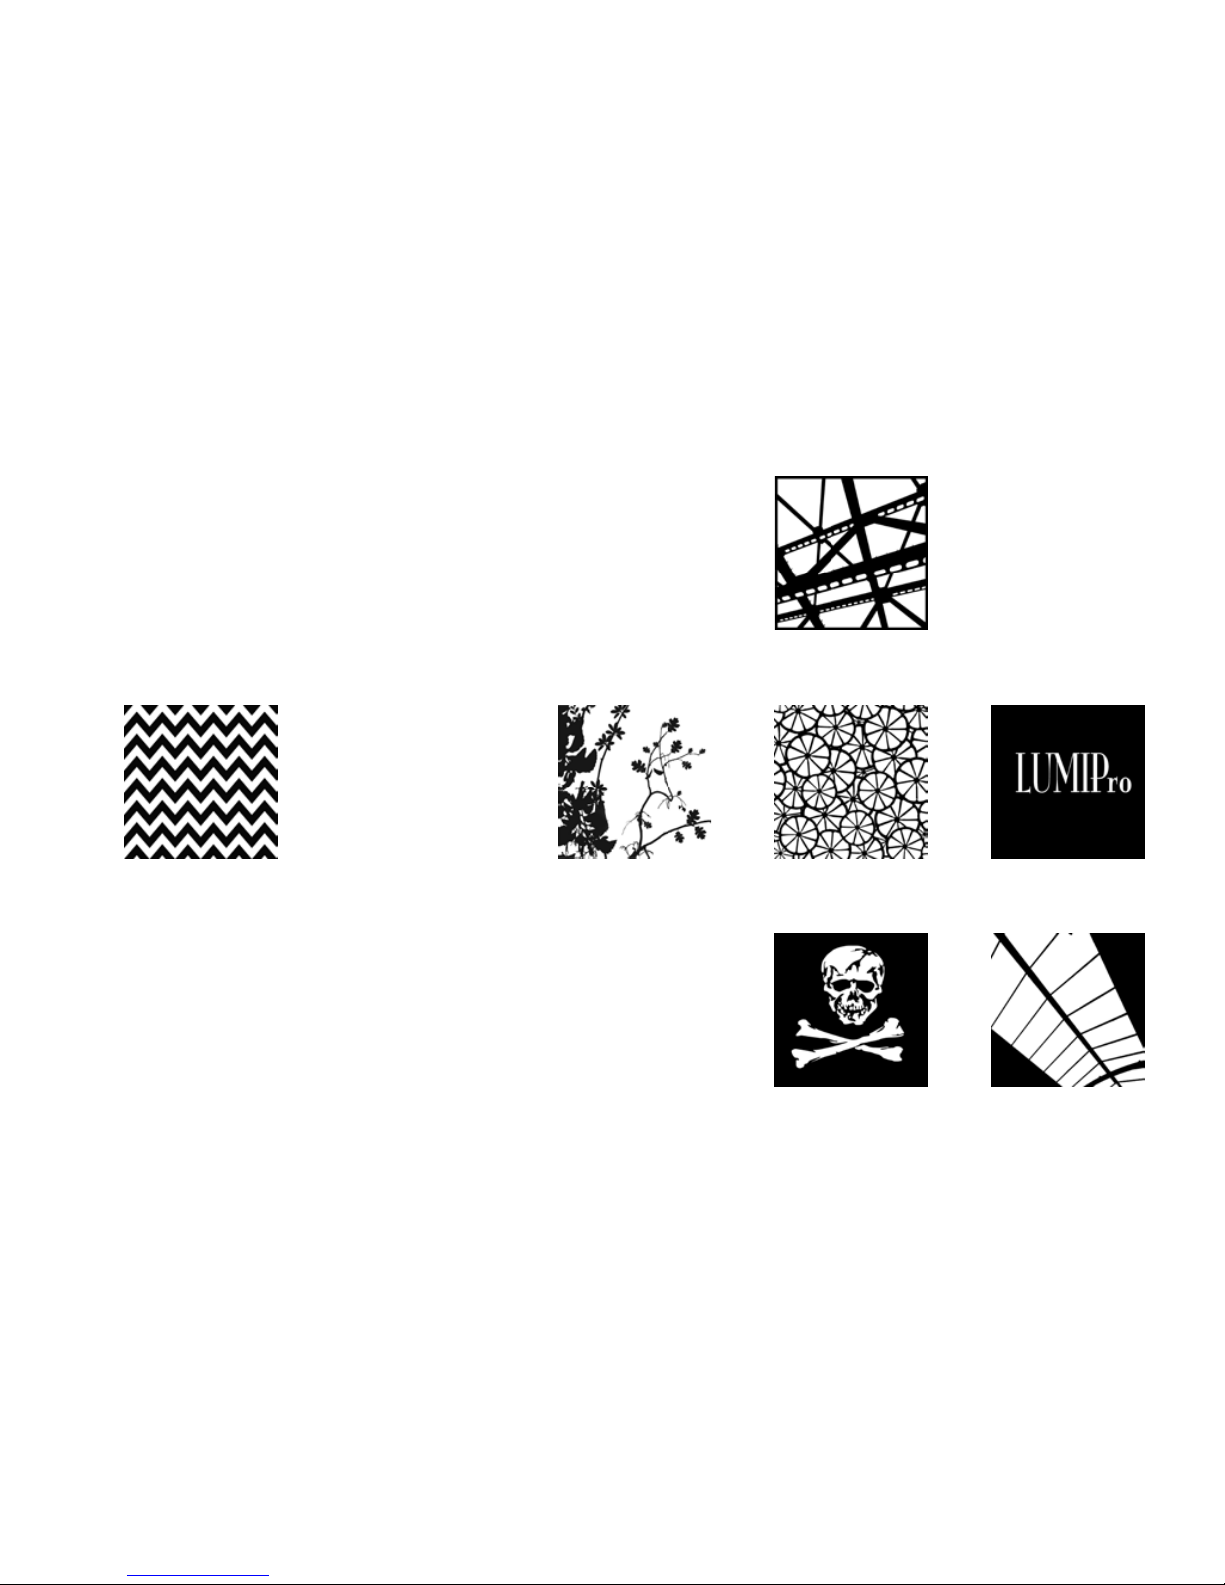
LUMIPro 2017
viii
Projectors - Gobos
herringbone
jagged
ornamental
honeycomb
leaded
palm frond
iris
leaves
screen
ironwork ivy
LUMIPro
skylight
lemons
skull n bones
Page 42
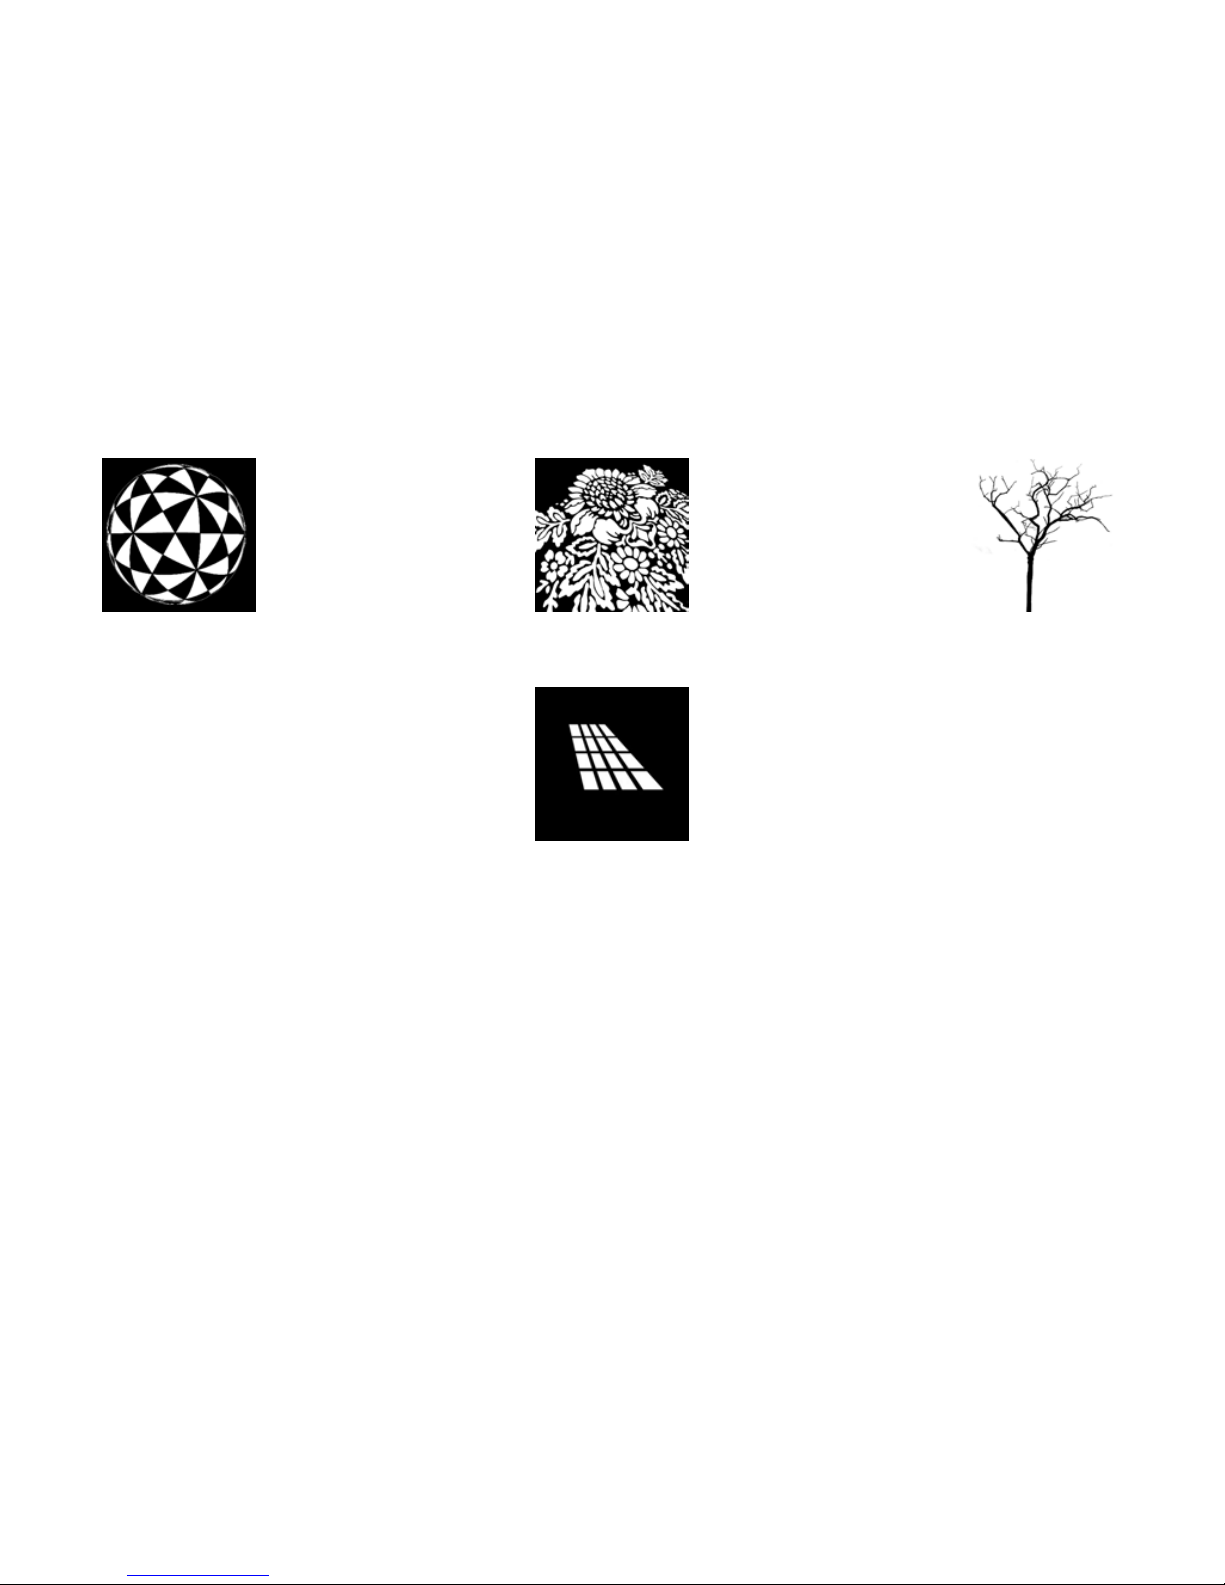
LUMIPro 2017
ix
Projectors - Gobos
spherical
vegas
sun gate
warehouse
sunower
window
tree 1tree 2
wroght iron
Page 43

LUMIPro 2017
x
Tips and Hints - Zooming
One of the easiest things you can do to improve the look of your portraits is to get away from the default zoom level SL gives you. It’s designed for walking around and shopping, and is
guaranteed to make you look less than your best. When you zoom in, you are eectively creating a more natural lens. To zoom in, press Control-0; to zoom out, Control-8. Control-9 sets
you back to the default zoom level. Compare the 3 images below: the rst is at the default zoom level; the second is 2x, and the 3rd is 6x.
Notice how in the rst image, the model’s face is kind of thin and pointy, and the bust is out of proportion to the head. Even zooming in a little bit will have an immediate impact on the
composition. e second image is taken at 2x the zoom of the default, and already her proportions are much improved. Her face is a bit fuller and less angular, and while still a little unbalanced both le-to-right and top-to-bottom, the bust has a much more natural look. By the third image, zoomed at 6x the default, the appearance of the model is very balanced: her face
is signicantly fuller looking than in the rst; her bust is very normal looking from all perspectives.
Zooming is also a good way balance foreground and background. ink of that eect created by Alfred Hitchcock and is now practically a movie cliché: the actor is stationary while the
background stretches away (or towards) the moviegoer. at’s what we’re doing here. By default, the background can seem unnaturally far away. Even avis a couple meters away will seem
small in comparison to the avi in the foreground. Zooming can x that, which makes group shots much more manageable, and photos taken outside the studio much less like tourist
snapshots and more like portraits. You can also isolate interesting background elements, and pull them into the picture with your model.
6x Zoom (Default -> Control-0 x6) 2x Zoom (Control-0 x2)Default zoom (Control-9)
Page 44

LUMIPro 2017
xi
Tips and Hints - Adjusting Lights
While the professionally-designed presets will denitely get you started, and will always be good go-to light setups when things are moving fast, there will be other times when you want
to set your own lighting positions. is is easy to do, as we described earlier in the manual. However, if your model is tied up in a twisted pose, the ball movement can be a little hard to
grasp intuitively. It is for this reason we include the **AdjLights animation (Preset 1). Compare the two images below, and you’ll see why:
While editing in place may be unintuitive, the beauty of LUMIPro 2017 is that the lights stay put relative to the model no matter how crazy the pose you’re in might get. Once you’ve set
your pose up using **AdjLights, return to your original pose, and your model will be lit perfectly.
In this image (the *AdjLights pose), you can see LUMIPro’s lights
are lined up horizontally, vertically, and front-to-back. is makes it
very easy to move, whether using Edit mode or the touch method,
because everything moves the way it feels like it should. Note especially that the Z axis (the blue line) is running straight up and down
through the model. If you click on the top of the blue ball, it will
move upwards; click on the right side, it will move to the right, etc.
Now compare it to Figure 2.
Here, the Z axis is running horizontally (mostly) instead of vertically,
while the X and Y axes (red and green, respectively), are kind of horizontal. Unintuitively, touching the blue ball on the top moves it to the
le. Touching the red ball on the right moves it forward, and touching the green ball on the le moves it backwards. Sort of. e same is
true when using the Edit mode. Movement of the lights is completely
unintuitive.
Figure 2. DM Foot TouchFigure 1. AdjLights
Page 45

LUMIPro 2017
xii
Tips and Hints - Tidbits
• You can wear multiple HUDs! You have a HUD for female models, and a HUD for male models, and want to mix and match, you say? Easy. Wear both HUDs (being sure to assign the
models their desired roles), and pose/light away. 300 poses at your ngertips not enough? Double up!
• Ditch the Linden Labs viewer. It’s not meant for professional SL photography, and is lacking too many features, which can make it nearly impossible to get anything more than a garden-variety snapshot. We use Firestorm (as seen in the various screen shots used in this manual), but there are several excellent viewers out there. Find the one that’s right for you.
• Working in no-script sims can be a nightmare, but here’s a good tip: make sure you and your model(s) are fully geared up with LUMIPro 2017 scripted wearables (lights, projectors,
and the LUMIPro 2017 HUD) before you enter the script-prohibiting sim.
• Join the LUMIPro group! If you don’t have enough free slots, make one somehow. is is one of the best, most helpful tools available to Second Life photographers. Someone in the
world is always awake and ready to help you with a shot, with a problem, with a location, or with anything else that you might need.
Page 46

LUMIPro 2017
xiii
Credits
Stefan Buscaylet - Mr. LUMIPro
Owner, Founder, and Creator of LUMIPro
-Photo by Karol Lyric
Samantha Ansar-Buscaylet - Miss LUMIPro
Community Leader, Blog Goddess, and Chief Cat Herder
-Photo by Karol Lyric
Karol Lyric - Madam LUMIPro
Phototographer, Advertising, and Manual Writer
-Photo by Dai Aloix
Many many thanks to our users, fans, pose contributors, and the dedicated team of folks who helped make LUMIPro the rst AVI Award Winner for Best Photography/Media Tool, 2015!
Beta Testers
Many thanks to all our Beta Testers, whose diligence and suggestions helped make LUMIPro 2017 possible!
Pose Contributors for LUMIPro 2017
Strokerz Toyz, Pics n Poses, ...: Something New :... & ...:Something Erotic:..., Glamurus Poses & Animations, IMAGE ESSENTIALS
Gobo Maker Extaordinaire - TexasRob McRae
Page 47

LUMIPro 2017
xiv
LUMIPro 2016
• Added HUD control of lighting.
• Refreshed LCD panel to include Pose Filter
• Presets renamed to Scenes
• New Gobos added
LUMIPro 2016
• Reworked preset.
• Added camera save/restore including wicked cool DOF capability.
• New gobos added.
• New sitball controls.
• Various cleanup of the interface
LUMIPro 3.41
• Added some wicked cool gobos.
• Fixed a projector script bug.
• LUMIPro 3.4
• Extended and reworked the 3.3 color interface adding intensity, radius, fallo.
• Signicant script count reduction.
• Revised LCD.
• delayed animation requests until actually needed.
• Added social media connection and context help.
• Increased posable models from 4 to 6.
LUMIPro 3.3
• Totally revised color picking system.
• Various bug xes can be found at lumiprobeta.blogspot.com
LUMIPro 3.2
• Rezzable Sit Ball for adjusting position.
• A revised HUD minimize.
• Backup/Restore server transfers animations.
• Dynamic eye movement for machinima.
LumiPro 3.1
• Animation gazer system.
LumiPro 3.0 0.90
• Wearable projectors.
• Pose Filtering.
• Code optimized to now hold ~400 animations.
• Sample poses from 5 pose creators.
LumiPro 3.0 0.80
• Major release with projectors.
• Disabled point light with intensity=0.
• Help button now has options.
• New ball status reporting option.
• Attempt to address HUD not fully rezzing on relog.
• Shiny balls.
• color menu reworked.
• Revised radius menu.
• EMS lock.
LumiPro 3.0 0.75
• Presets!
• HUD allows users to save/restore 9 lighting presets and the user can name them.
• Backup server updated to also backup reset settings
LumiPro 3.0 0.74
• xed errors with requesting animations not yet granted and when the hud is dropped on the
ground.
• Giving a set of lights to a model selects that model automatically
• Lights no longer reset when the model relogs
• next/prev pose buttons are slightly visible while hud hidden to allow button presses
• Animation stop added to hud
• Fixed bug on previous animation when rst animation selected
• Lights grids now have the correct menu text
• Intensity and Radius both now have repeating menus
Lumipro 3.0 0.73
• addressing memory issue on 200+ animations.
• gazer hide on power button xed.
• Update server now working again.
• power button always visible.
• xed copy problem.
• silenced debug script
Lumipro 3.0 0.72
• lights now only adjust for selected model.
• Save/restore includes light parameters as well as position.
• Some two hud broadcast xes in the gazer and light selectors.
• Found a couple scripts not in mono.
• Stop animating works.
Lumipro 3.0 0.71 Introduced at SLCC 2011 - 8/13/2011
Lumipro 2.02 5/15/2010 - power rez issue xed. 100m hud capability,
Lumipro 2.01 4/18/2010 - xed lighting permission issue
Lumipro 2.00 Release 4/17/2010
Lumipro 1x releases 2008-2010
(C) Stefan Buscaylet. Real life US patent disclosures pending. Any unintentional release of script
code requires contacting Stefan Buscaylet immediately.
Page 48
LUMIPro 2017
1
Quick Start Tutorial—Part I
is Quick Start Tutorial will have you up and running with LUMIPro 2017 as quick as can be! We’ll cover it in 4 basic steps: selecting and preparing a model, posing and lighting them,
preparing and taking a photo, and nally, storing your session. Even if you’ve used LUMIPro before, you might nd this useful for learning some of the new layouts and features as well.
You can learn this by yourself, but to get the most out of this tutorial, invite a friend over. You will learn how to manage models, and have fun in the process! Note: this tutorial is designed
to get you started with using LUMIPro to take photos. ere’s much more under the hood, and the manual covers it all—and then some. Do yourself a favor and check it out! Before you
get started with LUMIPro, try this: take a reference photo of your model without using LUMIPro. Take the picture from the torso up, and the model looking over your le shoulder. We’ll
be duplicating that shot further into the tutorial, so save it for now, and we’ll compare later. You’ll be amazed at the dramatic dierence LUMIPro will make to your photography.
Step 1. At top of the HUD sits the Toolbox. Click on the
Flipper button to toggle between Toolbox modes. Shown is
the Light Controll, Eye Gazer, Sit Ball, then the Projector.
When you’re ready, make sure the Sit Ball is showing in the
Joystick area
Step 2. Assign a model. In yellow, you’ll see your name between two arrows. is is the model the HUD will control.
Click on your name, and select your friend from the menu.
Step 3. Give them lights. Click the GIVE LIGHTS button,
and LUMIPro 2017 will deliver a set of wearable lights and
a projector directly to the chosen model. It will be at the
top level of their Inventory folder, named “LUMIPro Talent:
Right-click ADD this folder.” Have them wear just the lights,
and then tell them to approve the control requests they’ll get.
Step 4. Light them up! Select a sky preset that’s not too
bright. You’ll get a better idea of what the lights are doing if
you’re not competing with the sun! Now that your model is
adorned in colorful light balls, click on the button labeled
“BUTTERFLY.” is is a nice, basic preset that will light
your model evenly, and add a little dimension as well. Try all
four of the presets—BUTTERFLY, REMBRANDT, RIM, and
SPLIT, and see the dierences among them. When you’re
done experimenting, return to the BUTTERFLY preset.
Step 5. Pose your model. Straight out of the box, LUMIPro
2017 comes with a set of professionally-craed poses from
some great SL posemakers. When you click on the Wheelies,
you step through each of them in turn. Click Right Wheelie
to move the next pose, and Le Wheelie to move to the last
pose. Try them out, and nd a pose that you like. Try not to
embarrass your model too much, as tempting as it might be.
Congratulations, you’re on your way to learning LUMIPro!
Now you know how to select your model, give them lights,
turn them on (the lights, that is), and how to pose your
model. Next, you’ll learn how to use the Sit Ball and the
HUD to position your model. Let’s continue.
Your Name Here
NEW!
Page 49

LUMIPro 2017
2
Quick Start Tutorial—Part II
Now that you’re getting comfortable with basic lighting and posing, we’re going to add a couple things into the mix. e rst thing to look at is the Sit Ball. is makes it super easy to
control where in space your model resides (at least physically). at control is all contained in the Toolbox, so let’s focus on that for a moment, and see how it works.
Step 6. If you’re continuing from the rst section, the Sit
Ball should be what’s showing in the Toolbox Joystick
area. If not, click the Flipper button until the Toolbox
looks like shown:
Step 9. Clicking anywhere inside the Joystick moves the
Sit Ball around an imaginary sphere centered on you,
the photographer. e closer to the center you click, the
smaller the movements; the closer to the edge, the greater
the movements. Try it out. If things get crazy, have your
model get o the Sit Ball, then click their name on the
HUD. e Sit Ball will jump to their current location.
Are you getting the feel for this now? ere might be
a lot of little buttons, but they all do pretty much what
you would expect them to do. e beauty of LUMIPro is
that you can focus on your picture, not on all the ddly
bits you need to manage to light and place them. When
you’re done experimenting, place your model where
would like them, and them move to Part III, where we’ll
adjust the lights and focus the eyes. Take your time: the
page will still be there when you return!
Step 7. Rez a Sit Ball. Click the REZ button, and from the
menu click the Sit Ball button. A LUMIPro Sit Ball will
be rezzed in front and above your selected model; have
them le-click and sit on it. ey’ll be sitting in mid air.
If you had already posed them, click Right Wheelie and
then Le Wheelie to get back to the original pose.
Step 8. Adjust their position. Surrounding the Joystick are
four primary arrows: Up, Down, Le, and Right. ese
will move the Sit Ball on the Z axis. e Up and Down
arrows, move as you would expect: up and down. e Le
and Right arrows spin the Sit Ball in place, like a top (only
not quite as fast).
e secondary arrows at the 2:00 and 4:00 positions move
the Sit Ball along the X axis, front to back: away from you
(up arrow) and towards you (down arrow). Play with the
buttons now, and get a feel for how they behave.
Move Up
Move Away
Rotate CCW Rotate CW
Move Towards
Move Down
Page 50

LUMIPro 2017
3
Quick Start Tutorial—Part III
Now that you’ve got your model placed, posed, and lit, they’re right where you want them. Now we’re going to ne-tune the lighting, nd a good camera angle, and set the eyes. Be prepared for fewer ddly bits and more creativity; time to let your inner artist shine!
Step 10. Adjusting the lights is simply a matter
of touching them in the direction you want them
to move. In the picture to the right, the light will
move towards the model’s neck. If the top of the
light is clicked, the light will move up; the bottom:
down, etc. is overcomes a fundamental basic
in SL: you can’t use Edit to adjust prims worn by
somebody else. For this tutorial, click on the right
side of the Red light ball, until it appears in position shown here, above the model’s le shoulder.
You may also adjust the Green and Blue balls as
well, until you’re satised that the lighting looks
good; continue when you’re ready.
Step 11. Find a shot. For this tutorial, let’s focus
on a shot from the torso up, with the model rotated slightly to the right, as if they’re looking o
over your le shoulder. Take a moment to frame
the shot until it’s similar to what is shown to the
right.
TIP: To show o your model a little better, try
this: rst press Control-9. is sets your camera to
the default focal length. en press Control-zero
three or four times, to zoom in a little bit. is will
give you a more natural look. Try it!
When you have your camera in place, you may
notice a couple things: your model is not looking at the camera, and there’s a big red ball in the
shot. Clicking the HIDE button will hide the ball
instantly, but we still want the HUD open for the
next step, so let’s just hide the lights for now.
Step 12. In the LCD window of the HUD, locate the
ALPHA/Gear button, and click on it.
Step 13. In the resulting menu, you’ll have several choices, which the manual will cover in greater detail. For
now, click the HUD Only button. e window will close.
Step 14. Repeat Step 12, then click the Toggle button.
You will now be able to show and hide rezzable items like
lights, sit balls, and projectors independent of the HUD.
Try it out: clicking on the Alpha button should now
show and hide the model’s lights and sit ball. When
you’re comfortable with the way things are working, let’s
make a picture!
Page 51

LUMIPro 2017
4
Quick Start Tutorial—Part IV
We have one more light to add before we shoot, and that’s a projector. Projectors have the unique ability to cast shadows as well as light up a model. We’ll use one here to give the scene a
little atmosphere using colors and shadows that you just can’t get with lights alone. One of the wearable items you passed to your model was a projector, but we’re going to rez one directly
from the HUD—just for practice—but they both function identically, which makes the wearable projectors great for use in no-rez sims.
Step 15. Rez a Projector. is part’s easy: click the Rez
button on the Toolbox, and from the menu, click the
Projector button. is will rez a projector aimed at your
model, bright enough to temporarily blind avatars in the
next sim. Or as they call it on the runway, “a facelight.”
Step 16. Click the Projector Tools button to
the right of the LCD display. is will bring up
the Projector menu, which will be covered in
greater detail in the manual. For now, click the
button labeled “Bulb.”
Step 17. e Bulb setting gives you several options for
the texture applied to the Projector. Try them all, keeping in mind that as textures, they will need a few seconds
to rez completely—depending on your computer and
connection. When you’re ready to proceed, click button
#8 (So Color). is will tone down the brightness, and
add a warm mosaic of color to your model.
Step 18. With your bulb setting selected, now we’ll add
a gobo (lightingese for “go between”) for some extra
shadow interest. Click the Back button, and from the
main menu, click the Gobo button. You’ll see a list of
dierent options. Like the bulb options, this will take a
few seconds to rez before you’ll see the results. Unlike
the bulb options, however, you cannot hide a gobo
when shooting: the projected light needs an opaque
prim to block the light and cast shadows. Check the
various gobos out, and when you’re ready, click button
#3, Art Deco.
Step 19. Adjust the position of the projector. Using
the Joystick, move the projector around your model,
either by clicking the arrow keys or clicking inside the
Joystick area, until you nd a position you like. When
you’re satised, continue on to Part V.
Page 52

LUMIPro 2017
5
Quick Start Tutorial—Part V
It’s fun time! Now that your shot is framed, it’s almost time to capture the soul of your model. But wait; they say the eyes are the windows to the soul, and right now they’re gazing o into
the distance, and itting around like a mead-drunk bumblebee. We’ll x that with just a couple clicks.
Step 20. Use the Flipper on the Toolbox to change to the Eye Gazer mode.
It’s the eyeball icon, and when your Toolbox looks like this, you’re ready.
Step 21. Click in and around the Joystick, and you’ll see your model’s eyes
moving accordingly. ere are 121 separate eye positions loaded into the
High Resolution Eye Gazer, so there is plenty of exibility. Click around
until your model is looking right at you. If you can’t nd the perfect gaze,
feel free to adjust your camera, or switch back to Sit Ball mode and adjust
your position. When you’ve captured the right look, take a picture.
Now you could stop here if you wanted to: you now know how to add a
model, give them their wearables, light them up, pose them, move them,
adjust their eyes, shoot them—and even learned a couple handy tips on
focal length and how to manage showing and hiding your lights. But
there’s a couple more things to show you, and then we’ll be done.
Page 53

LUMIPro 2017
6
Quick Start Tutorial—Part VI
Now that you’ve taken the perfect picture, it’s time for some chores. e rst thing you might want to do is save this scene so that you can recreate all or parts of it later, either with your
current model, or with another. is is great if you do portrait work in SL and have a set of stock setups you like to use, or if you own a store in SL and like to display your outts the same
way every time. You might also save the setup of your favorite shots just in case your model wants another shoot with a dierent wardrobe. e possibilities are endless.
at’s it! Be kind, and release your model from their pose and eye position by clicking on the red X button at the bottom of the HUD. ey can jump o the Sit Ball by standing, and walk
about freely with all the sass and class of their on AO again. Oh...Remember that reference shot at the beginning? Let’s take a look and see what the dierence might be:
Step 22. In the LCD area of the LUMIPro HUD, locate and click on the Scene
button. A panel will pop out. Click on the Lights, Camera, and Pose buttons, and
on Preset button number 1. ey will all turn red, as shown below, indicating that
you’ve saved all three settings. Note that you can chose to save (or restore) just the
lights, the camera, or any combination you desire.
Step 23. When saved, the buttons will turn green. Congratulations, you’ve saved
your scene for later use. To recall it, open the Scene panel, click the desired button,
and then click the restore button. Your lighting adjustments, camera position, and
selected pose will all be recalled in an instant! Click the red X button to close the
Scene Save/Restore panel.
Page 54

LUMIPro 2017
7
While LUMIPro can’t work miracles, it can go a very long way to making your photos go from good to great! If you’re new to LUMIPro, or even if you’re an experienced and highly-skilled LUMIPronarian, do yourself a favor and read the manual; it’s lled with all sorts of great information that can really make a dierence in your photography. Not convinced yet?
Take a look at the Before and Aer pics below. Your mileage may vary ;)
Before LUMIPro Aer LUMIPro
Quick Start Tutorial—Epilogue
 Loading...