

Page 1
Visit our website at: http://www.harborfreight.com
Email our technical support at: [email protected]
Owner’s Manual & Safety Instructions
Save This Manual Keep this manual for the safety warnings and precautions, assembly,
operating, inspection, maintenance and cleaning procedures. Write the product’s serial number in the
back of the manual near the assembly diagram (or month and year of purchase if product has no number).
Keep this manual and the receipt in a safe and dry place for future reference. 17d
When unpacking, make sure that the product is intact
and undamaged. If any parts are missing or broken,
please call 1-888-866-5797 as soon as possible.
Copyright© 2015 by Harbor Freight Tools®. All rights reserved.
No portion of this manual or any artwork contained herein may be reproduced in
any shape or form without the express written consent of Harbor Freight Tools.
Diagrams within this manual may not be drawn proportionally. Due to continuing
improvements, actual product may differ slightly from the product described herein.
To ol s re q u ir e d f o r a s s e mb l y a n d s e r vi c e m a y n o t b e in c l ud e d .
Read this material before using this product.
Failure to do so can result in serious injury.
SAVE THIS MANUAL.
Page 2
Page 2 For technical questions, please call 1-888-866-5797. Item 62565
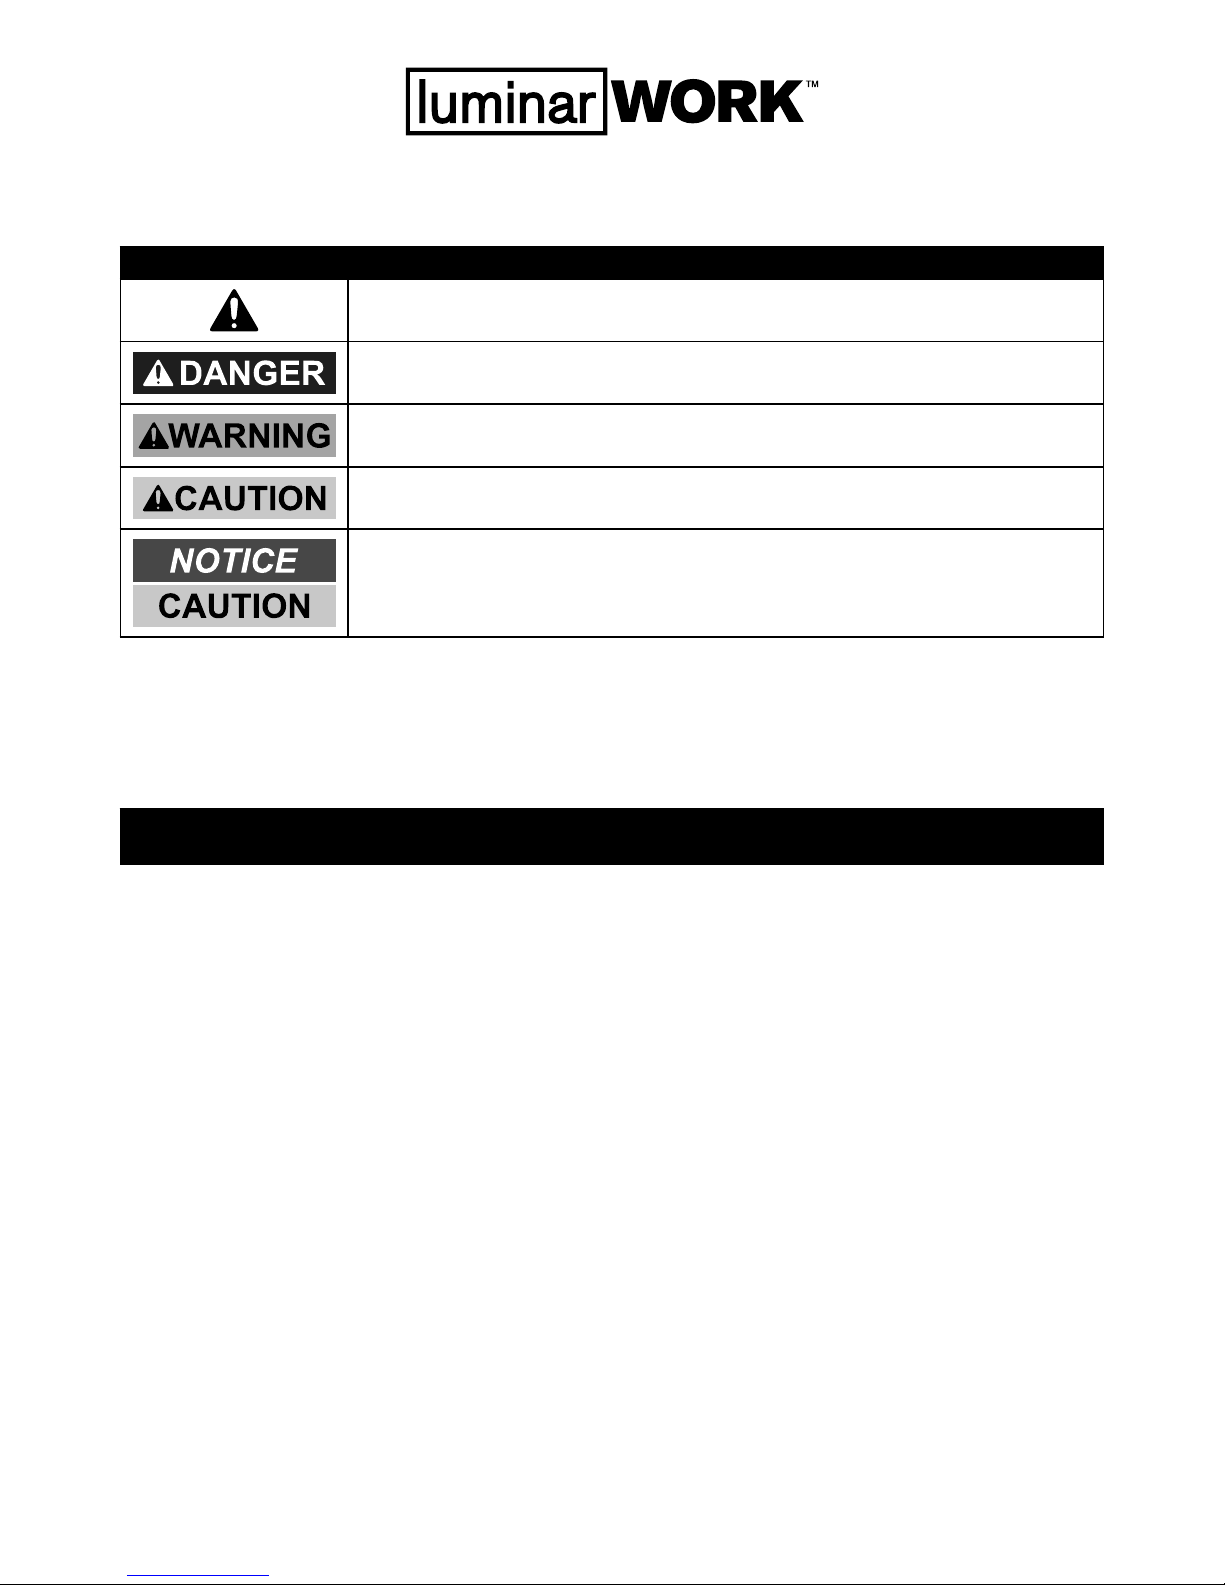
WARNING SYMBOLS AND DEFINITIONS
This is the safety alert symbol. It is used to alert you to potential personal injury hazards.
Obey all safety messages that follow this symbol to avoid possible injury or death.
Indicates a hazardous situation which, if not avoided,
will result in death or serious injury.
Indicates a hazardous situation which, if not avoided,
could result in death or serious injury.
Indicates a hazardous situation which, if not avoided,
could result in minor or moderate injury.
Addresses practices not related to personal injury.
INSTRUCTIONS PERTAINING TO A RISK OF FIRE, ELECTRIC SHOCK,
EXPOSURE TO EXCESSIVE UV RADIATION, OR INJURY TO PERSONS.
IMPORTANT SAFETY INSTRUCTIONS
Lighted Lamp is HOT:
WARNING – To reduce the risk of FIRE, ELECTRIC SHOCK,
EXPOSURE TO EXCESSIVE UV RADIATION, OR INJURY TO PERSONS:
1. Turn off/unplug and allow to cool
before replacing bulb.
2. Bulb gets HOT quickly!
Only contact On/Off Button/Plug when turning on.
3. Do not touch hot lens, guard, or enclosure.
4. Do not remain in light if skin feels warm.
5. Do not look directly at lighted lamp.
6. Keep lamp away from materials that may burn.
7. Use only with 250 watt or smaller bulbs.
8. Do not touch the bulb at any time. Use a soft cloth
instead. Oil from your skin may damage the bulb.
9. Do not operate the portable luminaire
with a missing or damaged guard,
lamp containment barrier, or UV filter.
10. Avoid electric shock. Do not use with an
extension cord near water or where water may
accumulate. Keep lamp at least 16 feet (5m) from
pools and spas. Keep plugs and receptacles
dry. Use only on GFCI-protected circuits.
Do not submerge the Light in water.
11. The Light is not waterproof. Use extreme
caution in any wet location.
12. Be careful when placing tripod.
Make certain that the area is clear of debris
and obstructions that may bump the Light.
13. Do not obstruct walkways or
common areas with the cord.
14. Maintain labels and nameplates on the Light.
These carry important safety information.
If unreadable or missing, contact
Harbor Freight Tools for a replacement.
Page 3

Page 3For technical questions, please call 1-888-866-5797.Item 62565
15. This product is not intended for use in a residence
or to be mounted in a cabinet. This product is
not suitable for recessed installation in ceilings
or on buildings. This product can cause a fire.
16. Do not leave the Light unattended when it is plugged
into an electrical outlet. Turn off the Light, and
unplug it from its electrical outlet before leaving.
17. This product is not a toy.
Keep it out of reach of children.
18. People with pacemakers should consult their
physician(s) before use. Electromagnetic fields in
close proximity to heart pacemaker could cause
pacemaker interference or pacemaker failure. In
addition, people with pacemakers should:
• Avoid operating alone.
• Properly maintain and inspect
to avoid electrical shock.
• Properly ground power cord. Ground
Fault Circuit Interrupter (GFCI) should
also be implemented – it prevents
sustained electrical shock.
19. WARNING: The cord of this product contains
lead and/or di (2-ethylhexyl) phthalate (DEHP),
chemicals known to the State of California
to cause cancer, and birth defects or other
reproductive harm. Wash hands after handling.
(California Health & Safety Code § 25249.5, et seq.)
20. The warnings, precautions, and instructions
discussed in this instruction manual cannot
cover all possible conditions and situations
that may occur. It must be understood by the
operator that common sense and caution are
factors which cannot be built into this product,
but must be supplied by the operator.
21. Do not operate a Light in explosive atmospheres,
such as in the presence of flammable liquids,
gases, or dust. A Light creates sparks
which may ignite the dust or fumes.
22. Do not abuse the cord. Never use the cord for
carrying, pulling, or unplugging the Light. Keep
the cord away from heat, oil, sharp edges,
and moving parts. Damaged or entangled
cords increase the risk of electric shock.
23. Stay alert, watch what you are doing, and use
common sense when operating a Light. Do
not use a Light while you are tired or under
the influence of drugs, alcohol, or medication.
A moment of inattention while operating a
Light may result in serious personal injury.
24. Do not use the Light if the On/Off Button does not
turn it on and off. Any Light that cannot be controlled
with the Button is dangerous and must be repaired.
25. Have your Light serviced by a qualified repair person.
Use only identical replacement parts. This will
ensure that the safety of the Light is maintained.
26. Always point the Light away from a wall, whether
the unit is in use or not. If the Light is accidentally
pointed at a wall while it is on or while it is
still hot when turned off, a fire may result.
27. Wear ANSI-approved goggles during setup and use.
SAVE THESE INSTRUCTIONS.
Page 4
Page 4 For technical questions, please call 1-888-866-5797. Item 62565
Grounding
TO PREVENT ELECTRIC SHOCK AND DEATH FROM INCORRECT GROUNDING WIRE CONNECTION:
Check with a qualified electrician if you are in doubt as to whether the outlet is properly grounded.
Do not modify the power cord plug provided with the Light. Never remove the grounding prong from
the plug. Do not use the Light if the power cord or plug is damaged. If damaged, have it repaired by a service
facility before use. If the plug will not fit the outlet, have a proper outlet installed by a qualified electrician.
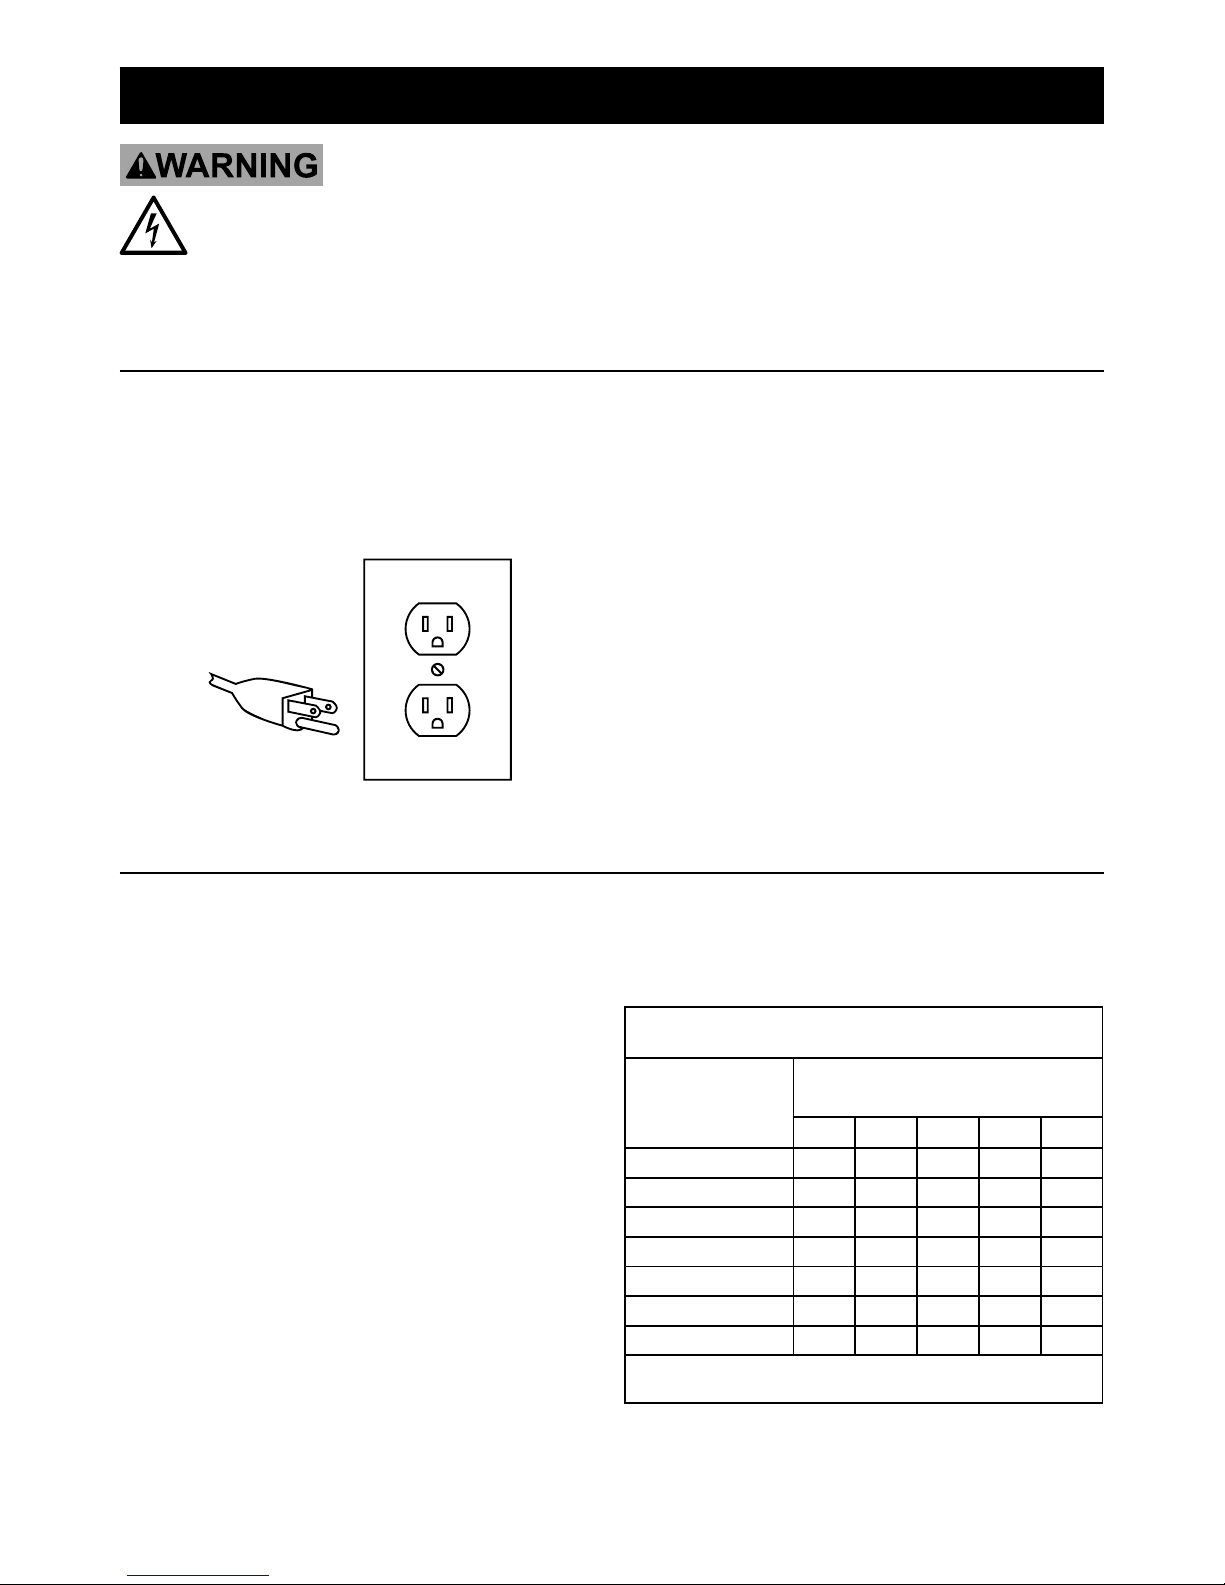
Grounded Lights: Lights with Three-Prong Plugs
1. Lights marked with “Grounding Required” have
a three-wire cord and three-prong grounding
plug. The plug must be connected to a properly
grounded outlet. If the Light should electrically
malfunction or break down, grounding provides a
low resistance path to carry electricity away from
the user, reducing the risk of electric shock.
3-Prong Plug and Outlet
2. The grounding prong in the plug is connected
through the green wire inside the cord to the
grounding system in the Light. The green wire
in the cord must be the only wire connected to
the Light’s grounding system and must never
be attached to an electrically “live” terminal.
3. The Light must be plugged into an appropriate
outlet, properly installed and grounded in
accordance with all codes and ordinances.
The plug and outlet should look like those in the
preceding illustration. See 3-Prong Plug and Outlet.
Extension Cords
1. Grounded Lights require a three-wire extension cord.
Double Insulated Lights can use either
a two- or three-wire extension cord.
2. As the distance from the supply outlet increases,
you must use a heavier gauge extension cord.
Using extension cords with inadequately sized wire
causes a serious drop in voltage, resulting in loss of
power and possible Light damage. (See Table A.)
3. The smaller the gauge number of the wire,
the greater the capacity of the cord. For
example, a 14-gauge cord can carry a
higher current than a 16-gauge cord.
4. When using more than one extension cord to
make up the total length, make sure each cord
contains at least the minimum wire size required.
5. If you are using one extension cord for more than
one Light, add the nameplate amperes and use the
sum to determine the required minimum cord size.
6. Make sure the extension cord is properly wired
and in good electrical condition. Always replace
a damaged extension cord or have it repaired
by a qualified electrician before using it.
7. Protect the extension cords from sharp objects,
excessive heat, and damp or wet areas.
TABLE A: RECOMMENDED MINIMUM WIRE
GAUGE FOR EXTENSION CORDS* (120 VOLT)
NAMEPLATE
AMPERES
(at full load)
EXTENSION CORD
LENGTH
25´ 50´ 75´ 100´ 150´
0 – 2.0 18 18 18 18 16
2.1 – 3.4 18 18 18 16 14
3.5 – 5.0 18 18 16 14 12
5.1 – 7.0 18 16 14 12 12
7.1 – 12.0 16 14 12 10 -
12.1 – 16.0 14 12 10 - -
16.1 – 20.0 12 10 - - -
* Based on limiting the line voltage drop to five volts at
150% of the rated amperes.
Page 5
Page 5For technical questions, please call 1-888-866-5797.Item 62565
Symbology
Double Insulated
Canadian Standards Association
Underwriters Laboratories, Inc.
V
Volts
~
Alternating Current
A
Amperes
WARNING marking concerning Risk
of Eye Injury. Wear ANSI-approved
safety goggles with side shields.
Read the manual before
set-up and/or use.
WARNING marking
concerning Risk of Fire.
Do not cover ventilation ducts.
Keepammableobjectsaway.
WARNING marking concerning
Risk of Electric Shock.
Properly connect power cord
to appropriate outlet.
Specifications
Electrical Rating 120 VAC / 500 W
Bulb Two 250 W / 120 VAC Halogen (included)
Set Up Instructions
Read the ENTIRE IMPORTANT SAFETY INSTRUCTIONS section at the beginning of this
manual, including all text under subheadings therein before setup or use of this product.
Risk of accidental starting; resulting in serious personal injury. Turn the Power Switch of the Light
OFF and unplug it from the electrical outlet before assembling or making any adjustments.
Deviation from the assembly instructions may result in a risk of fire or electric shock.
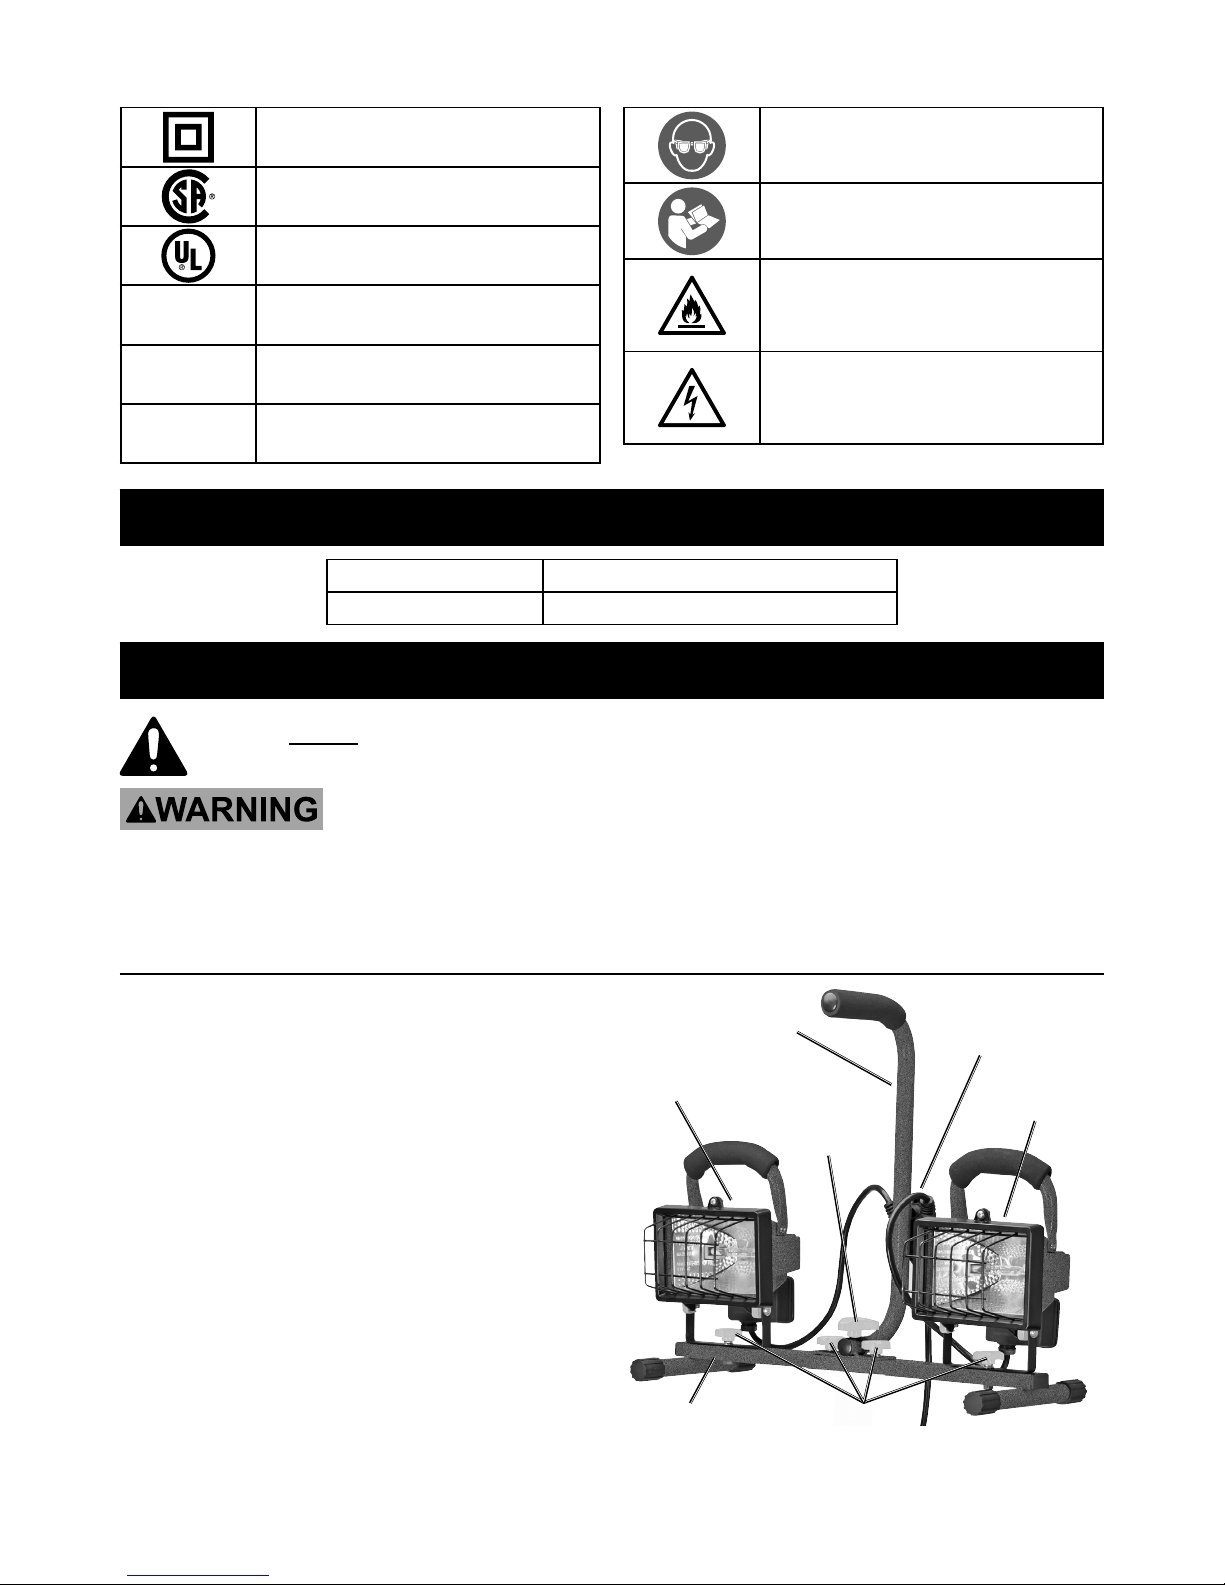
Head Assembly
1. Locate the Portable Stand. Remove the four
Screw Knobs from the bottom of the Stand.
Place the Portable Stand on a flat surface.
2. Carefully, position the twin Lamp Heads with Center
Handle assembly next to the Stand. Attach the
Center Handle facing the front of the Stand
using two Screw Knobs. Refer to Figure A.
3. Each Lamp Head has an attached U-shaped bracket
with a hole that lines up with the holes on the
Stand. Lamp Heads should face forward. Thread
the Screw Knob through the top of the bracket and
into the hole on the top of the Portable Stand.
4. Attach the Y-Cord to the back of the Center
Handle using the Screw Knob on the Handle.
Knobs
Center Handle
Lamp Head
Lamp Head
Portable Stand
Stand
Attachment
Knob
Y-Cord
Figure A
Page 6
Page 6 For technical questions, please call 1-888-866-5797. Item 62565
Tripod Setup
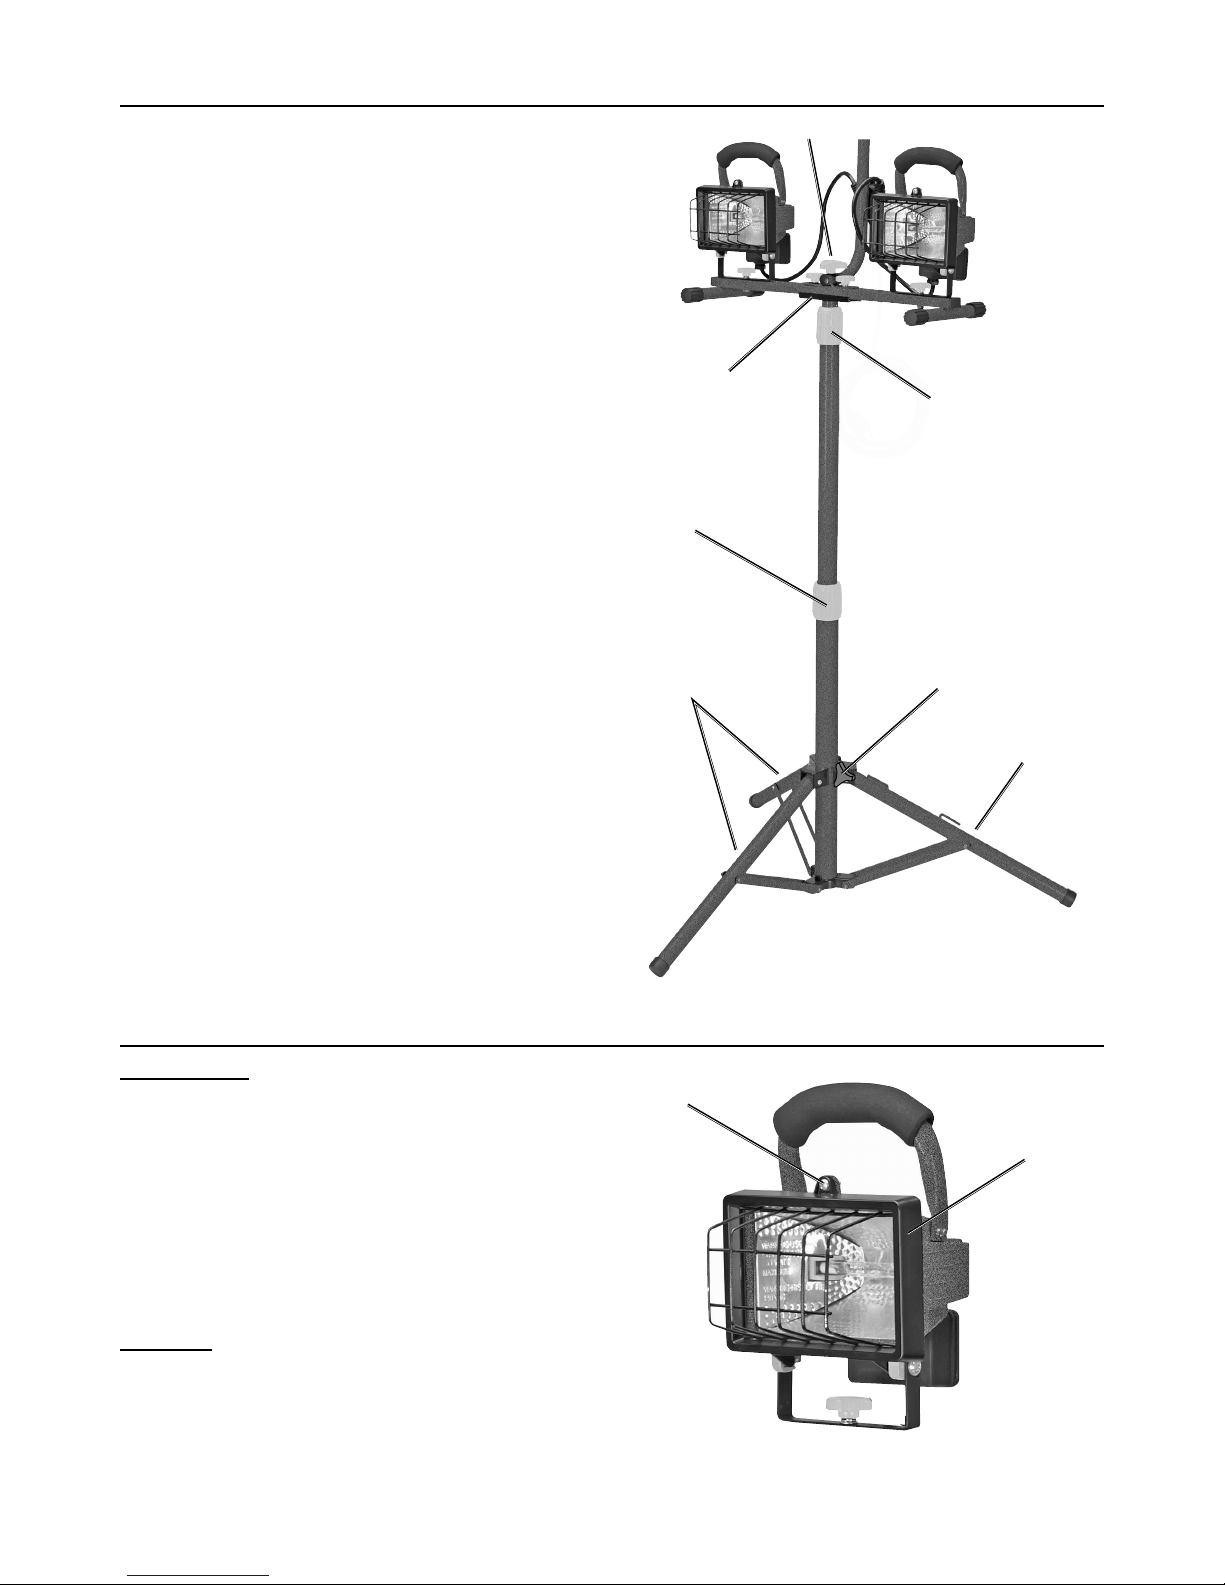
1. Loosen the Support Knob located at the top
of the Tripod leg assembly where the three
tripod legs meet. Refer to Figure B.
2. Move the support legs away from the center
tube of the Tripod and push down on the center
leg connector to extend the three legs.
3. Retighten Support Knob.
4. To adjust Tripod height, loosen one of
the Height Adjusting Knobs and raise the
pole section to the desired height.
5. Firmly tighten the Height Adjusting
Knob after adjustment.
6. To attach the Lamp Head assembly to the Tripod,
place the assembled Portable Stand onto the stand
bracket on the upper end of the Tripod tube. Thread
the Stand Attachment Knob through the hole on
the Center Handle/Portable Stand and into the
top of the stand bracket. Firmly tighten the Stand
Attachment Knob to secure. Refer to Figure B.
Height
Adjusting Knob
Height
Adjusting Knob
Support
Knob
Legs
Leg
Stand Attachment Knob
Stand Bracket
Figure B
Light Assembly
For each light:
1. Remove the Bolt at the top of the housing and
open the Lamp Cover. Refer to Figure C.
2. The bulb is shipped in a protective
box inside the light.
3. One of the lamp holder sockets is spring-loaded
and is marked “ENGAGE LAMP THIS SIDE
FIRST.” Insert the Bulb into that side of the Bulb
Socket first, then pivot it over to the other side.
CAUTION! Do not touch the Bulb with your bare
hands; oil from skin will drastically shorten the life
span of the bulb if not cleaned with rubbing alcohol
and allowed to dry before use. Handle the bulb with
a soft, clean cloth or clean work gloves instead.
4. Close the Lamp Cover and secure with the Bolt.
Bolt
Lamp
Cover
Figure C
Page 7
Page 7For technical questions, please call 1-888-866-5797.Item 62565
Operating Instructions
Read the ENTIRE IMPORTANT SAFETY INSTRUCTIONS section at the beginning of this
manual, including all text under subheadings therein before setup or use of this product.
1. Plug the Light into a standard 120V
grounded, electric outlet.
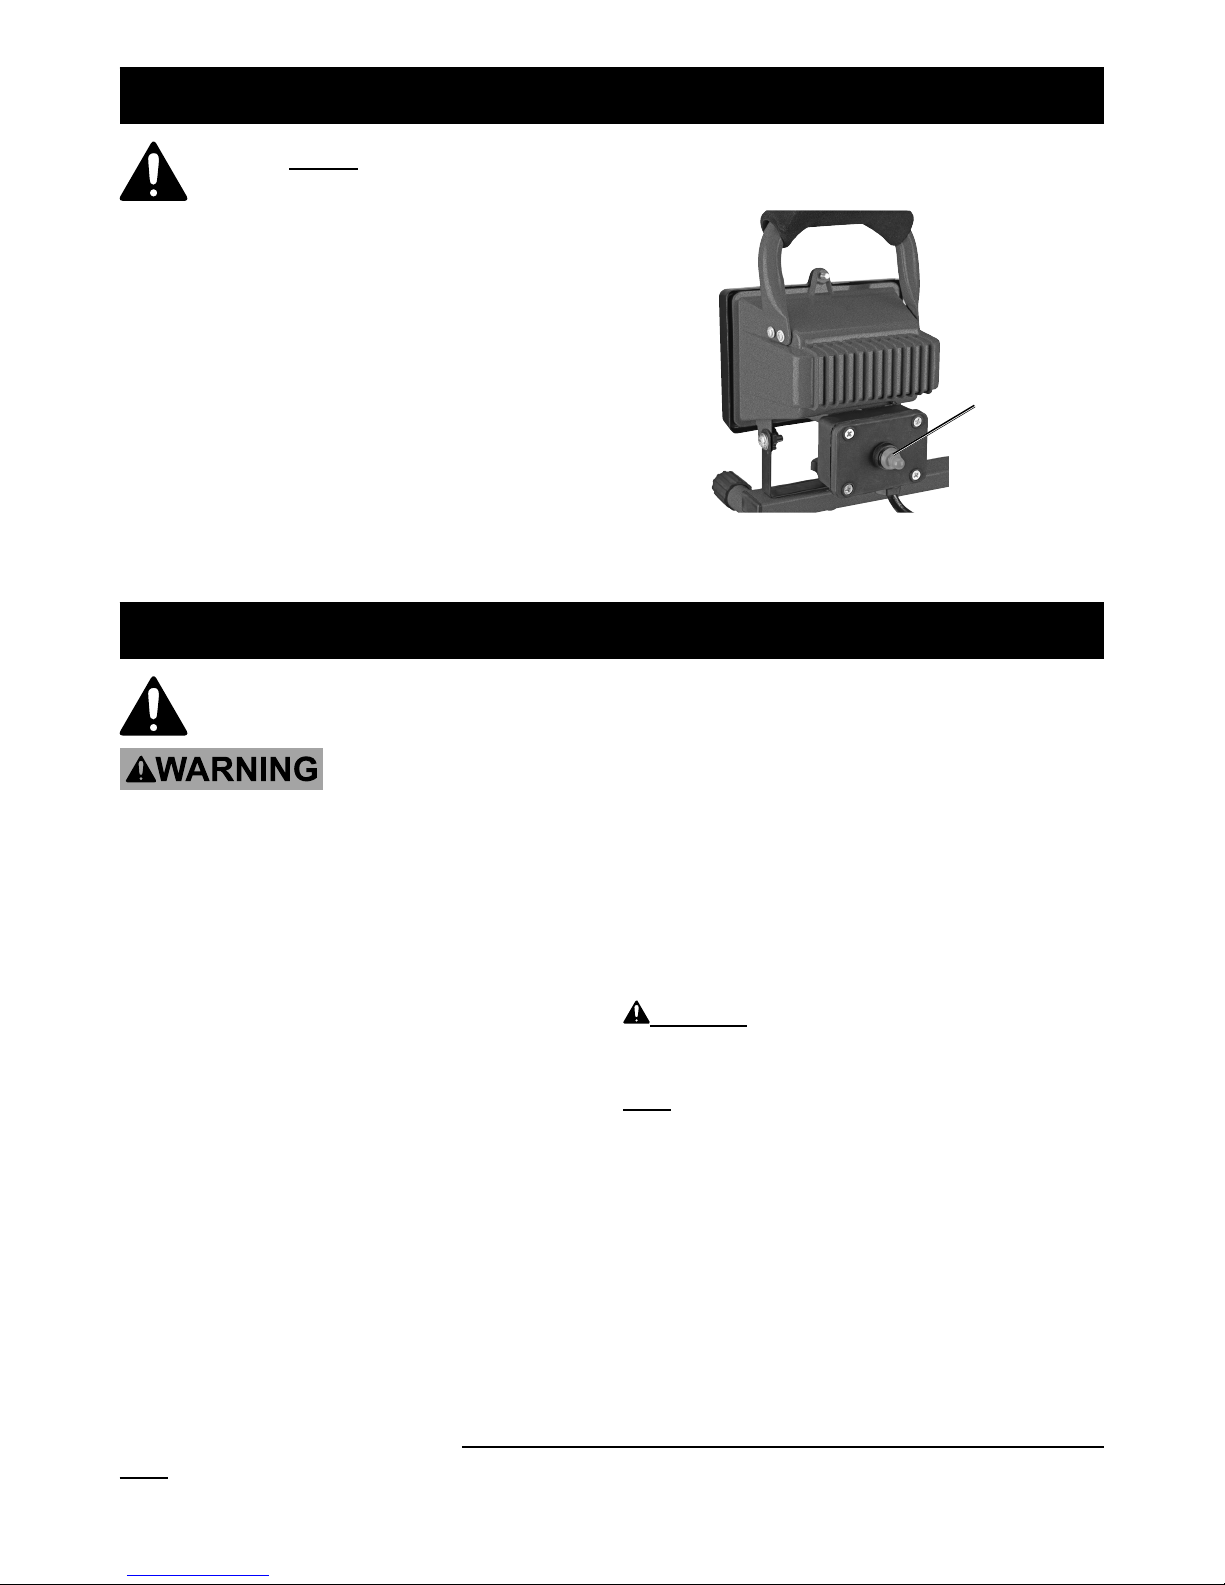
2. Push the On/Off Switch on the back of the Light.
3. WARNING! Keep the Light away from
combustible objects. The Light and housing
will get hot enough to start a fire.
4. To turn off, push the On/Off Switch.
5. To prevent accidents; turn off Light and
disconnect power supply after use.
Allow the Lights to cool. Clean, then store
the Light indoors out of children’s reach.
On/Off
Switch
Figure D
Maintenance And Servicing
Procedures not specifically explained in this manual must
be performed only by a qualified technician.
TO PREVENT SERIOUS INJURY FROM ACCIDENTAL OPERATION:
Make sure that the On/Off Button is in the OFF position and unplug the tool from
its electrical outlet before performing any procedure in this section.
TO PREVENT SERIOUS INJURY FROM LIGHT FAILURE:
Do not use damaged equipment. If damage is noted, have the problem corrected before further use.
1. BEFORE EACH USE, inspect the general
condition of the Light. Check for:
• loose hardware
• damaged cord/electrical wiring
• cracked or broken parts
• any other condition that may
affect its safe operation
2. AFTER USE, allow Light to cool and then wipe
external surfaces of the Light with a clean cloth.
WARNING! If the supply cord of this
light is damaged, it must be replaced only
by a qualified service technician.
Note: Replacement parts may not
be available for this item.
Record Product’s Serial Number Here:
Note: If product has no serial number, record month and year of purchase instead.
Page 8

3491 Mission Oaks Blvd. • PO Box 6009 • Camarillo, CA 93011 • 1-888-866-5797
Limited 90 Day Warranty
Harbor Freight Tools Co. makes every effort to assure that its products meet high quality and durability standards,
and warrants to the original purchaser that this product is free from defects in materials and workmanship for the
period of 90 days from the date of purchase. This warranty does not apply to damage due directly or indirectly,
to misuse, abuse, negligence or accidents, repairs or alterations outside our facilities, criminal activity, improper
installation, normal wear and tear, or to lack of maintenance. We shall in no event be liable for death, injuries
to persons or property, or for incidental, contingent, special or consequential damages arising from the use of
our product. Some states do not allow the exclusion or limitation of incidental or consequential damages, so the
above limitation of exclusion may not apply to you. THIS WARRANTY IS EXPRESSLY IN LIEU OF ALL OTHER
WARRANTIES, EXPRESS OR IMPLIED, INCLUDING THE WARRANTIES OF MERCHANTABILITY AND FITNESS.
To take advantage of this warranty, the product or part must be returned to us with transportation charges
prepaid. Proof of purchase date and an explanation of the complaint must accompany the merchandise. If
our inspection verifies the defect, we will either repair or replace the product at our election or we may elect
to refund the purchase price if we cannot readily and quickly provide you with a replacement. We will return
repaired products at our expense, but if we determine there is no defect, or that the defect resulted from
causes not within the scope of our warranty, then you must bear the cost of returning the product.
This warranty gives you specific legal rights and you may also have other rights which vary from state to state.
 Loading...