

Page 1
PS751 - Firmware(FW) Upgrade Instruction
Master FW
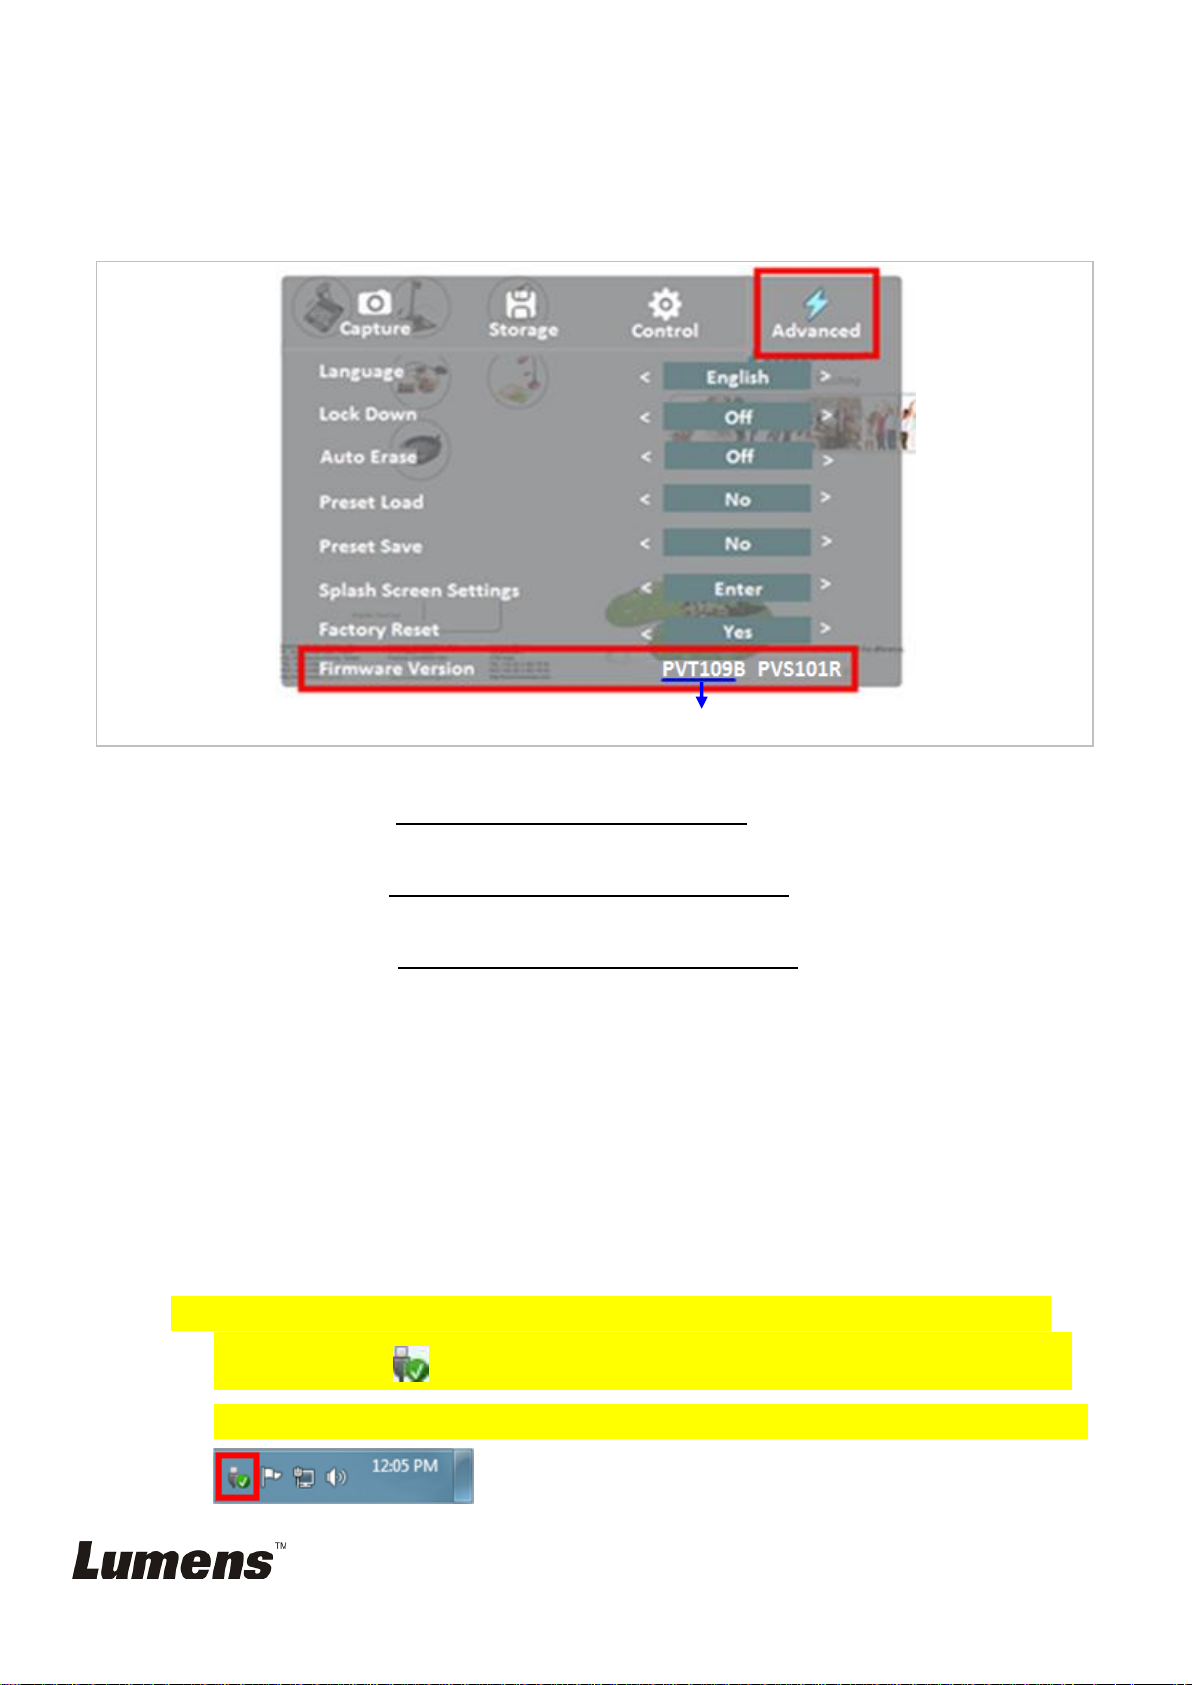
1. Before FW upgrade, please check the current FW version of PS751.
([Menu] [Setting] [Advanced][Firmware Version])
1.1 If the current FW before PVT108(included), please upgrade to FW PVT109B first.
- Please refer to “ 2. Upgrade to the FW PVT109B.”
- After upgrade to FW PVT109, please upgrade to the latest version.
Please refer to “3. Upgrade to the latest FW version”
1.2 If the current FW after PVT109B, please upgrade to the latest version directly
- Please refer to “3. Upgrade to the latest FW version”
-
2. Upgrade to the FW PVT109B
*Note: upgrade to PVT109 may cause the files and custom logo saved in the internal
memory be erased. Please save the files before upgrade if necessary.
2.1 Save the FW file ”PVT109.BRN” & “FW_ PVT.BRN” into a USB flash drive.
Please put the “unzipped” file into USB flash drive.
Put the FW files in the Root directory, not subdirectory.
If two more firmware files coexist in the USB flash drive, the unit will always
detect the latest version.
When remove the storage device from PC, please click the Safely Remove
Hardware icon in the taskbar. Wrong way to unplug the storage device
may cause the data error and crash the unit during FW upgrades procedure.
PS751 – Firmware (FW) Upgrade Instruction
Page 2
2.2 Plug in the power cord and connect PS751 with a monitor/projector.
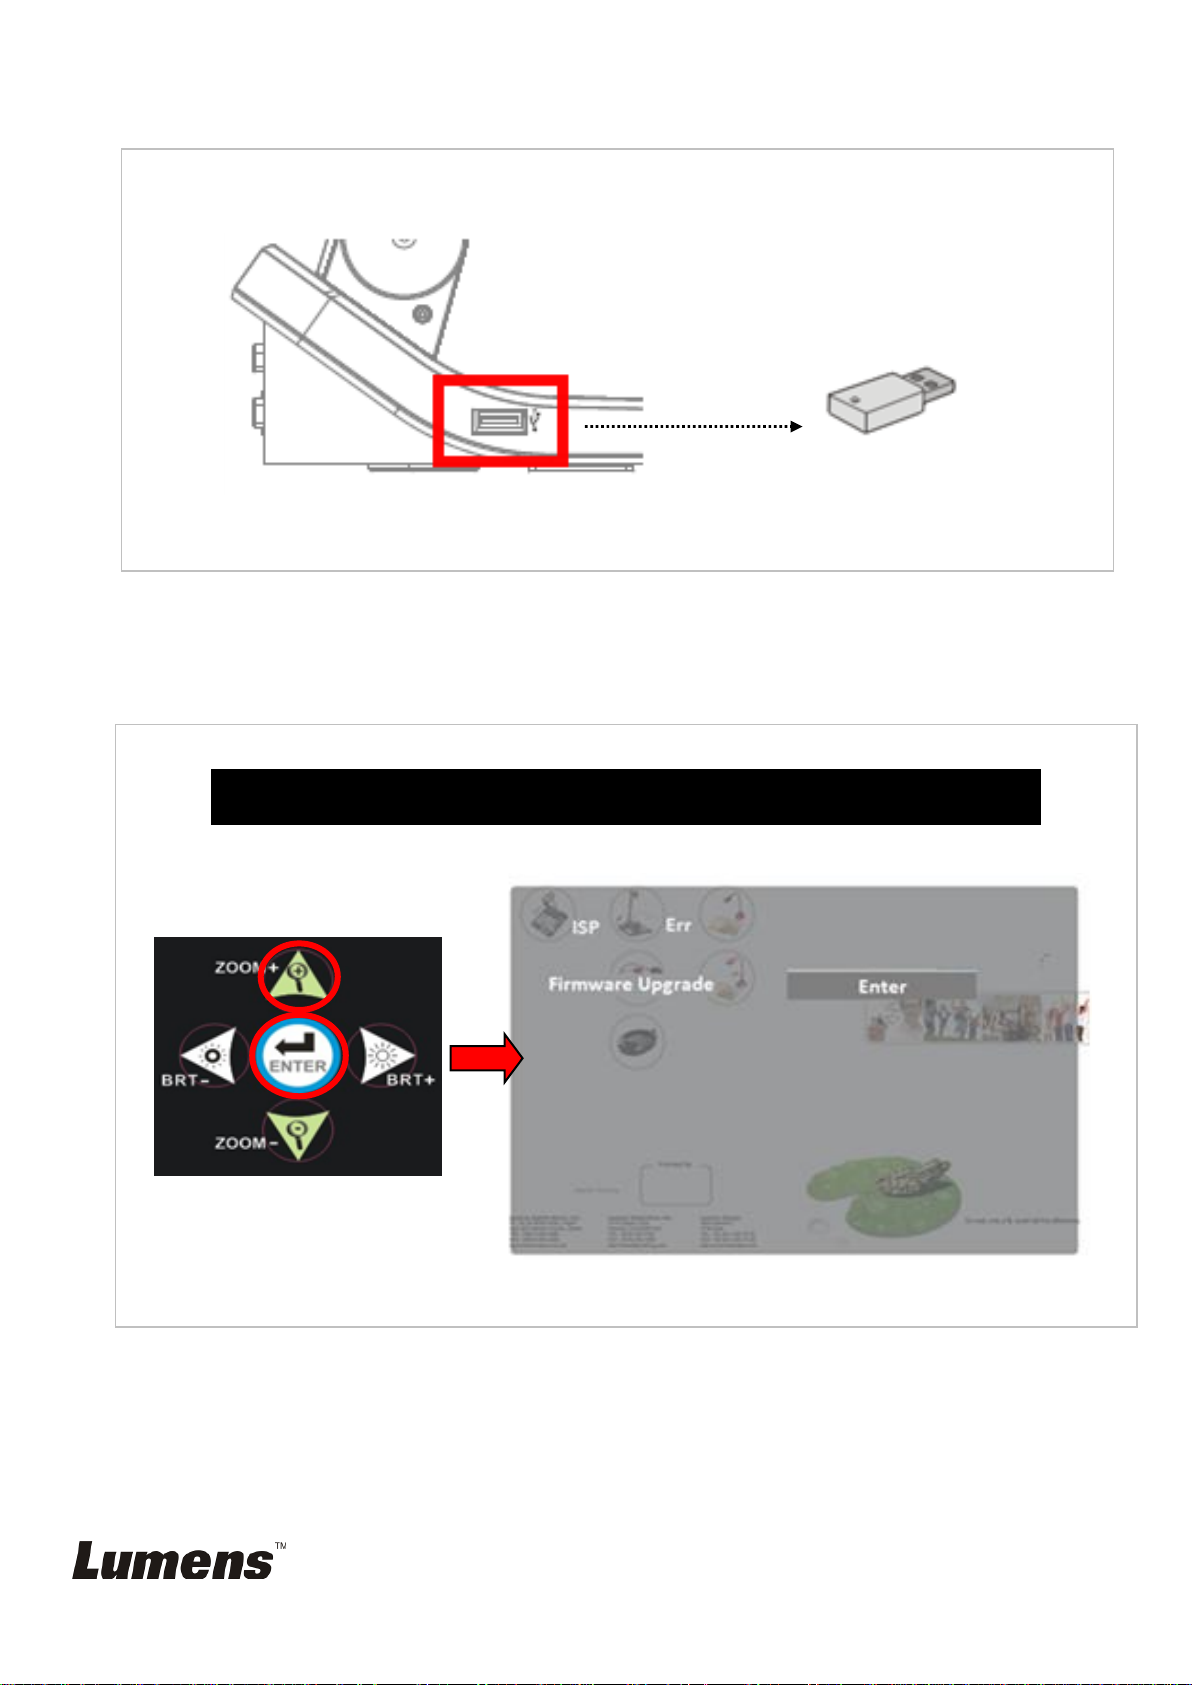
Service Menu:Press “ Enter” + ”Zoom+ ” in sequence
1
2.
USB Flash Drive
2.3 Insert the USB flash drive into the USB port
2.4 Power on the unit and access the service menu
Please use Keypad to call the “Service Menu”.
Press “Enter”(do not release), then press” Zoom+”, hold both buttons in a
second, then the “Service menu” will be shown on screen as following picture.
PS751 – Firmware (FW) Upgrade Instruction
Page 3
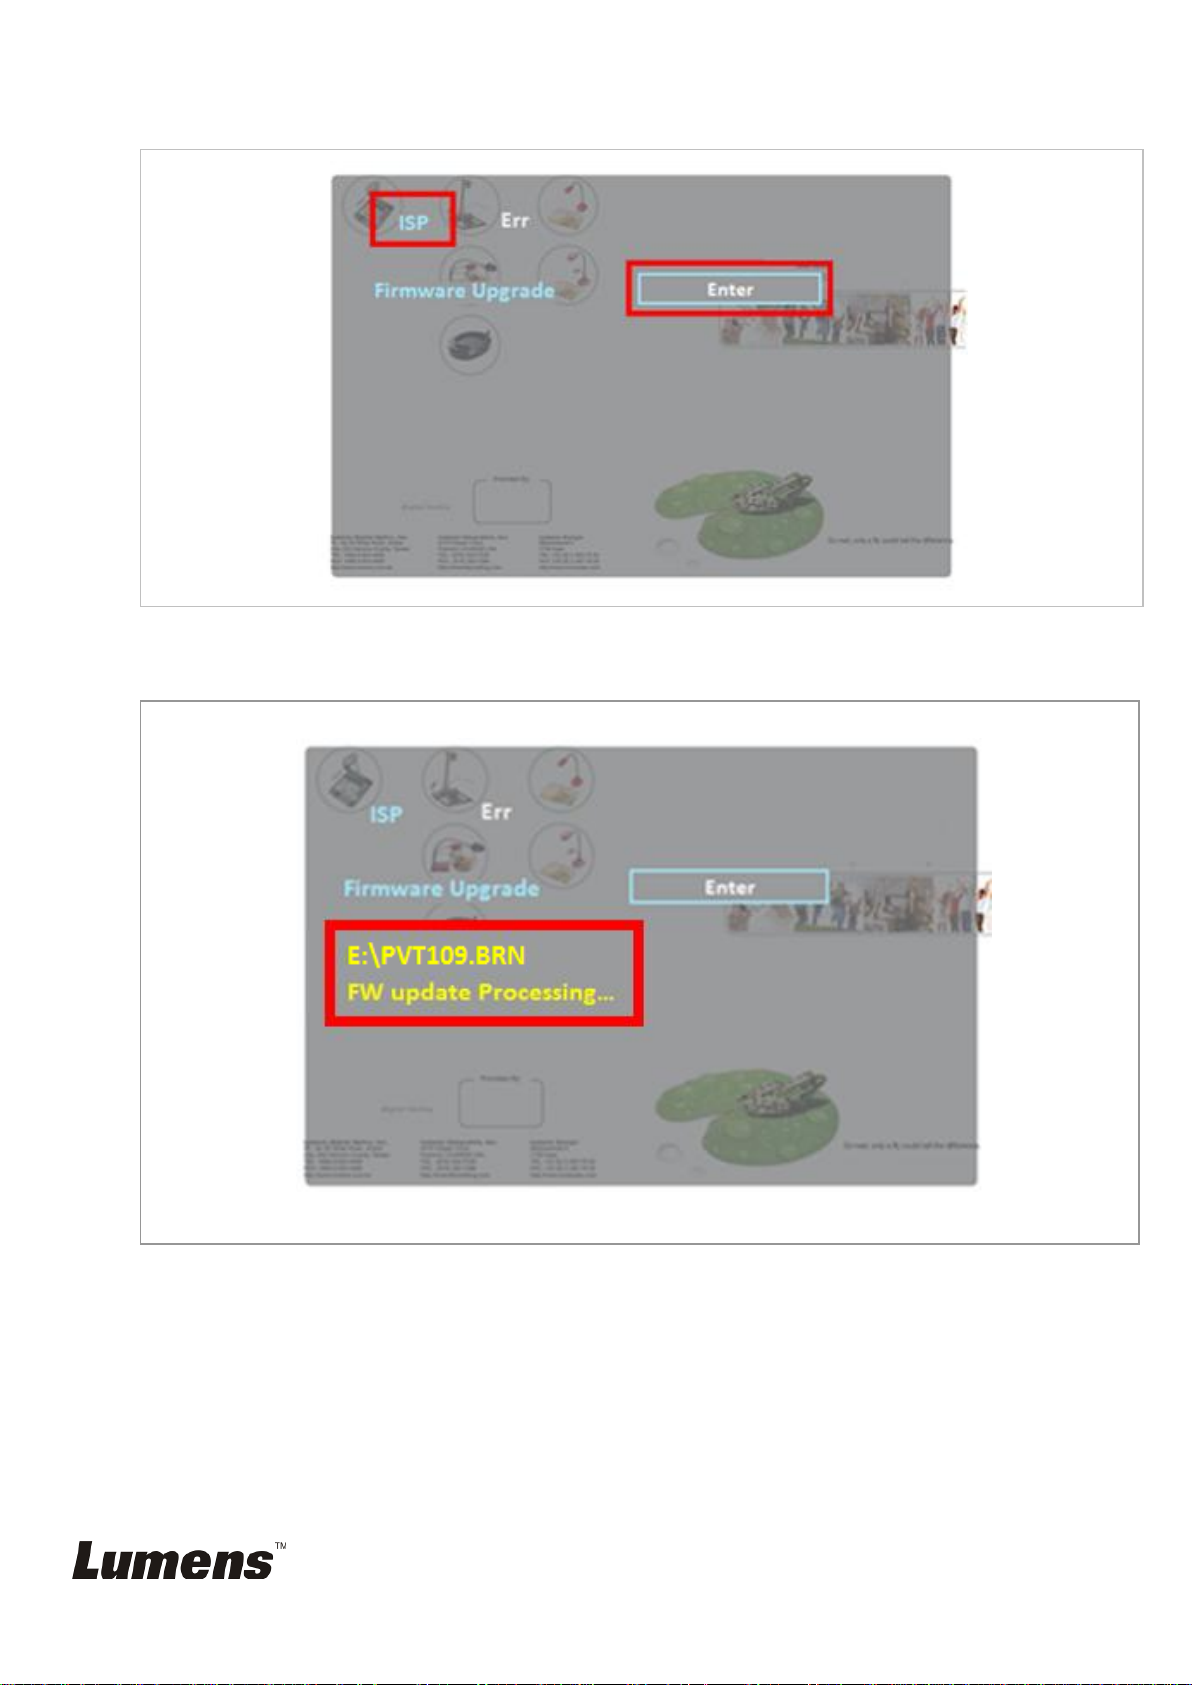
2.5 Go [ISP] menu, select [Firmware Upgrade] and press [Enter]
2.6 FW start upgrading.(around 30sec taken)
*Note: Please do not stop the upgrade process which may cause the unit shut down.
PS751 – Firmware (FW) Upgrade Instruction
Page 4

2.7 Power reset the unit when the process finish.
(Unplug and re-reconnect the power cord to take effect.)
2.8 After unplug and reconnect the power cord, the unit will power on automatically
and continue the FW upgrade. (around 1min taken)
*Note: Please do not stop the upgrade process which may cause the unit shut down.
PS751 – Firmware (FW) Upgrade Instruction
Page 5

Master FW version
2.9 Restart the unit after upgrading successfully.
(Unplug and re-connect the power cord to take effect.)
2.10 Check FW version (PVT109B) on OSD.
([Menu] [Setting] [Advanced][Firmware Version])
2.11 Finished
PS751 – Firmware (FW) Upgrade Instruction
Page 6

Service Menu:Press “ Enter” + ”Zoom+ ” in sequence
1
2
USB Flash Drive
3. Upgrade to the latest FW version
3.1 Save the FW file ”PVTXXX.BRN” into a USB flash drive.
Please put the “unzipped” file into USB flash drive.
Put the FW files in the Root directory, not subdirectory.
If two more firmware files coexist in the USB flash drive, the unit will always
detect the latest version.
When remove the storage device from PC, please click the Safely Remove
Hardware icon in the taskbar. Wrong way to unplug the storage device
may cause the data error and crash the unit during FW upgrades procedure.
3.2 Plug in the power cord and connect the unit with a monitor/projector.
3.3 Insert the USB flash drive into the USB port.
3.4 Power on the unit and access the service menu
Please use Keypad to call the “Service Menu”.
Press “Enter”(do not release), then press” Zoom+”, hold both buttons in a
second, then the “Service menu” will be shown on screen as following picture.
PS751 – Firmware (FW) Upgrade Instruction
Page 7

3.5 Go [ISP] menu, select [Firmware Upgrade] and press [Enter].
3.6 FW start upgrading.(around 2mins taken)
*Note: Please do not stop the upgrading process which may cause the unit shut down.
PS751 – Firmware (FW) Upgrade Instruction
Page 8

3.7 Restart the unit after upgrading successfully.
(Unplug and re-plug the power cord to take effect.)
3.8 Check FW version on OSD.
([Menu] [Setting] [Advanced][Firmware Version])
3.9 Finished.
PS751 – Firmware (FW) Upgrade Instruction
 Loading...