

Page 1
PS600
Digital Visualizer
Quick Start Guide
English - 1
Page 2
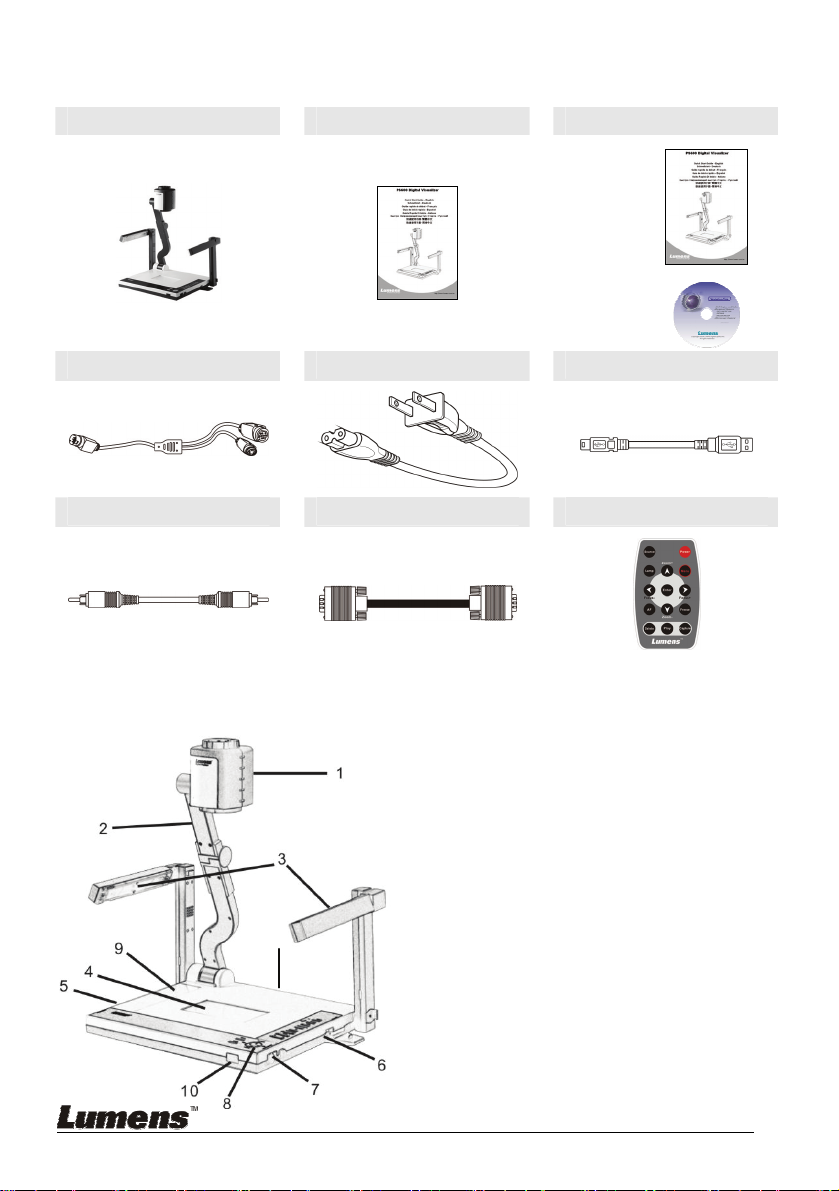
1. Product Content (10 Items)
Main Unit Quick Start Guide User Manual & CD
S-Video Cable Power Cord USB Cable
C-Video Cable VGA Cable Remote
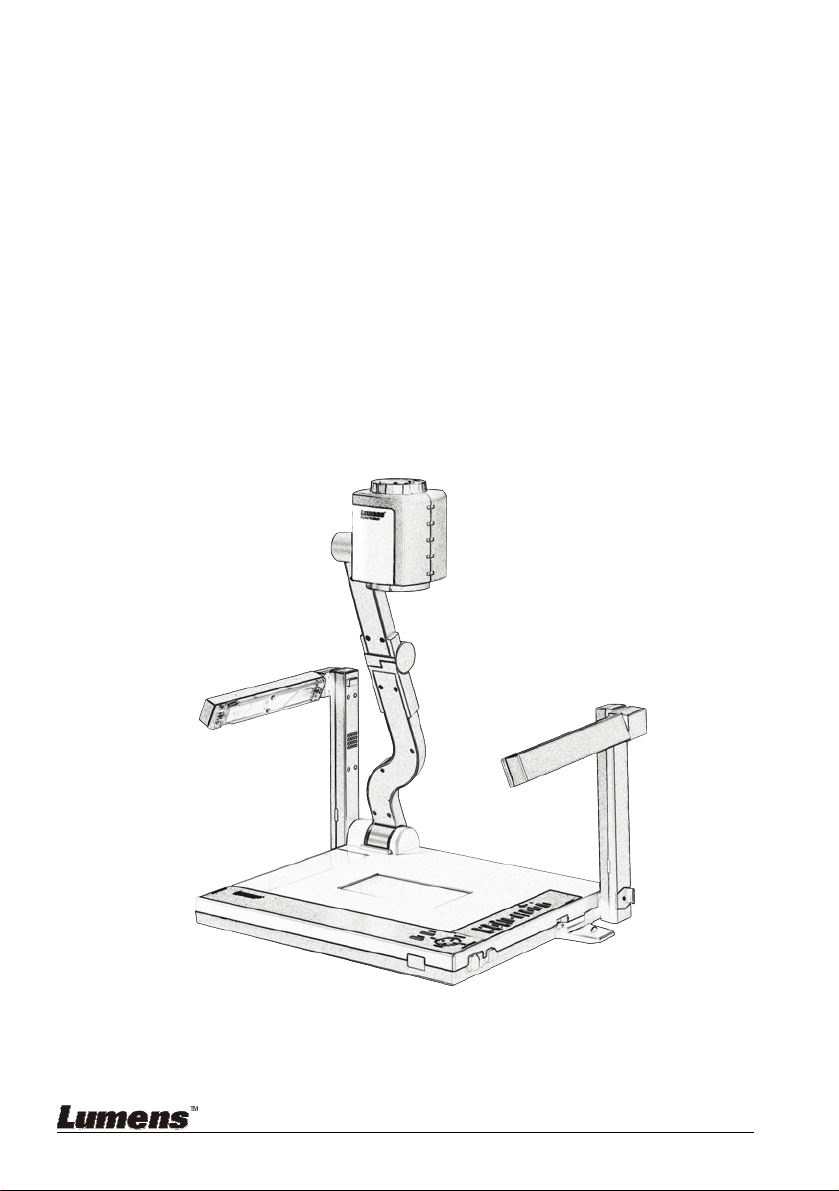
2. Product Overview
English - 2
11
1. Camera Head
2. Camera arm
3. Lamp
4. Backlight
5. Remote controller slot
6. CF card slot
7. Lamp lock
8. Control Panel
9. Button Function Guide
Page 3
10. IR sensor (for controller)
11. IO connector
3. Installation Process
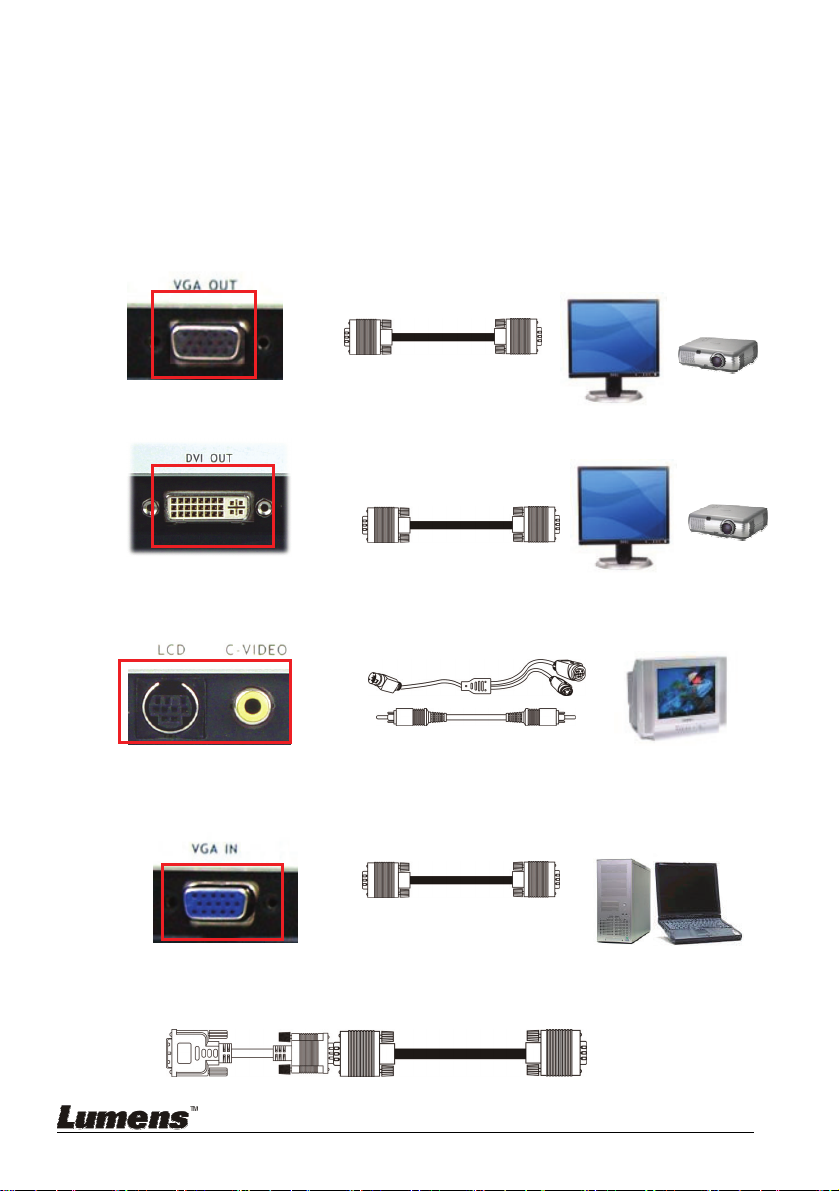
3.1 Input /Output Connection
3.1.1 Connecting VGA out to Monitor or Projector
3.1.2 Connecting DVI out to Monitor or Projector
3.1.3 Connecting S-Video/C-Video to TV
3.1.4 Connecting VGA in to Computer
Monitor
Projector
Monitor
Projector
TV
PC Notebook
Notice DVI to VGA adapter cable must be used 【 】
No VGA output once C-Video output is turn on
English - 3
Page 4

3.1.5 Connecting USB to Computer
Connect to USB port then install the supplied View II or See II program. Please refer
to View II or See II installation Instruction for more information.
PC Notebook
Notice【 】Don’t connect the Digital Visualizer to PC Until USB Driver has been
installed properly.
3.1.6 RS232 to Computer
Connect to RS232 port then execute RS232 command.
PC Notebook
3.1.7 Plug in the power outlet
AC Outlet
English - 4
Page 5

3.2 Initial Setup
3.2.1 Setup the Digital Visualizer
1. Pull up the arm and camera head then turning the camera head
toward the platform
2. Press and slide the latches (Lamp release) to release the lamp lock
then Pull up the lamp arms.
3. Rotate the folded lamp to face the platform as the arrow shows.
Note※ :The angle of the camera head/lamp arm/lamp head is limited.
Do not turn it forcefully when it reaches the maximal angle
3.2.2 Power On
Note※ :Before using the Digital Presenter, make sure that you have
connected it to the computer, video source or other output devices.
Please refer to the 3-1 section.
1. Press (the POWER『 』button) for about 1 second to power on
the Digital Presenter. The red LED (flashing until the presenter is
started) turns to green.
2. Press the
lamp or backlight.
※Note: you may rotate the camera head appropriately for better lighting.
English - 5
LAMP『 』button on the remote control to switch the side
Page 6

4. Start to use
4.1 Select Input Source
The default input source is set as "Digital Visualizer", press Source『 』to
switch.
Monitor
Keypad
Projector
4.2 Zoom in/zoom out
Zoom in / out by pressing continuously
Keypad
Remote
PC Notebook
Remote
English - 6
Page 7

4.3 Auto Focus
Auto Focus by pressing once
Keypad
4.4 Brightness Adjustment
4.5 A4/A5 Size
Remote
Keypad
A5 to change. The default shooting area is A4 size, please『 』
English - 7
Keypad
Page 8

4.6 Capture & Play Image:
Capture Live Image or Play the captured imageCapture Play『 』 『 』
4.7 OSD Menu
Keypad
Keypad
Remote
Remote
* Please refer to the Button Function Guide pasted on the front panel for simple
operation.
* More detail functions of OSD menu, please read the user manual.
* The updated information will be regularly released on Lumens web site,
please visit our web site
http://www.lumens.com.tw for the most updated.
English - 8
 Loading...