

Page 1

Linux Driver
for
Visual Presenter
User Manual
Table of Content
1. SYSTEM REQUIREMENTS ................................................................................................1
2. INSTALLATION ...................................................................................................................1
3. CAMERA SETTING............................................................................................................. 2
4. BASIC OPERATION............................................................................................................ 3
4.1. Use in Gstreamer ..................................................................................................................................3
4.2. Use in Sound Recorder ........................................................................................................................4
4.3. Use in Skype..........................................................................................................................................4
4.4. Use in Xsane..........................................................................................................................................6
5. TROUBLESHOOTING ........................................................................................................7
5.1. Checking that driver installation is complete ....................................................................................7
5.2. Removing the driver .............................................................................................................................7
Date: 2009 July
English -
0
Page 2
1. System Requirements
1.1. CPU:1GHz or better processor
1.2. RAM: 512 MB
1.3. Available Disk Space: 100 MB
1.4. USB 2.0 Host
2. Installation
2.1. Connect the power cord of the Visual Presenter and press the power button on the Visual
Presenter.
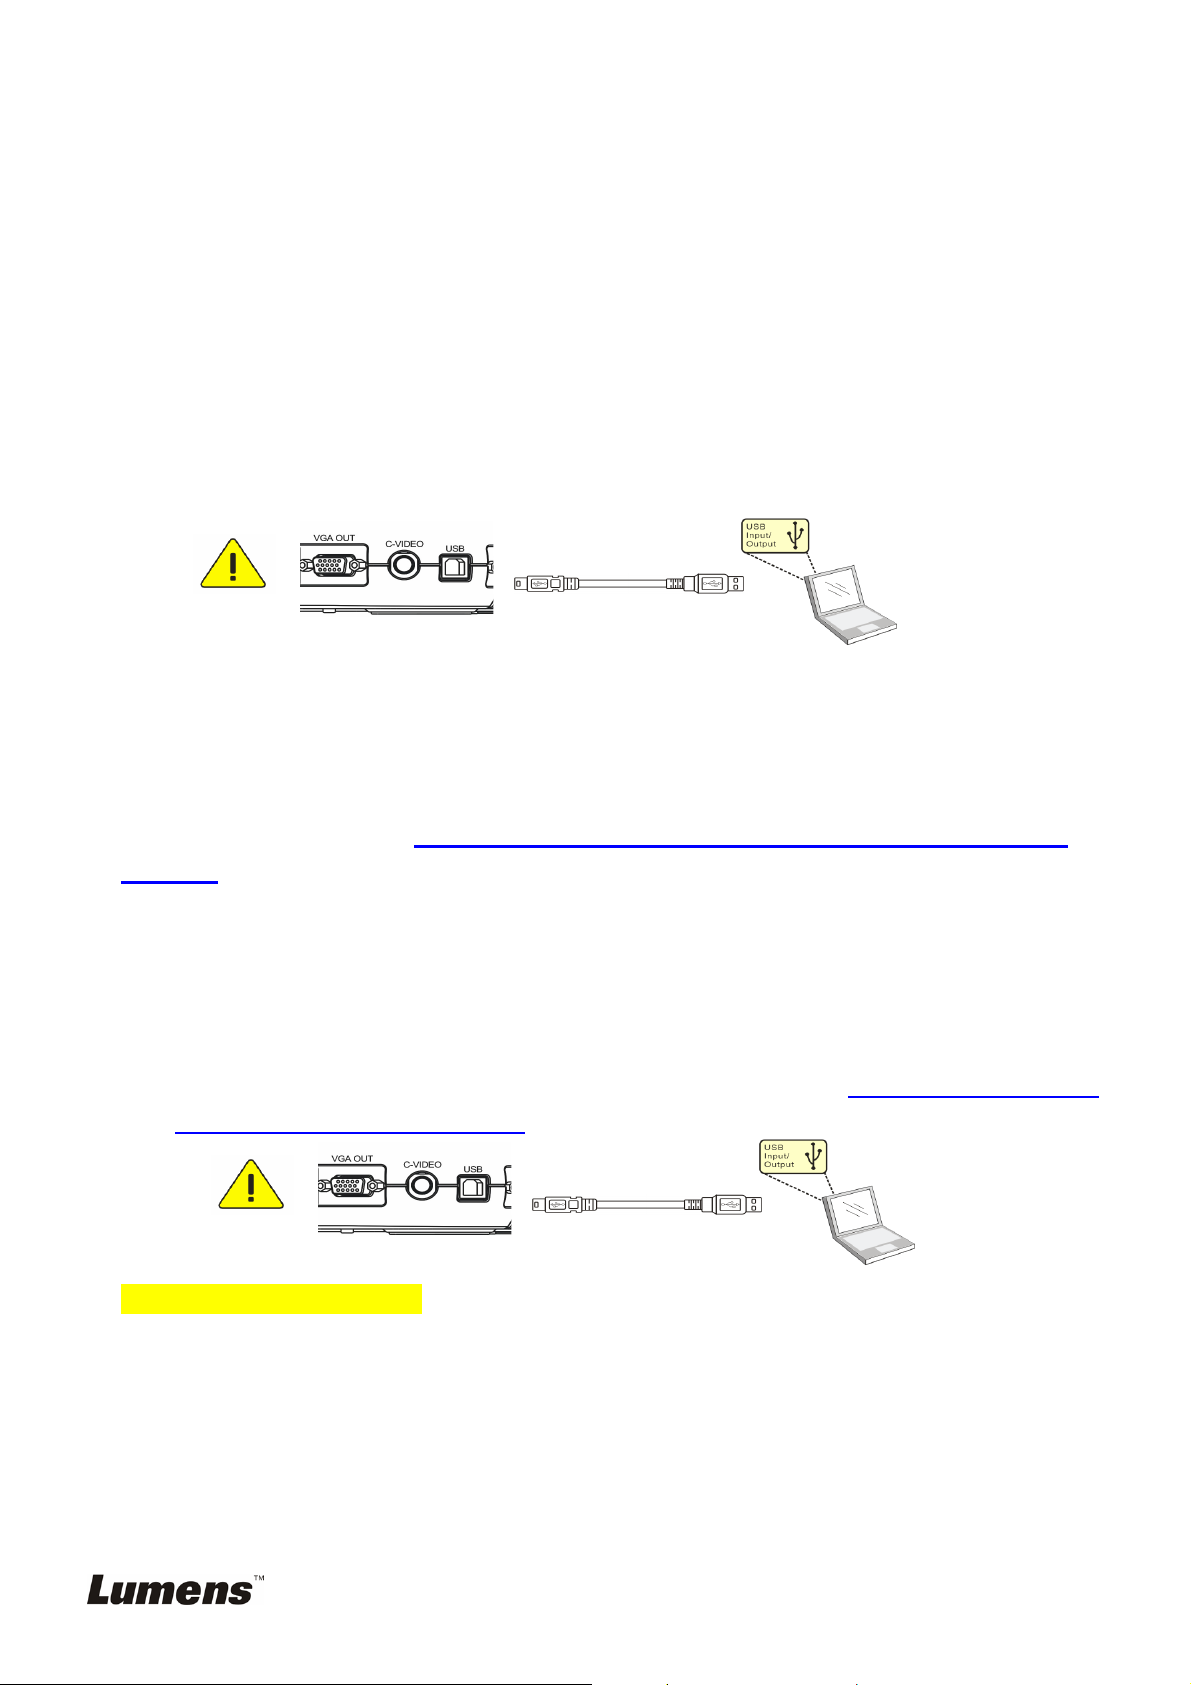
2.2. Remove the USB cable from Computer and Visual Presenter.
2.3. Launch the Linux Terminal application.
2.4. Key in the following command:
8
sudo dpkg –i visualpresenterlv1_ubuntu8.10-1.0.0_i386.deb or
sudo dpkg –i visualpresenterlv1_ubuntu9.04-1.0.0_i386.deb
<Note> Please remove the current driver version before upgrading to a new driver. For
more information, refer to 4.Troubleshooting 4.2 How do I remove the driver in this
manual.
2.5. Add user to video, audio group, key in the following command:
sudo gpasswd –a username video
sudo gpasswd –a username audio
<Note>
2.6. Once the USB driver installation was completed, please connect one end of the USB cable to
2.7. Reboot the system now.
The username depends on which user you logged in
the Visual Presenter and the other to the USB port on your computer
Quick Start Guide 3. I/O Connection).
(refer to Visual Presenter
English -
1
Page 3
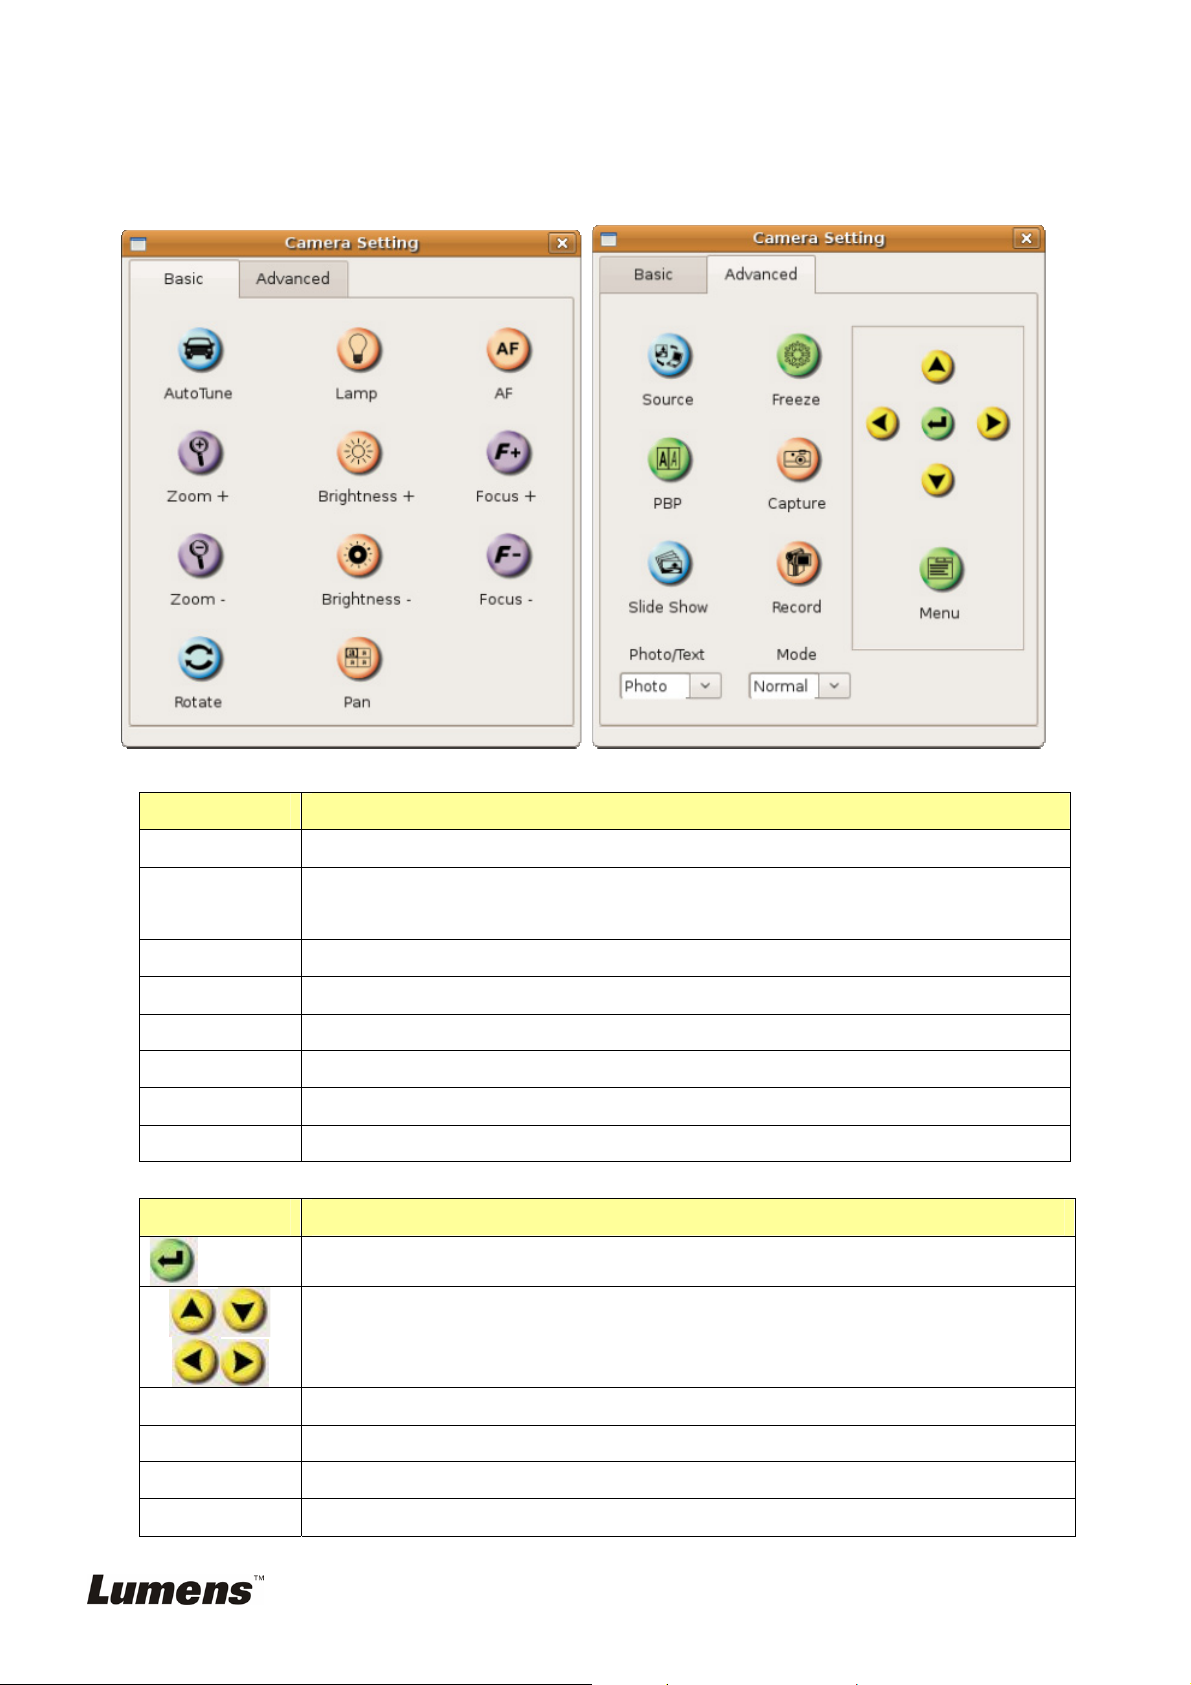
3. Camera Setting
3.1. Launch the Linux Terminal application.
3.2.
Key in the following command: vpcamerasetting
3.3. Basic :
Name Function
AF
Auto Tune
Brightness+/-
Focus +/-
Lamp
Pan
Rotate
Zoom +/-
3.4. Advanced
Name Function
Automatically adjust focal length on an object.
Automatically adjust the image to have the best brightness and focusing
performance.
Manually adjust the brightness of the image.
Manually adjust focal length on an object.
Turn on / off the lamp.
switch a part of the live image
Rotate the image by 0°/90°/180°/270°.
Increase or decrease the image size.
Enter/Activate functions.
Move up, down, left or right to select the needed function.
Capture
Freeze
Menu
PBP
Capture the image to the SD card (priority) or internal memory.
Freeze the current image to temporarily stay on the screen. Press again to defreeze.
Activate the setting menu function/exit menu.
PBP (Picture by picture): Compare live images with captured image files.
English -
2
Page 4

Record
Record motion images. Press [Record] to record images to SD card (priority) or
internal memory; press[Record]again to stop recording.
Slide Show
Source
Show the photos or videos stored in the SD card (priority) or internal memory in slide
mode.
Switch between different sources of signals:
1. Live images (default)
2. SD card (priority) or internal memory
3. Computer
4. Basic Operation
4.1. Use in Gstreamer
4.1.1. Launch the Linux Terminal application.
4.1.2. Key in the following command: gstreamer-properties
4.1.3. Playing Audio
1. Select the plugin [ALSA - Advanced Linux Sound Architecture]
2. Select the desired device [Visual Presenter Audio LV1].
3. Press [Test ] to allow the computer to play audio recorded in the Visual Presenter.
<Note> This function only works in product models that can record audio.
4. Press [OK] to close the dialog box.
4.1.4. Playing Video
1. Select the plugin [Video for Linux (V4l)]
2. Select the desired device [Visual Presenter Video LV1].
3. Press [Test ] to play video recorded in the Visual Presenter.
<Note> This function only works in product models that can record video.
English -
3
Page 5

4. Press [OK] to close the dialog box.
4.2. Use in Sound Recorder
4.2.1. Click ApplicationÆ Sound&Video Æ Sound Recorder
4.2.2. For the “Record as: ” option, select [Voice, Lossless( .wav type)].
4.2.3. Click [Record] to start recording.
4.2.4. Click [Stop] to stop recording.
4.2.5. Click [Play] to play recorded sounds.
4.3. Use in Skype
4.3.1. Launch the Linux Terminal application.
4.3.2. Key in the following command:
4.3.3.
Setting the sound device
4.3.3.1. Click on the “S” symbol to launch the [Options] windows
skype
English -
4
Page 6

4.3.3.2. For “Sound In,” select [(plughw:VpAudioLV1,0]
4.3.3.3. For “Sound Out,” select [Default device(default)] or pulse
4.3.4. Video device setting
4.3.4.1. Add XML code in the file ~/.Skype/skype username/config.xml as follows: To
open the file, key in the following command:
gedit ~/.Skype/skype username/config.xml
<Video>
<AdvertPolicy>contacts</AdvertPolicy>
<AutoSend>1</AutoSend>
<CaptureHeight>1024</CaptureHeight>
<CaptureWidth>1280</CaptureWidth>
English -
5
Page 7

<Device>/dev/video0</Device>
<Fps>15</Fps>
<RecvPolicy>callpolicy</RecvPolicy>
</Video>
<Note > The values of <CaptureHeight> and <CaptureWidth> will automatically
change toe reflect the resolution setting of visual present. (Refer to the section
about setting the DIP switch in the Visual Presenter User Manual for more
detailed information).
4.3.4.2. Setting the video device
1. Under “Select webcam,” choose [Visual Presenter Video LV1]
2. Check the boxes labeled [Enable Skype Video] and [Start my video
automatically when I am in a call.]
3. Press the [Test] button to show a live image from the visual presenter.
4.3.5. Once the settings are complete, the visual presenter is ready to be used to make a conference call.
Use in Xsane
4.4.
4.4.1. Launch the Linux Terminal application.
4.4.2. Key in the following command: Xsane
4.4.3. Press [Continue at your own risk] to continue.
4.4.4. Select type [JPEG] and Gray [Color]
4.4.5. Press [Acquire preview] to capture a live image
English -
6
Page 8

5. Troubleshooting
5.1. Checking that driver installation is complete
5.1.1. Launch the Linux Terminal application
5.1.2. Key in the following: lsmod | grep visualpresenteraudio. The following information
will be displayed:
5.1.3. Key in the following command: lsmod | grep visualpresentervideo. The following
information will be displayed:
5.2. Removing the driver
5.2.1. Launch the Linux Terminal application
5.2.2. Key in the following command:
sudo dpkg –r visualpresenterlv1
5.2.3. Key in the following command: sudo rmmod visualpresenteraudio
5.2.4. Key in the following command: sudo rmmod visualpresentervideo
5.2.5. Key in the following command: rm `find /lib/modules/ -name
visualpresentervideo.ko`
5.2.6. Key in the following command: rm `find /lib/modules/ -name
visualpresenteraudio.ko`
5.2.7. Key in the following command: rm /usr/local/bin/vpcamerasetting
English -
7
 Loading...