

Page 1

TM
Ladibug
Document Camera Image Software
User Manual
Page 2

Contents
1. Introduction ..................................................................... 2
2. System requirement ........................................................ 2
3. Install Ladibug™ ............................................................. 3
4. Start to use Ladibug™ ..................................................... 5
5. Operation ........................................................................ 6
5.1 Main Menu ........................................................................... 6
5.2 Camera Settings .................................................................. 7
5.3 Options ................................................................................ 8
5.4 Time Lapse .......................................................................... 9
6. Descriptions of Functions .............................................. 10
6.1 Start the Document Camera .............................................. 10
6.2 I would like to display a live image ..................................... 10
6.3 I would like to optimize the image ...................................... 10
6.4 I would like to adjust the brightness ................................... 10
6.5 I would like to turn on/off the lamp ..................................... 10
6.6 I would like to zoom in/zoom out ........................................ 10
6.7 I would like to capture images ........................................... 10
6.8 I would like to freeze the live image ................................... 11
6.9 I would like to record video ................................................ 11
7. Remove the LadibugTM program ................................... 12
8. Troubleshooting ............................................................. 12
1
Page 3

1. Introduction
After installing the LadibugTM application, you can use the software to:
Control the Document Camera.
Capture and record images.
2. System requirement
Systems supported
Ubuntu 10.04 ~11.10(32-bit)
OpenSUSE 11.4 (2.6.37.1-1.2-desktop, 32-bit)
Fedora 15 (2.6.38.6-26.rc1.fc15.i686.PAE , 32-bit)
System requirement
Min CPU: P4 2.8 GHz and above
Memory: 512MB
Resolution: 1024x768
100MB Min Disc Space
2
Page 4
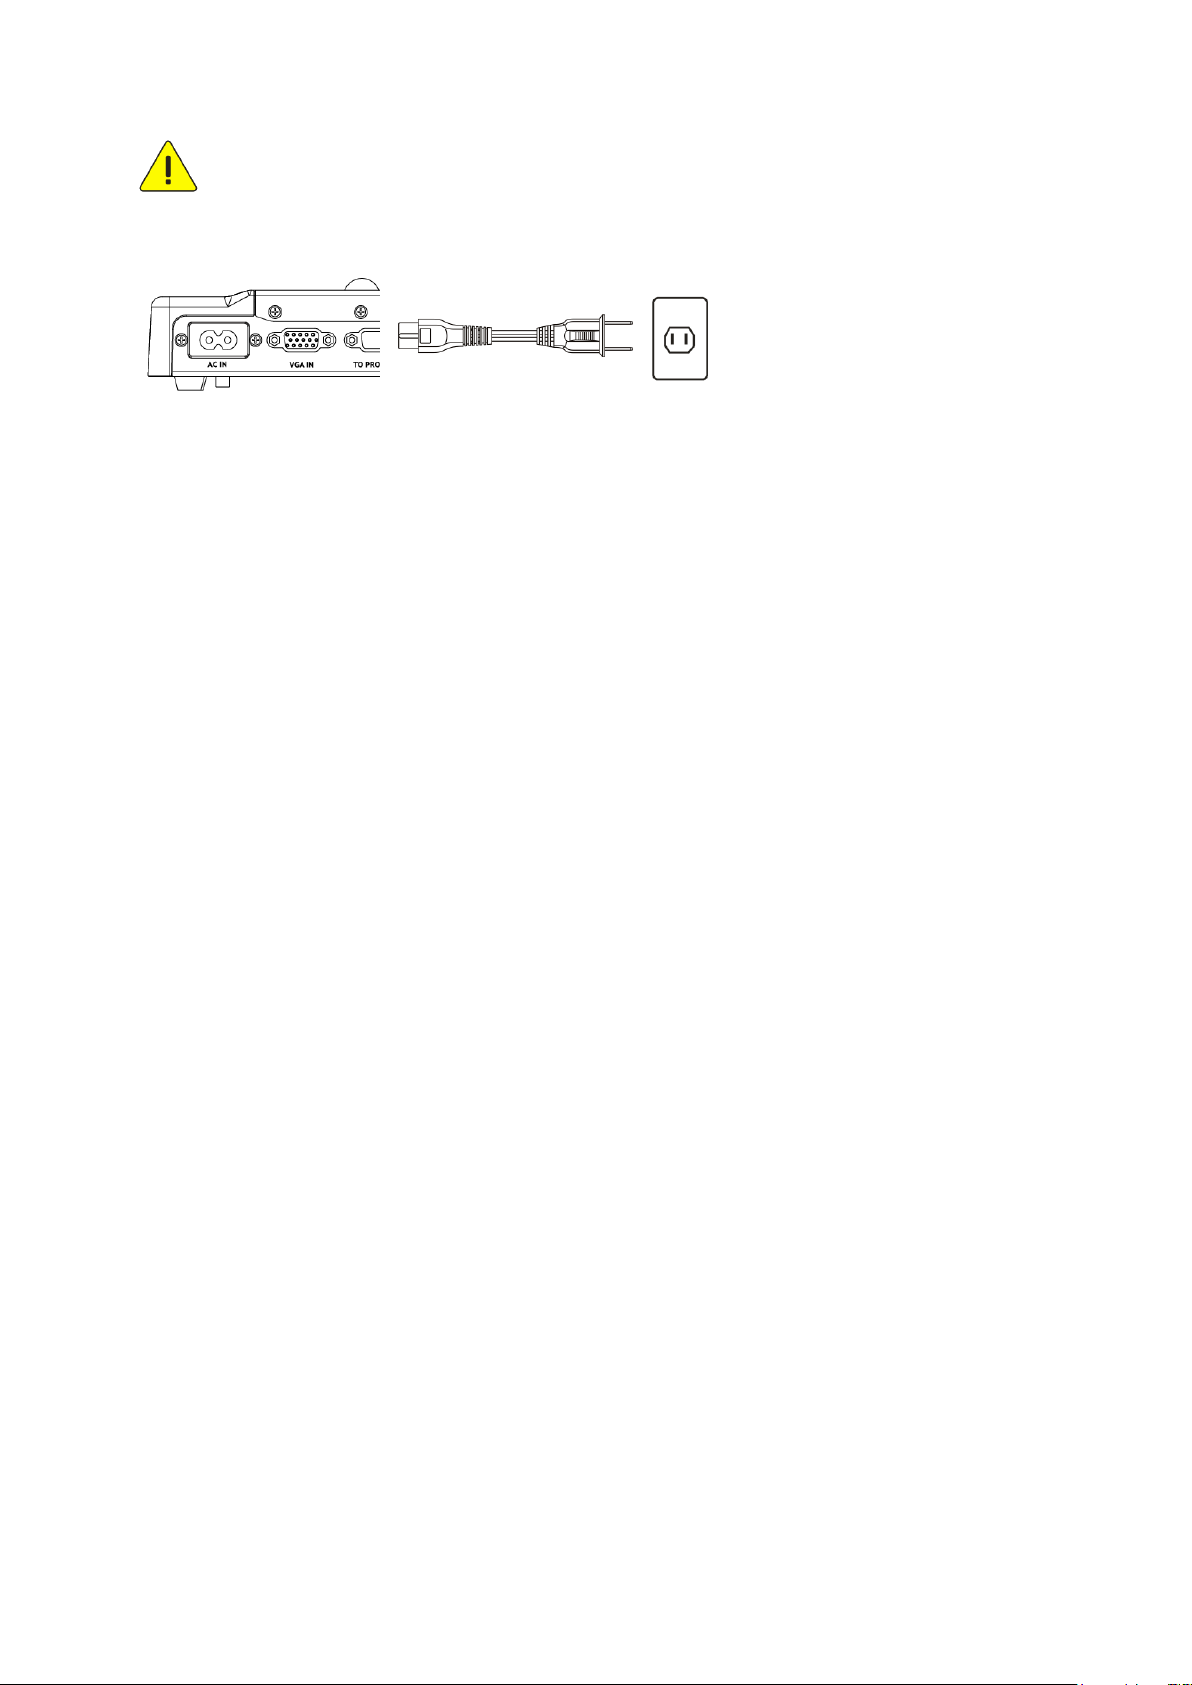
AC Outlet
3. Install Ladibug™
<Note> In case you have installed other versions of Ladibug, please un-install it and
re-install it again.
<Note> Please disconnect your computer and digital dock before software installation.
3.1. Connect the power cord of the Document Camera.
<Note> Appearance of power cord and AC outlet may vary with countries/regions.
3.2. Please download the Ladibug™ software after connected to the Lumens™
web site.
3.3. To ensure complete installation, please make sure the network is available.
3.4. Open the terminal window and start installing by following the instructions
below.
3.4.1 Ubuntu10.04~11.10 applicable
3.4.1.1. Unzip” Ladibug_Ubuntu11.10_X.X.X_Setup.zip” to your PC(do not unzip
it to the USB disk or other device)
3.4.1.2. Right click “ladibug-1.1.0-Linux-x86-Install” -> Properties -> Permissions
-> check “Allow executing file as program”
3.4.1.3. Double click “ladibug-1.1.0-Linux-x86-Install” and follow the instructions
3.4.1.4. If your login id is not “root”, add the login id to group “disk”, “audio”,
“video” :
3.4.1.4.1 sudo gpasswd -a `whoami` video
3.4.1.4.2 sudo gpasswd -a `whoami` audio
3.4.1.4.3 sudo gpasswd -a `whoami` disk
3.4.2 Fedora15 applicable
3.4.2.1. If your login id is not “root”, add the login id to the “/etc/sudoers” file :
3.4.2.1.1 su root
3.4.2.1.2 chmod 777 /etc/sudoers
3.4.2.1.3 open /etc/sudoers by text editor
3.4.2.1.4 Add the statement :
Your login id ALL=(ALL) ALL
3.4.2.1.5 chmod 0440 /etc/sudoers
3.4.2.2. unzip “Ladibug_OpenSUSE11.4_Fedora15_X.X.X_Setup.zip” to your
PC(do not unzip it to the USB disk or other device)
3.4.2.3. Right click “ladibug-1.1.0-Linux-x86-Install” -> Properties -> Permissions
-> check “Allow executing file as program”
3.4.2.4. Run “./ladibug-1.1.0-Linux-x86-Install” on terminal and follow the
instructions
3.4.2.5. If your login id is not “root”, add the login id to group “disk”, “audio”,
“video” :
3.4.2.5.1 sudo gpasswd -a `whoami` video
3
Page 5

3.4.2.5.2 sudo gpasswd -a `whoami` audio
3.4.2.5.3 sudo gpasswd -a `whoami` disk
3.4.3 OpenSUSE11.4 applicable
3.4.3.1. Add login id to group “disk”, “audio”, “video”:
3.4.3.1.1 YaST -> Security and Users -> User and Group Management ->
Edit -> Details -> Additional Groups
3.4.3.1.2 Select disk, audio and video
3.4.3.2. unzip “Ladibug_OpenSUSE11.4_Fedora15_1.0.0_Setup.zip” to your
PC(do not unzip it to the USB disk or other device)
3.4.3.3. Right click “ladibug-1.1.0-Linux-x86-Install” -> Properties -> Permissions
-> check “Is executable”
3.4.3.4. Double click “ladibug-1.1.0-Linux-x86-Install” and follow the instructions
3.5. Turn on the Document Camera by pressing the [POWER] button on the unit
or the remote control for several seconds.
3.6. Connect USB cable to the Document Camera and your computer. (Please
refer to the Document Camera user manual)
3.7. Restart your computer.
4
Page 6

4. Start to use Ladibug™
4.1. Click the “Application” -> “Other” -> [Ladibug] icons in sequence to open the
Ladibug™ program.
4.2. Mouse over [Ladibug] icon to select menu functions.
5
Page 7

POWER:
Turn the Document Camera on / off
LAMP:
Turn the lamp on / off
AUTO TUNE:
Automatically adjust the image for
best possible quality.
PREVIEW:
Display live images
OPTIONS:
Select video compression method
and the audio source. For detailed
operation instructions, please refer
to 5.3 Options.
BRIGHTNESS:
Adjust image brightness
MAIN:
Launch the main functions menu
Right click on this icon to show
information about the Ladibug™.
ZOOM:
Zoom in/out from the image
CAMERA SETTING:
Launch the Camera Setting window
to adjust live images. For detailed
operation instructions, please refer
to 5.2 Camera Settings.
ADVANCE:
Launch the advanced functions menu
FREEZE:
Freeze a live image
EXIT:
Close Ladibug™.
TIME LAPSE CAPTURE:
Capture images at a pre-set intervals
For detailed operation instructions,
please refer to 5.4 Time Lapse
RECORD VIDEO:
Record videos
CAPTURE STILL IMAGE:
Capture still images
5. Operation
5.1 Main Menu
6
Page 8

5.2 Camera Settings
Control the live image via the Camera Settings interface. The operating procedure is the same as
the remote control and control panel of the Document Camera. Refer to the Document Camera
user manual for more information.
<Note> The display of the button may vary depending on product functions.
An inactive button will grey out.
7
Page 9

33..
5.3 Options
1. Factory Reset: Activate the factory reset.
2. Video Compress Codec Format: Set the video format.
<Note> You need to enable the [Enable Video Compress]
Enable Audio Recorder: Enable the audio record device and set the audio source.
8
Page 10

5.4 Time Lapse
1. Select file directory to change the default.
2. Specify a file name.
3. Set the start time.
4. Capture images at a pre-set interval.
9
Page 11

6. Descriptions of Functions
6.1 Start the Document Camera
Click .
6.2 I would like to display a live image
Click to display the live image.
6.3 I would like to optimize the image
Click .
6.4 I would like to adjust the brightness
Click to show the brightness scroll.
Move upward to increase brightness, or downward to decrease brightness.
6.5 I would like to turn on/off the lamp
Click to turn on/off the lamp.
6.6 I would like to zoom in/zoom out
Click to display the image scrollbar.
Scroll up/down to enlarge/reduce the image.
Note: The DC120 function can be only used in Freeze mode.
6.7 I would like to capture images
<NOTE> You can click to change time lapse setting, more details please refer
to 5.4 Time Lapse.
10
Page 12

Click then a “Save As” window will be displayed.
Key in the file name then click [Save].
6.8 I would like to freeze the live image
Click to freeze the live image of Ladibug™.
6.9 I would like to record video
Click to open the video tool.
<NOTE> You can click to change video format and audio source
setting, more details please refer to 5.3 Options.
Click [Record] to start recording.
Click [Stop] to stop recording.
Click to close the record tool.
11
Page 13

7. Remove the LadibugTM program
1. Open the Command bar window.
2. Type the following command.
sudo dpkg – r ladibug
3. Enter your password.
8. Troubleshooting
8.1 Q: Black screen is displayed in live image after Ladibug™ was
re-installed.
Solution:
1. Remove the Ladibug™ then restart the computer.
2. Re-install the Ladibug™ .
8.2 Q: Ladibug™ cannot be activated.
Solution:
In case of incomplete installation, Ladibug™ may not be activated. Please follow these
steps to check and perform a re-installation.
1. Open a terminal window and type “ladibug” to check (the components not installed).
2. Activate the “Synaptic package manager” and install the components as shown in
step 1; or search and download required components from the Internet for installation.
12
 Loading...