

Page 1
Getting Started with Your Lumens Document Camera DC160
pg. 1
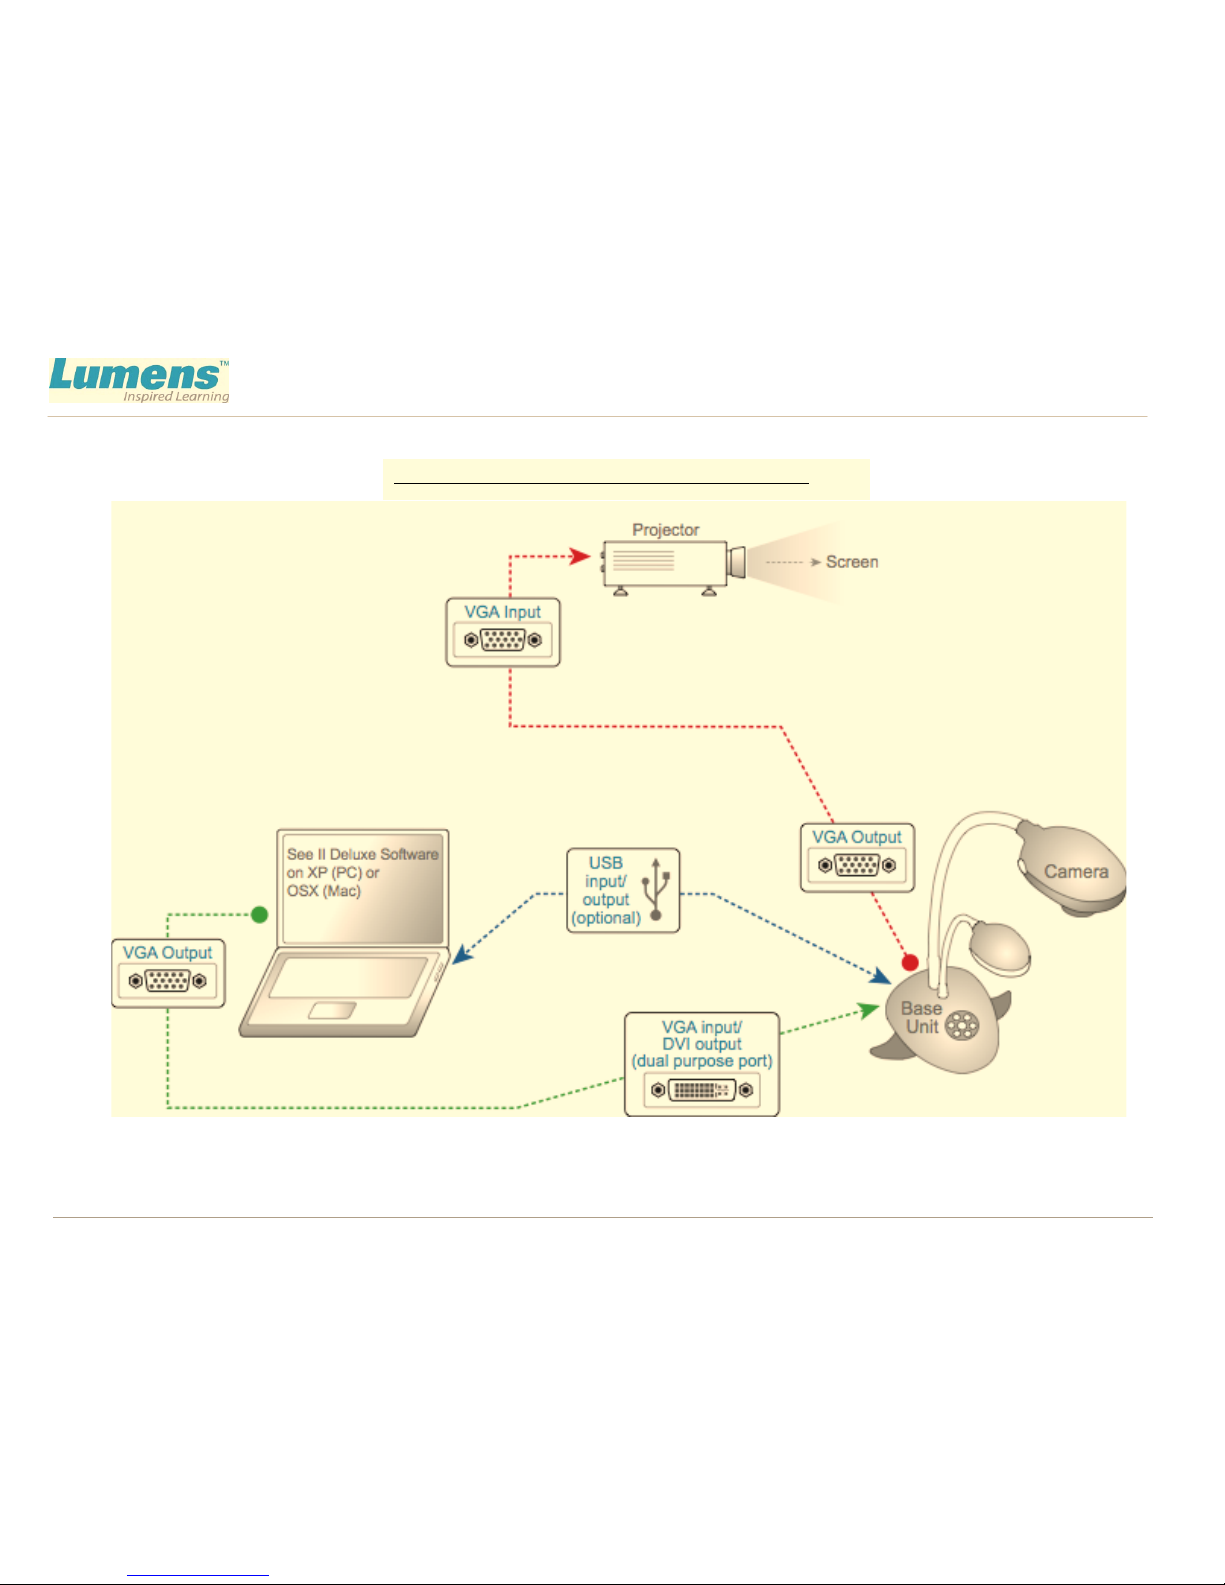
Overview of Connection Between Components
Getting Started with Your Lumens Document Camera
Page 2
Getting Started with Your Lumens Document Camera DC160
pg. 2
Getting Started with Your Lumens Document Camera
Document cameras are quickly becoming the most sought-after interactive learning tool for the classroom.
They are digital video cameras that are used in place of overhead projectors and allow you to project
documents, books, pictures, and three-dimensional objects. As you will see from this document, they are
simple to use.
Document cameras are also recognized as an output device, used to view and digitally capture objects as well
as record video. They are typically used with a projector, which is also an output device, that takes video in
(VGA in) and projects the images to a screen.
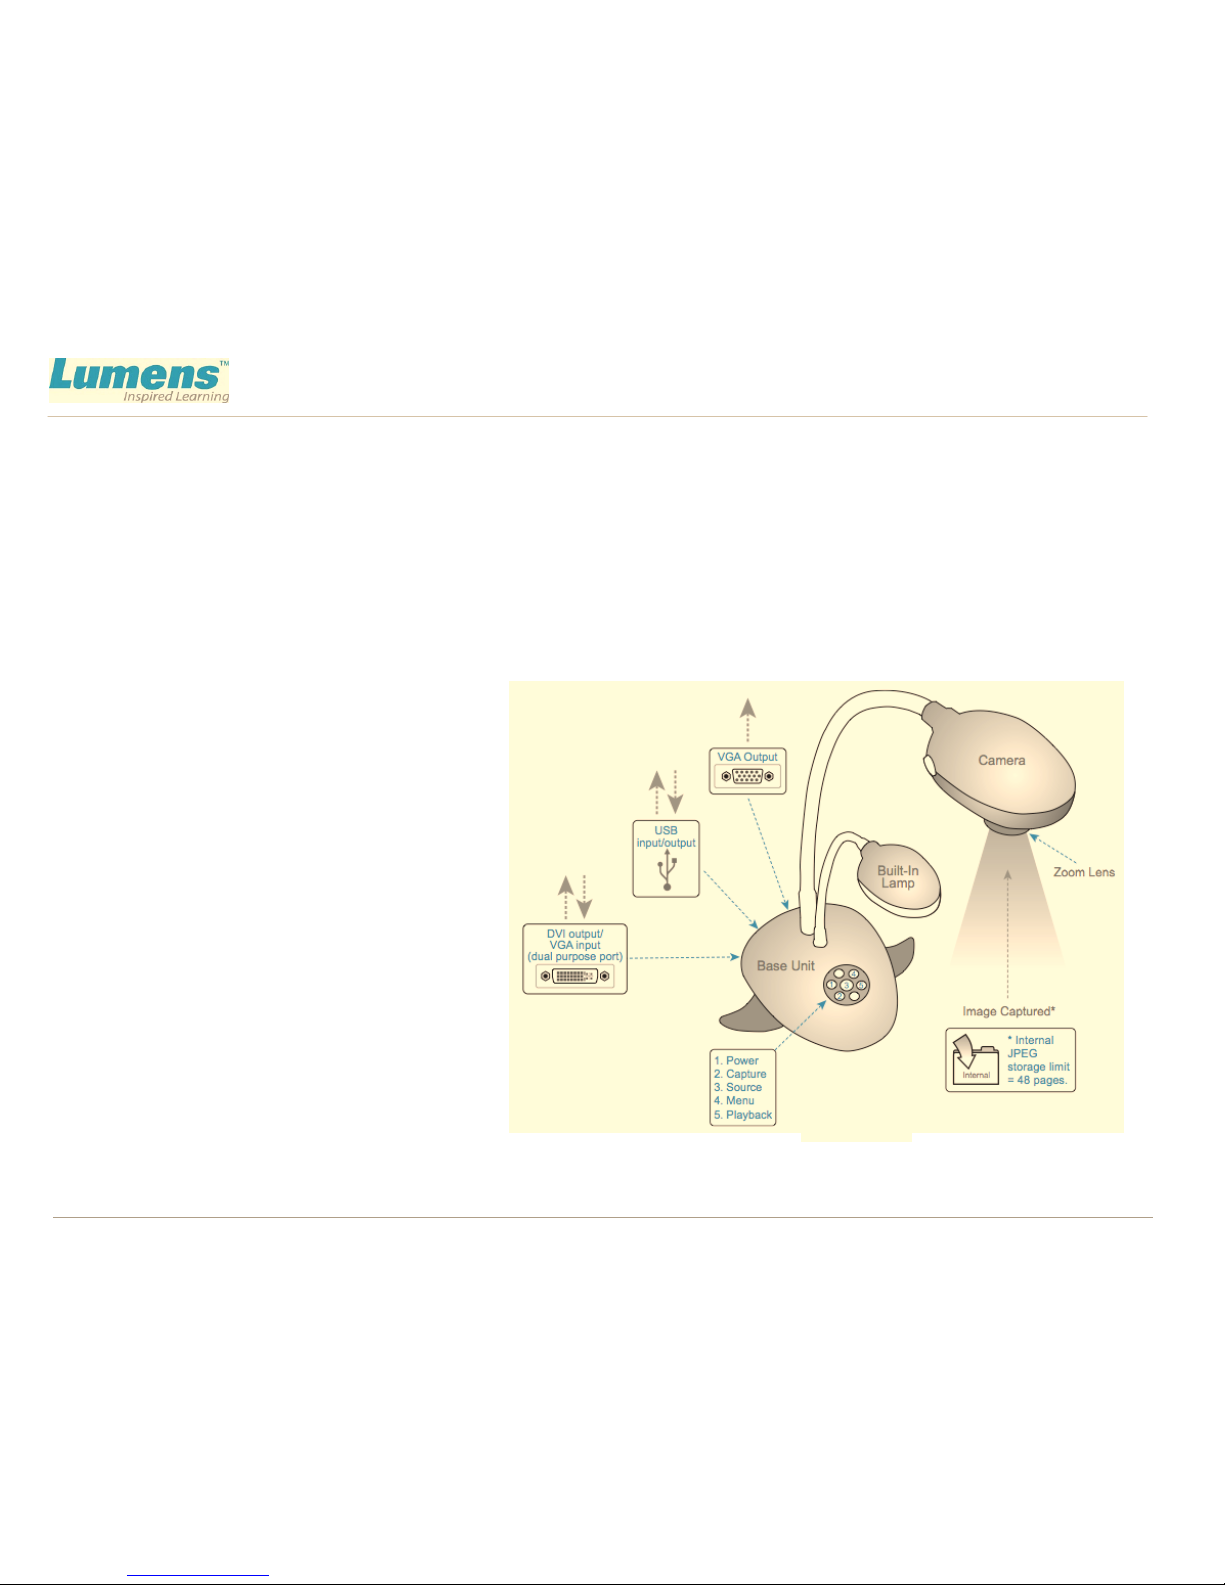
Camera Components and Functions
Document cameras consist of three basic
parts:
1) The camera head
2) The lamp(s), and
3) The base unit
The base unit is your gateway to
leveraging all that the camera can do.
The base unit enables several functional
operating options including:
A) video or VGA output to your
projector through the VGA port
B) DVI output to your projector if that
option is available on your particular
projector
C) video input from your computer via the DVI to VGA adapter (an optional item)
Image 1.0
B/C
D
F
2
3
E
Page 3

Getting Started with Your Lumens Document Camera DC160
pg. 3
D) a source button that switches your input source so you can toggle between the image from your
camera to an image on your computer, via VGA output that connects to your projector; playback capability so
you can view captured images in a slideshow format; forward and backward buttons on the base unit allow you
to control slideshow movement
E) image capture capability (in the case of the DC160, it captures 48 JPEG images)
F) USB port that acts as an input and output port, and, with a computer running Lumens’ See-II Deluxe software
enables
o Complete remote control capability of the document camera
o Remote capture of images from the document camera to a computer’s memory (note that there is no
limitation to how many images the camera can capture; capacity is based on amount of storage space
available on the PC)
o Transfer internally stored images from the base unit into the computer
Connecting Your Document Camera with a Projector
1. Connect the VGA output port from the base unit (A on Image 1.0)
to the projector’s VGA input port (if the projector has a DVI input port,
you may want to use that instead of the VGA input port (E on Image 2.0).
2. Power up the base unit and the
projector. Check the projector source
selection to ensure it is set to the correct
port so that the camera image can be
displayed on the screen.
Image 2.0
E
Page 4

Getting Started with Your Lumens Document Camera DC160
pg. 4
3. You should be able to see your image on the screen. If not:
a. Press the source button on the projector and cycle through its available input options. If your
image is still undetected, power down the base unit and make sure the dip switch on the bottom of
the unit is set to RGB. Power up the base unit and try again.
How to Capture Images to Your Document Camera
1. The DC160 document camera has the ability to internally capture 48 JPEG images. Simply press the
capture button (D on Image 1.0) and watch the top left corner of the screen for “Processing” to indicate
that the current image is being saved into the document camera’s internal memory.
2. Press the Play button (D on Image 1.0) to display thumbnails of all the stored images.
3. Select the one you wish to display and press Enter. You can use the forward and backward arrow keys to
advance or back up to the appropriate images.
4.
Press the menu button (D on Image 1.0) twice to return to the current live image from the document
camera.
 Loading...