

Page 1
English - 1
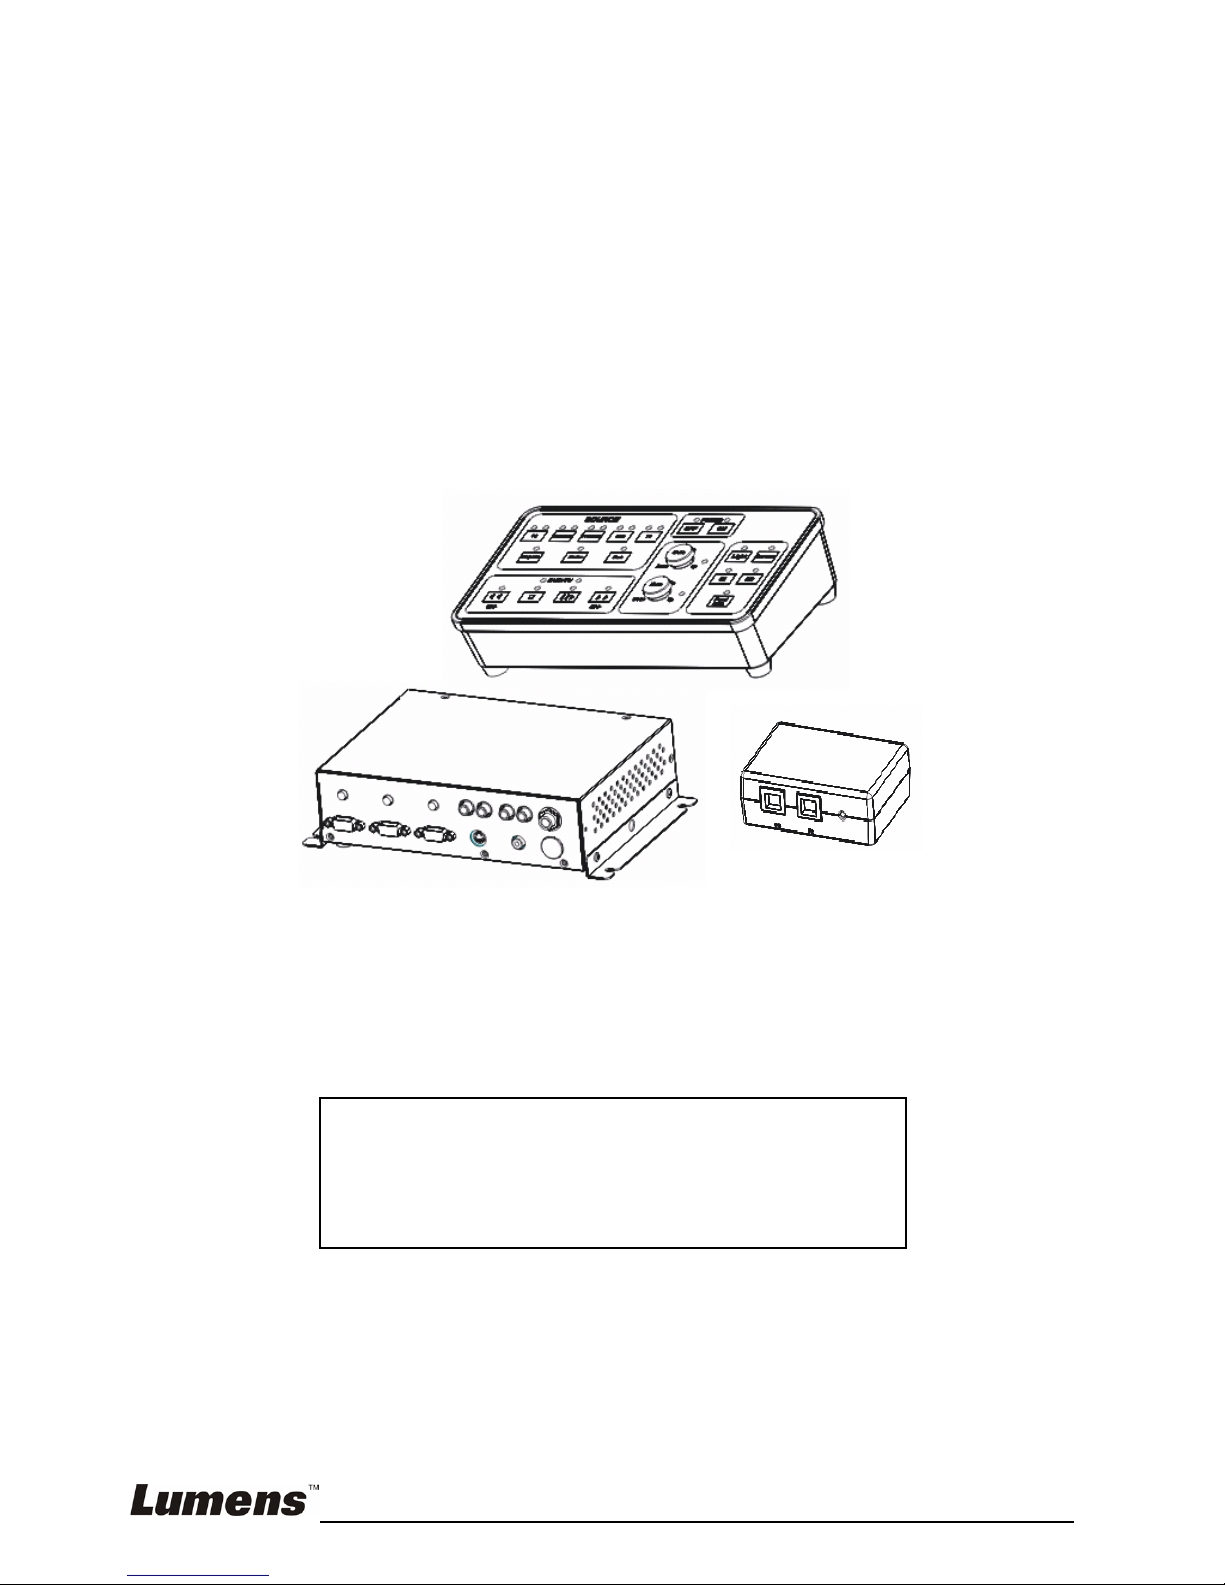
CS501 Control Switcher
Installation Manual
[Important]
To download quick start guide, multilingual
manuals, software, and drivers, please visit
Lumens web site at
http://www.lumens.com.tw/goto.htm
Page 2

English - 2
Contents
1. Safety Precautions ......................................................................................... 3
2. Package Content ............................................................................................ 4
3. Product Introduction...................................................................................... 5
3.1. CS501 Product Overview ....................................................................... 5
3.2. CS501 Connecting Peripherals .............................................................. 5
4. System Diagram ............................................................................................. 6
4.1. CS501 Diagram ...................................................................................... 6
4.2. CS501C Diagram.................................................................................... 6
4.3. CS501M Diagram ................................................................................... 7
5. CS501 locking method................................................................................... 8
5.1. Locking of CS501M ................................................................................ 8
5.2. Locking of CS501C................................................................................. 8
6. Installation and Usage of the Software ........................................................ 9
6.1. System requirements.............................................................................. 9
6.2. Installation Steps..................................................................................... 9
6.3. Step 1 Select automatic setting or manual setting ...............................10
6.4. Step 2 Set up the control modes of the devices ................................... 11
6.5. Step 3 Set up the Video/Audio of the devices ...................................... 17
6.6. Step 4 Set up the password.................................................................. 18
6.7. Step 5 Set up the devices that should be turned on/off when power
on/off..................................................................................................... 18
6.8. Step 6 Load the set parameters ...........................................................19
6.9. Step 7 Control devices with the control panel ......................................20
7. LED Light Indications .................................................................................. 21
8. Troubleshooting ........................................................................................... 23
Page 3

English - 3
1. Safety Precautions
1. Do not place the product where the cord can be stepped on as this may
result in fraying or damage to the lead or the plug.
2. Use the type of power source indicated. If you are not sure of the type of
power available, consult your dealer or local electricity company for advice.
3. Always take the following precautions when handling the plug. Failure to do
so may result in sparks or fire:
Ensure the plug is free of dust before inserting it into a socket.
Ensure that the plug is inserted into the socket securely.
4. Do not overload wall sockets, extensions leads or multi-way plug boards as
this may cause fire or electric shock.
5. Do not block the slots and openings in the case. They provide ventilation and
prevent the machine from overheating.
FCC Warning
This equipment has been tested and found to comply with the limits for a Class A
or B digital device, pursuant to Part 15 of FCC Rules. These limits are designed to
provide reasonable protection against harmful interference in a residential
installation.
EN55022 (CE Radiation) Warning
This product is intended for use in a commercial, industrial, or educational
environment. It is not intended for residential use.
This is a Class A product. In a domestic environment it may cause radio
interference, in which case the user may be required to take adequate measures.
The typical use is in a conference room, meeting room or auditorium.
Page 4
English - 4
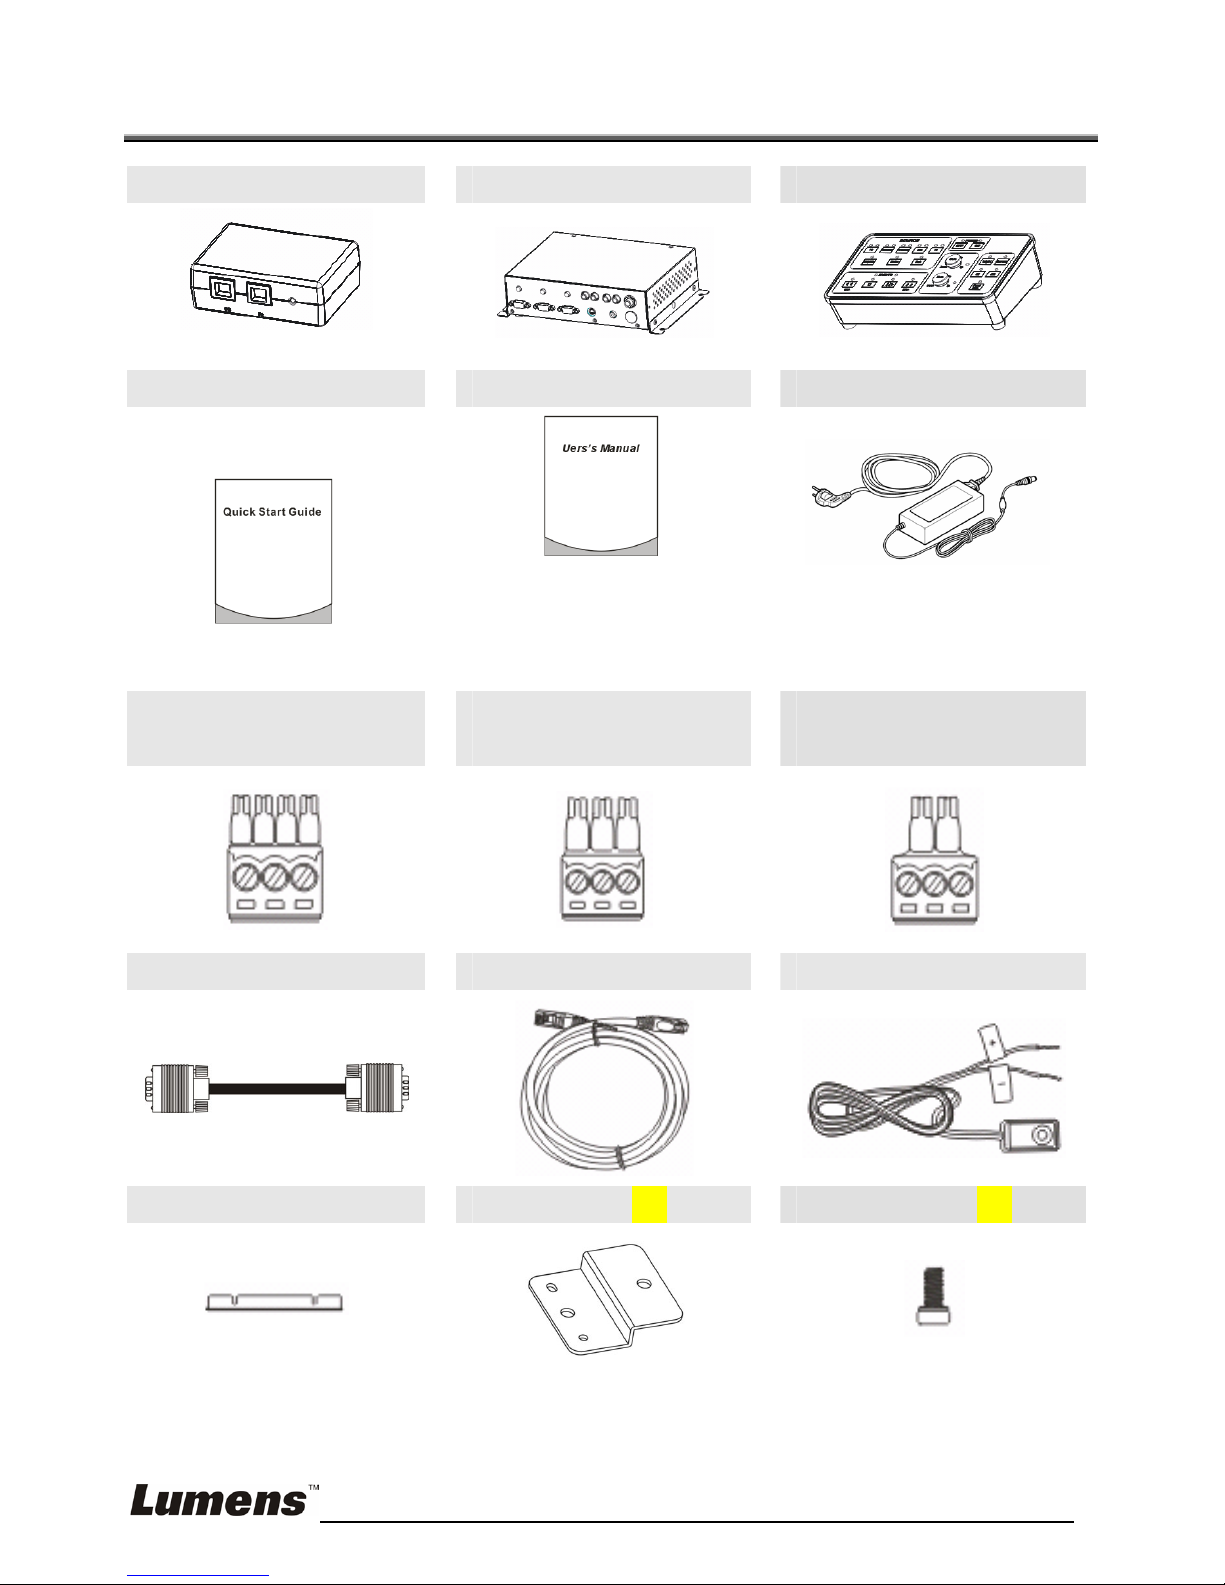
2. Package Content
CS501C x1 CS501M x1 CS501P x1
Quick Start Guide x 1
User Manual x 1
Power Cord x 1
(For download of other
language versions, please
visit Lumens website)
Appearance may vary with
country/region
4-PIN European
terminal x3
3- PIN European
terminal x2
2- PIN European
terminal x 2
VGA Cable x 1 Ethernet cable x 1
IR wire x 2
Bracket x 2 Bracket x2 M3 screw x 6
Page 5
English - 5
3. Product Introduction
3.1. CS501 Product Overview
¾ CS501P: Control Panel
¾ CS501M: Main box
¾ CS501C: Converter
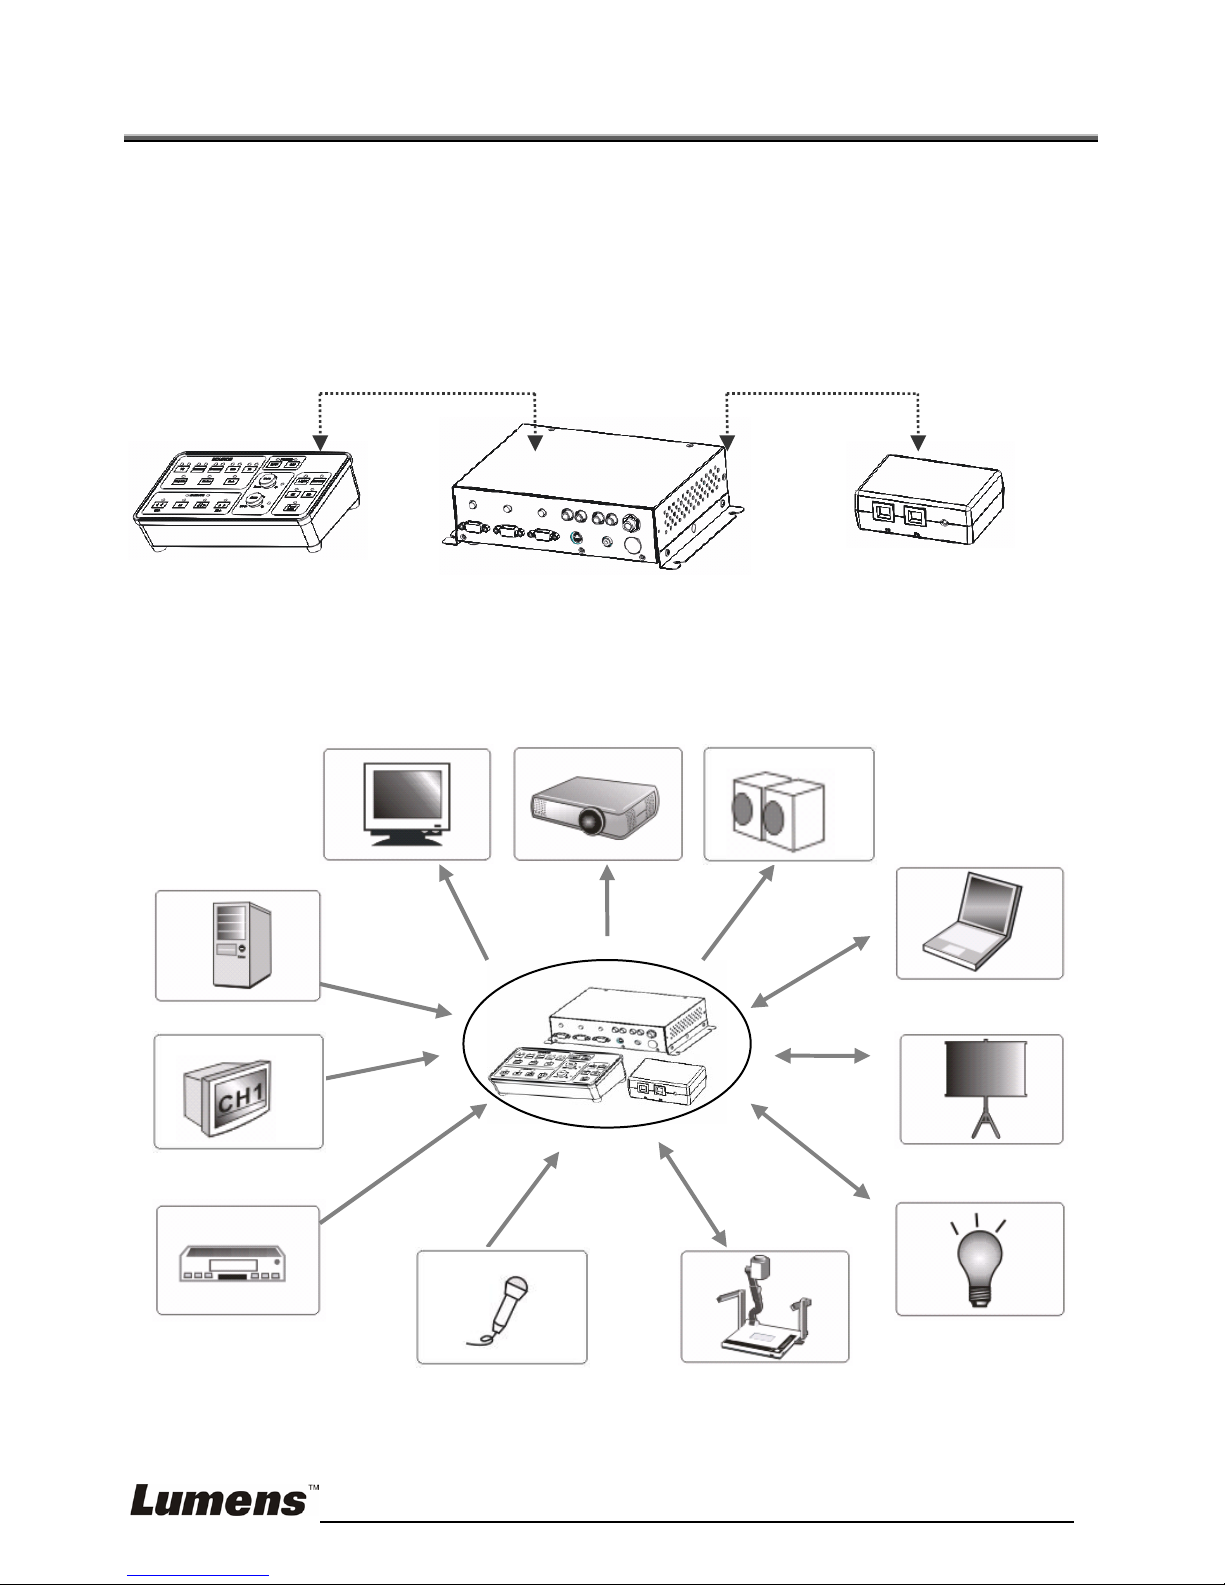
3.2. CS501 Connecting Peripherals
CS501CCS501M CS501P
Monitor
Pro
j
ecto
r
Projection
screen
Light
DVD
Visual Presenter
Notebook
PC
CATV
Speaker
Microphone
Page 6
English - 6
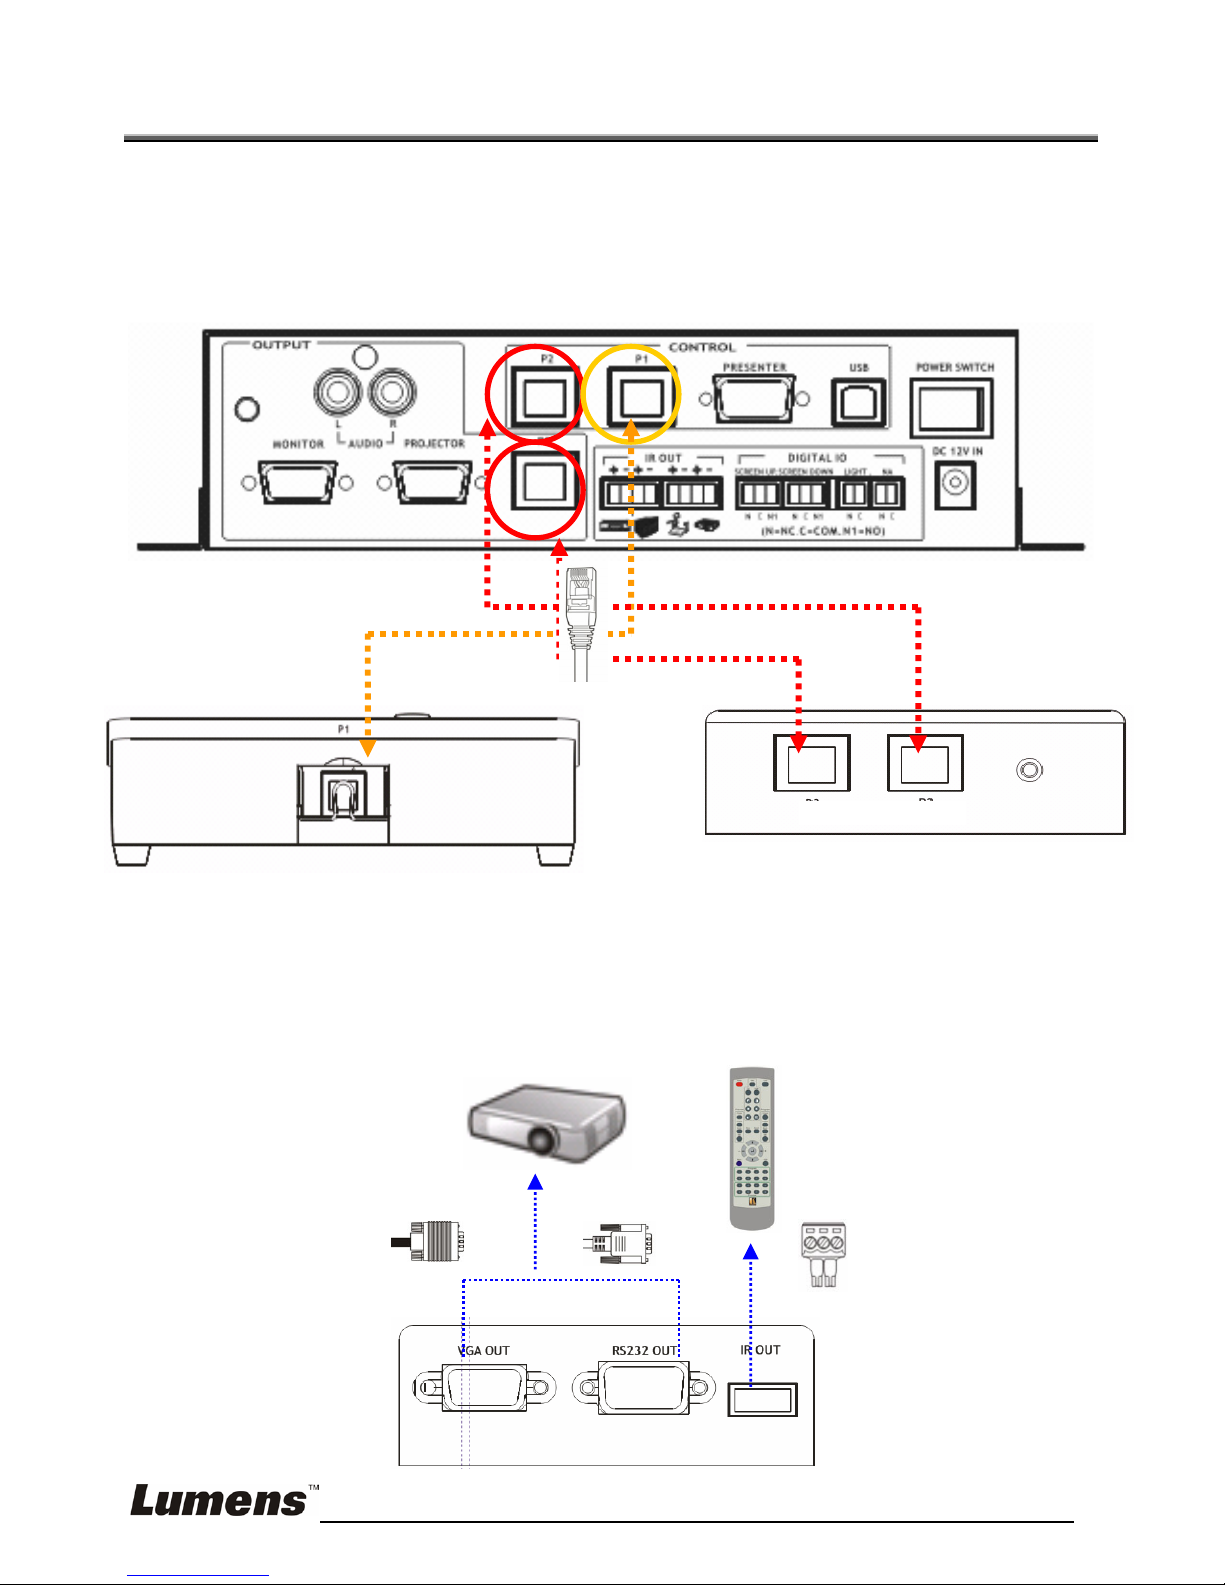
4. System Diagram
4.1. CS501 Diagram
4.2. CS501C Diagram
<Note> If the cable length is longer than 25m, it is recommended to use
CS501C.
CS501M
CS501C
CS501P
P2
P1
P3
P1
P3 P2
Page 7

English - 7
4.3. CS501M Diagram
<Remark> The “+” connector of [IR OUT] shall be connected to “+” of
the IR wire
PC
Notebook
Visual
Presenter
Microphone
DVD or
DVD or
CATV CATV
Monitor
Projector
Speaker
Screen
Up
Light
Screen
Down
Remote
Control
Notebook
Visual
Presenter
Page 8

English - 8
5. CS501 locking method
5.1. Locking of CS501M
z Use accessories such as the stand and M3 screws to install the stand, as
shown on the left in the figure below.
z Lock CS501M to the table surface using M4 screws (tooth=0.7 P, length>
4 mm), as shown on the right in the figure below.
5.2. Locking of CS501P
z Use accessories such as the stand and M3 screws to install the stand, as
shown on the left in the figure below.
z Lock CS501M to the table surface using M4 screws (tooth=0.7 P, length>
4 mm), as shown on the right in the figure below.
5.3. Locking of CS501C
z Mount CS501C on a flat surface using cable tie, as shown in the figure
below
Page 9

English - 9
6. Installation and Usage of the Software
After installing the USB driver and Control Manager application, you can use
the following functions via the software:
¾ Remote learning: Control the projector, visual presenter, DVD player,
CATV
¾ RS232 setting: Control the projector, visual presenter
¾ Video and sound effect setting:Adjust DVD and CATV
¾ Setting the password
¾ Setting of integrated ON/OFF commands
¾ Setting parameters archive
6.1. System requirements
¾ Operating System: Windows XP SP2 32 bits, Windows Vista 32/64 bits
¾ CPU: Intel and AMD CPU 1 GHz above
¾ RAM: 512MB
¾ Free disk space: 50 MB
¾ Resolution: XGA (1024 x 768)
6.2. Installation Steps
6.2.1. Please download the driver and the software at the following URL:
(http://www.lumens.com.tw/goto.htm)
6.2.2. Execute the setup file of the drive program with USB unconnected
6.2.3. Refer to Chapter 4 Installation and Connections
for USB connection
6.2.4. Click [setup.exe] to install the software and follow the instructions on
screen
Page 10

English - 10
6.2.5. Verifying the installation is completed
¾ Right-click on My Computer and select [Content] / [Hardware] /
[Device Administrator]
¾ Find Control Manager on the desktop of the computer
6.3. Step 1 Select automatic setting or manual setting
[Custom] is for manual setting and [Auto Run] is for automatic setting; [Auto
Run] is recommended for first-time operation
Page 11

English - 11
6.4. Step 2 Set up the control modes of the devices
6.4.1. Setting up the control mode of the PROJECTOR: Click the
[PROJECTOR] button
¾ RS232 setting
1. Click [Select Projector] and the projector information will be
displayed on this page after selecting the built-in file
<Note> If there are no Blank on/off (Hex) data in the loaded
information, please input the values by yourself. The values
may be found in the user manual of the projector.
2. [Time Delay]: Set up the delay time for every unit in all control
commands
3. Click [OK] to save and close this window.
Page 12

English - 12
¾ Set up the remote learning: Click [IR]
1. Take the remote and point it at the IR receiver
2. Click [OFF] on the screen, and press down [Power Off] on the
remote when the text prompts.
3. Click [ON] on the screen, and press down [Power ON] on the
remote when the text prompts.
<Note> If the button on the remote is not pressed down or released
within the limited time when the text prompts, the prompt window
of learning failure will pop-up.
¾ To change the IR sending settings, please click [IR Setting]
1. Select the button to be set up
2. Set up the key press times
3. Set up the key press time
4. Set up the time delay
5. Click [OK]
<Note> The key press times and the time delay are only applicable
to the setting of Power off
X
Y
Z
[
\
Page 13

English - 13
¾ Click [Finish] after completion
¾ Improving the image quality: Please click [Image Equalizer]
1. Click [OK] to finish after adjusting the relevant values
6.4.2. Setting up the control mode of the PRESENTER: Click the
[PRESENTER] button
¾ RS232 setting
1. Click [Select Presenter] and the information of the visual
presenter will be displayed on this page after selecting the
built-in file
Page 14

English - 14
2. Set up the remote learning: Click [IR], please refer to 6.4.1 Set up
the remote learning for operation
3. Click [OK] to save and close this window after completion
6.4.3. Setting up the control mode of the DVD: Click the [DVD] button
¾ Set up the remote learning
1. Select the input connection as [S-Video] or [C-Video]
2. Take the remote and point it at the IR receiver and click the [ON]
button on the screen. Press down [Power On] on the remote
when the text prompts
3. Take the remote and point it at the IR receiver and click the [OFF]
button on the screen. Press down [Power Off] on the remote
when the text prompts
4. Take the remote and point it at the IR receiver and click the
[>>]/[<<]/[>>| ]/[ |<<]/[]/ [¾]/[||] button on the screen. Press
down [>>]/[<<]/[>>| ]/[ |<<]/[]/ [¾]/[||] on the remote when the
text prompts
<Note> If the button on the remote is not pressed down or released
within the limited time when the text prompts, the prompt window
of learning failure will pop-up.
Page 15

English - 15
¾ To change the IR sending settings, please click [IR Setting] and
refer to 6.4.1 To change the IR sending settings
for operation
¾ Click [Finish] after completion
6.4.4. Setting up the control mode of the CATV/AUX: Click the [CATV/AUX]
button
¾ Set up the remote learning
1. Select the input connection as [S-Video] or [C-Video]
2. Take the remote and point it at the IR receiver and click the [ON]
button on the screen. Press down [Power On] on the remote
when the text prompts
3. Take the remote and point it at the IR receiver and click the [OFF]
button on the screen. Press down [Power Off] on the remote
when the text prompts
4. Take the remote and point it at the IR receiver and click the [CH-]
button on the screen. Press down [CH-] on the remote when the
text prompts
5. Take the remote and point it at the IR receiver and click the [CH+]
button on the screen. Press down [CH+] on the remote when the
text prompts
X
Y Z
[
Page 16

English - 16
¾ To change the IR sending settings, please click [IR Setting] and
refer to 6.4.1 To change the IR sending settings
for operation
¾ Click [Finish] after completion
X
Y Z
[
\
Page 17

English - 17
6.5. Step 3 Set up the Video/Audio of the devices
<Note> The button can only be used after the device is properly
connected. Click [Refresh] to refresh the connection status of the
device
6.5.1. Enter the Video/Audio setting window: Click the [PC] / [NOTEBOOK] /
[PRESENTER] / [DVD] / [CATV/AUX] buttons. As illustrated in the
following figure, adjust the [Audio] / [Brightness] / [Contrast] / [DVD] /
[CATV/AUX] values and then click [OK]. To resume the default values,
click [Reset].
Page 18

English - 18
6.6. Step 4 Set up the password
1. Check [Enable password]
2. Click the button on the screen and input the password in the [Key in
Password] field. The password should be four digits.
3. Input the same password again in the [Confirm Password] field
4. Click [OK] to save the settings
5. Click [Next] to enter the next step
6.7. Step 5 Set up the devices that should be turned on/off when
power on/off
<Remark> The “Control Setting” should be finished first for
PROJECTOR, PRESENTER, DVD, CATV/AUX
1. Check the devices to be turned on/off at the same time
2. Click [Save] to save the set parameters (including the previous pages)
into the computer
3. Click [Program] to write the set parameters (including the previous pages)
into CS501M
Page 19

English - 19
6.8. Step 6 Load the set parameters
Load all the parameters set in Control Manager previously into the software
1. In the main screen, select the [Custom] button and then click the
Machine Program page
2. Click [Load from PC]: Load the file from the PC with the file name
xxxx.cs
3. Press [Import from CS501M]: Import set values from CS501M. AP will
be updated according to these values simultaneously.
Page 20

English - 20
6.9. Step 7 Control devices with the control panel
The functions are equivalent to the buttons on CS501P. Please refer to
Instructions to Control Panel
of CS501 Quick Start Guide
Page 21

English - 21
7. LED Light Indications
<Note> The below functions are listed alphabetically
# LED Light State
Description
Actions
1
POWER ON: Light-on
Stand-by NA
2
¾ POWER
ON/PC/PROJECTOR/MONITOR:
Light-on
¾ LIGHT ON/OFF/PROJECTOR
ON/OFF: Light-on if [Macro
command] is checked in the
software
Power on
successfully
NA
3
¾ LIGHT ON/OFF/PROJECTOR
ON/OFF/SCREEN UP/SCREEN
DOWN: Flash once a second
¾ POWER ON: Light-on
Password
should be
entered after
Power On
Key in the
password
4
POWER ON: Flash once a second
Password
correct
NA
5
¾ POWER ON/LIGHT
ON/OFF/PROJECTOR ON/OFF/
SCREEN UP/SCREEN DOWN:
Flash once every 0.5 second and
return to state #3 after 3 seconds
¾ POWER ON: Light-on and return to
state #3 after 3 seconds
Password
incorrect
Click to
[POWER OFF]
to power off
6
PANEL LOCK: Flash once a second
and light-on after 3 seconds
The buttons on
the panel have
been locked
NA
Page 22

English - 22
7
PANEL LOCK: Flash once a second
and light-off after 3 seconds
The buttons on
the panel have
been unlocked
NA
8
PANEL LOCK: Flash once a second
RS232 cannot
communicate
with CS501M
Please remove
the USB cable
on the
CS501M.
Contact the
distributor if the
above problem
still exists after
removing the
USB cable
9
LIGHT ON/OFF: Light-on
Turn on/off the
light
NA
10
PROJECTOR ON/OFF: Light-on
Turn on/off the
Projector
NA
11
SCREEN UP: Light-on
Screen Up NA
12
SCREEN DOWN: Light-on
Screen Down NA
13
BLANK: Light-on
Projecting
screen, switch
to black screen
14
AUDIO MUTE: Light-on
Mute NA
Page 23

English - 23
8. Troubleshooting
This chapter describes problems you may encounter in usage. If you have
questions, please refer to related chapters and follow all the suggested solutions.
If the problem still occurred, please contact our distributors or service center.
NO Issues Solutions
1 The following figure appears in the software
1. Please check if
CS501M is turned on
2. Is the USB properly
connected?
3. Please re-start the
software
2 The device cannot be selected Please make sure the
device is properly
connected
3 The LED indicators are not on Please contact your
distributor
 Loading...