

Page 1

+
SAFETY AND OPERATING MANUAL
Pocket Hole Jig
PHJ95
ORIGINAL INSTRUCTIONS
PHJ95
Page 2

TABLE OF CONTENTS
Welcome to Lumberjack!
Dear customer, Congratulations on your purchase. Before using the
Product for the first time please be sure to read these instructions for use.
They provide you with all information necessary for using the product safely and to
ensure its long service life.
Closely observe all safety information in these instructions!
General Power Tool Safety Warnings………………………………….…......01
Symbols ……………………………….……….…………………………………….………02
Machine Details and Product features……….…………………………….….03
Assembly……………………………………………………………………………………..04
Uses…………………………………………………………………………………………….05
Maintenance and Service………………………………….…………………………06
Lumberjack Guarantee…………………………………………………………………07
PHJ95
Page 3

PHJ95 01
GENERAL POWER TOOL SAFETY WARNINGS
Read all safety warnings and all
instructions
– Failure to follow the warnings and
instructions may result in electric shock, fire
and/or serious injury.
1. Work Area Safety
1.1 Keep work area clean and well lit.
Cluttered or dark areas invite accidents.
1.2 Keep children and bystanders away
while operating this tool. Distractions can
cause you to lose control.
2. Personal Safety
2.1 Stay alert, watch what you are doing
and use common sense when operating
this tool. Do not use this tool while you
are tired or under the influence of
drugs, alcohol or medication. A moment
of inattention whilst operating this tool may
result in serious personal injury.
2.2 Use personal protective equipment
(PPE). Always wear eye protection.
Protective equipment such as dust masks, non‐
skid shoes, hard hats, or hearing protection
used for appropriate conditions will reduce the
risk of personal injuries.
2.3 Do not over-reach. Keep proper
footing and balance at all times. This
enables better control of any other tool used
with this tool in unexpected situations.
2.4 Dress properly. Do not wear loose
clothing or jewellery. Keep your hair,
clothing and gloves away from moving
parts. Loose clothes, jewellery or long hair
can be caught in moving parts.
2.5 If devices are provided for the
connection of dust extraction and
collection facilities, ensure these are
connected and properly used. Use of dust
collection can reduce dust‐related hazards.
3. Service
3.1 Have your tools serviced by a
qualified repair person using only
identical replacement parts. This will ensure
that the safety of the power tool is maintained.
4. Additional Safety and Working
Instructions
4.1 Dusts from materials such as lead‐
containing coatings, some wood types,
minerals and metals can be harmful to
one’s health and cause allergic reactions,
leading to respiratory infections and/or
cancer.
Materials containing asbestos may only be
worked by specialists. Observe the relevant
regulations in your country for the materials to
be worked.
4.2 Prevent dust accumulation at the
workplace. Dusts can easily ignite.
Page 4
SYMBOLS AND POWER RATING CHART
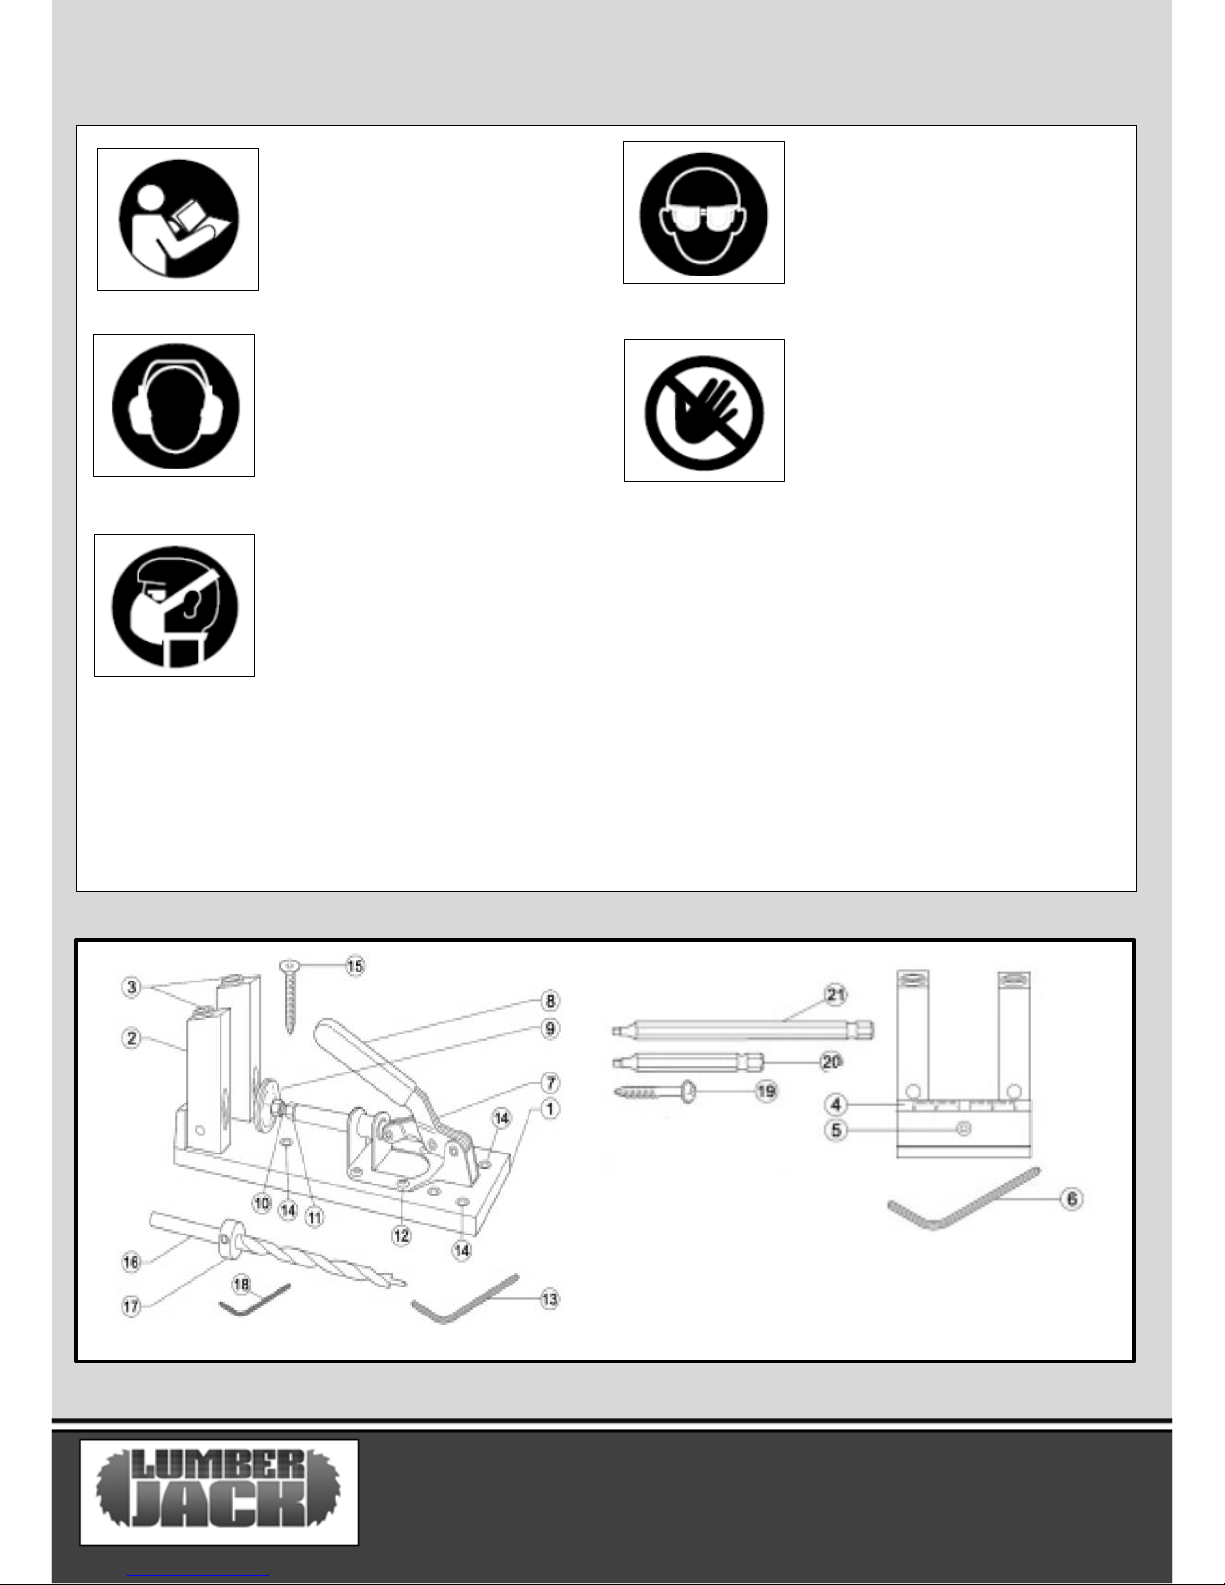
Danger! – Read the operating
instructions to reduce the risk of
injury.
Caution! Wear safety goggles.
Caution! Wear ear defenders. The
impact of noise can cause
damage to hearing.
Caution! Risk of Injury! Do
not reach into the running
saw blade.
Caution! Wear a dust mask.
PHJ95 06
PHJ95 02
Page 5
PHJ95 08
PHJ95 03
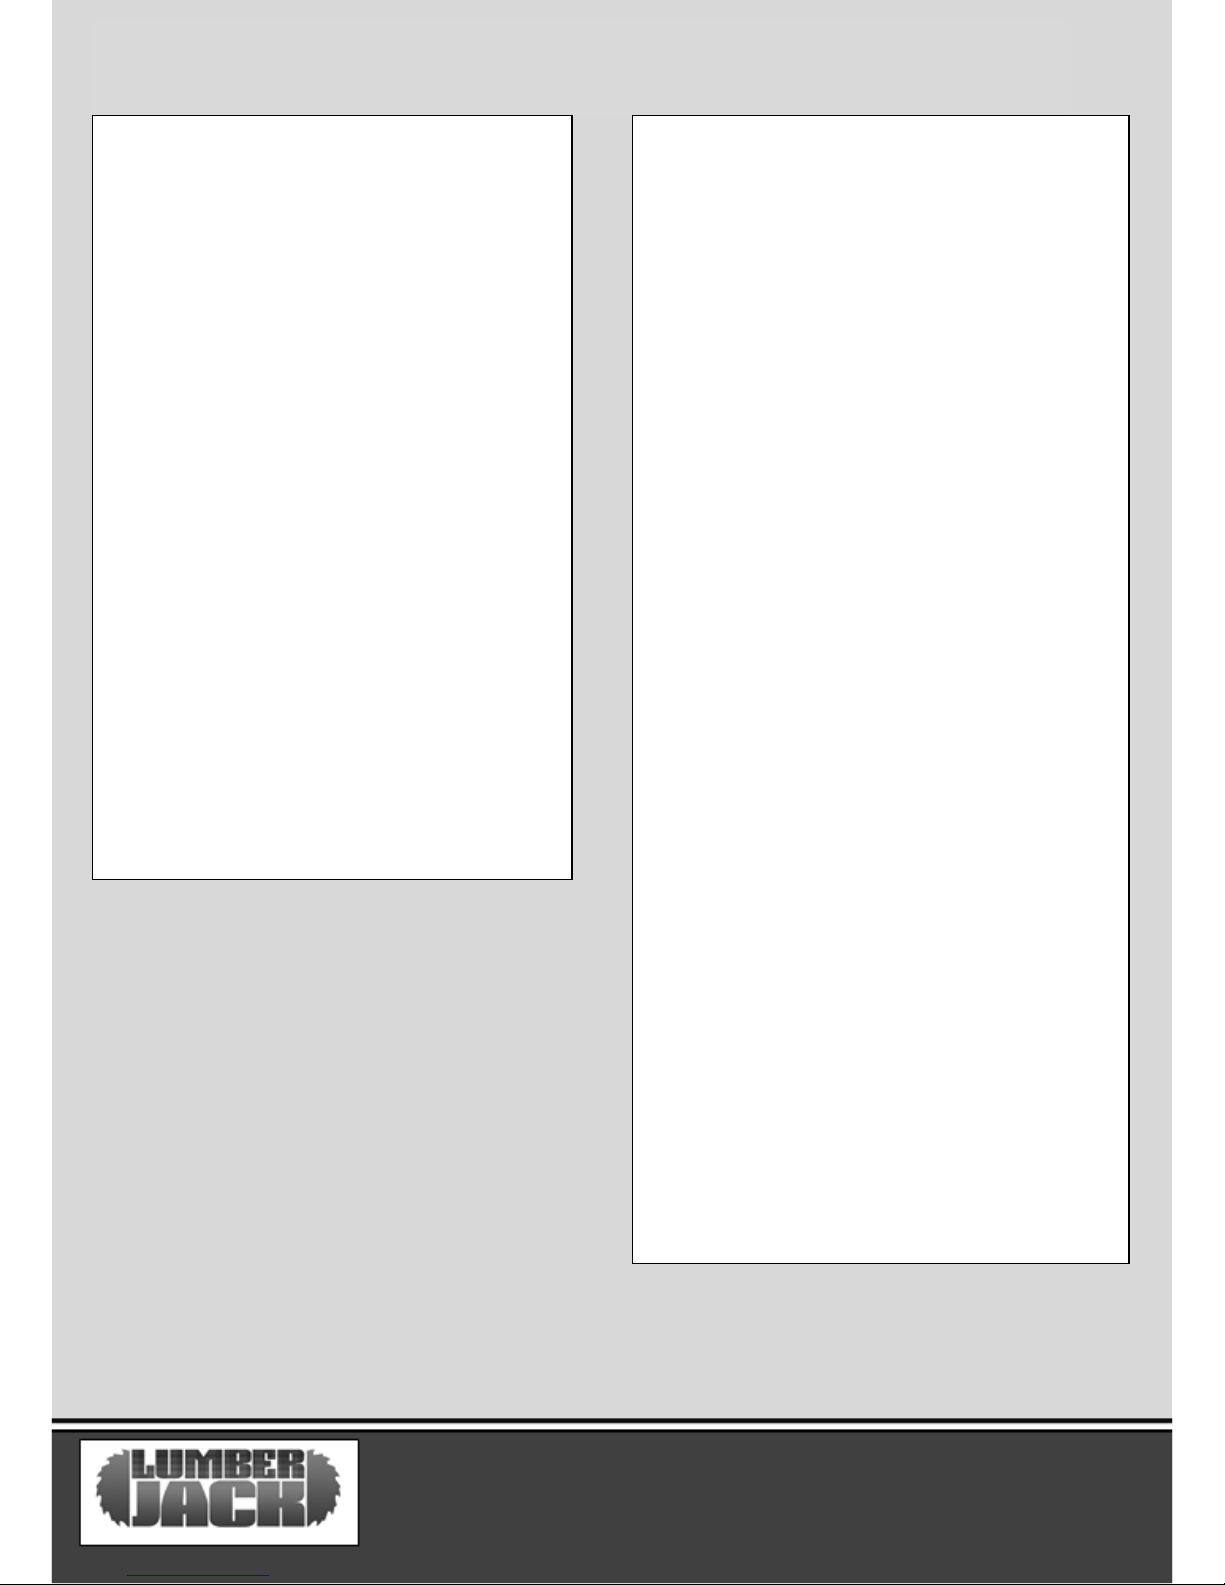
MACHINE DETAILS AND PRODUCT FEATURES
Machine Details
Specifications:
Max Thickness of Work piece ‐ 38mm
Min Thickness of Work piece ‐ 16mm
Min Width of Work Piece ‐ 38mm
Hole Pitch ‐ 29 – 63mm
Drill Diameter ‐ 9.5mm
Weight ‐ 3.2kg
Package Contents:
Pocket hole Jig
Face Clamp
Hex Key
9.5mm Drill Bit and Collar
2 x Square headed driver Bits
100 x Square Headed Screws
Product Features
1. Pocket hole jig body
2. Guide columns with solid hardened bushes
3. Solid bush drill guide hole
4. Guide column equidistant scale
5. Guide column adjustment screw
6. Guide column screw hex key 4mm
7. Clamp
8. Clamp handle
9. Clamping pad
10. Adjustable clamping pad stud
11. Adjustable clamping pad lock nut
12. Push‐pull securing machine screws
13. Push‐pull securing screw hex key
3mm A/F
14. Bench fixing holes
15. Bench fixing screws No. 8 x 25mm
16. Stepped drill
17. Stepped drill depth collar
18. Depth collar hex key 2.5mm A/F
19. Square drive self‐tapping screw No. 7 x 30mm
20. Short square drive bit No. 2 x75mm long
21. Long square drive bit No. 2 x150mm long
Intended Use
This accessory is to be used with a drill with
minimum 10mm chuck capacity to allow pocket
hole jointing of softwoods and hardwoods. It is
ideally suited for use with materials 19mm thick.
Page 6
PHJ95 04
ASSEMBLY
Avoid unintentional starting of the
machine. During assembly and for all
work on the machine, the power plug
must not be connected to the mains
supply.
Carefully remove all parts included in the
delivery from their packaging.
Remove all packaging material from the
machine and the accessories provided.
Before starting the operation of the machine
for the first time, check if all parts listed in the
box content section have been supplied.
Note: Check the tool for possible damage.
Before further use the machine, check that all
protective devices are fully function. Any
lightly damaged parts must be carefully
checked to ensure flawless operation of the
tool. All parts must be properly mounted and
all conditions fulfilled that ensure faultless
operation.
Damaged protective devices and parts must be
immediately replaced by an authorised service
centre.
The jig can be used both mounted and
unmounted though the most common way to
use the jig is mounted to a bench.
Mounting the Jig
– Mount jig to bench using mounting holes
(14).
– We also recommend mounting a piece of
wood either side of the jig (the same thickness
as the jig base), so that they support any work
piece from tilting and turning whilst you are
drilling.
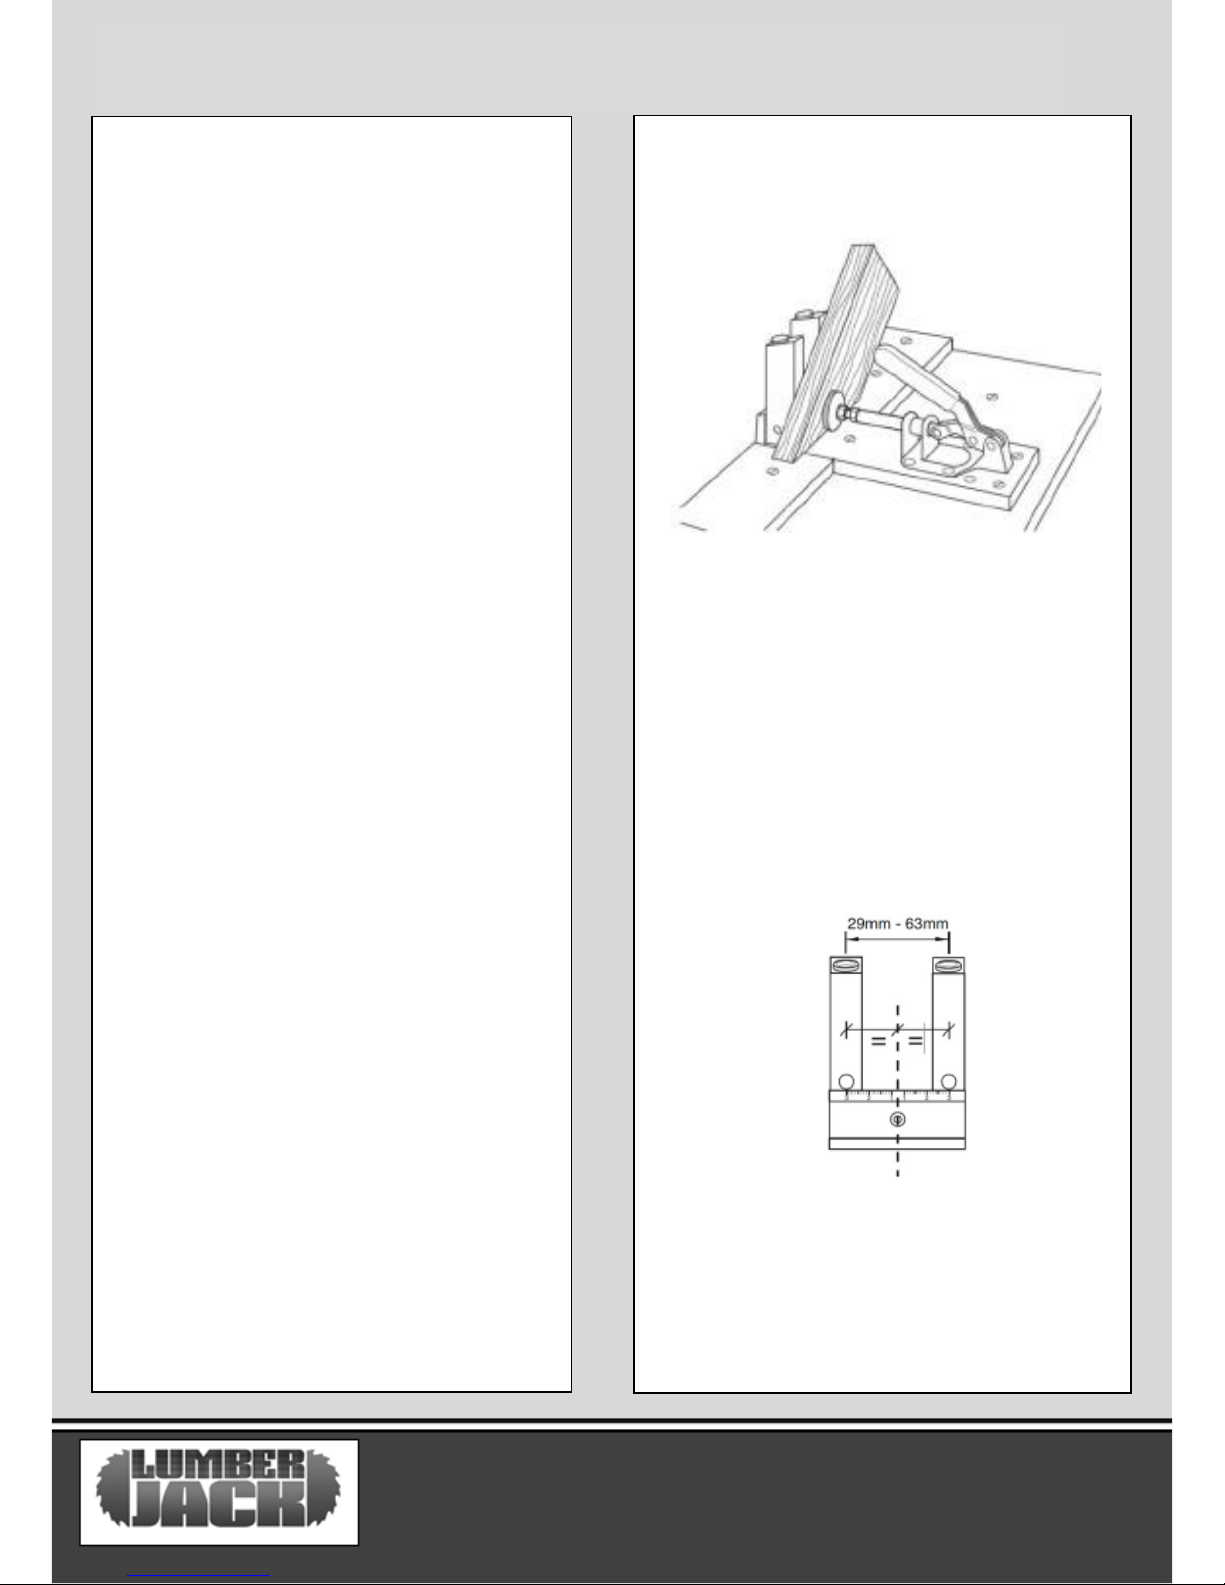
Setting the Pocket Holes
– The adjustable guides can be locked at various
positions allowing centres of 29mm to 63mm in
width.
– Once you have decided how far apart the hole
centres need to be, both drill columns can set
equidistant from the centre using the scale on
the jig and locked into position using the
supplied Allen key.
Page 7
PHJ95 05
USES
Setting the Clamp
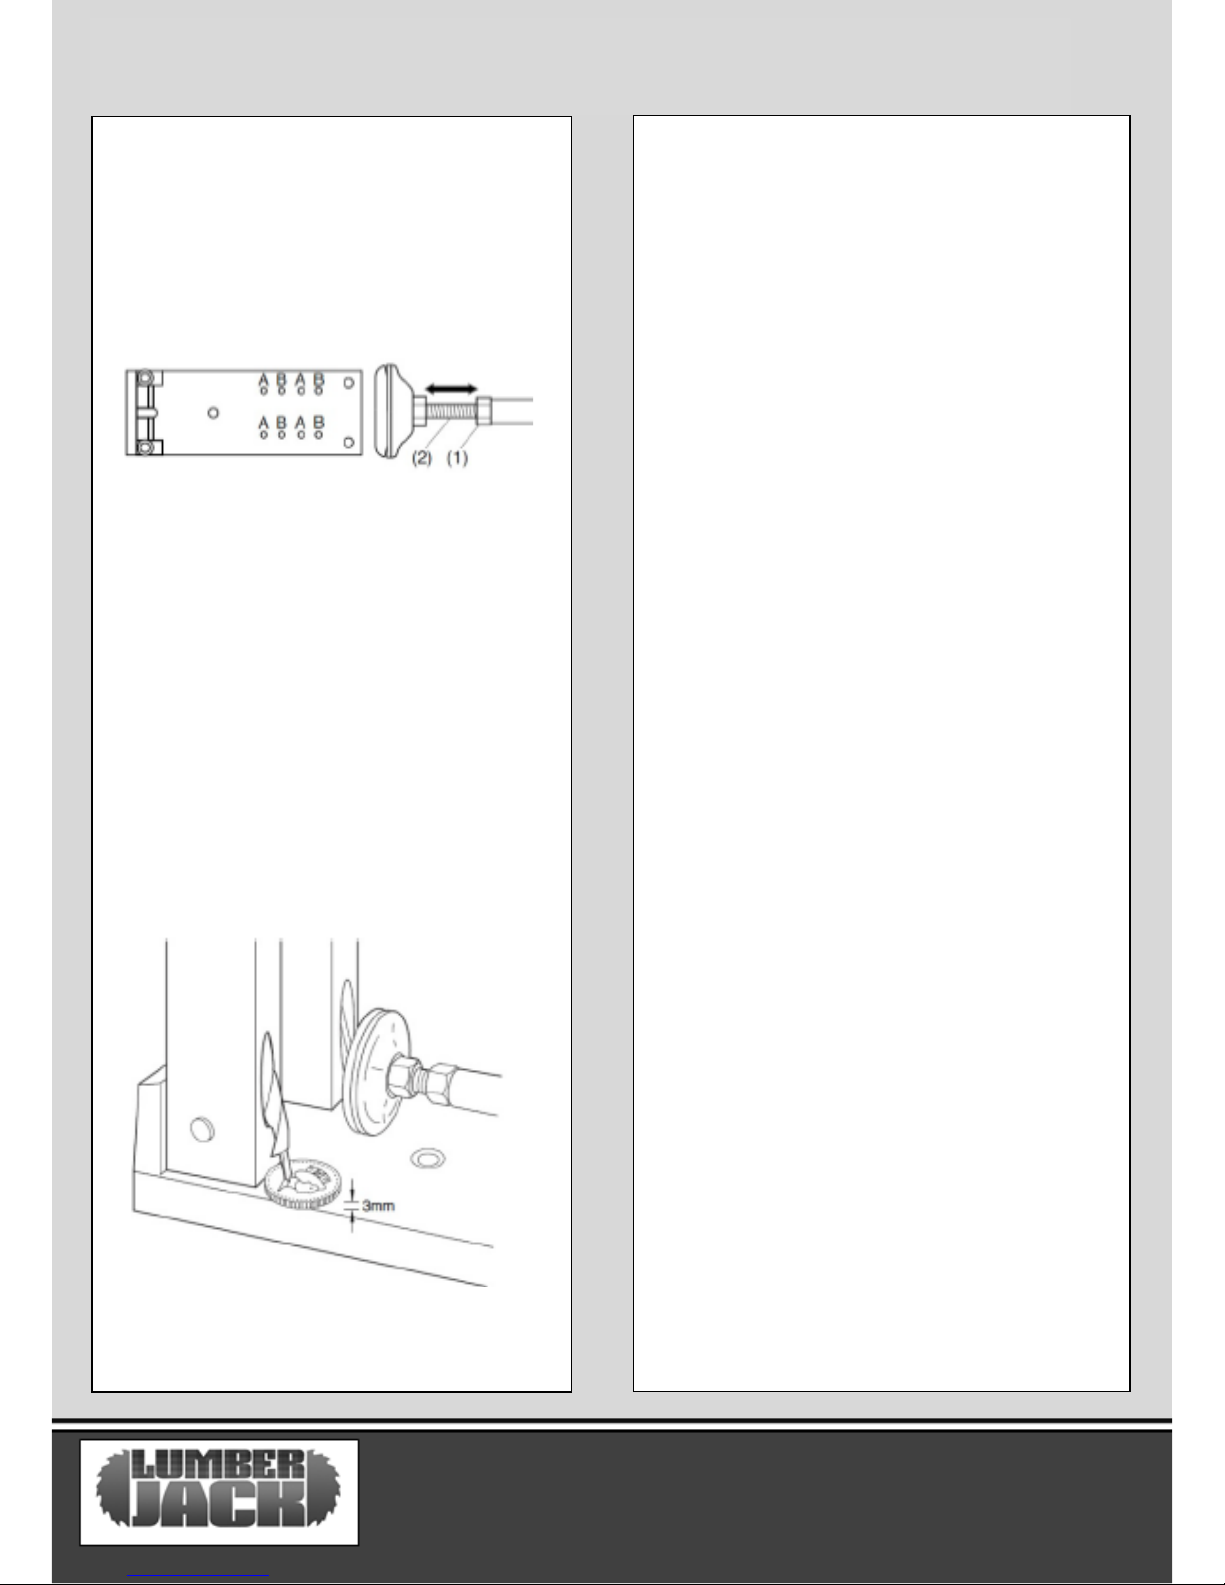
– The jig has two positions for the clamp to sit
in. Position A is for materials of thickness
16mm to 18mm, whereas as position B allows
materials of thickness 18mm to 38 mm be
clamped securely.
– Adjust the clamp to position A or B as
needed.
– Next adjust the clamp pad to hold the
material firmly whilst drilling. To do this loosen
nut (1) then screw clamp pad in or out as
required. When satisfied re‐tighten nut (1) to
secure the clamp pad into position.
Setting the Drilling Depth
– Insert the drill bit into the guide column.
– Position a 5p piece underneath the tip as
below.
– Now set the collar to the top of the column
and lock in place.
The drill bit is now set to give a 30mm screw,
approximately 15mm of screw depth into the
joining piece of wood. Please note that this is
only a start position from which to work. We
recommend trial joints to be made in scrap
wood to test the depth is correct.
Uses
Frame Corner Joints – faster and stronger
than dowel and biscuits.
Square Corner Joints – faster and stronger
than dowel and biscuits.
T‐ Joints – faster and stronger than dowel and
biscuits.
Mitred Frame Corner Joints – for narrow
frames a single pocket hole is necessary. Cut the
mitre and rout any rebates before boring the
pocket holes. For material less than 50mm wide
it may be necessary to tilt the pocket hole piece
so that the hole is not perpendicular to the
mitred edge.
Angled Joints – eliminates difficult clamping
up. The joint is created not by cutting each mitre
to half the angle but by cutting angle on one
jointing piece and drilling pocket holes into the
square piece. The method results in the mitred
edge having an overhang, which will need to be
removed by plane or sander.
Page 8
PHJ95 06
USES & MAINTENANCE AND SERVICE
Curved Joints – this uses the same
technique as the angled joint, but the angles
will be shallower (5° to 15°). The overhang will
need to be removed as previous.
Mitred Corner Joints – joining two pieces
with 45° mitres with the pocket jig is not
advisable, however a 90° change of direction
can be created by using a bevel‐jointing piece.
The joint comprises of a 90° infill piece with
45° mitres on both sides.
Edge to Edge Joints – allows narrow strips
to be jointed to create wider boards such as a
table top.
Edging of countertops or shelving – a
quick and easy way to join edging onto
plywood, MDF or particle board shelves.
Jig making – very useful for jig making and
temporary assembly operations. Ideal for
routing jigs.
Post and Rail Joints – pocket holes allow
strong table and chair joints. For fitting tabletops to rails, the rails will need to be pocket
hole drilled. To allow for the movement of the
timber as it expands and contracts the hole
must be slightly over size.
This is achieved by lifting the rail about 3mm
off the base of the jig. This should allow the
pilot tip of the drill to break through the end of
the timber, giving the screw space for some
movement. Alternatively move the rail
sideways slightly to drill another pocket hole
(interlocking) allowing a slot for the screw.
Framed Panel (Cabinet) Joints – pocket
holes can be used for almost all framed
cabinet carcass construction.
Maintenance and Service
– Before each use inspect the general
condition of the machine. Check for loose
screws, misalignment or binding of moving
parts, cracked or broken parts, and any other
condition that may affect its safe operation.
– Each day remove all sawdust and debris
from the jig with a soft brush, cloth or vacuum.
Do not use solvents or caustic agents to clean
the jig.
– Periodically lubricate the holes in the guide
columns with PTFE dry lubricant
Page 9
PHJ95 07
LUMBERJACK GUARANTEE
1. Guarantee
1.1 Lumberjack guarantees that for a
period of 12 months from the date of
purchase the components of
qualifying products (see clauses 1.2.1
to 1.2.8) will be free from defects
caused by faulty construction or
manufacture
1.2 During this period, Lumberjack, will
repair or replace free of charge any
parts which are proved to be faulty
in accordance with paragraph 1.1
providing that:
1.2.1 You follow the claims procedure
set out in clause 2.
1.2.2 Lumberjack and its Authorised
Dealers are given reasonable
opportunity after receiving notice
of the claim to examine the
product.
1.2.3 If asked to do so by lumberjack or
its Authorised Dealer, you return
the product at your own cost to
Lumberjack’s or the supplying
Authorised Dealer’s Premises -
For the examination to take place clearly
stating the Returns Material Authorisation
Number given.
1.2.4 The fault in question is not caused by
industrial use, accidental damage, fair wear
and tear, wilful damage, neglect, incorrect
electrical connection, misuse, alteration or
repair of the product without approval.
1.2.5 The product has been used in a
domestic environment only.
1.2.6 The fault does not relate to
consumable items such as blades, bearings,
drive belts or other wearing parts which
can reasonably be expected to wear at
different rates depending on usage.
1.2.7 The product has not been used for
hire purposes.
1.2.8 The product has been purchased by
you, as the guarantee is not transferable
from a private sale.
Page 10
PHJ95 11
LUMBERJACK GUARANTEE
2. Claims Procedure
2.1 In the first instance please contact the
Authorised Dealer who supplied the product to
you. In our experience many initial problems
with machines that are thought to be fault due
to faulty parts are actually solved by correct
setting up or adjustment of the machine. A good
Authorised Dealer should be able to resolve the
majority of these issues much more quickly than
processing a claim under the guarantee. If a
return is requested by the Authorised Dealer or
Lumberjack, you will be provided with a Returns
Material Authorisation Number which must be
clearly stated on the returned package, and any
accompanying correspondence. Failure to
provide a Returns Material Authorisation
Number may result in item being refused
delivery.
2.2 Any issues with the product resulting in a
potential claim under the guarantee must be
reported to the Authorised Dealer from which it
was purchased within 48 hours of receipt.
2.3 If the authorised Dealer who supplied the
product to you has been unable to satisfy your
query, any claims made under this guarantee
should be made directly to Lumberjack. The
claim itself should be made in a letter setting out
the date and place of purchase, giving a brief
explanation of the problem which has led to the
claim.
2.4 Please note that it is essential that the letter of
claim reaches Lumberjack on the last day of this
guarantee at the latest. Late claims will not be
considered.
3. Limitation of Liability.
3.1 We only supply products for domestic and
private use. You agree not to use the product for
any commercial, business or resale purposes and
we have no liability to you for any loss of profit,
loss of business, business interruption or loss of
business opportunity.
3.2 This guarantee does not confer any rights
other than these expressly set out above and does
not cover any claims for consequential loss or
damage. This guarantee is offered as an extra
benefit and does not affect your statutory rights
as a consumer.
4. Notice
This guarantee applies to all product purchased
from an Authorised Dealer of Lumberjack within
the United Kingdom. Terms of guarantee may vary
in other countries.
PHJ95 08
 Loading...