

Page 1

100 Series Mini Dome
960H Analog Surveillance Camera
with Microphone
Installation &
Operation
Manual
Page 2

2
Luma 100 Series Mini Dome Camera
Installation
Before you start, ensure that the device is in good
condition and all the assembly parts are included.
} Make sure that all equipment is powered off
during installation.
} Ensure the wall is strong enough to hold three
times the weight of the camera and the mount.
} If the mounting surface is cement, use the
included expansion screws to install the
camera. If mounting to a wood surface, use
self-tapping wood screws (not included) to
secure the camera.
} If the product does not function properly,
please contact technical support. Do
not disassemble the camera for repair or
maintenance.
Page 3

3
Luma 100 Series Mini Dome Camera
Box Contents
} Camera and mount
} Cover with dome
} Self-adhesive mounting template
} 2 x camera mount screws with anchors
} 4 x cover screws
} 3mm hex wrench
} Lens adjustment tool
Other Required Equipment
Aside from the contents of this box, you will need
} Phillips screwdriver
} Power source: 12V DC
} CC-TV tester (recommended)
Page 4
4
Luma 100 Series Mini Dome Camera
Overview
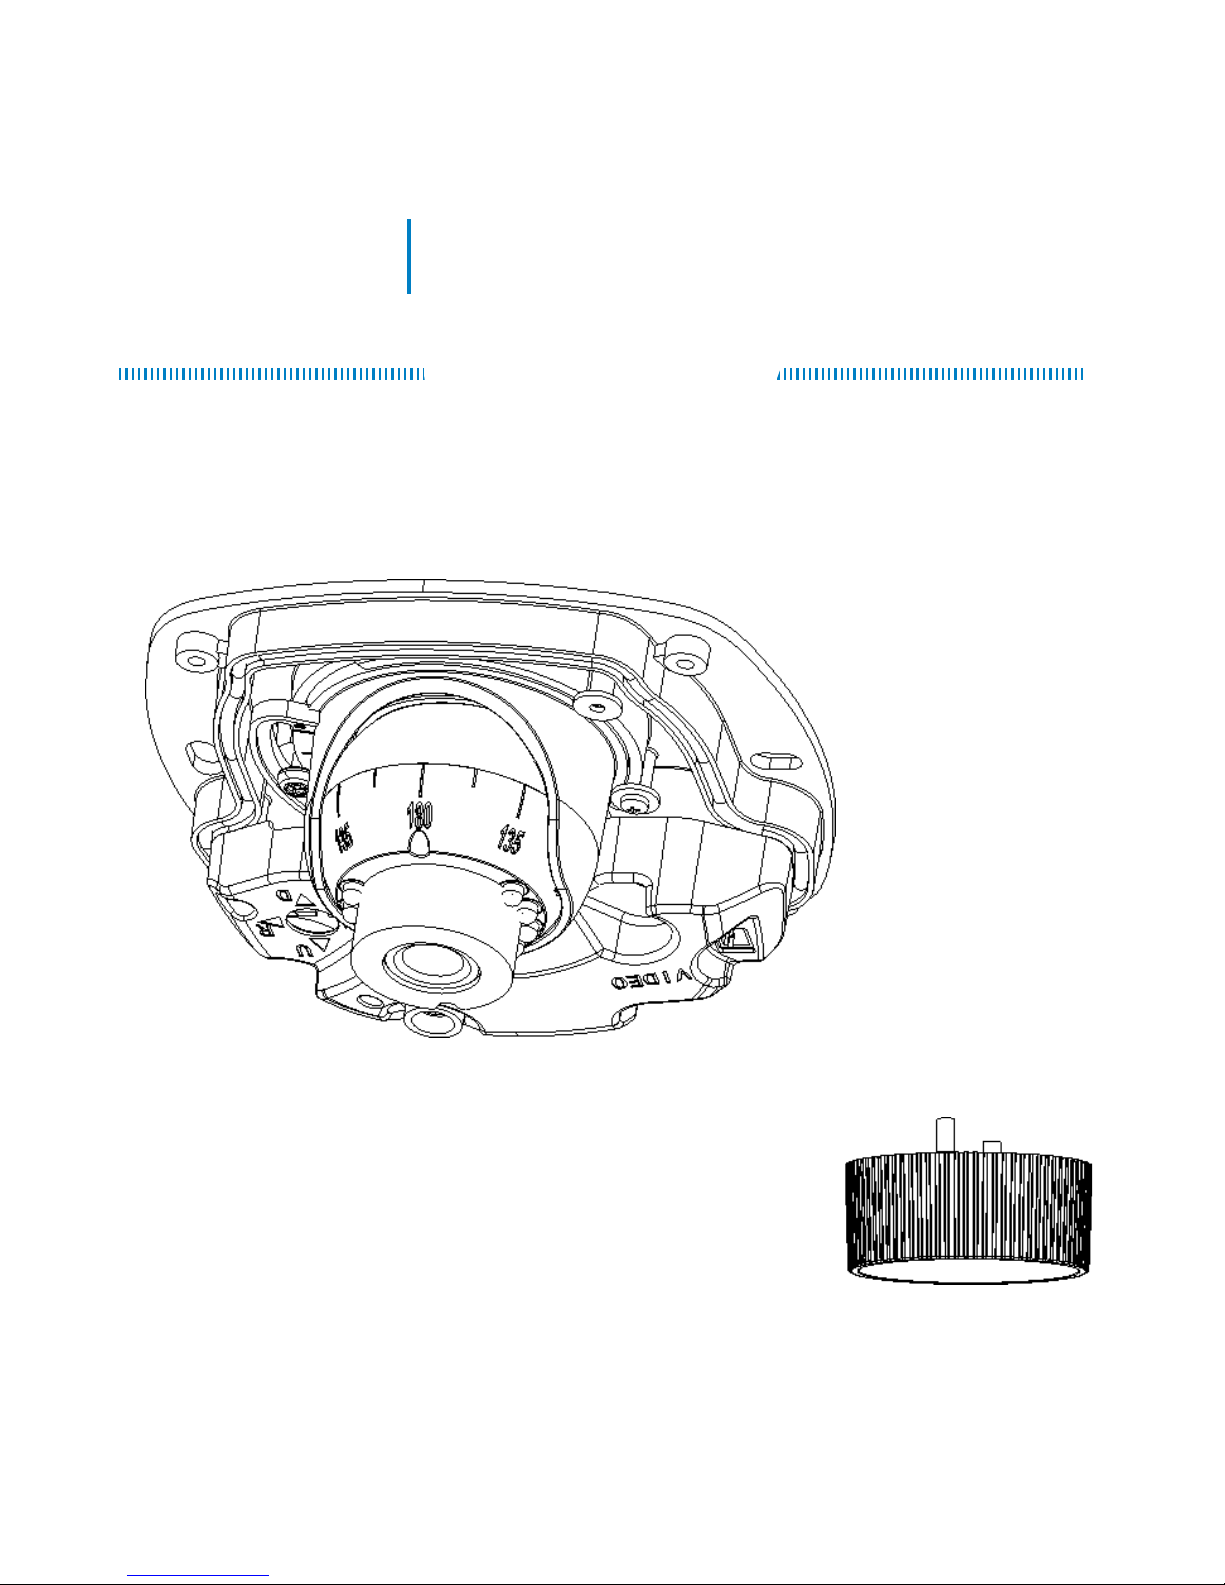
Before installing, familiarize yourself with the
parts of your camera.
Camera
and Mount
Lens
Adjustment
Tool
Page 5
5
Luma 100 Series Mini Dome Camera
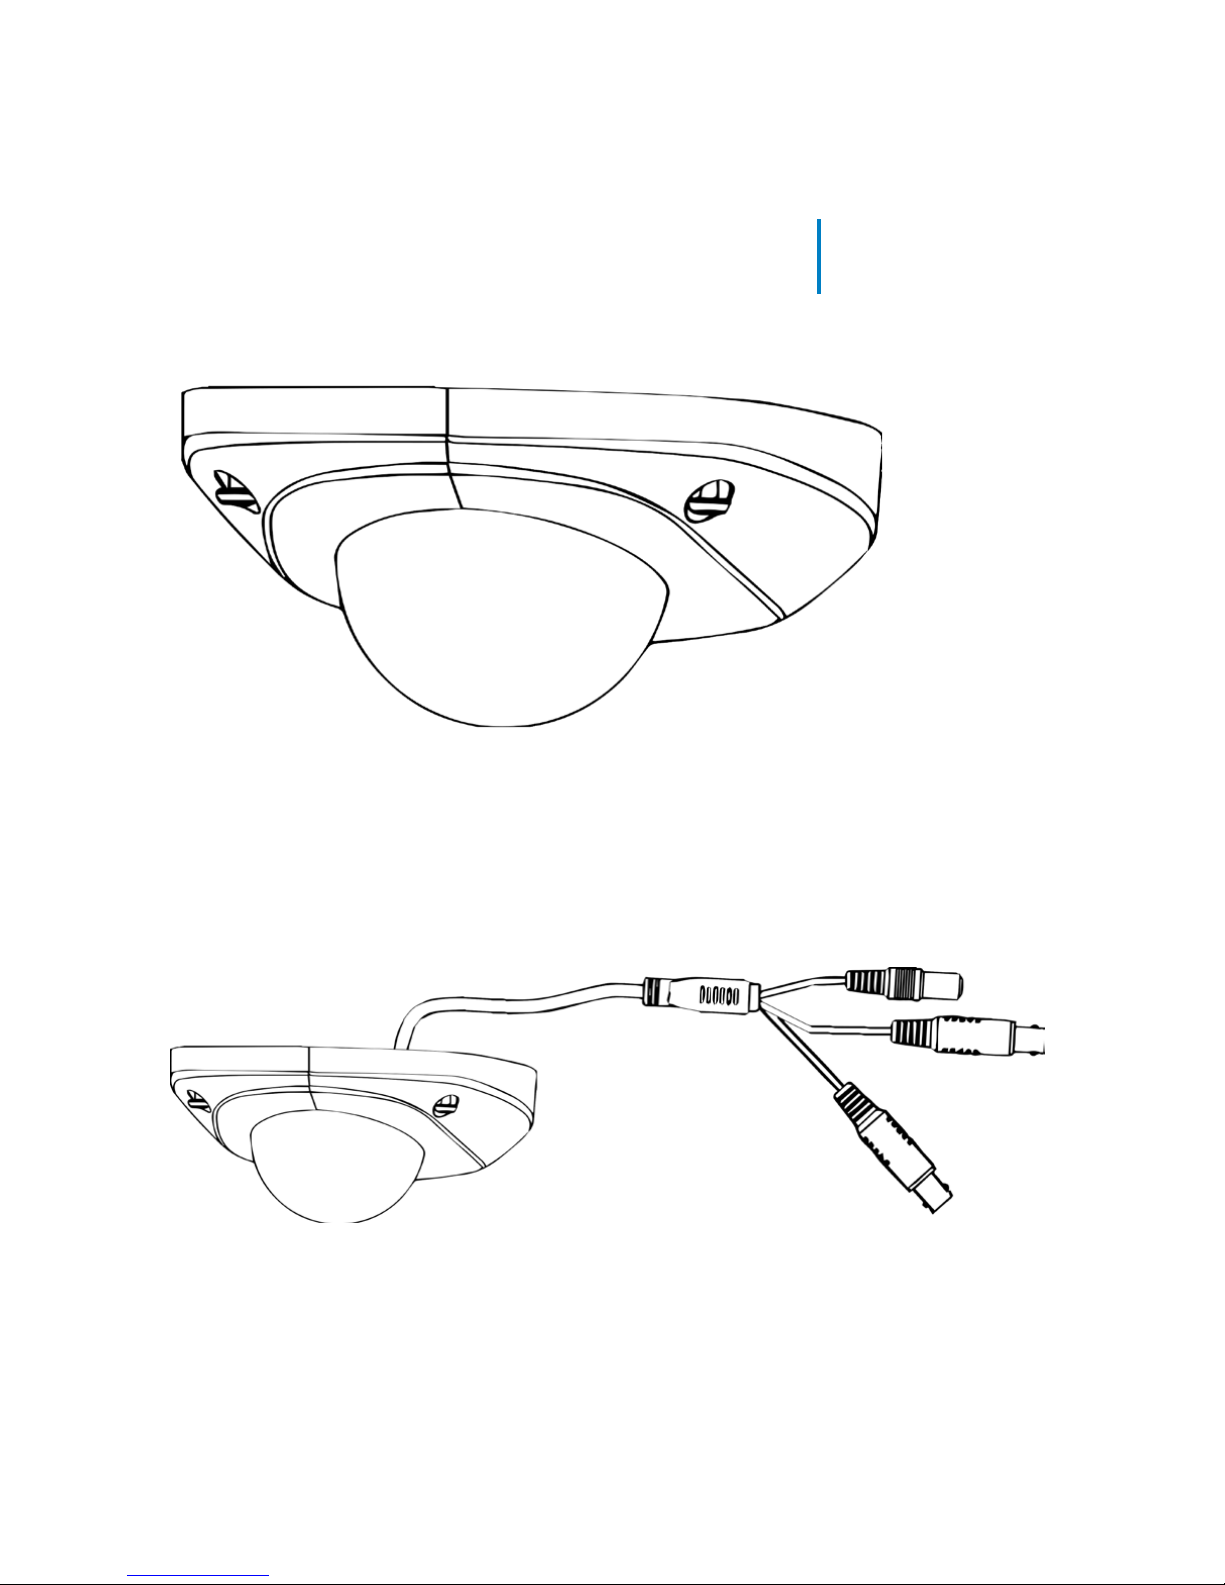
Cover and
Dome
Video
BNC Cable
(black)
Power
Cable
(red)
Audio
BNC Cable
(white)
Page 6
6
Luma 100 Series Mini Dome Camera
Prepare for Installation
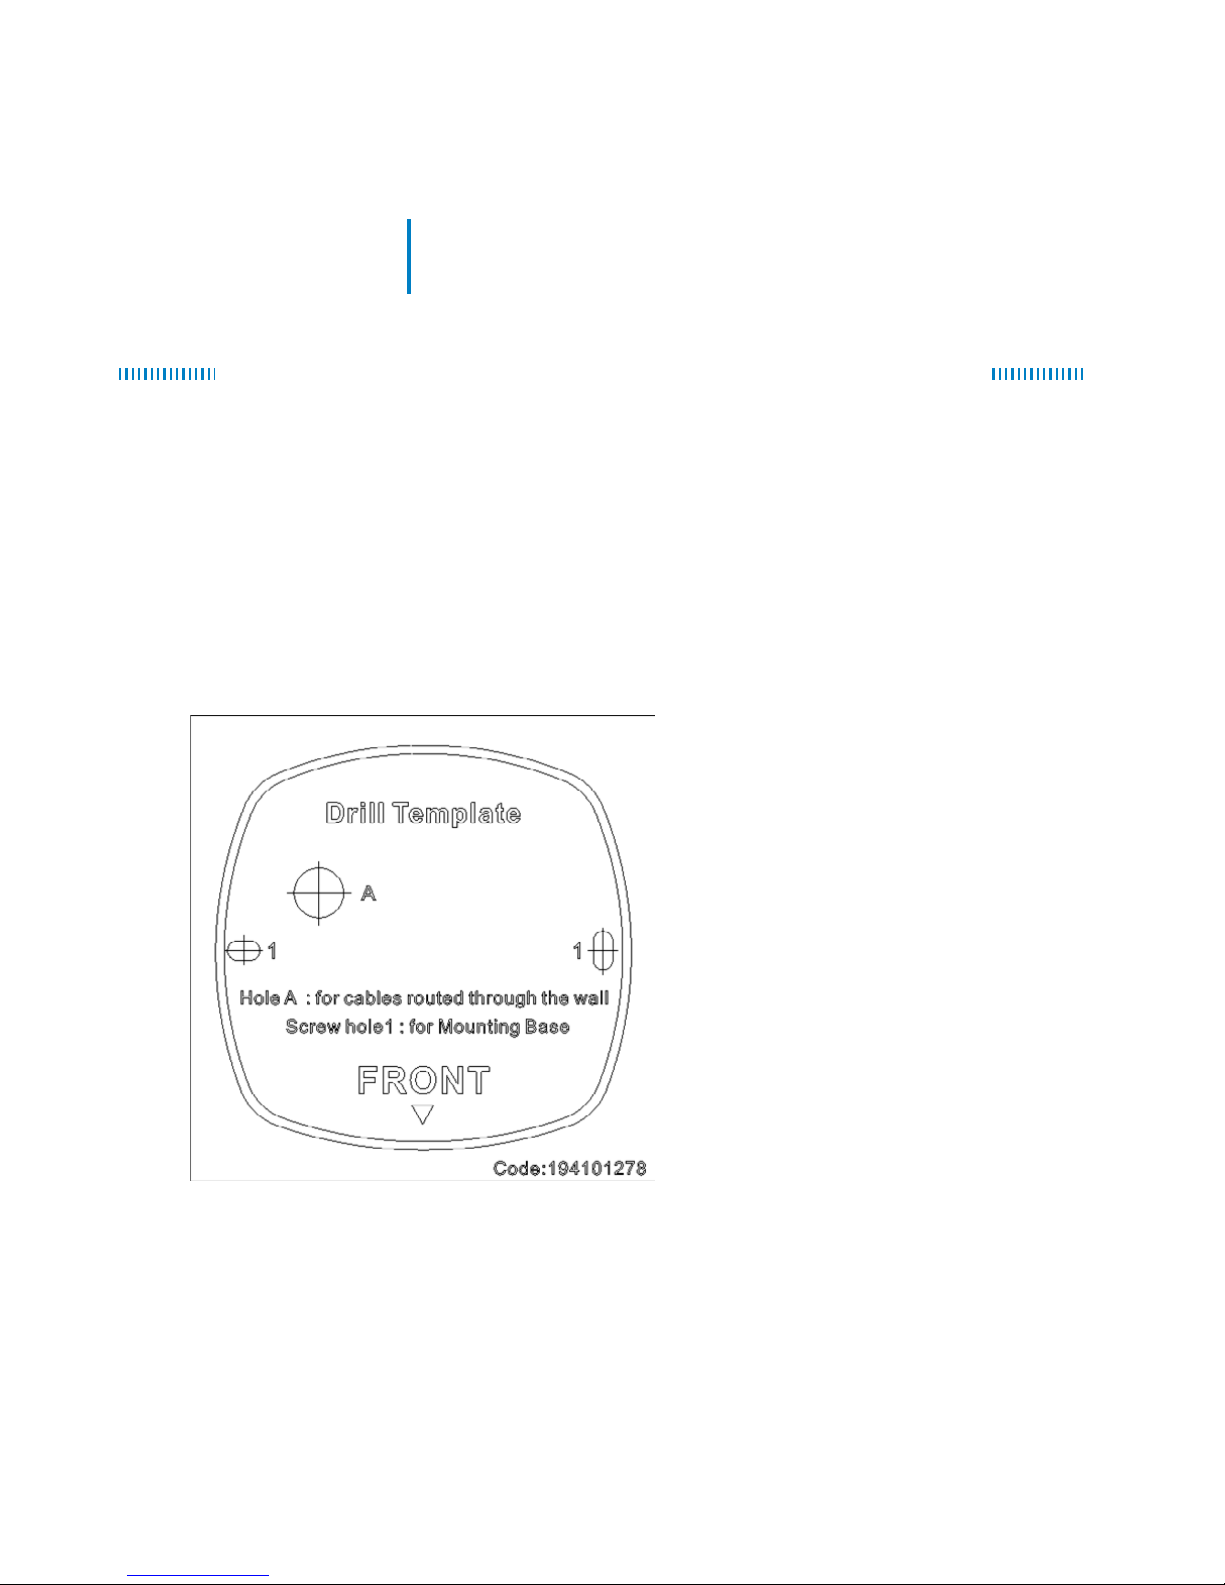
1. Drill a cable hole and pilot holes for your screws
in the ceiling, using the supplied template.
Ensure that the front of the template aims at
the desired surveillance area.
Page 7
7
Luma 100 Series Mini Dome Camera
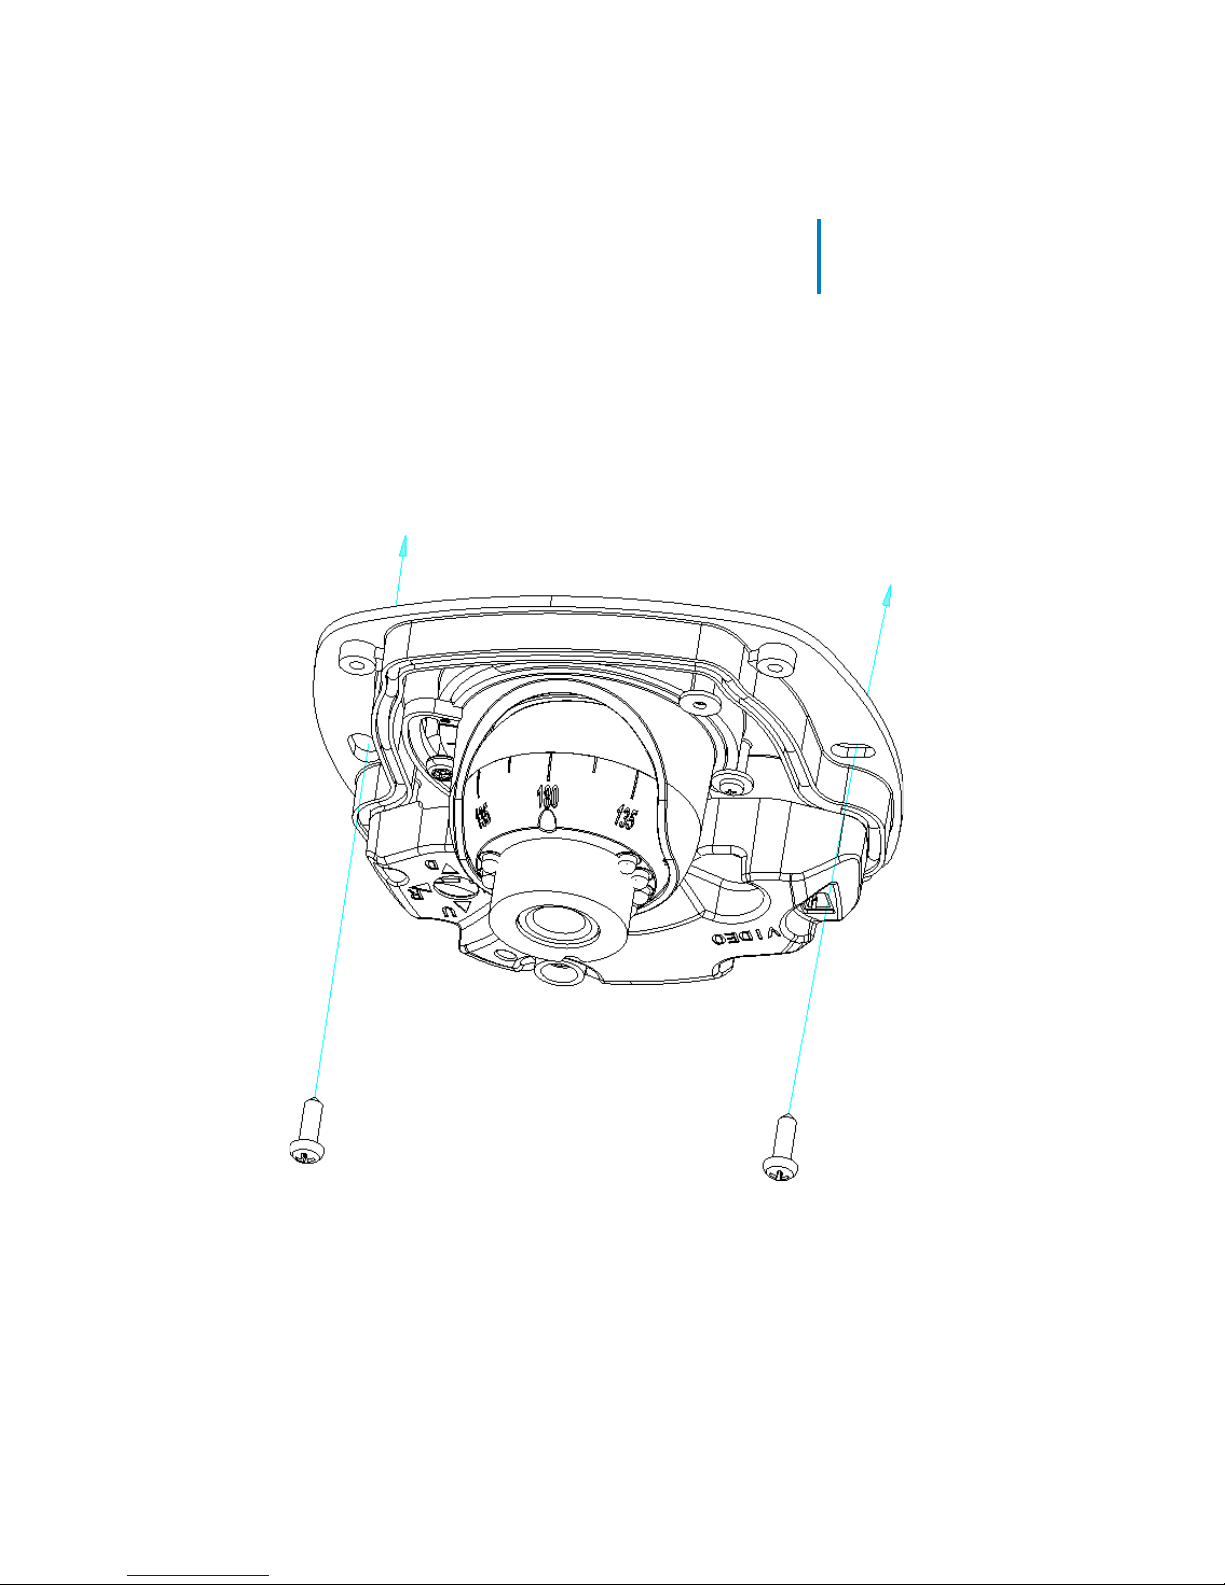
2. Remove the cover from the camera and mount.
Route the cables through the cable hole. Screw
the camera and mount into the ceiling.
Page 8
8
Luma 100 Series Mini Dome Camera
Install the Camera
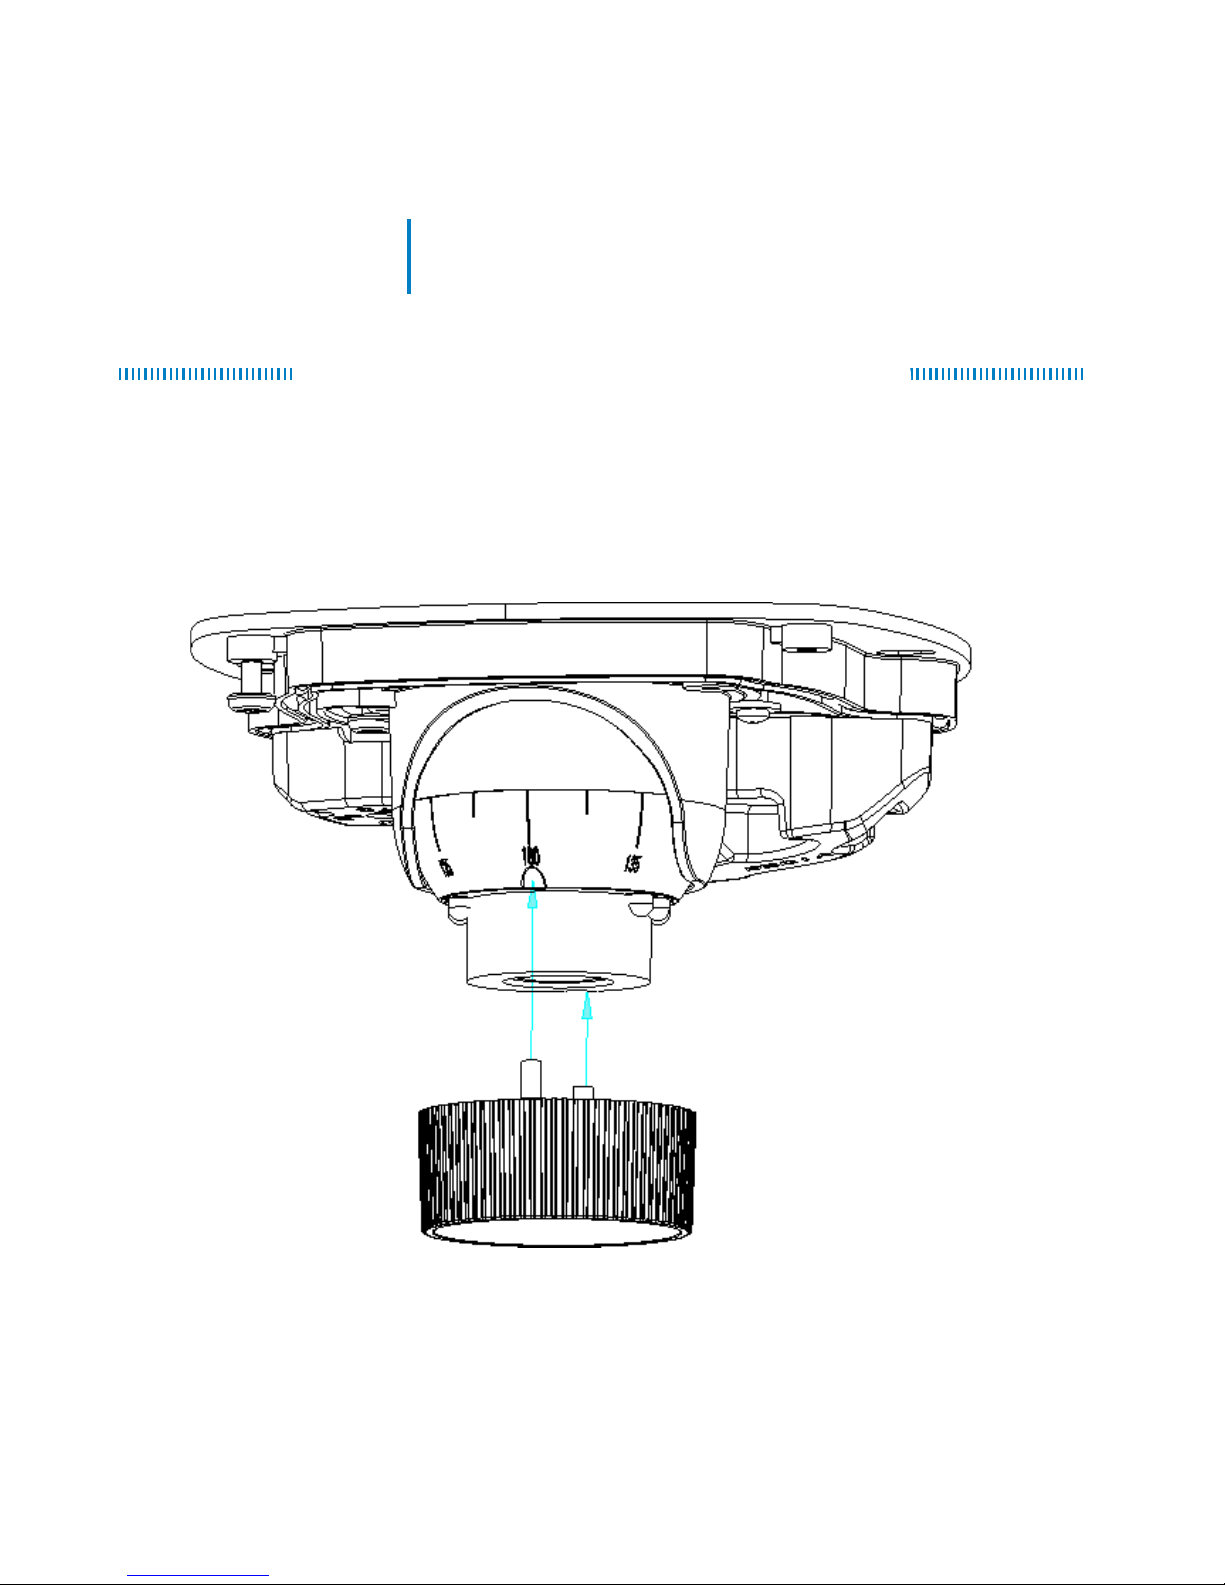
3. Insert prongs of the lens adjustment tool into the
holes on the front of the lens, as shown.
Page 9
9
Luma 100 Series Mini Dome Camera
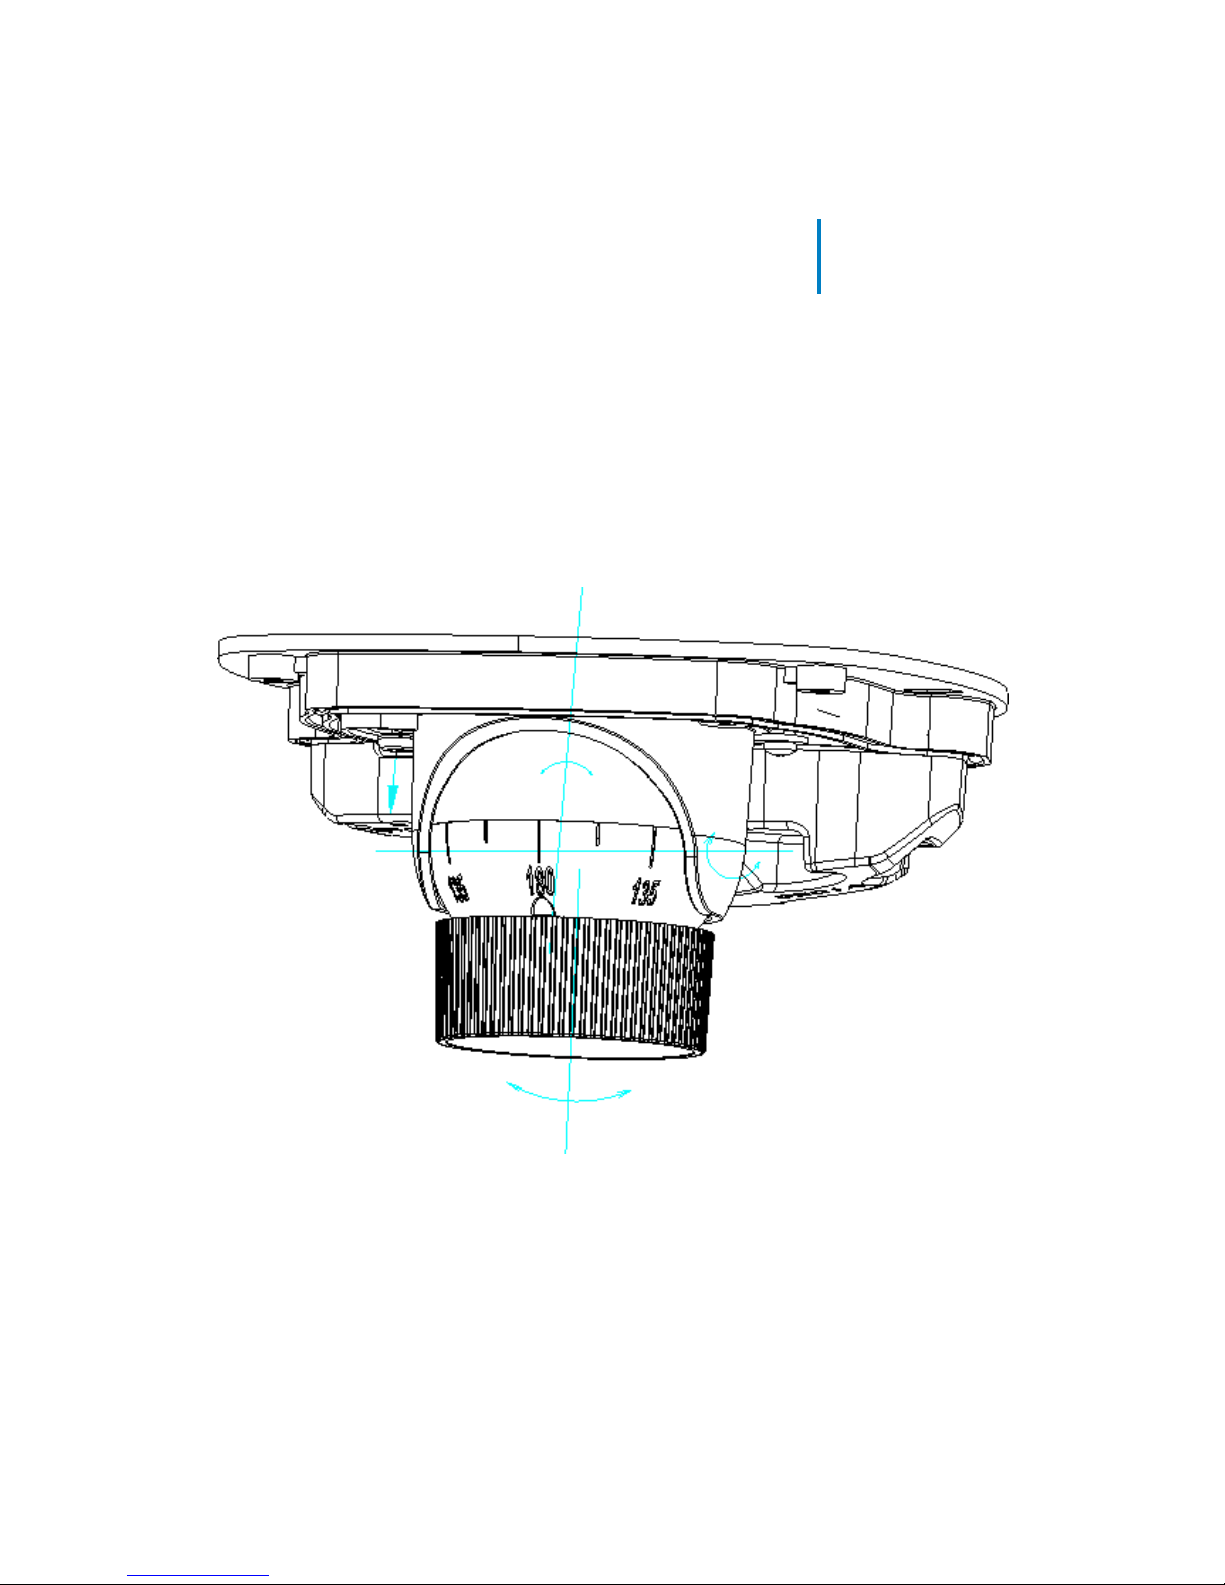
4. Using the lens adjustment tool for leverage,
orient the camera in the direction desired. To
ensure a level picture, the infrared sensor (next
to one of the prongs) should be down.
Page 10

10
Luma 100 Series Mini Dome Camera
5. Connect the audio BNC cable to the matching
Audio In port on the recorder. You must use
the audio port that matches the number of the
video port (they are not configurable). If you do
not want to use the microphone, tape the BNC
off to prevent accidental cross-connection.
6. Using a screwdriver (Phillips or flat-head),
turn the microphone volume control counterclockwise until it stops. Power up the speakers,
then adjust the volume control as desired.
Volume
Control
Page 11
11
Luma 100 Series Mini Dome Camera
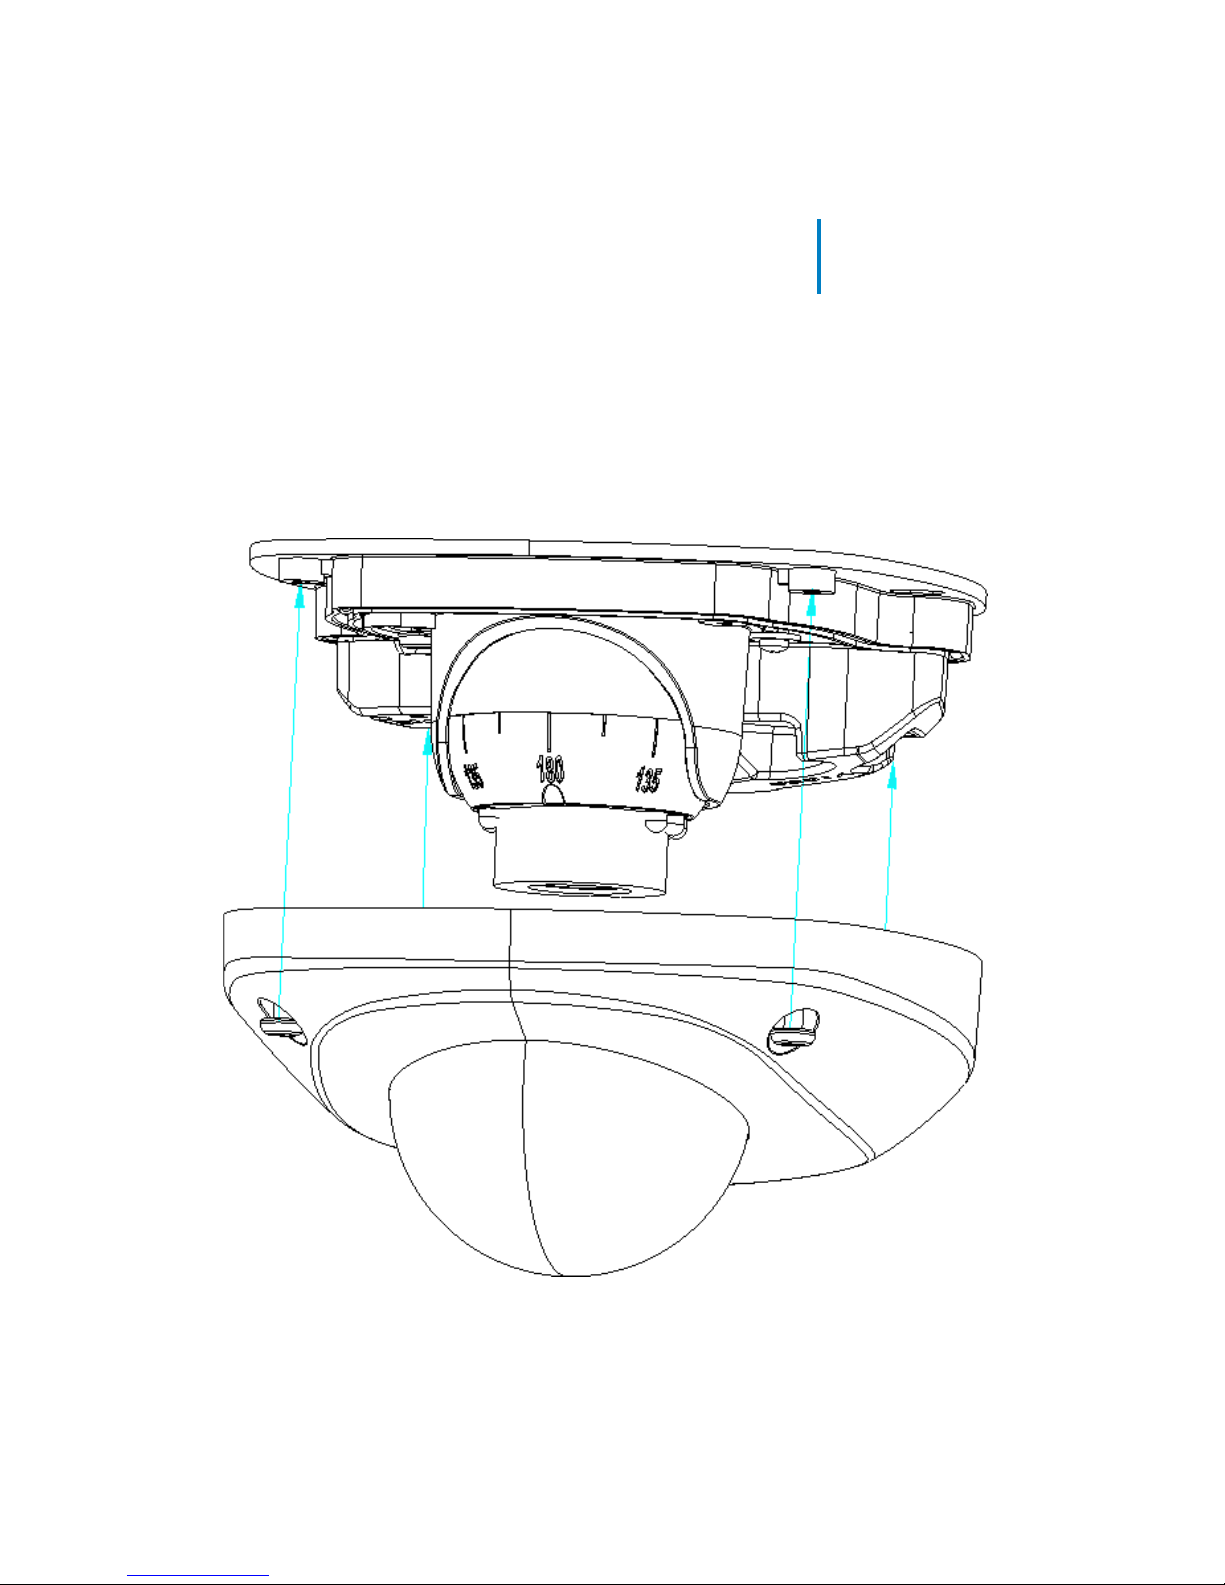
7. Attach the cover and dome to the camera
mount and secure it with screws. Connect
the power, and video cables.
Page 12

12
Luma 100 Series Mini Dome Camera
Support
If you need help, email [email protected].
For information, instructional videos, support
documentation, or ideas, visit our website.
5-Year Limited Warranty
This Luma Surveillance™ product has a 5-Year Limited
Warranty. This warranty includes parts and labor repairs
on all components found to be defective in material or
workmanship under normal conditions of use. This
warranty shall not apply to products that have been
abused, modified or disassembled. Products to be repaired
under this warranty must be returned to a designated
service center with an assigned return authorization (RA)
number. Contact technical support for an RA number.
Copyright ©2015 by SnapAV. All rights reserved. SnapAV,
Luma Surveillance, and all related marks and images are
trademarks or registered trademarks of SnapAV.
Version 151202-1311
 Loading...