

Page 1

UCS 1000
R4.2
Page 2

Copyright © 2000 by Lucent Technologies. All rights reserved.
Page 3

Copyright and legal notices
Copyright
Copyright © 2000 by Lucent Technologies.
All rights reserved.
Printed in the USA.
This material is protected by the copyright laws of the United States and other
countries. It may not be reproduced, distributed, or altered in any fashion by
any entity (either internal or external to Lucent Technologies), except in
accordance with applicable agreements, contracts or licensing, without the
express written consent of the Enterprise Networks (EN) Global Learning
Solutions (GLS) organization and the business management owner of the
material.
Acknowledgment This document was prepared by the GLS organization of the EN division of
Lucent Technologies. Offices are located in Denver CO, Columbus OH,
Page 4

Copyright and legal notices
Trademarks Lucent Technologies has made every effort to supply the following trademark
information about company names, products, and services mentioned in the
UCS 1000 R4.2 documentation library:
• Adobe Systems, Inc. — Trademarks: Adobe, Acrobat.
• Enhanced Software Technologies, Inc. — Trademark: Quickstart.
• Equinox Systems, Inc. — Registered trademark: Equinox
• Hewlett Packard Corporation — Registered trademarks: Hewlett-Packard
and HP
• Intel Corporation — Registered trademarks: Pentium.
• International Business Machines Corporation — Registered trademar ks:
IBM, VTAM.
• Lucent Technologies — Registered tra dem ar ks: 4 ES S, 5ESS, AUDIX,
CONVERSANT, DEFINITY, Voice Power. Trademarks: FlexWord, Intuity,
Lucent.
Page 5

Copyright and legal notices
• Oracle Corporation — Trademarks: OBJECT*SQL, ORACLE,
ORACLE*Terminal, PRO*C, SQL*FORMS, SQL*Men u, SQL*Net,
SQL*Plus, SQL*ReportWriter.
• PCI Industrial Computer Manufacturers Group — Registered trademarks:
CompactPCI and PICMG.
• Santa Cruz Operation, Inc. — Registered trademarks: UnixWare.
• Sun Micr osystems — Registered trademarks: Sun, Sun Microsystems,
Sun Workstation, Solaris (computer and peripherals). Trademarks:
Solaris (operating system utilities) and Java
• UNIX System Laboratories, Inc. — Registered trademarks: UNIX.
• Xerox Corporat ion — Trademarks: Ethernet.
Limited Warranty Lucent Technologies provides a limited warranty on this product. Refer to the
“Limited Use Software License Agreement” card provided with your package.
Lucent Technologies has determined that use of this electronic data delivery
Page 6

Copyright and legal notices
United States FCC
Compliance
Information
Part 15: Class A statement. This equipment has been tested and found to
comply with the limits for a Class A digital device, pursuant to Part 15 of the
FCC Rules. These limits are designed to provide reasonable protection
against harmful interference when the equipment is operated in a commercial
environment. This equipment generates, uses, and can radiate radiofrequency energy and, if not installed and used in accordance with the
instructions, may cause harmful interference to radio communications.
Operation of this equipment in a residential area is likely to cause harmful
interference, in which case the user will be required to correct the
interference at his own expense.
Canadian
Department of
Communications
(DOC) Interference
Information
This digital apparatus does not exceed the Class A limits for radio noise
emissions set out in the radio interference regulations of the Canadian
Department of Communications.
Le Présent Appareil Nomérique n’émet pas de bruits radioélectriques
dépassant les limites applicables aux appareils numériques de la class A
préscrites dans le reglement sur le brouillage radioélectrique édicté par le
Page 7

Copyright and legal notices
Your Responsibility for Your System’s Security
You and your system manager are responsible for the security of your system
and for preventing unauthorized use. You are also responsible for reading all
installation, instruction, and system administration documents provided with
this product in order to fully understand the features that can introduce risk of
toll fraud and the steps that can be taken to reduce that risk. Lucent
Technologies does not warrant that this product is immune from or will
prevent unauthorized use of common-carrier telecommun ication services or
facilities accessed through or connected to it. Lucent Technologies will not be
responsible for any charges that result from such unauthorized use.
Lucent Technologies Fraud Intervention and Corporate Security
If you suspect that you are being victimized by toll fraud and you need
technical support or assistance, call the Lucent Technologies National
Customer Care Center Toll Fraud Intervention Hotline at 1 800 643-2353.
Aside from whether immediate support is required, all toll fraud incidents
involving Lucent products or services should be reported to Lucent Corporate
Page 8

Copyright and legal notices
Documentation
Ordering
Information
Call or Write
Lucent Technologies Publications Center
2855 N. Franklin Road
Indianapolis, IN 46219
Voice 1 800 457-1235 International Voice 317 322-6791
FAX 1 800 457-1764 International FAX 317 322-6699
To Ord er
To order a document, contact the Lucent Technologies Publications Center
and specify the 9-digit document number, the issue number, and the issue
date.
Standing Orders
You can be placed on a standing order list for this and other documents you
may need. Standing order will enable you to automatically receive updated
versions of individual documents or document sets, billed to account
Page 9

Contents
Copyright and legal notices iii
About This Book xxii
Overview. . . . . . . . . . . . . . . . . . . . . . . . . . . . . . . . . . . . . . xxii
Intended Audiences . . . . . . . . . . . . . . . . . . . . . . . . . . . . . . . . xxiii
How This Book Is Organized. . . . . . . . . . . . . . . . . . . . . . . . . . . . xxiii
Administration Procedures and Information. . . . . . . . . . . . . . . . . . . . . . . . . . . . xxiv
Reference Material . . . . . . . . . . . . . . . . . . . . . . . . . . . . . . . . . . . . . . . . . . . . . . .xxv
To Locate Specific Topics . . . . . . . . . . . . . . . . . . . . . . . . . . . . . . . . . . . . . . . . . .xxv
Conventions Used in This Book . . . . . . . . . . . . . . . . . . . . . . . . . . xxv
Other Typography . . . . . . . . . . . . . . . . . . . . . . . . . . . . . . . . . . . . . . . . . . . . . . xxxiii
Safety and Security Alert Labels. . . . . . . . . . . . . . . . . . . . . . . . . xxxiv
Page 10

User Interface Overview . . . . . . . . . . . . . . . . . . . . . . . . . . . . . . . 1
UCS 1000 R4.2 User Interface . . . . . . . . . . . . . . . . . . . . . . . . . . . 2
Cursor Movement Keys. . . . . . . . . . . . . . . . . . . . . . . . . . . . . . . . . . . . . . . . . . . . . 4
Menus and Windows . . . . . . . . . . . . . . . . . . . . . . . . . . . . . . . . . . . . . . . . . . . . . . . 5
Message Line . . . . . . . . . . . . . . . . . . . . . . . . . . . . . . . . . . . . . . . . . . . . . . . . . . . 10
Function Keys . . . . . . . . . . . . . . . . . . . . . . . . . . . . . . . . . . . . . . . . . . . . . . . . . . . 11
Online Help . . . . . . . . . . . . . . . . . . . . . . . . . . . . . . . . . . . . .17
Accessing the Administration Menus . . . . . . . . . . . . . . . . . . . . . . . .18
Administration Menu Options. . . . . . . . . . . . . . . . . . . . . . . . . . . . . . . . . . . . . . . . 20
2 UNIX Administration 22
Overview. . . . . . . . . . . . . . . . . . . . . . . . . . . . . . . . . . . . . . . 22
UnixWare Documentation . . . . . . . . . . . . . . . . . . . . . . . . . . . . . . 22
UNIX System Administration Access . . . . . . . . . . . . . . . . . . . . . . . .23
Application Administration . . . . . . . . . . . . . . . . . . . . . . . . . . . . . . 25
Backup Scheduling, Setup and Control . . . . . . . . . . . . . . . . . . . . . . .25
Page 11

Port Access Services and Monitors . . . . . . . . . . . . . . . . . . . . . . . . . 47
Printer Configuration and Services . . . . . . . . . . . . . . . . . . . . . . . . .47
Restore from Backup Data. . . . . . . . . . . . . . . . . . . . . . . . . . . . . . 48
Basic Restore Services . . . . . . . . . . . . . . . . . . . . . . . . . . . . . . . . . . . . . . . . . . . . 48
Extended Restore Services . . . . . . . . . . . . . . . . . . . . . . . . . . . . . . . . . . . . . . . . . 49
Schedule Automatic Task . . . . . . . . . . . . . . . . . . . . . . . . . . . . . . 50
Security Management . . . . . . . . . . . . . . . . . . . . . . . . . . . . . . . . 51
Software Installation and Removal. . . . . . . . . . . . . . . . . . . . . . . . . . 52
Storage Device Operations and Definition. . . . . . . . . . . . . . . . . . . . . . 53
System Name, Date and Time, and Initial Password Setup . . . . . . . . . . . . . 54
User Login and Group Administration . . . . . . . . . . . . . . . . . . . . . . . . 56
Exit UNIX System Administration Menu . . . . . . . . . . . . . . . . . . . . . . . 57
3 Voice System Administration 58
Overview. . . . . . . . . . . . . . . . . . . . . . . . . . . . . . . . . . . . . . . 58
Accessing the Voice System Administration Menu . . . . . . . . . . . . . . . . . . . . . . . 58
Page 12

Adding Message Destinations . . . . . . . . . . . . . . . . . . . . . . . . . . . . . . . . . . . . . . . 72
Removing Message Destinations . . . . . . . . . . . . . . . . . . . . . . . . . . . . . . . . . . . . 74
Adding Thresholds. . . . . . . . . . . . . . . . . . . . . . . . . . . . . . . . . . . . . . . . . . . . . . . . 76
Removing Thresholds . . . . . . . . . . . . . . . . . . . . . . . . . . . . . . . . . . . . . . . . . . . . . 78
Modifying Message Priorities. . . . . . . . . . . . . . . . . . . . . . . . . . . . . . . . . . . . . . . . 79
Modifying Threshold Periods . . . . . . . . . . . . . . . . . . . . . . . . . . . . . . . . . . . . . . . . 81
Saving Changes and Exiting Message Administration . . . . . . . . . . . . . . . . . . . . 83
System Control . . . . . . . . . . . . . . . . . . . . . . . . . . . . . . . . . . . 84
Diagnose . . . . . . . . . . . . . . . . . . . . . . . . . . . . . . . . . . . . . . . . . . . . . . . . . . . . . . . 85
Renumbering Voice Channels . . . . . . . . . . . . . . . . . . . . . . . . . . . . . . . . . . . . . . . 87
Reporting Voice System Status . . . . . . . . . . . . . . . . . . . . . . . . . . . . . . . . . . . . . . 89
Stopping the Voice System . . . . . . . . . . . . . . . . . . . . . . . . . . . . . . . . . . . . . . . . . 90
Shutting Down the System . . . . . . . . . . . . . . . . . . . . . . . . . . . . . . . . . . . . . . . . . 91
Starting the Voice System . . . . . . . . . . . . . . . . . . . . . . . . . . . . . . . . . . . . . . . . . . 93
Voice Equipment. . . . . . . . . . . . . . . . . . . . . . . . . . . . . . . . . . .94
Display the Voice Equipment Window. . . . . . . . . . . . . . . . . . . . . . . . . . . . . . . . . 95
Equipment Options . . . . . . . . . . . . . . . . . . . . . . . . . . . . . . . . . . . . . . . . . . . . . . 101
Page 13

4 Switch Interface Administration 141
Overview. . . . . . . . . . . . . . . . . . . . . . . . . . . . . . . . . . . . . . 141
Switch Interfaces Hardware . . . . . . . . . . . . . . . . . . . . . . . . . . . . 141
Accessing the Switch Interfaces Menu . . . . . . . . . . . . . . . . . . . . . . 142
Digital Interfaces . . . . . . . . . . . . . . . . . . . . . . . . . . . . . . . . . . 144
Accessing the Digital Interfaces Menu. . . . . . . . . . . . . . . . . . . . . . . . . . . . . . . . 144
Displaying Digital Interface Assignments. . . . . . . . . . . . . . . . . . . . . . . . . . . . . . 146
T1 A/B Robbed-bit E&M Protocol . . . . . . . . . . . . . . . . . . . . . . . . . . . . . . . . . . . 150
E1 CAS Protocols . . . . . . . . . . . . . . . . . . . . . . . . . . . . . . . . . . . . . . . . . . . . . . . 163
ISDN-PRI Layer 1 Protocol . . . . . . . . . . . . . . . . . . . . . . . . . . . . . . . . . . . . . . . . 174
T1 for 4ESS Applications. . . . . . . . . . . . . . . . . . . . . . . . . . . . . . . . . . . . . . . . . . 188
Changing Switch System Parameters . . . . . . . . . . . . . . . . . . . . . . . 191
Displaying Switch System Parameters . . . . . . . . . . . . . . . . . . . . . . 194
5 Database Administration 196
Overview. . . . . . . . . . . . . . . . . . . . . . . . . . . . . . . . . . . . . . 196
Page 14

EVENTS Table. . . . . . . . . . . . . . . . . . . . . . . . . . . . . . . . . . . . . . . . . . . . . . . . . . 202
EVSUM Table . . . . . . . . . . . . . . . . . . . . . . . . . . . . . . . . . . . . . . . . . . . . . . . . . . 203
TRASUM Table . . . . . . . . . . . . . . . . . . . . . . . . . . . . . . . . . . . . . . . . . . . . . . . . . 204
OLDCDH View. . . . . . . . . . . . . . . . . . . . . . . . . . . . . . . . . . . . . . . . . . . . . . . . . . 204
Relationship Between the CALL, SERVICE, and EVENT Tables . . . . . . . . . . . 204
Resizing Call Data Tables . . . . . . . . . . . . . . . . . . . . . . . . . . . . . . . . . . . . . . . . . 206
Verify Call Data Tables. . . . . . . . . . . . . . . . . . . . . . . . . . . . . . . . . . . . . . . . . . . . 208
Table Searches . . . . . . . . . . . . . . . . . . . . . . . . . . . . . . . . . . . . . . . . . . . . . . . . . 210
Database Interface Process . . . . . . . . . . . . . . . . . . . . . . . . . . . . 213
Database DIP Timeout. . . . . . . . . . . . . . . . . . . . . . . . . . . . . . . . . . . . . . . . . . . . 213
Database Cursors . . . . . . . . . . . . . . . . . . . . . . . . . . . . . . . . . . . . . . . . . . . . . . . 215
Increasing Database Storage Size. . . . . . . . . . . . . . . . . . . . . . . . . 217
Decreasing the Database Storage Size . . . . . . . . . . . . . . . . . . . . . . 220
Reducing the Amount of Call Data Stored. . . . . . . . . . . . . . . . . . . . . . . . . . . . . 220
Reducing the Number of Days Data is Stored. . . . . . . . . . . . . . . . . . . . . . . . . . 220
Changing the Data Storage Number of Days . . . . . . . . . . . . . . . . . . . . . . . . . . 222
Increasing the Shared Pool Size. . . . . . . . . . . . . . . . . . . . . . . . . . 223
Page 15

Completing ORACLE Environment Setup if
Server is Not a UCS 1000 R4.2 . . . . . . . . . . . . . . . . . . . . . . . . . . . . . . . . . . . 239
Accessing a Remote Database Using PRO*C or SQL*PLUS. . . . . . . . . . . . . . 240
Removing a Database Access ID . . . . . . . . . . . . . . . . . . . . . . . . . . . . . . . . . . . 245
SQL*PLUS Database Administration . . . . . . . . . . . . . . . . . . . . . . . 246
Monitoring the Database. . . . . . . . . . . . . . . . . . . . . . . . . . . . . . 247
Database Commands . . . . . . . . . . . . . . . . . . . . . . . . . . . . . . . . . . . . . . . . . . . . 247
Database Trace Files. . . . . . . . . . . . . . . . . . . . . . . . . . . . . . . . . . . . . . . . . . . . . 252
6 Peripheral Administration 253
Overview. . . . . . . . . . . . . . . . . . . . . . . . . . . . . . . . . . . . . . 253
Accessing the Unix Management Menu . . . . . . . . . . . . . . . . . . . . . . 253
Modem Administration . . . . . . . . . . . . . . . . . . . . . . . . . . . . . . . 255
Installing the Modem . . . . . . . . . . . . . . . . . . . . . . . . . . . . . . . . . . . . . . . . . . . . . 256
Configuring the Modem . . . . . . . . . . . . . . . . . . . . . . . . . . . . . . . . . . . . . . . . . . . 256
Administering the Modem . . . . . . . . . . . . . . . . . . . . . . . . . . . . . . . . . . . . . . . . . 266
Page 16

Administering the Remote Terminal. . . . . . . . . . . . . . . . . . . . . . . . . . . . . . . . . . 295
7 Common Administration 297
Overview. . . . . . . . . . . . . . . . . . . . . . . . . . . . . . . . . . . . . . 297
Command Menu . . . . . . . . . . . . . . . . . . . . . . . . . . . . . . . . . . 297
Accessing the Command Menu. . . . . . . . . . . . . . . . . . . . . . . . . . . . . . . . . . . . . 298
System Monitor . . . . . . . . . . . . . . . . . . . . . . . . . . . . . . . . . . . . . . . . . . . . . . . . . 298
Trace Service. . . . . . . . . . . . . . . . . . . . . . . . . . . . . . . . . . . . . . . . . . . . . . . . . . . 306
Reports Administration. . . . . . . . . . . . . . . . . . . . . . . . . . . . . . . 308
Accessing the Reports Administration Menu. . . . . . . . . . . . . . . . . . . . . . . . . . . 309
Call Classification Report. . . . . . . . . . . . . . . . . . . . . . . . . . . . . . . . . . . . . . . . . . 310
Call Data Detail Report . . . . . . . . . . . . . . . . . . . . . . . . . . . . . . . . . . . . . . . . . . . 317
Call Data Summary Report . . . . . . . . . . . . . . . . . . . . . . . . . . . . . . . . . . . . . . . . 325
Message Log Report . . . . . . . . . . . . . . . . . . . . . . . . . . . . . . . . . . . . . . . . . . . . . 333
Administrative Commands Log Report . . . . . . . . . . . . . . . . . . . . . . . . . . . . . . . 344
Traffic Report. . . . . . . . . . . . . . . . . . . . . . . . . . . . . . . . . . . . . . . . . . . . . . . . . . . 352
Signal Processing Activity Report . . . . . . . . . . . . . . . . . . . . . . . . . . . . . . . . . . . 358
Page 17

addhdr . . . . . . . . . . . . . . . . . . . . . . . . . . . . . . . . . . . . . . . 373
alarm_cutoff . . . . . . . . . . . . . . . . . . . . . . . . . . . . . . . . . . . . 374
annotate . . . . . . . . . . . . . . . . . . . . . . . . . . . . . . . . . . . . . . 374
assign card/channel . . . . . . . . . . . . . . . . . . . . . . . . . . . . . . . . 375
assign_permissions . . . . . . . . . . . . . . . . . . . . . . . . . . . . . . . . 377
assign service/startup . . . . . . . . . . . . . . . . . . . . . . . . . . . . . . . 379
attach . . . . . . . . . . . . . . . . . . . . . . . . . . . . . . . . . . . . . . . 382
autoreboot . . . . . . . . . . . . . . . . . . . . . . . . . . . . . . . . . . . . . 384
bbs . . . . . . . . . . . . . . . . . . . . . . . . . . . . . . . . . . . . . . . . . 387
ccarpt . . . . . . . . . . . . . . . . . . . . . . . . . . . . . . . . . . . . . . . 390
cddrpt . . . . . . . . . . . . . . . . . . . . . . . . . . . . . . . . . . . . . . . 391
cdsrpt . . . . . . . . . . . . . . . . . . . . . . . . . . . . . . . . . . . . . . . 394
codetype . . . . . . . . . . . . . . . . . . . . . . . . . . . . . . . . . . . . . . 396
configure_tam . . . . . . . . . . . . . . . . . . . . . . . . . . . . . . . . . . . 397
copy . . . . . . . . . . . . . . . . . . . . . . . . . . . . . . . . . . . . . . . . 398
Page 18

decode . . . . . . . . . . . . . . . . . . . . . . . . . . . . . . . . . . . . . . . 413
defService . . . . . . . . . . . . . . . . . . . . . . . . . . . . . . . . . . . . . 414
delete card/channel . . . . . . . . . . . . . . . . . . . . . . . . . . . . . . . . 416
delete eqpgrp . . . . . . . . . . . . . . . . . . . . . . . . . . . . . . . . . . . 419
delete service/startup . . . . . . . . . . . . . . . . . . . . . . . . . . . . . . . 420
detach . . . . . . . . . . . . . . . . . . . . . . . . . . . . . . . . . . . . . . . 423
diagnose bus 1. . . . . . . . . . . . . . . . . . . . . . . . . . . . . . . . . . . 426
diagnose card . . . . . . . . . . . . . . . . . . . . . . . . . . . . . . . . . . . 427
dip_int . . . . . . . . . . . . . . . . . . . . . . . . . . . . . . . . . . . . . . . 431
display assignments . . . . . . . . . . . . . . . . . . . . . . . . . . . . . . . . 433
display card . . . . . . . . . . . . . . . . . . . . . . . . . . . . . . . . . . . . 435
display channel . . . . . . . . . . . . . . . . . . . . . . . . . . . . . . . . . . 441
display dnis . . . . . . . . . . . . . . . . . . . . . . . . . . . . . . . . . . . . 443
display eqpgrp/group. . . . . . . . . . . . . . . . . . . . . . . . . . . . . . . . 444
display equipment . . . . . . . . . . . . . . . . . . . . . . . . . . . . . . . . . 445
Page 19

encode . . . . . . . . . . . . . . . . . . . . . . . . . . . . . . . . . . . . . . . 463
erase. . . . . . . . . . . . . . . . . . . . . . . . . . . . . . . . . . . . . . . . 464
explain . . . . . . . . . . . . . . . . . . . . . . . . . . . . . . . . . . . . . . . 466
findHomes . . . . . . . . . . . . . . . . . . . . . . . . . . . . . . . . . . . . . 471
fixLogFile. . . . . . . . . . . . . . . . . . . . . . . . . . . . . . . . . . . . . . 473
iCk, iCkAdmin . . . . . . . . . . . . . . . . . . . . . . . . . . . . . . . . . . . 477
logCat . . . . . . . . . . . . . . . . . . . . . . . . . . . . . . . . . . . . . . . 498
lComp . . . . . . . . . . . . . . . . . . . . . . . . . . . . . . . . . . . . . . . 509
list . . . . . . . . . . . . . . . . . . . . . . . . . . . . . . . . . . . . . . . . . 512
logCat . . . . . . . . . . . . . . . . . . . . . . . . . . . . . . . . . . . . . . . 514
logDstPri . . . . . . . . . . . . . . . . . . . . . . . . . . . . . . . . . . . . . . 520
logEvent/logMsg . . . . . . . . . . . . . . . . . . . . . . . . . . . . . . . . . . 522
logFmt . . . . . . . . . . . . . . . . . . . . . . . . . . . . . . . . . . . . . . . 526
mkAlerter. . . . . . . . . . . . . . . . . . . . . . . . . . . . . . . . . . . . . . 530
mkheader . . . . . . . . . . . . . . . . . . . . . . . . . . . . . . . . . . . . . 533
Page 20

restore . . . . . . . . . . . . . . . . . . . . . . . . . . . . . . . . . . . . . . . 559
retireAlarms . . . . . . . . . . . . . . . . . . . . . . . . . . . . . . . . . . . . 562
rmdb . . . . . . . . . . . . . . . . . . . . . . . . . . . . . . . . . . . . . . . . 564
show_sys . . . . . . . . . . . . . . . . . . . . . . . . . . . . . . . . . . . . . 568
soft_disc . . . . . . . . . . . . . . . . . . . . . . . . . . . . . . . . . . . . . . 570
soft_szr. . . . . . . . . . . . . . . . . . . . . . . . . . . . . . . . . . . . . . . 572
spadc. . . . . . . . . . . . . . . . . . . . . . . . . . . . . . . . . . . . . . . . 574
spar . . . . . . . . . . . . . . . . . . . . . . . . . . . . . . . . . . . . . . . . 575
spsav. . . . . . . . . . . . . . . . . . . . . . . . . . . . . . . . . . . . . . . . 581
spStatus . . . . . . . . . . . . . . . . . . . . . . . . . . . . . . . . . . . . . . 583
spVrsion . . . . . . . . . . . . . . . . . . . . . . . . . . . . . . . . . . . . . . 594
start_vs. . . . . . . . . . . . . . . . . . . . . . . . . . . . . . . . . . . . . . . 594
stop_vs. . . . . . . . . . . . . . . . . . . . . . . . . . . . . . . . . . . . . . . 596
striphdr. . . . . . . . . . . . . . . . . . . . . . . . . . . . . . . . . . . . . . . 597
sysmon. . . . . . . . . . . . . . . . . . . . . . . . . . . . . . . . . . . . . . . 598
Page 21

vusage . . . . . . . . . . . . . . . . . . . . . . . . . . . . . . . . . . . . . . . 618
wl_copy . . . . . . . . . . . . . . . . . . . . . . . . . . . . . . . . . . . . . . 619
wl_edit . . . . . . . . . . . . . . . . . . . . . . . . . . . . . . . . . . . . . . . 620
wl_gen . . . . . . . . . . . . . . . . . . . . . . . . . . . . . . . . . . . . . . . 622
wl_init . . . . . . . . . . . . . . . . . . . . . . . . . . . . . . . . . . . . . . . 624
wl_install . . . . . . . . . . . . . . . . . . . . . . . . . . . . . . . . . . . . . . 625
Glossary 627
Index 699
Page 22

About This Book
Overview
This document describes the procedures needed to perform full system
administration for the following areas:
• The UNIX operating system
• The voice system
• Databases
• Switch interfaces
This document also describes the procedures needed to create and access
system reports and to monitor the system.
Page 23

About This Book Intended Audiences
Intended Audiences
The primary audience for this document are system administrators. This
includes:
• On-site technicians who perform system administration at the customer
site
• End customers who choose to administer their own systems
Secondary audiences include the field support personnel.
We assume that the primary users of this book have completed the UCS
1000 R4.2 hardware installation and maintenance training course. See Using
the CD-ROM Documentation on page xxxvi for more information.
How This Book Is Organized
This document is designed to take you step by step through the system
Page 24

About This Book How This Book Is Organized
Administration Procedures and Information
See Chapter 1, Administration Overview , to familiarize yourself with the user
interface and the system administration process including the user interface
and the menus.
See Chapter 2, UNIX Administration
, for information about how to access the
SYSADM menu and the procedures to perform basic UnixWare-level
administration.
See Chapter 3, Voice System Administration
, for information about how to
access the Voice System Administration menu and a description of all the
administrative options. This chapter also contains the reference and
procedural information for the Configuration Management option.
See Chapter 4, Switch Interface Administration
, for the procedures and
reference information for administering the supported analog and digital
switch interfaces.
See Chapter 5, Database Administration
, for the procedures and reference
Page 25

About This Book Conventions Used in This Book
See Chapter 7, Common Administration , for quick-reference information for
some of the more common administrative tasks. Daily administration includes
running system reports; performing common procedures such as system
monitoring, media formatting, and backups; and administering the date and
time.
Reference Material
See Appendix A, Summary of Commands, for an alphabetical list of the
commands in the UCS 1000 R4.2 command language.
See the Glossary for help in identifying and defining commonly used terms
and acronyms .
To Locate Specific Topics
This book includes an alphabetical index at the end for quick access to
Page 26

About This Book Conventions Used in This Book
Note: The screens shown in this book are examples only. The screens
you see on your system may be similar, but not exactly the same
in all cases.
Terminology • The word “type” means to press the key or sequence of keys specified.
For example, an instruction to type the letter “y” is shown as
Type y to continue.
• The word “enter” means to type a value and then press the ENTER key
on the keyboard. For example, an instruction to type the letter “y” and
press
ENTER is shown as
Enter y to continue.
• The word “select” means to move the cursor to the desired menu item
and then press
ENTER. For example, an instruction to move the cursor to
the start test option on the Network Loop-Around Test screen and then
press
ENTER is shown as
Page 27
About This Book Conventions Used in This Book
• The system displays menus, screens, and windows. Menus (Figure 1)
present options from which you can choose to view another menu, or a
screen or window. Screens and windows both show (Figure 2 on page
xxviii and Figure 3 on page xxix) and request (Figure 4 on page xxix and
Figure 5 on page xxx
) system information.
Figure 1. Example of a UCS 1000 R4.2 Menu
Page 28

About This Book Conventions Used in This Book
Figure 2. Example of a UCS 1000 R4.2 Screen Showing Information
UnixWare Installation Prima ry Hard Disk Par titioning
In order to install LINCS, you should reserve a UNIX system
partition (a portion of your hard disk’s space) containing 100%
of the space on your primary hard disk. After you press ’ENTER’
you will be shown a screen that will allow you to create new
partitions, delete existing partitions or change the active
partition of your primary hard disk (the partition that your
computer will boot from).
WARNING: All files in any partition(s) you delete will be
destroyed. If you wish to attempt to preserve any files from an
existing UNIX system, do not delete its partitions(s).
The UNIX system partition that you intend to use on the primary
hard disk must be at lease 4200 MBs and labeled “ACTIVE.”
Press ’ENTER’ to continue
Page 29
About This Book Conventions Used in This Book
Figure 3. Example of a UCS 1000 R4.2 Window Showing Information
Figure 4. Example of a UCS 1000 R4.2 Screen Requesting Information
UNIX System Installation Set Slice Sizes
Please select whether you would like the recommended slice
sizes or would like to customize the slice sizes.
Page 30

About This Book Conventions Used in This Book
Figure 5. Example of a UCS 1000 R4.2 Window Requesting Information
Keyboard and
Telephone Keypad
Representations
• Keys that you press on your terminal or PC are represented as capitalized
BOLD text. For example, an instruction to press the Enter key is shown
as
Press ENTER.
• T wo or three keys that you press at the same time on your terminal or PC
(that is, you hold down the first key while pressing the second and/or third
key) are represented as a series of small, capitalized
BOLD text
separated by the
plus sign (+). For example, an instruction to press and
hold “Alt” while typing the letter “d” is shown as
Press ALT+ D
Page 31

About This Book Conventions Used in This Book
• Keys that you press on your telephone keypad are represented as bold
text. For example, an instruction to press the first key on your telephone
keypad is shown as
Press
1 to record a message.
Screen Displays • System messages, field names, and prompts that appear on the screen
are shown in
typewriter text, as shown in the following examples:
~ Enter the number of ports to be dedicated to outbound traffic in the
Maximum Simultaneous Ports field.
~ Enter y in the Message Transfer? field.
~ The system displays the following message:
Installation in progress.
•
The sequence of menu options that you must select to display a specific
screen or submenu appears in a series of boxes.
Example:
Page 32

About This Book Conventions Used in This Book
In this example, you would access the Voice System Administration menu
and select the Reports menu. From the Reports menu, you would then
select the Message Log Report window.
Some Screen
Simulations
Text in a simulated screen display appears in typewriter text.
Example:
Items That May or
May Not Appear
Grayed-out type represents optional items that may or may not appear in a
given display.
QuickStart - Data Recovery Rescue
Copyright(c) 1997-1999 by Enhanced Software Technologies, Inc.
Serial# 8200-999 Version: 1.3.17
Backup Verify Recover Duplicate Configure Exit
System System System Diskette QuickStart and Reboot
Page 33

About This Book Conventions Used in This Book
Other Typography
Command Text • Literal values, commands, and text that you type in or enter appear in
bold type, as in the following examples:
Example 1:
Enter change-switch-time-zone at the
Enter command: prompt.
Example 2:
Type high or low in the
Speed: field.
• Command variables are shown in bold italic type when they are part of
what you must type in, and in italics when they are not part of the
command line, for exam ple :
Enter ch ma machine_name, where machine_name is the name of
the call delivery machine you just created.
• Command options are shown inside square brackets, for example:
Page 34

About This Book Safety and Security Alert Labels
Safety and Security Alert Labels
This book uses the following symbols to call your attention to potential
problems that could cause personal injury, damage to equipment, loss of
data, service interruptions, or breaches of toll fraud security:
!
CAUTION:
Indicates the presence of a hazard that if not avoided can or will cause minor
personal injury or property damage, including loss of data.
WARNING:
!
Indicates the presence of a hazard that if not avoided can cause death
or severe personal injury.
!
DANGER:
Indicates the presence of a hazard that if not avoided will cause death or
severe personal injury.
Page 35

About This Book Related Resources
Related Resources
Updates to the
Product
The following Web site displays any updates or exceptions to the product that
have occurred after the publication of this document:
http://glsdocs.lucent.com
Training For more information on UCS 1000 R4.2 training, call the BCS Education and
Training Center at one of the following numbers:
• Organizations within Lucent Technologies (904) 636-3261
• Lucent Technologies customers and all others (800) 256-8988
Documentation Appendix A, “Documentation Guide,” in UCS 1000 R4.2 System Description,
585-313-209, provides an overview of all the books in the UCS 1000 R4.2
library that are mentioned in this book.
Additional
Suggested
It is suggested that you also obtain and use the following book for information
Page 36

About This Book Related Resources
You can also order the printed documents by calling 1-888-582-3688 or
visiting the Customer Information Center (CIC) website at:
http://www.lucent.com/cgi-bin/CIC_store.cgi
Using the CD-ROM Documentation
Lucent Technologies ships the documentation in electronic form. Using the
Adobe
Acrobat Reader application, you can read these documents on a
Windows PC, on a Sun Solaris workstation, or on an HP-UX workstation.
Acrobat Reader displays high-quality, print-like graphics on both UNIX and
Windows platforms. It provides scrolling, zoom, and extensive search
capabilities, along with online help. A copy of Acrobat Reader is included with
the documents.
Setting the Default
Magnification
You can set your default magnification by selecting File | Preferences |
General. We recommend the Fit Page option.
Page 37

About This Book Related Resources
chapter you are viewing. You can control the appearance of bookmarks by
selecting View | Page Only or View | Bookmarks and Page.
Using the Button
Bar
The button bar can take you to the book’s Index, table of contents, main
menu, and glossary. It also lets you update your documents. Click the
corresponding button to jump to the section you want to read.
Using Hypertext
Links
Hypertext-linked text appears in blue, italics, and underlined. These links are
shortcuts to other sections or books.
Navigating with
Double Arrow Keys
The double right and double left arrows ( and ) at the top of the
Acrobat Reader window are the go-back and go-forward functions. The goback button takes you to the last page you visited prior to the current page.
Typically, you use to jump back to the main text from a cross reference or
illustration.
Searching for
Topics
Acrobat has a sophisticated search capability. From the main menu, select
Tools | Search. Then choose the Master Index.
Page 38

About This Book Related Resources
If you would want to read the documentation in paper form rather than on a
computer monitor, you can print all or portions of the online screens.
Printing an Entire Document
To print an entire document:
1 From the documentation main menu screen, select one of the print-
optimized documents. Print-optimized documents print two-screens to a
side, both sides of the sheet on 8.5x11-in or A4 paper.
2 Select File | Print.
3 Enter the page range you want to print, or select All. Note that the print
page range is different from the page numbers on the documents (they
print two to a page).
4 After the document is printed, close the file. Do not leave this file open
while viewing the electronic documents.
Page 39

About This Book How to Comment on This Book
How to Comment on This Book
A comment card is included at the back of this book. While we have tried to
make this document fit your needs, we are interested in your suggestions for
improving it and urge you to complete and return a comment card to us. If the
comment card has been removed from this book, send you comments to the
address below. Be sure to include the name and document number of this
book, UCS 1000 R4.2 Administration, 585-313-507.
Lucent Technologies
GLS Information Development Division
Room 22-2H15
11900 North Pecos Street
Denver, Colorado 80234-2703 US
You may also fax your comments to the attention of the Lucent Technologies
UCS 1000 R4.2 writing team at (303) 538-1741.
Page 40

1 Administration Overview
Overview
This chapter provides an overview of system administration and is designed
to familiarize you with the UCS 1000 R4.2 user interface and the system
administration process including:
• User interface overview
• User interface components
• The administration menus
User Interface Overview
Page 41

1 Administration Overview UCS 1000 R4.2 User Interface
active. To return to the previous menu or window, you can cancel the active
one.
UCS 1000 R4.2 User Interface
Administering the voice system through the administrative screens involves
many activities, and all share a common user interface. Although the
information on the screen changes often, the information arrangement does
not change. The typical screen contents is as follows (Figure 6 on page 3
):
• Menu and/or window
• Message line
• Function key labels
Page 42

1 Administration Overview UCS 1000 R4.2 User Interface
Figure 6. Sample UCS 1000 R4.2 System Screen
Message Line
Function Key La bels
Menu or
Window
Page 43

1 Administration Overview UCS 1000 R4.2 User Interface
Cursor Movement Keys
Table 1 lists the keys used to maneuver within a menu or window. They are
referred to throughout this book as the cursor movement keys.
Table 1. Cursor Movement Keys
Type of Movement Key
Move to next line in menu, list, or text; “wrap” from
last item to first item in a menu or form
Move to previous line in menu, list, or text; “wrap”
from first item to last item in a menu or form
Move down one “screenful”
PgDw
Move up one “screenful”
PgUp
Move to next field in a screen or window Tab, or Enter
Move to previous field in a screen or window Shift, or Ta b
Page 44

1 Administration Overview UCS 1000 R4.2 User Interface
Menus and Windows
You use menus and windows to exchange information with the voice system.
This exchange may involve activities such as making menu selections or
populating fields. Since the display may contain more than one menu or
window at the same time, each menu/window is outlined so that it is clear
what information it contains. At any given time, only one menu or window on
screen is designated as active.
Menus A menu allows you to select an option that takes you to the next menu or
window (Figure 7
).
Figure 7. Sample Menu
Page 45

1 Administration Overview UCS 1000 R4.2 User Interface
The components of a menu include:
• Title — The title describes the information contained within the menu, or
the tasks you can accomplish using it. In this book, titles are shown with
the first letter of each word capitalized, followed by the word menu, such
as the Configuration Management menu.
• Scroll Indicator — The scroll bar indicates whether there is additional text
to be displayed. The indicates there is more information to view below
what is presently shown. The indicates there is more information to
view above what is currently displayed. Not every menu has a scroll
indicator.
Selecting a Menu Item
To select a menu item, highlight it using one of the following methods and
then press Enter:
• Use the cursor movement keys to move the highlight bar:
~ Press to move the highlight bar down.
Page 46

1 Administration Overview UCS 1000 R4.2 User Interface
• T ype the first character(s) of the menu line. The system highlights the first
menu item beginning with that letter. For example, in Figure 7 on page 5
,
type S to select
System Control. If there is another menu item beginning
with “s,” type more characters.
The menu items are not case-sensitive; that is, typing A is the same as
typing a. If you type a letter for which there is no matching item, the
system “beeps” and does not move the highlight bar.
Windows A window allows you to enter and view information, and can range in size.
See Figure 8
and Figure 9 on page 8.
Figure 8. Sample Window
Page 47

1 Administration Overview UCS 1000 R4.2 User Interface
Figure 9. Sample Window
The components of a window include:
• Title — The title describes the information contained within the window, or
the tasks you can accomplish using it. In this book, titles are shown with
the first letter of each word capitalized, followed by the word window, such
as Voice Equipment window.
• Scroll Indicator — The scroll bar indicates whether there is additional text
to be displayed. The indicates there is more information to view below
what is presently shown. The indicates there is more information to
view above what is currently displayed. Not every window has a scroll
indicator.
Page 48

1 Administration Overview UCS 1000 R4.2 User Interface
Populating Fields
There are three ways to enter information in a field, as described below.
• Type the first character or first few characters of the entry.
With the cursor positioned on the field, begin to type the entry. As soon as
you type enough characters to uniquely identify the desired entry, the
system automatically supplies the remaining characters. If the entry is
invalid, the system beeps and removes the invalid characters.
For example, given the
Day: field in Figure 10 on page 10, assume that
valid entries are the names of the days in the week. When you type M, the
system fills in the entire word Monday because there is only one valid
entry that begins with M.
However, if you type S, the system waits before filling in the day of the
week because there are two valid entries that begin with S (Saturday and
Sunday). At this point, if you type a, the system fills in the word Saturday.
If you type u, the system fills in the word Sunday. This technique is not
case-sensitive. In other words, typing either M or m in the above example
Page 49

1 Administration Overview UCS 1000 R4.2 User Interface
Figure 10. Fields in the Call Data Summary Report Window
•
Type the entire entry.
Move to the desired field and type the entire entry. While in a field, you
can also edit the entry.
• Use the CHOICES screen selections.
Press
F2 (Choices) to open a menu that shows the available choices for a
field. Select an option as you would in a standard menu. The content of
the CHOICES menu varies depending on the situation. Sometimes no
CHOICES menu is available for a screen or window.
Page 50

1 Administration Overview UCS 1000 R4.2 User Interface
Function Keys
Your keyboard has eight to twelve function keys. The system uses the first
eight function keys, labeled
F1 through F8.
The boxed labels at the bottom of the display correspond to the function keys
on your keyboard. Function keys are the means by which you command the
system to perform a function within the active menu or window. The label
describes the instruction that is sent to the system when you press the
corresponding function key. The commands, and therefore the labels, that
are available at any given time vary depending on the active menu or
window. Menus and windows may have one or two rows of function key
labels. See Figure 11 on page 12
for an example of a window with function
key labels.
In Figure 11 on page 12
you press F1 to access the Help screen for the
System Monitor window. Also in Figure 11 on page 12
, notice that the label
for
F4 is blank. This indicates that no command is issued if you press the F4
function key. If you press an inactive function key, the system beeps and the
Page 51

1 Administration Overview UCS 1000 R4.2 User Interface
Figure 11. Function Key Labels — System Monitor Window
Standard Function
Key Labels
Standard function key labels remain constant regardless of the active menu
or window. They represent commands that are valid for every menu or
Page 52

1 Administration Overview UCS 1000 R4.2 User Interface
Table 2. Standard Function Key Labels
Key Description
F1 Help Opens an online help window. See Online Help on page
17 for more information about online help.
F6 Cancel Closes the active screen and cancels any additions,
deletions, or changes made. The screen that
immediately precedes the just-closed screen becomes
the active screen. If there is an activity in progress, such
as making a backup copy of an application on a floppy
disk, pressing
F6 (CANCEL) does not interrupt the
operation.
F7 Cmd-Menu Opens the Command Menu. Options include System
Monitor, Trace Service, and Exit. See Command Menu
on page 297 in Chapter 7, Common Administration , for
more information.
Page 53

1 Administration Overview UCS 1000 R4.2 User Interface
Table 3. Optional Function Key Labels
Function Key
Label
Description
F2 (Choices) Opens a menu screen containing choices for the
current field, if there is a finite set of choices for a
particular field. Move the cursor to the field you want
to fill and press
F2 (CHOICES). The CHOICES
menu opens, displaying the options available for that
field.
F2 (Prevpage) Scrolls back one full page, towards the beginning of
text that is too long to fit within the active screen or
window.
F3 (Nextpage) Scrolls forward, toward the end of text that is too
long to fit within the active screen, menu, or window.
For example, pressi ng
F3 in Figure 11 on page 12
Page 54

1 Administration Overview UCS 1000 R4.2 User Interface
F5 (Bottom) Scrolls toward the bottom of a page.
F6 (Print) Prints the information provided by the active screen,
such as a report.
F7 (Frm-Mgmt) Opens the Frame Management Menu. See
Command Menu on page 297
in Chapter 7,
Common Administration , for more information.
Options include list, move, refresh, and UNIX
system.
F8 Chg-Keys Switches the function key labels displayed from
standard to optional, or vice versa. For example,
Figure 11 on page 12
and Figure 12 on page 16
show the System Monitor window. Figure 12 on
Table 3. Optional Function Key Labels
Function Key
Label
Description
Page 55

1 Administration Overview UCS 1000 R4.2 User Interface
Figure 12. Change Keys — System Monitor Screen
Note: In Figure 12, the Host Mon function key selection does not
appear if host software is not installed.
Page 56

1 Administration Overview Online Help
Online Help
Most screens and windows have a companion text window that contains
helpful reference information. Figure 13
shows the help screen associated
with the Database Access ID Table window. The system online help windows
are not designed to be a substitute for this book. They briefly describe each of
your options for a given menu or window. Press
F1 to access online help.
Figure 13. Sample Online Help Screen, Database Access ID Table
Page 57

1 Administration Overview Accessing the Administration Menus
Accessing the Administration Menus
To access the administration menu:
1 At the Console Login: prompt, enter root
The system prompts you for a password.
2 Enter your root password.
The system displays the system prompt
#.
3 Enter one of the following commands at the prompt:
~ To display the administration menu, enter cvis_mainmenu
The system displays the administration menu (Figure 14
).
Figure 14. Administration Menu
Page 58

1 Administration Overview Accessing the Administration Menus
!
CAUTION:
Do not create multiple simultaneous cvis_menu processes. This could
severely impact performance and may lock up the system.
The system displays the Voice System Administration menu (Figure
15).
Figure 15. Voice System Administration Menu
Page 59

1 Administration Overview Accessing the Administration Menus
Administration Menu Options
From the administration menu, you can initiate UNIX System Administration
and Voice System Administration, or you may exit.
UNIX System
Administration
From the UNIX System Administration menu, you can set up a variety of
generic software operations including backups, printer operations, and
peripheral setup. See Chapter 2, UNIX Administration
, for more information
and procedures on UNIX administration.
Voice System
Administration
From the Voice System Administration menu, you can begin your session for
administering the system, such as application packages or reports. See
Chapter 3, Voice System Administration
, for more information and
procedures on voice system administration.
Exit Exit takes you out of the administration menus and returns you to the UNIX
system prompt.
Press
F6 (Cancel) from almost any place in the Administration menu
Page 60

1 Administration Overview Accessing the Administration Menus
Note: F6 (Cancel) does not exit from the UNIX System Administration
menus. See Exit UNIX System Administration Menu on page 57
in
Chapter 2, UNIX Administration
, for the procedure to exit from the
UNIX System Administration menus.
Page 61

2 UNIX Administration
Overview
This chapter describes the UnixWare™ system administration user interface,
the procedures to access the UnixWare administration menu, and the
procedures to perform basic UnixWare-level administration.
The sections in this chapter are arranged in the same order as the
administration services in the UnixWare administration main menu.
UnixWare Documentation
For additional information on UnixWare administration, see the UnixWare
documentation. Start with the System Administration Volume 1 for an
Page 62

2 UNIX Administration UNIX System Administration Access
UNIX System Administration Access
To access SYSADM (the OA&M menu interface of UnixWare):
1 At the Console Login: prompt, enter root
The system prompts you for a password.
2 Enter your root password.
The system displays the system prompt #.
3 Enter cvis_mainmenu
The system displays the Administration menu (Figure 16
).
Figure 16. Administration Menu
Page 63

2 UNIX Administration UNIX System Administration Access
4 Select:
The system displays the UNIX System V Administration menu (Figure 17
on page 24).
Figure 17. UNIX System V Administration Menu
> UNIX System Administration
Page 64

2 UNIX Administration Application Administration
All of the procedures in this book assume that you are using the user
interface menus. The procedures provide references to the books detailing
command line interfaces when possible.
Application Administration
The Application Administration menu provides menus and tasks for
administering custom applications. Application developers can use this option
to place menus from which to administer add-on or custom applications.
Backup Scheduling, Setup and Control
The Backup Service menu provides two backup options: basic and extended.
Back-up files can be stored on either tape or diskettes.
Note: Diskettes must be UNIX formatted when you begin this procedure.
Page 65

2 UNIX Administration Backup Scheduling, Setup and Control
The basic backup services allow you to:
• Display the date and time of the last system and incremental backup.
• Conduct a backup of all files or only selected files in your HOME directory.
• Add, change, delete, or display backup requests.
• Back up all system and user files that have been modified or created
since your voice system was installed.
The extended backup services allow you to:
• Determine the backup rotation period.
• Specify how backups are to be done for file systems and data partitions.
• Display the backup history and backup status logs.
• Establish lists of files that should not be backed up.
• Respond to system prompts during backup jobs.
• Schedule backups and the reminder messages that backups should be
Page 66

2 UNIX Administration Backup Scheduling, Setup and Control
To access backup services:
1 Start at the UNIX System V Administration menu (Figure 17 on page 24)
and select:
The system displays the Backup Service Management menu (Figure 18
).
Figure 18. Backup Service Management Menu
> backup_service
Page 67

2 UNIX Administration Backup Scheduling, Setup and Control
Basic Backup
To perform a basic backup:
1 Start at the Backup Service Management menu (Figure 18 on page 27)
and select:
The system displays the Backup to Removable Media menu (Figure 19
).
Figure 19. Backup to Removable Media Menu
> basic
Page 68

2 UNIX Administration Backup Scheduling, Setup and Control
Backup History The Backup History menu option displays the date and time of the last
system and incremental backup.
To view the backup history:
1 Start at the Backup to Removable Media menu (Figure 19 on page 28)
and select:
The system displays the Backup History window (Figure 20
).
Figure 20. Backup History Window
> Backup History
Page 69

2 UNIX Administration Backup Scheduling, Setup and Control
Backup of All
Personal Files
A personal backup copies all the files in your HOME (or personal) directory to
either tape or formatted diskettes.
To back up all files in your personal directory:
1 Start at the Backup to Removable Media menu (Figure 19 on page 28)
and select:
The system displays the Select Removable Media menu (Figure 21
).
Figure 21. Select Removable Media Menu
> Backup Files under /
> Personal Backup
Page 70

2 UNIX Administration Backup Scheduling, Setup and Control
2 Select the removable media type.
The system displays a message showing the approximate number of
diskettes or tapes, and the time required to backup the HOME directory.
The system prompts you to insert the first diskette or tape. The system
periodically prompts you to insert more diskettes or tapes until the backup
is complete.
3 Press ENTER when the backup is complete.
The system redisplays the Backup to Removable Media menu
(Figure 19 on page 28).
Backup of Selected
Personal Files
This procedure backs up selected files and directories in your HOME
directory to either tape or formatted diskette.
To back up selected personal files or directories:
1 Start at the Backup to Removable Media menu (Figure 19 on page 28)
and select:
Page 71

2 UNIX Administration Backup Scheduling, Setup and Control
The system displays the Select Removable Media menu (Figure 21 on
page 30).
2 Select the removable media type.
The system displays the Selective Backup of Files under / window
(Figure 22).
Figure 22. Selective Backup of Files under / Window
3
Enter the file names and directory names to be backed up. Separate each
entry with a space in the
Files or directories to back up: field.
Note: All files and directories must be in the HOME directory or in a
Page 72

2 UNIX Administration Backup Scheduling, Setup and Control
The system prompts you to insert the first diskette or tape. The system
periodically prompts you to insert more diskettes or tapes if they are
needed until the backup is compl ete.
5 Press ENTER when the backup is complete.
The system redisplays the Backup to Removable Media menu
(Figure 19 on page 28).
Schedule a Backup
to Tape
The Schedule Backup to Tape menu option allows you to:
• Add a system or incremental backup.
• Change a previously scheduled backup request.
• Delete a previously scheduled backup request.
• Display the scheduled backup list.
Note: You need either root or system administration privileges to add,
change, or delete a scheduled backup. You do not need those
privileges to display a list of scheduled backups.
Page 73

2 UNIX Administration Backup Scheduling, Setup and Control
Add a Backup
To schedule a new backup to tape:
1 Start at the Backup to Removable Media Menu (Figure 19 on page 28)
and select:
The system displays the Schedule a System Backup window (Figure 23
).
Figure 23. Schedule a System Backup Window
> Add
> Schedule Backup to Tape
Page 74

2 UNIX Administration Backup Scheduling, Setup and Control
2 Press F2 (Choices) to toggle between System Backup and Incremental
System Backup in the
Type of Backup: field. A system backup (field
default) performs a back up of all system and user files installed or
modified since the voice system was first installed. An incremental backup
performs a back up of all system and user files since the last backup.
3 Use one of the following methods to enter a value in the Month(s) of
the Year:
field:
~ Type a number from 1 to 12 where January is 1 and December is 12 to
indicate a single month.
~ Type two numbers separated by a hyphen to indicate a range of
months. For example, type 1-8 to instruct the system to perform
backups of January through August.
~ Press F2 (Choic es) a nd pr ess F2 (Mark) to select one or more months.
Press
F3 (Enter) to save the selected month or months and return to
the
Month(s) of the Year: field.
The default value is “all,” to back up all months.
Page 75

2 UNIX Administration Backup Scheduling, Setup and Control
~ Type two numbers separated by a hyphen to indicate a range of days.
For example, type 14-20 to instruct the system to perform a backup
every day from day 14 through day 20 of the month.
~ Press F2 (Choices) and press F2 (Mark) to select one or more days.
Press
F3 (Enter) to save the selected day or days and return to the
Day(s) of the Month: field.
The default is “all,” to back up all days of the month.
5 Use one of the following methods to enter a value in the Day(s) of the
Week:
field:
~ Type the first letter of the day to indicate a single day of the week, or
Press
F2 (Choices) to select a single day from a menu.
Note: Sunday is Su and Thursday is Th. Every other day of the week is
indicated by its first letter.
~ Type two days, separated by a hyphen to indicate a range of days. For
example, type M-Th to instruct the system to perform a backup every
Monday, Tuesday, Wednesday, and Thursday.
Page 76

2 UNIX Administration Backup Scheduling, Setup and Control
6 Set the Time of Day: field:
a Type a number in the Hours portion of the field to indicate the hour,
where 00 is midnight and 23 is 11:00 p.m. Or, press
F2 (Choices) to
select from a menu.
b Press .
The system places the cursor in the minutes portion of the field.
c Type a number from 0 to 59 to indicate the minutes past the hour.
The default time is 02:00, to start the backup at 2:00 a.m.
7 Press F3 (Save).
The system displays a confirmation window that asks whether you want to
continue to schedule the backup.
8 Do one of the following:
~ To confirm the backup schedule, press F3 (Cont).
Page 77

2 UNIX Administration Backup Scheduling, Setup and Control
Change Scheduled Backup Settings
To change scheduled backup settings:
1 Start at the Backup to Removable Media menu (Figure 19 on page 28)
and select:
The system displays the Change Scheduled Backup window (Figure 24
).
Figure 24. Change Scheduled Backup Window
> Change
> Schedule Backup to Tape
Page 78

2 UNIX Administration Backup Scheduling, Setup and Control
Figure 25. Change Scheduled Backup Information Window
4
Change the information as appropriate. See step 2 through step 6 in Add
a Backup on page 34 for information on how to add data to the fields in
this window.
5 Press F3 (Save).
Page 79

2 UNIX Administration Backup Scheduling, Setup and Control
6 Do one of the following:
~ To confirm the backup schedule, press F3 (Cont).
The system returns to the Schedule Backup to Tape menu.
~ To cancel the backup schedule, press F6 (Cancel).
The system returns to the Schedule Backup to Tape menu.
Delete a Scheduled Backup
To delete scheduled backups:
1 Start at the Backup to Removable Media menu (Figure 19 on page 28)
and select:
> Delete
> Schedule Backup to Tape
Page 80

2 UNIX Administration Backup Scheduling, Setup and Control
Figure 26. Delete Scheduled Backups Window
2
Select the scheduled backup to be deleted and press F2 (Mark). Select
as many of the entries as necessary.
3 Press F3 (Enter).
The system displays a confirmation window to confirm the backups
marked for deletion.
4 Do one of the following:
~ To confirm the backup deletion, press F3 (Cont).
The system returns to the Schedule Backup to Tape menu.
~ To cancel the backup deletion, press F6 (Cancel).
Page 81

2 UNIX Administration Backup Scheduling, Setup and Control
Display Scheduled Backups
To display a list of scheduled backups:
1 Start at the Backup to Removable Media menu (Figure 19 on page 28)
and select:
The system displays the Display Scheduled Backup window (Figure 27
).
Figure 27. Display Scheduled Backups Window
> Display
> Schedule Backup to Tape
Page 82

2 UNIX Administration File System Creation, Checking, and Mounting
Performing Extended Backup Services
See “Backing Up the UCS 1000 R4.2 System” in Chapter 3, “Common
System Procedures," in UCS 1000 R4.2 System Reference, 585-313-210, for
information on when and how to conduct exten ded backups .
File System Creation, Checking, and Mounting
File Systems administration allows you to:
• Check for and repair errors on a file system.
• Set file system defaults.
• Monitor disk usage for all file systems.
• Display a list of installed file system types.
• List files by age or size.
Page 83

2 UNIX Administration Machine Configuration, Display, and Shutdown
Figure 28 shows the options available for file system administration. See
System Files and Devices Reference in the Novell UnixWare documentation
set for additional information about each of these options.
Figure 28. Manage File Systems Menu
Page 84

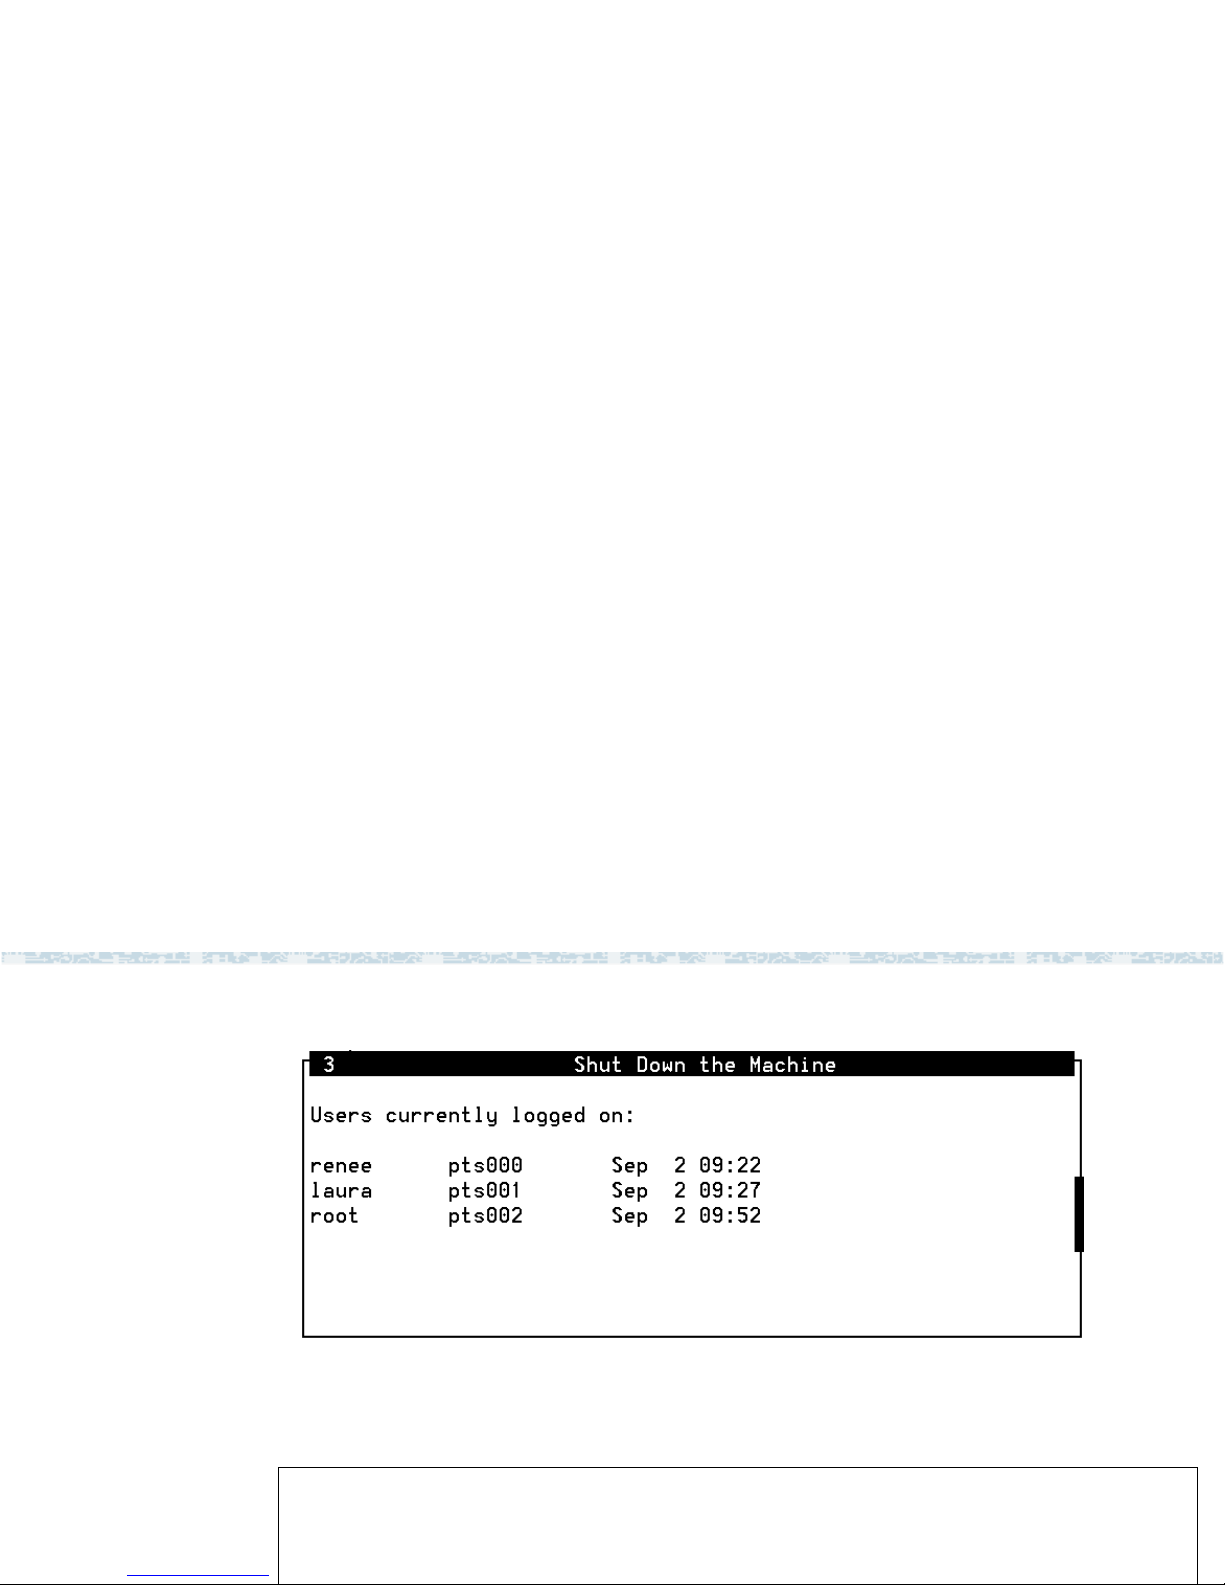
2 UNIX Administration Machine Configuration, Display, and Shutdown
• Reboot the machine.
• Display a list of users who are logged on.
Figure 29
shows the options available for machine administration. See
System Files and Devices Reference in the Novell UnixWare documentation
set for additional information about each of these options.
Figure 29. Machine Configuration Display and Shutdown Menu
Memory Size Disparity
The system may show that available memory is different than the amount that
is actually available. See “Setting Up the UnixWare Environment," in Chapter
Page 85
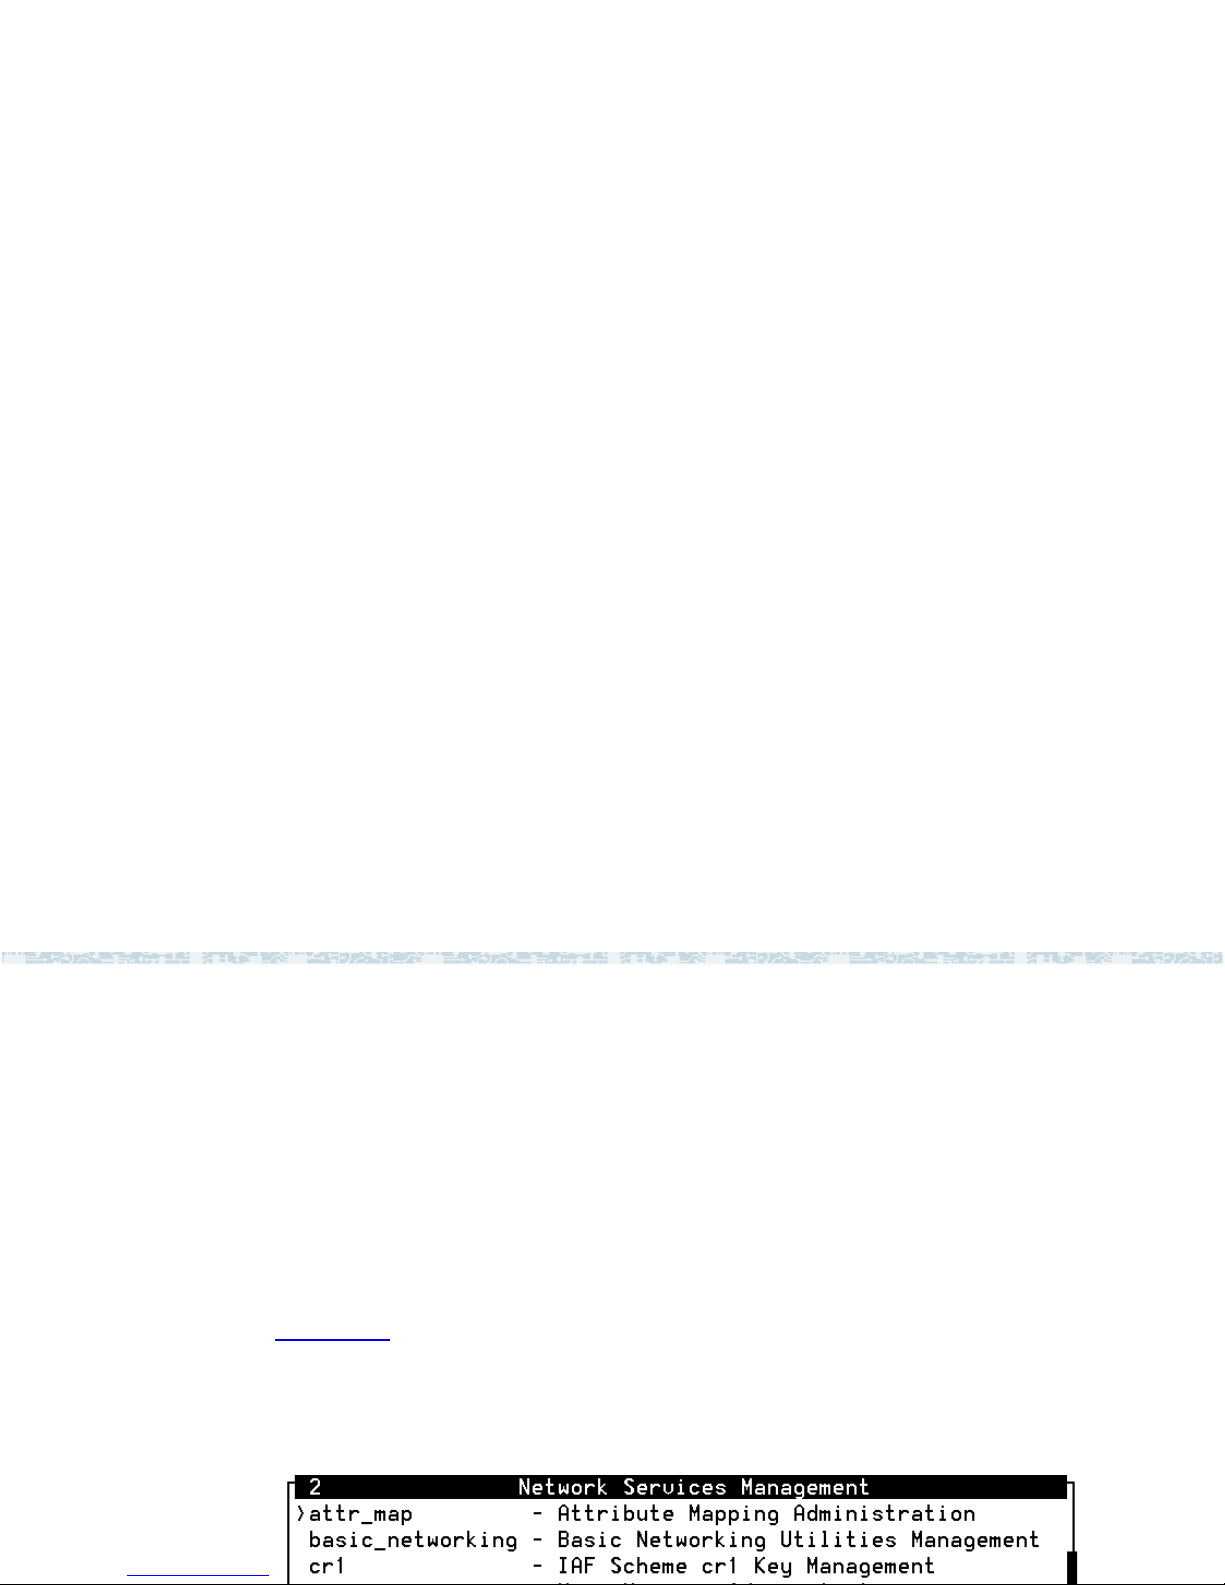
2 UNIX Administration Network Services Administration
Network Services Administration
Network Services administration allows you to:
• Make network selectio ns .
• Manage distributed file systems.
• Perform name-to-address translations.
• Manage basic networking.
Figure 30
displays the options available for network services administration.
See Network Administration in the Novell UnixWare documentation set for
additional information about each of these options.
Figure 30. Network Services Management Menu
Page 86

2 UNIX Administration Port Access Services and Monitors
Port Access Services and Monitors
Ports administration allows you to monitor and service ports, set up quick
terminal, and manage terminal line (tty) settings.
Figure 31 shows the options available for ports administration. See System
Administra tion Volume 1 in the Novell UnixWare documentation set for
additional information about each of these options.
Figure 31. Service Access Management Menu
Printer Configuration and Services
Page 87

2 UNIX Administration Restore from Backup Data
Restore from Backup Data
Restore service administration allows you to perform basic and extended
restore services.
Note: If you want to back up and restore speech files, see the spsav
command in Appendix A, Summary of Commands
.
Figure 32
shows the options available for restore service administration.
Figure 32. Restore Service Management Menu
Basic Restore Services
Page 88

2 UNIX Administration Restore from Backup Data
Extended Restore Services
Extended restore services allow you to:
• Specify the login of the operator who should be notified when a request
that requires operation intervention is queued.
• Respond to restore requests.
• Restore files, directories, file systems, or a data partition from a backup
archive.
• Display or modify the status of pending restore requests.
Figure 34
shows the options available for the Extended Restore Service.
Figure 34. Extended Restore Service Menu
Page 89

2 UNIX Administration Schedule Automatic Task
Schedule Automatic Task
Schedule task administration allows you to add, change, delete, and display
a task scheduled through cron.
Figure 35 shows the options available for schedule task administration. See
System Administration Volume 1 in the Novell UnixWare do cumentation set
for additional information about each of these options.
Figure 35. Schedule Automatic Task Menu
Page 90

2 UNIX Administration Security Management
Security Management
Security management allows you to manage the security features on the
system. Currently, this includes only the audit trail facility management.
Figure 36 shows the options available for audit trail facility management. This
menu includes the func ti ons for:
• Managing audit criteria
• Enabling and disabling auditing
• Displaying audit information
• Displaying and setting event log parameters on the system
Note: To use the audit subsystem, you must be logged in at the
SYS_PRIVATE security level, be a member of group audit, and be
able to access the commands within the AUD role.
Figure 36. Audit Trail Facility Management Menu
Page 91

2 UNIX Administra tion Software Installation and Removal
Software Installation and Removal
Software administration allows you to install software, display information
about software packages, store software without installing it, and remove
software.
Figure 37
shows the options available for software administration. See
System Files and Devices Reference in the Novell UnixWare documentation
set for additional information about each of these options.
Figure 37. Software Installation and Information Management Menu
Page 92

2 UNIX Administration Storage Device Operations and Definition
Storage Device Operations and Definition
Storage devices administration allows you to:
• Copy information from one volume to another.
• Display storage device information.
• Erase the contents of a volume.
• Configure a storage device on the system.
• Reconfigure a storage device on the system.
A storage device may be integral disks, diskettes, SCSI data storage devices,
nine-track tapes, and other devices configured on the system. The UCS 1000
R4.2 system uses integral disks (hard disks), diskettes, and tapes as storage
devices.
Figure 38
shows the options available for storage administration. See System
Files and Devices Reference in the Novell UnixWare documentation set for
Page 93

2 UNIX Administration System Name, Date and Time, and Initial Password Setup
Figure 38. Storage Device Operations and Definitions Menu
System Name, Date and Time, and Initial Password Setup
System setup administration allows you to administer the following system
characteristics:
• Environment (date, time, time zone)
Page 94

2 UNIX Administration System Name, Date and Time, and Initial Password Setup
!
CAUTION:
Your system’s machine name is used by the Feature Licensing software. Call
your support center before changing the machine name to avoid losing any of
your feature licenses.
Figure 39
shows the options available for system setup administration.
Figure 39. System Name, Date, Time and Initial Password Setup Menu
Page 95

2 UNIX Administration User Login and Group Administration
User Login and Group Administration
Users administration allows you to manage logins and groups on your
system, inclu di ng:
• Adding users or groups
• Defining defaults for adding users
• Listing users or groups
• Modifying attributes of users or groups
• Redefining user password information
• Removing users or groups
Figure 40
shows the options available for users administration. See System
Owner Handbook in the Novell UnixWare documentation set for additional
information about each of these options.
Figure 40. User Login and Group Administration Menu
Page 96

2 UNIX Administration Exit UNIX System Administration Menu
Exit UNIX System Administration Menu
To exit Unix System Administration:
1 Press F7 (Cmd-Menu).
The system displays the Command Menu (Figure 41
).
Figure 41. Command Menu
2
Select:
Page 97

3 Voice System Administration
Overview
The Voice System Administration menu provides access to many
administrative options. This chapter describes how to access the Voice
System Administration menu, and describes all of the administrative options.
This chapter contains the reference and procedural information for the
Configuration Management option.
Accessing the Voice System Administration Menu
To access the Voice System Administration menu:
1 At the Console Login: prompt, enter root
Page 98

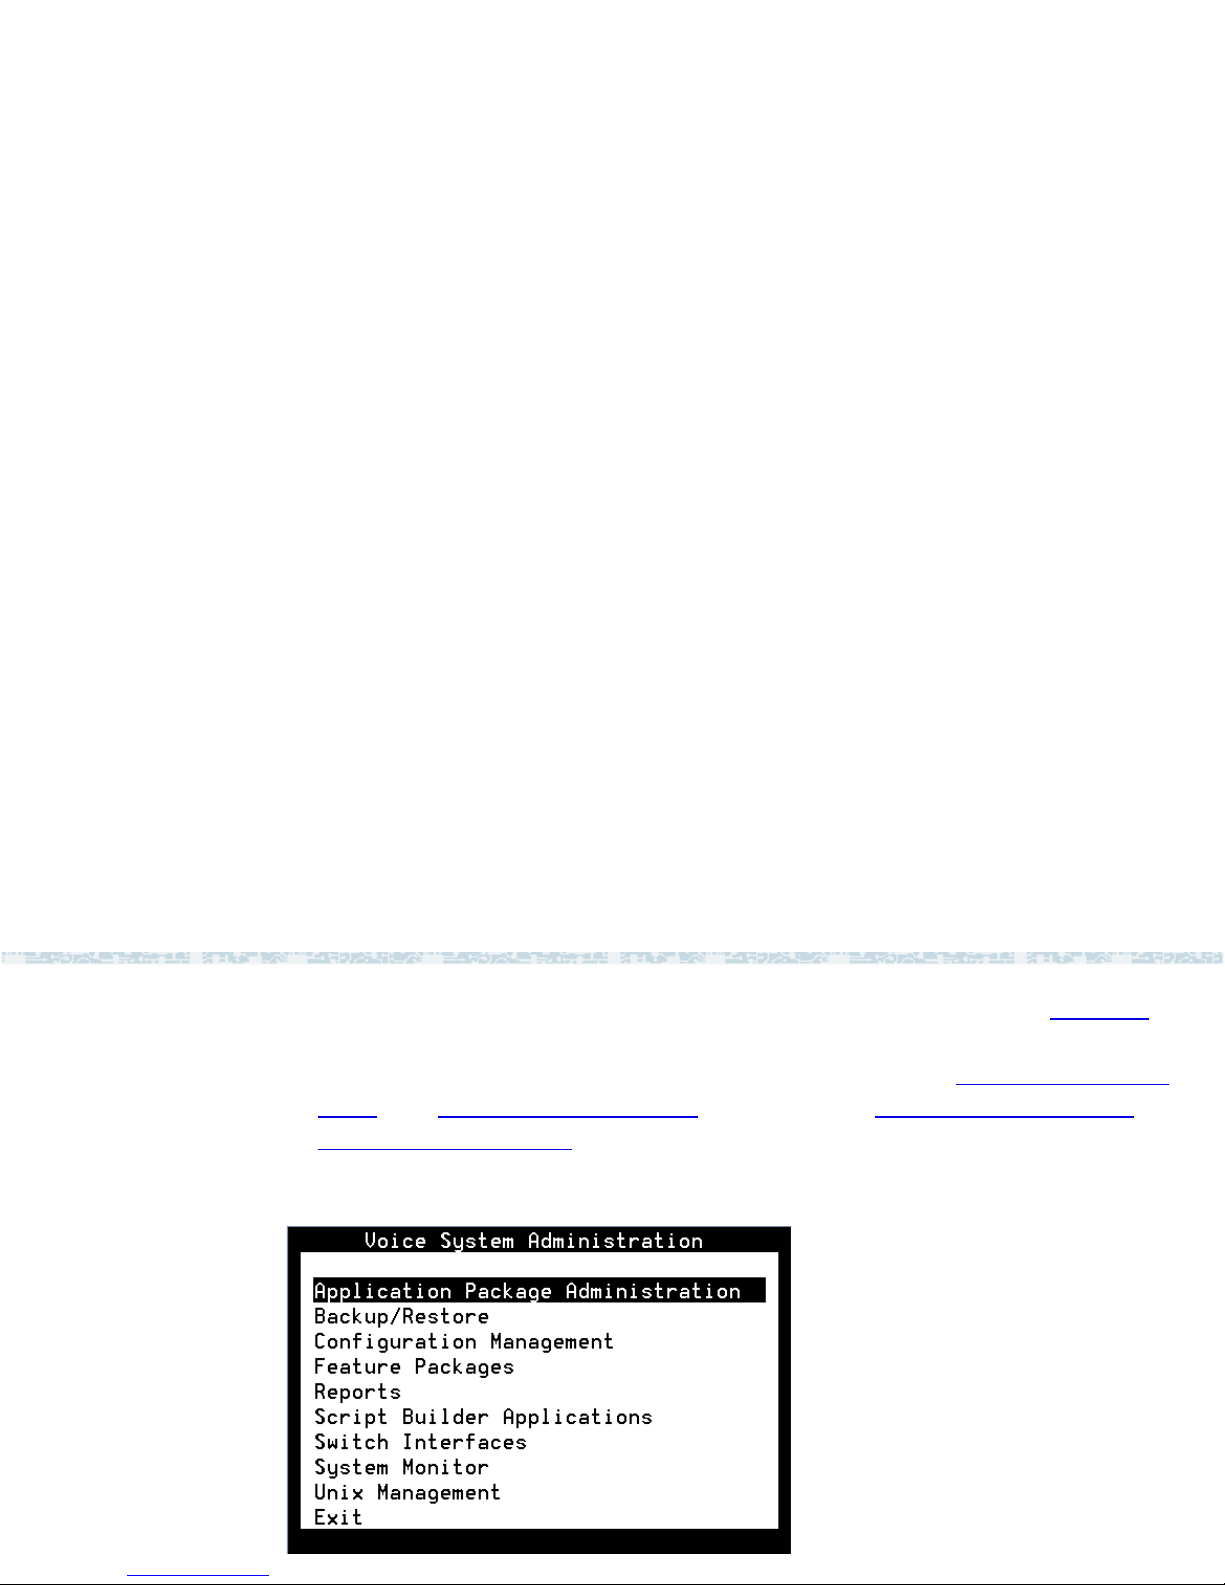
3 Voice System Administration Overview
Figure 42. Voice System Administration Menu
Voice System Administration Menu Options
From the Voice System Administration menu, you have access to all of the
major administrative features of the voice system.
Page 99

3 Voice System Administration Overview
Backup/Restore The Backup/Restore menu simplifies the backup and restore procedures by
providing a user interface for differential and full backups.
See “Common System Procedures," in UCS 1000 R4.2 System Reference,
585-313-210, for more information on performing backup and restore
procedures.
Configuration
Management
The Configuration Management menu provides capabilities for you to
perform the following adm ini s tra tive tas ks :
• Add or remove database access IDs
• License features to the voice system
• Configure host sessions and manage host protocols
• Modify system messages
• Administer alarms
• Diagnose equipment
Page 100

3 Voice System Administration Overview
Feature Packages The Feature Packages menu provides administrative access to the optional
feature packages currently installed.
Reports The Reports menu allows you to generate and customize reports for:
• Call classification and data
• System messages
• System traffic
See Chapter 7, Common Administration
, for more information on using the
Reports menu.
Switch Interfaces The Switch Interfaces menu provides access to administer digital switch
parameters.
See Chapter 4, Switch Interface Administration
, for more information on
using the Switch Interfaces menu.
System Monitor The System Monitor window displays the voice channels on the system and
 Loading...