

Page 1

Integrated Services
Digital Network (ISDN)
8528T Voice Terminal
Feature Package 3
User’s Manual
555-021-776
Comcode 107964488
Issue 2
December 1996
Page 2

WARRANTY
All terms and conditions specified in the owner’s agreement with Lucent
Technologies apply.
NOTICE
While reasonable efforts were made to ensure that the information in this
document was complete and accurate at the time of printing, Lucent
Technologies can assume no responsibility for any errors. Changes or
corrections to the information contained in this document may be incorporated
into future issues.
TO ORDER COPIES OF THIS DOCUMENT
Write: Lucent Technologies BCS Publications Center
P.O. Box 4100
Crawfordsville, IN 47933
Call: Voice 1 800 457-1235
International Voice 317 361-5353
Fax: Fax 1 800 457-1764
International Fax 317 361-5355
Order: Document No. 555-021-776
Issue 2, December 1996
DISCLAIMER
Intellectual property related to this product (including trademarks) and registered
to AT&T Corporation has been transferred to Lucent Technologies Incorporated.
Any references within this text to American Telephone and Telegraph Corporation
or AT&T should be interpreted as references to Lucent Technologies
Incorporated. The exception is cross-references to books published prior to
December 31, 1996, which retain their original AT&T titles.
HERITAGE
Lucent Technologies — formed as a result of AT&T’s planned restructuring —
designs, builds, and delivers a wide range of public and private networks,
communication systems and software, consumer and business telephone
systems, and microelectronics components. The world-renowned Bell
Laboratories is the research and development arm for the company.
THE “CE” MARK
The “CE” mark affixed to this equipment means that it conforms to the European
Union Electromagnetic Compatibility Directive (89/336/EEC) and the Low Voltage
Directive (73/23/EEC).
HEARING AID COMPATIBILITY
These voice terminals are Hearing Aid Compatible (“HAC”). In addition, some
units have an “HAC” label on them.
TRADEMARKS
DEFINITY and 5ESS are registered trademarks of Lucent Technologies.
Prepared by © 1996 Lucent Technologies
BCS Product Documentation Development All Rights Reserved
Middletown, NJ 07748-9972 Printed in USA
Page 3

INTERFERENCE WARNING INFORMATION - Part 15 of FCC Rules
Federal Communications Commission (FCC) Rules require that you be
notified of the following:
This equipment has been tested and found to comply with the limits for a
Class A digital device, pursuant to Part 15 of the FCC Rules. These limits
are designed to provide reasonable protection against harmful interference in
a residential installation. This equipment generates, uses and can radiate
radio frequency energy and, if not installed and used in accordance with the
instructions, may cause harmful interference to radio communications.
However, there is no guarantee that interference will not occur in a particular
installation. If this equipment does cause interference to radio or television
reception, which can be determined by turning the equipment off and on, the
user is encouraged to try to correct the interference by one or more of the
following measures:
• Reorient or relocate the receiving antenna.
• Increase the separation between the equipment and receiver.
• Connect the equipment into an outlet on a circuit different from that
to which the receiver is connected.
• Consult the dealer or an experienced radio/TV technician for help.
You may find the following booklet prepared by the Federal Communications
Commission helpful:
Problems.
Office, Washington, D.C. 20042, Stock No. 004-000-00345-4.
This booklet is available from the U.S. Government Printing
How to Identify and Resolve Radio-TV Interference
Page 4

Page 5

IMPORTANT SAFETY INSTRUCTIONS
Only the most careful attention has been devoted to quality standards in
the manufacture of your new telephone. Safety is a major factor in the
design of every set. But, safety is YOUR responsibility too.
Please read carefully the helpful tips listed below and on the next page.
These suggestions will enable you to take fullest advantage of your new
voice terminal. Then, retain these tips for later use.
When using your telephone equipment, the following safety precautions
should always be followed to reduce the risk of fire, electric shock, and
injury to persons.
d
Read and understand all instructions.
d
Follow all warnings and instructions marked on the telephone.
d
This telephone can be hazardous if immersed in water. To avoid the
possibility of electrical shock, do not use the telephone while you are
in the bathtub or shower, or when you are wet. If you accidentally
drop the telephone into water, do not retrieve the equipment until you
have first unplugged the line cord from the modular wall jack. Do not
reconnect the telephone until it has dried thoroughly.
d
Avoid using the telephone (other than the cordless type) during
electrical storms in your immediate area. There is a remote risk of
electric shock from lightning. Urgent calls should be brief. Even
though protective measures may have been installed to limit
electrical surges from entering your home or business, absolute
protection from lightning is impossible.
d
If you suspect a natural gas leak in the vicinity of the telephone,
report it immediately, but use a telephone away from the area in
question. The telephone’s electrical contacts could generate a tiny
spark. While unlikely, it is possible that this spark could ignite heavy
concentrations of gas.
d
Never push objects of any kind into the telephone through housing
slots since they may touch hazardous voltage points or short out
parts that could result in a risk of electric shock. Never spill liquid of
any kind on the telephone. If liquid is spilled, however, dry
immediately, and refer any service problems to qualified service
personnel.
d
To reduce the risk of electric shock, do not disassemble the
telephone. There are no user serviceable parts inside. Opening or
removing covers may expose you to hazardous voltages. Incorrect
reassembly can cause electric shock when the telephone is
subsequently used.
Page 6

d
Slots and openings in the housing must not be blocked or covered.
The openings should never be blocked by placing the telephone on a
sofa, rug or other similar surface. This product should never be
placed near or over a radiator or heat register. This product should
not be placed in a built-in installation unless proper ventilation is
provided.
d
The telephone should be operated only from the type of power
source indicated on the marking label. If you are not sure of the type
of power supply being used, contact a qualified service person.
d
Do not allow anything to rest on the power cord. Do not locate this
product where the cord will be abused by persons walking on it.
d
Do not overload the AC wall outlets and extension cords as this can
result in risk of fire or electric shock.
d
Before cleaning, disconnect all cords from the telephone. Do not
use liquid cleaners or aerosol cleaners. Use a damp cloth for
cleaning.
d
Disconnect the cords on the telephone and refer servicing to qualified
service personnel when these conditions exist:
When the power supply cord or plug is damaged or frayed.
If liquid has been spilled into the product.
If the product has been exposed to rain or water.
If the telephone does not operate normally by following the
operating instructions. Do not attempt to adjust any other
controls since doing so may result in damage and will require
extensive work by a qualified technician to restore the product to
normal operation.
If the product has been dropped or the housing has been
damaged.
If the product exhibits a distinct change in performance.
SAVE THESE INSTRUCTIONS
When you see this warning symbol on the product, refer to the
instructions booklet packed with the product for information before
!
proceeding.
Page 7

Contents
Introduction……………………………………………………………1
Organization of this Manual ………………………………………1
Conventions Used in this Manual…………………………………2
A Note on the Term, System Manager …………………………3
Your ISDN 8528T Voice Terminal …………………………………4
Feature Descriptions ………………………………………………8
Voice Features………………………………………………………8
Features Accessed with the Display and Softkeys………………9
Voice Features………………………………………………………11
Answering and Placing a Call ……………………………………11
Conference…………………………………………………………12
Drop…………………………………………………………………12
Hold…………………………………………………………………13
Message Retrieval ………………………………………………13
Mute ………………………………………………………………14
Redial (Last Number Dialed) ……………………………………14
Speakerphone and One-Way Speaker …………………………15
Transfer ……………………………………………………………17
Features Accessed with the Display and Softkeys……………18
Entering and Exiting Softkey Mode
(Using the Menu and the Exit Buttons) …………………………19
Using the Next, the Prev, and the Dir Buttons …………………20
Responding to Quit and Done……………………………………20
A Softkey Display Screen Flowchart ……………………………20
Setting the Clock …………………………………………………22
Setting the Speakerphone ………………………………………24
Adding, Editing, and Deleting a Number and Name
in the Directory ……………………………………………………26
Viewing a Directory Entry (and Placing a Call)…………………33
Using the Dir Button to Place a Call ……………………………35
Page 8

Using the Call Log…………………………………………………36
Locking and Unlocking the Directory, Call Log,
and All Softkeys …………………………………………………54
Changing or Removing Your Password…………………………58
Choosing the Contrast Level for the Display……………………60
Selecting a Personalized Ring……………………………………62
Setting the Rate at Which You View
the Display Messages ……………………………………………64
Turning on or off Softkey Information Tones……………………66
Setting the Number of Names on the Directory Page…………68
Self-Test……………………………………………………………70
Tones and Their Meanings ………………………………………72
Voice Terminal Tones ……………………………………………72
Labeling and Installing the Designation Card
and the Telephone Number Card ………………………………72
Installation……………………………………………………………74
Contents of the 8528T Package…………………………………74
Connecting the 8528T to the System……………………………74
Desktop Installation ………………………………………………78
Attaching Adjunct Equipment ……………………………………80
Technical Description ……………………………………………81
Page 9

Introduction
The Lucent 8528T voice terminal can be added to your Integrated
Services Digital Network (ISDN) communications system. In order to
provide you with excellent quality and reliability, Lucent designed this
new voice terminal with the latest advances in telecommunications
technology.
The 8528T voice terminal offers 28 call appearances, Mute, Redial,
Conference, Drop, Transfer, and Hold buttons, a Speakerphone which
can also be optioned as a listen-only Speaker, a Volume control, and an
Adjunct jack for adjunct equipment such as a headset adapter — all that
you will need for easy and efficient call-handling. Four softkeys (the
keys with arrows printed on them) and four display control buttons
located below a 2-line by 24-character liquid crystal display can be used
to access such features as a personal Directory, a Call Log which lists
the most recent incoming and outgoing calls, and a personalized ringing
pattern for the voice terminal.
The following features have been included for the
hearing and visually impaired person:
Two small bars have been placed on the 5 dial
pad key;
The rate at which the display messages appear
on your screen can be set at Slow, Medium, or
Fast;
Confirmation and error tones;
Compatibility with inductively coupled hearing
aids.
ORGANIZATION OF THIS MANUAL
This manual is arranged into the following sections:
d
Your ISDN 8528T Voice Terminal — shows the top and bottom
views of the 8528T and explains its features.
d
Feature Descriptions — lists the voice features and the features
that can be accessed with the softkeys, tells what each feature does,
and suggests how you might use it.
d
Voice Features — gives step-by-step procedures on using voice
features.
1
Page 10
d
Features Accessed with the Display and Softkeys — describes
the softkeys and how to use them to access features such as setting
up and using a personal Directory of frequently called numbers and
viewing a Call Log of incoming and outgoing calls.
d
Tones and Their Meaning — lists and describes the various voice
terminal tones.
d
Labeling and Installing the Designation Card — explains how to
remove and label the designation card.
d
Installation — gives brief step-by-step procedures for connecting
your voice terminal to the system, desktop installation such as
connecting the handset and the line cord, and, if appropriate,
attaching adjunct equipment.
d
Technical Description — provides information on the technical
aspects of the 8528T voice terminal.
CONVENTIONS USED IN THIS MANUAL
bbbbbbb
A rectangular box containing a feature name, such as
represents any button having a feature assigned to it, with a
corresponding feature name label.
A 2-line screen, such as
Redial
cbbbbbbbc
bbbbbbbbbbbbbbbbbbbbbbbb
c
Directory CallLog Option
c
c
MENU >
c
c
cbbbbbbbbbbbbbbbbbbbbbbbb
,
bbbbbb
Menu
represents the display that is shown when you press the
control button. The second line of the display lists the features you can
access by using the four softkeys (the buttons labeled with arrows).
2
cbbbbbbc
display
Page 11

A NOTE ON THE TERM, ´´SYSTEM MANAGER´´
In this manual it is often suggested that you refer to your System
Manager for more information. The System Manager may also be called
the
System Administrator
Manager
. For handy reference, use the space below to write your
or, possibly, the
Telecommunications
System Manager’s name, room number, and extension.
Name ________________________________________
Room _______________________ Extension ________
3
Page 12

Your ISDN 8528T Voice Terminal
Before you begin using your ISDN 8528T voice terminal, familiarize
yourself with the voice terminal features, lights, jacks, and other
components that are available to you. To help you do this, Figure 1
below and Figure 2, which appears later in this section, show you the
top and bottom views of the 8528T voice terminal.
bbbbbbbbbbbbbbbbbbbbbbbbbbbbbbbbbbbbbbbbbbb
c
ISDN 8528T
c
c
Handset
Display
c
c
Telephone
c
number
card
c
c
c
c
c
c
c
a
b
c
d
e
f
g
Volume
Mute Redial
Speaker Exit
Conf Drop
Transfer Hold
h
i
j
k
j
m
n
Dir
NextPrevMenu
o
p
q
r
s
t
u
ABC DEF
1
23
MNOJKLGHI
456
PQRS TUV WXYZ
78
*
9
Oper
#
O
v
w
x
y
z
A
B
Message
4 Softkeys
4 Display
control buttons
28 Call
appearance/
feature buttons
Message light
Dial pad
c
c
c
c
Volume control button
c
c
c
Speaker button
Conference button
Transfer button
Mute button
Redial button
Exit button
Drop button
Hold button
c
c
FIGURE 1 8528T Voice Terminal (Top View)
c
c
c
c
c
c
c
c
c
c
c
c
c
c
c
c
c
c
c
c
c
cbbbbbbbbbbbbbbbbbbbbbbbbbbbbbbbbbbbbbbbbbbb
4
Page 13
The 8528T voice terminal components pictured in Figure 1, the top view,
are described below and on the next page. For your convenience, they
are listed alphabetically.
Call appearance/feature buttons
These 28 buttons are devoted
either
to
handling incoming and outgoing calls (call appearances) and are labeled
with the telephone number or extension
or
they can be used as feature
buttons to access voice features such as Call Forward or Send All Calls;
these are labeled with the feature name. Each of these 28 call
appearance/feature buttons has a red light, which indicates the
line
and a green light which indicates the
NOTE: These buttons are arranged in four columns. The first column is
status of that line or feature
selected
.
labeled a through g; the second column is labeled h through n; the third
column is labeled o through u; the last column is labeled v through z and
A and B.
Conference button
For setting up conference calls with an additional
party. Conference calls include you and two other parties.
Designation card
For noting the call appearance telephone number or
extension or feature that the button can access.
Dial pad
and accessing features. The letters, ‘‘Q’’ and ‘‘Z,’’ have been added
to the
the
The standard 12-button pad for dialing telephone numbers
and
bb b
9
dial pad keys for entering Directory names, and
cbbbc
bbb
7
cbbbc
bb b
5
button on your dial pad has raised bars for visually-impaired
cbbbc
users.
bbbbbb
Menu
Display control buttons
d
d
d
bbbbbbb
bbbb
Dir
cbbbbc
Prev
,
cbbbbbbbc
bbbbbb
Menu
The
cbbbbbbc
bbbb
Dir
The
entries in order to place a call.
The
(Directory) button allows you to quickly access Directory
cbbbbc
bbbbbbb
Prev
cbbbbbbbc
bbbbbbb
, and
Next
cbbbbbbbc
button is used to access the main softkey menu.
bbbbbbb
Next
and
cbbbbbbbc
These four buttons are labeled
cbbbbbbc
.
buttons can be used to help you go back
,
and forth through menu options, to search for an entry in your
Directory, and to view entries in your Call Log.
Drop button
For disconnecting from a call or dropping the last party
added to a conference call.
Exit button
For exiting a display feature and returning to normal
call-handling mode.
5
Page 14

Handset
receiver.)
For placing and answering calls (often people call it the
Hold button
Message light
A red button, for putting a voice call on hold.
A red light which goes on steadily when a message has
been left for you. See your System Manager for instructions regarding
your local message retrieval procedures.
Mute button
For turning off (and then back on again) the microphone of
the handset or the speakerphone so the other person on the call cannot
hear you.
Redial button
For automatically redialing the last number that you dialed
from the dial pad.
Softkeys
arrows (
The four buttons located below the display and labeled with
), correspond to words on the display screen. Softkeys
are used along with display control keys to access or create a personal
Directory of frequently-called numbers, a Call Log of the most recent
incoming and outgoing calls, and such features as selecting a
personalized ringing pattern, doing a self-test of your voice terminal, and
setting the speakerphone and the clock.
Speaker button
For turning on and off the speakerphone or the
listen-only speaker.
Telephone number card
For noting the area code and telephone number
of your voice terminal.
Transfer button
For transferring a call to another voice terminal.
Volume control button
When on a call, used to increase or decrease the
receive volume of the handset or speakerphone. When you are not on a
call, the Volume control button is used to increase or decrease the
volume of the ringer and the tones.
6
Page 15
bbbbbbbbbbbbbbbbbbbbbbbbbbbbbbbbbbbbbbbbbbb
c
c
Routing Line
channel jack
c
c
c
c
c
c
c
c
c
c
c
c
c
c
Adjunct
Handset
c
Handset cord
routing channeljackjack
c
FIGURE 2 8528T Voice Terminal (Bottom View)
c
c
c
c
c
c
c
c
c
c
c
c
c
c
c
c
c
cbbbbbbbbbbbbbbbbbbbbbbbbbbbbbbbbbbbbbbbbbbb
The various components which appear on the bottom of the 8528T voice
terminal are shown in Figure 2 and listed and explained below.
Adjunct jack
adaptor, or other adjunct equipment. The jack is labeled ‘‘ADJUNCT.’’
WARNING: Do not insert the handset cord into the ‘‘ADJUNCT’’ jack. It
will cause equipment damage.
Handset jack
terminal. The jack is labeled
Line jack
jack is labeled ‘‘LINE.’’
Routing channels
cord, if applicable) through the appropriate routing channel. See the
section titled Installation. Be sure that you plug each cord into the
correct jack.
Used for connecting an external speakerphone, a headset
Used for connecting the handset cord to your voice
Used for connecting the line cord to your voice terminal. The
Thread the line cord and handset cord (and adjunct
.
7
Page 16

Feature Descriptions
Here are brief descriptions of the voice features and the features
accessed with the softkeys, including what each one does and how you
might want to use it.
VOICE FEATURES
Conference
Allows you to add an additional party to a call so that you
can conduct a conversation with more than one party. Use to set up
time-saving conferences, or to spontaneously include a party important
to a discussion.
Drop
Disconnects you from a call without requiring you to hang up the
handset or press the switchhook. Use this feature whenever you wish to
get dial tone to place another call without having to hang up. Can also be
used with the Conference feature to disconnect the last party added.
Hold
Temporarily disconnects you from a call, holding it until you can
return to it. While a call is on hold, you can place another call, activate
another feature, answer a waiting call, or leave your voice terminal to
perform another task. Use when you have a call that you don’t wish to
drop, but for which you have to interrupt briefly to do something else.
Message Retrieval
Your Message light goes on to let you know that a
caller has left a message. Follow your System’s message retrieval
procedures to get your message.
Mute
Turns off the microphone associated with the handset or the
speakerphone, whichever is currently active. Use when you want to
confer with someone in the room with you, but you do not want the other
party on the call to hear your conversation. (You are still able to hear the
person on the call.)
Redial (Last Number Dialed)
Automatically redials the last number you
dialed manually from the dial pad, either an extension or an outside
number. Use to save time in redialing a busy or unanswered number.
Speakerphone
or
the Speakerphone (listen and talk) function
Your voice terminal has either the Speaker (listen-only)
or
it may have neither.
Check with the System Manager to see how your voice terminal is set.
The
One-Way Speaker
voice features without lifting the handset. (Press
feature allows you to place calls or access other
bbbbbbbb
Speaker
cbbbbbbbbc
.) However, in
order to speak to the other party, you must use the handset (the speaker
will turn off). Use with feature activities that require
listening only
, such
as dialing or monitoring calls when you have been placed on hold.
8
Page 17

The
Speakerphone
access other voice features without lifting the handset.
(Press
bbbbbbbb
Speaker
cbbbbbbbbc
feature allows you to place and answer calls or
.) You may use the softkeys on the voice terminal to set
or reset the speakerphone. When you set the built-in speakerphone, it
performs a test of the surrounding environment and adjusts itself for
optimal performance. (See the description of ‘‘Reset Speakerphone’’
later in this section.) Use the built-in speakerphone any time you prefer
hands-free communications, both speaking and listening, or for group
conference situations.
Transfer
Transfers a call from your voice terminal to another extension.
Use when your caller needs to speak further with someone else.
FEATURES ACCESSED WITH THE DISPLAY AND SOFTKEYS
The following features can be accessed using the four softkeys located
below the display.
Call Log
The Call Log is initially set to list the 10 most recent incoming
unanswered calls only. An option is provided so that you may also
choose to access the 10 most recent answered calls, and the 10 most
recent outgoing calls placed from your voice terminal. Use to check on
calls that you missed (the unanswered calls) and to remind you of those
calls that you answered or placed most recently. You may also activate
the feature which allows you to automatically call back callers from the
incoming Call Log or automatically add those callers to your personal
Directory.
Clock
Contrast
For setting the date and time on your voice terminal display.
Change the contrast level of your display so that the letters or
numbers are darker or lighter against the background of the screen.
Directory
extensions or outside numbers and the names of the associated party.
Use
Used to create and edit a personal Directory of up to 30
bbbb
Dir
to quickly dial a call. Use as a handy place to store numbers
cbbbbc
you frequently call.
bbbb
Dir
Dir Button
When you press
followed by a softkey button
cbbbbc
associated with a specific Directory entry, a call is immediately placed to
the telephone number associated with that Directory entry. The phone
number appears on the display screen as it dials.
Exit button
Exits a display feature and returns the voice terminal display
to normal call-handling mode.
9
Page 18

Lock
Allows you to lock your Directory so that no one can make
unauthorized changes in it; lock your Call Log so that no one else can
view your Call Log entries; lock all of the softkeys so that no one can
view or change any of the features accessed by the softkeys.
Number of Names (on a Directory Page)
names
or
three names + Quit on the second line of an individual
Allows you to view
either
four
Directory page. If you choose to have four names on the Directory
screen at one time, you can leave the Directory or cancel calling a name
in your Directory only by pressing
bbbbb
Exit
(rather than using the softkey
cbbbbbc
Quit).
Personalized Ring
Allows you to select your own personalized ringing
pattern from among eight available patterns. Use to distinguish your
voice terminal’s ring from that of other nearby voice terminals.
Screen Timing (Rate at which the Display Message is Shown)
Allows you
to set the length of time the display message remains on the screen.
There are three rates: Slow, Medium, and Fast.
Self-Test
Performs a diagnostic test of your voice terminal including the
lights, ringer, dial pad keys, and display.
NOTE: When you perform a self-test of the voice terminal, it clears the
contents of the Call Log and the last number dialed from Redial, and
returns the volume control to the default setting.
Set Speakerphone
When you set the built-in speakerphone, it performs
a test of the surrounding environment and adjusts itself for optimal
performance.
Tones
A confirmation tone (sequential low and high tones) is provided
to let you know a selection has been accepted; an error tone (one beep)
alerts you that you made a mistake in your softkey entries. You may
choose to turn these softkey information tones on or off.
10
Page 19
Voice Features
The procedures which follow give short, step-by-step instructions for
using each feature. For your convenience, the features are listed
alphabetically. Unless otherwise noted, the calling procedure assumes
that the handset is off-hook.
aaaaaaaaaaaaaaaaaaaaaaaaaaaaaaaaaaaaaaaaaaaaaaaaaaaaaaaaaaaaaaaaaaaa
ANSWERING AND PLACING A CALL
aaaaaaaaaaaaaaaaaaaaaaaaaaaaaaaaaaaaaaaaaaaaaaaaaaaaaaaaaaaaaaaaaaaa
To answer a call
1 Lift the handset.
d
The green light (below the red light) goes on steadily at the
selected call appearance button.
NOTE: If you are not connected immediately, press the call
appearance button next to the flashing green light.
To place a call
1 Lift the handset, or press
d
The green (below the red light) goes on steadily at the selected
bbbbbb
Spkr
cbbbbbbc
.
call appearance button.
2 Listen for the dial tone and dial the number you want to call.
To end (or drop) a call
1 Hang up the handset or press
NOTE: If you use
bbbbbb
Drop
cbbbbbbc
bbbbbb
Drop
cbbbbbbc
, you will hear a dial tone and your voice
terminal is ready for another call.
To adjust the receive volume of the handset, the speakerphone, or
the listen-only speaker
1 While on a call,
to raise the volume, press the right half of the Volume control button
labeled
to lower the volume, press the left half of the Volume control button
labeled
;
.
11
Page 20
aaaaaaaaaaaaaaaaaaaaaaaaaaaaaaaaaaaaaaaaaaaaaaaaaaaaaaaaaaaaaaaaaaaa
CONFERENCE
aaaaaaaaaaaaaaaaaaaaaaaaaaaaaaaaaaaaaaaaaaaaaaaaaaaaaaaaaaaaaaaaaaaa
To add another party to a call
1 While on a call, press
d
The current call is placed on hold.
d
The red Conference light flutters.
NOTE: If an idle call appearance button is not automatically
bbbbbb
Conf
to add the next party.
cbbbbbbc
selected, press one yourself.
2 Listen for the dial tone, and dial the number of the next party.
3 Press
To drop a party from a conference call
1 Press
bbbbbb
Conf
after the next party answers.
cbbbbbbc
d
The red Conference light goes off.
d
All parties are now connected.
bbbbbb
Drop
.
cbbbbbbc
d
The last party you added is dropped.
aaaaaaaaaaaaaaaaaaaaaaaaaaaaaaaaaaaaaaaaaaaaaaaaaaaaaaaaaaaaaaaaaaaa
DROP
aaaaaaaaaaaaaaaaaaaaaaaaaaaaaaaaaaaaaaaaaaaaaaaaaaaaaaaaaaaaaaaaaaaa
To disconnect from a 2-person call and obtain dial tone without
hanging up
1 Press
bbbbbb
Drop
.
cbbbbbbc
d
Listen for dial tone.
NOTE: Pressing
bbbbbb
Drop
will also disconnect the last party added to a
cbbbbbbc
conference call. See the procedures for the Conference feature in
this section.
12
Page 21
aaaaaaaaaaaaaaaaaaaaaaaaaaaaaaaaaaaaaaaaaaaaaaaaaaaaaaaaaaaaaaaaaaaa
HOLD
aaaaaaaaaaaaaaaaaaaaaaaaaaaaaaaaaaaaaaaaaaaaaaaaaaaaaaaaaaaaaaaaaaaa
To put a call on hold while you answer another call
NOTE: The green light is flashing beside the call appearance button of
the incoming call.
1 Press
bbbbbb
Hold
.
cbbbbbbc
d
The red light goes off, and the green light flutters (next to the call
appearance button of the held call).
2 Press the call appearance button of the second call.
d
The red light goes on, and the green light goes on steadily.
d
You are connected to the second call.
NOTE: If you put a conference call on hold, the other parties remain
connected.
To return to the held call
1 Press the call appearance button next to the held call.
d
The red light goes on, and the green light goes on steadily (next
to the call appearance button of the previously held call).
d
You are connected to the held call.
aaaaaaaaaaaaaaaaaaaaaaaaaaaaaaaaaaaaaaaaaaaaaaaaaaaaaaaaaaaaaaaaaaaa
MESSAGE RETRIEVAL
aaaaaaaaaaaaaaaaaaaaaaaaaaaaaaaaaaaaaaaaaaaaaaaaaaaaaaaaaaaaaaaaaaaa
See your System Manager for instructions regarding the message
retrieval procedures for your system.
13
Page 22
aaaaaaaaaaaaaaaaaaaaaaaaaaaaaaaaaaaaaaaaaaaaaaaaaaaaaaaaaaaaaaaaaaaa
MUTE
aaaaaaaaaaaaaaaaaaaaaaaaaaaaaaaaaaaaaaaaaaaaaaaaaaaaaaaaaaaaaaaaaaaa
To turn off the microphone associated with the handset or the
speakerphone so the other party cannot hear you
1 While on a call, press
d
The red Mute light goes on.
d
The other party cannot hear your conversation, but you can hear
bbbbbb
Mute
cbbbbbbc
.
the other party.
To turn on the microphone associated with the handset or
speakerphone again, so the other party can hear you again
1 Press
bbbbbb
Mute
again.
cbbbbbbc
d
The red Mute light goes off.
d
You can resume your conversation with the other party.
aaaaaaaaaaaaaaaaaaaaaaaaaaaaaaaaaaaaaaaaaaaaaaaaaaaaaaaaaaaaaaaaaaaa
REDIAL (LAST NUMBER DIALED)
aaaaaaaaaaaaaaaaaaaaaaaaaaaaaaaaaaaaaaaaaaaaaaaaaaaaaaaaaaaaaaaaaaaa
To automatically redial the last number you dialed manually (this
can be an extension, outside number, or trunk/feature code)
NOTE: The 8528T voice terminal redials a number consisting of up to
37 digits.
1 Lift the handset.
2 Listen for the dial tone, and press
d
The last number you dialed (from the dial pad) is automatically
bbbbbbb
Redial
cbbbbbbbc
.
redialed.
3 Wait for the called party to answer.
14
Page 23
aaaaaaaaaaaaaaaaaaaaaaaaaaaaaaaaaaaaaaaaaaaaaaaaaaaaaaaaaaaaaaaaaaaa
SPEAKERPHONE AND ONE-WAY SPEAKER
aaaaaaaaaaaaaaaaaaaaaaaaaaaaaaaaaaaaaaaaaaaaaaaaaaaaaaaaaaaaaaaaaaaa
NOTE: Your voice terminal is set for the One-Way Speaker (listen-only)
or
for the Speakerphone (listen and speak) function
or
for neither.
Check with your System Manager to see how your voice terminal is set.
For directions on setting or resetting your speakerphone for optimal
performance, see ‘‘Setting The Speakerphone’’ in the next section
Features Accessed with the Display and Softkeys.
One-Way Speaker
Use the following procedures if your voice terminal is set for the
One-Way Speaker (listen only) feature.
To place/answer a call without lifting the handset or to use the
one-way speaker with any listening-only feature
1 Press
bbbbbbbb
Speaker
cbbbbbbbbc
d
The red light next to
.
bbbbbbbb
Speaker
cbbbbbbbbc
and the red light next to
bbbbbb
Mute
cbbbbbbc
go on.
2 Place or answer the call or access a selected feature.
3 If you are placing a call, dial the telephone number.
4 Adjust speaker volume, if necessary.
d
To raise the volume, press the right half of the Volume control
button labeled
to lower the volume, press the left half of the Volume control
button labeled
5 When the other person answers, pick up the handset to talk.
6 Press
bbbbbbbb
Speaker
cbbbbbbbbc
d
The red light next to
;
.
to hang up.
bbbbbbbb
cbbbbbbbbc
Speaker
and the red light next to
bbbbbb
Mute
cbbbbbbc
go off.
To activate the speaker while using the handset
1 Press
bbbbbbbb
Speaker
cbbbbbbbbc
d
The red light next to
.
bbbbbbbb
Speaker
cbbbbbbbbc
go on.
d
The speaker is active, and the handset is turned off.
2 Hang up handset.
and the red light next to
15
bbbbbb
Mute
cbbbbbbc
Page 24
NOTE: If you want to speak to the other party, you must pick up the
handset (which turns off the speaker).
Speakerphone
Use the following procedures if your voice terminal is set for the
Speakerphone (listen and speak) feature.
NOTE: If your voice terminal is set for the Speakerphone feature, you
can adjust the speakerphone to the surrounding room acoustics to
provide optimal performance. Use the directions in ‘‘Setting the
Speakerphone’’ in the section titled Features Accessed with the
Display and Softkeys.
To place/answer a call without lifting the handset or to use the
speakerphone with any voice feature
1 Press
2 Place or answer the call or access a selected feature.
3 If you are placing a call, dial the telephone number.
4 Adjust the speakerphone volume if necessary.
5 Press
bbbbbbbb
Speaker
cbbbbbbbbc
d
The red light next to
d
To raise the volume, press the right half of the Volume control
button labeled
to lower the volume, press the left half of the Volume control
button labeled
bbbbbbbb
Speaker
cbbbbbbbbc
d
The red light next to
.
bbbbbbbb
cbbbbbbbbc
;
.
to hang up.
bbbbbbbb
cbbbbbbbbc
Speaker
Speaker
goes on.
goes off.
To prevent the other party from hearing you
NOTE: If the Speakerphone feature is not active, the Mute feature turns
off the microphone associated with the handset (not the speakerphone).
1 Press
2 Press
bbbbbb
Mute
.
cbbbbbbc
d
The red light goes on and the other party cannot hear you.
bbbbbb
Mute
again to resume talking to other party.
cbbbbbbc
d
The red light goes off and the other party can hear you again.
16
Page 25
Speakerphone (Continued)
To change from speakerphone to handset
1 Lift handset and talk.
d
The red light next to
bbbbbbbb
Speaker
cbbbbbbbbc
goes off.
To change from handset to speakerphone
1 Press
2 Hang up the handset.
bbbbbbbb
Speaker
cbbbbbbbbc
d
The red light next to
d
The speaker is active, and the handset is turned off.
.
bbbbbbbb
Speaker
cbbbbbbbbc
goes on.
aaaaaaaaaaaaaaaaaaaaaaaaaaaaaaaaaaaaaaaaaaaaaaaaaaaaaaaaaaaaaaaaaaaa
TRANSFER
aaaaaaaaaaaaaaaaaaaaaaaaaaaaaaaaaaaaaaaaaaaaaaaaaaaaaaaaaaaaaaaaaaaa
To send a call to another extension
1 Press
2 Listen for dial tone.
3 Dial the number that the call is to be transferred to (third party).
bbbbbbbb
Transfer
cbbbbbbbbc
d
The present call is put on hold.
d
The red Transfer light flutters.
d
Remain on the line and announce the call when the third party
.
answers.
NOTE: If the number of the third party is busy or there is no answer,
press the call appearance button next to the fluttering green light to
disconnect the incomplete call and to return to the call on hold.
bbbbbbbb
4 Press
d
d
5 Hang up.
NOTE: To prevent a transfer call from disconnecting, complete the
Transfer
cbbbbbbbbc
The party on hold is transferred to the third party.
Your voice terminal is released from the call.
again.
transfer process before entering into another action, such as
answering another call.
17
Page 26
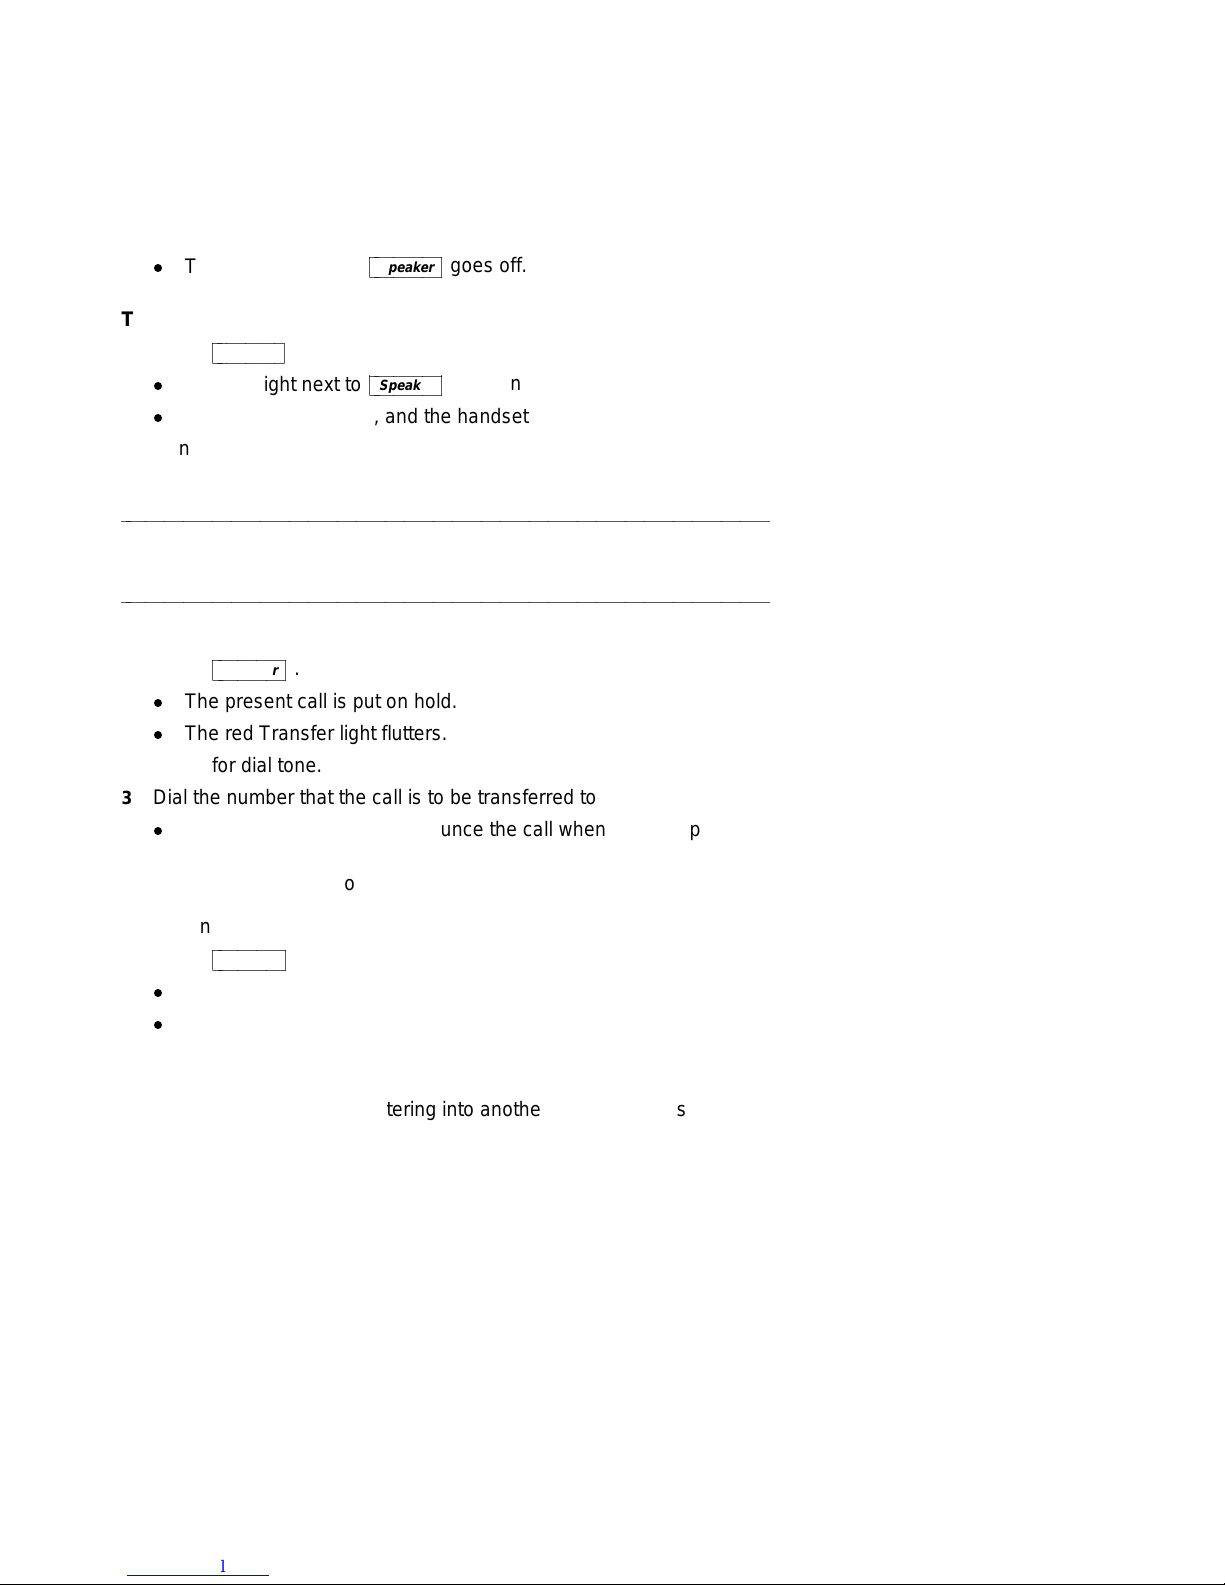
Features Accessed with the Display and
Softkeys
The softkeys are the four keys labeled with arrows (
directly below the display. Figure 3 shows the softkeys in relation to the
display above the softkeys and the display control buttons below them.
) located
bbbbbbbbbbbbbbbbbbbbbbbbbbbbbbbbbbbbbbbbbbb
c
c
Display
c
c
ISDN 8528T
c
c
c
c
c
NextPrevMenu Dir
c
c
c
Softkeys
Display control buttons
c
FIGURE 3 The 8528T Voice Terminal Display, Softkeys, and Display Control Buttons
You can use the softkeys and display control buttons to access the
following features:
d
Setting the clock;
d
Setting the speakerphone;
d
Adding, editing, and deleting the numbers and associated names in
the voice terminal Directory;
d
Viewing a Directory entry and then placing a call to the number
currently shown on the display screen;
d
Using the
your Directory;
d
Using the Call Log to view incoming and/or outgoing calls, and
returning calls, if desired, to names and numbers listed in the
incoming Call Log;
d
Locking and unlocking the Directory, Call Log, and all softkey
functions;
bbbb
Dir
button to quickly place a call to a number located in
cbbbbc
c
c
c
c
c
c
c
c
c
c
c
c
cbbbbbbbbbbbbbbbbbbbbbbbbbbbbbbbbbbbbbbbbbbb
18
Page 27
d
Changing or removing your password;
d
Selecting the contrast level for the display;
d
Selecting a personalized ringing pattern;
d
Setting the rate at which the display messages are shown on the
screen;
d
Adding confirmation or error tones to display messages;
d
Setting the number of names on a Directory page.
d
Initiating a self-test of the voice terminal’s lights, ringer, buttons, and
dial pad keys;
ENTERING AND EXITING SOFTKEY MODE
(USING THE MENU AND THE EXIT BUTTONS)
bbbbbb
Menu
You can begin to use the softkeys by pressing the
Main Menu screen that you see looks like this:
cbbbbbbc
button. The
bbbbbbbbbbbbbbbbbbbbbbbb
c
Directory CallLog Option
c
c
Notice that the first line of the menu is fully capitalized, so that you know
the feature that you are responding to. The second line of the voice
terminal display shows the menu choices that you can select. To access
any of the choices, you must press the softkey below that menu choice.
For example, by using the menu above, you can enter your Directory by
pressing the leftmost softkey, the one under Directory. To access the
voice terminal Call Log, you would press the softkey below CallLog. To
view other softkey options, press the softkey below Option.
NOTE: If you press
screen, you will exit Softkey mode.
If you are at any other screen, pressing
and return you to the Main Menu.
There are also ‘‘timed’’ informative screens which appear for only a few
seconds. You do not need to respond to these screens. (If you press
any of the softkeys during one of these timed messages, the display
advances to the next message.)
bbbbb
Exit
Press
functions in progress, and return to normal call-handling mode.
at any time to exit softkey mode, abandon any softkey
cbbbbbc
MENU >
bbbbbb
Menu
cbbbbbbc
while the Main Menu is on your display
bbbbbb
Menu
cbbbbbbc
c
c
cbbbbbbbbbbbbbbbbbbbbbbbb
will abandon any action
19
Page 28

USING THE NEXT, THE PREV, AND THE DIR BUTTONS
If there is a ‘‘>’’ at the top right of the screen, you can press the
button to see the next set of menu selections. If there is a ‘‘<’’ at the top
left of the screen, you can press the
screen on that level.
Use the
bbbb
Dir
button to enter your Directory in order to quickly place a
cbbbbc
bbbbbbb
Prev
cbbbbbbbc
button to move back a
bbbbbbb
Next
cbbbbbbbc
call.
RESPONDING TO QUIT AND DONE
When you see Quit on the second line of the display, it means that
you have the option of abandoning the action you have begun.
Press the softkey below Quit if you do not want to respond to the
options on the screen.
When you see Done on the second line of the display, it means that
you have already entered information or accessed a feature.
Pressing the softkey below Done will confirm your action and allow
you to move on to the next screen.
NOTE: In most of the display messages shown in this section, Done
appears in the right lower corner, rather than Quit. Remember that if
Quit is not available, you can always press
bbbbb
Exit
cbbbbbc
to abandon.
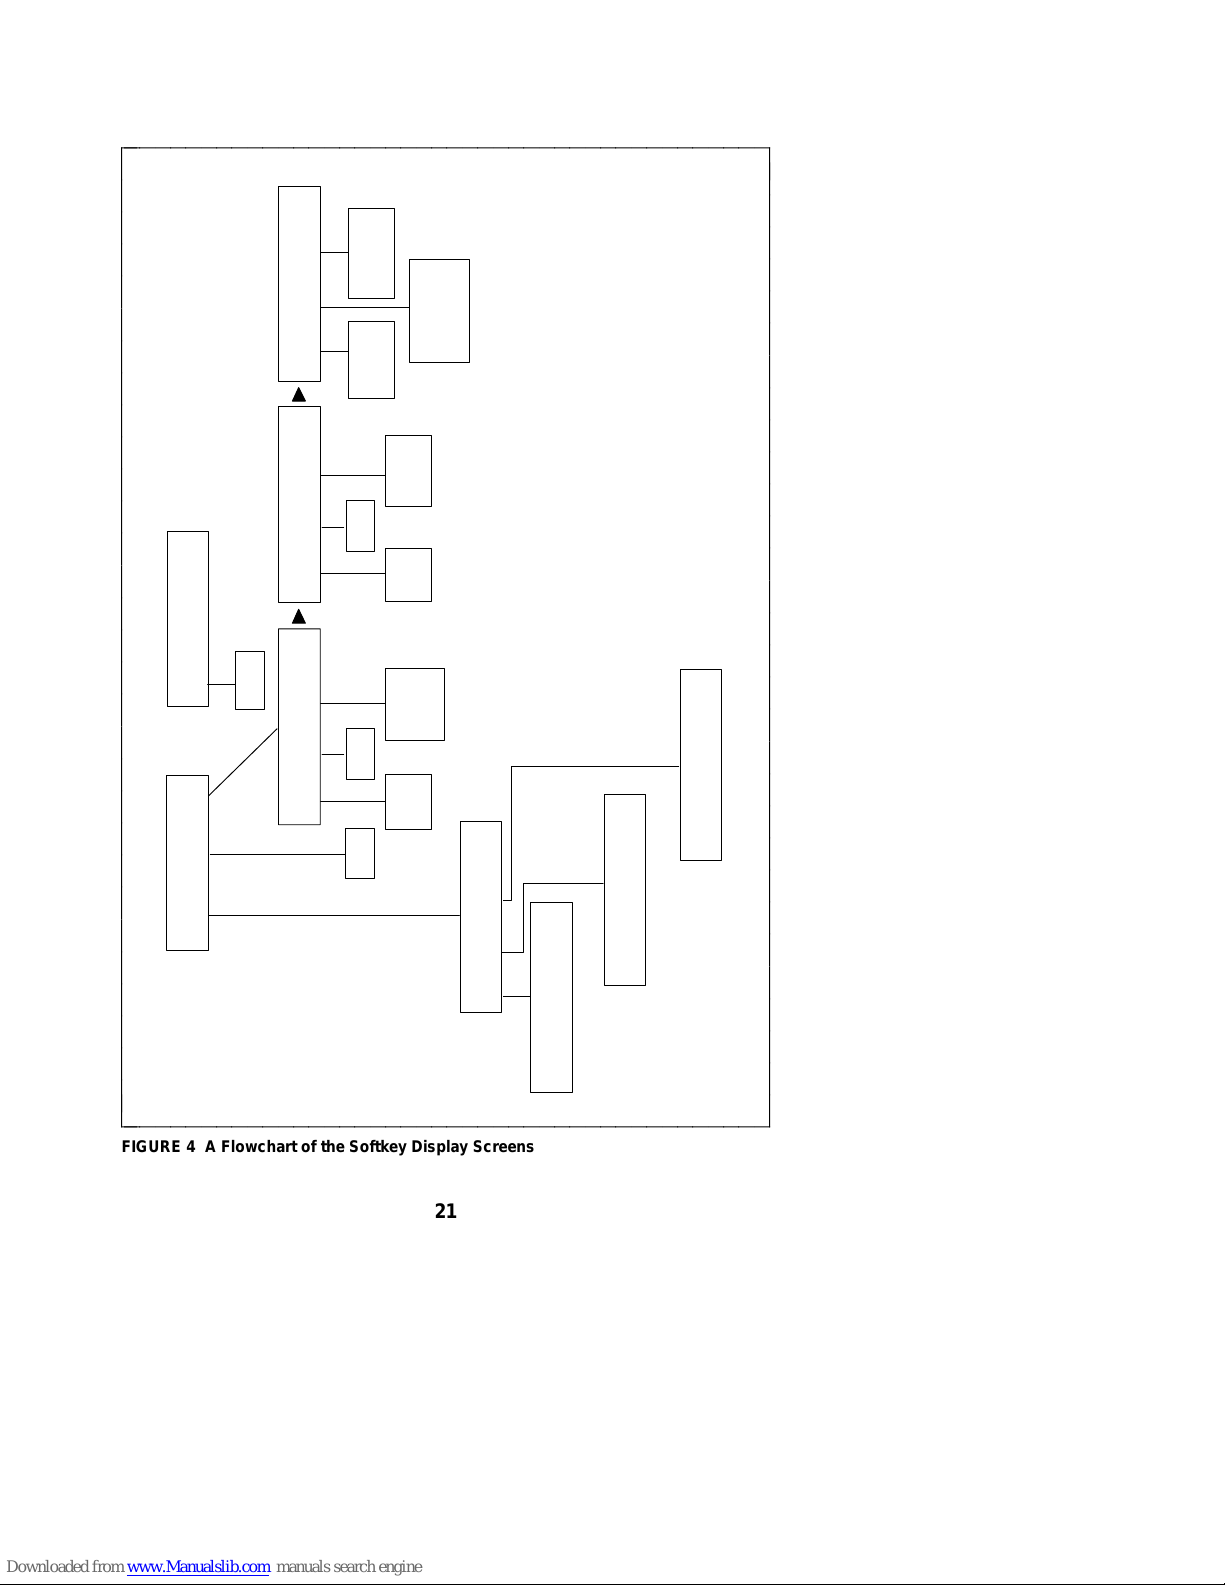
A SOFTKEY DISPLAY SCREEN FLOWCHART
You may wish to review the display screen flowchart in Figure 4 before
you begin using the softkey features. You may also want to return to the
flowchart if you forget what a feature does or its relation to the Main
Menu screen.
20
Page 29
bbbbbbbbbbbbbbbbbbbbbbbbbbbbbbbbbbbbbbbbbbb
c
c
DoneCallLogDoneClock Lock Names
c
c
c
OPTIONS
c
c
<
c
c
>
Tones
Set Number
of Names on
Directory Page
Set
Tones
Information
All
Off
Set Call Log:
Unanswered-only
c
Screen
Duration
Ring
Select
Set Timed
c
c
OPTIONS
c
<
c
c
MENU
Cntrast Ring Screen Done
>
Set
Display
Contrast
c
c
c
c
c
c
c
c
c
c
c
c
<
Test
Self-Test
OPTIONS
>
MENU
Directory CallLog Option
Spkr
Set
Clock
Call Log
Lock
Directory,
Set
Speaker-
Call Log,
or Softkeys
phone
DIRECTORY
Call View Add/Del Done
><
CALL
Quit
><
ADD/DEL DIRECTORY
Quit
PRESS TO VIEW
Name Name Name
Add Delete Edit Done
c
c
c
c
FIGURE 4 A Flowchart of the Softkey Display Screens
Name Name Name
c
c
c
c
c
c
c
c
c
c
c
c
c
c
c
c
c
c
c
c
c
c
c
c
c
c
c
c
c
c
cbbbbbbbbbbbbbbbbbbbbbbbbbbbbbbbbbbbbbbbbbbb
21
Page 30

aaaaaaaaaaaaaaaaaaaaaaaaaaaaaaaaaaaaaaaaaaaaaaaaaaaaaaaaaaaaaaaaaaaa
SETTING THE CLOCK
aaaaaaaaaaaaaaaaaaaaaaaaaaaaaaaaaaaaaaaaaaaaaaaaaaaaaaaaaaaaaaaaaaaa
When your voice terminal is first installed, when it is unplugged and then
plugged in again, or after a power outage, this display is shown:
bbbbbbbbbbbbbbbbbbbbbbbb
PRESS Menu THEN Option
c
TO SET THE CLOCK.
c
c
To set the clock
bbbbbb
1 Press
d
Menu
cbbbbbbc
The display shows:
.
c
c
cbbbbbbbbbbbbbbbbbbbbbbbb
bbbbbbbbbbbbbbbbbbbbbbbb
c
Directory CallLog Option
c
c
MENU >
c
c
cbbbbbbbbbbbbbbbbbbbbbbbb
2 Press
d
The display shows:
bbbbbbbbbbbbbbbbbbbbbbbb
c
c
c
(the softkey) below Option.
OPTIONS >
Spkr Clock Lock Done
22
c
c
cbbbbbbbbbbbbbbbbbbbbbbbb
Page 31

3 Press
d
(the softkey) below Clock.
The display shows the date and time, such as:
bbbbbbbbbbbbbbbbbbbbbbbb
Sep 24, 1995 10:00 AM
c
- + Quit
c
c
The display format for the clock is:
MMM DD, YYYY HH:MM AM or PM
in which MMM = month abbreviation, such as ‘‘Oct’’
DD = day of the month such as ‘‘02’’ or ‘‘24’’
YYYY = year such as ‘‘1995’’
HH:MM = hour and minutes such as ‘‘10:45’’
AM or PM = morning or afternoon
4 Do the following to change the date and/or time:
Use the softkey below + to go forward a month (such as from
‘‘Sep’’ to ‘‘Oct’’), to go forward a day (such as from ‘‘24’’ to ‘‘25’’),
a year, an hour or a minute, or to switch between ‘‘AM’’ and
‘‘PM.’’
Use the softkey below - to go back a month (such as from ‘‘Sep’’
to ‘‘Aug’’), to go back a day (such as from ‘‘24’’ to ‘‘23’’), a year,
an hour, or a minute, or to switch between ‘‘AM’’ and ‘‘PM.’’
NOTE: You can also use the dial pad to change the display
clock. For example, when the month is flashing on the screen,
you can press the
when the date is flashing, enter ‘‘25’’ from the dial pad to select
‘‘25’’ as the date. Use ‘‘A’’ for ‘‘AM’’ or ‘‘P’’ for ‘‘PM.’’
The display field, which you are currently viewing, such as ‘‘Sep,’’
flashes. To go on to the next field, such as from ‘‘Sep’’ (the
month) to ‘‘24’’ (the day), press
at the lower right corner changes to Done.
5
When the correct date appears on the display
below Done.
d
The display confirms your changes.
6 Once the clock has been set, you can now set the speakerphone.
Go on to the next procedure, ‘‘Setting the Speakerphone.’’
bb b
8
key to change the month to August, or,
cbbbc
bbbbbbb
Next
cbbbbbbbc
c
c
cbbbbbbbbbbbbbbbbbbbbbbbb
. The Quit menu choice
, press the softkey
23
Page 32
aaaaaaaaaaaaaaaaaaaaaaaaaaaaaaaaaaaaaaaaaaaaaaaaaaaaaaaaaaaaaaaaaaaa
SETTING THE SPEAKERPHONE
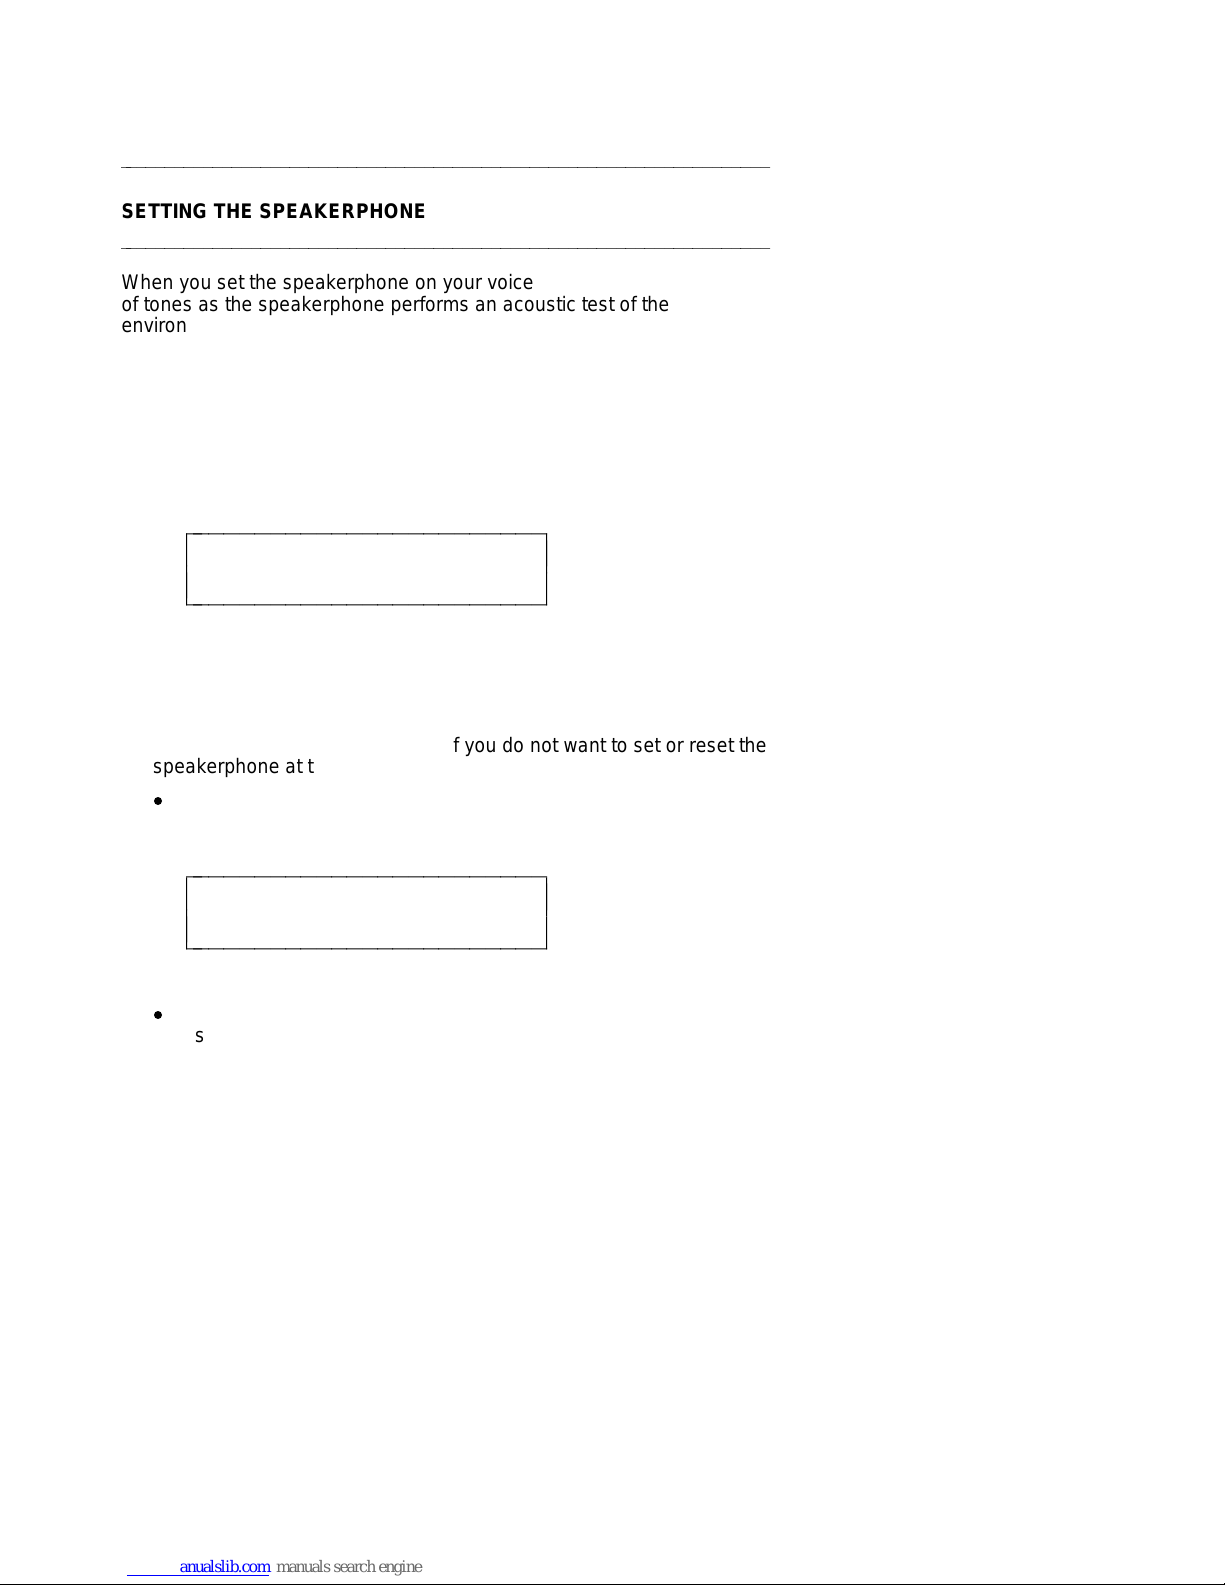
aaaaaaaaaaaaaaaaaaaaaaaaaaaaaaaaaaaaaaaaaaaaaaaaaaaaaaaaaaaaaaaaaaaa
When you set the speakerphone on your voice terminal, you hear a set
of tones as the speakerphone performs an acoustic test of the
environment. When the tones stop, your speakerphone has finished
adjusting itself for optimal performance and is ready for use. You must
set the speakerphone when you initially set up your voice terminal, and
reset it when you move the voice terminal to a different location (even if
it’s in the same room), or after a power outage.
After you have set the clock, the following display appears (if the
speakerphone needs to be set).
bbbbbbbbbbbbbbbbbbbbbbbb
READY TO SET THE SPKR
c
Begin Cancel
c
c
Follow these procedures to set the speakerphone.
1 Press the softkey below Begin to set the speakerphone.
(Press the softkey below Cancel if you do not want to set or reset the
speakerphone at this time.)
d
If you press the softkey below Begin, the display shows the
following timed screen:
c
c
cbbbbbbbbbbbbbbbbbbbbbbbb
bbbbbbbbbbbbbbbbbbbbbbbb
OPTIMIZING PERFORMANCE
c
OF THE SPEAKERPHONE.
c
c
d
You will hear a set of rising tones as the speakerphone adjusts
itself to the surrounding acoustical environment.
automatic. No user response is required.
24
c
c
cbbbbbbbbbbbbbbbbbbbbbbbb
These tones are
Page 33
The following procedure is an alternate way of using the softkeys to
set the speakerphone.
bbbbbb
Menu
1 Press
2 Press the softkey below Option.
cbbbbbbc
d
The display shows:
.
bbbbbbbbbbbbbbbbbbbbbbbb
c
Spkr Clock Lock Done
c
c
3 Press the softkey below Spkr.
d
The display shows:
OPTIONS >
c
c
cbbbbbbbbbbbbbbbbbbbbbbbb
bbbbbbbbbbbbbbbbbbbbbbbb
OPTIMIZING PERFORMANCE
c
OF THE SPEAKERPHONE.
c
c
d
You hear a set of rising tones as the speakerphone adjusts itself
to the surrounding acoustical environment.
automatic. No user response is required.
c
c
cbbbbbbbbbbbbbbbbbbbbbbbb
These tones are
25
Page 34
aaaaaaaaaaaaaaaaaaaaaaaaaaaaaaaaaaaaaaaaaaaaaaaaaaaaaaaaaaaaaaaaaaaa
ADDING, EDITING, AND DELETING A NUMBER AND NAME IN THE
DIRECTORY
aaaaaaaaaaaaaaaaaaaaaaaaaaaaaaaaaaaaaaaaaaaaaaaaaaaaaaaaaaaaaaaaaaaa
The 8528T voice terminal supports up to 30 Directory entries. The
telephone numbers entered in the Directory can be up to 24 digits, and
associated names can be up to five characters in length. Directory
entries can be changed by deleting or editing.
When you enter names into your Directory, the entries are automatically
alphabetized for you.
NOTE: If there are frequently used names that you want to place at the
front of your Directory, place a # or * as the first character in the name
such as ‘‘#KimB’’ or ‘‘*Dan.’’ These names will then appear before the
‘‘A’s’’ in your Directory. (Names beginning with # appear first in the
Directory, followed by names beginning with *, and then names
beginning with a number, 0 through 9, and then the alphabet.)
Adding Numbers and Names Into the Directory
To enter/add a number and name into the Directory
bbbbbb
Menu
1 Press
2 Press the softkey below Directory.
3 Press the softkey below Add/Del.
cbbbbbbc
NOTE: If the Directory is locked, you must enter your 3-digit
password in order to modify your Directory. See the information in
‘‘Locking and Unlocking the Directory, Call Log, and All Softkeys’’
later in this section.
d
The display shows:
.
bbbbbbbbbbbbbbbbbbbbbbbb
c
c
c
4 Press the softkey below Add.
ADD/DEL DIRECTORY
Add Delete Edit Done
26
c
c
cbbbbbbbbbbbbbbbbbbbbbbbb
Page 35
d
The display shows:
bbbbbbbbbbbbbbbbbbbbbbbb
ENTER PHONE #:_
c
Pause Quit
c
c
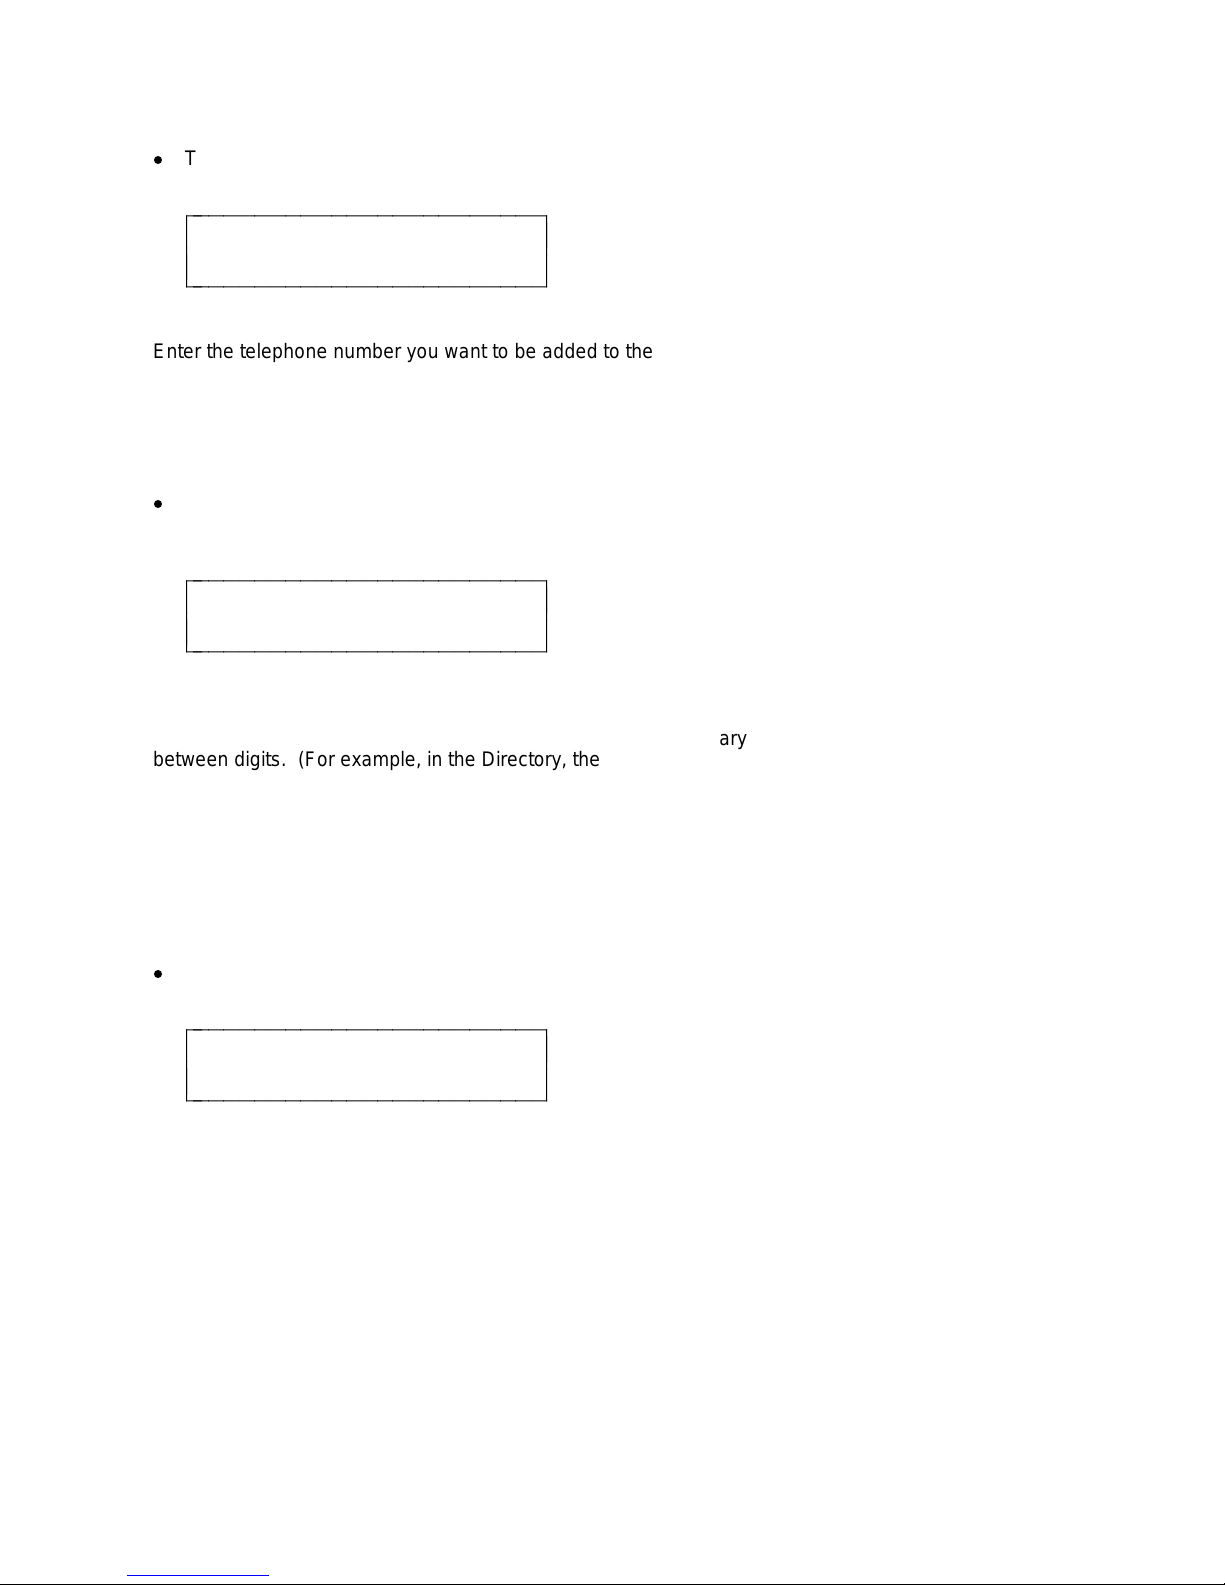
5 Enter the telephone number you want to be added to the Directory.
(You can enter up to 24 digits. A pause counts as 1 digit.)
NOTE: To place a 1.5 second pause between an access code, such
as ‘‘9,’’ and the telephone number, press the softkey below Pause. A
pause will be inserted into the Directory entry, and a comma will
appear on the display.
d
After you have entered at least one digit, you will see the
following display:
c
c
cbbbbbbbbbbbbbbbbbbbbbbbb
bbbbbbbbbbbbbbbbbbbbbbbb
ENTER PHONE #:9_
c
Pause Backspace Done
c
c
IMPORTANT: Hyphens, dashes and/or spaces are NOT necessary
between digits. (For example, in the Directory, the number,
555-1234, is entered as ‘‘5551234,’’ without the intervening hyphen.)
NOTE: After you have entered 10 digits, including any pauses, the
words, ‘‘Enter Phone #:’’ begin to move off the display screen one
letter at a time in order to accommodate the remainder of the
telephone number.
c
c
cbbbbbbbbbbbbbbbbbbbbbbbb
When you are finished entering the phone number, press the softkey
below Done .
d
The display shows:
bbbbbbbbbbbbbbbbbbbbbbbb
ENTER 5-CHAR NAME:_
c
c
c
Quit
27
c
c
cbbbbbbbbbbbbbbbbbbbbbbbb
Page 36

6 Use the dial pad keys to enter the name of the person whose number
you have just added to the Directory. Pressing the softkey below
Quit now will abandon the procedure. The number you entered will
not be saved.
IMPORTANT: You may need to press the dial pad key more than
once to enter the correct character. For example, press the GHI (or
bb b
4
) key once to enter a ‘‘G’’; press the
cbbbc
‘‘H’’; press the key a third time to enter an ‘‘I.’’ If you press the dial
pad key a fourth time, a ‘‘4’’ appears on the screen. If you press the
bb b
4
key again, the screen will again print a ‘‘G.’’
cbbbc
You can also use a # or a * at the beginning of or within the name.
Once the letter on the screen is correct, you
enter the next letter.
d
After you have entered at least one character, the following
display appears:
bbbb
4
key twice to enter an
cbbbbc
must
press
bbbbbbb
Next
cbbbbbbbc
to
bbbbbbbbbbbbbbbbbbbbbbbb
ENTER 5-CHAR NAME:A
c
Case DeleteChar Done
c
c
NOTE: As you enter each letter of the name, that letter flashes on
the screen until you move on to the next letter.
When a letter is flashing, use Case to switch between UPPER
CASE and lower case letters. Of course, you may have a
combination of both in your 5-character name (such as Steve or
HarvW).
When a letter is flashing, use DeleteChar to erase that letter.
bbbbbbb
Use
Next
cbbbbbbbc
to advance to the next letter.
c
c
cbbbbbbbbbbbbbbbbbbbbbbbb
bbbbbbbbbbbbbbbbbbbbbbbb
ENTER 5-CHAR NAME:A_
c
c
c
When Backspace appears on the second line of the display, you
can use this feature to go back one space and erase the
previous letter.
Backspace Done
28
c
c
cbbbbbbbbbbbbbbbbbbbbbbbb
Page 37

7 When you are finished entering the name, press the softkey below
Done.
d
The display confirms your entry.
Editing Entries in the Directory
To edit a Directory entry
bbbbbb
Menu
1 Press
2 Press the softkey below Directory.
3 Press the softkey below Add/Del.
cbbbbbbc
NOTE: If the Directory is locked, you must enter your 3-digit
password in order to modify your Directory. (See the information in
‘‘Locking and Unlocking the Directory, Call Log, and All Softkeys’’
later in this section.)
d
The display shows:
.
bbbbbbbbbbbbbbbbbbbbbbbb
c
c
c
ADD/DEL DIRECTORY
Add Delete Edit Done
c
c
cbbbbbbbbbbbbbbbbbbbbbbbb
4 Press the softkey below Edit in order to edit a Directory entry.
d
The display shows:
bbbbbbbbbbbbbbbbbbbbbbbb
< SELECT TO EDIT >
c
EdBks HarvW Steve Quit
c
c
NOTE: Once again, remember that the names in the Directory
are arranged alphabetically.
5 Do the following:
bbbbbbb
Press
Directory.
Next
cbbbbbbbc
to page forward through the names in the
29
c
c
cbbbbbbbbbbbbbbbbbbbbbbbb
Page 38
bbbbbbb
Prev
Press
cbbbbbbbc
Directory.
6 Press the softkey below the name of the entry you want to edit.
d
The display shows:
to page backwards through the names in the
bbbbbbbbbbbbbbbbbbbbbbbb
EDIT 5-CHAR NAME: Harv_
c
c
c
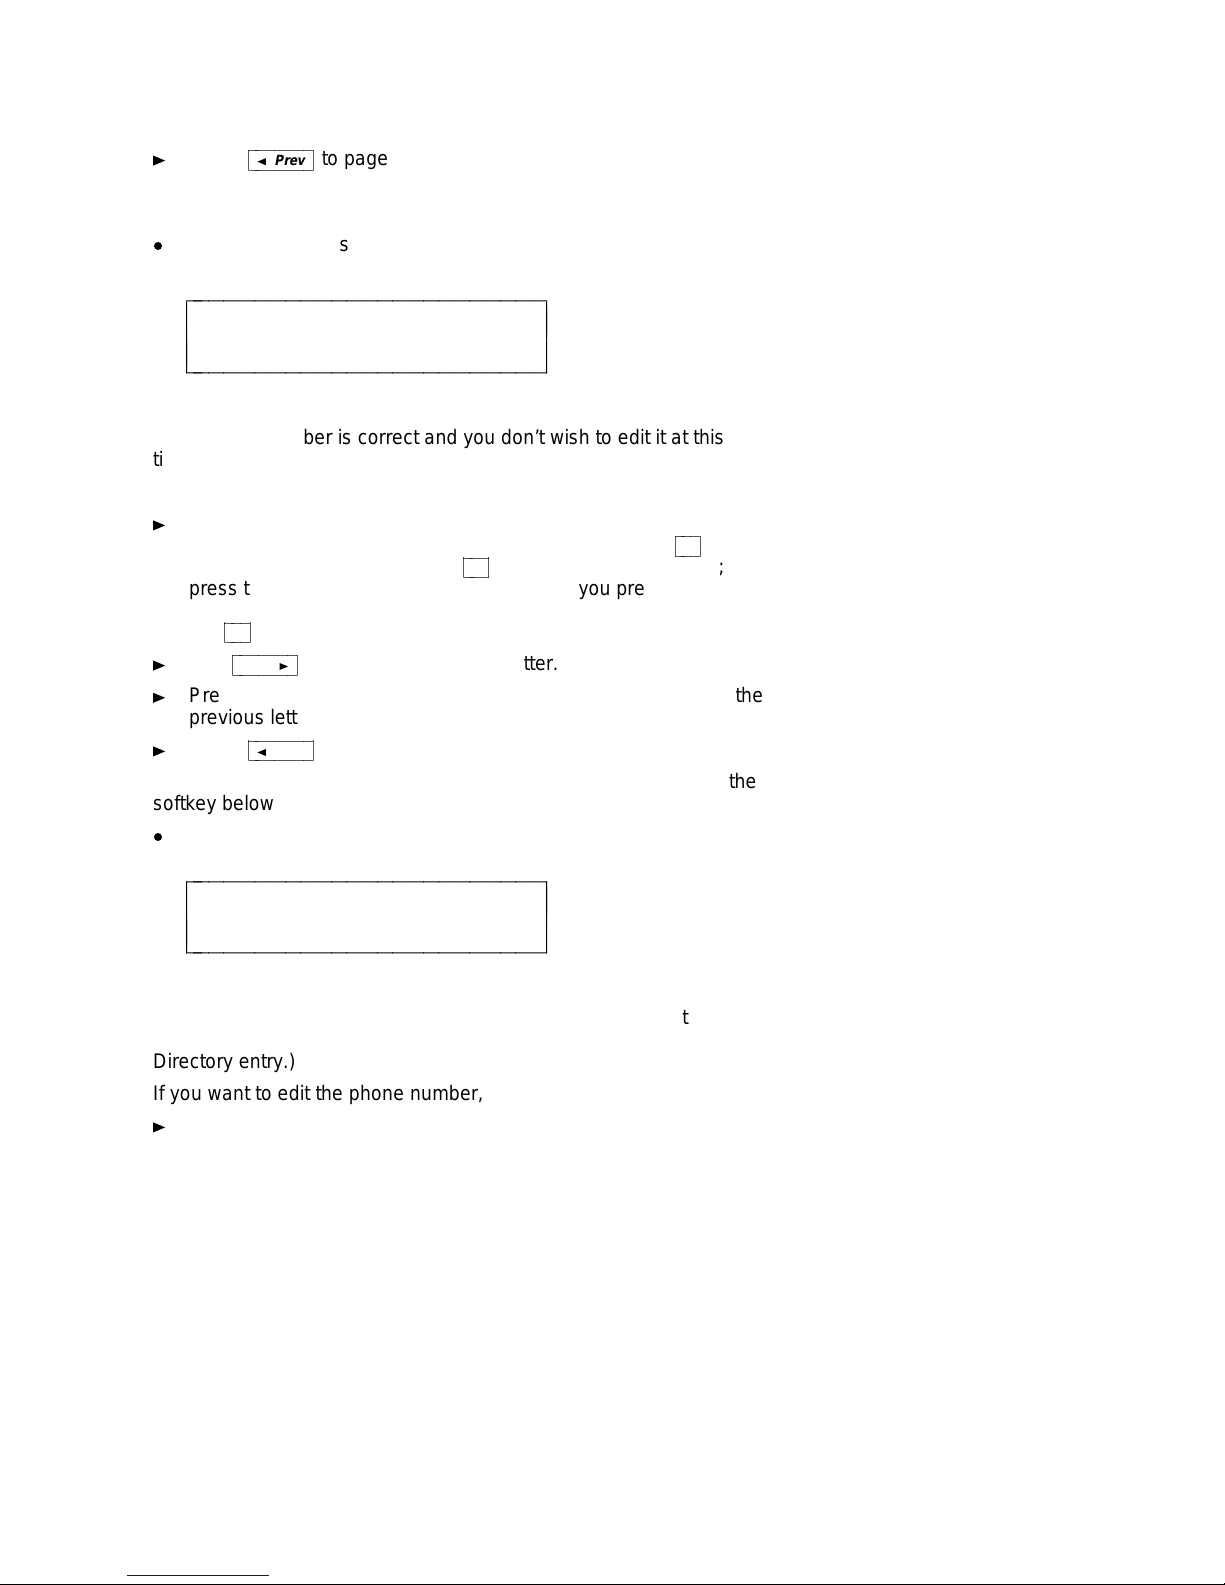
7 If the phone number is correct and you don’t wish to edit it at this
time, press the softkey below Done.
If you want to edit the name, do the following:
You may need to press the dial pad key more than once to enter
the correct character. For example, press the GHI (or
once to enter a ‘‘G’’; press the
press the key a third time to enter an ‘‘I.’’ If you press the dial
pad key a fourth time, a ‘‘4’’ appears on the screen. If you press
the
Use
Press the softkey below Backspace to move back and erase the
previous letter.
Press
8 When you have completed entering the 5-character name, press the
softkey below Done.
d
The display then shows:
Backspace Done
bb b
4
cbbbc
bb b
4
key again, the screen will again print a ‘‘G.’’
cbbbc
bbbbbbb
Next
cbbbbbbbc
to advance to the next letter.
bbbbbbb
Prev
cbbbbbbbc
to move back a letter without erasing it.
c
c
cbbbbbbbbbbbbbbbbbbbbbbbb
bb b
4
key twice to enter an ‘‘H’’;
cbbbc
) key
bbbbbbbbbbbbbbbbbbbbbbbb
EDIT PHONE #:5551234_
c
Pause Backspace Done
c
c
9 If the phone number is correct and you don’t wish to edit it at this
time, press the softkey below Done. (You are done editing a
Directory entry.)
If you want to edit the phone number, do the following:
To move back and erase a number, press the softkey below
Backspace.
30
c
c
cbbbbbbbbbbbbbbbbbbbbbbbb
Page 39
bbbbbbb
Prev
To move back without erasing a number, press
To erase the flashing number, press the softkey below Delete.
To move forward without erasing a number, press
To enter new or corrected numbers, press the appropriate dial
pad keys.
Press the softkey below Pause to insert a 1.5-second pause in
the telephone number. Each pause in the number is represented
on the screen by a comma.
When you have completed editing the telephone number, press
the softkey below Done.
d
The display confirms your choice.
Deleting an Entry from the Directory
To delete an entry from the Directory
bbbbbb
Menu
1 Press
2 Press the softkey below Directory.
3 Press the softkey below Add/Del to add or delete a Directory entry.
cbbbbbbc
NOTE: If the Directory is locked, you must enter your 3-digit
password in order to modify your Directory. (See the information in
‘‘Locking and Unlocking the Directory, Call Log, and All Softkeys’’
later in this section.)
d
The display shows:
.
cbbbbbbbc
.
bbbbbbb
Next
cbbbbbbbc
.
bbbbbbbbbbbbbbbbbbbbbbbb
c
c
c
ADD/DEL DIRECTORY
Add Delete Edit Done
31
c
c
cbbbbbbbbbbbbbbbbbbbbbbbb
Page 40

4 Press the softkey below Delete.
d
The display shows:
bbbbbbbbbbbbbbbbbbbbbbbb
< SELECT TO DELETE >
c
EdBks HarvW Steve Quit
c
c
c
c
cbbbbbbbbbbbbbbbbbbbbbbbb
5 Do the following:
6 Press the softkey below the name of the entry you want to delete.
d
The display shows:
bbbbbbb
Press
Directory.
Press
Directory.
Next
cbbbbbbbc
bbbbbbb
cbbbbbbbc
to page forward through the names in the
Prev
to page backwards through the names in the
bbbbbbbbbbbbbbbbbbbbbbbb
5551234
c
HarvW Delete Quit
c
c
7 Press the softkey below Delete if you want to delete this entry.
d
The display confirms your choice.
c
c
cbbbbbbbbbbbbbbbbbbbbbbbb
32
Page 41
aaaaaaaaaaaaaaaaaaaaaaaaaaaaaaaaaaaaaaaaaaaaaaaaaaaaaaaaaaaaaaaaaaaa
VIEWING A DIRECTORY ENTRY (AND PLACING A CALL)
aaaaaaaaaaaaaaaaaaaaaaaaaaaaaaaaaaaaaaaaaaaaaaaaaaaaaaaaaaaaaaaaaaaa
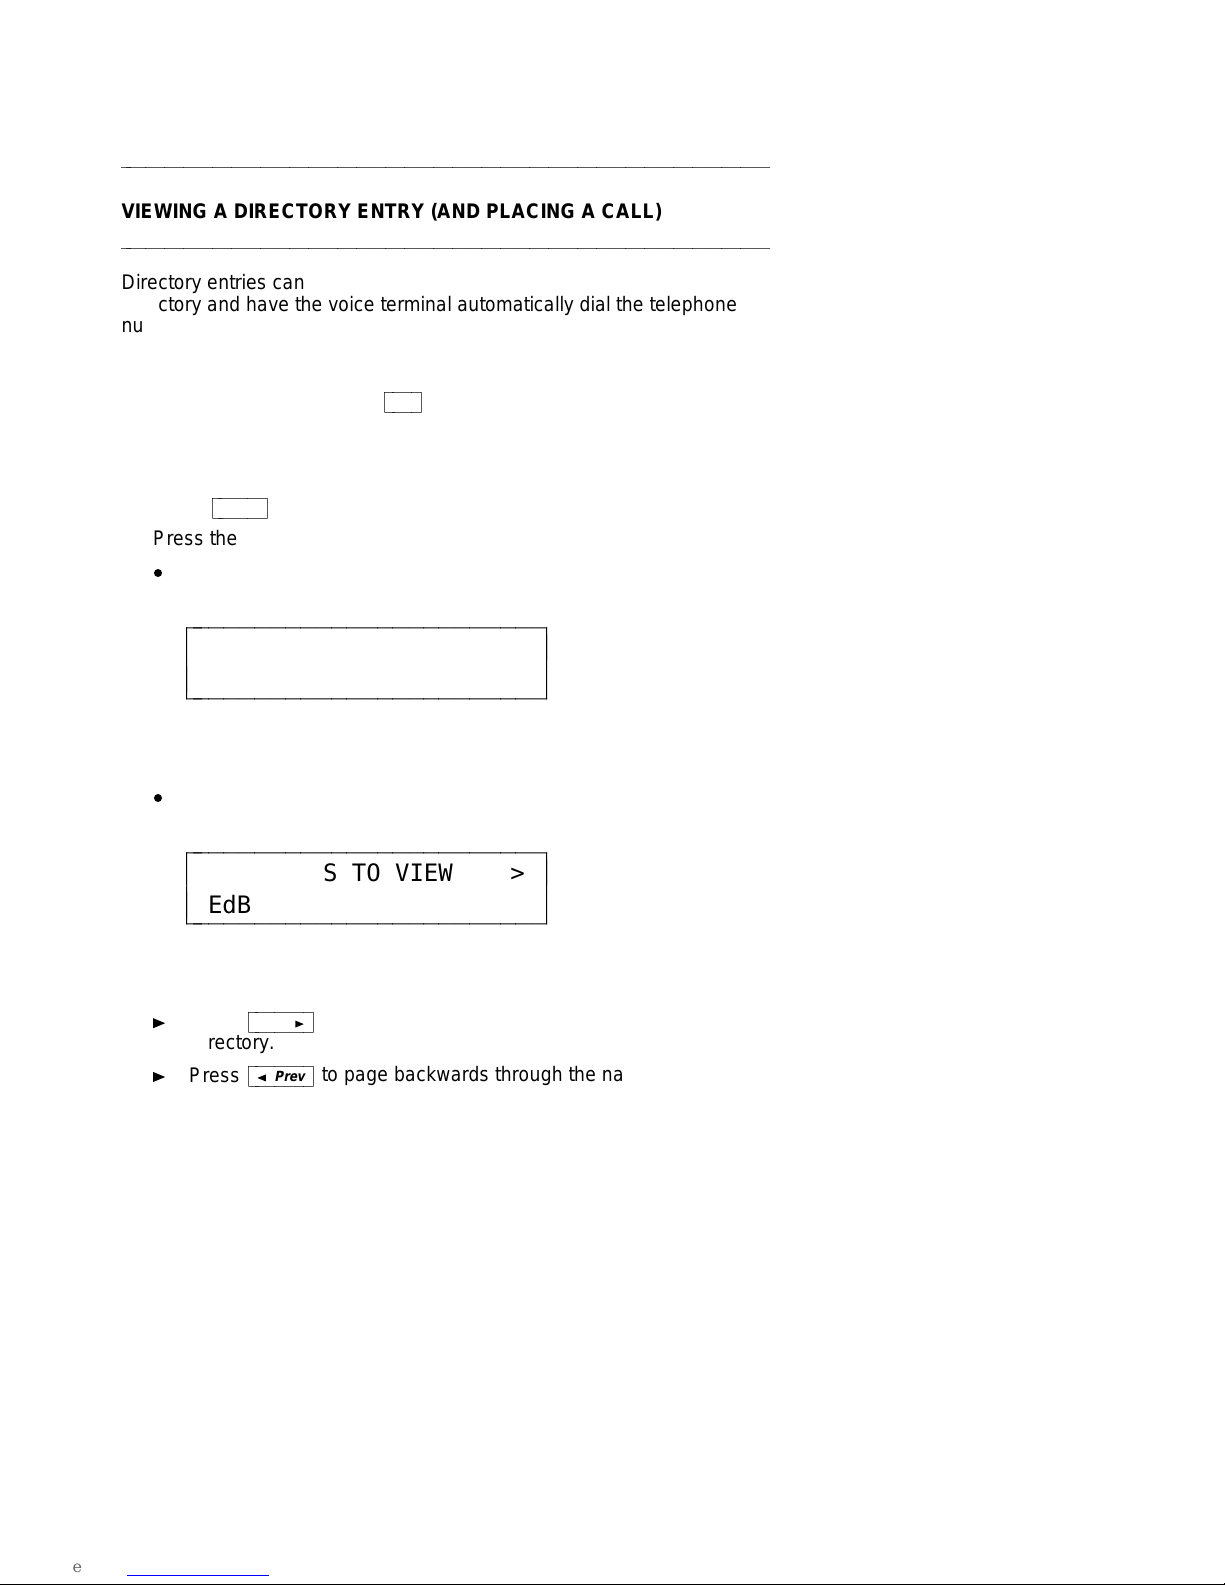
Directory entries can be viewed and changed, or you can exit the
Directory and have the voice terminal automatically dial the telephone
number you are presently viewing.
To view a Directory entry (and, if desired, call that number)
NOTE: You can also use the
Directory. To do this, use the procedures in ‘‘Using the Dir Button to
Place a Call.’’
bbbbbb
Menu
1 Press
2 Press the softkey below Directory.
cbbbbbbc
d
The display shows:
.
bbbb
Dir
button to call a number in your
cbbbbc
bbbbbbbbbbbbbbbbbbbbbbbb
c
Call View Add/Del Done
c
c
3 Press the softkey below View.
d
The display shows:
DIRECTORY
c
c
cbbbbbbbbbbbbbbbbbbbbbbbb
bbbbbbbbbbbbbbbbbbbbbbbb
< PRESS TO VIEW >
c
EdBks HarvW Steve Quit
c
c
c
c
cbbbbbbbbbbbbbbbbbbbbbbbb
4 Do the following:
bbbbbbb
Press
Directory.
Press
Directory.
Next
cbbbbbbbc
bbbbbbb
cbbbbbbbc
to page forward through the names in the
Prev
to page backwards through the names in the
33
Page 42

5 Press the softkey below the Directory entry of the name you want to
view.
d
The display shows:
bbbbbbbbbbbbbbbbbbbbbbbb
5551234
c
HarvW Call Edit/Del Done
c
c
NOTE: The name of the person associated with this telephone
number, such as HarvW, is shown in the lower left corner.
6 Do one of the following:
To call this number, press the softkey below Call.
d
The voice terminal exits softkey mode and dials the telephone
number you are currently viewing on the screen.
If you want to edit or delete the Directory entry, press the softkey
below Edit/Del.
d
The display shows:
c
c
cbbbbbbbbbbbbbbbbbbbbbbbb
bbbbbbbbbbbbbbbbbbbbbbbb
EDIT/DELETE HarvW
c
Edit Delete Quit
c
c
c
c
cbbbbbbbbbbbbbbbbbbbbbbbb
If you want to edit the Directory entry, press the softkey under
Edit. If you want to delete the Directory entry, press the
softkey below Delete. (If you need help in editing or deleting
the Directory entry, return to the directions in ‘‘Adding,
Editing, and Deleting a Number and Name in the Directory.’’)
7 If you have completed viewing the telephone number, press the
softkey below Done.
34
Page 43

aaaaaaaaaaaaaaaaaaaaaaaaaaaaaaaaaaaaaaaaaaaaaaaaaaaaaaaaaaaaaaaaaaaa
USING THE DIR BUTTON TO PLACE A CALL
aaaaaaaaaaaaaaaaaaaaaaaaaaaaaaaaaaaaaaaaaaaaaaaaaaaaaaaaaaaaaaaaaaaa
bbbb
Dir
You can also use the
your Directory.
IMPORTANT: When you press the softkey under the name in the
Directory you wish to call, the call is placed
does not ask you to respond to a screen before the call is placed.
To use the Dir button to call a person whose number appears in
your Directory
bbbb
Dir
1 Press
d
The display shows:
to enter your Directory.
cbbbbc
button to place a call to a number entered in
cbbbbc
immediately. The menu
bbbbbbbbbbbbbbbbbbbbbbbb
< CALL >
c
EdBks HarvW Steve Quit
c
c
c
c
cbbbbbbbbbbbbbbbbbbbbbbbb
NOTE: The word ‘‘CALL’’ flashes to remind you that if you press a
softkey below a name, it will automatically call that entry.
2 Do the following:
3 When the name of the person whose number you want to call
appears on the second line of the screen, press the softkey below
that name.
d
The voice terminal exits softkey mode and dials the telephone
number you have selected
bbbbbbb
Press
Directory.
Press
Directory.
Next
cbbbbbbbc
bbbbbbb
cbbbbbbbc
to page forward through the names in the
Prev
to page backwards through the names in the
immediately
35
.
Page 44

aaaaaaaaaaaaaaaaaaaaaaaaaaaaaaaaaaaaaaaaaaaaaaaaaaaaaaaaaaaaaaaaaaaa
USING THE CALL LOG
aaaaaaaaaaaaaaaaaaaaaaaaaaaaaaaaaaaaaaaaaaaaaaaaaaaaaaaaaaaaaaaaaaaa
The voice terminal Call Log stores the 10 most recent unanswered
incoming calls, the 10 most recent answered incoming calls, and the
10 most recent calls that were placed at the voice terminal.
NOTE: If multiple calls from the same telephone number are received,
only the most recent call from that number appears in the Call Log.
When an eleventh call comes in or is placed, it is added to the top of the
Call Log in the appropriate category; the call listed at the bottom of the
list in that category is deleted from the list.
When your voice terminal arrives and is initially set up, it will have only
an Unanswered Call Log. If you want to readjust your own Call Log, see
the procedures in the sub-section titled ‘‘Setting the Call Log.’’ You may
designate whether you want to:
d
View only incoming unanswered calls in your Call Log;
d
Turn off the Call Log;
d
View all calls, incoming and outgoing, in your Call Log.
NOTE: Incoming Call Log will reflect information provided by the network
your voice terminal is connected to. If no information appears in your
Call Log, see your system manager.
For all incoming calls, you may also choose to activate the Callback
feature which allows you to return calls to callers listed in your incoming
Call Log. You may also choose to activate the AutoAdd feature. With
this feature the voice terminal automatically saves the names and
numbers in your incoming Call Log and adds them to your Directory.
36
Page 45

Viewing Unanswered Incoming Calls in the Call Log
(When the Call Log is set to Unanswered Calls Only)
To view the 10 most recent unanswered calls (with Call Log set to
‘‘Unanswered Only’’)
bbbbbb
Menu
1 Press
2 Press the softkey below CallLog.
cbbbbbbc
NOTE: If the Call Log is locked, you will need to enter your 3-digit
password before you can use the Call Log. (See the information in
‘‘Locking and Unlocking the Directory, Call Log, and All Softkeys’’
later in this section.)
d
The display shows:
.
bbbbbbbbbbbbbbbbbbbbbbbb
UNANSWERED CALL LOG
c
New Old Done
c
c
NOTE: The words, ‘‘New’’ or ‘‘Old’’ appear on the second line only
if you have new or old calls in your voice terminal’s Call Log.
3 Press the softkey below New or below Old according to the
unanswered calls you want to view at this time.
d
The display shows:
c
c
cbbbbbbbbbbbbbbbbbbbbbbbb
bbbbbbbbbbbbbbbbbbbbbbbb
555-1235 P.Feher >
c
Time Delete More
c
c
d
If your terminal is able to place calls to numbers in the incoming
Call Log, the display will show:
c
c
cbbbbbbbbbbbbbbbbbbbbbbbb
bbbbbbbbbbbbbbbbbbbbbbbb
555-1235 P.Feher >
c
Time Call Save More
c
c
37
c
c
cbbbbbbbbbbbbbbbbbbbbbbbb
Page 46

NOTE: If the number and the name of the caller cannot be
identified, you will see the message, ‘‘Phone#/Name Unavailable’’
on your display screen. (The name is present only if it’s an
internal call.)
4 If you want to see the time at which this call rang at your voice
terminal, press the softkey below Time.
5 If Delete is displayed, you may press the softkey below it to remove
this call from the Call Log.
6 If Call is displayed, you may press the softkey below it to exit softkey
mode and place a call to this number.
NOTE: Not all telephone numbers can receive calls. Often the
displayed number may represent the outgoing trunk of a building.
Calls placed to such numbers will result in error tones or indefinite
ringing. The phone will automatically insert an outside-line access
code or remove unnecessary numbers as long as you have dialed
these types of calls at some point.
7 If Save is displayed, you may press the softkey below it to add it to
your Directory.
NOTE: If you have activated the AutoAdd feature, the name and
number of incoming callers will automatically be saved in your
Directory.
d
The display shows:
bbbbbbbbbbbbbbbbbbbbbbbb
EDIT PHONE #:5551234_
c
Pause Backspace Done
c
c
c
c
cbbbbbbbbbbbbbbbbbbbbbbbb
NOTE: After editing the phone number and pressing the softkey
below Done, you are prompted to enter a 5-character name
associated with that number. If you need help in editing (or
entering the name into) the Directory entry, return to the
directions in ‘‘Adding, Editing, and Deleting a Number and Name
in the Directory.’’
8 If you want to see information on the next or previous call in the Call
Log, press the softkey below More or press
d
The display shows you the number and name of the next or
previous unanswered call in the Call Log.
d
The display tells you when you have finished viewing all the new
unanswered calls in the Call Log.
38
bbbbbbb
Next
cbbbbbbbc
or
bbbbbbb
Prev
cbbbbbbbc
.
Page 47

9 When you are finished viewing each unanswered call in the Call Log,
press the softkey below More until you reach the end of that list.
Then press the softkey below Done.
NOTE: After you have viewed new calls in the Call Log, they become old
calls. The Call Log will continue to hold the 10 most recent unanswered
calls.
Setting the Call Log
To turn on or to turn off, or to set the Call Log
bbbbbb
Menu
Next
.
twice to view the third Option screen.
1 Press
2 Press the softkey below Option.
3 Press
cbbbbbbc
bbbbbbb
cbbbbbbbc
d
The display shows the third option screen:
bbbbbbbbbbbbbbbbbbbbbbbb
< OPTIONS
c
Tones CallLog Names Done
c
c
c
c
cbbbbbbbbbbbbbbbbbbbbbbbb
4 Press the softkey below CallLog.
NOTE: If the Call Log is locked, you will need to enter your 3-digit
password before you can use the Call Log. (See the information in
‘‘Locking and Unlocking the Directory, Call Log, and All Softkeys’’
later in this section.)
d
The display shows:
bbbbbbbbbbbbbbbbbbbbbbbb
c
c
c
5 To set up your Call Log (turn Call Log off, logs only unanswered
calls, or logs all calls), press the softkey below Set-up.
CALL LOG OPTIONS >
Set-up Indicator Done
39
c
c
cbbbbbbbbbbbbbbbbbbbbbbbb
Page 48
d
The display shows the current status of the Call Log:
bbbbbbbbbbbbbbbbbbbbbbbb
CALL LOG:UNANSWERED ONLY
c
Off Unansw All Done
c
c
6 Do one of the following:
If you do not want your voice terminal to collect Call Log
information, press the softkey below Off.
If you want to have only unanswered calls entered into the Call
Log, press the softkey below Unansw.
If you want both unanswered and answered incoming calls and
all outgoing calls to be entered into your Call Log, press the
softkey below All.
d
The display shows you the Call Log setting you have selected.
7 If the correct Call Log setting appears on your screen, press the
softkey below Done.
d
The display confirms your choice.
d
If the Call Log is turned off, the display asks you to confirm your
choice to clear and turn off the Call Log.
If you press the softkey below Yes, your Call Log is cleared and
then turned off, and the word ‘‘CallLog’’ will not appear on the
Main Menu.
c
c
cbbbbbbbbbbbbbbbbbbbbbbbb
Seeing Indication of New Unanswered Incoming Call(s)
Under the Date and Time on Your Display Screen
You can set your display so that you receive an indication when a new
unanswered incoming call is placed into your Call Log.
bbbbbbbbbbbbbbbbbbbbbbbb
Sep 24, 1995 10:00 AM
c
(TWO NEW CALLS LOGGED.)
c
c
40
c
c
cbbbbbbbbbbbbbbbbbbbbbbbb
Page 49
To set your display so that you receive an indication of new
unanswered incoming calls on the second line of the display
bbbbbb
Menu
Next
.
twice to view the third Option screen.
1 Press
2 Press the softkey below Option.
3 Press
cbbbbbbc
bbbbbbb
cbbbbbbbc
d
The display shows the third option screen:
bbbbbbbbbbbbbbbbbbbbbbbb
< OPTIONS
c
Tones CallLog Names Done
c
c
4 Press the softkey below CallLog.
NOTE: If the Call Log is locked, you will need to enter your 3-digit
password before you can use the Call Log. (See the information in
‘‘Locking and Unlocking the Directory, Call Log, and All Softkeys’’
later in this section.)
d
The display shows:
c
c
cbbbbbbbbbbbbbbbbbbbbbbbb
bbbbbbbbbbbbbbbbbbbbbbbb
c
c
c
CALL LOG OPTIONS >
Set-up Indicator Done
c
c
cbbbbbbbbbbbbbbbbbbbbbbbb
5 Press the softkey below Indicator.
d
The display shows:
bbbbbbbbbbbbbbbbbbbbbbbb
SHOW NEW CALL INDICATOR?
c
Yes No Explain
c
c
6 Press the softkey below Yes or No.
41
c
c
cbbbbbbbbbbbbbbbbbbbbbbbb
Page 50
NOTE: If you press the softkey below Explain, you can read more
information on the indicator feature.
d
If you press No, the display returns you to the original ‘‘Call Log
Options’’ screen; if you press Yes, the display confirms that you
will receive indication when a new unanswered incoming call
arrives.
Returning Calls to Callers Listed in Your Incoming Call Log
To be able to call back people whose names and numbers appear in
your incoming Call Log:
bbbbbb
Menu
Next
.
twice to view the third Option screen.
1 Press
2 Press the softkey below Option.
3 Press
cbbbbbbc
bbbbbbb
cbbbbbbbc
d
The display shows the third option screen:
bbbbbbbbbbbbbbbbbbbbbbbb
< OPTIONS
c
Tones CallLog Names Done
c
c
c
c
cbbbbbbbbbbbbbbbbbbbbbbbb
4 Press the softkey below CallLog.
NOTE: If the Call Log is locked, you will need to enter your 3-digit
password before you can use the Call Log. (See the information in
‘‘Locking and Unlocking the Directory, Call Log, and All Softkeys’’
later in this section.)
d
The display shows:
bbbbbbbbbbbbbbbbbbbbbbbb
c
Set-up Indicator Done
c
c
5 Press
CALL LOG OPTIONS >
bbbbbbb
Next
cbbbbbbbc
.
42
c
c
cbbbbbbbbbbbbbbbbbbbbbbbb
Page 51
d
The display shows:
bbbbbbbbbbbbbbbbbbbbbbbb
< CALL LOG OPTIONS
c
CallBack AutoAdd Done
c
c
6 If you want to be able to call back callers in your incoming Call Log,
press the softkey below CallBack.
d
The display shows the current setting for the CallBack feature
and allows you to change it:
c
c
cbbbbbbbbbbbbbbbbbbbbbbbb
bbbbbbbbbbbbbbbbbbbbbbbb
CALL FROM INCOMING: No
c
Yes No Explain Done
c
c
7 If the CallBack feature is set to No, you can change the setting to
Yes by pressing the softkey below Yes.
NOTE: By setting the CallBack feature option to Yes, you can call
back callers in your incoming Call Log. This setting will be active until
you change the CallBack setting to No.
If you press the softkey below Explain, you can read more
information on the indicator feature.
8 When the display shows the CallBack setting you prefer (Yes or No),
press the softkey below Done.
d
If you activate the CallBack feature, the display message asks
you for your areacode:
c
c
cbbbbbbbbbbbbbbbbbbbbbbbb
bbbbbbbbbbbbbbbbbbbbbbbb
ENTER AREACODE:_
c
Pause Backspace Done
c
c
43
c
c
cbbbbbbbbbbbbbbbbbbbbbbbb
Page 52
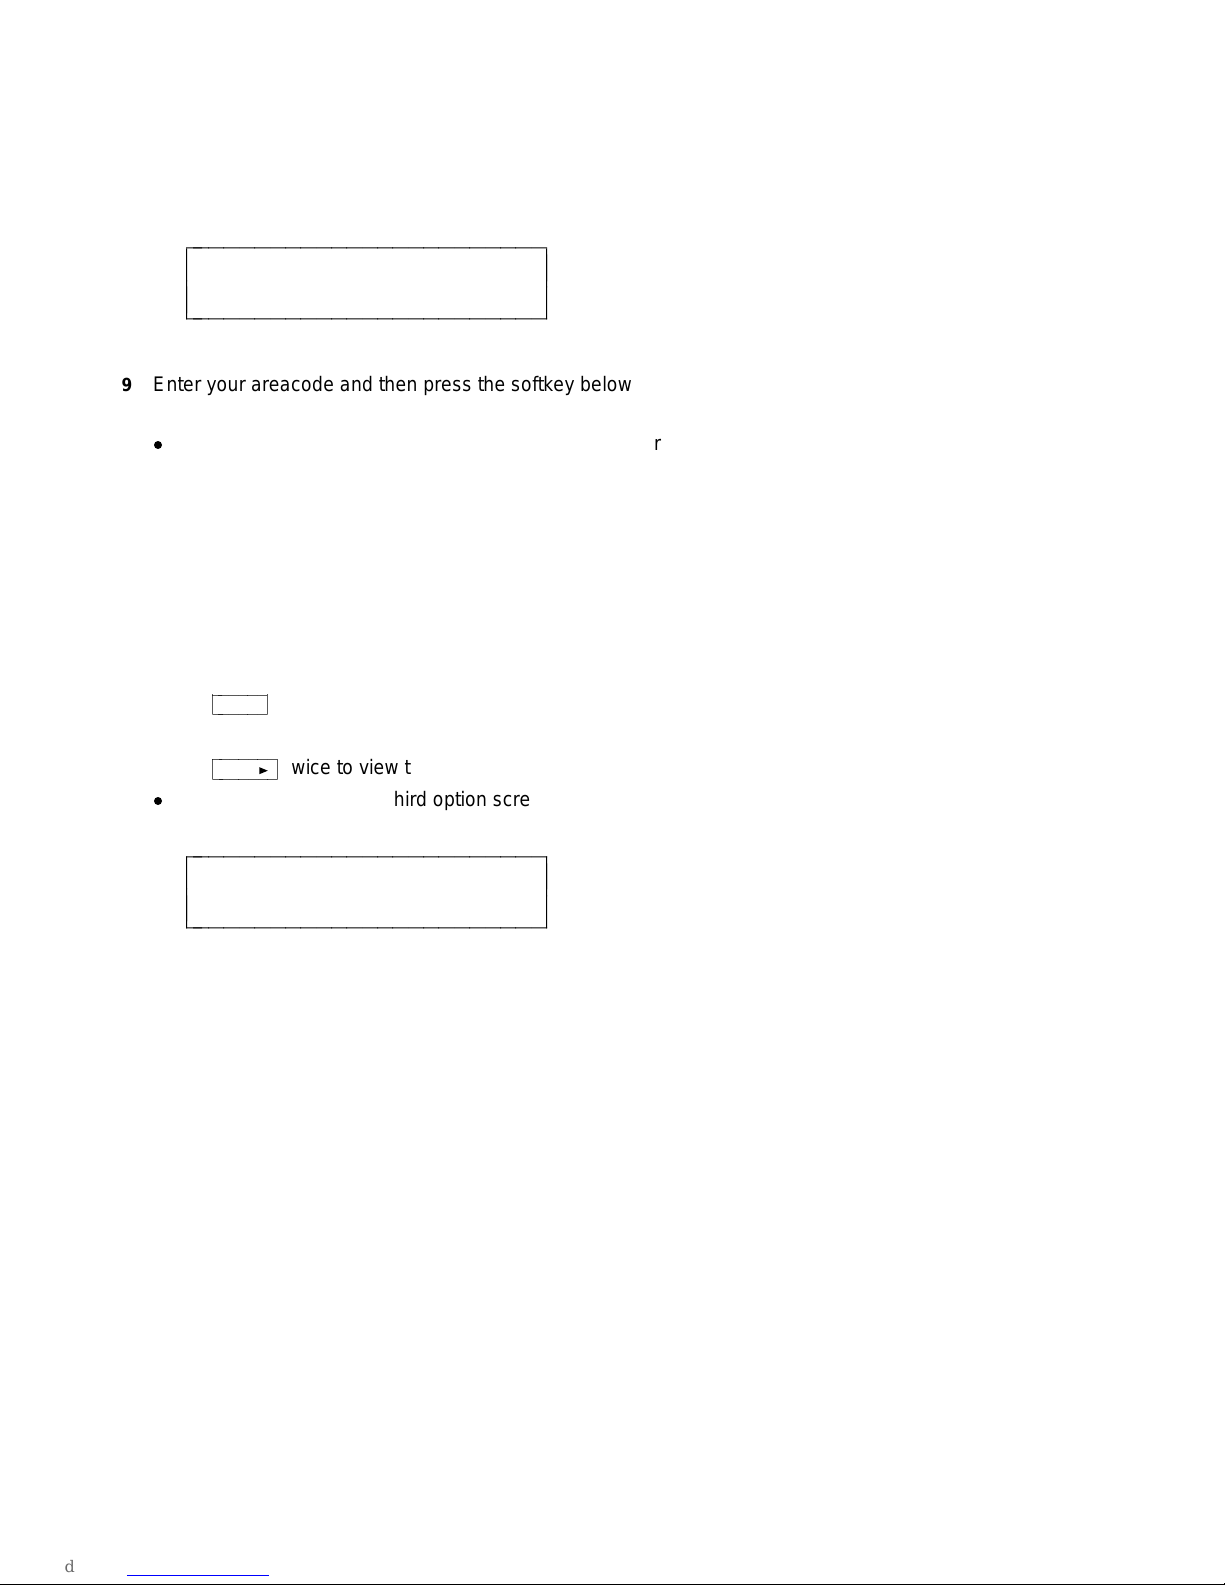
or, if the voice terminal has already determined the areacode
from past calls which you have placed, the display message asks
you to confirm your areacode:
bbbbbbbbbbbbbbbbbbbbbbbb
IS YOUR AREACODE 607 ?
c
Yes No
c
c
9 Enter your areacode and then press the softkey below Done
or press the softkey below Yes to verify your areacode.
d
The display confirms that you will now be able to return calls to
numbers in your incoming Call Log.
Automatically Adding Names and Numbers from Incoming Calls to
Your Directory
To automatically add incoming callers to your Directory:
bbbbbb
Menu
Next
.
twice to view the third Option screen.
1 Press
2 Press the softkey below Option.
3 Press
cbbbbbbc
bbbbbbb
cbbbbbbbc
d
The display shows the third option screen:
c
c
cbbbbbbbbbbbbbbbbbbbbbbbb
bbbbbbbbbbbbbbbbbbbbbbbb
< OPTIONS
c
Tones CallLog Names Done
c
c
44
c
c
cbbbbbbbbbbbbbbbbbbbbbbbb
Page 53

4 Press the softkey below CallLog.
NOTE: If the Call Log is locked, you will need to enter your 3-digit
password before you can use the Call Log. (See the information in
‘‘Locking and Unlocking the Directory, Call Log, and All Softkeys’’
later in this section.)
d
The display shows:
bbbbbbbbbbbbbbbbbbbbbbbb
c
c
c
5 Press
d
The display shows:
CALL LOG OPTIONS >
Set-up Indicator Done
bbbbbbb
Next
cbbbbbbbc
.
c
c
cbbbbbbbbbbbbbbbbbbbbbbbb
bbbbbbbbbbbbbbbbbbbbbbbb
< CALL LOG OPTIONS
c
CallBack AutoAdd Done
c
c
6 Press the softkey below AutoAdd.
d
The display shows:
c
c
cbbbbbbbbbbbbbbbbbbbbbbbb
bbbbbbbbbbbbbbbbbbbbbbbb
SAVE INCOMING TO DIR?No
c
Yes No Explain Done
c
c
7 If you want to automatically add the names and numbers of incoming
calls to your Directory, press the softkey below Yes.
NOTE: If you select the Yes option, the names and numbers of
incoming callers will automatically be added to your Directory until
you change the AutoAdd setting to No.
45
c
c
cbbbbbbbbbbbbbbbbbbbbbbbb
Page 54

8 When the display shows the AutoAdd setting you prefer (Yes or No),
press the softkey below Done.
d
If you activate the AutoAdd feature, the display message asks
you for your areacode:
bbbbbbbbbbbbbbbbbbbbbbbb
ENTER AREACODE:_
c
Pause Backspace Done
c
c
or, if the voice terminal has already determined the areacode
from past calls which you have placed, the display message asks
you to confirm your areacode:
c
c
cbbbbbbbbbbbbbbbbbbbbbbbb
bbbbbbbbbbbbbbbbbbbbbbbb
IS YOUR AREACODE 607 ?
c
Yes No
c
c
9 Enter your areacode and then press the softkey below Done
or press the softkey below Yes to verify your areacode.
d
The display confirms that incoming calls will be added to your
Directory.
c
c
cbbbbbbbbbbbbbbbbbbbbbbbb
46
Page 55
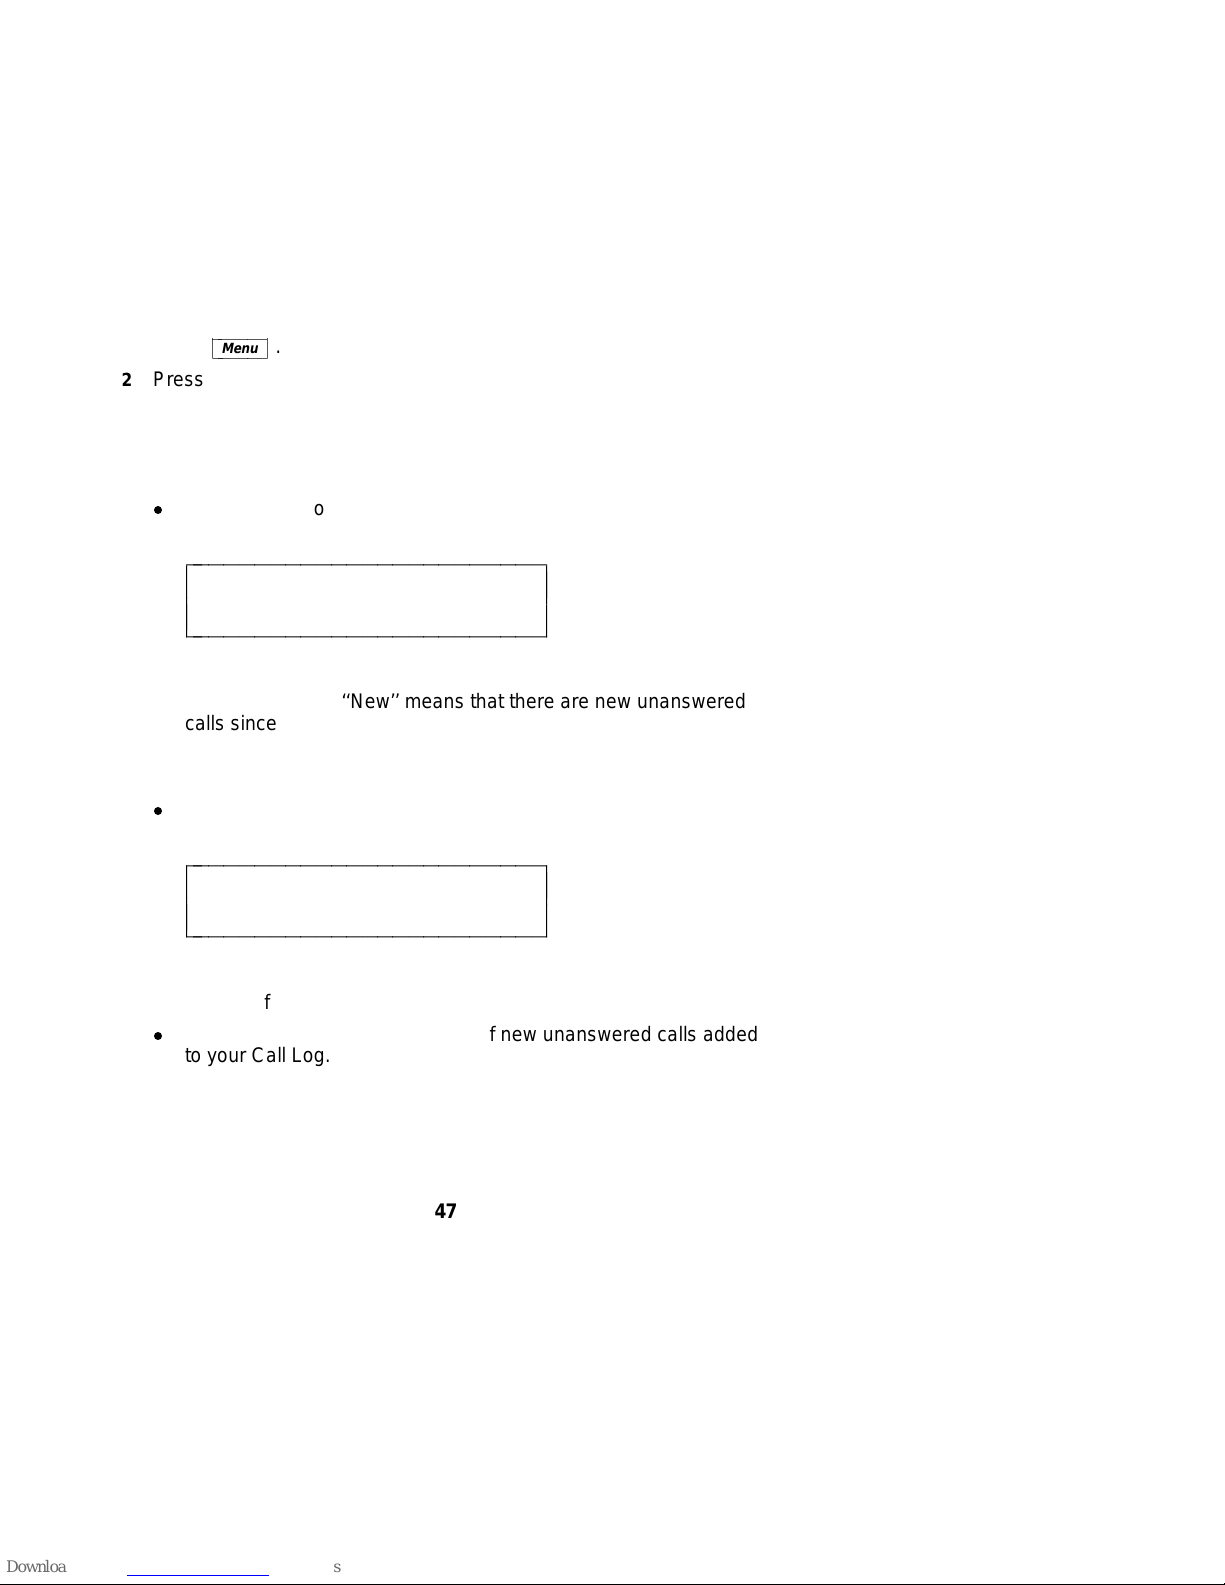
Viewing Unanswered Incoming Calls in the Call Log
(When Call Log is set to All Calls)
Use the following procedures when the Call Log is set for ‘‘All Calls.’’
To view the 10 most recent unanswered calls (when the Call Log is
set to ‘‘All Calls’’)
bbbbbb
Menu
1 Press
2 Press the softkey below CallLog.
cbbbbbbc
NOTE: If the Call Log is locked, you will need to enter your 3-digit
password before you can use the Call Log. (See the information in
‘‘Locking and Unlocking the Directory, Call Log, and All Softkeys’’
later in this section.)
d
The display shows:
.
bbbbbbbbbbbbbbbbbbbbbbbb
(New) CALL LOG
c
Incoming Outgoing Done
c
c
NOTE: The word ‘‘New’’ means that there are new unanswered
calls since the last time you checked the Call Log for unanswered
incoming calls.
3 Press the softkey below Incoming.
d
The display shows:
c
c
cbbbbbbbbbbbbbbbbbbbbbbbb
bbbbbbbbbbbbbbbbbbbbbbbb
(New) INCOMING
c
Unanswered Answered Done
c
c
4 Press the softkey below Unanswered.
d
The display tells you the number of new unanswered calls added
to your Call Log.
47
c
c
cbbbbbbbbbbbbbbbbbbbbbbbb
Page 56

d
Then the display shows you the number (and name, if it is an
internal call) such as:
bbbbbbbbbbbbbbbbbbbbbbbb
555-1235 P.Feher >
c
Time Delete More
c
c
d
If your terminal is able to place calls to numbers in the incoming
Call Log, the display will show:
c
c
cbbbbbbbbbbbbbbbbbbbbbbbb
bbbbbbbbbbbbbbbbbbbbbbbb
555-1235 P.Feher >
c
Time Call Save More
c
c
5 If you want to see the time at which the call rang at your voice
terminal, press the softkey below Time.
6 If Delete is displayed, you may press the softkey below it to remove
this call from the Call Log.
7 If Call is displayed, you may press the softkey below it to exit softkey
mode and place a call to this number.
NOTE: Not all telephone numbers can receive calls. Often the
displayed number may represent the outgoing trunk of a building.
Calls placed to such numbers will result in error tones or indefinite
ringing. The phone will automatically insert an outside-line access
code or remove unnecessary numbers as long as you have dialed
these types of calls at some point.
8 If Save is displayed, you may press the softkey below it to add the
number to your Directory.
NOTE: If you have activated the AutoAdd feature, the name and
number of incoming callers will automatically be saved in your
Directory.
d
The display shows:
c
c
cbbbbbbbbbbbbbbbbbbbbbbbb
bbbbbbbbbbbbbbbbbbbbbbbb
EDIT PHONE #:5551234_
c
Pause Backspace Done
c
c
48
c
c
cbbbbbbbbbbbbbbbbbbbbbbbb
Page 57

NOTE: After editing the phone number, you are prompted to
enter a 5-character name associated with that number. If you
need help in editing (or entering the name into) the Directory
entry, return to the directions in ‘‘Adding, Editing, and Deleting a
Number and Name in the Directory.’’
9 If you want to see information on the next or previous call in the Call
Log, press the softkey below More or press
d
The display shows you the number and/or name of the next or
previous unanswered call in the Call Log.
d
The display informs you when you have viewed all of the new or
old calls.
10 When you are finished viewing each call, press the softkey below
More until you reach the end of the list. Then press the softkey
below Done.
Viewing Answered Incoming Calls in the Call Log
To view the list of the 10 most recent answered calls
bbbbbb
Menu
1 Press
2 Press the softkey below CallLog.
3 Press the softkey below Incoming to view incoming calls.
cbbbbbbc
NOTE: If the Call Log is locked, you must enter your 3-digit password
to modify your Call Log. (See the information in ‘‘Locking and
Unlocking the Directory, Call Log, and All Softkeys’’ later in this
section.
d
The display shows:
.
bbbbbbb
Next
cbbbbbbbc
or
bbbbbbb
Prev
cbbbbbbbc
.
bbbbbbbbbbbbbbbbbbbbbbbb
(New) INCOMING
c
Unanswered Answered Done
c
c
49
c
c
cbbbbbbbbbbbbbbbbbbbbbbbb
Page 58

4 Press the softkey below Answered to view incoming answered calls
in your Call Log.
d
The display shows you the most recent answered call:
bbbbbbbbbbbbbbbbbbbbbbbb
555-1235 P.Feher >
c
Time Delete More
c
c
NOTE: The number shown at the top left, such as ‘‘555-1235,’’ is
the telephone number of the answered call. The name of the
person associated with that number is shown at the right of the
first line.
d
If your terminal is able to place calls to numbers in the Call Log,
the display will show:
c
c
cbbbbbbbbbbbbbbbbbbbbbbbb
bbbbbbbbbbbbbbbbbbbbbbbb
555-1235 P.Feher >
c
Time Call Save More
c
c
5 If you want to see when the call was answered, press the softkey
below Time.
6 If Call is displayed, you may press the softkey below it to exit softkey
mode and place a call to this number.
NOTE: Not all telephone numbers can receive calls. Often the
displayed number may represent the outgoing trunk of a building.
Calls placed to such numbers will result in error tones or indefinite
ringing. The phone will automatically insert an outside-line access
code or remove unnecessary numbers as long as you have dialed
these types of calls at some point.
7 If Save is displayed, you may press the softkey below it to add the
telephone number to your Directory.
NOTE: If you have activated the AutoAdd feature, the name and
number of incoming callers will automatically be saved in your
Directory.
c
c
cbbbbbbbbbbbbbbbbbbbbbbbb
50
Page 59

d
The display shows:
bbbbbbbbbbbbbbbbbbbbbbbb
EDIT PHONE #:5551234_
c
Pause Backspace Done
c
c
NOTE: After editing the phone number, you are prompted to
enter a 5-character name associated with that number. If you
need help in editing (or entering the name into) the Directory
entry, return to the directions in ‘‘Adding, Editing, and Deleting a
Number and Name in the Directory.’’
8 If you want to see more of the most recent calls you have answered,
press the softkey below More or press
d
The display again shows you the telephone number of the next or
previous incoming call.
d
The display informs you when you have viewed all of the
answered calls in your Call Log.
9 When you are finished viewing each answered call in the Call Log,
press the softkey below More until you reach the end of the list.
Then press the softkey below Done.
c
c
cbbbbbbbbbbbbbbbbbbbbbbbb
bbbbbbb
Next
cbbbbbbbc
or
bbbbbbb
Prev
cbbbbbbbc
.
Viewing Outgoing Calls in the Call Log
To view the 10 most recent calls placed from the voice terminal
bbbbbb
Menu
1 Press
2 Press the softkey below CallLog.
cbbbbbbc
d
This display shows:
.
bbbbbbbbbbbbbbbbbbbbbbbb
c
Incoming Outgoing Done
c
c
3 Press the softkey below Outgoing to view the list of calls you have
placed.
CALL LOG
51
c
c
cbbbbbbbbbbbbbbbbbbbbbbbb
Page 60

d
The display shows one of the following screens, according to
whether you have entered both a name and a number into the
Directory entry (it makes no difference whether you dialed the
number from the dial pad or the Directory or used
bbbbbbbbbbbbbbbbbbbbbbbb
555-1237 Steve >
c
Time Call More
c
c
or
bbbbbbbbbbbbbbbbbbbbbbbb
555-1236 >
c
Time Call Save More
c
c
NOTE: The telephone number shown here is the number of the
call placed from this voice terminal, such as 555-1237 or
555-1236. The name of the person associated with that number,
such as in the first example directly above (the name ‘‘Steve’’
appears there), is shown at the right of the first line (if one has
been entered into the personalized Directory).
4 Do one of the following:
If you press the softkey below Time, the display will show you
the time the call was placed.
If you press the softkey below Call, the voice terminal exits
Softkey mode and places a call to this number.
If there is
this number is not in your Directory. If you want this number
entered into your Directory, press the softkey below Save.
d
not
a name associated with the number, it means that
The display shows:
bbbbbbb
Redial
cbbbbbbbc
c
c
):
cbbbbbbbbbbbbbbbbbbbbbbbb
c
c
cbbbbbbbbbbbbbbbbbbbbbbbb
bbbbbbbbbbbbbbbbbbbbbbbb
EDIT PHONE #:5551234_
c
Pause Backspace Done
c
c
52
c
c
cbbbbbbbbbbbbbbbbbbbbbbbb
Page 61

d
After editing the phone number, you are prompted to enter a
5-character name associated with that number.
NOTE: If you need help in editing (or entering the name into)
the Directory entry, return to the directions in ‘‘Adding,
Editing, and Deleting a Number and Name in the Directory.’’
You can view other outgoing calls placed at the voice terminal by
pressing the softkey below More or by pressing
bbbbbbb
Prev
cbbbbbbbc
. The display informs you when you have viewed all the
bbbbbbb
Next
cbbbbbbbc
or
new outgoing calls in the Call Log.
5 When you are finished viewing each outgoing call in the Call Log,
press the softkey below More until you reach the end of the list. Then
press the softkey below Done.
53
Page 62
aaaaaaaaaaaaaaaaaaaaaaaaaaaaaaaaaaaaaaaaaaaaaaaaaaaaaaaaaaaaaaaaaaaa
LOCKING AND UNLOCKING THE DIRECTORY, CALL LOG,
AND ALL SOFTKEYS
aaaaaaaaaaaaaaaaaaaaaaaaaaaaaaaaaaaaaaaaaaaaaaaaaaaaaaaaaaaaaaaaaaaa
The 8528T voice terminal allows you the option of locking the following:
d
You can lock the Directory so that no one can make unauthorized
changes to it;
d
You can lock the Call Log so no one can view your incoming or
outgoing calls or change your Call Log options;
d
You may also choose to lock all the softkeys so that no one can
view or change any of the features accessed by the softkeys.
In order to lock any (or all) of these features, you must enter your own
personal 3-digit security password. As you enter the 3 digits, a *
appears in place of each digit. In this way, your password remains
private.
NOTE: Your password remains the same for all three features.
If you
access
automatically relock when you exit that feature. You must use your
password every time you want to
use the lock option to
a locked feature by entering a password, the feature will
unlock
access
that feature.
that locked feature until you
To lock your Directory, Call Log, or all softkeys
bbbbbb
Menu
1 Press
2 Press the softkey below Option.
cbbbbbbc
d
The display shows:
.
bbbbbbbbbbbbbbbbbbbbbbbb
c
Spkr Clock Lock Done
c
c
3 Press the softkey below Lock.
OPTIONS >
54
c
c
cbbbbbbbbbbbbbbbbbbbbbbbb
Page 63

d
The display shows:
bbbbbbbbbbbbbbbbbbbbbbbb
c
Select-Item Done
c
c
4 Press softkey below Select-Item.
d
The display shows:
LOCK
bbbbbbbbbbbbbbbbbbbbbbbb
SELECT ITEM TO LOCK >
c
CallLog Directory Done
c
c
bbbbbbb
d
or if you press
screen:
Next
cbbbbbbbc
, the display shows the next ‘‘Select Item’’
bbbbbbbbbbbbbbbbbbbbbbbb
< SELECT ITEM TO LOCK
c
Softkeys Done
c
c
c
c
cbbbbbbbbbbbbbbbbbbbbbbbb
c
c
cbbbbbbbbbbbbbbbbbbbbbbbb
c
c
cbbbbbbbbbbbbbbbbbbbbbbbb
5 Press the softkey below CallLog or Directory or Softkeys according
to which one you want to lock.
d
The display asks you to confirm your choice (Yes or No) in order
to lock the Directory, Call Log, or softkeys.
NOTE: If you press the softkey below Explain, you can read
more information on the locking feature.
6 If you press No, the display returns you to the original ‘‘Select Item
To Lock’’ screen; if you press Yes, the display asks you to enter or
create a 3-digit password.
7 Enter or create your 3-digit password.
55
Page 64
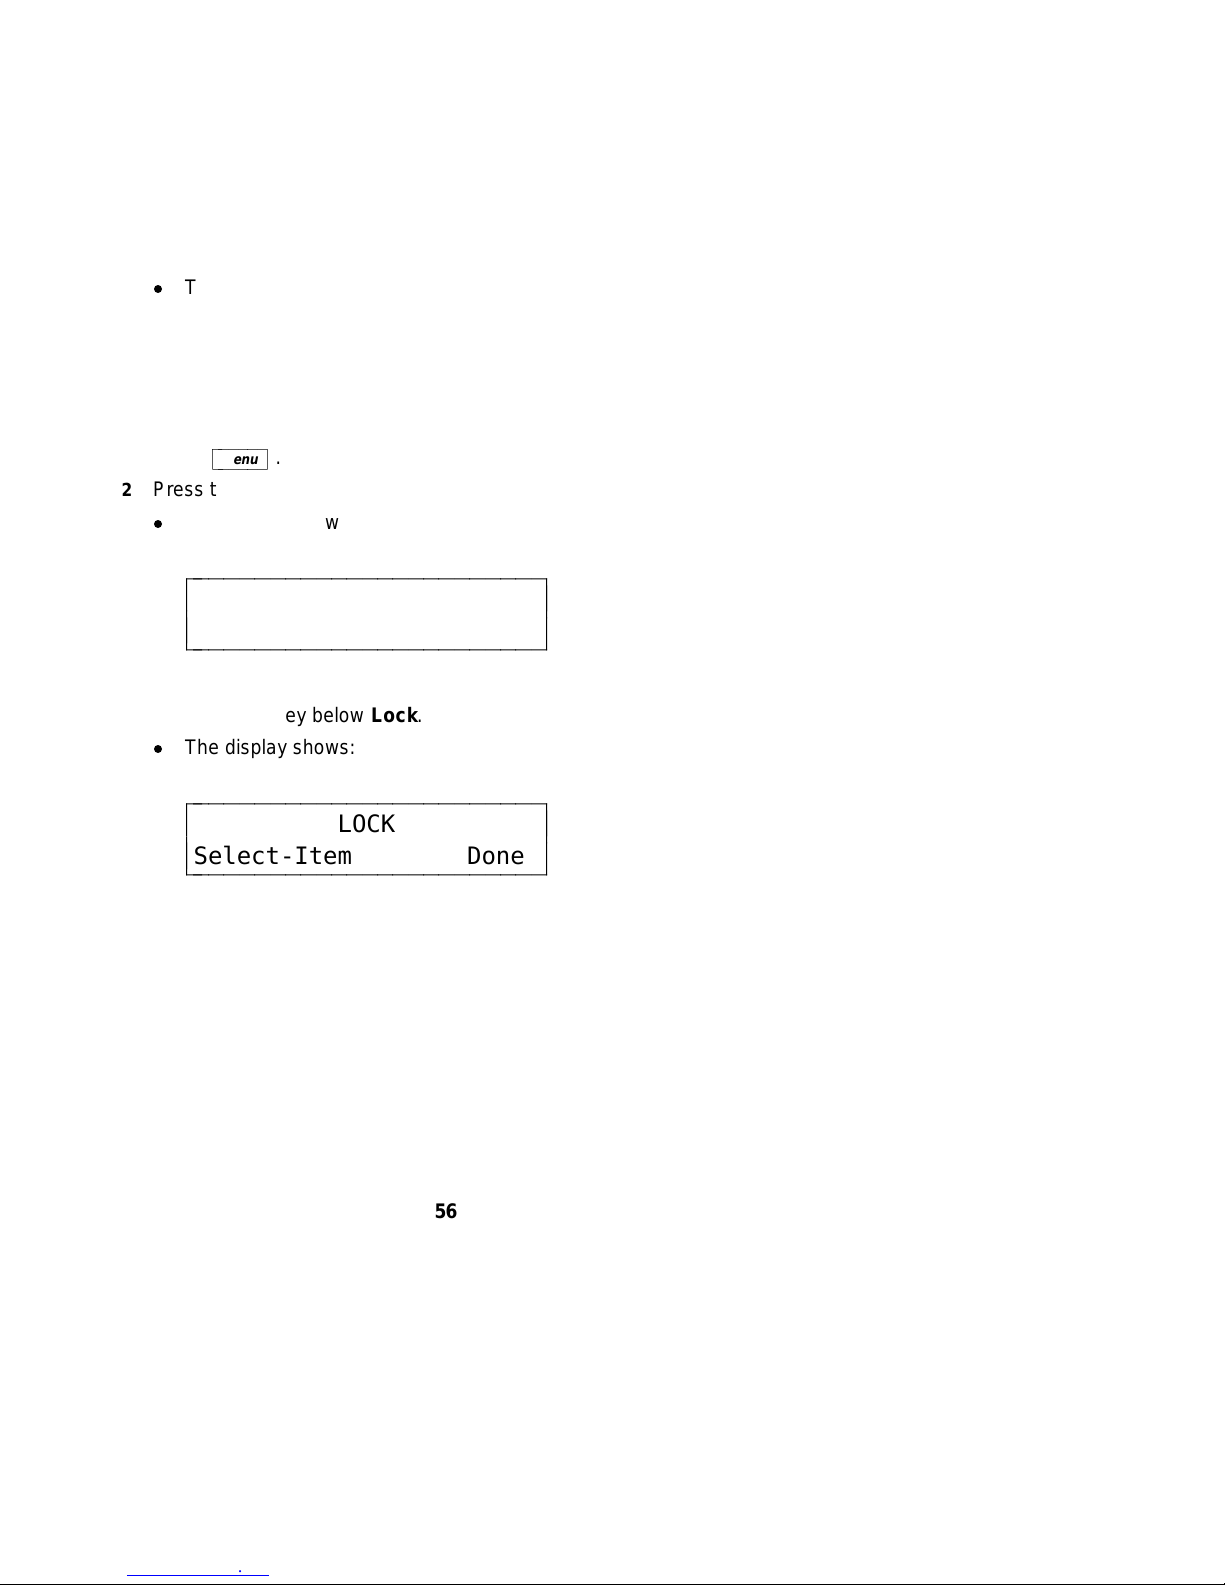
8 When you have entered your password, press the softkey below
Done.
When you have created a password, the display asks you to
‘‘Please Re-enter the Password.’’ When you have completed that
task, press the softkey below Done.
d
The display confirms that you have locked the feature of your
choice.
To unlock your Directory
NOTE: If you have lost your password, see your system manager.
bbbbbb
Menu
1 Press
2 Press the softkey below Option.
cbbbbbbc
d
The display shows:
.
bbbbbbbbbbbbbbbbbbbbbbbb
c
Spkr Clock Lock Done
c
c
3 Press the softkey below Lock.
d
The display shows:
OPTIONS >
c
c
cbbbbbbbbbbbbbbbbbbbbbbbb
bbbbbbbbbbbbbbbbbbbbbbbb
c
Select-Item Done
c
c
LOCK
56
c
c
cbbbbbbbbbbbbbbbbbbbbbbbb
Page 65

4 Press softkey below Select-Item.
d
The display shows:
bbbbbbbbbbbbbbbbbbbbbbbb
SELECT ITEM TO LOCK >
c
CallLog Directory Done
c
c
bbbbbbb
d
or if you press
screen:
Next
cbbbbbbbc
, the display shows the next ‘‘Select Item’’
c
c
cbbbbbbbbbbbbbbbbbbbbbbbb
bbbbbbbbbbbbbbbbbbbbbbbb
< SELECT ITEM TO LOCK
c
Softkeys Done
c
c
5 Press the softkey below CallLog or Directory or Softkeys according
to which one you want to unlock.
d
The display message tells you that the feature is locked and asks
you to confirm your choice (Yes or No) in order to unlock the
Directory, Call Log, or softkeys.
6 If you press No, the display returns you to the original ‘‘Select Item
To Lock’’ screen; if you press Yes, the display asks you to enter a
3-digit password.
7 Enter your 3-digit password.
8 When you have entered your password, press the softkey below
Done.
d
The display confirms that you have unlocked the feature of your
choice.
c
c
cbbbbbbbbbbbbbbbbbbbbbbbb
57
Page 66

aaaaaaaaaaaaaaaaaaaaaaaaaaaaaaaaaaaaaaaaaaaaaaaaaaaaaaaaaaaaaaaaaaaa
CHANGING OR REMOVING YOUR PASSWORD
aaaaaaaaaaaaaaaaaaaaaaaaaaaaaaaaaaaaaaaaaaaaaaaaaaaaaaaaaaaaaaaaaaaa
To change or remove a 3-digit security password
bbbbbb
Menu
1 Press
2 Press the softkey below Option.
cbbbbbbc
d
The display shows:
.
bbbbbbbbbbbbbbbbbbbbbbbb
c
Spkr Clock Lock Done
c
c
3 Press the softkey below Lock.
d
The display shows:
OPTIONS >
c
c
cbbbbbbbbbbbbbbbbbbbbbbbb
bbbbbbbbbbbbbbbbbbbbbbbb
c
Select-Item Pswd Done
c
c
LOCK
c
c
cbbbbbbbbbbbbbbbbbbbbbbbb
4 Press softkey below Pswd.
d
The display shows:
bbbbbbbbbbbbbbbbbbbbbbbb
c
Change Remove Done
c
c
PASSWORD
58
c
c
cbbbbbbbbbbbbbbbbbbbbbbbb
Page 67

5 Do one of the following:
If you want to change your password, press the softkey below
Change.
d
The display messages ask you to enter your old password,
create a new password, and re-enter the new password.
d
When you have done this, the display confirms that the new
password is now active.
If you want to remove your 3-digit password, press the softkey
below Remove.
d
The display asks you to enter your 3-digit password.
d
When you have entered the password, the display confirms
that the password is removed and everything is unlocked.
59
Page 68

aaaaaaaaaaaaaaaaaaaaaaaaaaaaaaaaaaaaaaaaaaaaaaaaaaaaaaaaaaaaaaaaaaaa
CHOOSING THE CONTRAST LEVEL FOR THE DISPLAY
aaaaaaaaaaaaaaaaaaaaaaaaaaaaaaaaaaaaaaaaaaaaaaaaaaaaaaaaaaaaaaaaaaaa
You can use the softkeys to set the darkness or lightness of the voice
terminal display.
To choose the contrast level of the display
bbbbbb
Menu
Next
.
to view the second Options screen.
1 Press
2 Press the softkey below Option.
3 Press
cbbbbbbc
bbbbbbb
cbbbbbbbc
d
The display shows:
bbbbbbbbbbbbbbbbbbbbbbbb
< OPTIONS >
c
Cntrast Ring Screen Done
c
c
4 Press the softkey below Cntrast.
d
The display shows:
c
c
cbbbbbbbbbbbbbbbbbbbbbbbb
bbbbbbbbbbbbbbbbbbbbbbbb
CONTRAST: L>>>>>H
c
- + Done
c
c
NOTE: The arrows are arranged between Low and High. There
are five possible contrast levels, and thus five possible arrows
between L and H.
60
c
c
cbbbbbbbbbbbbbbbbbbbbbbbb
Page 69

bbbbbbb
Prev
5 Press the softkey below - or
Each button press decreases the number of arrows by one.
Press the softkey below + or
cbbbbbbbc
bbbbbbb
cbbbbbbbc
to make the contrast lighter.
Next
to make the contrast darker.
Each button press increases the number of arrows by one.
6 Press the softkey below Done when you are finished.
d
The display confirms that the contrast level has been set.
61
Page 70
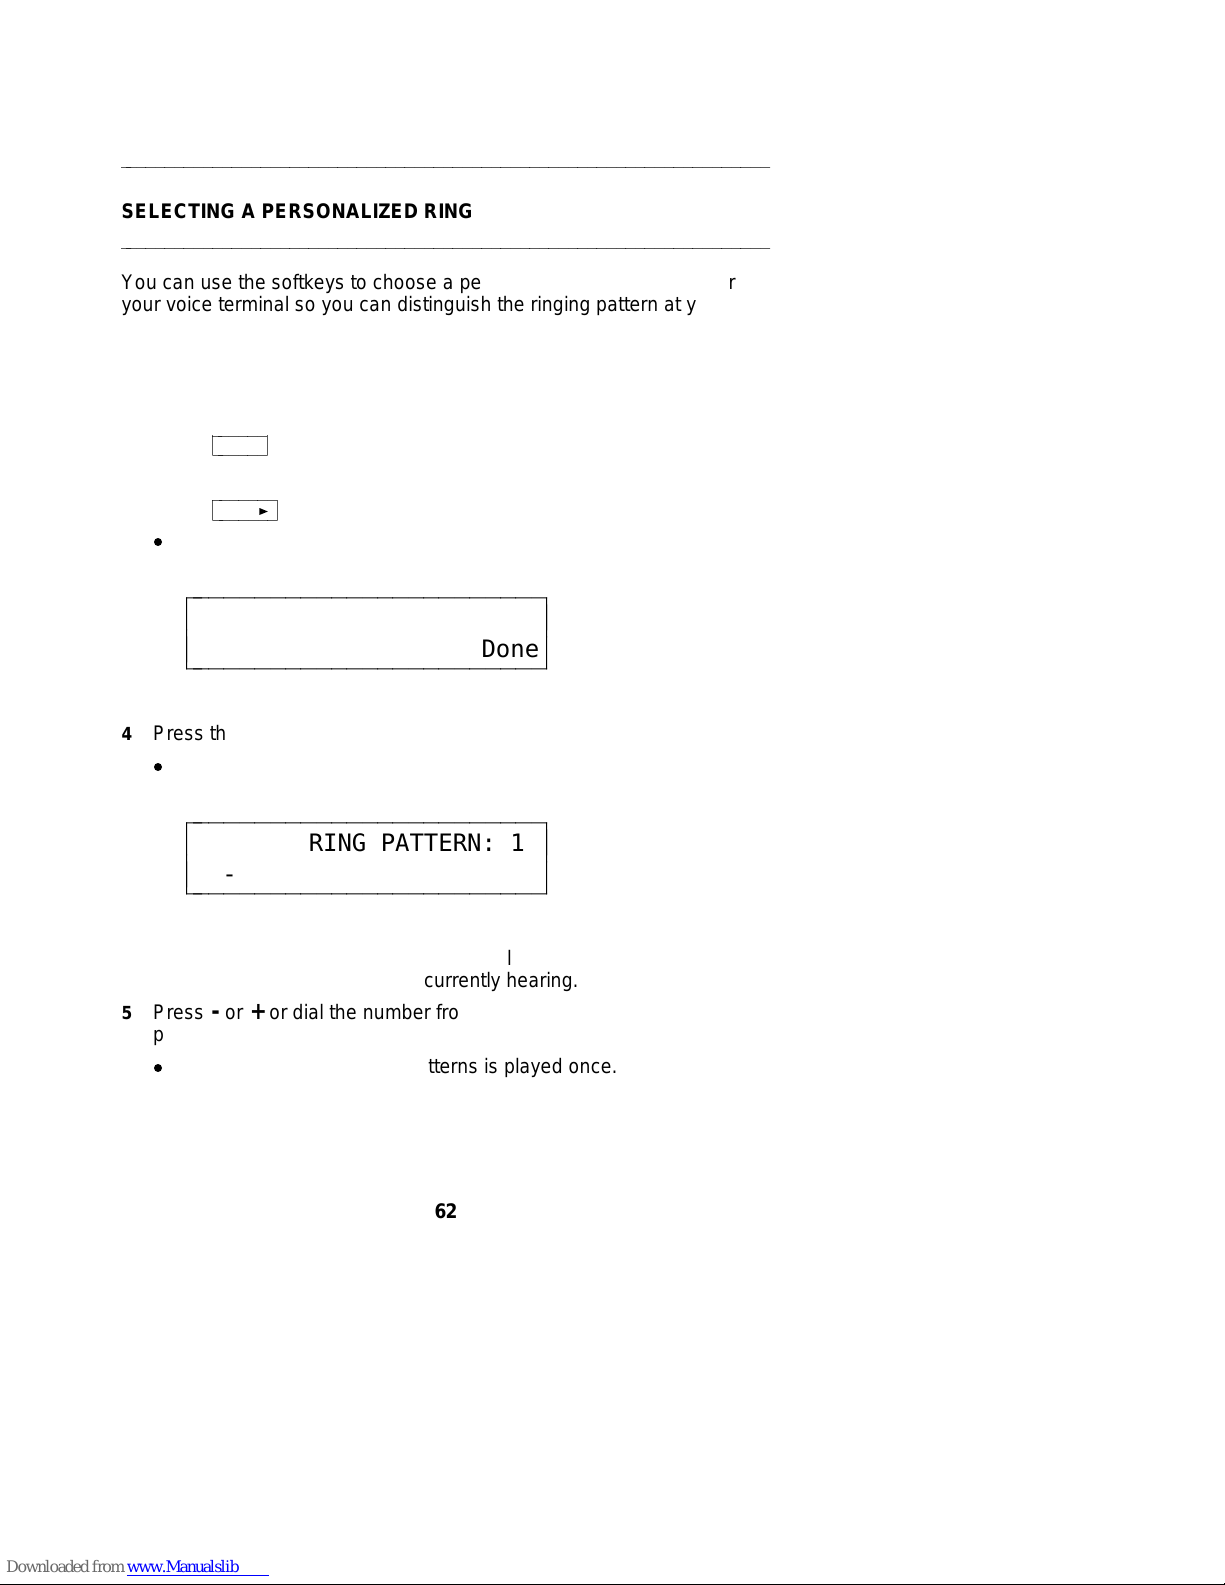
aaaaaaaaaaaaaaaaaaaaaaaaaaaaaaaaaaaaaaaaaaaaaaaaaaaaaaaaaaaaaaaaaaaa
SELECTING A PERSONALIZED RING
aaaaaaaaaaaaaaaaaaaaaaaaaaaaaaaaaaaaaaaaaaaaaaaaaaaaaaaaaaaaaaaaaaaa
You can use the softkeys to choose a personalized ringing pattern for
your voice terminal so you can distinguish the ringing pattern at your
voice terminal from others in your office. There are eight different ringing
patterns to choose from.
To select a personalized ringing pattern for your voice terminal
bbbbbb
Menu
Next
.
to view the second Options screen.
1 Press
2 Press the softkey below Option.
3 Press
cbbbbbbc
bbbbbbb
cbbbbbbbc
d
The display shows:
bbbbbbbbbbbbbbbbbbbbbbbb
< OPTIONS >
c
Cntrast Ring Screen Done
c
c
4 Press the softkey below Ring.
d
The display shows:
c
c
cbbbbbbbbbbbbbbbbbbbbbbbb
bbbbbbbbbbbbbbbbbbbbbbbb
SELECT RING PATTERN: 1
c
- + Done
c
c
NOTE: The number ‘‘1’’ in this sample screen is the number of
the ringing pattern you are currently hearing.
5 Press - or + or dial the number from the dial pad to hear ringing
patterns 1 through 8.
d
Each of the eight ringing patterns is played once.
62
c
c
cbbbbbbbbbbbbbbbbbbbbbbbb
Page 71

6 When you hear the ringing pattern you want to use for your voice
terminal, press the softkey below Done.
d
The display confirms the ringing pattern you have chosen.
To adjust the ring volume (this may be adjusted only when you are
not
on a call)
1 To raise the volume, press the right half of the Volume control button
labeled
to lower the volume, press the left half of the Volume control button
labeled
;
.
63
Page 72

aaaaaaaaaaaaaaaaaaaaaaaaaaaaaaaaaaaaaaaaaaaaaaaaaaaaaaaaaaaaaaaaaaaa
SETTING THE RATE AT WHICH YOU VIEW THE DISPLAY
MESSAGES
aaaaaaaaaaaaaaaaaaaaaaaaaaaaaaaaaaaaaaaaaaaaaaaaaaaaaaaaaaaaaaaaaaaa
You can use the softkeys to set the length of time the display message
stays on the screen. When you receive your voice terminal, the rate is
set to Medium. However, there are actually three rate settings: Slow,
Medium, and Fast. You may want to test all three reading rates before
you make a final selection.
To select the rate at which you see the display messages
bbbbbb
Menu
Next
.
to view the second Option screen.
1 Press
2 Press the softkey below Option.
3 Press
cbbbbbbc
bbbbbbb
cbbbbbbbc
d
The display shows:
bbbbbbbbbbbbbbbbbbbbbbbb
< OPTIONS >
c
Cntrast Ring Screen Done
c
c
c
c
cbbbbbbbbbbbbbbbbbbbbbbbb
4 Press the softkey below Screen.
d
The display shows the current rate:
bbbbbbbbbbbbbbbbbbbbbbbb
TIMED MESSAGE RATE: MED
c
Slow Med Fast Done
c
c
64
c
c
cbbbbbbbbbbbbbbbbbbbbbbbb
Page 73

5 Press the softkey below either Slow, Medium, or Fast, according to
the rate at which you want the display messages to be shown.
d
The display reflects the choice you have made.
6 When the display screen shows the display message rate you want,
press the softkey below Done.
NOTE: Be sure to check the timing of the message for the rate at
which you have set the messages to be displayed. If it is too fast or
too slow, you may modify the rate again.
65
Page 74
aaaaaaaaaaaaaaaaaaaaaaaaaaaaaaaaaaaaaaaaaaaaaaaaaaaaaaaaaaaaaaaaaaaa
TURNING ON OR OFF SOFTKEY INFORMATION TONES
aaaaaaaaaaaaaaaaaaaaaaaaaaaaaaaaaaaaaaaaaaaaaaaaaaaaaaaaaaaaaaaaaaaa
Along with timed confirmation screens, the voice terminal also provides
softkey mode confirmation tones (sequential low and high tones). Also
available are error tones (one beep) to alert you if you have made a
mistake in your softkey entries. You may choose to turn these softkey
information tones on or off.
NOTE: This procedure turns on or off the information tones
with the softkeys
those features
procedure described here.
To turn on or off the confirmation and error tones
1 Press
2 Press the softkey below Option.
3 Press
d
The display shows:
. The confirmation and error tones associated with
not
used with the softkeys are not turned on or off by the
bbbbbb
Menu
Next
.
twice to view the third Options screen.
cbbbbbbc
bbbbbbb
cbbbbbbbc
associated
bbbbbbbbbbbbbbbbbbbbbbbb
< OPTIONS
c
Tones CallLog Names Done
c
c
c
c
cbbbbbbbbbbbbbbbbbbbbbbbb
4 Press the softkey below Tones.
d
The display shows the current setting (On or Off):
bbbbbbbbbbbbbbbbbbbbbbbb
INFORMATION TONES: OFF
c
Off On Done
c
c
5 Press the softkey below Off to turn off the softkey mode information
tones, or press the softkey below On to turn on the information tones.
d
The display changes to reflect your choice (On or Off).
66
c
c
cbbbbbbbbbbbbbbbbbbbbbbbb
Page 75

6 When the display screen reflects your choice (On or Off), press the
softkey below Done.
NOTE: Even if you choose to turn off the softkey mode information
tones, you will still hear the confirmation and error tones associated with
the voice features (features not accessed with the softkeys).
67
Page 76

aaaaaaaaaaaaaaaaaaaaaaaaaaaaaaaaaaaaaaaaaaaaaaaaaaaaaaaaaaaaaaaaaaaa
SETTING THE NUMBER OF NAMES ON THE DIRECTORY PAGE
aaaaaaaaaaaaaaaaaaaaaaaaaaaaaaaaaaaaaaaaaaaaaaaaaaaaaaaaaaaaaaaaaaaa
bbbb
Dir
When you view the names in your Directory or use
name of someone in your Directory whom you want to call, you will
initially see three names and the word Quit on the second line of each
Directory page, such as in the following two screens.
to locate the
cbbbbc
bbbbbbbbbbbbbbbbbbbbbbbb
< PRESS TO VIEW >
c
EdBks HarvW Steve Quit
c
c
c
c
cbbbbbbbbbbbbbbbbbbbbbbbb
bbbbbbbbbbbbbbbbbbbbbbbb
< CALL >
c
EdBks HarvW Steve Quit
c
c
However, you may choose to change this option so that you can view
four names (instead of three) on the second line of each Directory page.
Your "Number of Names" options are these:
d
If you choose ‘‘3+Quit,’’ you will see three names on each Directory
page. You can quit viewing more names in the Directory or decide
not to call a name in your Directory (when you have used
pressing the softkey below Quit.
d
If you choose ‘‘4,’’ you will see four names on each Directory page,
but, if you decide not to view more names in the Directory or in order
to cancel calling a name (when you have used
bbbbb
Exit
cbbbbbc
.
does not
affect the maximum number of entries
press
NOTE: This option sets the number of names (either three or four) on
each Directory page. It
(which is 30) you can maintain in your Directory.
c
c
cbbbbbbbbbbbbbbbbbbbbbbbb
bbbb
Dir
), by
cbbbbc
bbbb
Dir
), you must
cbbbbc
68
Page 77

To set the number of names (3 or 4) on an individual Directory page
bbbbbb
Menu
Next
.
twice to view the third Options screen.
1 Press
2 Press the softkey below Option.
3 Press
cbbbbbbc
bbbbbbb
cbbbbbbbc
d
The display shows:
bbbbbbbbbbbbbbbbbbbbbbbb
< OPTIONS
c
Tones CallLog Names Done
c
c
4 Press the softkey below Names.
d
The display shows the current setting (‘‘3+Quit’’ or ‘‘4’’):
c
c
cbbbbbbbbbbbbbbbbbbbbbbbb
bbbbbbbbbbbbbbbbbbbbbbbb
NAMES PER PAGE: 3+Quit
c
3 4 Explain Done
c
c
5 Press the softkey below 4 if you want to view four names on each
Directory page. Press the softkey below 3 if you want to see three
names (and Quit).
d
The display changes to reflect your choice (‘‘3+Quit’’ or ‘‘4’’).
6 When the display screen reflects your choice, press the softkey
below Done.
c
c
cbbbbbbbbbbbbbbbbbbbbbbbb
69
Page 78

aaaaaaaaaaaaaaaaaaaaaaaaaaaaaaaaaaaaaaaaaaaaaaaaaaaaaaaaaaaaaaaaaaaa
SELF-TEST
aaaaaaaaaaaaaaaaaaaaaaaaaaaaaaaaaaaaaaaaaaaaaaaaaaaaaaaaaaaaaaaaaaaa
bbbbbbb
If you press
following menu screen appears:
Next
cbbbbbbbc
while the Main Menu is on the display screen, the
bbbbbbbbbbbbbbbbbbbbbbbb
< MENU
c
Test
c
c
If you press the softkey below Test, you can perform a test of your voice
terminal’s lights, ringer, display, and dial pad keys.
NOTE: Performing a self-test of the voice terminal clears the contents of
the Call Log and the last number dialed from Redial, and the volume
setting is returned to the default.
To make sure your voice terminal is working properly
NOTE: The handset must be on-hook when you test the voice terminal.
Performing the self-test terminates any call in progress, and prevents
you from receiving calls until the test is completed.
The self-test also clears the Call Log and the last number dialed from
Redial, and the volume setting is returned to the default.
c
c
cbbbbbbbbbbbbbbbbbbbbbbbb
1 While the handset is on-hook, press
2 Press
3 Press the softkey below Test.
bbbbbbb
Next
cbbbbbbbc
d
The display shows the second Menu screen (shown above).
d
The display shows:
to see the second Menu screen.
bbbbbbbbbbbbbbbbbbbbbbbb
c
Begin Cancel
c
c
SELF-TEST
70
bbbbbb
Menu
cbbbbbbc
.
c
c
cbbbbbbbbbbbbbbbbbbbbbbbb
Page 79

4 Press the softkey below Begin to start the self-test. (Press the
softkey below Cancel if you do not want to initiate a self-test of your
voice terminal at this time.)
d
When you press Begin, the following occurs:
— The display reminds you to press
bbbbb
Exit
twice if you wish to
cbbbbbc
end the self-test.
— Terminal emits a tone.
— Message light goes on.
— The display shows you the Feature Package number and the
Self-Test passed message.
NOTE: If these events do not occur, contact your system
manager.
5 After you hear repeated tone, press any button on the voice terminal.
d
Terminal emits a key click.
6 Press
d
Lights to the left of the Mute, Speaker, Conf, and Transfer
buttons go on steadily.
7 Press
d
Lights to the left of the Mute, Speaker, Conf, and Transfer
bbbbbb
Mute
cbbbbbbc
bbbbbbb
Redial
cbbbbbbbc
bbbbbbbb
Speaker
,
cbbbbbbbbc
bbbbb
Exit
,
cbbbbbc
bbbbbb
,
cbbbbbbc
bbbbbb
Conf
,
cbbbbbbc
Drop
, and
, and
bbbbbb
cbbbbbbc
bbbbbbbb
Transfer
cbbbbbbbbc
Hold
.
.
buttons flutter.
8 Pick up handset and press each dial pad key.
d
Message light flutters.
d
Handset emits a touch tone as each key is pressed.
9 Hang up handset.
10 When the self-test is completed, press
NOTE: If you do
not
press
bbbbb
Exit
cbbbbbc
bbbbb
Exit
twice.
cbbbbbc
twice to end the test, the voice
terminal automatically exits the self-test after 30 seconds.
71
Page 80

Tones and Their Meanings
VOICE TERMINAL TONES
d
busy signal—A low-pitched tone repeated 60 times a minute
(every second); indicates the number dialed is in use.
d
confirmation tone—Two rising tones; indicates a feature activation
or cancellation has been accepted.
d
dial tone—A continuous tone; indicates dialing can begin.
d
error tone—An alternating high and low tone; indicates a dialing
error, a denial of the service requested, or a failure to dial within a
preset interval (usually 10 seconds) after lifting the handset or dialing
the previous digit.
d
local error tone—A steady low tone; indicates an incorrect button
press.
d
reorder tone—A fast busy signal; indicates a call is blocked.
d
self-test tone—Periodic tones; indicates that the voice terminal is
continuing to perform a self-test.
d
speakerphone reset tones—A rising set of tones; indicates the
speakerphone is adjusting itself to the surrounding room acoustics.
Labeling and Installing the Designation Card
and the Telephone Number Card
Inside the front cover of this user’s manual are button designation cards
on which you can write the telephone number, extension, name, or
feature that each call appearance/feature button can access. These
designation cards match the call appearance/feature buttons on the
voice terminal; that is, the buttons are arranged in four columns. The
first column is labeled a through g; the second column is labeled h
through n; the third column is labeled o through u; the last column is
labeled v through z and A and B.
Below the perforated bottom edge of each designation card is a
telephone number card on which you can write your telephone number.
At the bottom of each designation and telephone number card is an
additional attached section which will make it easier for you to insert
these cards in a typewriter or run the cards through a laser printer.
72
Page 81

To label and install the designation card and telephone number card
1 Tear the button designation card, along with the telephone number
card and attached ‘‘tail,’’ from the user’s manual along the perforated
edges.
2 Label the button designation card with the appropriate number,
extension, name, or feature for each call appearance/feature button.
Label the telephone number card with your own telephone number.
You can handwrite or type the information on the cards or run the
cards through a laser printer.
3 Separate the button designation card and telephone number card
along the perforated border. You may discard the attached ‘‘tail’’
section.
4 Place the button designation card under the plastic card cover on the
voice terminal. Place the telephone number card under the
telephone number card cover located beneath the handset.
73
Page 82

Installation
CONTENTS OF THE 8528T PACKAGE
Before you begin, make sure you have the following parts in the box:
d
8528T voice/data terminal (with attached desktop stand)
d
K-type handset
d
9-foot handset cord
d
7-foot line cord
d
Designation card(s)
NOTE: You will find designation cards at the front of this book.
d
Cover(s) for Designation card(s)
d
This user’s manual
CONNECTING THE 8528T TO THE SYSTEM
The circuitry of the 8528T voice terminal contains a set of terminating
resistor jumpers, labeled ON and OFF. ON enables the terminating
resistor, and OFF bypasses the terminating resistor. It also contains a
set of power jumpers, labeled AUX (auxiliary), and PHAN (phantom).
Auxiliary draws power from an adjunct/bulk power unit, and phantom
draws power from the PBX.
NOTE: When the voice terminal is shipped from the factory, the
terminating resistor jumpers are set to OFF, and the power jumpers are
set to AUX.
The diagram imprinted in the base of the voice terminal, to the right of
the jumper pins, shows the location of the power and terminating resistor
jumpers. (There are 12 jumper pins, positioned four across and three
down. Each of the four jumper posts covers two pins.)
The following paragraphs contain instructions for connecting the 8528T
to the system using one of the configurations listed below:
d
When the 8528 is connected to a PBX
d
When the 8528 is connected to a 5ESS Central Office switch
74
Page 83

When the 8528 Is connected to a PBX:
1 Locate the terminating resistor jumpers by sliding the cover
downward (covering the line jack and adjunct jack) until the power
and terminating resistor jumpers are visible. Verify the jumper
settings for your given configuration. (See Figure 5 for these
settings.)
WARNING: If any of the jumpers
!
are not set correctly, they must be
set by a qualified technician.
bbbbbbbbbbbbbbbbbbbbbbbbbbbbbbbbbbbbbbbbbbb
c
c
c
Auxiliary Power and
Terminating Resistor OFF
AUX ON
Auxiliary Power and
Terminating Resistor ON
AUX ON
c
c
c
c
c
POWER
POWER
OFFPHAN
TERM. RESISTOR
OFFPHAN
TERM. RESISTORTERM. RESISTOR
c
c
c
c
Phantom Power and
Terminating Resistor ON
AUX ON
Phantom Power and
Terminating Resistor OFF
AUX ON
c
c
TERM. RESISTOR
POWER
OFFPHAN
c
c
c
c
FIGURE 5 Settings for Connection with a PBX
POWER
OFFPHAN
c
c
c
c
c
c
c
c
c
c
c
c
c
c
c
c
c
cbbbbbbbbbbbbbbbbbbbbbbbbbbbbbbbbbbbbbbbbbbb
d
Verify that the terminating resistor jumpers are set to OFF, when
the voice terminal is in a point-to-point configuration and the
terminating resistor is placed in the closet or a 440A4 is
connected on the line.
75
Page 84

d
Verify that the terminating resistor jumpers are set to ON, when
the voice terminal is in a point-to-point configuration and the
terminating resistor is
connected on the line.
d
Verify that the terminating resistor jumpers are set to OFF, when
the voice terminal is in a multipoint configuration and the
terminating resistor is either in the closet, a 440A4 is connected
on the line, or the jumper is set to ON in any of the other voice
terminals on the line.
NOTE: Only one terminating resistor is used for multipoint
configuration.
d
Verify that the terminating resistor jumpers are set to ON, when
the voice terminal is in a multipoint configuration and the
terminating resistor is
connected on the line, or the jumper is
other voice terminals on the line.
2 Locate the Phantom/Auxiliary power jumpers. Verify the power
jumper settings for your given configuration.
!
d
Verify that the power jumpers are set to PHAN (phantom) when
power is provided by the PBX.
d
Verify that the power jumpers are set to AUX (auxiliary) when
power is provided in the closet or locally.
3 Slide the cover upward (covering the power and terminating resistor
jumpers) until the line jack and adjunct jack are visible.
not
in the closet or a 440A4 is
not
in the closet, or a 440A4 is
not
set to ON in any of the
WARNING: If any of the jumpers
are not set correctly, they must be
set by a qualified technician.
not
not
When the 8528 Is connected to a 5ESS Central Office switch:
1 Locate the terminating resistor jumpers by sliding the cover
downward (covering the line jack and adjunct jack) until the power
and terminating resistor jumpers are visible. Verify the jumper
settings for your given configuration. (See Figure 6 for these
settings.)
WARNING: If any of the jumpers
!
are not set correctly, they must be
set by a qualified technician.
76
Page 85
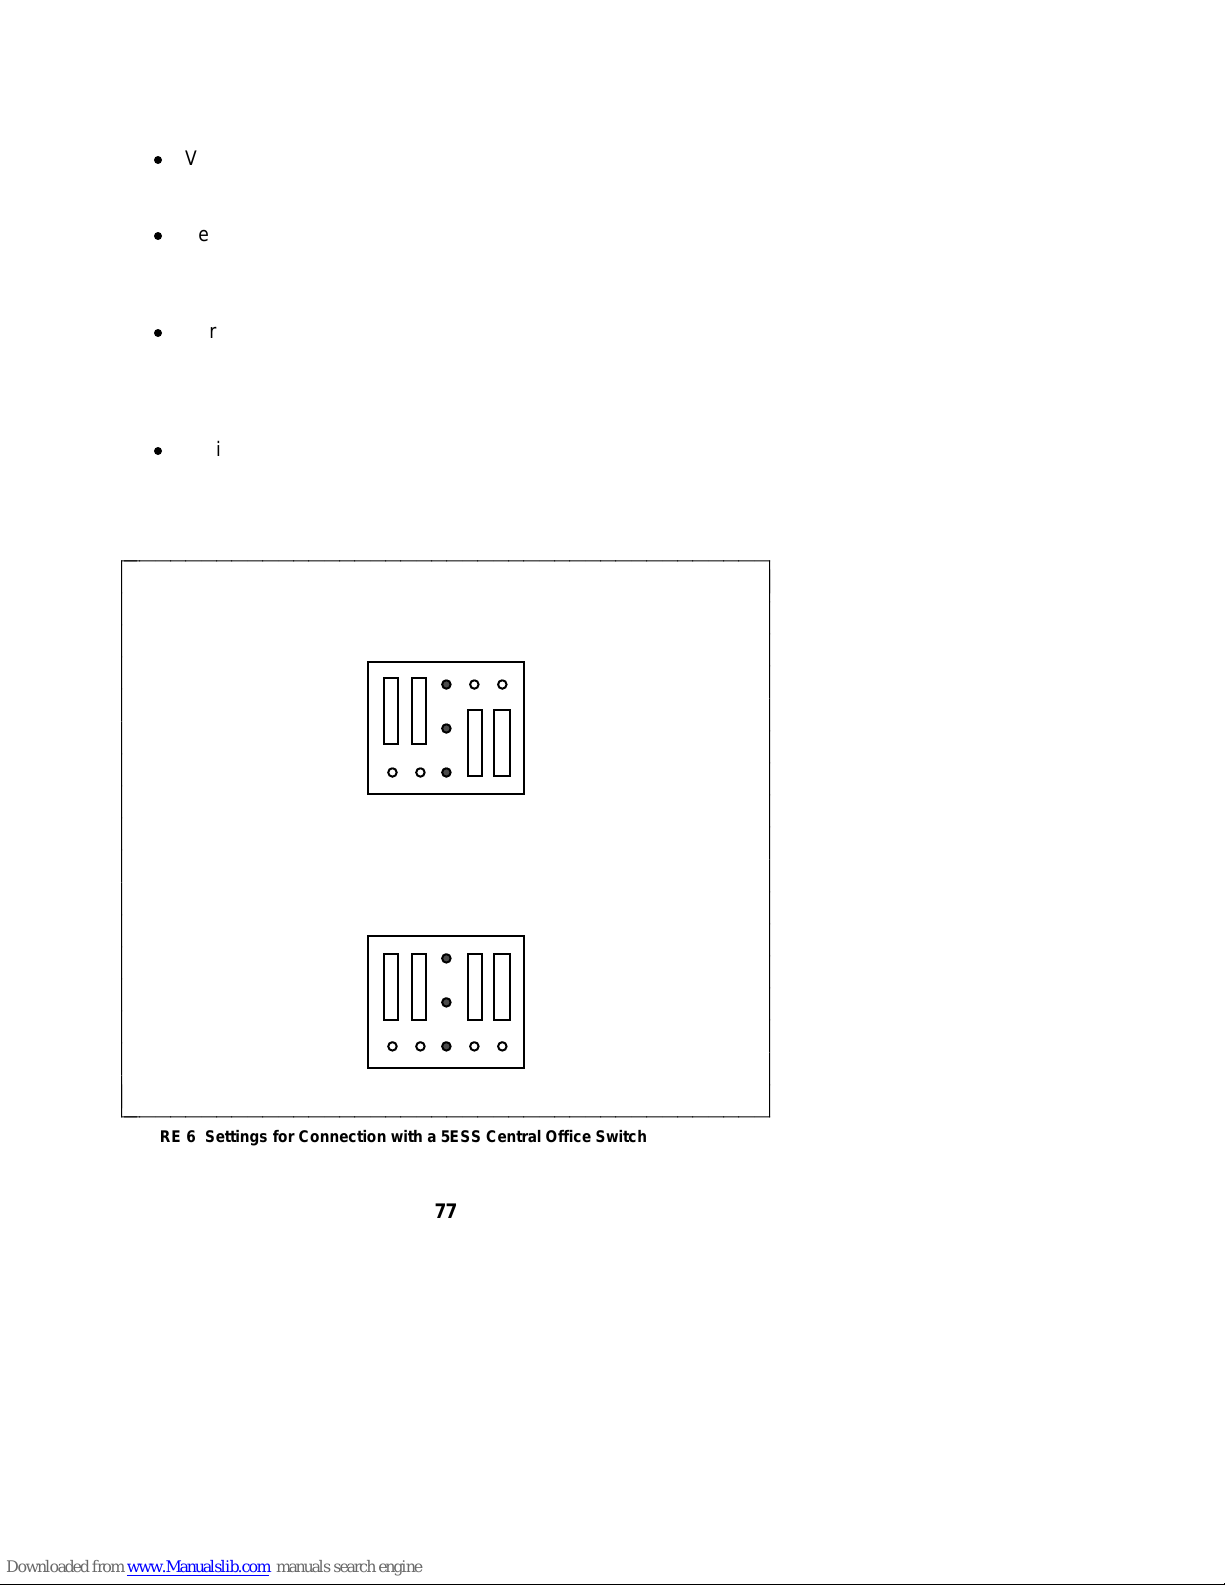
d
Verify that the terminating resistor jumpers are set to OFF, when
the set is in a point-to-point configuration and the terminating
resistor is in the closet or a 440A4 is connected on the line.
d
Verify that the terminating resistor jumpers are set to ON, when
the set is in a point-to-point configuration and the terminating
resistor is
line.
d
Verify that the terminating resistor jumpers are set to OFF, when
the set is in a multipoint configuration and the terminating resistor
is either in the closet or a 440A4 is connected on the line, or the
jumper is set to ON in one of the other sets on the line. NOTE:
Only one terminating resistor is used for multipoint configuration.
d
Verify that the terminating resistor jumpers are set to ON, when
the set is in a multipoint configuration and the terminating resistor
is
not
jumper is
not
in the closet or a 440A4 is
in the closet, a 440A4 is
not
set to ON in any of the other sets on the line.
not
connected to the
not
connected on the line or, the
bbbbbbbbbbbbbbbbbbbbbbbbbbbbbbbbbbbbbbbbbbb
c
c
c
Auxiliary Power and
Terminating Resistor OFF
AUX ON
c
c
c
c
c
POWER
PHAN OFF
TERM. RESISTOR
c
c
c
c
Auxiliary Power and
Terminating Resistor ON
AUX
ON
c
c
c
c
c
c
FIGURE 6 Settings for Connection with a 5ESS Central Office Switch
POWER
PHAN
OFF
TERM. RESISTOR
c
c
c
c
c
c
c
c
c
c
c
c
c
c
c
c
c
cbbbbbbbbbbbbbbbbbbbbbbbbbbbbbbbbbbbbbbbbbbb
77
Page 86

2 Locate the Phantom/Auxiliary power jumpers. Verify the power
jumper settings for your given configuration.
WARNING: If any of the jumpers
!
d
Verify that the power jumpers are set to AUX (auxiliary).
3 Slide the cover upward (covering the power and terminating resistor
jumpers) until the line jack and adjunct jack are visible.
DESKTOP INSTALLATION
NOTE: The following instructions describe the installation of the 8528T
voice/data terminal on a desk or table.
Use the following directions to connect the line cord and adjunct cord to
the appropriate jacks on the voice/data terminal.
1 Place the voice/data terminal face down on a flat surface.
2 Snap one end of the 7-foot line cord into the ‘‘LINE’’ jack and the
adjunct cord (if applicable) into the ‘‘ADJUNCT’’ jack on the bottom of
the voice/data terminal. Thread each cord through the routing
channel, making sure the cord fits under the square tabs. See
Figure 7 for the location of the jacks. For more information on
installing adjuncts, refer to the section ‘‘Attaching Adjunct
Equipment.’’
WARNING: Correct cord types must be used when connecting
terminals and associated components. Failure to use the correct
cord and/or to properly insert the cord into the jack may cause
voice/data terminal malfunction or equipment damage.
3 Snap one end of the coiled cord into the Handset jack (marked with
the handset symbol) on the bottom of the voice/data terminal, as
shown in Figure 7. Thread the handset cord through the handset
cord routing channel.
WARNING: Do
It will cause equipment damage.
are not set correctly, they must be
set by a qualified technician.
not
insert the handset cord into the ‘‘ADJUNCT’’ jack.
78
Page 87

bbbbbbbbbbbbbbbbbbbbbbbbbbbbbbbbbbbbbbbbbbb
c
Routing Line
c
channel jack
c
c
c
c
c
c
c
c
c
c
c
c
c
c
Adjunct
Handset
c
Handset cord
routing channeljackjack
c
FIGURE 7 Line, Adjunct, and Handset Cord Routing for Desktop Installation
c
c
c
c
c
c
c
c
c
c
c
c
c
c
c
c
c
cbbbbbbbbbbbbbbbbbbbbbbbbbbbbbbbbbbbbbbbbbbb
4 Turn the voice/data terminal right side up, with the front facing you.
5 Snap the free end of the handset cord into the handset and place the
handset in the cradle.
6 Snap the free end of the line cord into the modular jack. Lift the
handset and listen for the dial tone.
79
Page 88

ATTACHING ADJUNCT EQUIPMENT
If you are installing a speakerphone (models Lucent S101A, S201A, or
QUORUM CS201A), a headset adapter (model Lucent 500A or the
507A adapter), or other adjunct that may be offered, follow these steps
to connect the adjunct equipment to your voice/data terminal.
1 Place the voice/data terminal face down on a flat surface.
2 Insert the adjunct cord into the ‘‘ADJUNCT’’ jack until you hear a
click. See Figure 7 for the location of the ‘‘ADJUNCT’’ jack.
3 Route the adjunct cord through the channel. Refer to the ‘‘Desktop
Installation’’ section for instructions.
4 Connect the free end of the adjunct cord to your speakerphone or
headset adapter.
NOTE: Refer to the adjunct’s installation documentation for its power
requirements.
80
Page 89

Technical Description
Physical Dimension and Weight
The desktop-mounted voice terminal measures
d
11 3/4 inches (29.8 cm) wide
d
10 3/8 inches (26.4 cm) long
d
5 1/2 inches (14.1 cm) high (with handset)
d
3 1/2 lbs (1.57 kg)
Power Requirements
The 8528T voice terminal requires phantom power or auxiliary power;
either is selected by setting a pair of jumpers. If phantom power is used,
less than 1 Watt of power is drawn from the switch to support a normal
operating mode. If adjunct equipment is connected to the voice terminal,
auxiliary power must be used.
WARNING: If auxiliary power is selected, use only a nominal 40 or
48 Vdc, UL-Listed Communications Circuit Power source.
Environmental Requirements
The 8528T can operate in temperatures ranging from 40 to
120 degrees F (4 to 48 degrees C) and relative humidity ranging
from 5 to 95 percent.
81
Page 90

Page 91

Index
A
Adding numbers and names
into the Directory, 26
Adjunct equipment
attaching, 80
Adjunct jack
connection, 78, 79, 80
description, 7
location, 79
Adjusting the volume
receive, 11
speaker/speakerphone, 11, 15, 16
tone ringer, 63
Answering calls, 11
B
Buttons
call appearance, 5
Conference, 5
dial pad, 5
display control, 5
Dir, 5, 9, 20
Exit, 5, 19
Menu, 5, 19
Next >, 5, 20
< Prev, 5, 20
Drop, 5
Exit, 5, 9
Hold, 6
Mute, 6
Redial, 6
Speaker, 6
Transfer, 6
Volume control, 6
C
Call Log, 9, 36
adding automatically
to your Directory, 44
calling back callers, 42
indication of new
unanswered calls, 40
locking, 54
setting, 36
all calls, 40
turning on or off, 39
unanswered calls only, 40
turning on or off, 39
unlocking, 56
viewing calls
answered incoming, 49
outgoing, 51
unanswered incoming, 37, 47
Calls
answering, 11
Conference, 12
Drop, 12
ending, 11
Hold, 13
message retrieval of, 13
Mute, 14
placing
from dial pad, 11
from Dir button, 35
from Directory softkey, 33
Redial, 14
speakerphone, 15
Transfer, 17
Changing the password, 58
Clock, 9
setting the, 22
Conference, 8, 12
Contrast, 9
Contrast display level
setting the, 60
Creating the password, 55, 59
D
Deleting an entry in the Directory, 31
Designation card, 5
installing, 72
labeling, 72
Dial pad, 5
Dir button, 9, 20, 35
Directory, 9
adding, 26
calling, 33, 35
deleting, 31
editing, 29
locking, 54
number of names on page, 10, 68
unlocking, 56
viewing, 33
Display
contrast level
setting the, 60
control buttons, 5, 18, 20
I-1
Page 92

messages, 19
Done
responding to, 20
Drop, 8, 12
E
Editing the Directory, 29
Entering a number and name
in the Directory, 26
Entering Softkey Mode, 19
Exit button, 9, 19
Exiting Softkey Mode, 19
F
Feature descriptions
display, 9
Self-Test, 70
softkeys, 9
voice, 8
Features accessed with the
display and softkeys, 9, 18
Flowchart of softkey
display screens, 20
description, 7
location, 79
Lock feature, 10
Locking
Call Log, 54
Directory, 54
Softkeys, 54
M
Menu button, 19
Message light, 6
Messages
retrieving, 8, 13
setting display rate of screens, 64
Mute, 8, 14, 16
N
Next button, 20
Number and name into Directory
adding, 26
deleting, 31
editing, 29
entering, 26
H
Handset, 6
Handset jack
connection, 78, 79
description, 7
location, 79
Hold, 8, 13
I
Information tones
turning on or off, 66
Installing
adjunct equipment, 80
designation card, 72
handset cord, 78
line cord, 78
telephone number card, 72
L
Labeling the designation card, 72
Labeling the telephone
number card, 72
Line jack
connection, 78, 79
P
Password
changing, 58
creating, 55, 59
removing, 58
Personalized Ring, 10
selecting, 62
Placing calls
from dial pad, 11
from Directory
using Dir button, 35
using the softkeys, 33
Prev button, 20
Q
Quit
responding to, 20
R
Rate
setting viewing time
of display messages, 64
Redial (Last Number Dialed), 8, 14
Removing the password, 58
I-2
Page 93

Ring
selecting a personalized pattern, 62
Ringer
adjusting the volume, 63
S
Screen Timing, 10
Selecting a personalized ring, 62
Self-Test, 10, 70
Set Speakerphone, 10
Setting
Call Log, 36, 39
clock, 22
display contrast level, 60
information tones, 66
message display rate, 64
number of names on
Directory page, 68
ringing pattern, 62
speakerphone, 24
Setting the Call Log, 36
all calls, 40
turning of or off, 39
unanswered calls only, 40
Softkeys
Call Log, 36
clock, 22
contrast, 60
description of, 6, 18
Directory, 26
done, 20
enter, 19
exit, 19
flowchart, 20
information tones, 66
locking, 54
number of names on
Directory page, 68
personalized ring, 62
quit, 20
Self-Test feature, 70
speakerphone, 24
unlocking, 56
Softkeys display screens flowchart, 20
Speaker, 8, 15
adjusting the volume, 11, 15
Speakerphone, 8, 15, 24
adjusting the volume, 11, 16
setting, 24
T
Technical description, 81
Telephone number card, 6
installing, 72
labeling, 72
Tone ringer
adjusting the volume, 63
Tones, 10
description, 71
setting, 66
Transfer, 9, 17
U
Unlocking
Call Log, 56
Directory, 56
Softkeys, 56
V
Viewing
Call Log
answered incoming, 49
outgoing, 51
unanswered incoming, 37, 47
Directory entry, 33
Voice Features, 11
I-3
 Loading...