

LTO CONTROL60 User Manual
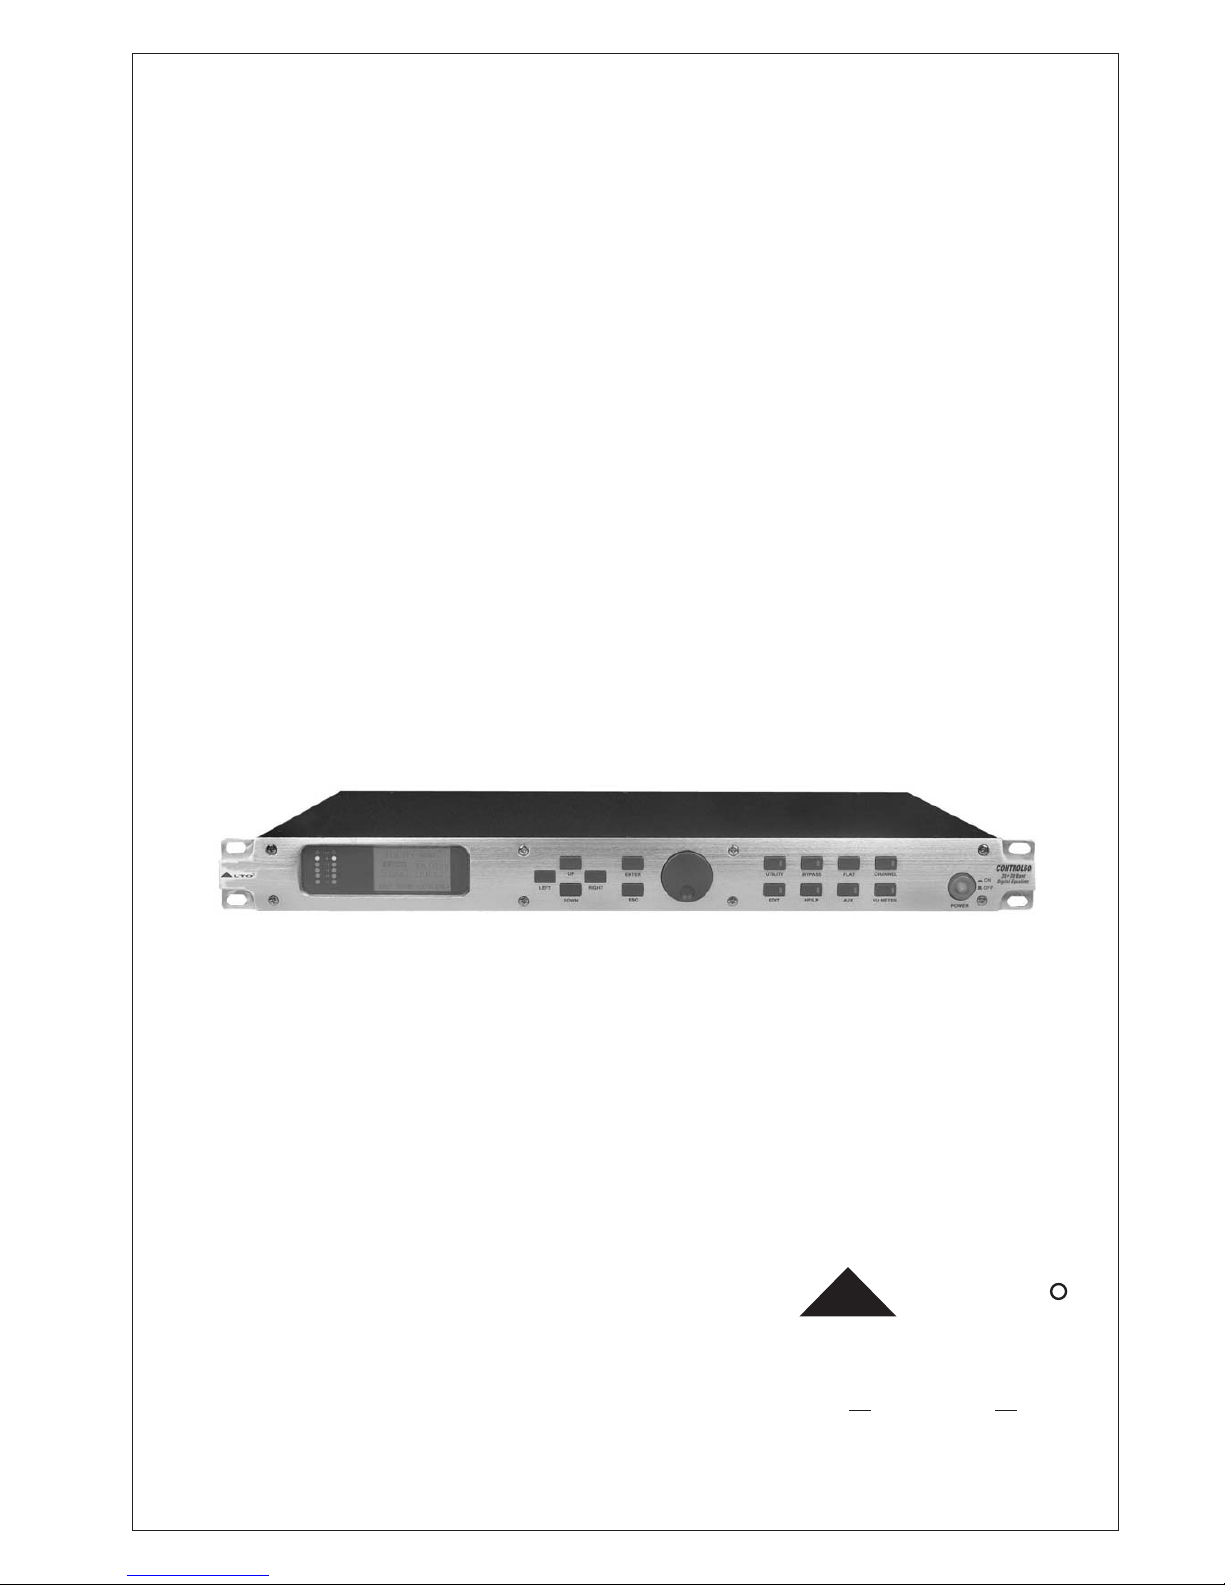
CONTROL60
30+30 Band
Digital Equalizer
User's Manual
LTO
R
www.altoproaudio.com
Version 2.3 September 2005
English
SAFETY RELATED SYMBOLS
CAUTION
RISK OFELECTRIC SHOCK
DO NOTOPEN
This symbol, wherever used, alerts you to the presence of un-insulated and dangerous voltages within the product enclosure. These are voltages that
may be sufficient to constitute the risk of electric
shock or death.
Protective Ground Terminal
AC mains (Alternating Current)
Hazardous Live Terminal
ON: Denotes the product is turned on.
This symbol, wherever used, alerts you to important operating and maintenance instructions.
Please read.
OFF: Denotes the product is turned off.
WARNING
Describes precautions that should be observed to
prevent the possibility of death or injury to the user.
CAUTION
Describes precautions that should be observed to
prevent damage to the product.
Protective Ground
Operating Conditions
IMPORTANT SAFETY INSTRUCTIONS
Cleaning
Servicing
Power Cord and Plug
the recommended fuse type as indicated in this
manual. Do not short-circuit the fuse holder. Before
replacing the fuse, make sure that the product is
OFF and disconnected from the AC outlet.
Before turning the product ON, make sure that it is
connected to Ground. This is to prevent the risk of
electric shock.
Never cut internal or external Ground wires. Likewise,
never remove Ground wiring from the Protective
Ground Terminal.
Always install in accordance with the manufacturer's
instructions.
To avoid the risk of electric shock and damage, do
not subject this product to any liquid/rain or moisture.
Do not use this product when in close proximity to
water.
Do not install this product near any direct heat source.
Do not block areas of ventilation. Failure to do so
could result in fire.
Keep product away from naked flames.
Read these instructions
Follow all instructions
Keep these instructions. Do not discard.
Heed all warnings.
Only use attachments/accessories specified by the
manufacturer.
Do not tamper with the power cord or plug. These are
designed for your safety.
Do not remove Ground connections!
If the plug does not fit your AC outlet seek advice from
a qualified electrician.
Protect the power cord and plug from any physical
stress to avoid risk of electric shock.
Do not place heavy objects on the power cord. This
could cause electric shock or fire.
When required, either blow off dust from the product
or use a dry cloth.
Do not use any solvents such as Benzol or Alcohol.
For safety, keep product clean and free from dust.
Refer all servicing to qualified service personnel only.
Do not perform any servicing other than those instructions contained within the User's Manual.
Fuse
To prevent fire and damage to the product, use only
No user serviceable parts inside.
Power Supply
Ensure that the mains source voltage (AC outlet)
matches the voltage rating of the product. Failure
to do so could result in damage to the product and
possibly the user.
Unplug the product before electrical storms occur
and when unused for long periods of time to reduce
the risk of electric shock or fire.
External Connection
Always use proper ready-made insulated mains
cabling (power cord). Failure to do so could result
in shock/death or fire. If in doubt, seek advice from
a registered electrician.
Do Not Remove Any Covers
Within the product are areas where high voltages
may present. To reduce the risk of electric shock do
not remove any covers unless the AC mains power
cord is removed.
Covers should be removed by qualified service
personnel only.
WARNING
1
Disposing of this product should not be
placed in municipal waste and should be
Separate collection.

6.TECHNICAL SPECIFICATIONS
Dear Customer:
PREFACE
Thanks for choosing LTO CONTROL60 and thanks for choosing one of the results of LTO AUDIO TEAM job and
researches.
For our LTO AUDIO TEAM, music and sound are more than a job...are first of all passion and let us say our
obsession!
We have been designing professional audio products for a long time in cooperation with some of the major brands
in the world in the audio field.
The LTO line presents unparalleled analogue and digital products made by Musicians for Musicians in our R&D
centers in Italy, Netherlands, United Kingdom and Taiwan. The core of our digital audio products is a sophisticated
DSP (Digital Sound Processor) and a large range of state of the art algorithms which have been developed by our
Software Team for the last 7 years.
Because we are convinced you are the most important member of LTO AUDIO TEAM and the one confirming the
quality of our job, we would like to share with you our work and our dreams, paying attention to your suggestions
and your comments.
Following this idea we create our products and we will create the new ones! From our side, we guarantee you and
we will guarantee you also in future the best quality, the best fruits of our continuous researches and the best prices.
Our LTO CONTROL60 is the result of many hours of listening and tests involving common people, area experts,
musicians and technicians.
The result of this effort is a DSP hi-performance equalizer that can be used in applications as musical performances,
installation and sound reinforcement.
Besides we offer to you a number of factory EQ curves that we collected and transformed in presets now available
in our small, efficient and easy to use LTO CONTROL60.
Nothing else to add, but that we would like to thank all the people that made the LTO CONTROL60 a reality available
to our customers, and thank our designers and all the LTO staff, people who make possible the realization of products
containing our idea of music and sound and are ready to support you, our customers, in the best way, conscious
that you are our best richness.
Thank you very much
LTO AUDIO TEAM
2

TABLE OF CONTENTS
1. INTRODUCTION .......................................................................................... ..................................4........
2. FEATURE LIST ......................................................................................................................................4
3. CONTROL ELEMENTS ............................................................................. .............................................4
3.1 The Front Panel
3.2 The Rear Panel
4. INSTALLATION & CONNECTION ............................................................... .................................5.........
4.1 Power Up and Audio Connections
4.2 Installation
4.3 Operational Overview
5. MIDI STANDARD CONTROL ............................................................................ ..................................12
a. Audio Connections
b.Power Up Setting
a. Standard Use
b. Application Examples
3
4.3.1 UTILITY KEY
a. Load Preset
c. EQ. Type
b. Store Preset
d. MIDI Setup
4.3.2 EDIT EQ
4.3.3 HP/LP
4.3.4 AUX
7. WARRANTY ........... ................................................................................. ..............................................16
6. TECHNICAL SPECIFICATIONS ............................................................................ ...............................15
MIDI Controllers Values
1. INTRODUCTION
Purchasing LTO CONTROL60, you purchase a very powerful equalizer, easy to use and contain in very efficienta
single unit rack package.
Our new CONTROL60 is a versatile and very powerful parametric/graphic PRE-EQ. It is based on 2 extremely
powerful high speed 24 32-bit DSPs and very high quality 20-bit A/D and 24-bit D/A converters, thepreserving
pureness of analogue sound in your digital applications. It can be operated in 6 different modes:
Graphic 2 30 Dual Mono 1/3 oct(GR.D.M)
Graphic 2 30 Stereo 1/3 oct(GR.ST)
Graphic 1 60 Mono 1/6 oct(GR.Mono )
Parametric 2 30 Dual Mono(PAR.D.M)
Parametric 2 30 Stereo (PAR.ST)
Parametric 1 60 Mono (PAR.Mono)
allowing the user to obtain the desired sound and timbre out of the musical signals easily.
These algorithms are fully dual mono/stereo algorithms and use very powerful high precision and symmetrical
filters, designed for professional use, able to modify the sound color improving the over sound quality withoutall
introducing any loss or distortion.
4
2. FEATURE LIST
Robust and Compact Design
Digital Stereo Equalizer with 24/32-bit High-Speed DSP Processor
Very High-Quality BurrBrown 20-bit A/D and 24 D/A Converters for Pure and Clean Audio Quality
Open Architecture for Easy Software Updates
MPU Control
2 30 or 1 60 Band Parametric Equalizer
Windows Editor for Easy to Use and Powerful Pc Based MIDI Remote Control
SMT Design for Greater Reliability
Optimized Signal Path to Provide Superior Sound
Manufactured Under QS9000, VDA6.1 Quality System
3. CONTROL ELEMENTS
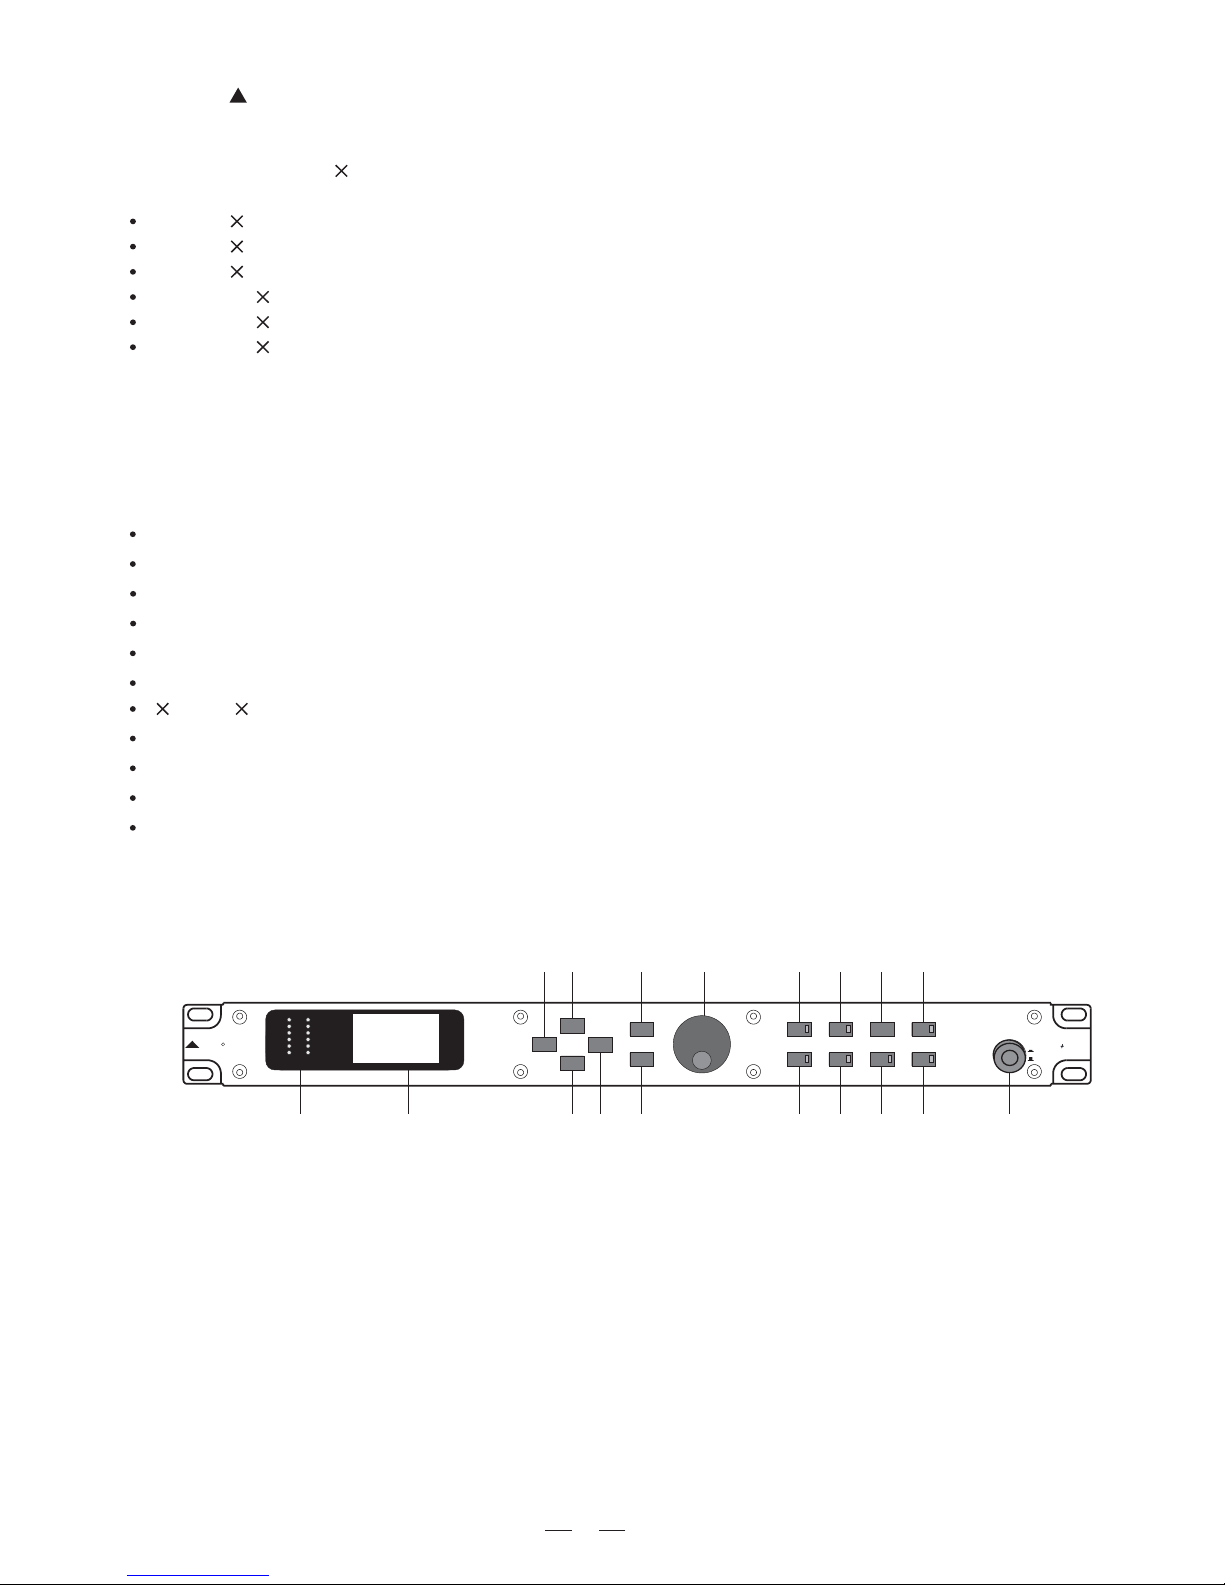
3.1 The Front Panel
1.Power Switch with LED
2.Channel key with LED
3.Flat key
4.Bypass key LEDwith
5.Utility key LEDwith
6.VU meter key LEDwith
7.AUX key LEDwith
8.HP/LP key with LED
9.Edit key with LED
10.Dial Control knob
11.Enter key
12.Esc key
18 17 15 14 12 9 8 7 6
5432
16 13 11
1
10
Easy to Operate Front Panel Controls and Display
ON
OFF
POWER
UP
LEFT
RIGHT
DOWN
ENTER
ESC
UTILITY
EDIT
BYPASS
HP/LP
FLAT
AUX
CHANNEL
VU METER
CONTROL60
30 30Band
Digital Equalizer
R
LTO
-18
-24
-30
-6
-12
CLIP
Power Switch With LED (1)
Turns the apparatus on and off. Press the SW, the power LED inside the SW will turn on.
Dial Control Knob (10)
Used only to change editable values.
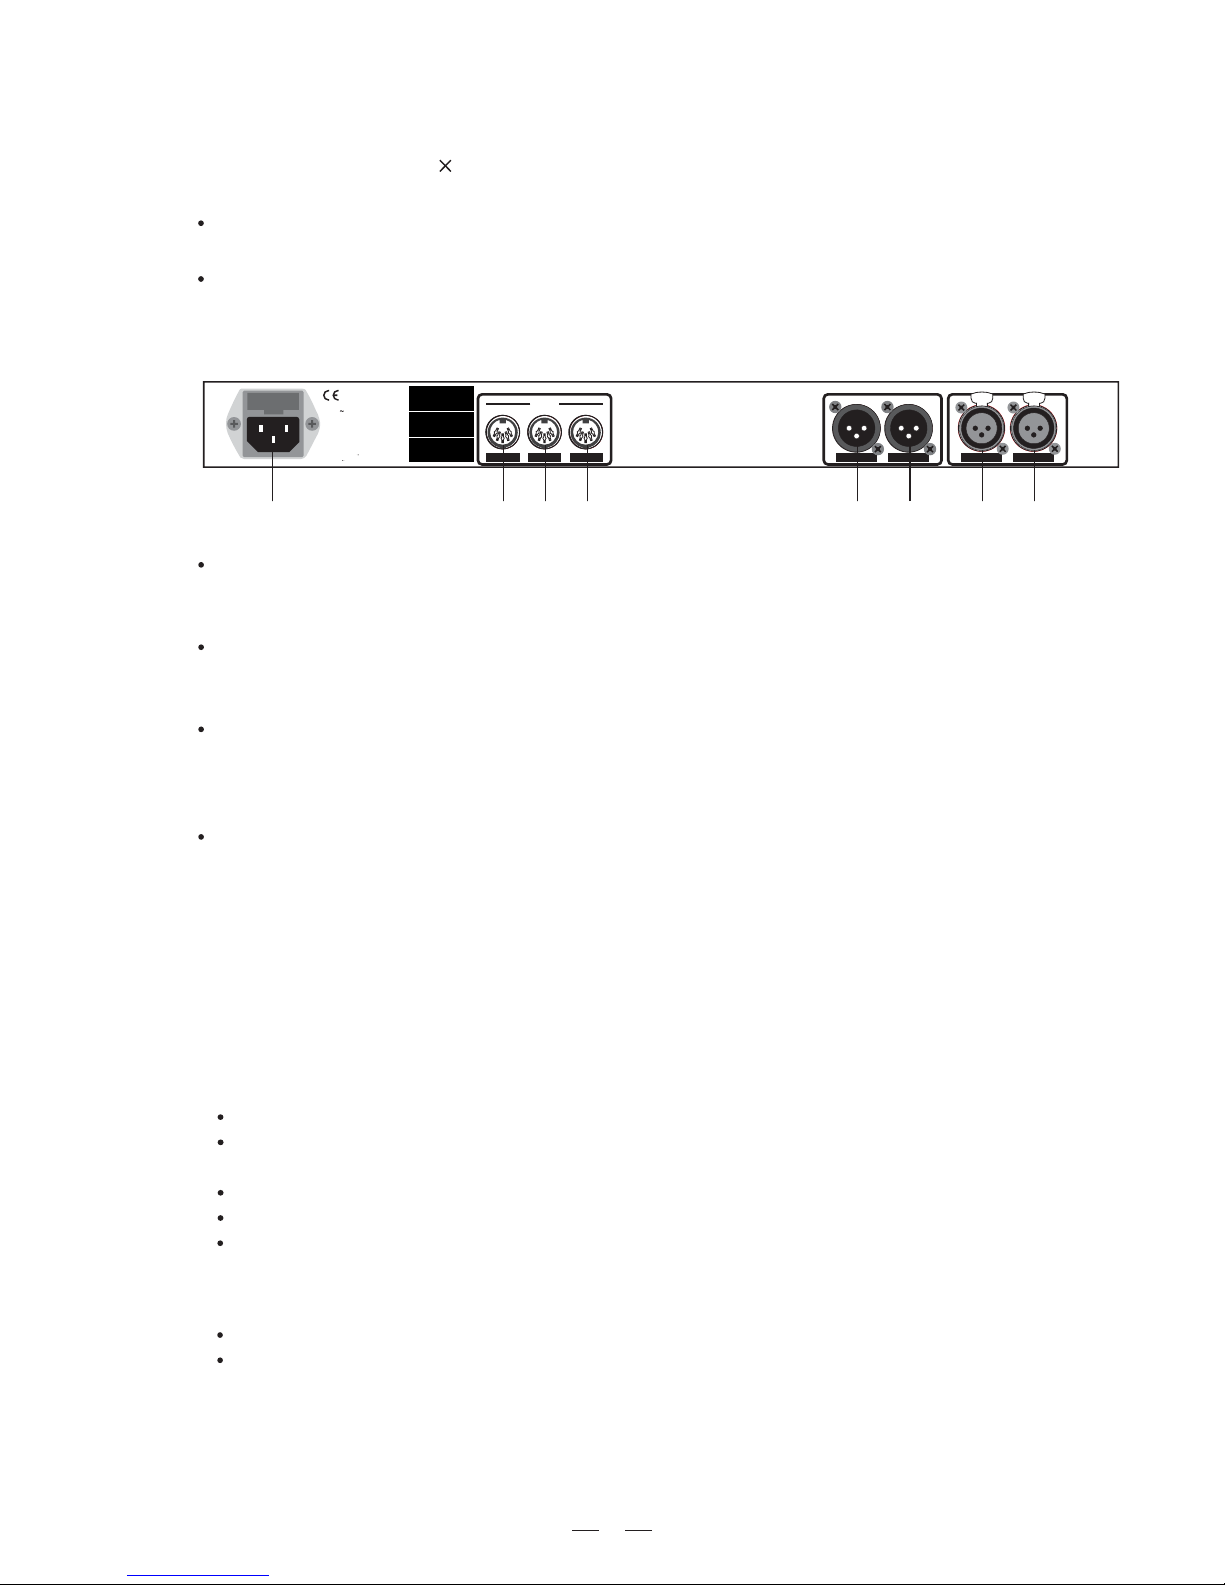
3.2 The Rear Panel
Input (19/20)
These are XLR balanced connectors which connect to sources such as the channel inserts of mixing consoles.
They may be used with nominal input levels from consumer to professional audio.
Outputs (21/22)
These are XLR balanced connectors which connect to devices such as the channel inserts on a mixing console
or power amplifier input. For mono applications, use the output1 and/or output2.
MIDI Connectors
MIDI in (23): 5-poles DIN connector for the MIDI input to the CONTROL60.
MIDI thru (24): 5-poles DIN connector for the MIDI thru.
MIDI out (25): 5-poles DIN connector for the MIDI output from the CONTROL60.
Power Connector (26)
This is an IEC 3-pole socket for connecting the AC power supply to the CONTROL60.
4. INSTALLATION & CONNECTION
4.1 Power Up and Audio Connections
a. Audio Connections
b. Power Up Setting
The connections between the CONTROL60 and the other audio devices have to be made using high quality
cables so to prevent bad performances of the CONTROL60 itself. So it should be good to use low-capacitance
shielded cables with a flexible internal conductor. Connect the cables to the CONTROL60 properly by observing
the following precautions:
Do not bundle audio cables with AC power cords.
Do not place audio cables and CONTROL60 near sources of electromagnetic interference such as:
Transformers, monitors, computers, etc.
Always unplug cables by firmly grasping the body of the plug and pulling directly outward.
Do not place cables where they can be stepped on.
Before turning on the CONTROL60's power, check if:
All connections have been made correctly.
The volume controls of the amplifier or mixer are turned down.
Insert the Power plug into the POWER input on the rear panel of the CONTROL60 and plug the power cord into
an AC outlet.
Turn on the power of the CONTROL60, pushing the ON/OFF button on the front panel.
Turn on the power of the amplifier/mixer, and adjust the volume.
13.Up key
14.Right key
15.Down key
16.Left key
17.LCD graphical display 128 64
18.Vu-meter
INPUT1INPUT2
OUTPUT1OUTPUT2
INPUTTHRUOUTPUT
MIDI
AC INPUT
95-240V 60-50Hz
RatedPower Consumption 15W
FUSE:
210-240V:T250mAL 250VAC
95-120V:500mA 250VAC
REPLACEFUSE WITH CORRECT
TYPEONLY
Apparaten skall anslutas till
jordat uttag nar den ansluts
till ett natverk
25 24 23 22 21 20 1926
5
PUSH
21
3
NEW TIDE
PUSH
21
3
NEW TIDE
Avoid twisting a cable or having it make sharp, right angle turns.
SERIAL
MODEL
CODE
 Loading...