

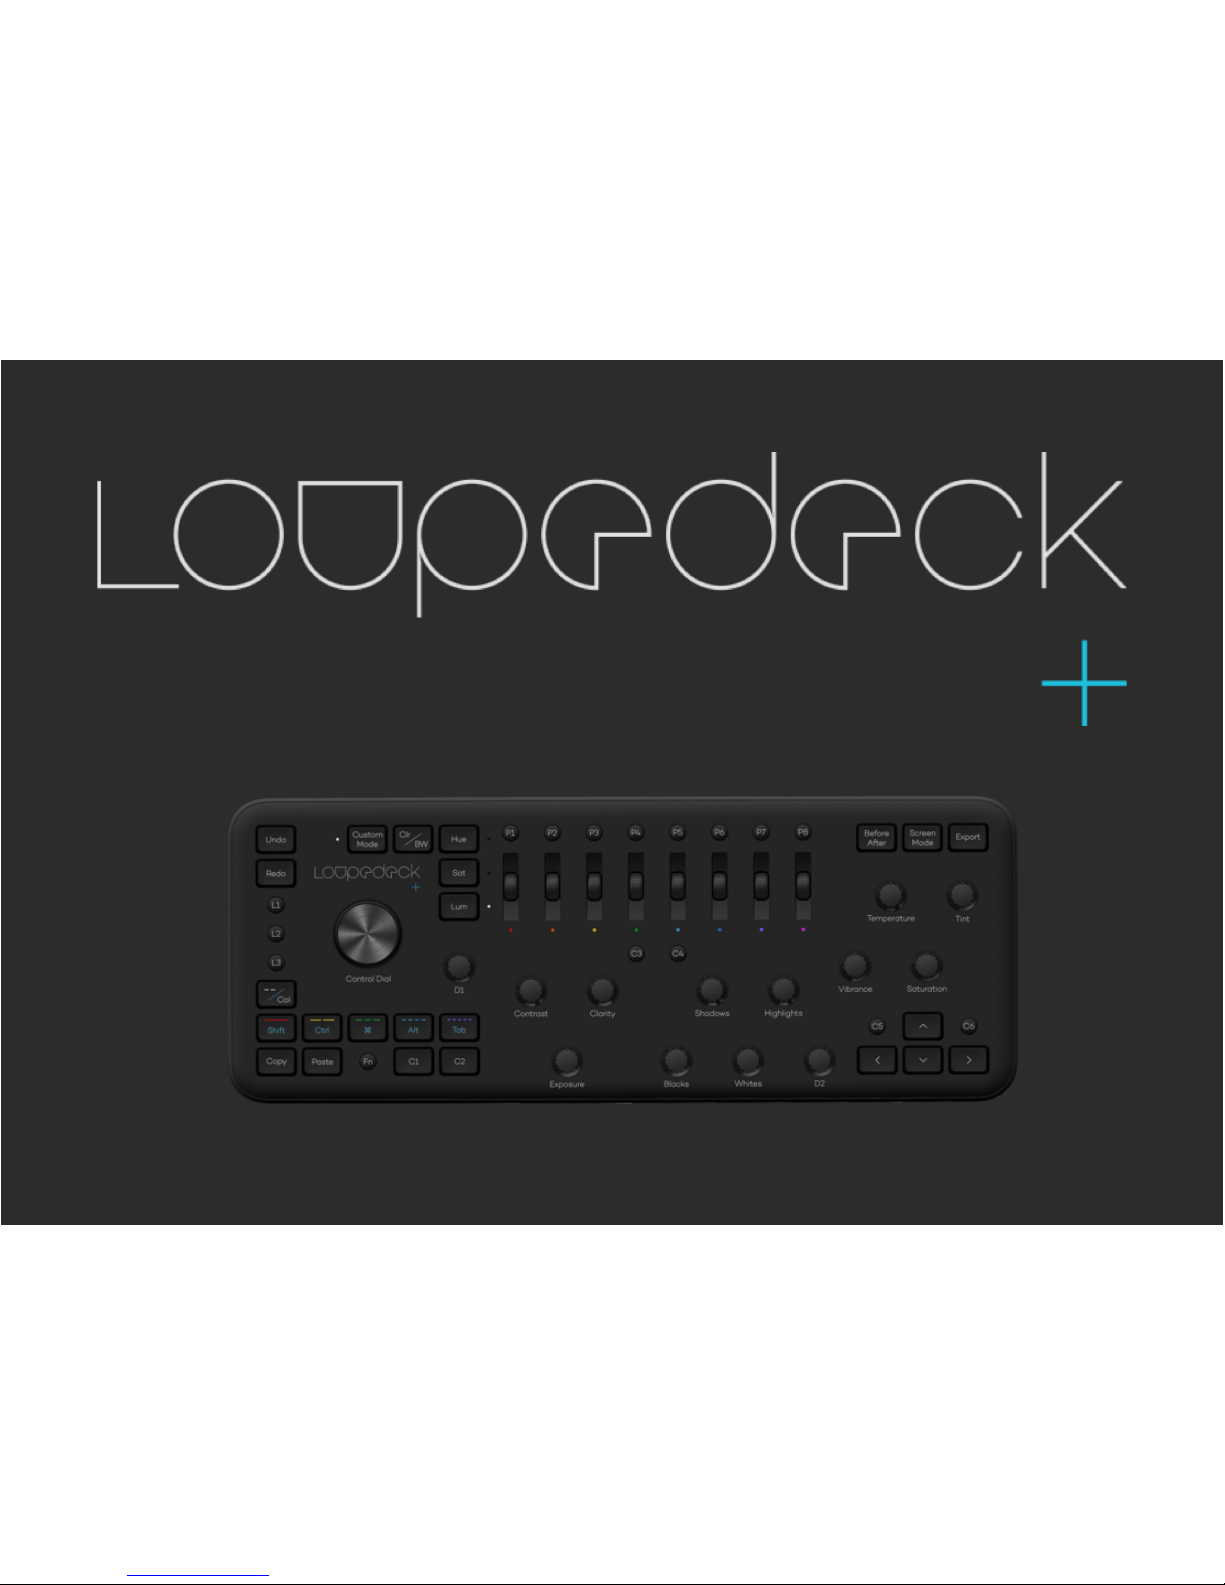
Loupedeck ADOBE PREMIERE PRO CC User Manual
USER GUIDE 2.4.2
ADOBE PREMIERE PRO CC

The Loupedeck+TM console for Adobe Lightroom Classic CCTM, Aurora HDR, and
Adobe Premiere Pro CC. Adobe Premiere Pro is the latest software to be
integrated, making the Loupedeck+ compatible with both photo and video.
Within this user guide you will learn how to setup your Loupedeck+ with
Premiere Pro as well as the basic functions needed to begin the editing process.
Please read this user guide to its entirety, so you can experience everything the
Loupedeck+ has to offer.
Loupedeck+ works seamlessly with MacOS and Windows operating systems,
running the software versions listed below:
• Adobe® Premiere Pro 12 or later
• Adobe® Lightroom® 7.4 or later
• Adobe® Lightroom® 2015.1 to 2015.14
(Stand alone versions 6.0 to 6.14)
• Windows® 10, Windows® 8.1, Windows® 7
• Mac® OS 10.12 and 10.13
CONNECTING AND SETTING UP LOUPEDECK+
We know you may be eager to begin editing with your Loupedeck+,
however you must first download the Loupedeck software.
Internet connection is required to download the software
How to Set up your Loupedeck+:
1. Download & install the latest Loupedeck software v 2.4.2 by visiting
www.loupedeck.com/setup
2. Connect the USB cable to your computer’s USB port
How to Set up your Loupedeck+ with Adobe Premiere Pro CC:
Windows:
1. While Loupedeck softare is running, open Adobe Premiere Pro CC
2. Go to Edit -> Preferences -> Control surface -> Push “Add”
3. Select “Loupedeck 2” and accept
MacOS:
1. While Loupedeck softare is running, open Adobe Premiere Pro CC
2. Go to Premiere Pro CC -> Edit -> Preferences ->
Control surface -> Push “Add”
3. Select “Loupedeck 2” and accept
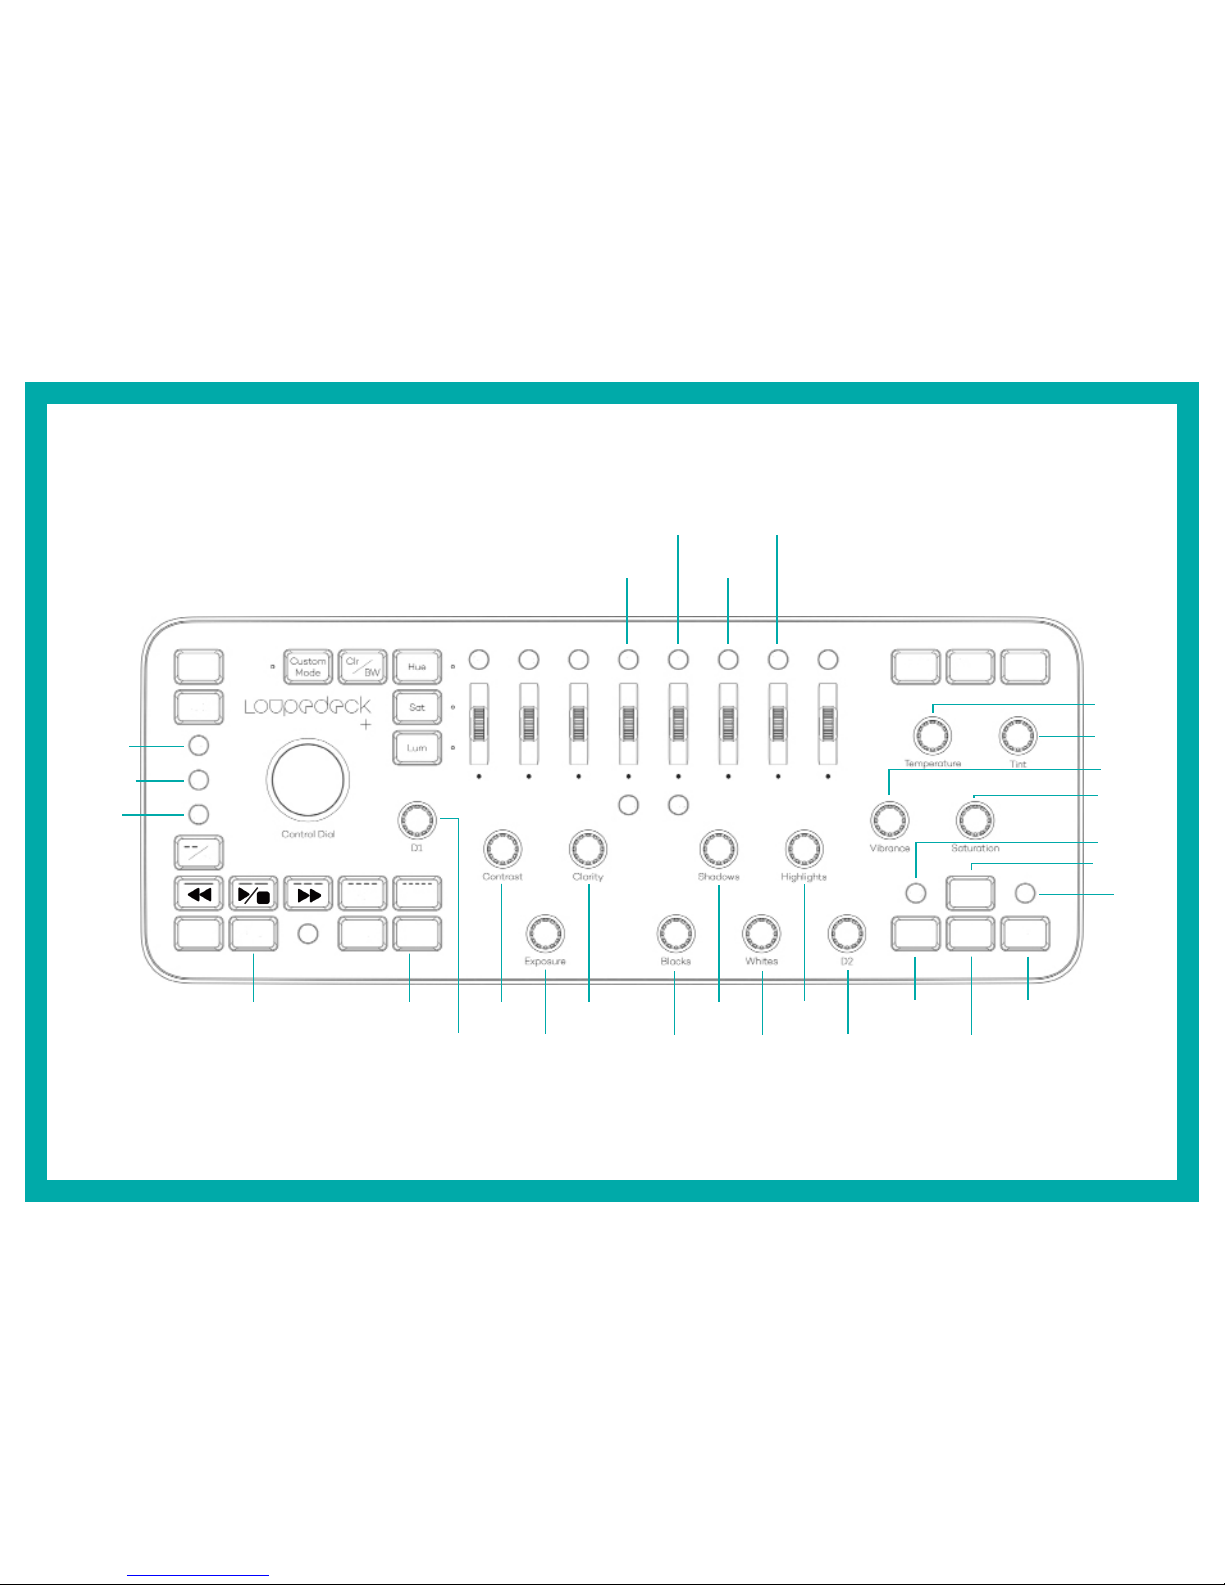
LOUPEDECK+ AND PREMIERE PRO
In Adobe Premiere Pro, Loupedeck is fully customizable to match your personal
editing workflow. We have selected some factory default functions, so you can
begin editing immediately.
We have also added printable cheat-sheets to help guide you through your first
steps of using Loupedeck+. For your own settings, please print blank
Loupedeck+ layout sheets, located on the last page.
Loupedeck+ has basic commands such as, exposure and contrast on the
default layer. Pressing FN and using the same dials and buttons will
create a second layer, called the FN layer.
Loupedeck+ also has a “Custom Mode” which can be activated by pressing the
“Custom Mode” button (LED will be lit when Custom Mode is activated). This will
open all the dials for extra customization as a third layer. When “Custom Mode”
is enabled by pressing FN, you will have an alternative “Custom Mode” with FN,
which makes four different layers of possibilities to master Premiere Pro!
When using “Custom Mode”, all functions on buttons D1 and D2 dials are the
same as in the default layer. When “Custom Mode” with FN is activated, all of
the functions on buttons D1 and D2 dials are the same as in the FN layer.
By starting to use Loupedeck+ in steps you will experience a fast and more
efficient learning curve!
Color explanations :
BASIC LAYER
FN LAYER
CUSTOM MODE LAYER
CUSTOM MODE FN LAYER
WORKING WITH LOUPEDECK+
HOW TO CUSTOMIZE YOUR SETTINGS?
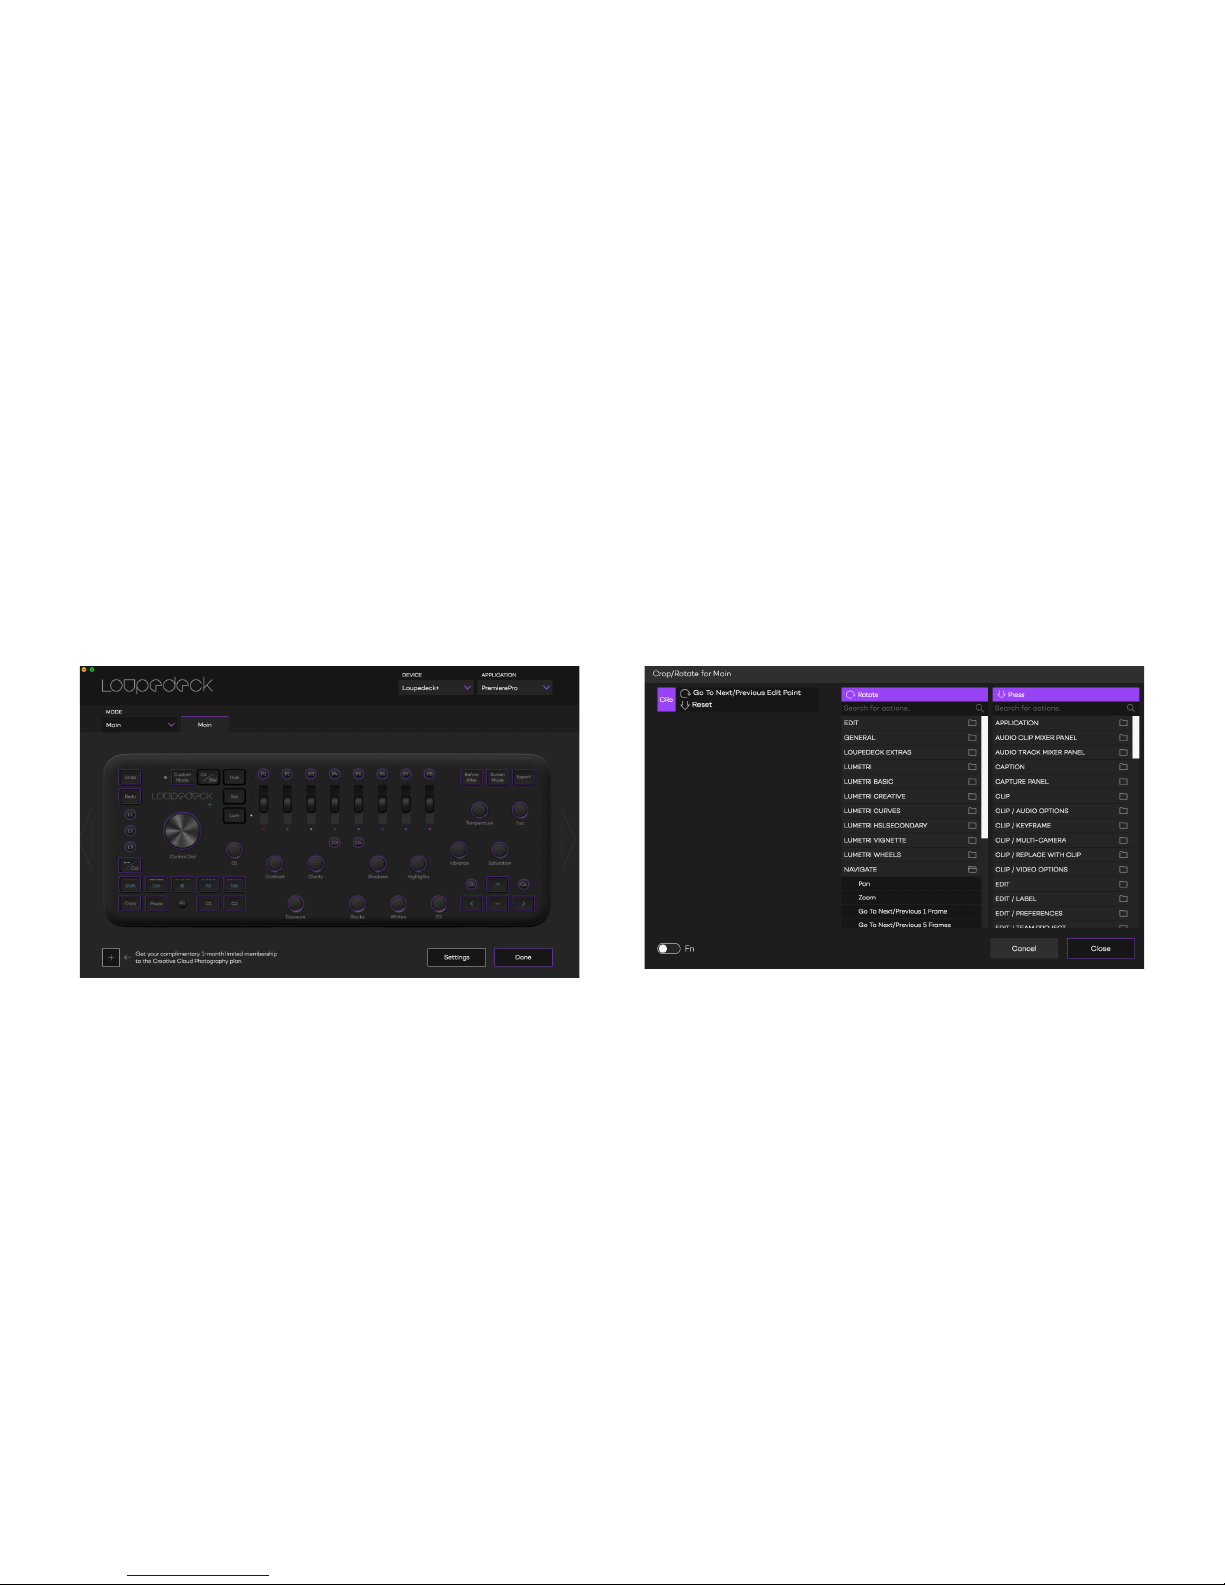
After installing Loupedeck+ your application will appear as below:
Within the upper right corner, you will find the Device and Application
dropdown menus. From the Application menu select “Premiere Pro.”
On the configuration UI: Click the button with your mouse you wish to
configure. Some buttons and dials are grouped together. If you click on the
“Control Dial” the following dialog will open:
Within the left column, you will find the current function for buttons and dials.
In the middle column you can select different Premiere Pro functions. Currently,
Command is marked with an arrow under the function (rotate or press).
“Search for Action”, is recommended due to the large amount of Premiere
Pro functions listed inside Loupedeck configuration software. Commands are
sorted to folders by their appearence in Premier Pro. For example, all commands
that aid in timeline navigation will be under *Timeline Navigation”.
Please note, in some cases the naming of the function within the Loupedeck+
configuration software differs from the naming presented in Premiere Pro.
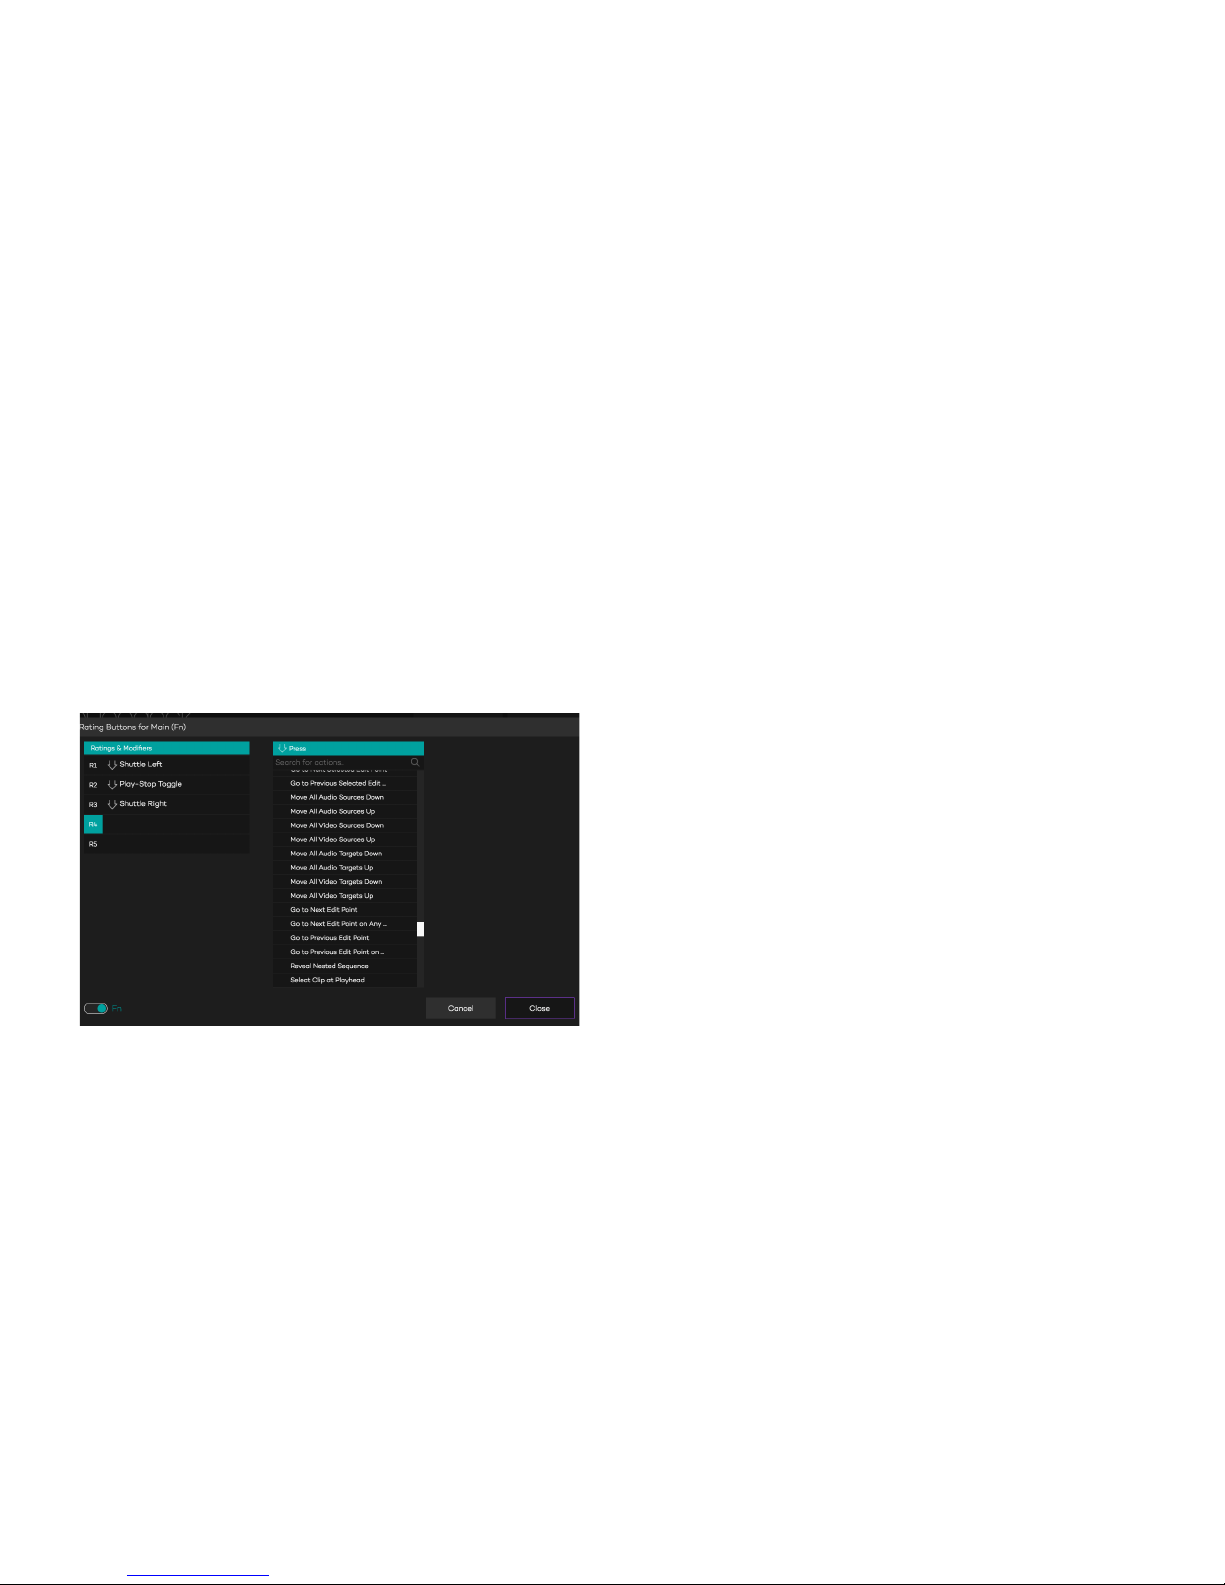
You will find the second level by clicking FN-switch from bottom-left corner.
All of these commands are available in Loupedeck+ when you have FN button
pressed down.
All changes are automatically saved, no additional actions are necessary to
apply changes. When “Cancel” is pressed all changes will be discarded.

BASIC LAYER
FACTORY DEFAULT FUNCTIONS
PAST E
INSERT
COPY PA STE SAV E
MATCH
FRAME
Fn
IN OUT
ADD
EDIT
RIPPLE
DELETE
ROLLING EDIT
TOOL
LINK
PEN TOOL
GO TO
NEXT / PREV
EDIT POINT
STEP BACK
1 FRAME
PRESS:
TOGGLES BETWEEN
ZOOM TO FIT &
ZOOM
STEP FORWARD
1 FRAME
PREVIOUS
EDIT POINT
NEXT
EDIT
POINT
FULL
SCREEN
COMPARSION
VIEW
TIMELINES
SOURCE
MONITOR
PROGRAM
MONITOR
INPUT
LUT
ADD/
REMOVE
VIDEO KEY-
FRAME
SELECT
ALL
EXTEND
PREVIOUS
EDIT TO
PLAYHEAD
EXTEND
SELECTED
EDIT TO
PLAYHEAD
TRIM
TOOL
ROTATE:
GO TO NEXT/
PREVIOUS
5 FRAMES
PRESS:
ADD EDIT
TOGGLE
TRIM
TYPE
ROTATE:
ZOOM
FN L AYER
FACTORY DEFAULT FUNCTIONS
PAST E
ATTRIBUTES
Fn
RIPPLE
DELETE
IMPORT
SAV E
AS
REVERSE
MATCH
FRAME
TRACK SELECT
TOOL
GO TO SEQUENCE
START / END
TYPE TOOL
CLEAR
IN
CLEAR
OUT
ADD EDIT TO
ALL TRACKS
CUT
LOOK
ADD OR
REMOVE
AUDIO
KEYFRAME
DESELECT
ALL
EXTEND
NEXT EDIT TO
PLAYHEAD
PAN
RESET
GO TO NEXT/
PREVIOUS
1 FRAME
NUDGE CLIP
SELECTION UP
NUDGE CLIP
SELECTION
DOWN
NUDGE CLIP
SELECTION
LEFT ONE
FRAME
NUDGE CLIP
SELECTION
RIGHT ONE
FRAME
HIGHLIGHTS:
Y AXIS
HIGHLIGHTS:
X AXIS
MIDTONES:
X AXIS
HIGHLIGHTS:
BRIGHTNESS
(Z)
SHADOWS:
Y AXIS
SHADOWS:
X AXIS
SHADOWS:
LUMINANCE (Z)
MIDTONES:
Y AXIS
MIDTONES:
X AXIS
MIDPOINT MIDTONES:
LUMINANCE (Z)
GO TO
NEXT/ PREV
MARKER
DELETE
 Loading...