

Losi LOSB9605 User Manual

Operating Manual
Losi (LOSB9605) Intelligent 1-5 Cell Balance Charger
Model: LE5000
Features:
• Microprocessor Controlled high-performance balance charger
• Charge LiPo or Lithium-ion batteries
• Cell voltage balancer
• Temperature Controlled (optional) auto shut-off from 0 to 80 degrees Celsius
• Capacity Controlled auto shut-off charge from 100mAh to 9900mAh
• Time Controlled auto shut-off from 0 to 720 minutes
• Low voltage input alarm if input drops below 10–11V
• Selectable number of cells from 1 to 5
• Adjustable charge rate setting from 0.1A to 5.0A
• Uses constant voltage and limited current charging model for maximum
battery performance.
• Alarmed protection for:
o Battery temperature is over limit
o Charge time is over limit
o Charged capacity is over limit
o Reverse voltage connection
o Input voltage error
o Connection breakdown
o Short circuit
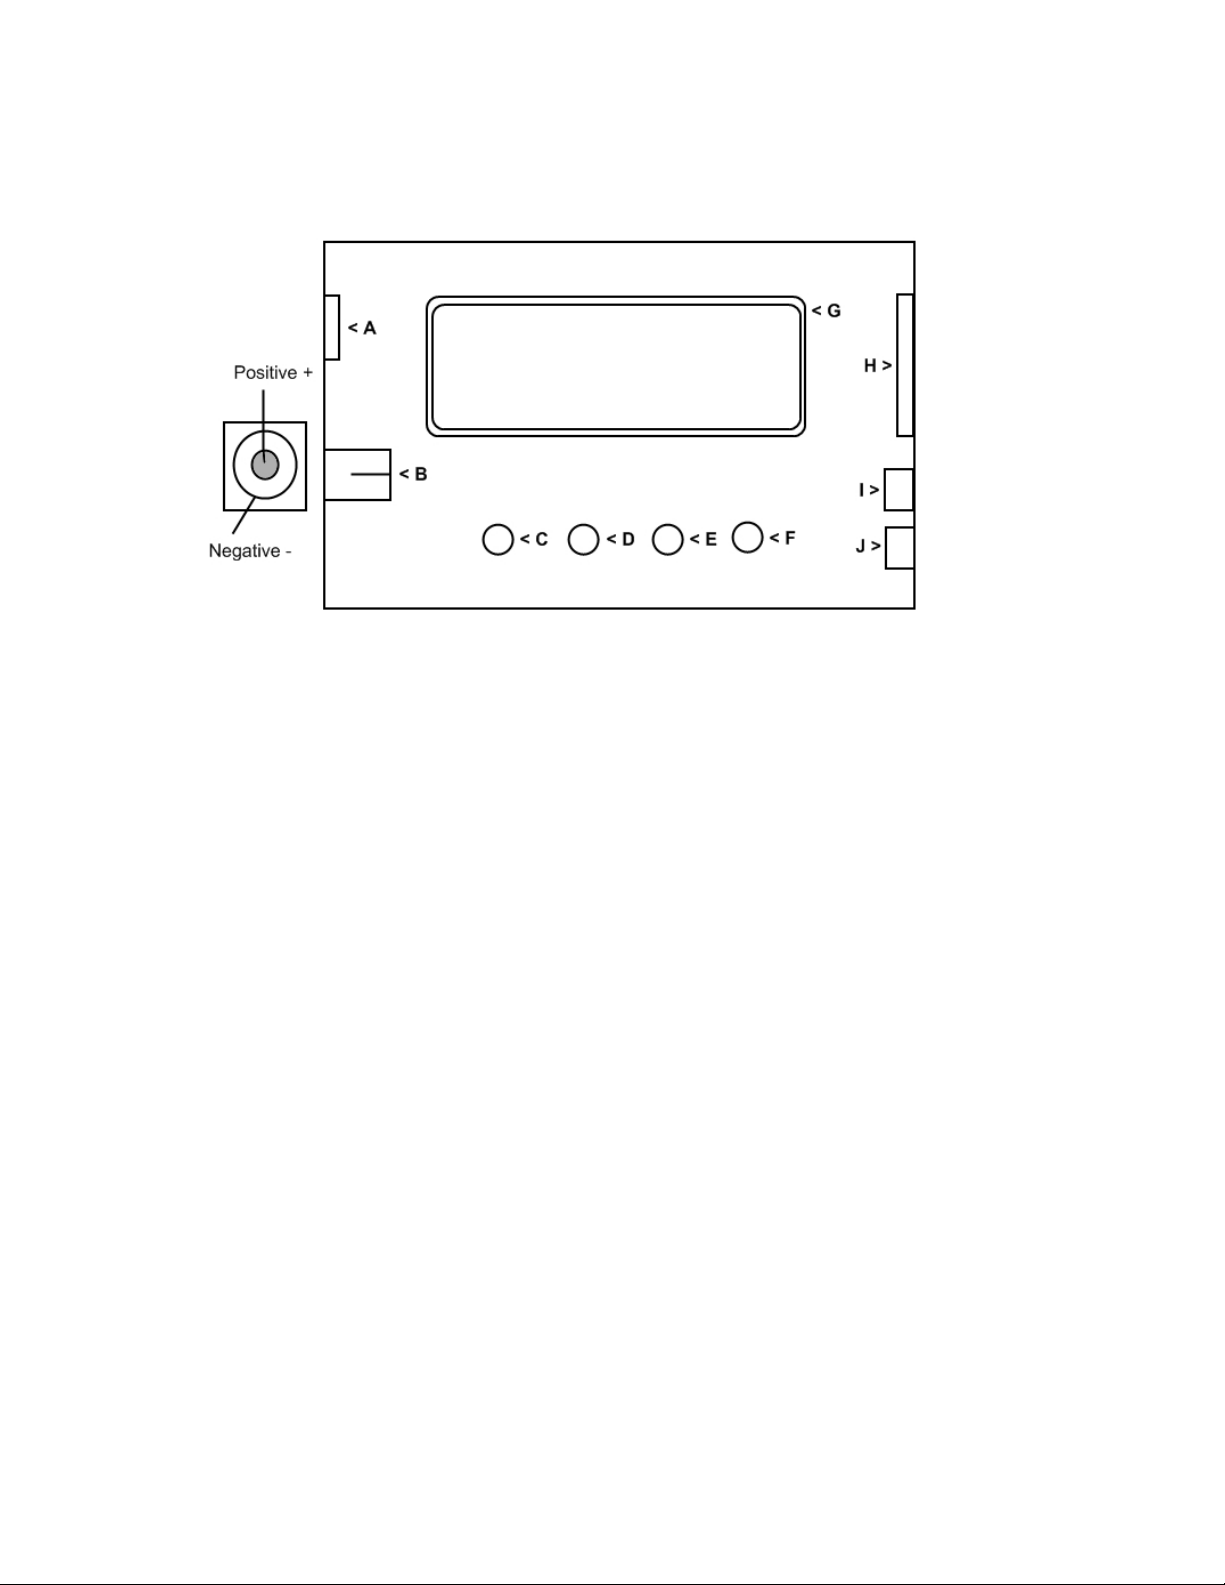
Physical Overview:
A. Temperature Sensor Input (Optional)
This sensor can be used to monitor the temperature of the battery and stop
charging if the temperature exceeds a preset value. Control temperature is
set through the charger control setup.
B. DC Input
Connection for a 12V car battery or hobby grade power supply. Input voltage
should be between 11-16V
C. Stop Button
Pressing Stops charging and is used to return from program mode.
D. Decrease Select Button
Pressed to decrease value presented in display.
E. Increase Select Button
Pressed to increase value presented in display.
F. Start Button
Pressing Starts charging and is used to navigate/confirm program settings.
G. LCD Display
Large 64 x 14.5mm display presents charger’s functions and programming
options.
H. Cell Balance Connector
8-pin connector used with supplied leads to balance charge batteries.
I. Charge Lead Output Connection (+)
Positive output lead plugs in here; uses standard banana plug socket.
J. Charge Lead Output Connection (-)
Negative output lead plugs in here; uses standard banana plug socket.
Charger Control Setup:
By following the sample LCD screens below you will be able to Con trol the functional
settings of the charger. Use the “Increase” and “Decrease” buttons to select values.
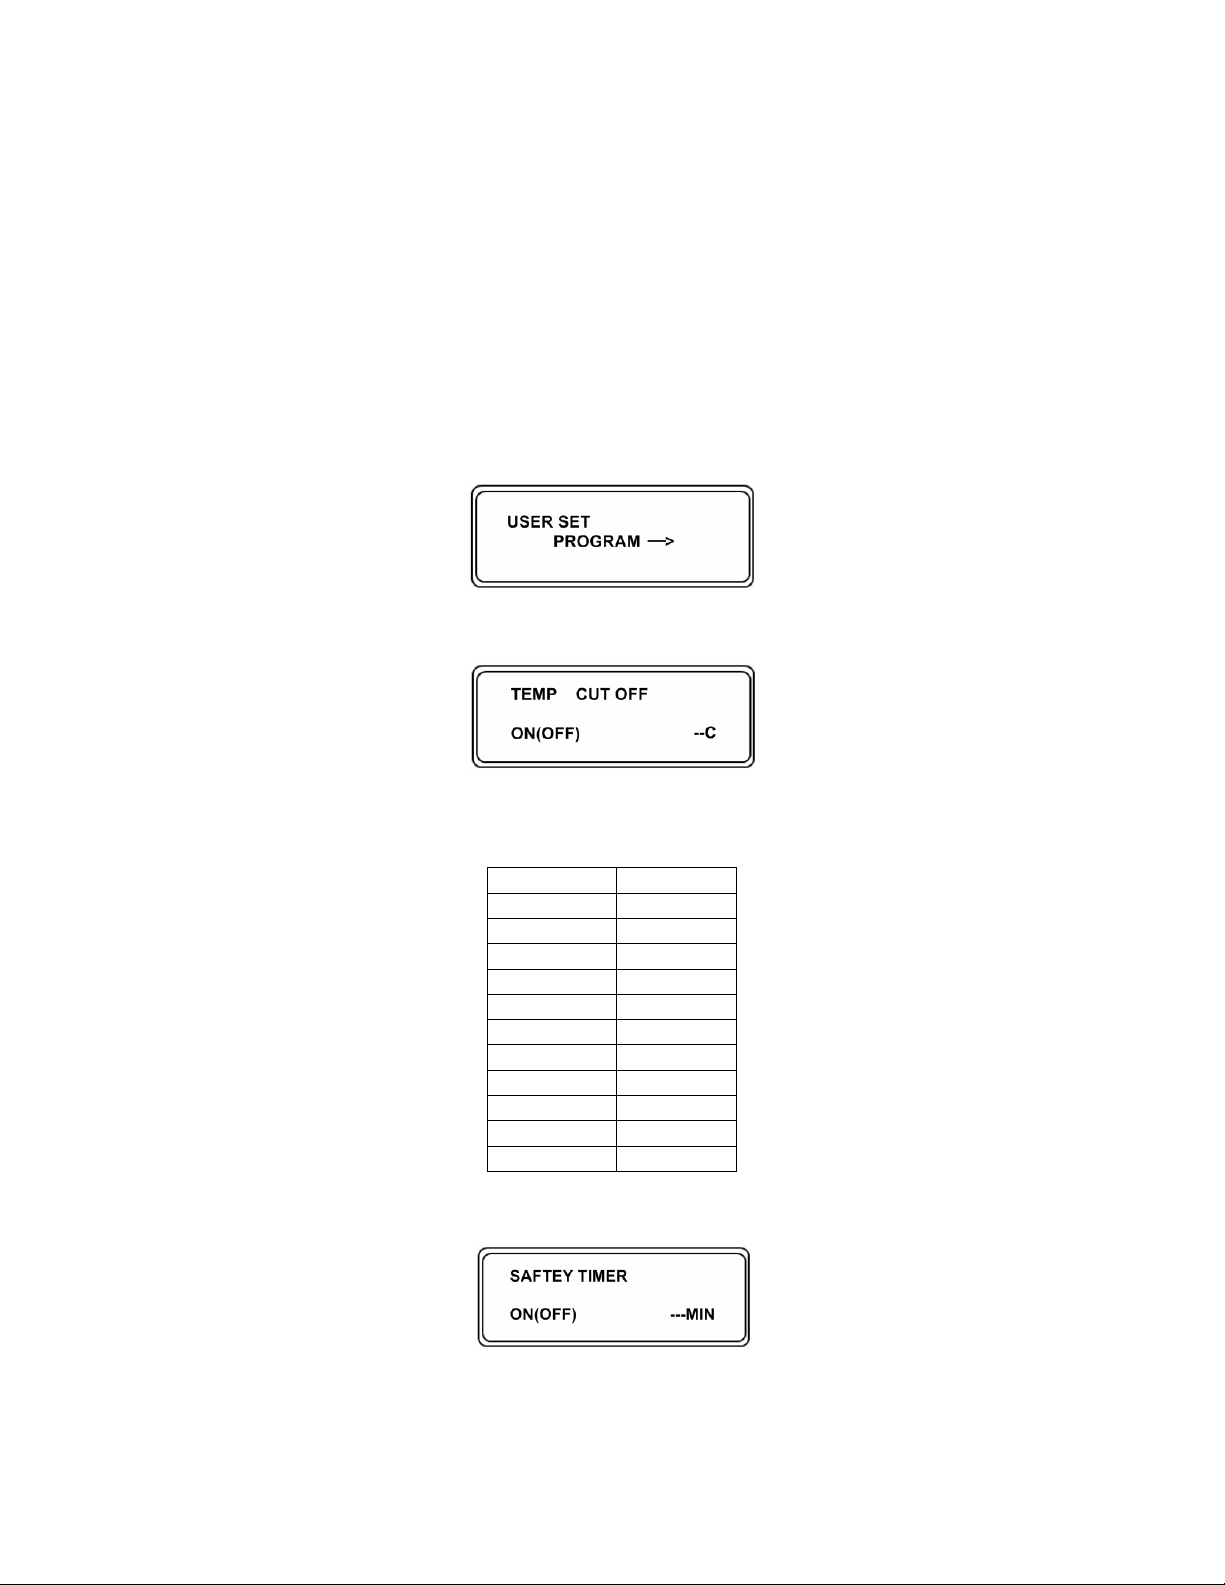
Press START key to enter Setup then proceed below:
Beginning LCD display
Select ON and set the temperature in Celsius to the one that you would like the
charger to stop charging the battery on. Set to 32 Celsius as a default value, see
table below for reference.
Fahrenheit
70 21
75 24
80 27
85 29
90 32
95 35
100 38
110 43
115 46
120 49
125 52
Time limit to prevent overcharging a battery if other controls were to fail; set time in
minutes for maximum charge time. Set to 65 minutes as a default value.
Celsius
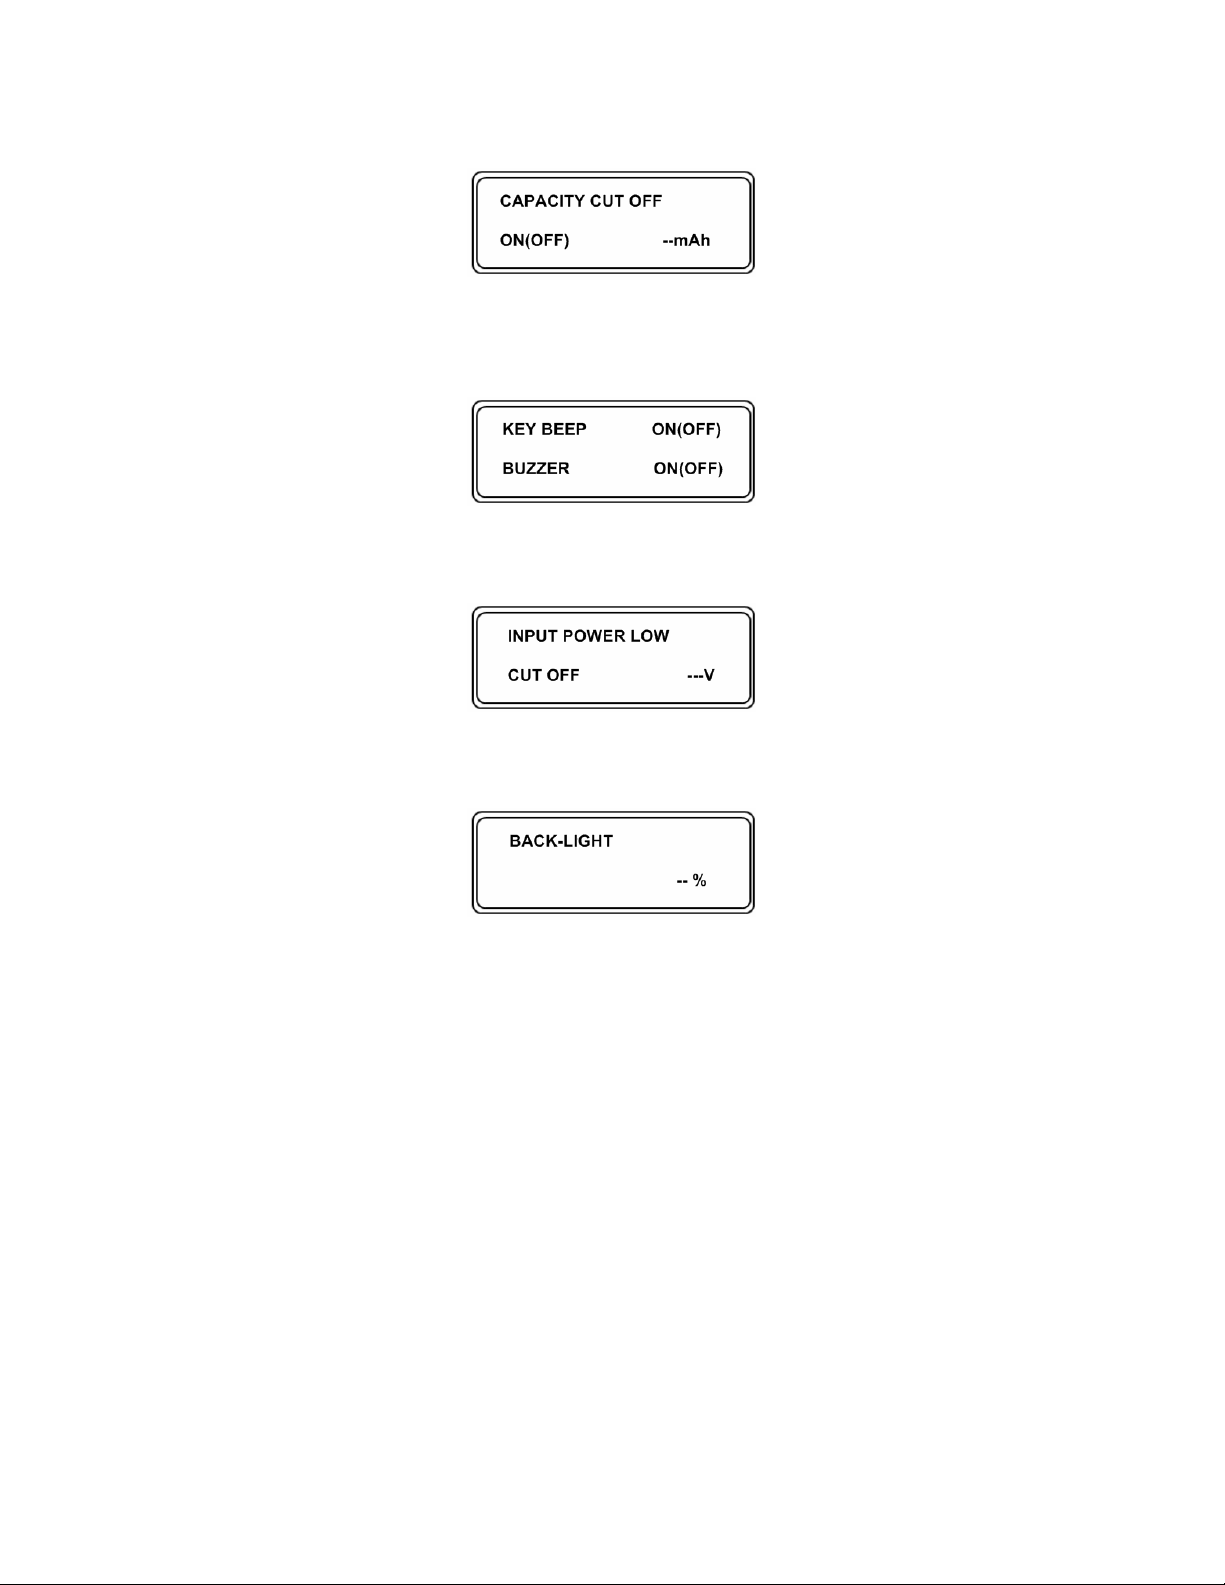
Set the maximum charge capacity before charging to prevent overcharging if other
controls were to fail; set the capacity in mAh. Set to the Capacity of the battery to
be charged as a default value.
Control sounds when pressing keys and the buzzer for audible alerts. Individually
select each as desired.
If the input voltage is below this value the charger will stop operations. Set to 11V
as a default value.
Adjust for the brightness of the charger’s LCD display here.
 Loading...