

Page 1

NOTE:
Getting Started
Getting Started
Before you start running your new Mini-DT, it is absolutely necessary that you read
through all of the operating instructions to prevent unnecessary damage and get the
maximum enjoyment from your vehicle.
Step 1
Plug the AC charger into the proper wall receptacle (110V).
Plug the battery pack into the charger and let it charge for
3 hours for the rst time. After running, or when the Mini-DT
slows noticeably, recharge the battery pack for 5-6 hours for
a full charge.
Step 2
Remove the transmitter battery cover by sliding the cover
from left to right. Install eight (8) AA batteries into the
battery holder. Pay close attention to the correct direction
of the positive (+) and negative (-) ends as marked in the
tray. Once all 8 batteries have been installed, reinstall the
battery cover by sliding it on from right to left.
Step 4
Step 3
Fig 2
Fig 1
Fig 3
Fig 4
Once the battery
is charged,
remove the
body clip from
the front of the
battery tray (g.
3) and lift up the
front of the tray
(g. 4). Install
the battery pack
as shown (g.
5), reinstall the
body clip and
plug the battery
pack into the
ESC.
Insert the antenna wire through the antenna mount and
into the antenna tube (g. 1) pushing it through until it
comes out the other end. Push the antenna tube (g. 2)
into the antenna mount.
Mini-DT Quick Start Guide―Page 1
Fig 5
Page 2
Mini-DT Quick Start Guide―Page 2
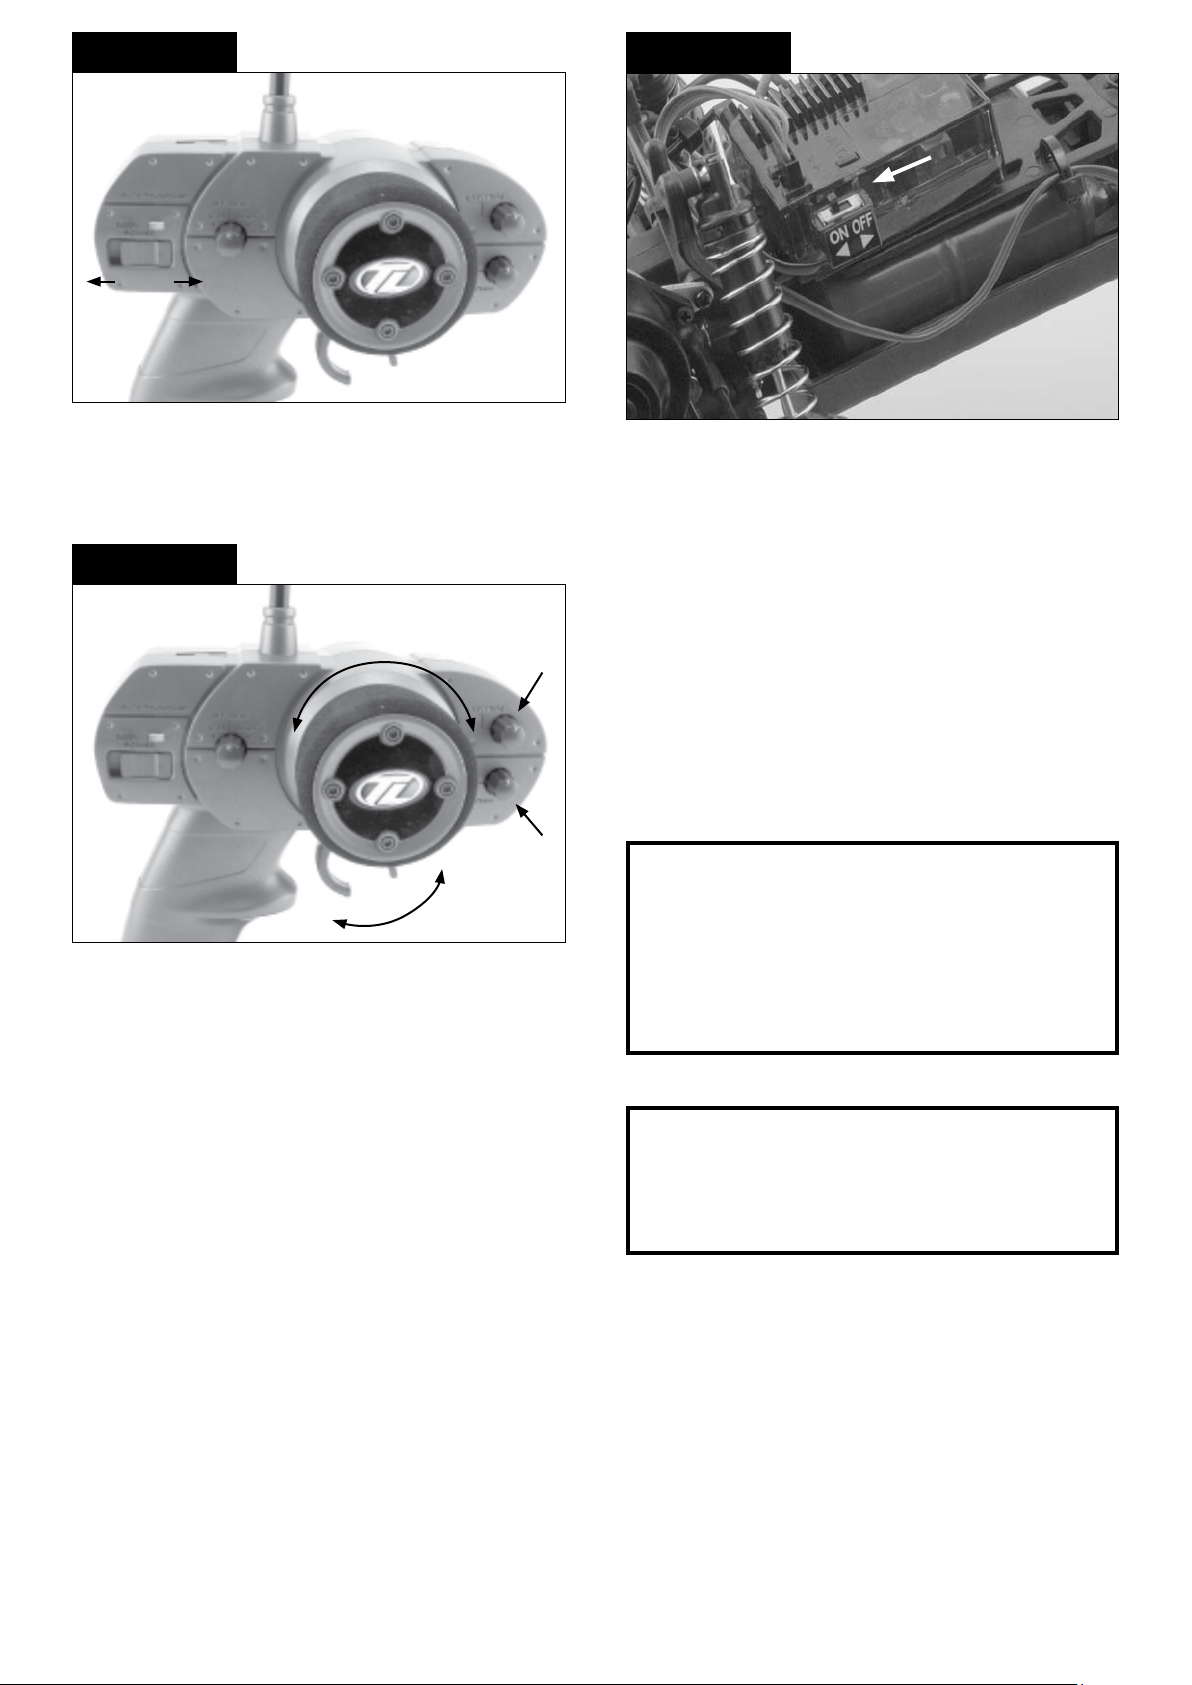
Step 5 Step 6
Off/On
Always turn on the transmitter rst by sliding the switch
on the left side of the wheel from left to right. The small
red and green lights above the switch should both light
up. If not, check for low or incorrectly installed batteries.
Step 7
The On/Off switch for the receiver/ESC is located on the
right side toward the back of the unit. Locate the switch
and slide the switch lever back to the “ON” position,
which is clearly marked on the side of the switch. The
Mini-DT should now be powered up. If not refer to the
Troubleshooting Guide for help in locating the cause.
St.Trim
Left Right
Brake/Reverse
Forward
Th.Trim
Once the transmitter has been turned on, turn on the
Mini-DT by sliding the switch on the speed controller to
the “On” position. If the rear wheels turn, adjust the “TH.
Trim” knob located to the lower right of the steering wheel
until they stop. To go forward, pull the trigger back. If you
should need reverse, wait for the model to stop then push
the trigger forward. When going forward the model should
move in a straight line. If not, adjust the “ST. TRIM” so that
it tracks in a straight line without having to turn the steering
wheel. After you are have nished, turn the Mini-DT off
FIRST by sliding the switch to the “OFF” position. After
the model has been turned off, turn off the transmitter. If
you wish to clean your Mini-DT, use compressed air and/
or a soft paintbrush to remove dust and dirt.
NEVER use
chemicals or anything wet as it can cause damage to both
electronics and plastic parts.
ALWAYS
• Turn on the transmitter before the vehicle
• Use caution when running your vehicle near
people
• Turn both the Mini-DT and transmitter “off”
when done
• Check the battery condition of the transmitter
before running
NEVER
• Operate the Mini-DT with low battery power
• Run the Mini-DT through water or wet grass
• Use chemicals to clean the chassis
• Run the Mini-DT without a gear cover
Safety Precautions
This is a sophisticated hobby Product and not a toy. It must be operated with caution and common sense and requires some
basic mechanical ability. Failure to operate this Product in a safe and responsible manner could result in injury or damage to
the Product or other property. This Product is not intended for use by children without direct adult supervision. The Product
manual contains instructions for safety, operation and maintenance. It is essential to read and follow all the instructions and
warnings in the manual, prior to assembly, setup or use, in order to operate correctly and avoid damage or injury.
Questions, Assistance, and Repairs
Your local hobby store and/or place of purchase cannot provide warranty support or repair. Once assembly, setup or use of
the Product has been started, you must contact Horizon directly. This will enable Horizon to better answer your questions
and service you in the event that you may need any assistance. For questions or assistance, please direct your email to
productsupport@horizonhobby.com, or call 877.504.0233 toll free to speak to a service technician.
Page 3

Mini-DT Quick Start Guide―Page 3
Mini-DT Troubleshooting Guide
Mini-DT Troubleshooting Guide
Doesn’t operate Battery not charged or plugged in Charge battery / plug-in
Receiver switch not “on” Turn on receiver switch
Transmitter not ‘on” or low battery Turn on / replace batteries
Motor runs but rear Pinion not meshing with spur gear Adjust pinion/spur mesh
wheels don’t move Pinion spinning on motor shaft Replace pinion gear on motor
Slipper too loose Check & adjust slipper
Transmission gears stripped Replace transmission gears
Drive pin in axle missing Check & replace
Steering doesn’t work Servo plug not in receiver Check if plug in / all the way
Servo gears or motor damaged Replace or repair servo
Won’t turn one direction Servo gears damaged Replace servo gears
Motor doesn’t run Motor plugs loose Plug in completely
Motor wire broken Repair or replace as needed
ESC damaged Call Electronics Tech
ESC gets hot Motor over-geared Put smaller pinion on motor
Driveline bound up Check wheels & trans for binds
Poor run time and/or Battery pack not fully charged Recharge
sluggish acceleration Charger not allowing full charge Try another charger
Slipper slipping too much Check/adjust slipper
Motor worn out Replace motor
Driveline bound up Check wheels & trans for binds
Poor range/glitches Transmitter battery low Check & replace as necessary
Transmitter antenna loose Check & tighten
Battery low in truck Replace or recharge
Loose plugs or wires Check motor and power plugs
Slipper won’t adjust Drive pin missing in shaft Replace drive pin
Spur gear face worn out Replace spur gear & adjust slipper
Warranty Period
Exclusive Warranty- Horizon Hobby, Inc., (Horizon) warranties that the Products purchased (the “Product”) will be free from
defects in materials and workmanship at the date of purchase by the Purchaser.
Limited Warranty
(a) This warranty is limited to the original Purchaser (“Purchaser”) and is not transferable. REPAIR OR REPLACEMENT
AS PROVIDED UNDER THIS WARRANTY IS THE EXCLUSIVE REMEDY OF THE PURCHASER. This warranty covers
only those Products purchased from an authorized Horizon dealer. Third party transactions are not covered by this warranty.
Proof of purchase is required for warranty claims. Further, Horizon reserves the right to change or modify this warranty
without notice and disclaims all other warranties, express or implied.
(b) Limitations- HORIZON MAKES NO WARRANTY OR REPRESENTATION, EXPRESS OR IMPLIED, ABOUT NONINFRINGEMENT, MERCHANTABILITY OR FITNESS FOR A PARTICULAR PURPOSE OF THE PRODUCT. THE
PURCHASER ACKNOWLEDGES THAT THEY ALONE HAVE DETERMINED THAT THE PRODUCT WILL SUITABLY MEET
THE REQUIREMENTS OF THE PURCHASER’S INTENDED USE.
(c) Purchaser Remedy- Horizon’s sole obligation hereunder shall be that Horizon will, at its option, (i) repair or (ii) replace,
any Product determined by Horizon to be defective. In the event of a defect, these are the Purchaser’s exclusive remedies.
Horizon reserves the right to inspect any and all equipment involved in a warranty claim. Repair or replacement decisions
are at the sole discretion of Horizon. This warranty does not cover cosmetic damage or damage due to acts of God,
accident, misuse, abuse, negligence, commercial use, or modication of or to any part of the Product. This warranty does
not cover damage due to improper installation, operation, maintenance, or attempted repair by anyone other than Horizon.
Return of any goods by Purchaser must be approved in writing by Horizon before shipment.
Damage Limits
HORIZON SHALL NOT BE LIABLE FOR SPECIAL, INDIRECT OR CONSEQUENTIAL DAMAGES, LOSS OF PROFITS OR
PRODUCTION OR COMMERCIAL LOSS IN ANY WAY CONNECTED WITH THE PRODUCT, WHETHER SUCH CLAIM
IS BASED IN CONTRACT, WARRANTY, NEGLIGENCE, OR STRICT LIABILITY. Further, in no event shall the liability of
Horizon exceed the individual price of the Product on which liability is asserted. As Horizon has no control over use, setup,
nal assembly, modication or misuse, no liability shall be assumed nor accepted for any resulting damage or injury. By the
act of use, setup or assembly, the user accepts all resulting liability.
Page 4

If you as the Purchaser or user are not prepared to accept the liability associated with the use of this Product, you are
advised to return this Product immediately in new and unused condition to the place of purchase.
Law: These Terms are governed by Illinois law (without regard to conict of law principals).
Inspection or Repairs
If this Product needs to be inspected or repaired, please call for a Return Merchandise Authorization (RMA). Pack the
Product securely using a shipping carton. Please note that original boxes may be included, but are not designed to
withstand the rigors of shipping without additional protection. Ship via a carrier that provides tracking and insurance for lost
or damaged parcels, as Horizon is not responsible for merchandise until it arrives and is accepted at our facility.
A Service Repair Request is available at www.horizonhobby.com on the “Support” tab. If you do not have internet access,
please include a letter with your complete name, street address, email address and phone number where you can be
reached during business days, your RMA number, a list of the included items, method of payment for any non-warranty
expenses and a brief summary of the problem. Your original sales receipt must also be included for warranty consideration.
Be sure your name, address, and RMA number are clearly written on the outside of the shipping carton.
Warranty Inspection and Repairs
To receive warranty service, you must include your original sales receipt verifying the proof-of-purchase date. Provided
warranty conditions have been met, your Product will be repaired or replaced free of charge. Repair or replacement
decisions are at the sole discretion of Horizon Hobby.
Non-Warranty Repairs
Non-Warranty Repairs
Should your repair not be covered by warranty the repair will be completed and payment will be required without
notication or estimate of the expense unless the expense exceeds 50% of the retail purchase cost. By submitting
the item for repair you are agreeing to payment of the repair without notication. Repair estimates are available upon
request. You must include this request with your repair. Non-warranty repair estimates will be billed a minimum of ½ hour of
labor. In addition you will be billed for return freight. Please advise us of your preferred method of payment. Horizon accepts
money orders and cashiers checks, as well as Visa, MasterCard, American Express, and Discover cards.
\If you choose to pay by credit card, please include your credit card number and expiration date. Any repair left unpaid or
unclaimed after 90 days will be considered abandoned and will be disposed of accordingly. Please note: non-warranty
repair is only available on electronics and model engines.
Electronics and engines requiring inspection or repair should be shipped to the following address:
Horizon Service Center
4105 Fieldstone Road
Champaign, Illinois 61822
or
Horizon Hobby UK
Units 1-4, Ployters Road
Staple Tye - Southern Way
Harlow
Essex
CM187NS
United Kingdom
or
Horizon Technischer Service
Otto-Hahn-Str. 9a
25337 Elmshorn
Germany
USA: Please call 1 877 504 0233 or visit horizonhobby.com to nd our distributor for your country for support with
any questions or concerns regarding this product or warranty.
UK: Please call +44 1279 641 097 or sales@horizonhobby.co.uk with any questions or concerns regarding this
product or warranty.
Germany: Please call +49 4121 46199 66 or service@horizonhobby.de with any questions or concerns regarding
this product or warranty.
Instructions for Disposal of WEEE by Users in the European Union
This product must not be disposed of with other waste. Instead, it is the user’s responsibility to dispose of their waste
equipment by handing it over to a designated collection point for the recycling of waste electrical and electronic equipment.
The separate collection and recycling of your waste equipment at the time of disposal will help to conserve natural resources
and ensure that it is recycled in a manner that protects human health and the environment. For more information about
where you can drop off your waste equipment for recycling, please contact your local city ofce, your household waste
disposal service or where you purchased the product.
Mini-DT Quick Start Guide―Page 4
 Loading...