

Page 1
GETTING STARTED
NOTE:
Before you start your Muggy, read your engine break-in and operating instructions.
If you run your Muggy without following proper break-in procedure, you may damage
or fail to get maximum performance from your engine, and void the warranty.
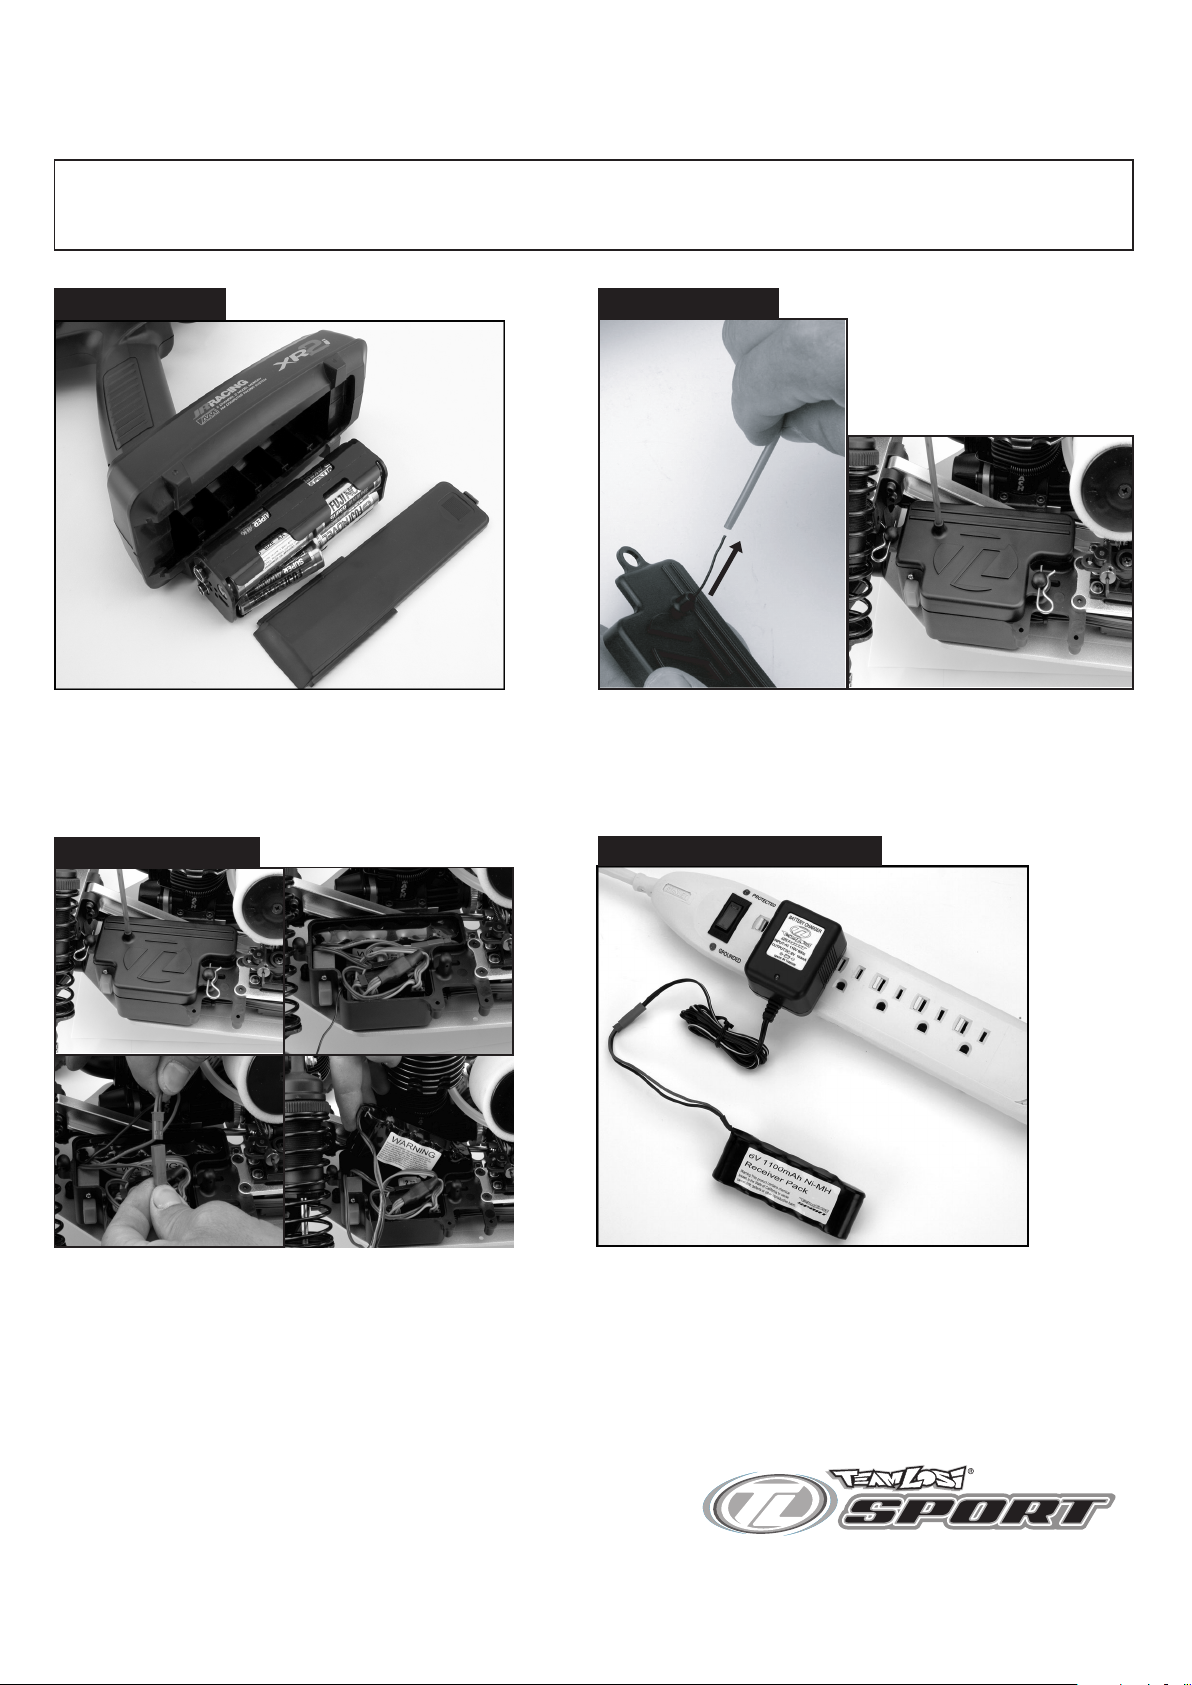
Radio Batteries
Install the 8 AA-size alkaline batteries in the
transmitter making sure the positive(+) and
negative (-) ends are oriented correctly. Use only
quality alkaline or rechargable Ni-Cad batteries.
5 cell Receiver Pack
Antenna Tube
Locate the antenna tube in the plastic bag with the
Operations guide. Thread the black antenna wire through
the mounting boss on top of the receiver box cover and
through the antenna tube. Push the antenna tube into the
mounting boss and attach the antenna cap.
Charging the Receiver Pack
Note: Your Muggy is equipped with a rechargable receiver pack
installed in your truck. Follow the instructions to remove or
replace the receiver pack.
To remove or charge the battery pack remove the two
clips securing the reciever box cover. Unplug the
battery from the switch. Remove the battery from the
receiver box.
Plug the AC charger into the proper wall
receptacle (110V). Plug the battery pack into
the charger. When the battery is charging the
red indicator light will be on. The battery must
be charged for 12 hours to attain full charge.
Page 1
Page 2
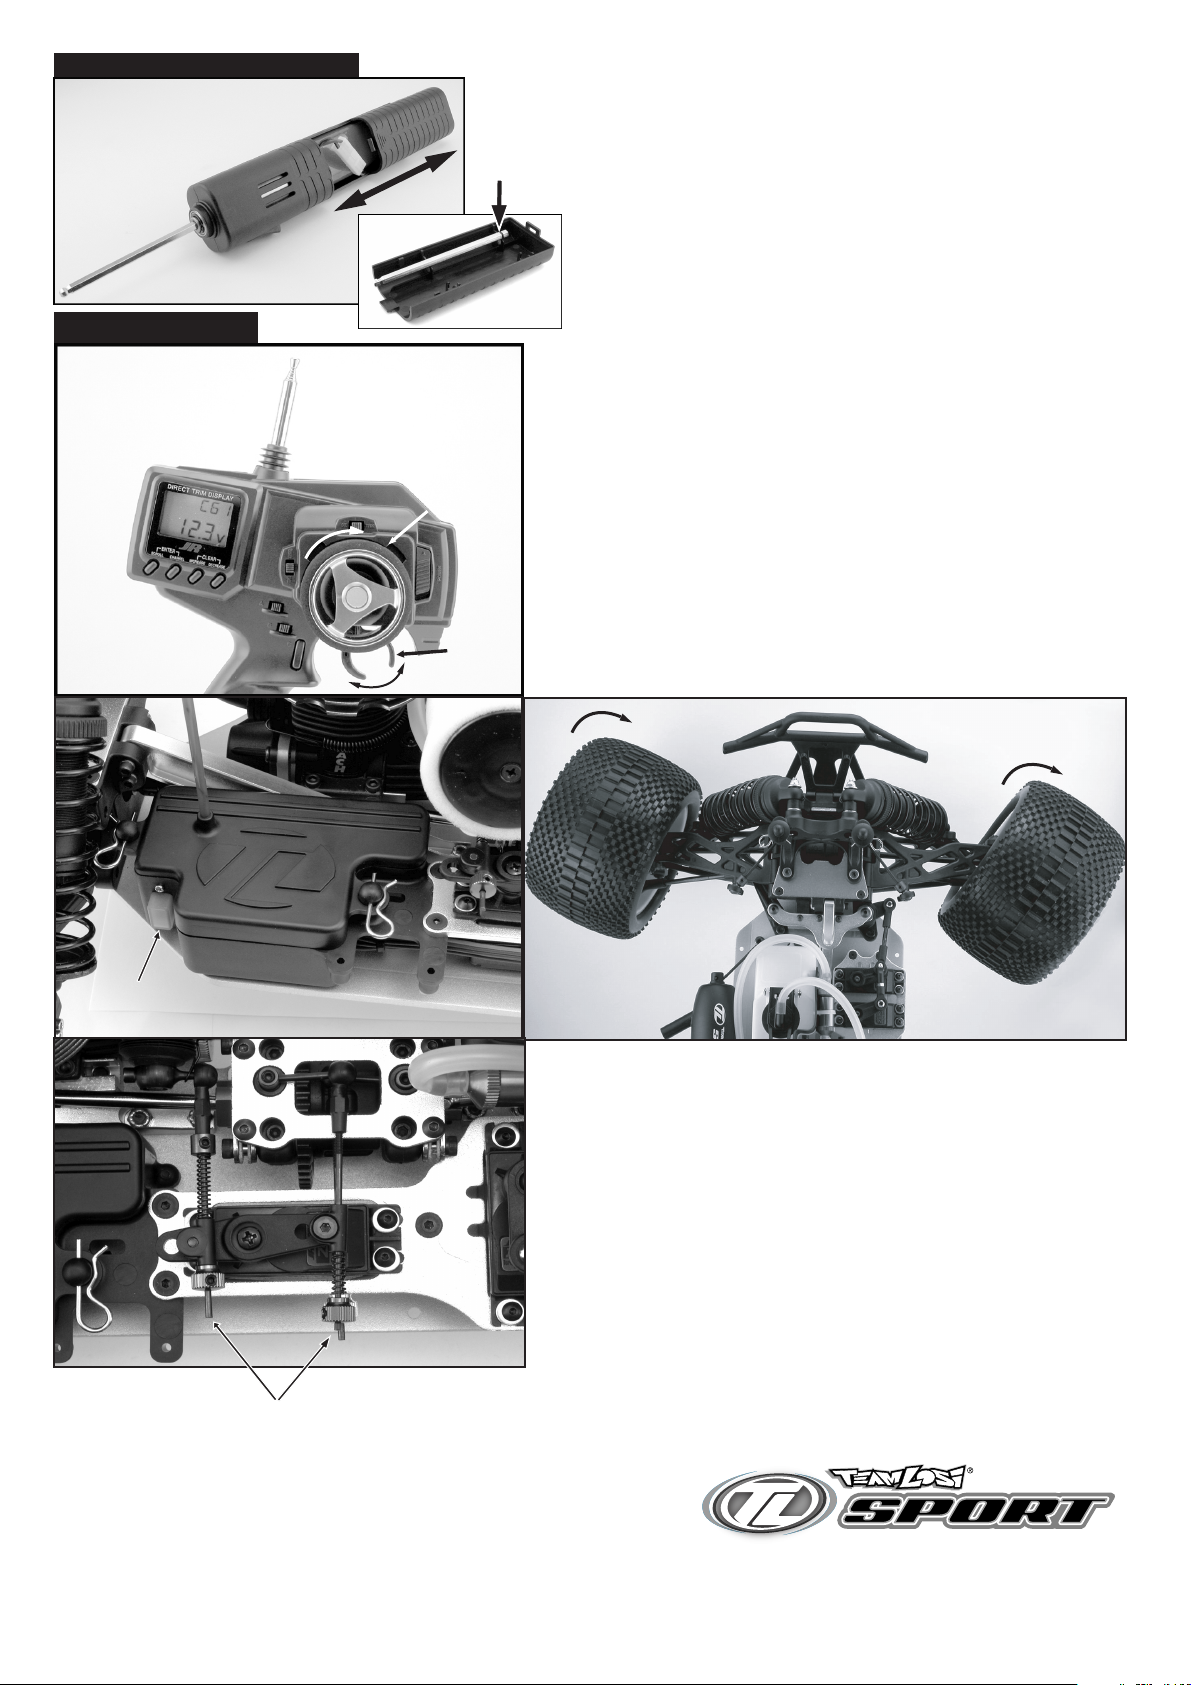
Rotary Starter Battery Install
Operations Check
O-ring
end.
Steering
Slide the battery access panel opposite the hand strap back
and remove the cover. Remove hex starter shaft from the
back side of the cover and press the o-ringed end into the
drive cup. Slide the 6 cell, 7.2 volt, "stick pack" into the SpinStart and plug it in. Note that the plug is made such that it can
only be plugged in one way. Carefully tuck the plug wires
under the battery access panel and slide shut.
Turn on the transmitter and check for proper voltage, 10-12.4
volts. Slide the switch on the side of the radio box to the ON
position. With the front tires off the ground turn the steering
wheel on the transmitter left to right. The wheels should turn
smoothly and with ease. Also operate the throttle and brake
checking for smooth operation. Do not try to operate your truck
if any of the servos or any part of the radio is not operating
correctly. If the servos operate slowly it is possible the
batteries are low and must be recharged. Never try to operate
your truck if either the transmitter or receiver batteries are low.
ON/OFF
Switch
Throttle`
Your Muggy is equipped with front and rear adjustable brakes.
To adjust the rear brake turn the red nob right or left. To
adjust the front brake turn the silver nob right or left. The blue
nob is the used to adjust your throttle linkage. A detailed
explanation of the throttle linkage setup is located in your
users manual. NOTE: The reference picture only shows one
brake adjuster. The second brake adjuster is located below.
Throttle/Brake
Linkage
Page 2
Page 3

Fueling
Fill your fuel bottle with fuel and lift the lid of the fuel
tank and fill the tank. Make sure to put the lid back on
both the fuel bottle and fuel jug.
Priming your Engine
Install Battery
e
z
i
S
”
C
“
- Neg
+ Pos
Remove the cover from the Glow plug igniter.
Install a "C" size Alkaline battery with the "+"
end of the battery as shown.
Insert the Spin-Starter into the back plate of the engine and plug the exhaust with a rag.
Press the Spin-Start button and turn over the engine for 5 seconds to help prime the
engine. Excessive priming will flood the engine and make it difficult to start.
Start your Engine
Attach the glow plug igniter to the glow plug. If you are using an aftermarket glow
igniter with a meter make sure the needle is in the green or good condition.
Holding the starter securely, press on the switch button and the engine should
turn over and start.
If the engine does not turn over, it may be flooded or the battery in the starter
needs to be charged. Use the 4-way wrench supplied to loosen the glow plug at
least two turns and press the Spin-Start button again. Raw fuel should come out
around the glow plug. Tighten the glow plug and resume the starting procedure.
Follow the engine break-in procedure, found in the Operations Guide, before
attempting any racing or high performance operation. Use caution when adding
fuel while the engine is running. Do not over fill or spill fuel outside the tank.
Page 3
Page 4

Stopping the Engine
Caution HOT!
When you are done running your Muggy use the handle of a screw driver or a
rag to cover the exhaust pipe exit. Be EXTREMELY careful not to burn you
hand as this will be hot.
Page 4
 Loading...