

Page 1
LOREX Technology Inc.
Copyright © 2007 LOREX Technology Inc. As our
products are subject to continuous improvement,
LOREX and its subsidiaries reserve the right to modify product design, specifications and prices, without
notice and without incurring any obligation. E&OE
Quick Set-up Guide
It’s all on the web
Product Information
User Manuals
Quick Start Guides
Specification Sheets
Software Upgrades
Firmware Upgrades
VISIT
www.lorexcctv.com
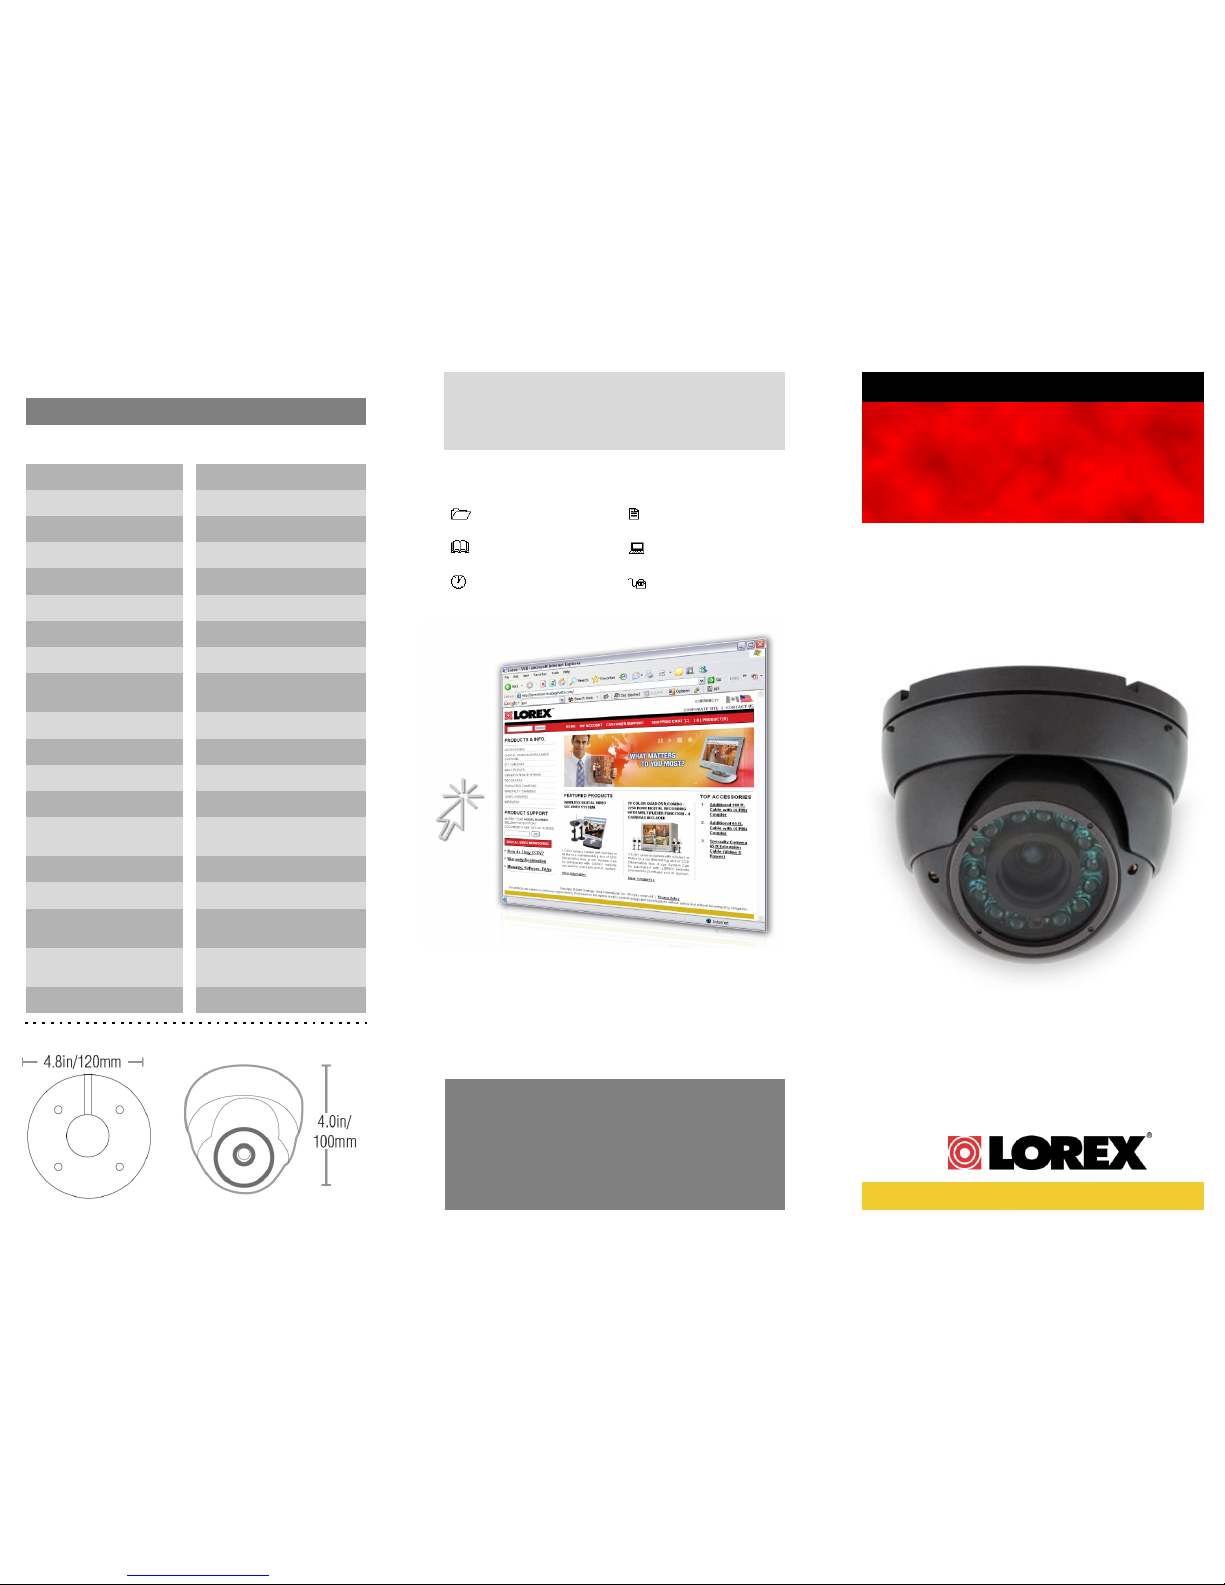
VANDAL RESISTANT
WEATHERPROOF
VARIFOCAL DAY/NIGHT
IR DOME CAMERA
Model: VQ1636HR
4. Camera Specifications
Specifications:
Image Sensor 1/3” Hi-Res Color CCD
Lens
Format / # Pixels
Horizontal Resolution
Minimum Illumination
IR Range
Scan System
FOV (Diagonal)
AES ShutterSpeed
Iris
S/N Ratio
Sync. System
Termination
Video Output
Power Consumption
NTSC: 768(H) x 494 (V)
480 TV Lines
0.1LUX (w/o LED)
0 LUX (w/LED)
Up to 60ft. (18.3m);14 LEDs
2:1 Interlace
35~70 Degrees
1/60 ~ 1/10,000 sec.
AES
More than 48dB
Internal
Video: BNC Female
Power: Barrel Female
Comp. 1.0 Vpp @ 75ohm
Max 300 mA @ DC 12V
Operating Temp
Weight
14°F ~ 113°F
(-10°C ~ 45°C)
1.9 lb. / 880g
4~9mm F1.6 / Varifocal
Power Requirement 12V DC
Dimension DIA: 4.8” (120mm)
H: 4.0” (100mm)
Page 2
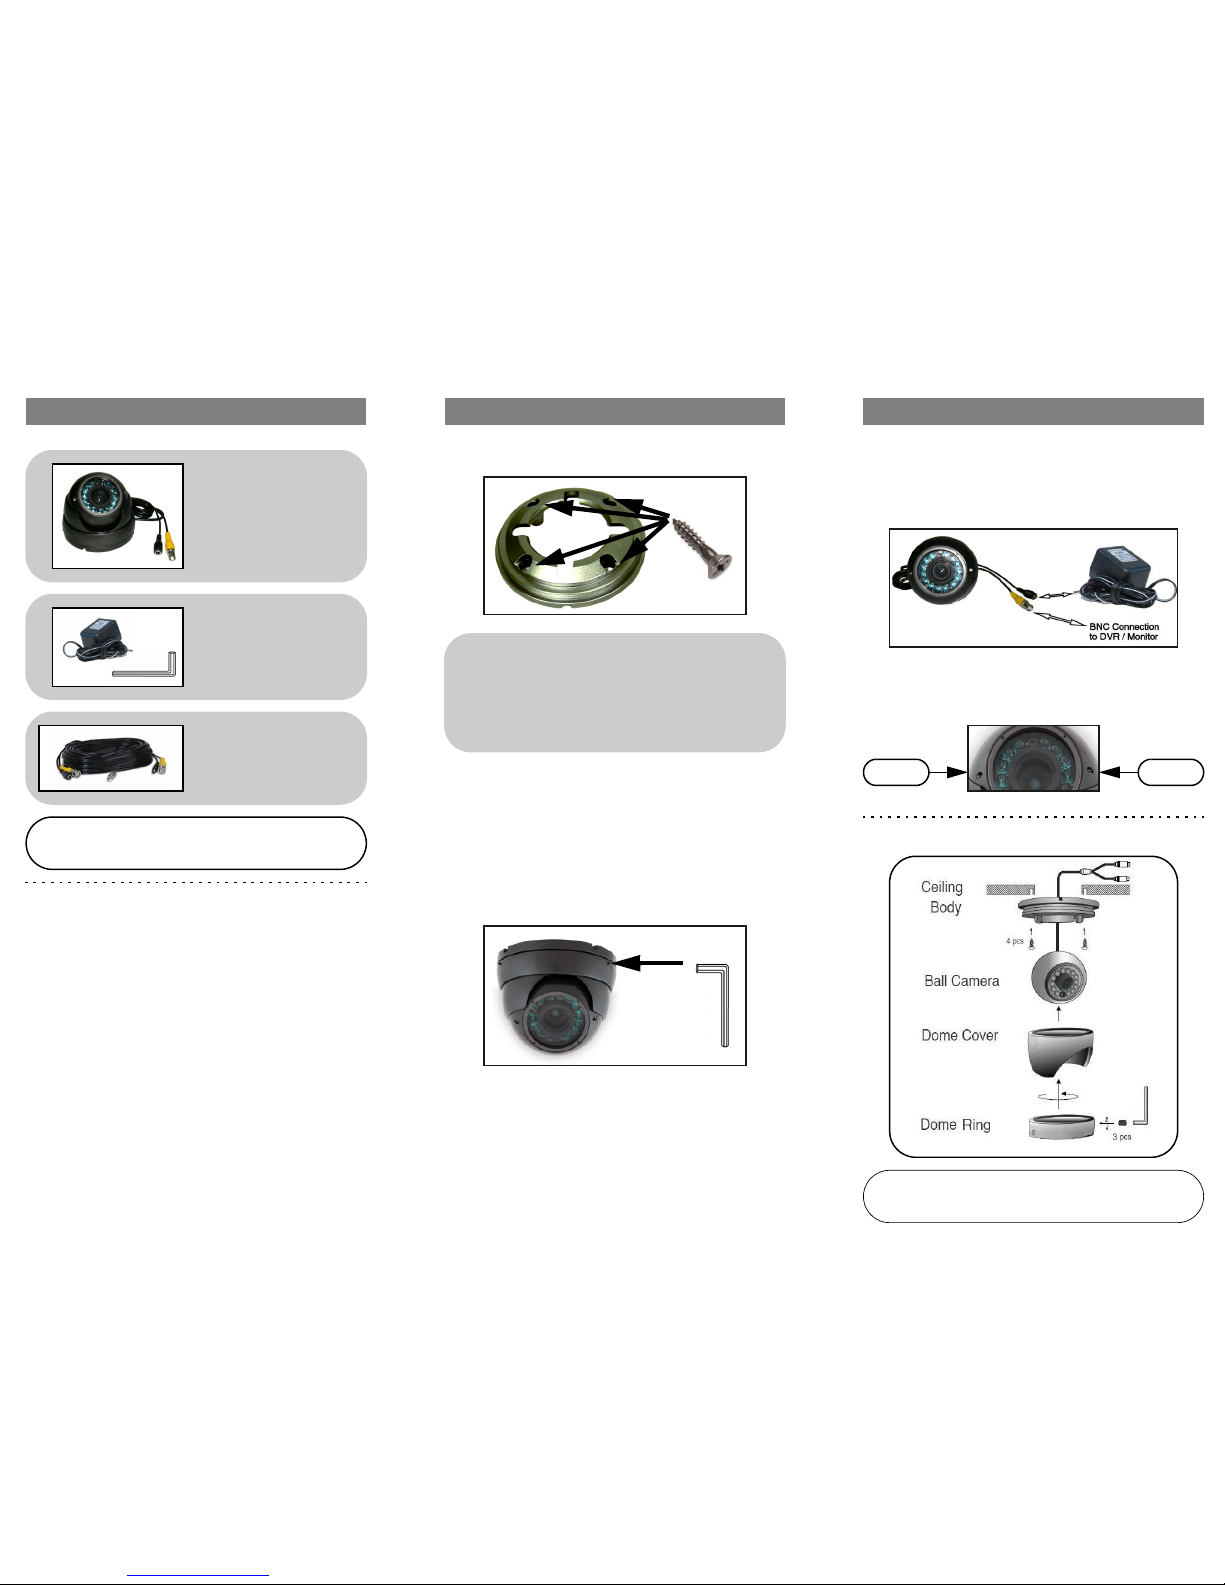
1. Package Contents
1 x 60 ft. extension cable
1 x BNC to RCA Adaptor
NOTE: Test the camera prior to selecting a permanent moun ting
location by temporarily connecting the Cameras and cables to the
system or DVR.
1 x Weatherproof Color
Day/Night Varifocal IR
Dome Camera (with
mounting hardware)
1 x Hex Tool for Dome
Cover
1 x AC Power Adapter
Features:
• True High Resolution: 1/3” CCD advanced image
sensor produces video with 480 TV Lines and 380K
pixels
• Varifocal 4-9mm lens for maximum viewing flexibility
• External zoom and focus adjustments make setup easy
• Advanced Day / Night mode: Picture automatically
switches camera to B&W delivering better clarity in low
light conditions
• 14 IR LEDs provides effective night vision range of 60
ft. (18.3m) *
• Ceiling or Wall Mountable
• Vandal Resistant Dome Can Withstand Impact from
10lb Sledge Hammer
• Weatherproof Design: Ideal for outdoor and indoor
applications (IP67) **
* IR Illumination range of 60ft. (18.3m) under ideal conditions.
Objects at or beyond this range may be partially or completely
obscured, depending on the camera application.
** Not recommended for submersion in water
WARNING - REGULATED 12V DC 500mA power supply is REQUIRED
for use with this camera. Use of a non-regulated, non-conforming power
supply can damage this product and will void the warranty.
2. Installing the Camera 3. Connecting the Camera
1. Mount the Camera Base to the Ceiling or
Wall using the provided screws.
2. Position the camera to the desired direction
and angle.
3. Position the Dome Cover over the Ball
Camera. Screw the Dome Ring on, and
tighten the screw using the provided Hex
Tool
4. Connect the BNC end of the Camera Cable
to the DVR or to a Monitor.
5. Connect the BNC end of the Camera Cable
to the Extension Cable. Connect the extension cable to an Observation System, DVR
or to a Monitor.
You may need to remove the Dome Cover,
Dome Ring and Ball Camera from the Camera
Base by loosening the tightening screws with
the provided Hex Tool, located on the Dome
Ring.
5. Connect the Power end of the Camera Cable
to the Extension Cable. Connect the extension cable to an AC Adapter. Plug the
adapter into a wall outlet.
6. Adjust the Zoom and Focus control screws
on the side of the camera using a screw
driver.
Setup Diagram:
Zoom Focus
 Loading...