

Lorex VANTAGE netHD LNR200 Series Quick Connection Manual
netHD LNR200 Series Quick Connection Guide - English - R1
Information in this document is subject to change without
notice. As our products are subject to continuous
improvement, Lorex Technology Inc. and our subsidiaries
reserve the right to modify product design, specifications and
prices, without notice and without incurring any obligation.
E&OE © 2013 LOREX. All rights reserved.
It’s all on the Web
www.lorextechnology.com
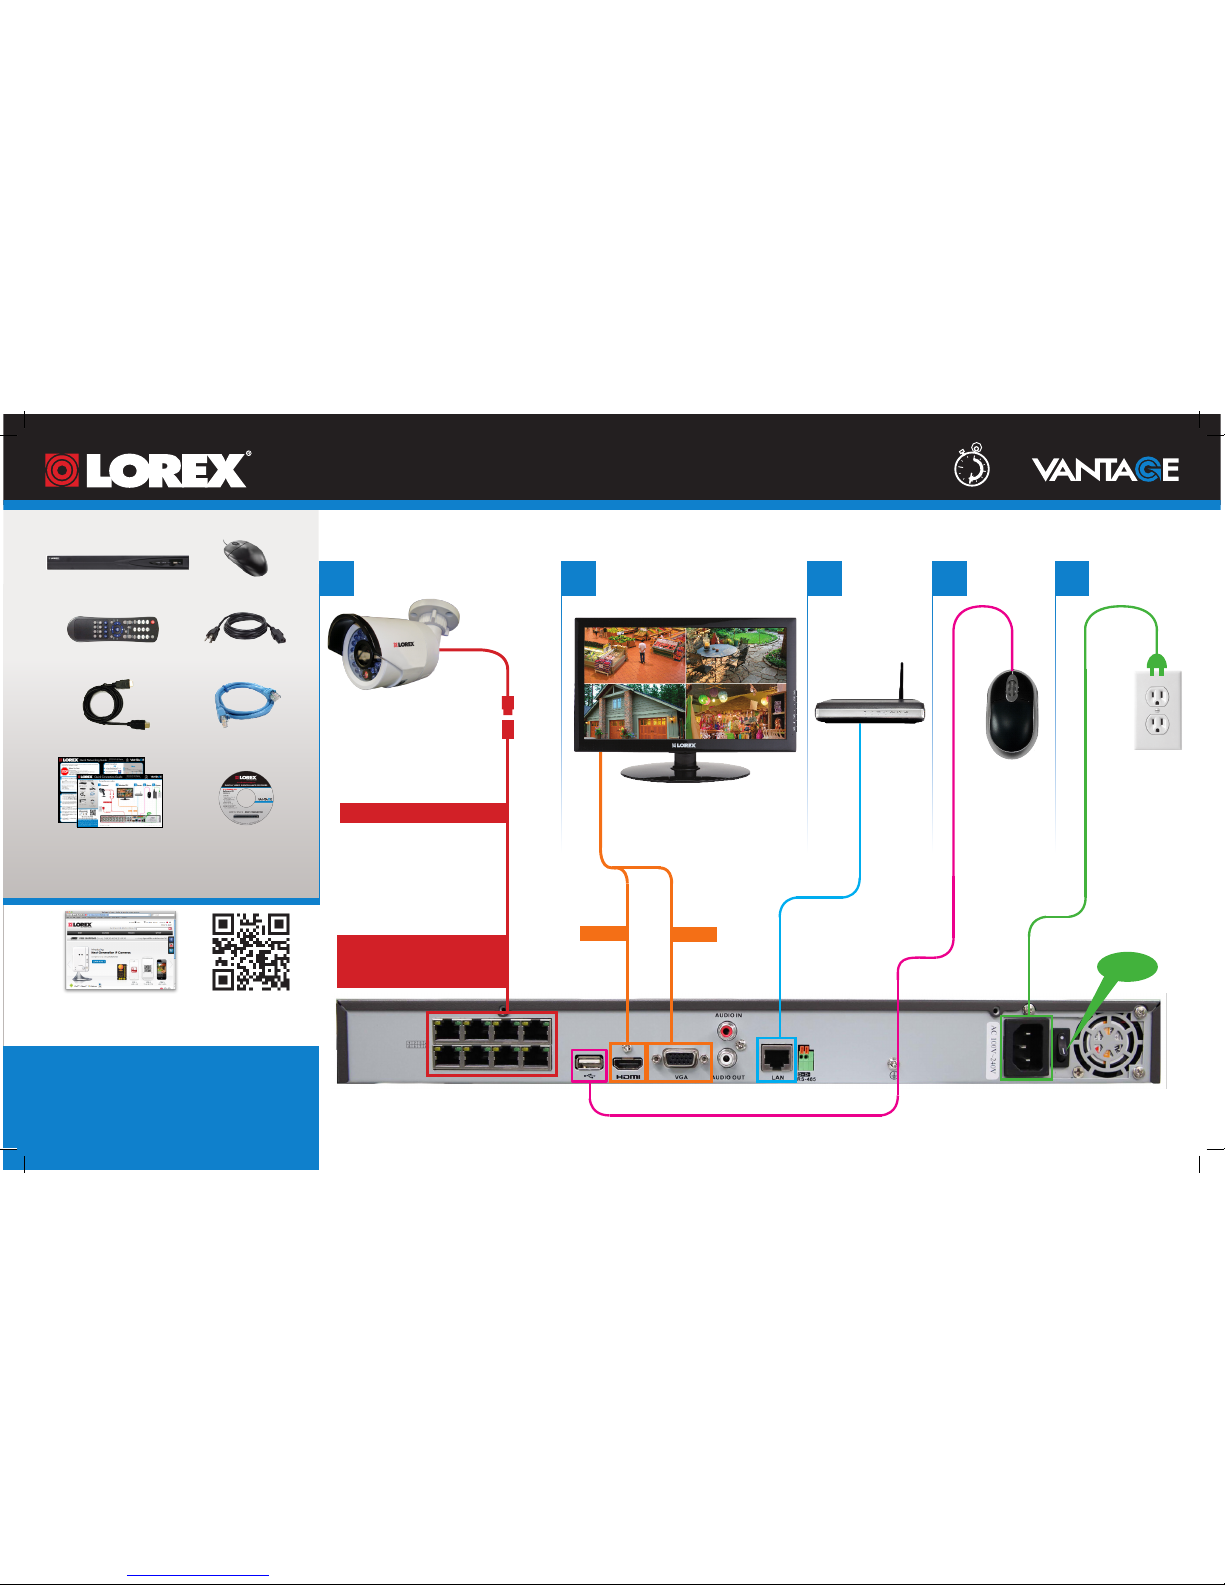
PACKAGE CONTENTS:
CD
(includes software
and manual)
HDMI cable
Remote control
Network Video Recorder
Quick Start Guides
Power cable
Ethernet cable
USB mouse
Connecting your system
*Not included/sold separately
21 3 5
Cameras* Monitor/TV* Router* Mouse Power
4
ON
HDMI
Ethernet Extension Cable*
VGA*
OR
Network Video Surveillance Recorder
netHD LNR200 Series
Quick Connection Guide
30 Minutes
NOTE: It may take up to
1 minute for cameras to start up
and transmit video to your NVR.
netHD LNR200 Series Quick Connection Guide - English - R1
1-19022013
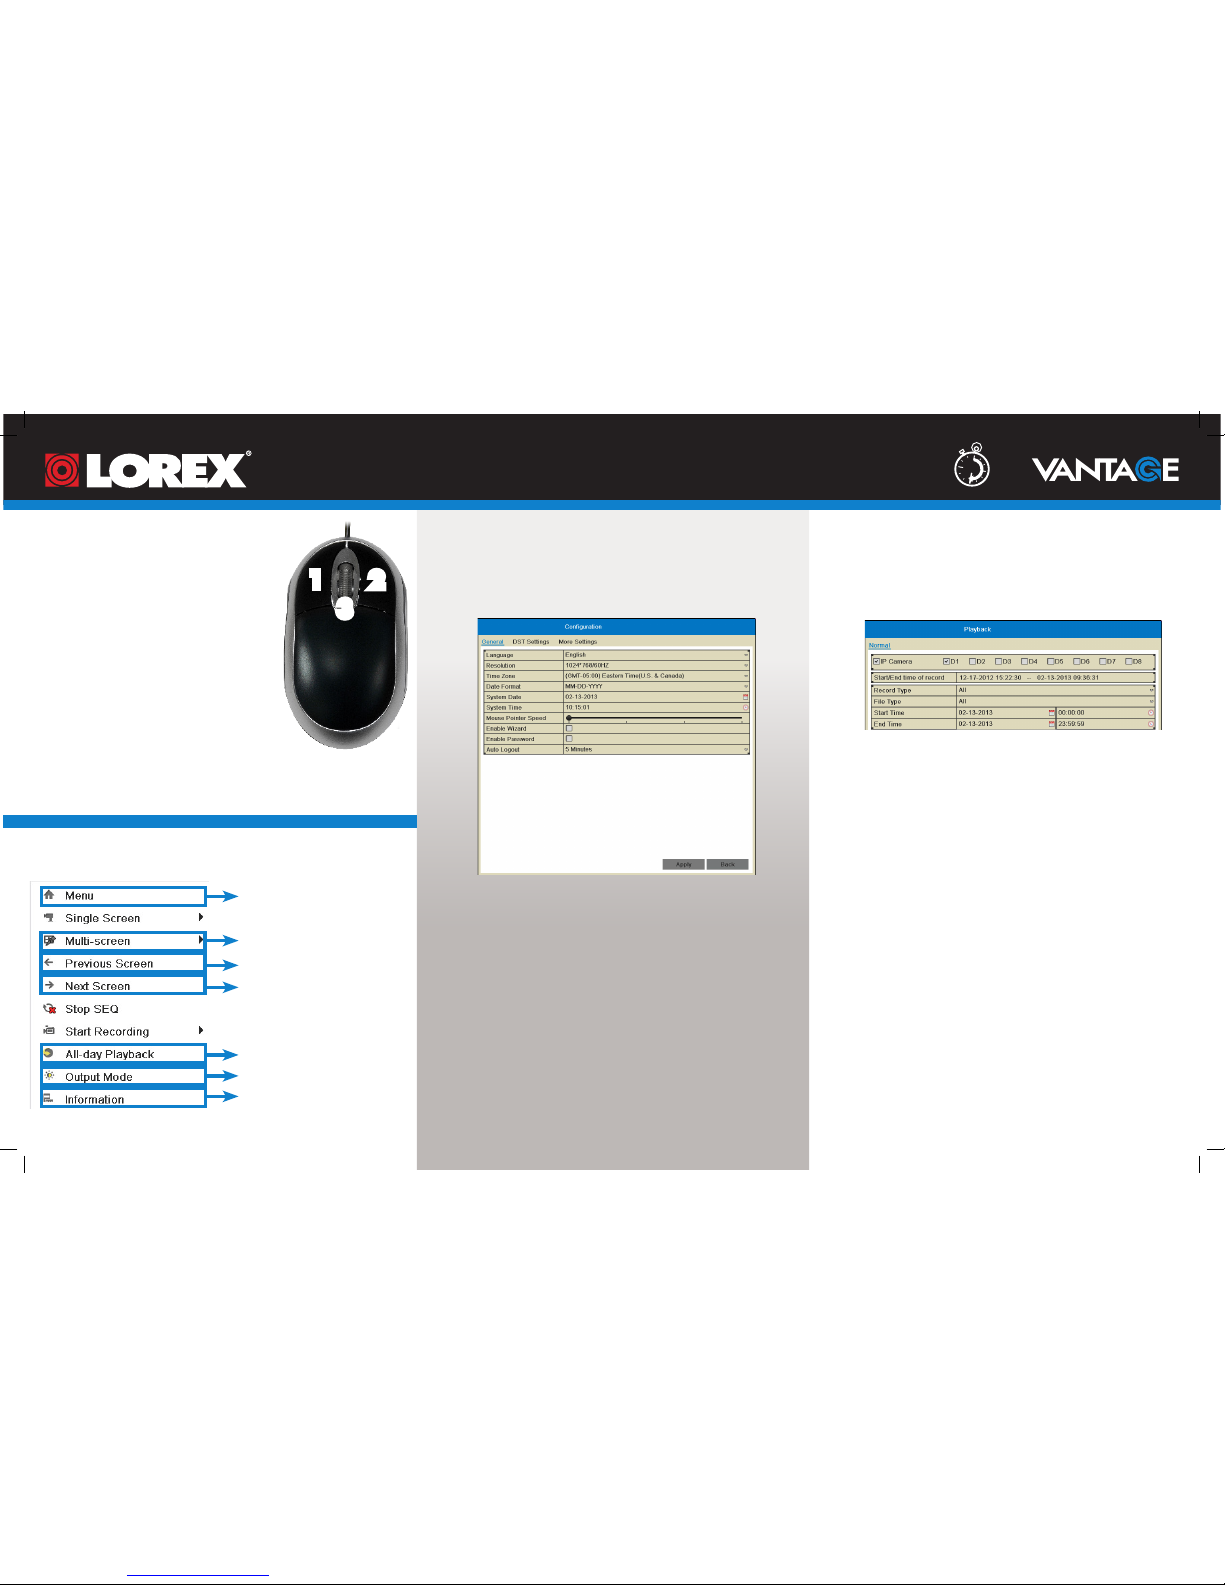
1: Left-click:
• Select a menu option
• During live view:
2: Right-click: Open the Quick
Menu or exit menus.
Right-click to open the Quick Menu.
Using the Mouse Setting the Date & Time Searching & Playing Back Video
1. Right-click to open the Quick Menu and then click
Menu.
4. Click Apply.
3.
1 2
It is important to set the correct time to assure accurate
time stamps on video recordings.
2. Select Playback.
Quick Menu Overview
Network Video Surveillance Recorder
netHD LNR200 Series
Quick Connection Guide
3.
30 Minutes
3
2. Click Configuration.
3: Scroll wheel: During live view, scroll up / down to
change channel.
Open the Main Menu.
Select the previous channel or group
of channels.
Select the next channel or group of
channels.
Access system information.
Choose color output mode for the
monitor.
Open Playback Mode for the currently selected channel.
4.
Click Playback to start playback from the earliest
available footage in your selected time range.
a.
b.
c.
a.
b.
c.
a. Select your Time Zone from the dropdown menu.
c. Click System Date and click arrows to enter the
Time.
b. Click Date Format and use the on-screen calendar to
enter the Date.
a. Under IP Camera, check the cameras you would
like to search for video.
c. Under End Time, select the end time for your search
in the same way that you selected the start time.
b. Under Start Time, select the start time for your
search. Click on the left to select the start date. Click
on the right to adjust the start time.
• Click on a camera to bring up the
Camera Toolbar.
• Double-click on a channel to view
in full-screen; double-click again to
return to split-screen view.
Select a split screen layout.
1. Right-click to open the Quick Menu and then click
Menu.
 Loading...