

Page 1
MODEL SG6160
WEATHERPROOF B&W VIDEO SECURITY CAMERA
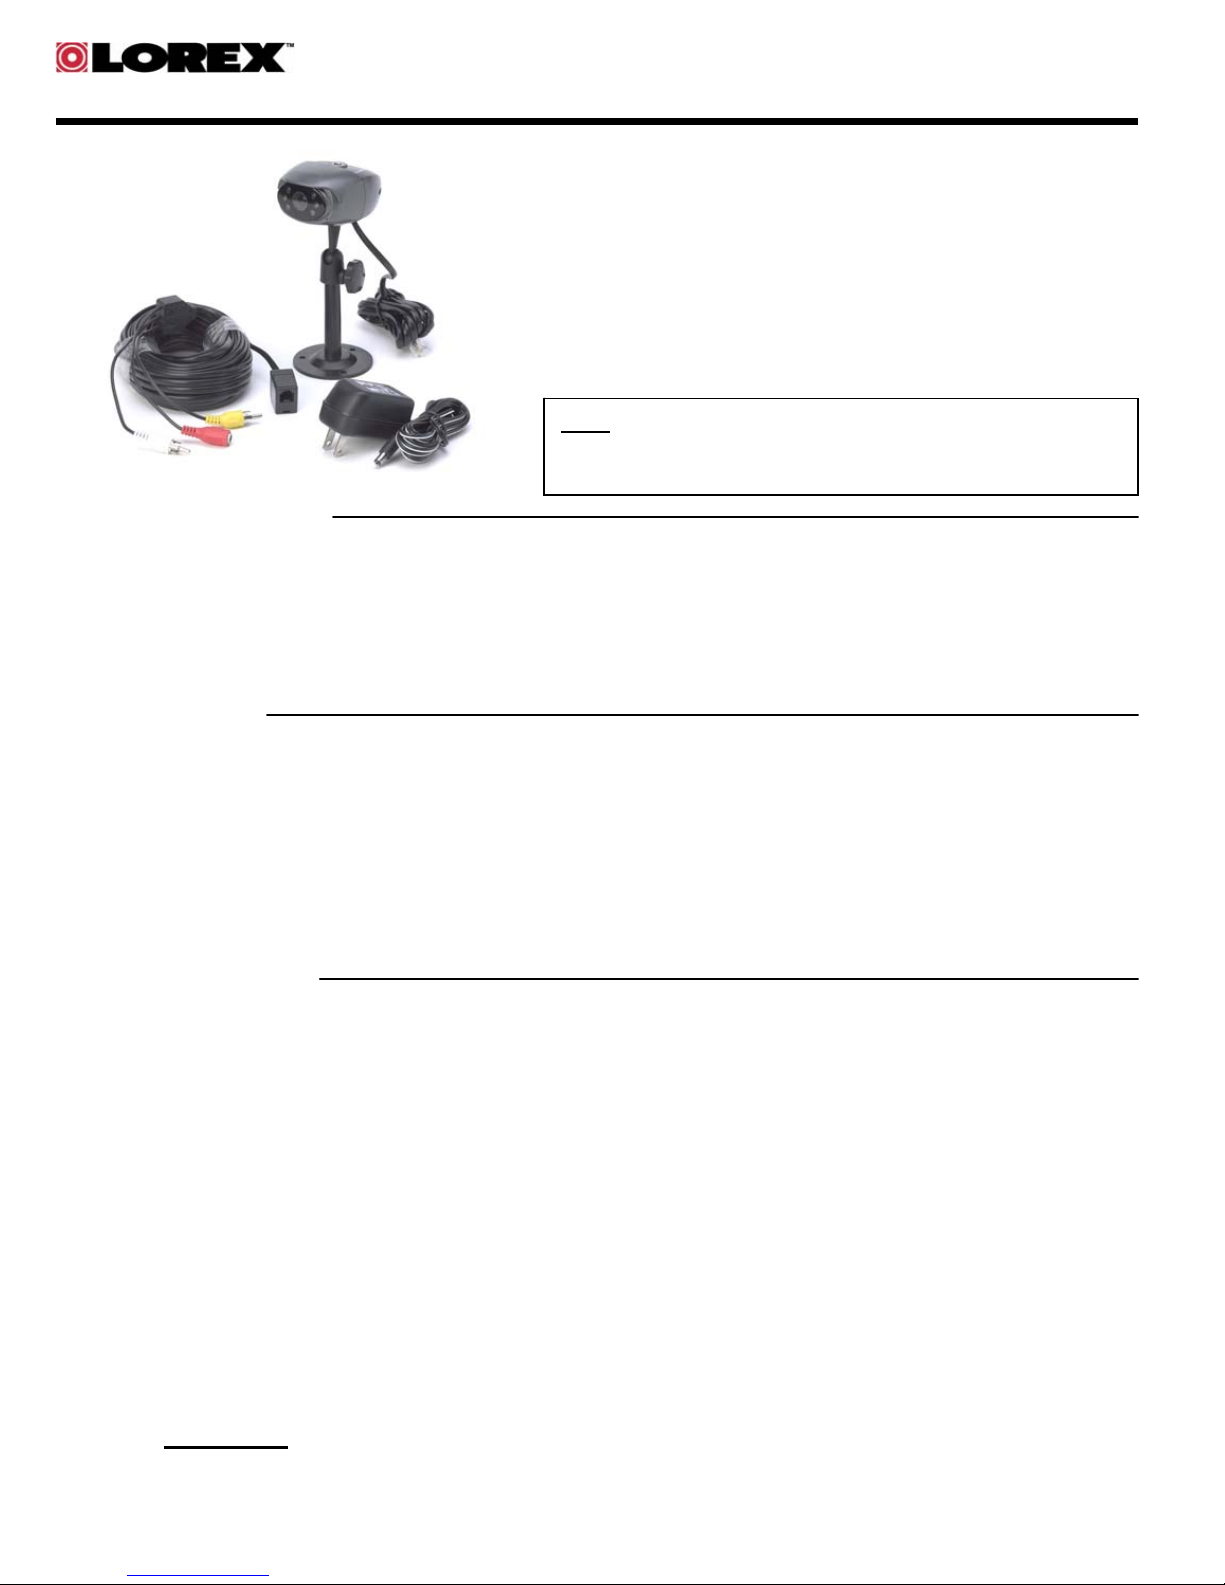
THIS PACKAGE CONTAINS:
1 - Camera with mounting bracket and 6ft cable
1 - 57 ft (17m) extensio n cable
1 - 9V DC, 120 mA Power Supply
2 - Fixing Screws and Masonry Plugs
1 - Owner’s Manual
Note: The combined cable run is 63 ft in total. (6 ft of
cable is attached to the camera plus an
additional 57 ft of cable is provided)
INTRODUCTION:
Congratulations on purchasing this Weatherproof B&W Video Security Camera. This camera is designed for
indoor or outdoor use,and allows you to see in the dark at close range. The camera easily connects to any
standard television or VCR. It allows you to see and hear events at the camera location by simply turning your
television or VCR to an A/V mode. This camera is ideal for monitoring or protecting your home, place of
business or other valuables. Please read this manual and keep it for future reference.
FEATURES:
• Easily connects to any TV with audio/video inputs
• Night vision capability of up to 3 ft
• Weatherproof Camera Housing Ideal for Indoor or Outdoor applications
• Listen-in, one way audio communication
• Fixed wide angle lens provides maximum viewing area
• Built-in auto-iris lens compensates for changing light conditions
• 0.5 lux minimum illumination at an infrared range of 3 ft
• Record picture to any standard VCR
INSTALLATION:
1. Mount the camera bracket in the chosen location by drilling holes for the masonry plugs and
screws. (A wooden surface will not require the use of drilling or masonry plugs)
2. Position the ball joint in the direction you want the camera to point.
3. Place the camera onto the ball joint arm and carefully tighten the retaining screw until the camera
is fixed at the desired view. DO NOT OVERTIGHTEN
4. Plug the camera lead (telephone cable) into the telephone RJ11 socket. The other end of this cable
has RCA connectors which consists of a video (yellow), audio (white), and power (red) connection.
5. Connect the RCA cable to your TV or VCR. The yellow video RCA cable should connect to the
video input of your TV/VCR, and the white audio RCA cable should connect to the audio input on
your TV/VCR
6. Plug the power supply into an electrical outlet, and plug the other end into the RED plug on the
camera
7. Switch on your TV/monitor and tune to an A/V, or AUX Channel
Please Note
the remote control (Usually marked AV or AUX). Please refer to your instruction manual or TV
retailer if you cannot access your A/V, or AUX channel for viewing the camera.
: The A/V or Aux. channel can be selected by pressing the correct button on the TV or
Page 2
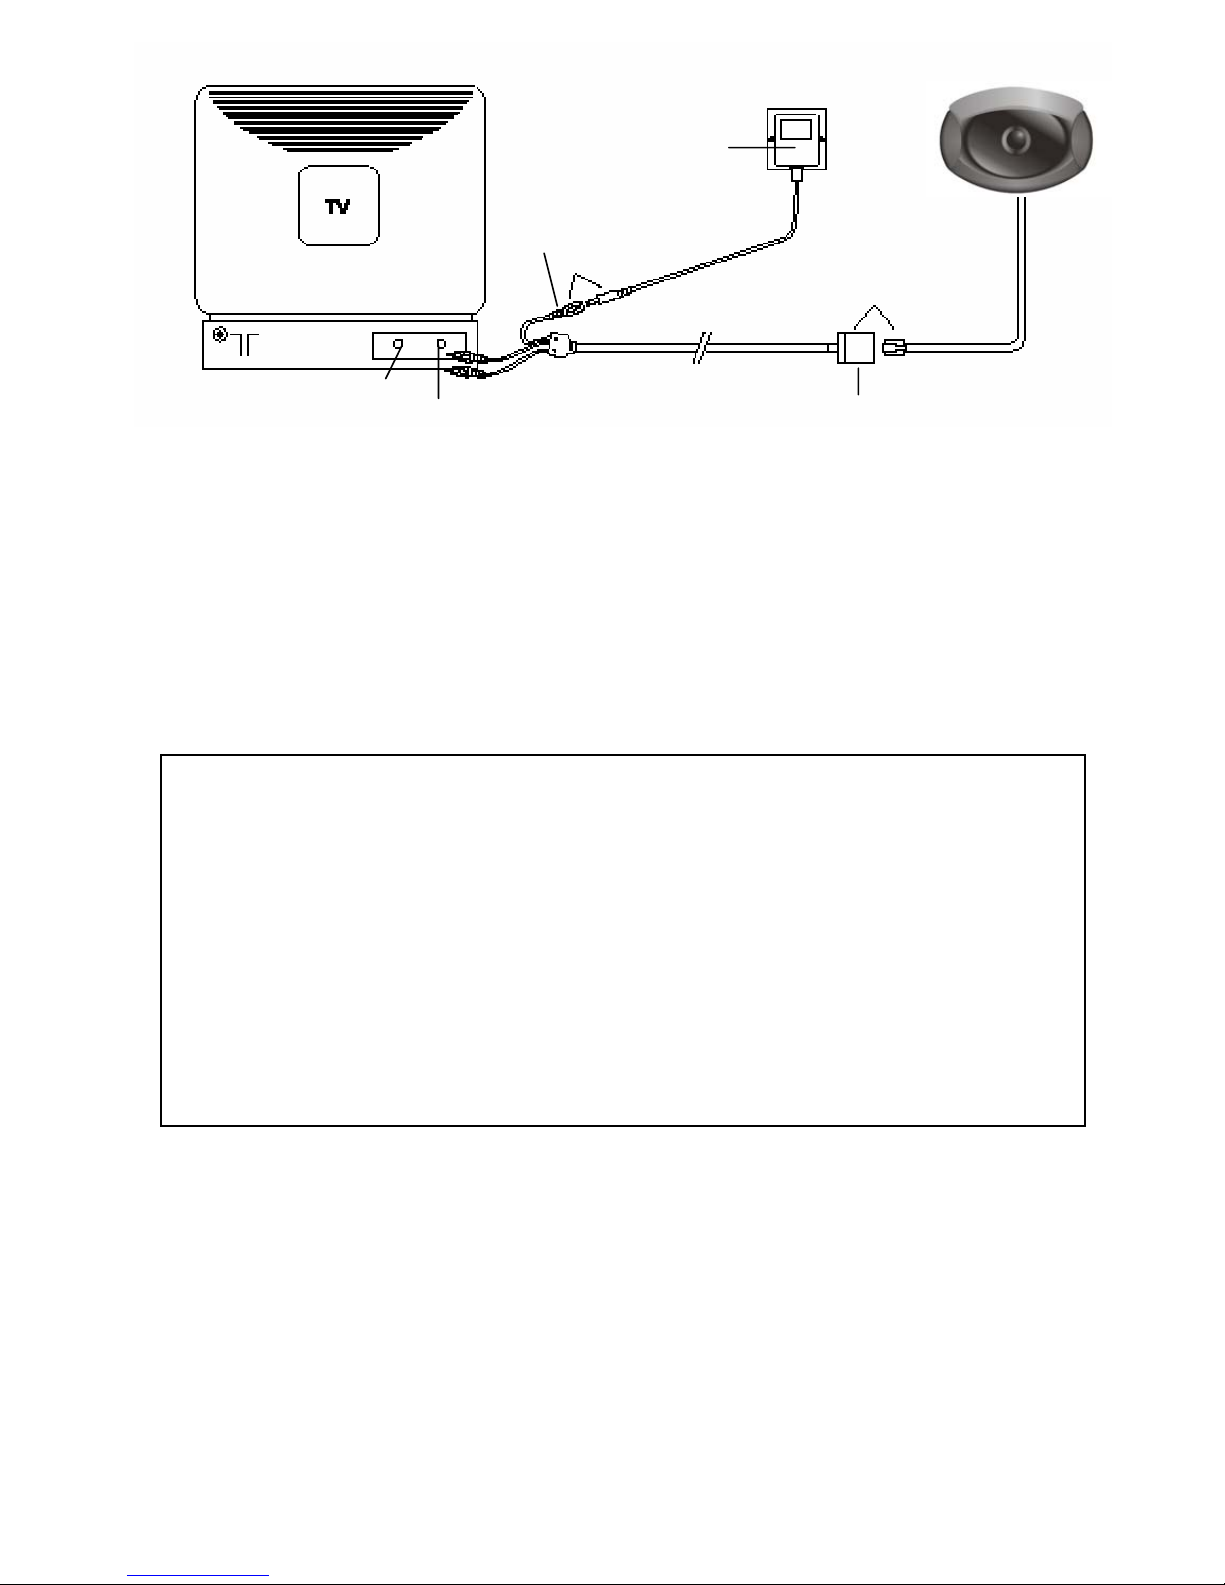
Camera
Audio
In
Video In
Wall Socket
Adapter
Power
Socket
RJ 11 Plug
Tips for Installation:
• The camera must not be focused to look directly in to the sun or any other bright light source. This will
produce a poor image and damage the camera
• The camera is at the best viewing angle when it is looking down at the subject
• When using the camera at a door to monitor visitors, make sure that you position the camera close
enough for the microphone to pick up sound
• The camera is “splash-proof”, but not waterproof. Do not install the camera where it comes in contact
with heavy rain or snow
SPECIFICATIONS
Image Pickup Device 1/4” B&W CMOS Sensor
Lens 3.7mm, F2.0
Viewing Angle 70 degrees ( Diagonal)
Number of Pixels 320(H) x 240(V)
Horizontal Resolution 280 TV lines
Minimum Illumination 0.5 Lux at 3 ft
Electronic Shutter Time 1/50 – 1/160,000 seconds
Video Output 1 Vp-p
Audio Output 1.3 Vp-p
Power Supply 9 V DC, 120 mA
Operational Temperature -10°C to +45°C (14°F to 113°F)
Distributed By:
STRATEGIC VISTA
300 Alden Road, Markham, Ontario, Canada L3R 4C1
For more information:
As our products are subject to continuous improvement, SVII and its subsidiaries reserve the right to modify product
design, specifications and pric es, without notice and without incurring any obligation. E&OE
www.strategicvista.com
 Loading...