

Page 1

It’s all on the web
Quick Set-up Guide
Image Device B&W CMOS
Resolution 240 TV Lines
Shutter Control Auto 1/60 – 1/6,000 SEC
Lens 3.6mm F2.0
Minimum Illumination 0.5 LUX, 0 LUX with IR LED
Power Requirement 9V DC Adapter (included)
Operating Temperature 14ºF to 113ºF (-10ºC to 45ºC)
Housings ABS Plastic
4. View the Camera Picture
Product Information
User Manuals
Quick Start Guides
Specification Sheets
Software Upgrades
Firmware Upgrades
www.lorexcctv.com
VISIT
Strategic Vista International Inc.
Copyright © 2005 Strategic Vista International Inc
As our products are subject to continuous improvement, SVII
and its subsidiaries reserve the right to modify product design,
specifications and prices, without notice and without incurring
any obligation. E&OE
WEATHER RESISTANT B&W
CAMERA with NIGHT VISION
BUSINESS & HOME
Model SG6117
a. Turn on your TV
b. To view the picture from the camera, select the
corresponding video input (i.e. Video Input 1 or
AUX etc.).
This camera can also be connected to a video
cassette recorder (VCR) or Digital Video Recorder
(DVR) that provides RCA camera cable input jacks.
Specifications
Refer to your VCR’s (or camera’s) owner’s manual
for instructions for connecting the VCR
Page 2
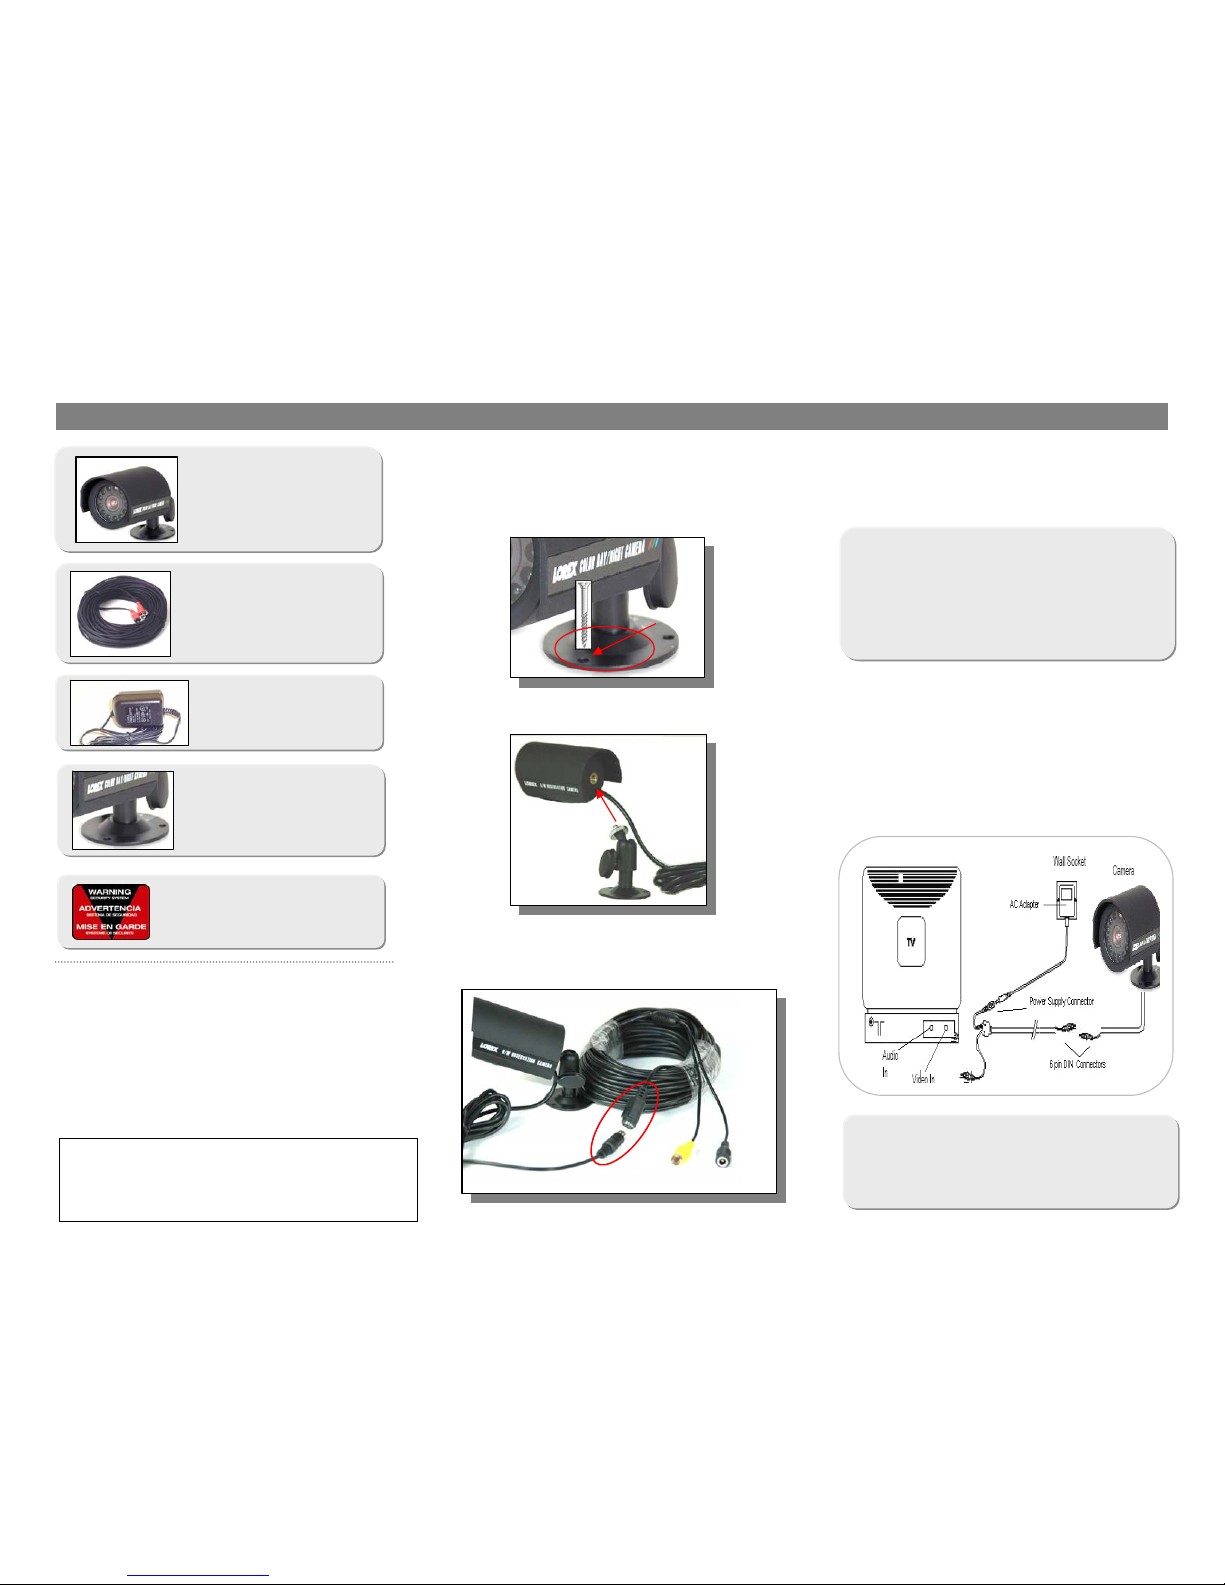
1. Confirm Package Contents 2. Mount the Video Camera
3. Connect the Camera to the TV
Features:
• Weather Resistant camera ideal for outdoor or
indoor applications *
• 12 high intensity IR LEDs provide illumination in
no/low light conditions up to 15 ft **
• Easily connects to most TV’s/ VCR’s
• Mounts Easily to Walls or Ceilings
AC Adapter
SG6117 Camera with 6’ cable
c. Apply power to the camera by plugging the AC
Adapter into the extension cable power jack and
then into the wall.
100 ft extension cable
a. Screw the camera bracket to the wall/ceiling in
the desired location with enough clearance for the
camera.
b. Install the camera on the camera bracket
Warning Window Sticker
b. Connect the RCA plug into the Video In (or
Aux) terminal of the TV.
a. Run the 100 ft extension cable (from the
camera) to the TV.
NOTE: The extension cable terminates with an RCA
plug (used to connect the camera to the TV) and a
power jack (used to conntect to the AC Adapter to
power the camera).
Camera Mounting Bracket
from camera
ext. cable
c. Connect the 100 ft extension cable to the
camera.
to TV
to AC
adapto
r
Take Sunshade Off
1. Hold body of housing (rear of camera faces you)
2. Pull sunshade backwards (towards you)
Put Sunshade On
1. Push the sunshade forward (away from you)
* NOT designed for direct exposure to water, rain or snow
** IR Illumination range of 15 ft under ideal conditions. Objects or
beyond this range may be partially or completely obscured,
depending on the camera application.
 Loading...