

Page 1
OWNER’S MANUAL — Please read before using this equipment.
Simulated Security Camera
Your Lorex Simulated Security Camera is an affordable and
effective theft-deterrent device. With its flashing red indicator and
camera cable, it looks like a real surveillance camera. You can easily mount the simulated security camera indoors or outdoors to deter
possible thieves and intruders.
Your simulated security camera comes with a wall mounting plate,
camera cable, camera stand (connected to the wall mounting plate),
three 1-inch (25.4 mm) screws, and three drywall anchors.
INSTALLING BATTERIES
Your simulated security camera requires two C batteries (not supplied) for power.
Cautions:
•Use only fresh batteries of the required size and recommended
type.
•Do not mix old and new batteries, different types of batteries
(standard, alkaline, or rechargeable), or rechargeable batteries
of different capacities.
Follow these steps to install batteries.
1.Use a Phillips screwdriver to loosen the four screws on the bottom of the simulated security camera, then remove the battery
compartment cover.
2.Place the batteries in the compartment as indicated by the
polarity symbols (+ and –) marked inside.
3.Replace the cover and secure it with the screws.
Fresh batteries will power the simulated security camera’s indicator
for about 4 months. When the indicator dims or stops flashing, replace the batteries.
Warning:
Dispose of old batteries promptly and properly. Do not
burn or bury them.
Caution:
If you do not plan to use the simulated security camera
with batteries for a month or more, remove the batteries. Batteries
can leak chemicals that can destroy electronic parts.
INSTALLING THE SIMULATED SECURITY
CAMERA
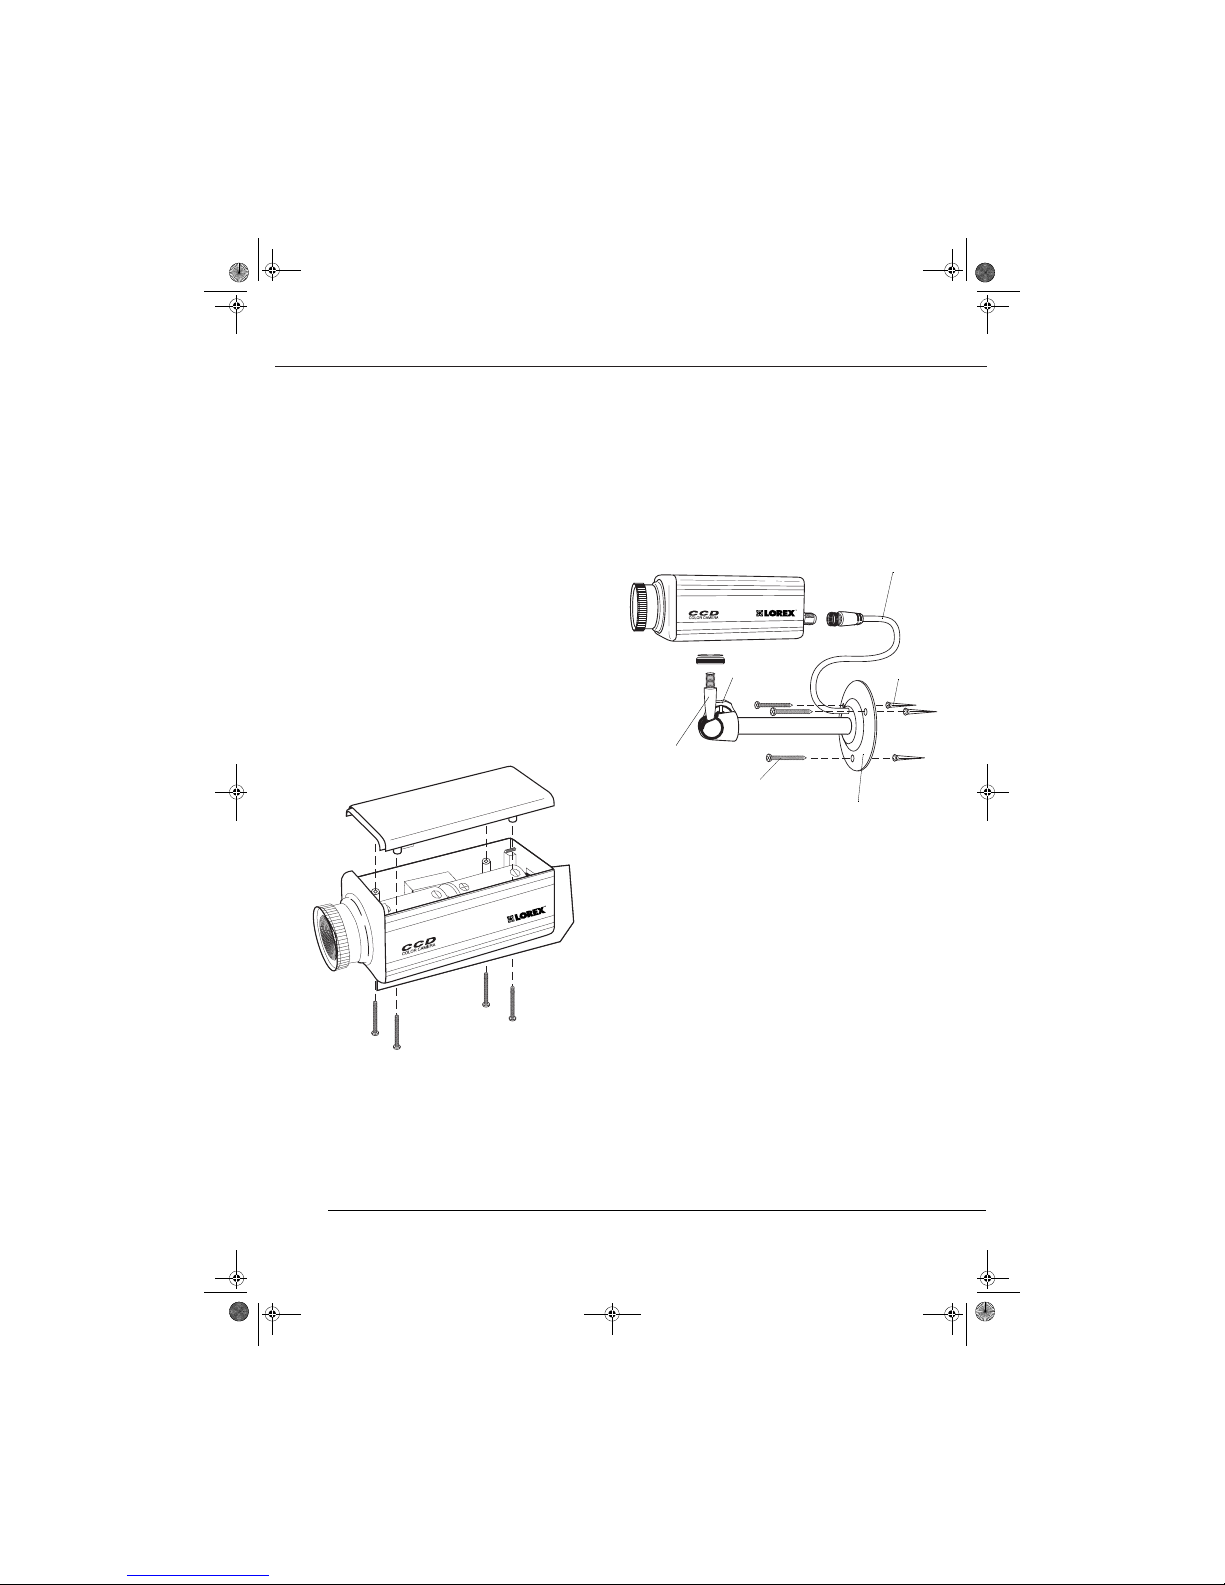
1.Using the wall mounting plate as a template, use a pencil to
mark the position of the three screw holes on the mounting location.
2.Drill three 1-inch (25.4 mm) holes in the marked positions.
3.If necessary, insert the three supplied drywall anchors into the
screw holes.
4.Insert a 1-inch (25.4 mm) screw through each of the three screw
holes in the wall mounting plate and into the mounting surface,
then tighten the screws.
5.Insert the bolt at the top of the camera stand into the nut in the
bottom of the simulated security camera, then use a pair of pliers to firmly tighten it.
6.Turn the camera stand’s knob to tighten the swivel on the camera stand.
7.Connect the camera cable’s F connector to the plug on the back
of the simulated security camera.
USING THE SIMULATED SECURITY
Wall Mounting Plate
Camera Cable
1-Inch (25.4 mm) Screws
Camera
Stand
Drywall
Anchor
Knob
Page 2
CAMERA
Set
ON/OFF
on the rear of the simulated security camera to ON to
turn it on. The red indicator flashes. Set
ON/OFF
to
OFF
to turn off the
simulated security camera.
CARE
Keep the simulated security camera dry; if it gets wet, wipe it dry immediately. Use and store the simulated security camera only in normal temperature environments. Handle the simulated security
camera carefully; do not drop it. Keep the simulated security camera
away from dust and dirt, and wipe it with a damp cloth occasionally
to keep it looking new.
Modifying or tampering with the simulated security camera’s internal
components can cause a malfunction and might invalidate its warranty.
SPECIFICATIONS
Power Source .............................................................. DC 3V (2 C batteries)
Alkaline Battery Life .............................................................. About 4 Months
Dimensions:
Camera (HWD) ............................................... 115/16 × 113/16 × 5 Inches
(50 × 46 × 127 mm)
Wall Mounting Plate and Camera Stand (HD) ............ 51/2 × 23/8 Inches
(140 × 60 mm)
Weight (mounted, without batteries) ..................................................... 9.2 oz
(260 g)
Because out products are subject to continuous improvement, LOREX reserves
the right to modify product design and specifications without notice and without
incurring any obligation. E&O.E.
 Loading...