

Page 1

www.lorexcctv.com
LOREX ROAD WARRIOR
MOBILE DIGITAL VIDEO RECORDER
INSTRUCTION MANUAL
English Version 2.0
™
MODEL:
RW2S SERIES
Copyright © 2010 Lorex Technology Inc.
www.lorexcctv.com
Page 2
Thank you for purchasing this product. Lorex is committed to providing our customers
with a high quality, reliable security solution.
This manual refers to the following model(s):
• RW2S Series
For more information on this product, firmware updates, and accessory products, please
visit us at:
www.lorexcctv.com
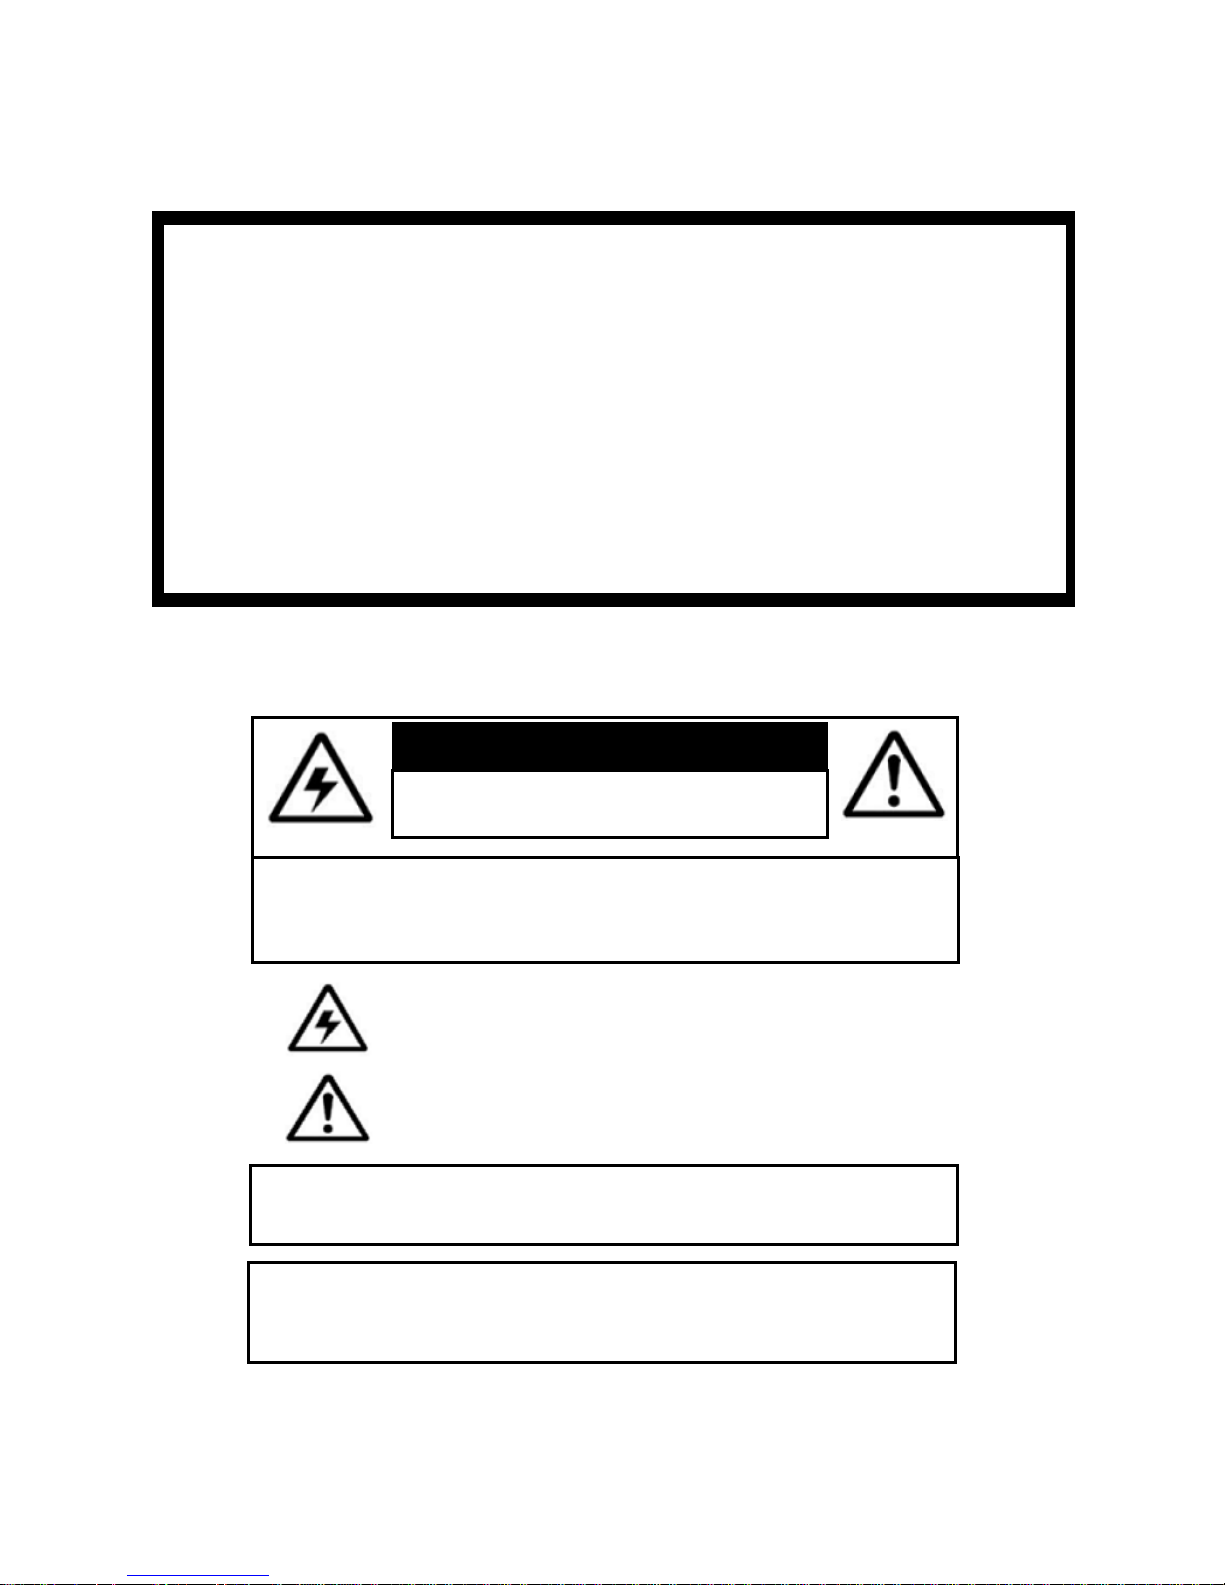
CAUTION
RISK OF ELECTRIC SHOCK
DO NOT OPEN
CAUTION: TO REDUCE THE RISK OF ELECTRIC SHOCK DO NOT
REMOVE COVER. NO USER SERVICABLE PARTS INSIDE.
REFER SERVICING TO QUALIFIED SERVICE PERSONNEL.
The lightning flash with arrowhead symbol, within an equilateral
triangle, is intended to alert the user to the presence of uninsulated
"dangerous voltage" within the products ' enclosure that may be of
sufficient magnitude to constitute a risk of electric shock.
The exclamation point within an equilateral triangle is intended to
alert the user to the presence of important operating and
maintenance (servicing) instructions in the literature accompanying
the appliance.
WARNING: TO PREVENT FIRE OR SHOCK HAZARD, DO NOT
EXPOSE THIS UNIT TO RAIN OR MOISTURE.
CAUTION: TO PREVENT ELECTRIC SHOCK, MATCH WIDE BLADE
OF THE PLUG TO THE WIDE SLOT AND FULLY INSERT.
Page 3

B E F O R E Y O U S T A R T
THIS PRODUCT MAY REQUIRE PROFESSIONAL INSTALLATION
LOREX IS COMMITTED TO FULFILLING YOUR SECURITY NEEDS
• We have developed user friendly products and documentation.
Please read the Quick Start Guide and User Manual before you
install this product.
• Consumer Guides and Video Tutorials are available on our web
site at www.lorexcctv.com/support
• If you require further installation assistance, please visit
www.lorexcctv.com/installation or contact a professional
installer.
• Please refer to the “Need Help” insert for technical support and
customer care information.
• Please note that once the components of this product have been
unsealed, you cannot return this product directly to the store
without the original packaging.
www.lorexcctv.com
Page 4

NEED HELP?
CONTACT US FIRST
DO NOT R E T U R N THIS PRODUCT TO THE STORE
Please make sure to register your product at www.lorexcctv.com to receive product updates and information
3 EASY WAYS TO CONTACT US:
Online:
Pr od u ct S up po r t is a v ai la b le 2 4/ 7 i nc lu di n g pr od uc t
in fo r ma ti on , us er m a nu al s, q ui ck s t ar t up gu id es a n d FAQ ’s
at w ww.lorexcct v.com/ suppo rt
To o rd er ac ce ss o ri es , v i si t
www.l orex cctv.com
By Email:
Te ch ni ca l S up po r t (f or te ch ni cal /i ns ta l la ti on is su es )
sup port @lore xcor p.co m
Cu st o me r Ca re (f or wa rr an ty an d ac c es so r y sa le s )
cus tome rservic e@lor exco rp. com
Cu st o me r Fe ed b ac k
inf o@lo rexco rp. com
By Phone:
NORTH AMERICA:
CUSTOMER SERVICE: 1-888-425-6739 (1-888-42-LOREX)
TECH SUPPORT: 1-877-755-6739 (1-877-75-LOREX)
MEXICO: 1-800-514-6739
INTERNATIONAL: +800-425-6739-0
(Ex amp le: Fr om the UK , dia l 0 0 i nst ead of +)
Ve rs i o n 7 - N o v 2 6 2 0 0 9
Page 5

AVANT DE
A N T E S D E
COMMENCER
CE PRODUIT POURRAIT EXIGER UNE
INSTALLATION PROFESSIONNELLE
LOREX S’ENGAGE À SATISFAIRE
VOS BESOINS SÉCURITAIRES
• Veuillez lire le guide de démarrage rapide et le
mode d’emploi avant d’installer ce produit.
• Les guides du consommateur et les séances
de tutorat vidéo sont disponibles sur l’Internet en
visitant www.lorexcctv.com/support
• Si vous avez besoin de l’aide pour l’installation,
E M P E Z A R
ESTE PRODUCTO PUEDE EXIGIR UNA
INSTALACIÓN PROFESIONAL
LOREX SE COMPROMETE A SATISFACER
SUS NECESIDADES EN SEGURIDAD
• Favor de leer la guía de instalación rápida y la
guía del usuario antes de instalar este producto.
• Puede conseguir las guías del consumidor y
los cursos en enseñanza video sobre el Internet
visitando www.lorexcctv.com/support
• Si necesita ayuda para la instalación, visite
veuillez visiter www.lorexcctv.com/installation
ou contactez un spécialiste en installation
• Veuillez référer à l’insert “Need Help” pour
ob¬tenir de l’information sur le service à la cli-
entèle et le support technique
• Veuillez constater qu’une fois que les
com¬posantes de ce produit ont été retirées de
l’emballage, vous ne pourrez plus retourner ce
produit directement au magasin.
www.lorexcctv.com/installation o contacte un
especialista en instalaciones
• Favor de referir al documento “Need Help” para
obtener información acerca del servicio al cliente
y al soporte técnico
• Favor de notar que una vez que los compo-
nentes de este producto han sido removidos del
embalaje, no podrá devolver este producto di-
rectamente a la tienda
w w w . l o r e x c c t v . c o m
Page 6

NECESITA AYUDA
VOUS AVEZ BESOIN
D’AIDE?
COMUNÍQUESE PRIMERO
CON NOSOTROS
NO DEVUELVA ESTE PRODUCTO A LA TIENDA
Cerciór ese de p or favor colocar su p roducto en www.
lorexcc tv.c om/regis trati on para recibir actualiz aciones y l a inform ación de l produc to
3 manera s sencillas de comuni carse
co n nosotros:
www
En línea:
apoyo al producto disponi ble 24/7 incluyendo información d el producto, manuales para el usuario, guías
de inici o rápido y preguntas más frecuentes en
www.lorexcctv.com/support
Para col ocar pedidos de accesorios, visite
www.lorexcctv.com
CONTACTEZ-NOUS
D’ABORD
NE RETOURNEZ PAS CE PRODUIT AU MAGASIN
Veu illez ve iller à enreg istrer v otre pro duit à w ww.
lorexcc tv.c om/regis trati on pour recevoir des mis es à
jour et l’infor mation d e produi t
3 façons faciles de nous cont acter:
www
En ligne:
le suppo rt des produits est disponible 24 heures sur 24, 7
jours su r 7, y compris les inf ormations sur les produits, les
guides d e l’utilisateur, les guides de d émarrage rapide et
les foires à questions
www.lorexcctv.com/support
Pour com mander des accessoires, visitez
www.lorexcctv.com
Por Correo Electrónico:
soporte técnico (para asuntos técnicos/la instalación)
support@lorexcorp.com
O
servicio al cliente (respecto a la garantía y a la venta
de acces orios)
customerservice@lorexcorp.com
Comentar ios de cliente
info@lorexcorp.com
Por Teléfono:
L’AMÉRIQUE DU NORD:
ATENCIÓN AL CLIENTE: 1-888-425-6739 (1-888-42-LOREX)
SOPORTE TÉCNICO: 1-877-755-6739 (1-877-75-LOREX)
MEXICO: 1-800-514-6739
INTERNACIONAL: +800-425-6739-0
(Ejemplo: Desde el Reino Unido, marque el 00 en lugar del +)
sus opiniones son bienvenidas en
info@lorexcorp.com
para colocar pedidos de accesorios, visite
Par Courriel:
support technique (pour les questions techniques et
d’instal lation) support@lorexcorp.com
OU
service à la clientèle (pour les questions de garantie
et les v entes d’accessoires)
customerservice@lorexcorp.com
Commenta ires des clients
info@lorexcorp.com
Par Téléphone:
NORTE AMÉRICA:
SERVICE À LA CLIENTÈLE: 1-888-425-6739 (1-888-42-LOREX)
SUPPORT TECHNIQUE: 1-877-755-6739 (1-877-75-LOREX)
MEXICO: 1-800-514-6739
INTERNATIONAL: +800-425-6739-0
(Exemple: À partir du Royaume-Uni, composez 00 au lieu de +)
nous serions heureux de recevoir vos
commentaires à info@lorexcorp.com pour
commander des accessoires, visitez
www.lorexcctv.com
www.lorexcctv.com
Ve rs i o n 7 - N o v 2 6 2 0 0 9
Page 7
Important Safeguards
In addition to the careful attention devoted to quality standards in the manufacturing process of
your video product, safety is a major factor in the design of every instrument. However, safety is
your responsibility too. This sheet lists important information that will help to assure your
enjoyment and proper use of the video product and accessory equipment. Please read them
carefully before operating and using your video product.
Installation
1. Read and Follow Instructions - All the safety and
operating instructions should be read before the
video product is operated. Follow all operating
instructions.
2. Retain Instructions - The safety and operating
instructions should be retained for future reference.
3. Heed Warnings - Comply with all warnings on the
video product and in the operating instructions.
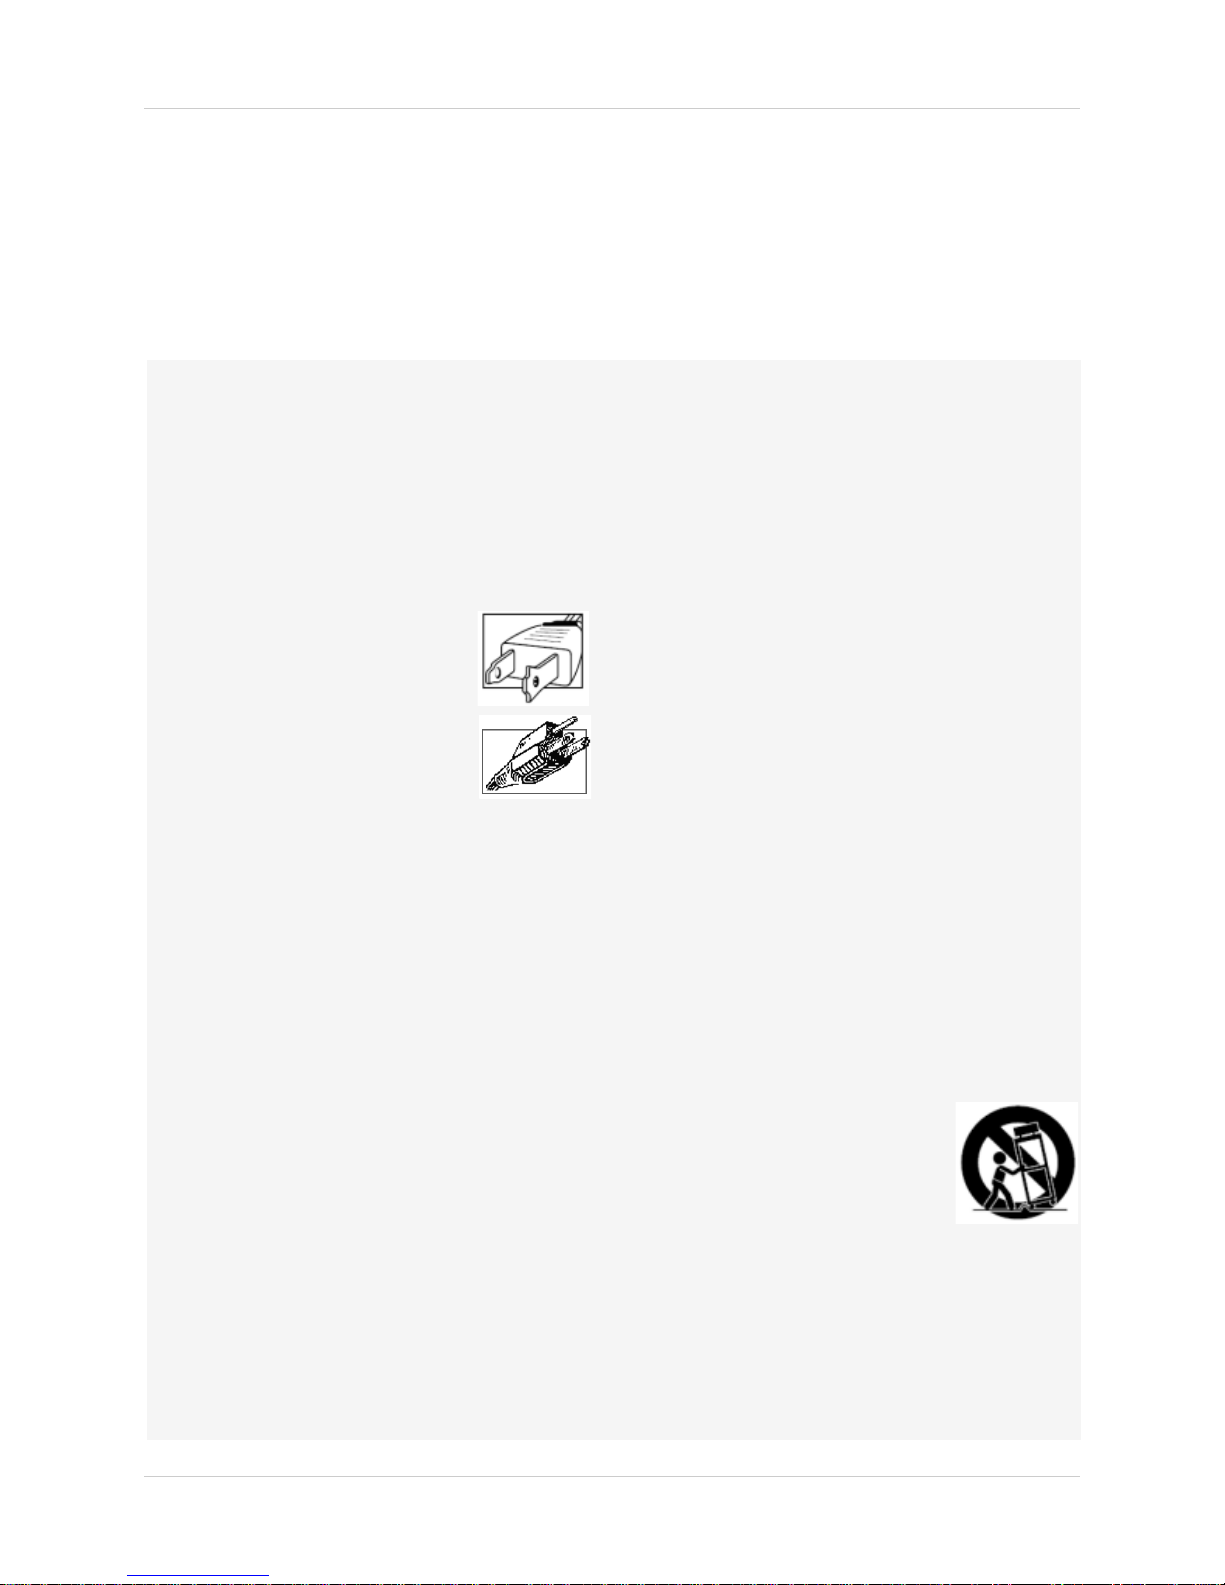
4. Polarization - Do not defeat the
safety purpose of the polarized or
grounding-type plug.
A polarized plug has two blades
with one wider than the other.
A grounding type plug has two
blades and a third grounding prong.
The wide blade or the third prong
are provided for your safety.
If the provided plug does not fit into your outlet,
consult an electrician for replacement of the
obsolete outlet.
5. Power Sources - This video product should be
operated only from the type of power source
indicated on the marking label. If you are not sure of
the type of power supply to your location, consult
your video dealer or local power company. For video
products intended to operate from battery power, or
other sources, refer to the operating instructions.
6. Overloading - Do not overload wall outlets of
extension cords as this can result in the risk of fire
or electric shock. Overloaded AC outlets, extension
cords, frayed power cords, damaged or cracked wire
insulation, and broken plugs are dangerous. They
may result in a shock or fire hazard. Periodically
examine the cord, and if its appearance indicates
damage or deteriorated insulation, have it replaced
by your service technician.
7. Power Cord Protection - Power supply cords should
be routed so that they are not likely to be walked on
or pinched by items placed upon or against them,
paying particular attention to cords at plugs,
convenience receptacles, and the point where they
exit from the video product.
8. Ventilation - Slots and openings in the case are
provided for ventilation to ensure reliable operation
of the product and to protect it from overheating.
These openings must not be blocked or covered. The
openings should never be blocked by placing the
video equipment on a bed, sofa, rug, or other similar
surface. This video product should never be placed
near or over a radiator or heat register. This video
product should not be placed in a built-in
installation such as a bookcase or rack unless
proper ventilation is provided or the video product
manufacturer’s instructions have been followed.
9. Attachments - Do not use attachments unless
recommended by the video product manufacturer as
they may cause a hazard.
10. Camera Extension Cables – Check the rating of
your extension cable(s) to verify compliance with
your local authority regulations prior to installation.
11. Water and Moisture - Do not use this video product
near water. For example, near a bath tub, wash
bowl, kitchen sink or laundry tub, in a wet
basement, near a swimming pool and the like.
Caution
operated equipment or accessories connected to
this unit should bear the UL listing mark of CSA
certification mark on the accessory itself and should
not be modified so as to defeat the safety features.
This will help avoid any potential hazard from
electrical shock or fire. If in doubt, contact qualified
service personnel.
12. Accessories - Do not place this
video equipment on an unstable
cart, stand, tripod, or table. The
video equipment may fall, causing
serious damage to the video
product. Use this video product
only with a cart, stand, tripod,
bracket, or table recommended by the
manufacturer or sold with the video product. Any
mounting of the product should follow the
manufacturer’s instructions and use a mounting
accessory recommended by the manufacturer.
: Maintain electrical safety. Powerline
iii
Page 8

Service
13. Servicing - Do not attempt to service this video
equipment yourself as opening or removing covers
may expose you to dangerous voltage or other
hazards. Refer all servicing to qualified service
personnel.
14. Conditions Requiring Service - Unplug this video
product from the wall outlet and refer servicing to
qualified service personnel under the following
conditions:
• When the power supply cord or plug is damaged.
• If liquid has been spilled or objects have fallen into
the video product.
• If the video product has been exposed to rain or
water.
• If the video product does not operate normally by
following the operating instructions. Adjust only
those controls that are covered by the operating
instructions. Improper adjustment of other controls
may result in damage and will often require
extensive work by a qualified technician to restore
the video product to its normal operation.
• If the video product has been dropped or the cabinet
has been damaged.
• When the video product exhibits a distinct change
in performance. This indicates a need for service.
Use
19. Cleaning - Unplug the video product from the wall
outlet before cleaning. Do not use liquid cleaners or
aerosol cleaners. Use a damp cloth for cleaning.
20. Product and Cart Combination - Video and cart
combination should be moved with care. Quick
stops, excessive force, and uneven surfaces may
cause the video product and car combination to
overturn.
21. Object and Liquid Entry - Never push objects for
any kind into this video product through openings as
they may touch dangerous voltage points or
“short-out” parts that could result in a fire or
electric shock. Never spill liquid of any kind on the
video product.
22. Lightning - For added protection for this video
product during a lightning storm, or when it is left
unattended and unused for long periods of time,
unplug it from the wall outlet and disconnect the
antenna or cable system. This will prevent damage
to the video product due to lightning and power line
surges.
15. Replacement Parts - When replacement parts are
required, have the service technician verify that the
replacements used have the same safety
characteristics as the original parts. Use of
replacements specified by the video product
manufacturer can prevent fire, electric shock or
other hazards.
16. Safety Check - Upon completion of any service or
repairs to this video product, ask the service
technician to perform safety checks recommended
by the manufacturer to determine that the video
product is in safe operating condition.
17. Wall or Ceiling Mounting - The cameras provided
with this system should be mounted to a wall or
ceiling only as instructed in this guide, using the
provided mounting brackets.
18. Heat - The product should be situated away from
heat sources such as radiators, heat registers,
stoves, or other products (including amplifiers) that
produce heat.
General Precautions
iv
Page 9

General Precautions
FCC CLASS B NOTICE
NOTE
This equipment has been tested and found to comply with the limits for a Class B digital device, pursuant to
Part 15 of the FCC Rules. These limits are designed to provide reasonable protection against harmful
interference in a residential installation. This equipment generates, uses, and can radiate radio frequency
energy and, if not in-stalled and used in accordance with the instruction, may cause harmful interference to
radio communications.
However, there is no guarantee that interference will not occur in a particular installation. If this equipment
does cause harmful interference to radio or television reception (which can be determined by turning the
equipment on and off), the user is encouraged to try to correct the interference by one or more of the following
measures:
• Reorient or relocate the receiving antenna
• Increase the separation between the equipment and receiver
• Connect the equipment into an outlet on a circuit different from that to which the receiver is
connected
• Consult the dealer or an experienced radio or television technician for assistance
www.lorexcctv.com
1. All warnings and instructions in this manual should be followed.
2. Remove the plug from the outlet before cleaning.
water dampened cloth for cleaning.
3. Do not use this unit in humid or wet places.
4. Keep enough space around the unit for ventilation. Slots and openings in the storage cabinet
should
not be blocked.
5. During lightning storms, or when the unit is not used for a long time, disconnect the power
suppl
y, antenna, and cables to protect the unit from electrical surge.
Do not use liquid aerosol detergents. Use a
This equipment has been certified and found to comply with the limits regulated by FCC, EMC, and
LVD. There
cause interference with other appliance usage.
However, it is imperative that the user follows the
fore, it is designated to provide reasonable protection against interference and will not
guidelines in this manual to avoid improper
usage which may result in damage to the unit, electrical shock and fire hazard injury.
In order to improve the feature functions and quality
of this product, the specifications are subject
to change without notice from time to time.
v
Page 10

Lorex Road Warrior
Lorex Viewer software
Features
Thank you for purchasing the Lorex Road Warrior. The Road Warrior features h.264 video
compression for ultra-clear video, and a built-in GPS antenna to track your location in the
recorded videos. Intuitive playback software allows you to archive, manage and view your videos.
The Road Warrior is designed to record daily driving events inside your vehicle, and from the
driver’s view. To play back the events, use the included Lorex Viewer software.
Lorex Road Warrior features
• 8 hour recording time on a 4 GB (gigabyte) SDHC memory card (included);
(Supports a maximum of a 32GB SDHC memory card).
• 2 high resolution color cameras to record a vehicle’s interior and driver’s view
• Wide Viewing angles: Driver-view camera: 17
• H.264 video compression for high quality, compact video files
• Record driving events and pinpoint the location of the event using Google Maps™ (Internet connection required).
• Integrated GPS antenna, impact sensor and microphone
• Record video events inside an
• Automatically tags the video if an emergency event occurs for easy searching
• IR LEDs for night vision recording inside the vehicle
d outside your vehicle
5° field of view / In-Car camera: 120° field of view
Lorex Viewer
• Manage, backup and view your recorded videos
• Easy, intuitive menu navigation
• View your video while tracking the location of your vehicle with Google Maps (Internet connection required).
• Save videos as AVI files for easy sharing
• Sort videos by event type
*Please visit www.lorexcctv.com for information, firmware, and comp
As our products are subject to continuous improvement, Lorex Technology Inc. and its subsidiaries reserve the right to modify product design,
specifications, and prices without notice and without incurring any obligation. E&OE
atibility updates
vi
Page 11

TABLE OF CONTENTS
Contents. . . . . . . . . . . . . . . . . . . . . . . . . . . . . . . . . . . . . . . . . . . . . . . . . . . . . . . 1
Before You Begin . . . . . . . . . . . . . . . . . . . . . . . . . . . . . . . . . . . . . . . . . . . . . . . 2
Setting the Time and Date . . . . . . . . . . . . . . . . . . . . . . . . . . . . . . . . . . . . . . . . . . . . . . . . . 2
Basic Installation . . . . . . . . . . . . . . . . . . . . . . . . . . . . . . . . . . . . . . . . . . . . . . . 3
Getting To Know Your Road Warrior . . . . . . . . . . . . . . . . . . . . . . . . . . . . . . . 4
Mounting Bracket . . . . . . . . . . . . . . . . . . . . . . . . . . . . . . . . . . . . . . . . . . . . . . . . . . . . . . . .5
Mounting your Road Warrior . . . . . . . . . . . . . . . . . . . . . . . . . . . . . . . . . . . . . . . . . . . . . . . 5
Installing the Panic Button extension . . . . . . . . . . . . . . . . . . . . . . . . . . . . . . . . . . . . . . . . . . . . . . . . . . . . . 6
Adjusting the Driver-View Camera . . . . . . . . . . . . . . . . . . . . . . . . . . . . . . . . . . . . . . . . . . . . . . . . . . . . . . . 6
Recording With Your Road Warrior . . . . . . . . . . . . . . . . . . . . . . . . . . . . . . . . 7
Calibrating Camera Angle (Optional) . . . . . . . . . . . . . . . . . . . . . . . . . . . . . . . . . . . . . . . . 7
How the Road Warrior Interprets
Bumps and Impacts . . . . . . . . . . . . . . . . . . . . . . . . . . . . . . . . . . . . . . . . . . . . . . . . . . . . . . . . 7
Using the Emergency Button . . . . . . . . . . . . . . . . . . . . . . . . . . . . . . . . . . . . . . . . . . . . . . 7
Lorex Viewer . . . . . . . . . . . . . . . . . . . . . . . . . . . . . . . . . . . . . . . . . . . . . . . . . . . 8
Using Lorex Viewer . . . . . . . . . . . . . . . . . . . . . . . . . . . . . . . . . . . . . . . . . . . . 10
Viewing Recorded Video Files . . . . . . . . . . . . . . . . . . . . . . . . . . . . . . . . . . . . . . . . . . . . . 10
Using Video Controls . . . . . . . . . . . . . . . . . . . . . . . . . . . . . . . . . . . . . . . . . . . . . . . . . . . . . . . . . . . . . . . . . 11
Frame Step . . . . . . . . . . . . . . . . . . . . . . . . . . . . . . . . . . . . . . . . . . . . . . . . . . . . . . . . . . . . . . . . . . . . . . . . . . . . . . . . . 11
Forward/Reverse Playback & Pause . . . . . . . . . . . . . . . . . . . . . . . . . . . . . . . . . . . . . . . . . . . . . . . . . . . . . . . . . . . . . . . . . . . 11
Timeline Slider . . . . . . . . . . . . . . . . . . . . . . . . . . . . . . . . . . . . . . . . . . . . . . . . . . . . . . . . . . . . . . . . . . . . . . . . . . . . . . . . . . . . . 11
Video Speed Slider . . . . . . . . . . . . . . . . . . . . . . . . . . . . . . . . . . . . . . . . . . . . . . . . . . . . . . . . . . . . . . . . . . . . . . . . . . .11
Single-Channel View . . . . . . . . . . . . . . . . . . . . . . . . . . . . . . . . . . . . . . . . . . . . . . . . . . . . . . . . . . . . . . . . . . . . . . . . .11
Two-Channel View . . . . . . . . . . . . . . . . . . . . . . . . . . . . . . . . . . . . . . . . . . . . . . . . . . . . . . . . . . . . . . . . . . . . . . . . . . . 12
Picture-in-Picture (PIP) View . . . . . . . . . . . . . . . . . . . . . . . . . . . . . . . . . . . . . . . . . . . . . . . . . . . . . . . . . . . . . . . . . .12
Enabling Google Maps View . . . . . . . . . . . . . . . . . . . . . . . . . . . . . . . . . . . . . . . . . . . . . . 12
Converting files to AVI . . . . . . . . . . . . . . . . . . . . . . . . . . . . . . . . . . . . . . . . . . . . . . . . . . . 13
Printing Video Images . . . . . . . . . . . . . . . . . . . . . . . . . . . . . . . . . . . . . . . . . . . . . . . . . . . . . . . . . . . . . . . . . 13
Watermarking Video Images . . . . . . . . . . . . . . . . . . . . . . . . . . . . . . . . . . . . . . . . . . . . . . 14
Configuring your Road Warrior . . . . . . . . . . . . . . . . . . . . . . . . . . . . . . . . . . 15
System Tab . . . . . . . . . . . . . . . . . . . . . . . . . . . . . . . . . . . . . . . . . . . . . . . . . . . . . . . . . . . . 15
Changing Camera Frame Rate . . . . . . . . . . . . . . . . . . . . . . . . . . . . . . . . . . . . . . . . . . . . . . . . . . . . . . . . . 15
Adjusting speedometer Unit of Measurement . . . . . . . . . . . . . . . . . . . . . . . . . . . . . . . . . . . . . . . . . . . . . 15
Looping Video Recording . . . . . . . . . . . . . . . . . . . . . . . . . . . . . . . . . . . . . . . . . . . . . . . . . . . . . . . . . . . . . . 15
Automatically Restarting your Road Warrior . . . . . . . . . . . . . . . . . . . . . . . . . . . . . . . . . . . . . . . . . . . . . . 15
Disabling Audio in Recording . . . . . . . . . . . . . . . . . . . . . . . . . . . . . . . . . . . . . . . . . . . . . . . . . . . . . . . . . . . 15
vii
Page 12

Event Tab . . . . . . . . . . . . . . . . . . . . . . . . . . . . . . . . . . . . . . . . . . . . . . . . . . . . . . . . . . . . . . 16
Choosing What Events to Record . . . . . . . . . . . . . . . . . . . . . . . . . . . . . . . . . . . . . . . . . . . . . . . . . . . . . . . . 16
Adjusting Impact Sensitivity . . . . . . . . . . . . . . . . . . . . . . . . . . . . . . . . . . . . . . . . . . . . . . . . . . . . . . . . . . . . 16
Changing Pre and Post Recording Time . . . . . . . . . . . . . . . . . . . . . . . . . . . . . . . . . . . . . . . . . . . . . . . . . . 16
Adjusting Speed Settings . . . . . . . . . . . . . . . . . . . . . . . . . . . . . . . . . . . . . . . . . . . . . . . . . . . . . . . . . . . . . . 16
User Settings Tab . . . . . . . . . . . . . . . . . . . . . . . . . . . . . . . . . . . . . . . . . . . . . . . . . . . . . . . 17
Changing the Administrator Password . . . . . . . . . . . . . . . . . . . . . . . . . . . . . . . . . . . . . . . . . . . . . . . . . . . 17
Imbedding User Information in Recordings . . . . . . . . . . . . . . . . . . . . . . . . . . . . . . . . . . . . . . . . . . . . . . . 17
Removable Disk Tab . . . . . . . . . . . . . . . . . . . . . . . . . . . . . . . . . . . . . . . . . . . . . . . . . . . . . 17
Selecting Memory Card Directory . . . . . . . . . . . . . . . . . . . . . . . . . . . . . . . . . . . . . . . . . . . . . . . . . . . . . . . 17
Checking Memory Card Capacity . . . . . . . . . . . . . . . . . . . . . . . . . . . . . . . . . . . . . . . . . . . . . . . . . . . . . . . . 17
Formatting the Memory Card . . . . . . . . . . . . . . . . . . . . . . . . . . . . . . . . . . . . . . . . . . . . . . . . . . . . . . . . . . 17
Version Tab . . . . . . . . . . . . . . . . . . . . . . . . . . . . . . . . . . . . . . . . . . . . . . . . . . . . . . . . . . . .18
Restoring User Settings . . . . . . . . . . . . . . . . . . . . . . . . . . . . . . . . . . . . . . . . . . . . . . . . . 18
Tips . . . . . . . . . . . . . . . . . . . . . . . . . . . . . . . . . . . . . . . . . . . . . . . . . . . . . . . . . . 19
Back up your videos . . . . . . . . . . . . . . . . . . . . . . . . . . . . . . . . . . . . . . . . . . . . . . . . . . . . .19
Replacing your SDHC memory card . . . . . . . . . . . . . . . . . . . . . . . . . . . . . . . . . . . . . . . . 19
Maintaining memory card health . . . . . . . . . . . . . . . . . . . . . . . . . . . . . . . . . . . . . . . . . . 19
Viewing videos on your SDHC memory card . . . . . . . . . . . . . . . . . . . . . . . . . . . . . . . . . 19
Obtaining GPS signals . . . . . . . . . . . . . . . . . . . . . . . . . . . . . . . . . . . . . . . . . . . . . . . . . . . . .19
Preventing data loss on your SDHC memory card . . . . . . . . . . . . . . . . . . . . . . . . . . . . 19
Mounting The Road Warrior - FAQ . . . . . . . . . . . . . . . . . . . . . . . . . . . . . . . . 20
What is the best location to mount the Road Warrior? . . . . . . . . . . . . . . . . . . . . . . . . . . . . . . . . . . . . . . 20
How do I remove the mounting bracket on my windshield? . . . . . . . . . . . . . . . . . . . . . . . . . . . . . . . . . . 20
Why does the Road Warrior come included with double-sided adhesive? . . . . . . . . . . . . . . . . . . . . . . 20
Appendix A: Upgrading Road Warrior Firmware . . . . . . . . . . . . . . . . . . . . 21
Appendix B: Lorex Viewer System Requirements . . . . . . . . . . . . . . . . . . . 22
Appendix C: Road Warrior Technical Specifications . . . . . . . . . . . . . . . . . 23
Troubleshooting Your Road Warrior . . . . . . . . . . . . . . . . . . . . . . . . . . . . . . 24
viii
Page 13

CONTENTS
LOREX ROAD WARRIOR
MOUNTING BRACKET WITH
BUILT-IN GPS ANTENNA
VIDEO CABLE
CAR ADAPTER
PANIC BUTTON
EXTENSION
ELECTRONIC INSTRUCTION
MANUAL (LOCATED IN SOFTWARE
CD), QUICKSTART GUIDE &
SOFTWARE CD
SDHC MEMORY CARD
SDHC MEMORY CARD READER
DOUBLE SIDED ADHESIVE,
ZIP TIES, ZIP TIE ANCHORS
The Road Warrior includes the following components:
Contents
CHECK YOUR PACKAGE TO CONFIRM THAT YOU HAVE RECEIVED THE COMPLETE SYSTEM,
INCLUDING ALL COMPONENTS SHOWN ABOVE.
CONTENT SPECIFICATIONS MAY CHANGE WITHOUT NOTICE DUE TO PRODUCT IMPROVEMENTS.
1
Page 14

Before You Begin
BEFORE YOU BEGIN
It is highly recommended to set the time and
date on your Road Warrior before you begin
recording.
If you do not set the time and date, the video
you record
date stamp, reducing effectiveness for court
evidence.
Setting the Time and Date
To set the time and date, you must first install
the Lorex Viewer software (included).
will not have the correct time and
6. Choose
Installation
Installation Method" window appears.
7. Click Finish when program installation
ompletes. Lorex Viewer opens.
c
To adjust the Time and Date with the Lorex
Viewe
1. Insert the SDHC memory card into the
memory
card reader into your computer’s USB port.
NOTE: Use the included memory card reader
to ensure compatibility.
NOTE: The SDHC memory card slides
smoothly all the way into the memory card
reader. The SDHC memory card goes in one
way only. Do not force in the card.
2. Click
default login is:
password is left blank.
Automatic Installation or Manual
and click Next. The "Select
r open:
card reader and plug memory
OK on the log in window prompt.The
admin. The default
To install the Lorex Viewer software:
1. Insert the Lorex Viewer CD into your PC’s
CD/D
VD drive.
2. Locate the Lorex_V2 (3.x.x).exe file on the
CD.
3. Double-click the Lorex_V2 (3.x.x).exe
e.The installer window appears.
fil
4. Click
5. Read and
Next.
scroll to the very bottom of the
software User Agreement. Select the
I Agree" box and click Next.
"
3. Click (Setup). The Setup window
opens.
4. In the Systems tab, under Standard time
zone, sel
savings settings.Click
window appears.
5. Locate the
directory
NOTE: Make sure that you save the .JDF file
onto your SDHC memory card, and NOT onto
your PC hard drive (ie. C:\). All Road Warrior
Settings must save onto the SDHC memory
card for settings to take effect.
6. Eject memory card and insert it into the
Road
automatically synchronizes the date with
the satellite once powered on.
ect your time zone and daylight
OK.The Save As
SDHC memory card reader
. Click Save.
Warrior. Your Road Warrior
2
Page 15

BASIC INSTALLATION
Figure 1.0 Insert SDHC memory card.
Figure 1.2 Plug minijack into GPS port.
Figure 1.3 Slide mounting bracket upwards to lock.
Figure 1.4 Mount Road Warrior to windshield.
Figure 1.1 Stick double-sided adhesive to base.
1. Insert the SDHC memory card
a. Open the SD memory slot cover (Figure 1.0).
b. Insert the SDHC memory card into the slot with
the s
ticker face up, and upright. Push memory
card firmly until you hear a click. The memory
card locks in place.
c. Close SD memory slot cover.
NOTE: The SDHC memory card should slide smoothly
into the memory slot. The SDHC memory card is
designed to go in one way only. Do not force in the card.
Basic Installation
2. Install the mounting bracket
a. Stick the double-sided adhesive onto the base of
the mounting bracket (Figure 1.1).
b. Plug the mini-jack connector from the mounting
br
acket into the side of the Road Warrior labeled
GPS (Figure 1.2).
c. Slide mounting bracket upwards on the back of
device (Figure 1.3). The mounting bracket
the
locks in place.
d. Connect the car adapter to the Road Warrior and
ciga
r lighter.
3. Mount the Road Warrior
NOTE: See “Mounting your Road Warrior” on page 5
for mounting tips.
a. Orient the unit upright (Figure 1.4). Firmly press
the
mounting bracket onto the windshield. Hold
for three seconds to secure.
b. Loosen the screws on the mounting bracket to
adjus
t the mounting angle. Tighten screws to
secure mounting position.
CAUTION: Always have a clear view of the road. Adjust
the positioning of the Road Warrior so that it does not
affect your driving reflexes and traffic awareness.
Check local laws before mounting unit on windshield.
3
Page 16

Getting To Know Your Road Warrior
Figure 1.5 Top, bottom and side views of the Road Warrior.
Familiarize yourself with the features of the unit before driving.
1
2
3
4
5
6
7
8 9
12
10
11
13
15
14
GETTING TO KNOW YOUR ROAD WARRIOR
1. Infrared LEDs (IR LEDs): Provides infrared lighting for night time recording of car interior.
2. In
-car Camera: Records video of car interior at a VGA resolution of 640x480
3. Dayl
4.
ight Sensor: Detects lighting conditions to enable or disable IR LEDs.
REC LED: Glows solid red to indicate the unit is recording. Flickers on and off during sudden
movements or bumps.
GPS LED:
Glows solid green to indicate GPS tracking is enabled. Flickers on and off when
locating signal.
POWER LED: Gl
5.
Emergency Button: Immediately records event when pressed.
6.
Mic: Records audio of car interior.
7.
DC12V Port: Port for 12V car adapter (included).
8.
Channel Switch Button: Changes video views when connected to an external monitor. For
ows solid red to indicate unit is powered.
details, see “Calibrating Camera Angle (Optional)” on page 7.
9.
Mini Serial Port: Do not use. For developmental purposes only.
10. GPS Jack: Receives GPS signal from GPS antenna built into the mounting bracket. See
“Mounting Bracket” on page 5 for details.
11.
Monitor Out: Outputs analog video to a portable display. See “Recording With Your Road
Warrior” on page 7 for details.
12. SDH
C (Secure Digital High Capacity) Memory Slot: Records video onto SDHC memory cards.
The maximum capacity the Road Warrior will detect is 32 GB.
13. Emer
gency Button Port: Connect the Panic Button extension cord to provide easy access to
the emergency button. Remove rubber protector with a thin, rigid object.
14. Adjus
15. Rear Mounting
table Driver-View Camera: Records the driver view. Push camera up and down to
adjust camera angle. Camera should click and lock into place with each push.
Slot: Locks mounting bracket onto the unit.
4
Page 17

Getting To Know Your Road Warrior
Figure 1.6 Mounting bracket with built-in GPS antenna. Plug GPS mini-jack into the GPS port on the side of the unit.
1
2
3
Figure 1.7 Secure Road Warrior to the right side of
your rear-view mirror to prevent viewing obstruction.
Mounting Bracket
1. Mini-jack connector: Transmits GPS tracking information to the Road Warrior.
GPS Antenna: The GPS (Global Positioning System) antenna tracks your current location in
2.
relation to satellites orbiting around the globe. The GPS antenna records information onto the
SDHC memory card. When watching videos with the Lorex Viewer, you can track the location
and speed of your vehicle on Google Maps.
NOTE: The built-in GPS antenna DOES NOT act as a portable navigation system. The purpose of
the GPS antenna on the mounting bracket is to track your location, and transmit the information
to the SDHC memory card only. See “Enabling Google Maps View” on page 12 for details.
Mounting Bracket Screws: Tightens and loosens the mounting bracket elbow. Twist screws
3.
clockwise to tighten, counter clockwise to loosen.
Mounting your Road Warrior
Mounting the Road Warrior at the correct angle allows
the unit to receive optimal GPS reception and recording
angles.
REMINDER: The mounting bracket adhesive has a
powerful bond to surfaces. Double-check the
mounting position before securing in place.
NOTE: Apply double-sided adhesive to the mounting
bracket base, and orient unit upright before mounting
(Figure 1.7).
To mount your Road Warrior for the first time:
1. Secure unit to
Position the unit so that it does not interfere with
your view. See “Mounting The Road Warrior - FAQ” on page 20 for more details.
the right of your rear-view mirror.
2. Press and hold the mounting base firmly to the windshield for three seconds to secure the
unit in plac
3. Plug in the car adapter to the Road Warrior
e.
and into the cigarette lighter to power up.
5
Page 18

Getting To Know Your Road Warrior
Figure 1.8 Loosen screws to adjust mounting
bracket elbow for optimal angle.
Figure 1.9 Remove rubber cover to the EMGCY port
with a paper clip.
Figure 2.0 Insert the connector firmly into the EMGCY
port. The connector only connects one way. Do not
force.
Figure 2.1 Secure panic button in an easy to reach
location on the car dashboard.
Mounting your Road Warrior (cont’d)
4. Adjust the angle of the mounting bracket by
loosening the screws on the side (Figure 1.8).
Tight
en screws to secure position.
NOTE: The Road Warrior takes 30 seconds to start up.
Wait for the GPS LED to glow solid green, followed
by a beep before driving. The REC and POWER LEDs
glow solid red. During normal operation, the REC,
GPS and POWER LED will always be on.
Installing the Panic Button extension
The panic button extension allows you to bookmark an
event as an "Emergency" for easy searching in the
Lorex Viewer. Emergency recordings capture video at
30 FPS for enhanced detail. Place the panic button
extension where you can easily reach.
To install the Panic Button extension cable:
1. Remove rubber cover on the side of the unit with a
thin, rigid object (Figure 1.9).
2. Insert the end of the panic button extension into the
EMGCY port (Figure 2.0).
3. Run the cable along the dashboard to conceal the
able out of view.
c
4. Remove the double-sided adhesive on the back of
the
panic button, and stick on surface (Figure 2.1).
NOTE: The end of the panic button extension connects
one way into the EMGCY port. Do not force.
Adjusting the Driver-View Camera
The Driver-View Camera adjusts to three angles. Push
camera up or down to lock in place.
6
Page 19

Recording With Your Road Warrior
Figure 2.2 Monitor out port on the side of
the Road Warrior.
Figure 2.3 View your camera angle by
hooking up an LCD to the Road Warrior.
Figure 2.4 Press the emergency button to
trigger high-quality video recording.
RECORDING WITH YOUR ROAD WARRIOR
The Road Warrior records continuously once it receives power. Before recording, familiarize
yourself with how the Road Warrior records events.
Calibrating Camera Angle (Optional)
The Road Warrior comes with a built-in monitor-out port. You
can hook up a portable monitor (not included) to view what the
Road Warrior records in real-time. This ensures that you have
the best possible recording angle.
To connect your portable display to the Road Warrior:
1. Connect the mini-jack from the video cable into the
MONITOR port on the side of the unit (Figure 2.2).
2. Connect the yellow RCA video cable into the portable
display (not included).The
(Figure 2.3)
3. Adjust camera angles as needed.
video displays on the monitor
To change camera views:
• Press the
channel 1 and channel 2. This switches camera views
between the in-car camera and the Driver-View camera.
CH button on the side of the unit to change between
How the Road Warrior Interprets
Bumps and Impacts
When your vehicle goes over a bump or receives a sudden force,
the built-in sensor causes the REC LED on the unit to flash for
several seconds. This means the Road Warrior has bookmarked
the event. When an event is bookmarked, you can easily
categorize and find the particular moment in the Event window
when you encountered the sudden bump or impact. See
“Viewing Recorded Video Files” on page 10 for details on how to
find videos by events.
Using the Emergency Button
The emergency button engages the Road Warrior to record at maximum quality, and marks the
event as "Emergency" when viewing the file in the Lorex viewer.
When you press the emergency button:
a. The video automatically pre-records and post r
See “Changing Pre and Post Recording Time” on page 16 for details.
ecords a set duration that you can configure.
b. The video is tagged as an "Emergency" event that you can later search and categorize the
video usin
g the included Lorex Viewer. The video records at maximum resolution (30 FPS).
7
Page 20

Lorex Viewer
3
8 9
1
2
5
6
7
10
12
11
4
LOREX VIEWER
The Lorex Viewer allows you to organize, view, and save your video files. The Lorex Viewer also
allows you to change specific recording parameters of your Road Warrior.
1. Main Viewer Window: Displays video currently being played.
2. Login Prompt: Login window. By default, the login name is admin; password field is left blank.
3.
Video Slider: Skips video timeline backward and forward. Drag slider bar to jump backward or
forward in a video.
4. Vi
deo Controls:
• Step Backward Single Frame: View reverse playback one frame at a time.
•
•
•
•
8
Rewind: Reverse playback.
Pause: Pause video playback.
Play: Begins forward playback.
Step Forward Single Frame: View forward playback one frame at a time.
Page 21

Lorex Viewer (cont’d)
3
8 9
1
2
5
6
7
10
12
11
4
Lorex Viewer
5. Vehicle Speed Display: Shows current speed of vehicle.
6.
Playback Speed Slider: Adjust playback speed of video from -4X to 6X (-1x, -2x, 1x, 2x, 4x, 6x).
7.
Channel View Modes:
Single Channel Mode:
Dual Channel Mode: View two channels of video in split-screen.
Picture-in-Picture Mode (PIP): View two channels of video simultaneously: one large
View a single channel of video.
screen, and a smaller inset in the bottom right corner.
8.
Volume Slider: Adjust volume from low to high.
9.
Viewer Settings:
• Browse button: Opens a tree-directory of files of your hard-drive.
•
•
•
10.
Backup button: Save video files as .AVI (See “Converting files to AVI” on page 13)
Setup button: Configure Road Warrior time and recording parameters.
Print button: Print JPEG (.jpg) image of channel 1 or channel 2.
Google Map Viewer: Track the location of your vehicle on Google Maps. (Internet connection required)
11. Event Window: Lists recorded events on the SDHC memory card.
Event Search Button: Search event by incident type: Overspeed, emergency, impact, sudden
12.
start, sudden stop.
9
Page 22

Using Lorex Viewer
USING LOREX VIEWER
Lorex Viewer allows you to play, save, and manage your recorded footage from the Road Warrior
SDHC memory card. Always use Lorex Viewer to play files recorded from the Road Warrior.
Viewing Recorded Video Files
Once you have recorded video files on your Road Warrior, you can view them on the Lorex Viewer.
To view your recorded video files:
Connect the memory card to the computer
1. Insert the SDHC memory card from the Road Warrior into the memory card reader.
2. Connect the memory card reader to a USB port on your PC.
Start Lorex Viewer
1. Open Lorex Viewer from the desktop shortcut, or navigate to
Start>Programs>Lorex_V2>Lorex_V2. Your video files on the memory card appear in the Event
Viewer on the top-right corner of the Lorex Viewer.
2. Click on the desired file in the Event Viewer. Y
by Event type. Click on Time/Date or Event to sort. For example, if you wanted to sort your
videos by event type, click Event in the Event Window.
3. Click (Play) to start video playback.
Password Protecting Lorex Viewer
To password protect Lorex Viewer:
1. Click (setup) and then click the User Settings ta
2. Under Us
The default user name is admin
10
er Info enter your desired user name and password. Click OK to save.
our video files are categorized by Time/Date or
b.
and the password field is left blank.
Page 23

Using Lorex Viewer
Step Backward Single Frame
Rewind Pause
Play
Step Forward Single Frame
Speed Slider (-4x to 8x)
Timeline Slider
Single-Channel view
Two-Channel view
Picture in Picture
Figure 2.5 Single-channel view mode.
Using Video Controls
Frame Step
Using the frame step button, you can view
video one frame at a time in forward or reverse
playback
To view files one frame at a time:
a. Click (step backward single frame)
to view a single frame of the video in
everse playback.
r
b. Click (step forward single frame)
to view a single frame of the video in
f
orward playback.
Forward/Reverse Playback & Pause
Use the play and rewind button to play video
forward or backward. Use the pause button to
pause video playback.
To play video forward or backward:
a. Click (play) for forward playback.
Video Speed Slider
The video speed slider allows you adjust the
playback speed of the video.
To speed up video playback:
1. Drag the speed slider to the right.
To slow down video playback:
1. Drag the speed slider to the left.
NOTE: The video speed slider does NOT work
during reverse playback.
Single-Channel View
The single-channel view allows you to watch
one channel of a video.
To view one channel of video:
b. Click (rewind) for reverse
playback.
To pause playback:
a. Click (pause) to pause the video.
Timeline Slider
The Time Slider allows you to jump to any part
of the video. To move forward or backward in
the video using the time slider, drag the slider
in the timeline.
1. Click (single-channel view).
Click (single-channel view) again to
switch channels.
11
Page 24

Using Lorex Viewer
Figure 2.6 Two-channel view.
Figure 2.7 Picture in picture view.
Figure 2.7 Press the play button to start Google Maps.
Figure 2.8 Google Maps window enabled.
Figure 2.9 Click the Map or Hybrid button to switch map
views.
Two-Channel View
The two-channel view splits the viewing area in
half and allows you to see the in-car camera
and Driver-View camera simultaneously.
To view two channels of video in split screen:
1. Click (two-channel view).
Picture-in-Picture (PIP) View
The Picture in Picture mode allows you to view
two channels of video, with one main screen,
and one smaller screen (inset).
Enabling Google Maps View
Lorex Viewer displays the location of your
vehicle on Google Maps. This feature allows
you to pinpoint the location of an event.
screen viewing modes disables Google Maps View.
To start Google Maps view:
1. Click (play) on the Google Maps
window. Google Maps connects, and
displays the curr
ent location of the vehicle
on the map.
Full
To view video in picture in picture mode:
1. Click (PIP) to view video in picture
in picture mode.
2. Click (PIP) again to flip between
inset and main screen.
Manipulating Video Windows
• You can move the video windows around by
dragging the video window. To to resize the
window, click the bottom right hand corner
of the window, and drag to resize.
• To exit from full-screen view, double-click
on the video screen image to return to the
main viewing window.
NOTE: Google Maps requires an internet
connection to retrieve map data.
2. Click
Hybrid or Map to manipulate how
Google Maps displays the map.
12
Page 25

Using Lorex Viewer
Figure 3.0 Select file you wish to back up from the
Event window.
Figure 3.1 Select AVI under the backup selection screen.
Figure 3.2 Backup-Data settings window.
Figure 3.2 Backup confirmation window.
Converting files to AVI
You can convert your video files to .AVI format
so that you can archive the video. By default,
the videos are encrypted with a proprietary
compression that is NOT playable alone.
To have your video files play as a stand-alone
file,
you must compress the files using Lorex
Viewer.
NOTE: To play back the video after you have
converted it using the Lorex Viewer, you
need a third party video codec. Search
online for the "FFDSHOW CODEC".
Download and install the FFDShow codec.
Once you have installed the codec, you are
ready to view backed up files from Lorex
Viewer.
To compress your video file:
1. Click the video you wish to backup from
Event browser. You can only select one
the
event at a time.
3. Under Select DATA, select
AVI and click OK
(Figure 3.1). The Backup-Data Settings
window opens.
4. Select the channel you wish to back up
under
Outside-Cam).
Select Channel (
Inside-Cam or
5. Select the checkbox under Audio ON/OFF
t
o enable or disable sound.
6. Click the browse button under
Backup-Dat
a Path to select the directory
you wish to save your file and then click
Save.
7. Click
Next to backup and compress your
video. A confirmation window appears.
2. Click (Back up) to open the backup
screen.
8. Click
Finish to close the window.
Printing Video Images
To print an image of your video with Lorex
Viewer open:
1. Pause the video that you want to capture
as an image.
2. Click (print). The channel selection
screen appears.
3. Select desired channel to print. Click
OK.
13
Page 26

Using Lorex Viewer
Figure 3.3 Select Watermark to protect the image with
watermark.
Figure 3.4 Watermark program main screen. Click Open to
browse for the watermarked bitmap file.
Figure 3.5 A Watermarked image that has NOT been tampered
with shows a large green circle on the image.
Figure 3.6 A Watermarked image that HAS been tampered wit
shows a large red ’X’ on the image.
Watermarking Video Images
To ensure video images have not been
tampered with, Lorex Viewer comes bundled
with a watermarking software called
Watermark Proofer. The watermark function
allows you to take an image of a single frame
screen shot, and verify that the screen shot has
not been tampered with.
Watermarking Video Images
To watermark a single frame of a video image:
1. Open Lorex Viewer
(Start>Programs>Lorex_V2)
2. Click (backup). The backup window
opens.
3. Under Select Image, click
and click
OK.
and log in.
BMP (Watermark)
4. Browse for the directory you wish to save
y
our picture in. Click
Viewing Watermarked Images
OK.
To view your watermarked video image:
1. Select
Start>Programs>Lorex_V2>Watermark
proofer
to start the watermarking
program.
2. Click
Open and browse for the
watermarked bitmap (.bmp) file you saved
with Lorex Viewer.
3. The image opens with either a pass or fail.
image with a waterproof mark that has
An
NOT been tampered with has a large green
circle on the picture (Figure 3.5). An image
with a waterproof mark that HAS been
tampered has a large red ’X’ on the picture
(Figure 3.6).
14
Page 27

Configuring your Road Warrior
CONFIGURING YOUR ROAD WARRIOR
Before using your Road Warrior for a long
period of time, it is recommended to configure
the Settings menu. This ensures that you
receive the best possible performance.
Click (Setup) to access the Setup menu,
then click the appropriate tabs on the top of the
window:
System Tab
Changing Camera Frame Rate
To change camera recording frame rate:
• From the Normal (Fps) drop-down menu,
select the desired frames per
second.Twenty frames per second is
considered real-time recording.
save.
Click OK to
Looping Video Recording
To record video on a continuous loop:
• Under Storage Method, select
OK
to save.
This will continually record video until the
memory card is full. Once the memory card
is full, the Road Warrior erases the memory
card and begins recording again.
Recycle. Click
Automatically Restarting your Road
Warrior
To prevent the Road Warrior from
encountering recording errors, you can set it to
restart automatically.
To enable automatic restart:
1. Select Auto Reboot.
2. Select the time you want the unit to restart.
Click OK to save.
You can adjust the recording frame rate for
both the Inside camera and the Outside
camera (Driver-View camera).
Adjusting speedometer Unit of
Measurement
To change the unit of measurement that Lorex
Viewer displays:
1. Select Km or MPH.
Click OK to save.
NOTE: Cigarette lighters in import vehicles
turn off when the car powers off. This means
the restart function will NOT work if the
vehicle is turned off. Cigarette lighters in
domestic vehicles remain on even if the
vehicle is turned off.
Disabling Audio in Recording
To disable audio recording in both channels:
• Deselect the Enable check box under the
Audio menu.
Click OK to save.
15
Page 28

Configuring your Road Warrior
Event Tab
Choosing What Events to Record
You can select the types of events that you
want the Road Warrior to record. For example,
you can have the Road Warrior record only
during emergency situations.
To choose the events you want the Road
War
rior to record:
• Select what type of events you want the
R
oad Warrior to record. Deselect the
events you do not want the Road Warrior to
record.
Click OK to save.
record
before
and
after
the event. For
example, after an impact, you may want to view
5 seconds before the event, and 30 seconds
after the event.
Note that the NORMAL(F
ps) frame rate must
be set to 1 for pre and post recording to work.
See “Changing Camera Frame Rate” on
page 15 for details.
To change pre and post recording time:
1. Drag the slider to the left to decrease the
dur
ation (in seconds). Drag the slider to
the right to increase the duration (in
seconds).
Click OK to save.
Adjusting Speed Settings
You can adjust what speed the "Overspeed"
event triggers a recording. For example, if you
set the speed setting to 88 m.p.h., the Road
Warrior will only mark an event as Overspeed
when your car reaches 89 m.p.h.
Emergency
: Records events when the
emergency button is pushed.
Impact: Records events when a vehicle hits
a bump or object.
Overspeed: Records events when the
vehicle reaches a certain speed.
Sudden Stop: Records events when the
vehicle abruptly stops.
Sudden Start: Records when the vehicle
accelerates quickly.
Changing Pre and Post Recording Time
When an event occurs, you can select how
many seconds you want the Road Warrior to
To adjust Speed Settings:
• Drag the slider left to decrease speed
ings; right to increase speed settings.
sett
Click OK to save.
Adjusting Impact Sensitivity
To adjust impact sensitivity:
• From the Sensitivity drop-down menu,
sel
ect desired impact (
Normal). Click OK to save.
Normal, High,
16
Page 29

Configuring your Road Warrior
User Settings Tab
Changing the Administrator Password
To change the Lorex Viewer password:
• Enter the desired user ID and password
int
o the appropriate fields, and click
save the settings.
Imbedding User Information in
Recordings
You can imbed your vehicle name and driver
license on the video as a watermark.
To add your information to video recordings:
• Enter your information into the blank fields
and click
OK.
OK to
Checking Memory Card Capacity
To check the capacity of your SDHC memory
card:
• Select the Removable Disk tab. The
memory c
ard capacity information displays
under Drive Information.
Formatting the Memory Card
Formatting the memory card permanently
deletes your videos. Create a copy of your
memory card files before proceeding with a
full memory card format.
To format your SDHC memory card:
1. Under the Removable Disk tab, click DA
RECOVER to unmount the memory card.
Then click FORMAT DRIVE. The format
window opens.
TA
Removable Disk Tab
Selecting Memory Card Directory
To change the directory of where Lorex Viewer
reads the memory card:
1. From the Select Drive drop-down menu,
sel
ect a save directory (i.e. G:\).
By default, Lorex Viewer automatically
ects your memory card. You should not
det
have to manually change the drive
directory.
2. Click Start.Cl
ick OK when the warning
indow appears.Formatting begins.
NOTE: By default, Windows reads a 4
gigabyte memory card as 3.78 GB.
This is normal.
Formatting the memory card using the Lorex
Viewer imbeds the Lorex Viewer into the memory
Attention!
card.
After formatting the memory card, Lor ex Viewer
automatically copies into your memory card
directory (the LOREX folder).
This means you can watch your videos without
installing Lorex Viewer onto the computer.
Navigate to the LOREX folder on your memory
card, and double-click "lorex" to star t the viewer.
• If you format your SDHC memory card
without using Lorex Viewer, the default
factory directories will not appear after
formatting.
format your memory card. This preserves
necessary folders for the unit to function.
Always use the Lorex Viewer to
17
Page 30

Configuring your Road Warrior
Figure 3.7 The Version tab shows what version of Lorex
Viewer you have installed.
Figure 3.8 Th e Save As menu. Save the CFG file t o a desired
directory.
Figure 3.9 The Open menu. You can only open CFG files.
Version Tab
The version tab shows the version number of
Lorex Viewer and Road Warrior. This
information may be useful when you want to
confirm that you have the latest version of
Lorex Viewer and the latest firmware on the
Road Warrior.
You may need to access the Version tab for
troubleshooting
support.
To view what version of Lorex Viewer, and the
firmware version
• Select the Version tab.
purposes with Lorex technical
of the Road Warrior you have:
2. Adjust your user settings (i.e. time
ings, pre and post recording time etc.)
sett
3. Click OK. The Sav
e As menu appears
(Figure 3.8).
4. Locate the directory you wish to save the
CF
G file. Click Save.
Once you have saved your Road Warrior user
settings file, you
can re-load your Road
Warrior user settings at any time.
Restoring User Settings
You can save your user settings so that you
may re-load your Road Warrior configuration
at any time.
For example, you may have to format your
SDHC
card has been formatted, all your user settings
such as time settings, pre and post recording
times etc., will reset to the factory default.
In order to save your settings, you must save
your user
Restoring Factory Default Settings
Saving User Settings
To save your Road Warrior user settings:
1. Click (setup) to open the setup
memory card. Once your SDHC memory
settings.
• Click on the bottom of the
menu; click Yes to restore factory settings.
menu.
To load your user settings file:
1. Click (setup) to open the setup
menu.
2. Click on the bottom of the
menu. The Open menu appears.
3. Locate the .JDF yo
u saved previously. Click
OPEN. Click OK to continue. A pop-up
menu opens. Click YES to load the JDF file.
18
Page 31

TIPS
Back up your videos
Back up your videos regularly to external
media such as blank CDs or DVDs (not
included). To reduce the risk of losing recorded
video on the Road Warrior, make an extra copy
of all important videos. All Road Warrior videos
are stored in the data folder in the SDHC
memory card. Videos end in a .JDF extension.
Formatting your SDHC memory card
Always use the Lorex Viewer to format your
memory card. By default, the Road Warrior
memory card has four system folders: config,
data, LOREX and update. Formatting your
memory card using the Lorex Viewer ensures
that these folders are restored after you
format your memory card.
The Lorex Viewer program automatically
copies into the memory card’s LOREX
directory. This allows you to run Lorex Viewer
on a foreign PC, without installing the Lorex
Viewer.
Tips
restore your user settings. See “Restoring
User Settings” on page 18 for details.
Viewing videos on your SDHC memory
card
Always use the included SDHC memory card
reader to view video files on your computer.
Should you lose or damage the included
memory card reader, replace it with a SDHC
memory card reader only.
Obtaining GPS signals
Always keep the GPS mounting bracket clear
of obstructions.
The Road Warrior seeks GPS signals when it is
powered on. Depending on weather conditions
and your environment, it may take longer than
usual for the GPS signal to lock in.
If you are in a garage, you may have to move
your vehicle outdoors before the Road Warrior
can detect a signal.
Preventing data loss on your SDHC
memory card
Always power off your Road Warrior before
removing the SDHC memory card. Removing
the SDHC memory card when the Road Warrior
is on may corrupt the files.
Replacing your SDHC memory card
The SDHC memory card included with your
Road Warrior is a high-grade, Class-6 memory
card. SDHC stands for Secure Digital High
Capacity, and provides extended memory
capacity compared to normal SD memory
cards. Always replace damaged memory cards
with Class-6 SDHC memory cards. The
maximum supported size is 32 GB gigabytes.
Maintaining memory card health
Back up your files regularly, and format your
SDHC memory card monthly. This ensures that
the memory card operates error-free. After
you format your SDHC memory card, you can
Moving the video window
Click and drag the video windows to
manipulate its location. Click the bottom right
hand corner of the video, and drag to increase
and decrease window size.
Closing the video window during full
screen playback
• To close the video window during full
screen playback, double-click on the video
screen image to return to the main viewing
window.
• To view video in full-screen playback,
double-click on the image in the video
window.
19
Page 32

Mounting The Road Warrior - FAQ
MOUNTING THE ROAD WARRIOR - FAQ
What is the best location to mount the Road Warrior?
Mount the Road Warrior as close as you can to the
rear view mirror, without obstructing your ability to
adjust the mirror. The in-car and driver-view camera
should cover the middle of the vehicle. The Road
Warrior should not be mounted too far into the
passenger side.
It is highly recommended to use a portable display
(not included) to
location of the Road Warrior. If you do not have
access to a portable display, simply hold the Road
Warrior by hand, where you would like to position it,
and begin recording. Then, view the video to see if the
mounting angle is appropriate.
calibrate the angle and mounting
Always have a clear view of the road.
safely.
Discontinue use if the Road Warrior distracts you from driving
How do I remove the mounting bracket on my windshield?
Remove the Road Warrior from the mounting
bracket, then firmly tug on the mounting bracket. Be
patient. The double-sided adhesive has a powerful
bond to glass surfaces.
Be careful not to break the mounting bracket while
trying to
remove it from the windshield.
Why does the Road Warrior come included with double-sided
adhesive?
Double-sided adhesive provides superior gripping power compared to suction cups. The Road
Warrior is designed to be held in place while the vehicle encounters bumps and sudden forces.
Extreme heat and extreme cold does not affect the strength of the double-sided adhesive. This is
vital when the Road Warrior is mounted in environments with extreme temperature fluctuations.
20
Page 33

Appendix A: Upgrading Road Warrior Firmware
APPENDIX A:
UPGRADING ROAD WARRIOR FIRMWARE
Occasionally, your Road Warrior may require a firmware update to enhance performance.
Firmware upgrades are available online at www.lorexcctv.com.
To upgrade your Road Warrior firmware:
Remove the SDHC memory card from the Road Warrior
1. Power off your Road Warrior. Remove the SDHC memory card.
2. Plug in the SDHC memory card into the memory card reader. Plug the memory card reader
int
o your PC’s USB port.
Download the firmware
1. Go to www.lorexcctv.com and search ’Road Warrior’ on the website.
2. Download the latest firmware onto your comput
firmware file.
NOTE: The
firmware file ends in a .arm extension.
er. Make note of where you downloaded the
Extract the firmware
• Double-click the zipped file and select the directory of where you would like to save the file.
Copy the firmware into the SDHC memory card
• Copy the firmware into the data folder of your Road Warrior’s SDHC memory card. Eject the
SDHC memory card when the files have successfully copied into the data folder.
Reboot the Road Warrior
1. Unpower your Road Warrior.
2. Insert the SDHC memory card with the firmware into the Road Warrior.
3. Power on your Road Warrior. Wait appr
the firmware upgrade is complete, the REC, GPS and POWER LED will have a solid glow.
oximately two minutes for the unit to upgrade. When
21
Page 34

Appendix B: Lorex Viewer System Requirements
APPENDIX B: LOREX VIEWER SYSTEM
REQUIREMENTS
Prior to using Lorex Viewer, make sure your system meets or exceeds the following system
requirements:
Description Requirement
CPU 2.0 GHz Pentium
®
4 or above
Operating
System
Browser Internet Explorer 7 or greater
Memory 1 GB RAM (more than 1 GB recommended)
Video 16 MB of video memory
HDD 2 GB of free space
Network (LAN) 10/100 Base-T Network
Network
(W
AN)
*High-speed Internet connection recommended
Windows XP/Vista
384 Kbps upstream*
22
Page 35

Appendix C: Road Warrior Technical Specifications
APPENDIX C: ROAD WARRIOR TECHNICAL
SPECIFICATIONS
Cameras Two CMOS cameras
Lens Curvature Driver-View Lens: 175°
Interior-View Lens: 120° Wide Angle
Video Input Digital 2 Channel Built-in
Video Compression H.264
Audio Compression ADPCM
Recording Resolution VGA 640 x 480
Recording Speed Maximum of 60 FPS (30 FPS per channel)
Recording Media SDHC memory card, Class 6. 32 Gigabyte
maxim
IR LED 850n with CDS sensor
Power Requirements DC 12V~24V
Operating Temperature 32° F ~ 113°F / (0° ~ 45°C)
Humidity Tolerance 10~95%
Weight 150g
Dimensions 65 (W) x 140 (D) x 30 (H) mm
um
23
Page 36

Troubleshooting Your Road Warrior
TROUBLESHOOTING YOUR ROAD WARRIOR
When a malfunction occurs, it may not be serious and can be corrected easily. The following
describes the most common problems and solutions. Please refer to the following before calling
Lorex Technical Support.
Error Solution
The computer freezes or
encounters an error when I try to
view files on the SDHC memory
card.
The Road Warrior does not power
on.
Video files are missing on the SDHC
memory card
The Lorex Viewer plays videos off
the memory card,
record.
The video is blurry.
The Road Warrior reboots after I
insert a SDHC memory card.
Google maps does not connect
when I start
Lorex Viewer does not install on my
computer.
but is unable to
Lorex Viewer.
Make sure that you are using the included SDHC memory card
reader. SDHC memory cards require a SDHC compatible card
reader.
Double check that the power adapter
Warrior and into your vehicle’s cigarette lighter. Your vehicle must
be turned in order to power the cigarette lighter.
Make sure the memory card is inserted correctly into the Road
Warrior. The memory card should smoothly slide into the memory
card slot. The memory card clicks and locks into place.
Make sure the memory card is not locked. Check your memory
card to see if the tab has been set to lock. Push the tab back into
the record position.
Make sure the secure film on the camera lens are removed.
Gently wipe the camera lenses with a non-abrasive cloth.
Back up all your video files on the memory card, then format the
memory card.
Make sure you have a working Internet connection.
Make sure you have administrative privileges if you are running
Window
Make sure your computer meets the minimum requirements:
P
Direct X 9.0 or greater / 2.0 GB of free hard drive space
s Vista. Lorex Viewer is designed for PCs only.
entium 4 2.0Ghz processor / 512 MB of RAM/ Windows XP/ Vista/
is plugged into the Road
My video is missing frames (choppy
video).
24
Ensure that you are using a CLASS 6 SDHC memory card.
Make sure your computer meets the minimum requirements.
Page 37

Page 38

Page 39

SEE HEAR PROTECT
Enhance your security with genuine Lorex Cameras, Digital Video Recorders,
Integrated Systems and Accessories. Order whatever you need at
www.lorexcctv.com or call 1-888-42-LOREX (1-888-425-6739)
Kitchen
LW2702
Warehouse
CVC6998HR
Drive Way
Office
CVC6993R
Restaurant
VQ1536HR
Convenience Store
LW2100
PROTECT EVERYTHING
THAT MATTERS
Add wired or wireless cameras to expand the
“Envelope of Protection” for your business,
your home and your family
Front Door
Nursery
Home Office
LW2002B
Backyard
SG7540
11262009-R10
LW2301
LW2002W
LW2201
 Loading...