

Lorex LW2020 SERIES, LW2030 Series Instruction Manual
HOME VIDEO MONITORING SYSTEM
INSTRUCTION MANUAL
ENGLISH VERSION 1.0
*
CONNECT
LW2020/LW2030 SERIES
*Handheld monitor included with LW2030 Series only
www.lorextechnology.com


Safety Instructions
WARNING
This video monitor is compliant with all relevant standards
regarding electromagnetic fields and is, when handled as
described in the User’s Guide, safe to use. Therefore, always read
the instructions in this User’s Guide carefully before using the
device.
• Adult assembly is required. Keep small parts away from children when
assembling.
• This product is not a toy. Do not allow children to play with it.
• This video monitor is not a substitute for responsible adult supervision.
• Keep this user’s guide for future reference.
• Keep the cords out of reach from children.
• Do not cover the video monitor with a towel or blanket.
• Never use extension cords with power adapters.
• Only use the power adapters provided.
• Test the video monitor before use. Become familiar with its functions.
• Do not use the video monitor near water.
• Do not install the video monitor near a heat source.
• Only insert batteries/battery pack of the same type.
• Do not touch the plug contacts with sharp or metal objects.
• Only use the chargers and power adapters provided. Do not use other
chargers or power adapters as this may damage the device and
battery pack.
CAUTION
Risk of explosion if battery is replaced by an incorrect type.
• DISPOSE OF OR RECYCLE BATTERIES PROPERLY IN ACCORDANCE WITH
APPLICABLE LAWS, which may vary by location.
• Insert batteries with the correct polarity.
• Do not mix new and used batteries.
• Remove exhausted batteries from the product.
• Keep all batteries away from children.
3 ft.
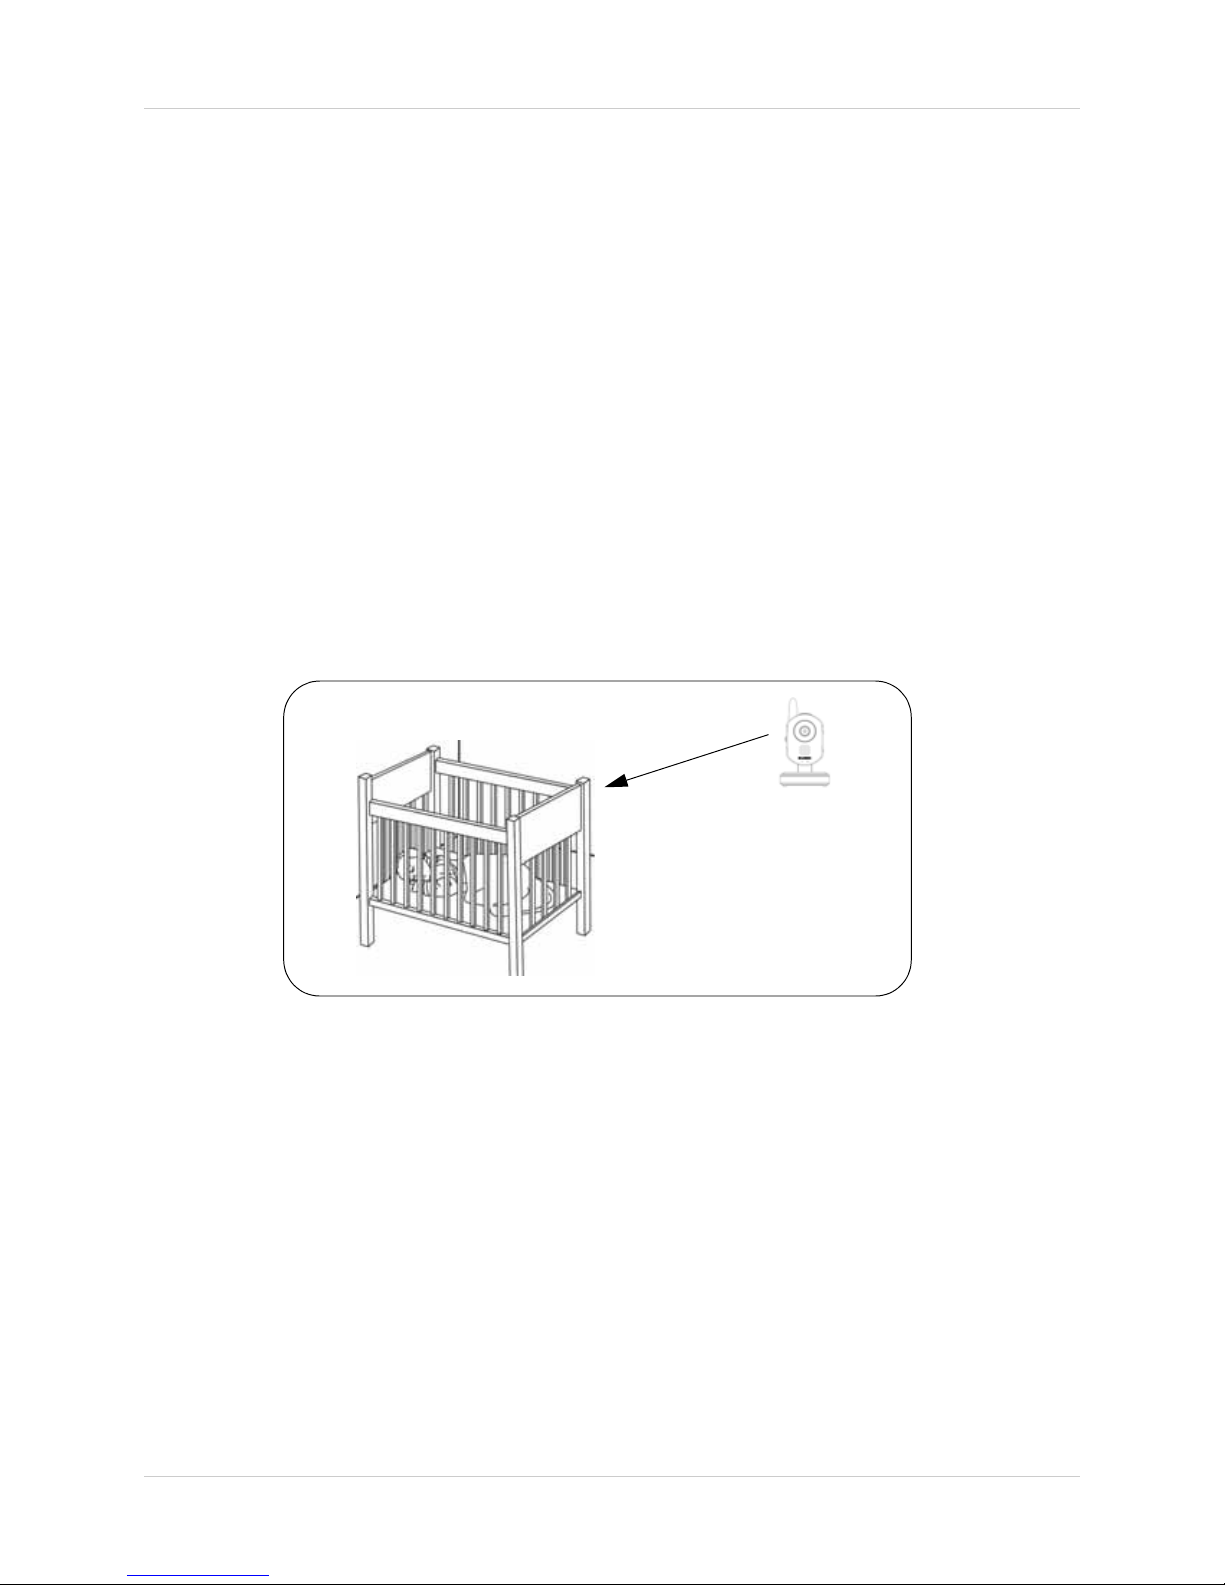
Using this product as a baby monitor
If you intend to use this wireless video monitor as a baby monitor, we advise you to take the
following precautions to avoid possible injury to infants:
• DO NO
bassinets, play yards and other safe sleep environments for infants.
• MAKE SURE all power adapter cords are out of arms reach of your infant.
Keep them at least 3ft/1m away
• MAKE SURE baby audio and video camera monitors are on a stable footing
so they cannot be easily knocked over
• Use the included cable clips to keep the power cord out of reach from infants and young
children.
NOTE: These pr
T place baby audio and video camera monitors too close to cribs,
ecautions are important even if your infant is not yet standing
or mobile.
ii

Table of Contents
Contents. . . . . . . . . . . . . . . . . . . . . . . . . . . . . . . . . . . . . . . . . . . . . . . . . . . . . . . 1
System Requirements . . . . . . . . . . . . . . . . . . . . . . . . . . . . . . . . . . . . . . . . . . . 2
Gateway Overview . . . . . . . . . . . . . . . . . . . . . . . . . . . . . . . . . . . . . . . . . . . . . . 3
Camera Overview . . . . . . . . . . . . . . . . . . . . . . . . . . . . . . . . . . . . . . . . . . . . . . . 4
Handheld Monitor (LW2030 Series only). . . . . . . . . . . . . . . . . . . . . . . . . . . . 6
How the Gateway Works . . . . . . . . . . . . . . . . . . . . . . . . . . . . . . . . . . . . . . . . 16
Setting up the Gateway . . . . . . . . . . . . . . . . . . . . . . . . . . . . . . . . . . . . . . . . . 18
Gateway Control Panel. . . . . . . . . . . . . . . . . . . . . . . . . . . . . . . . . . . . . . . . . . 31
Configuring Gateway menus . . . . . . . . . . . . . . . . . . . . . . . . . . . . . . . . . . . . . 34
Appendix A: Enabling UPnP. . . . . . . . . . . . . . . . . . . . . . . . . . . . . . . . . . . . . . 43
Appendix B:
Troubleshooting the handheld monitor. . . . . . . . . . . . . . . . . . . . . . . . . . . . 45
Appendix C:
Replacing the handheld monitor battery. . . . . . . . . . . . . . . . . . . . . . . . . . . 46
Notices . . . . . . . . . . . . . . . . . . . . . . . . . . . . . . . . . . . . . . . . . . . . . . . . . . . . . . . 47
iii

iv
Contents
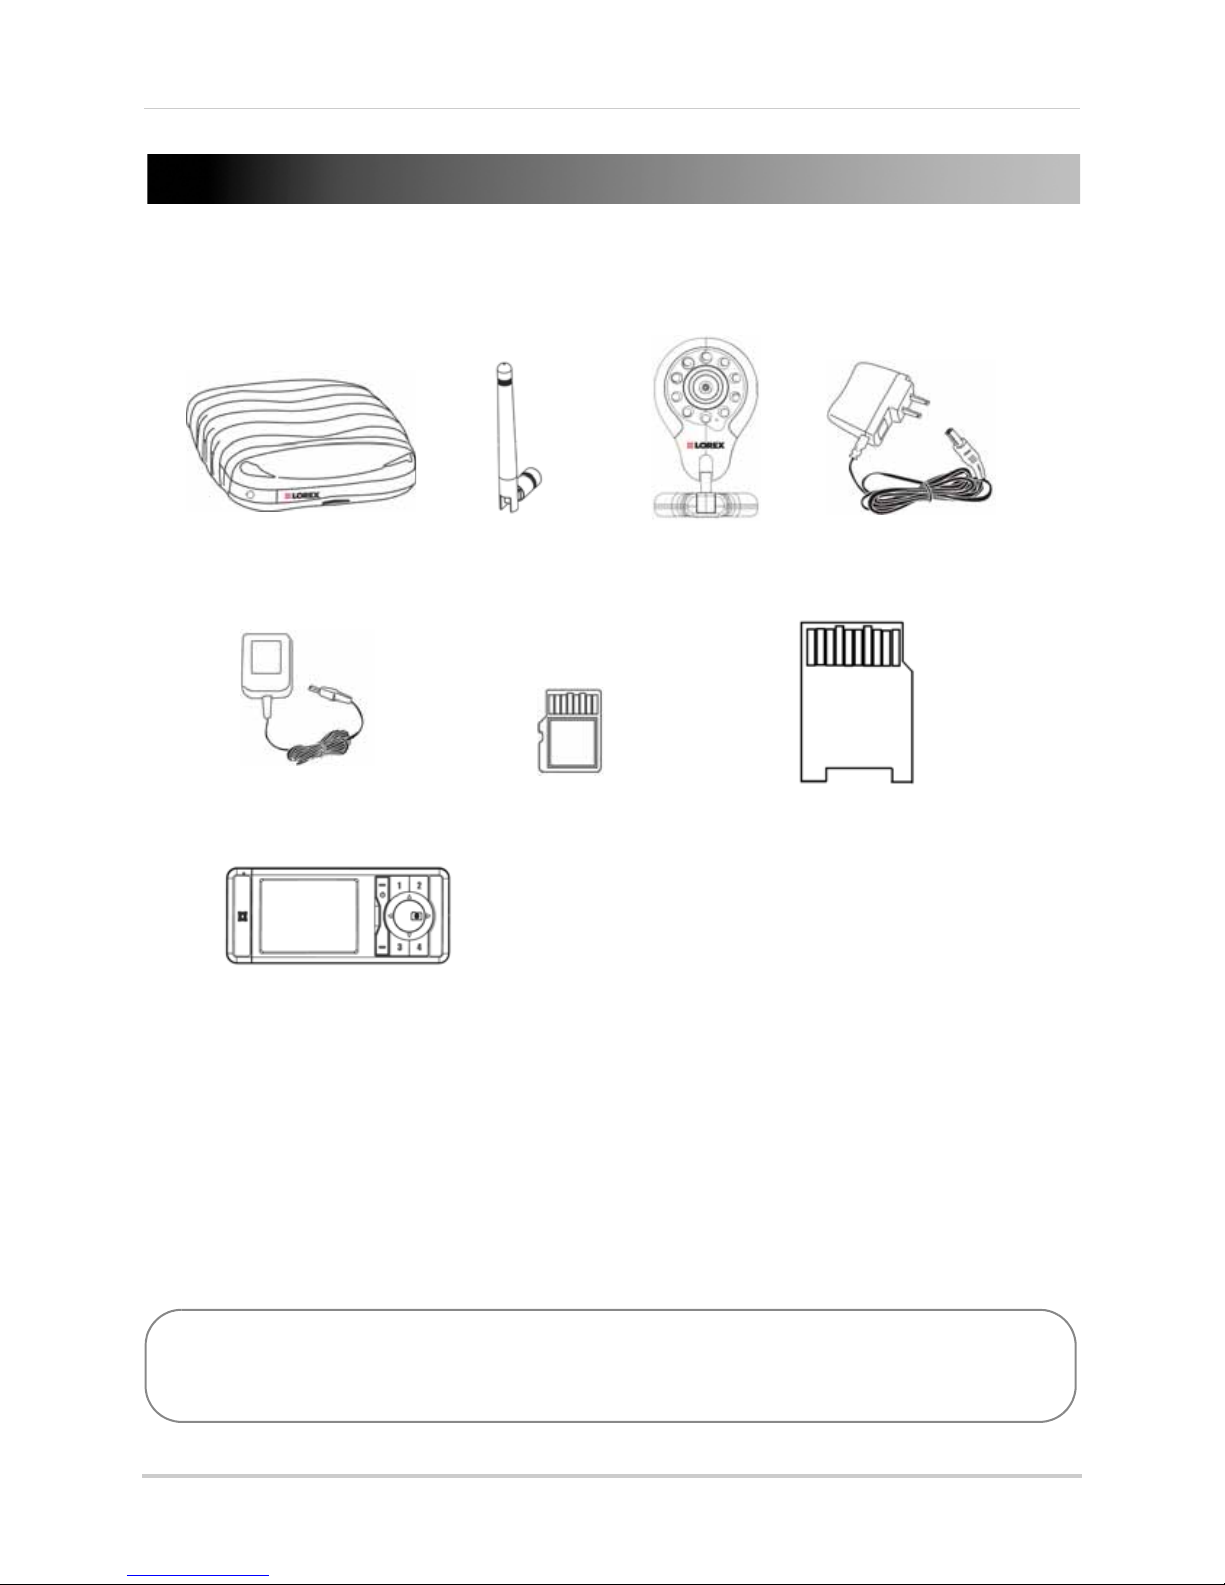
*Number of cameras and accessories may vary.
• Network cable
• Instruction manual
• Quick Start Guide
Gateway
Antenna
Camera*
Camera & Handheld
monitor power adapter x2
Gateway power adapter
microSD card
microSD card adapter
Additional Contents
Handheld monitor
The handheld monitor is included with the
LW2030 Series only.
The system comes with the following components:
CHECK YOUR PACKAGE TO CONFIRM THAT YOU HAVE RECEIVED THE COMPLETE
SYSTEM, INCLUDING ALL COMPONENTS SHOWN ABOVE.
1

System Requirements
Your system must meet the minimum system requirements.
PC Requirements
• Skype for Windows version 4.2 and above
• Windows 7, Windows Vista, Windows XP SP3
• 1 GHz or greater processor
Mac
• 1GHz Intel processor
• Mac OS 10.6 or later (Intel processors only)
• 100 MB free disk space.
• Either USB or regular headset if your Mac does not have a built-in microphone.
iPhone, iPad, iPod touch Requirements
• Skype for iPhone 3.0 and above
• iPhone 4 / 3GS (iOS 4.0 and above)
• iPod touch (3rd generation and above)
• iPad (1st generation and above)
General requirements
• High-speed broad connection of 512kbps down/128kbps up and a computer
• Home network with router
For further details, visit www.skype.com.
11
2
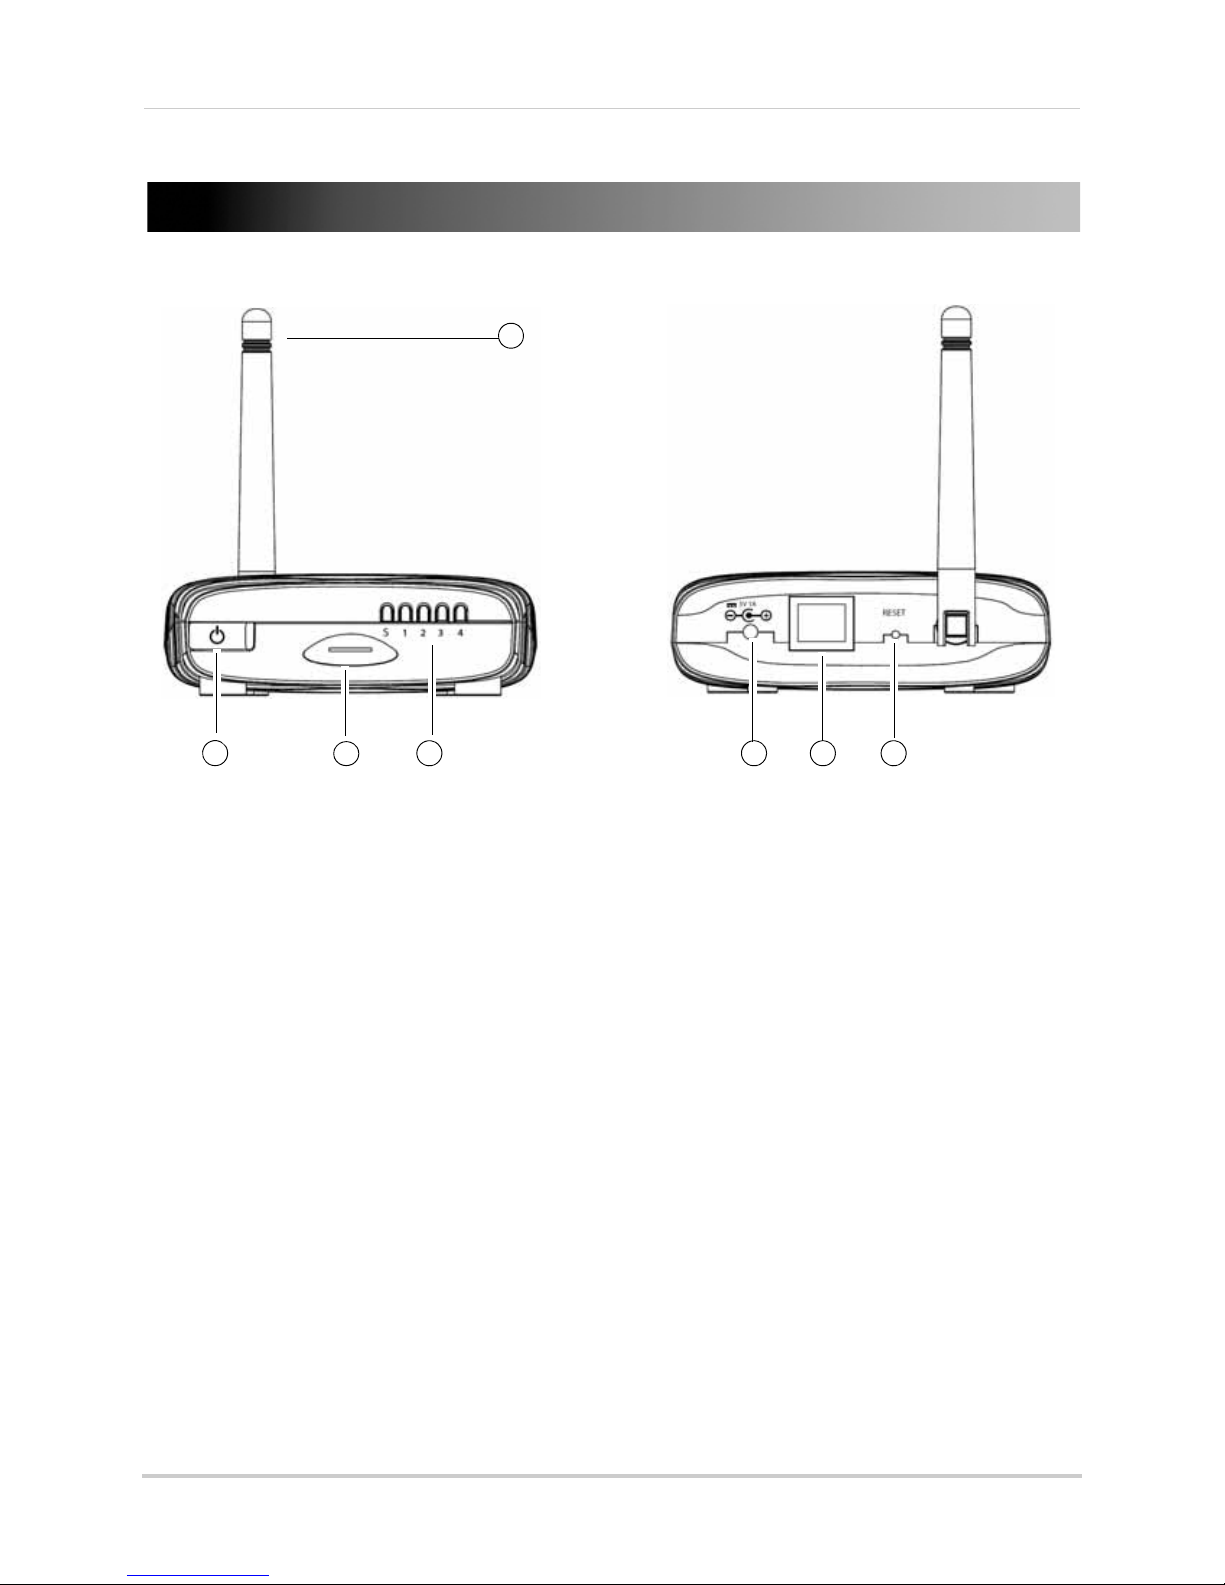
Gateway Overview
1
2
3
4 5 6 7
Front View
Rear View
Gateway Overview
1 Antenna: Transmits the video signal to the camera.
2 On/Off button: Press to turn the Gateway on or off.
3 mi
4 Cam
5 Powe
6 Ethe
7 Reset port: Res
croSD card slot: For future use.
era LED indicators:
• S:
Glows to indicate the Gateway is connected to Skype.
• 1~4: Glows to indicate the camera that is connected.
r Port: Connect a power adapter to the power port.
rnet port: Connect an ethernet cable from your internet router to
the Gateway’s ethernet port.
press and hold the Reset port for 10 - 15 seconds to reset the unit.
tores the Gateway settings to factory defaults. Use a paperclip, and gently
3
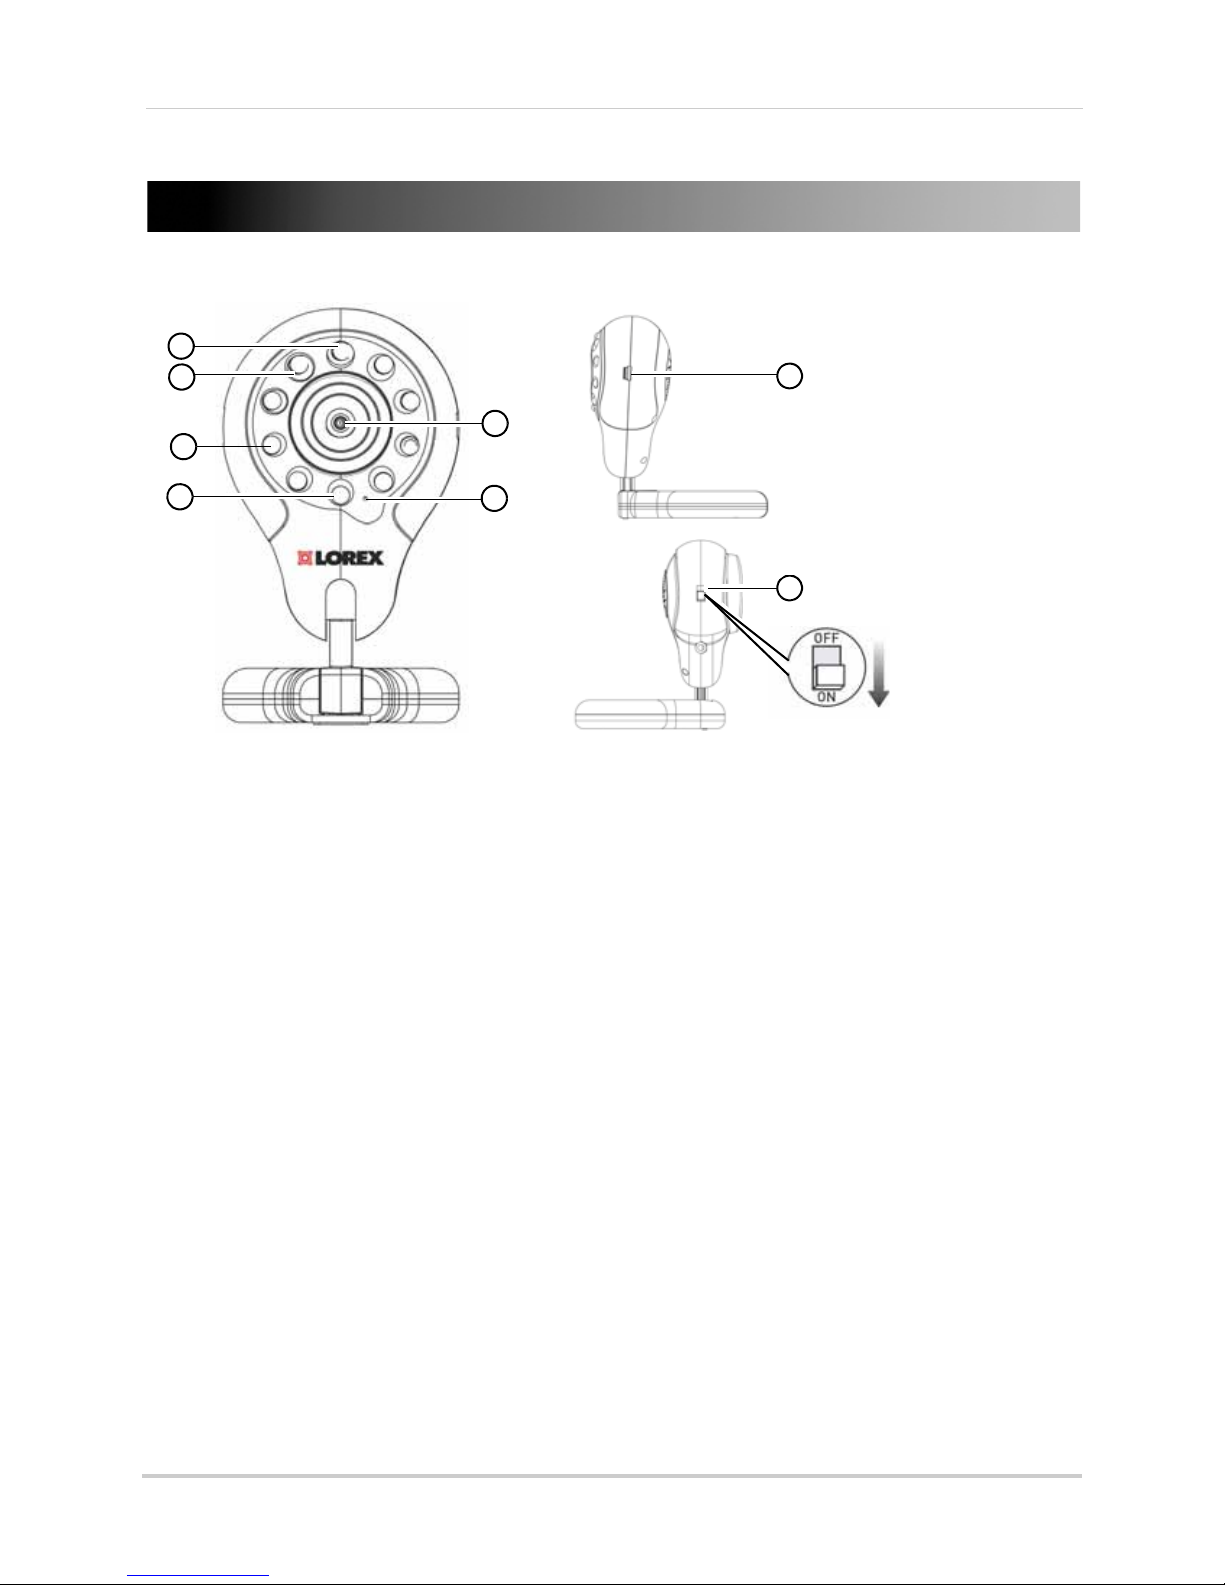
Camera Overview
1
2
4
6
7
5
3
8
Camera
1 Status LED: Glows green to indicate camera is active. Glows red if camera is inactive. Flashes
red to indicate low battery power.
2 Ch
arging LED: Glows red to indicate camera is charging.
Overview
3 Infr
4 Light Se
5 Cam
6 Mi
7 A
8 ON/OFF Switch: Tu
ared LEDs: Allows the camera to view in the dark. Glows red during night time viewing.
nsor: Detects the light level in the room to automatically turn on/off the night time
LEDs.
era lens
crophone
C adapter port: Connects to the included AC adapter to charge the camera.
rns camera on/off.
4
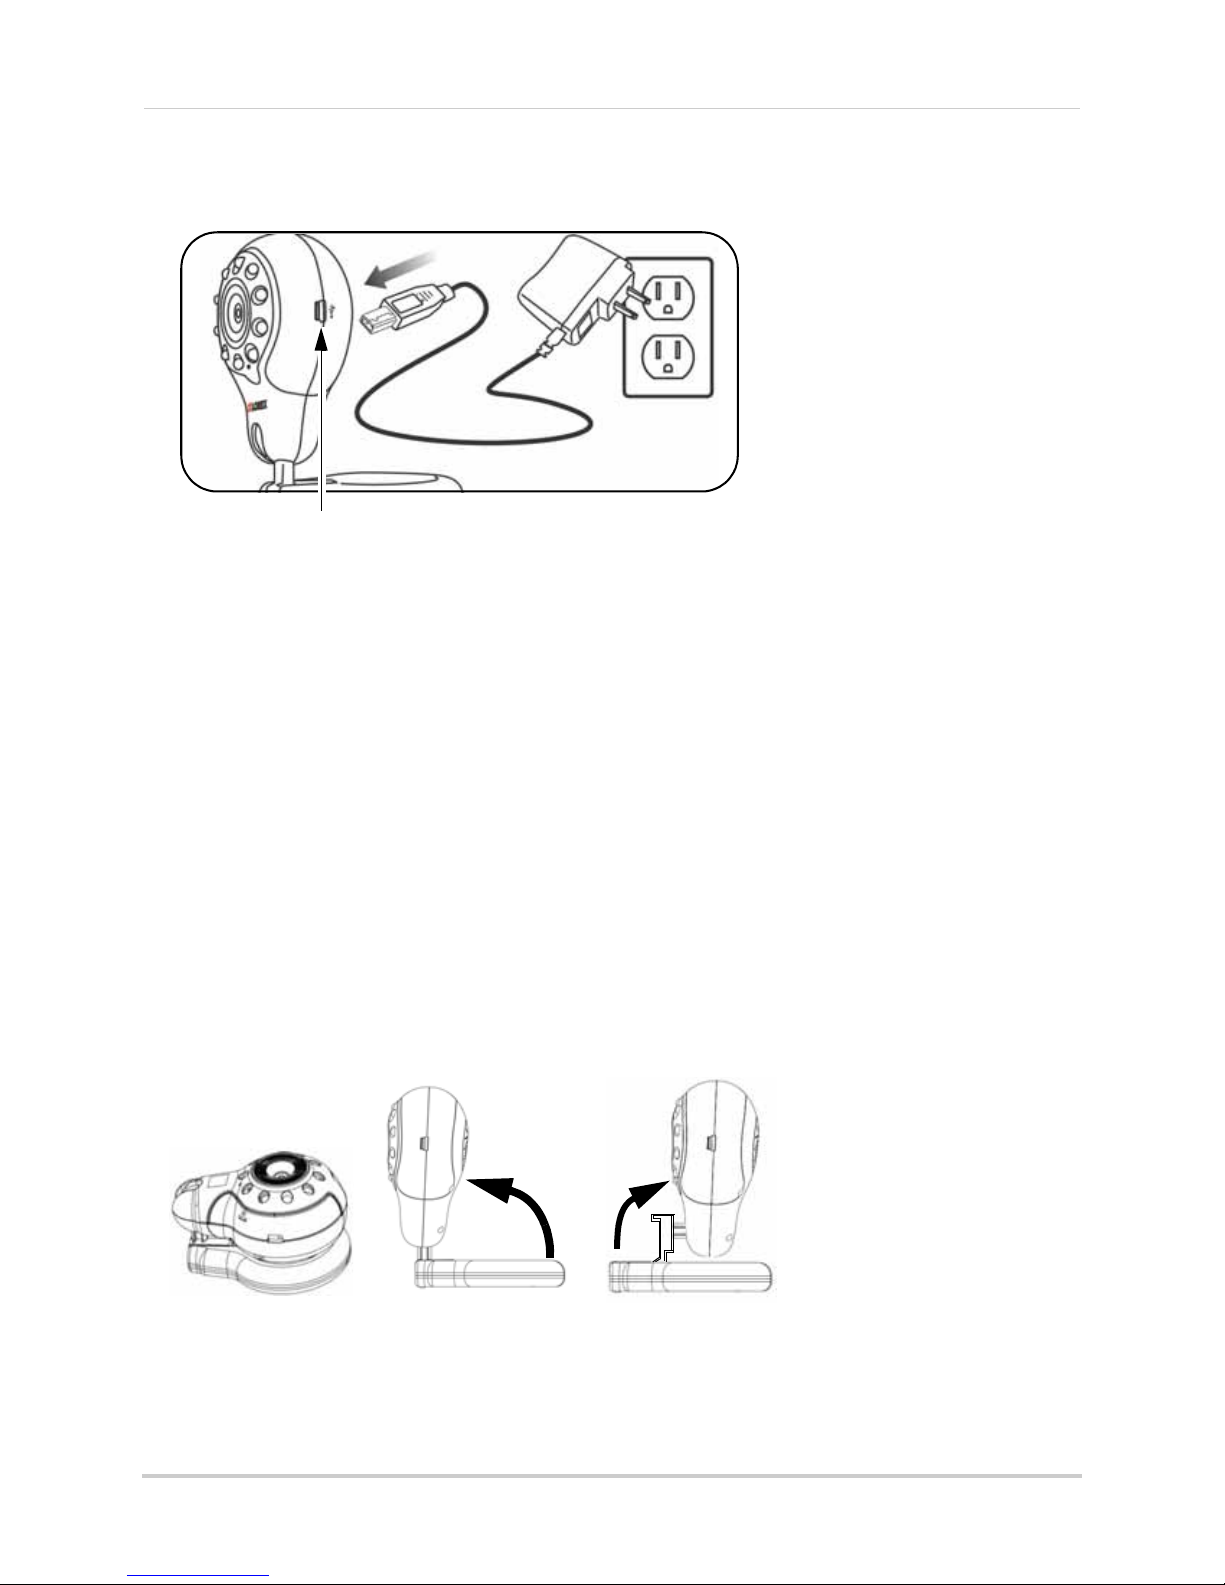
Camera Overview
AC adapter port
Table top setup
Step 1
Step 2
Step 3
Charging the camera
To charge the camera:
1 Plug the AC power connector from the power adapter into the AC adapter port on the camera.
2 Connect the power adapter to a power outlet.
3 The charging LED glows red to indicate the camera is charging.
NOTE: The Status LED on the camera flashes when there is approximately 30 minutes of
battery life left. Charge the camera for 6 consecutive hours to charge completely.
NOTE: Only use the included power adapter to charge the camera.
Adjusting the camera
• Place the camera in a location where it cannot be easily reached or knocked over
• Place the camera on a flat surface (i.e. table).
• Proceed to step 3 to improve camera balance when positioning on a flat surface
• The camera head swivels 360 degrees
5
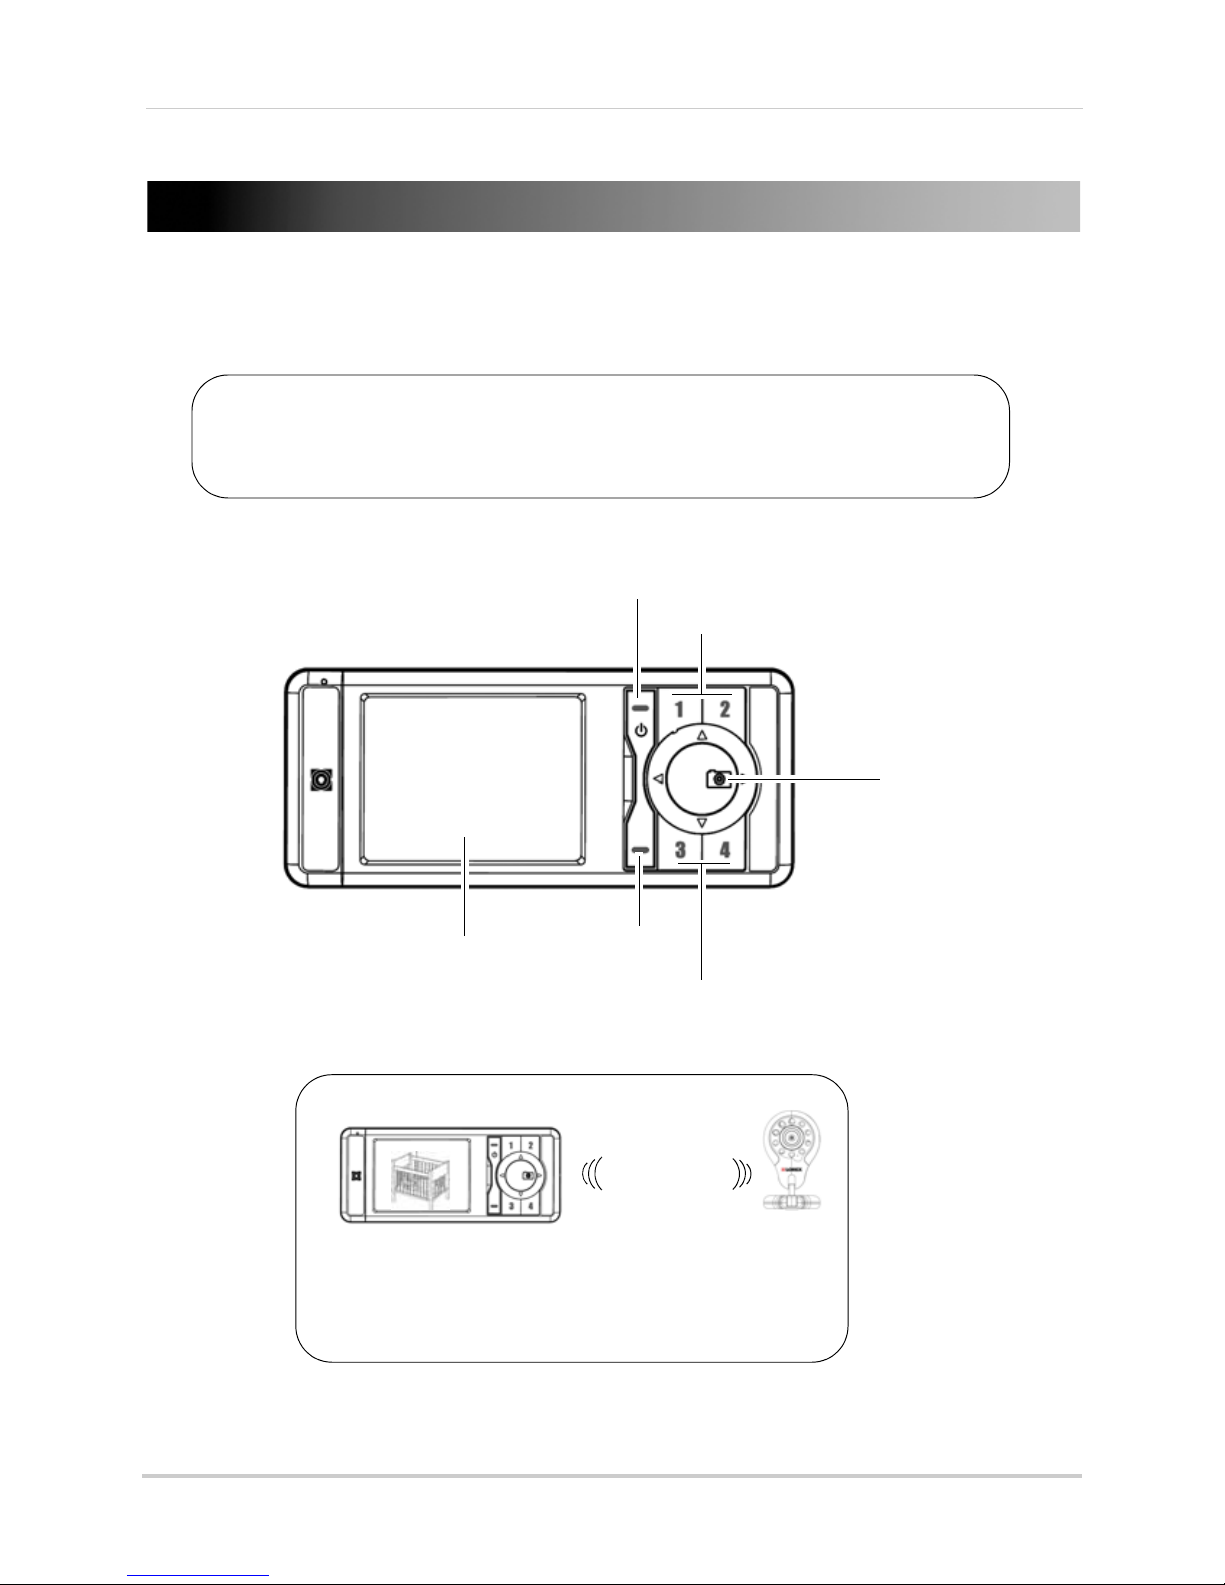
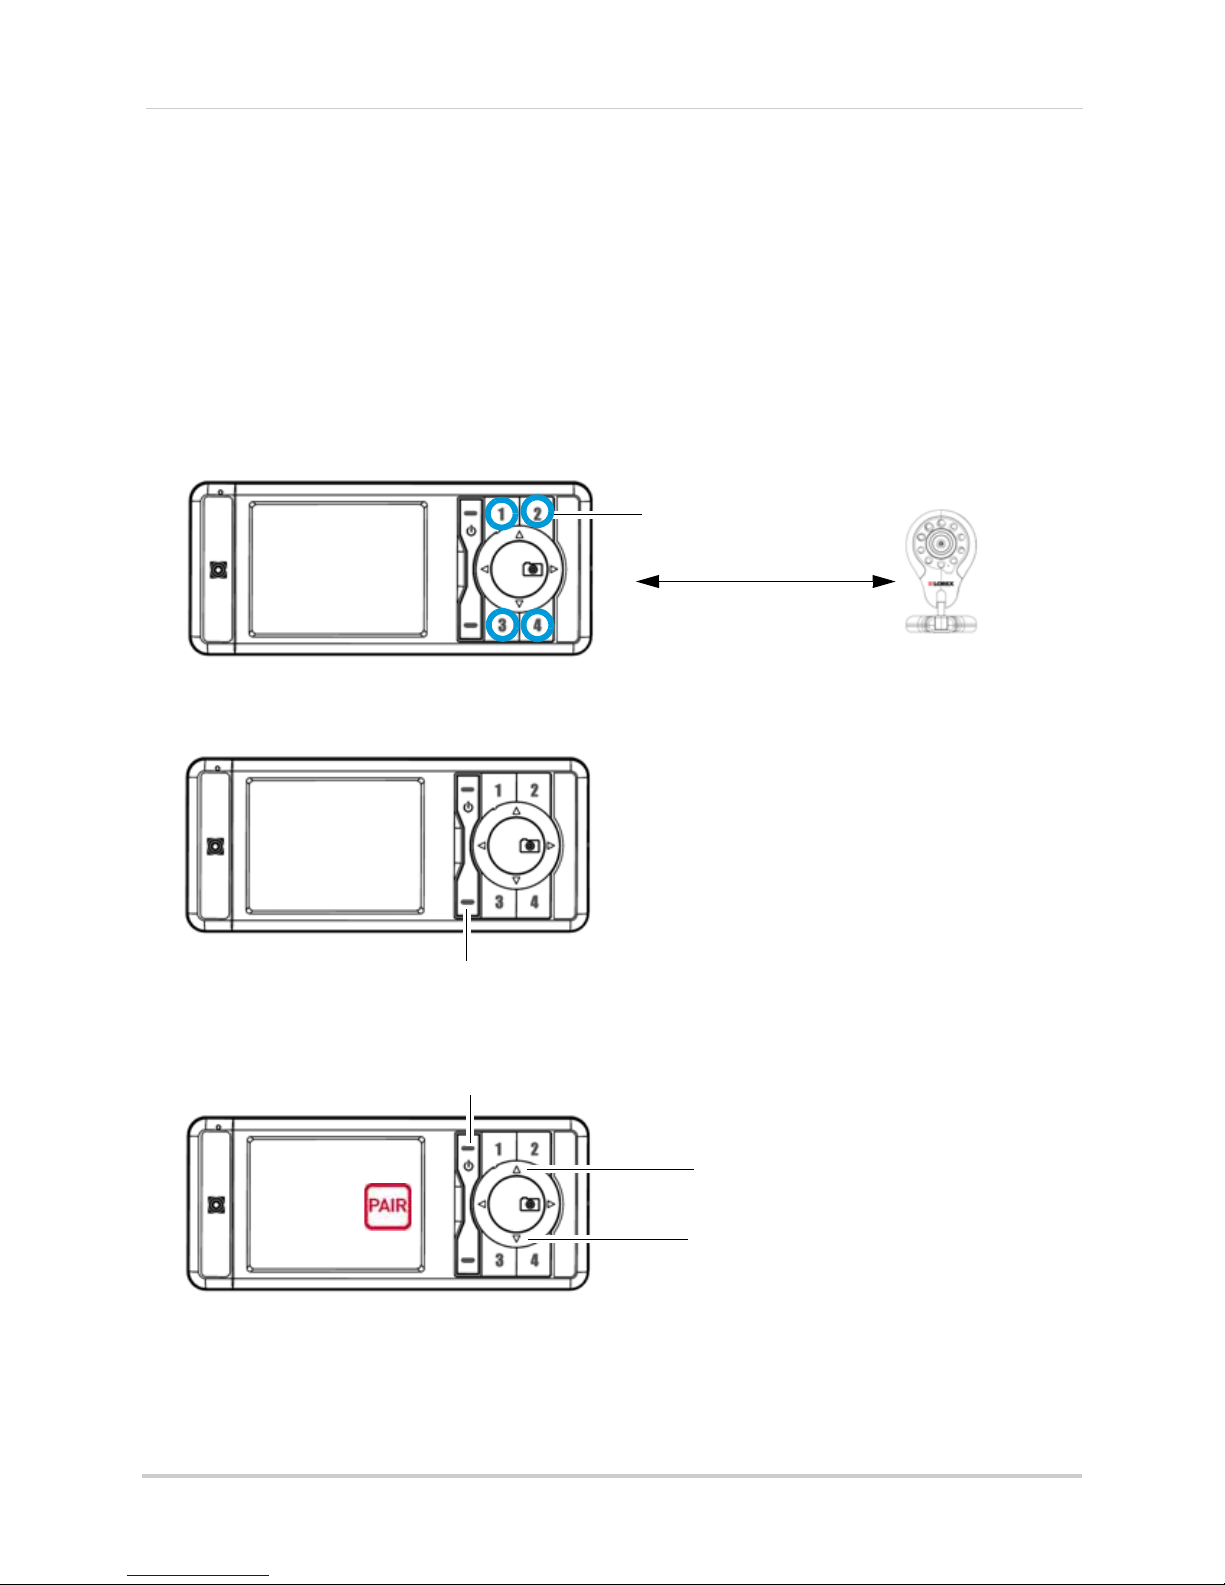
Handheld Monitor (LW2030 Series only)
NOTE: The handheld monitor has priority over a user connecting to the
Gateway. When a user attempts to connect to the Gateway, a
message on the handheld prompts you to accept or decline the
incoming user.
Video screen
Camera buttons
Camera buttons
Power button
Snapshot button
How it works
Menu button
The camera securely transmits video and
audio to the handheld monitor. You can view
up to 4 connected cameras, one at a time.
Handheld Monitor (LW2030 Series only)
The handheld monitor allows you to view video and listen to audio transmitting from the
camera. You can view up to four connected cameras, one at a time.
6
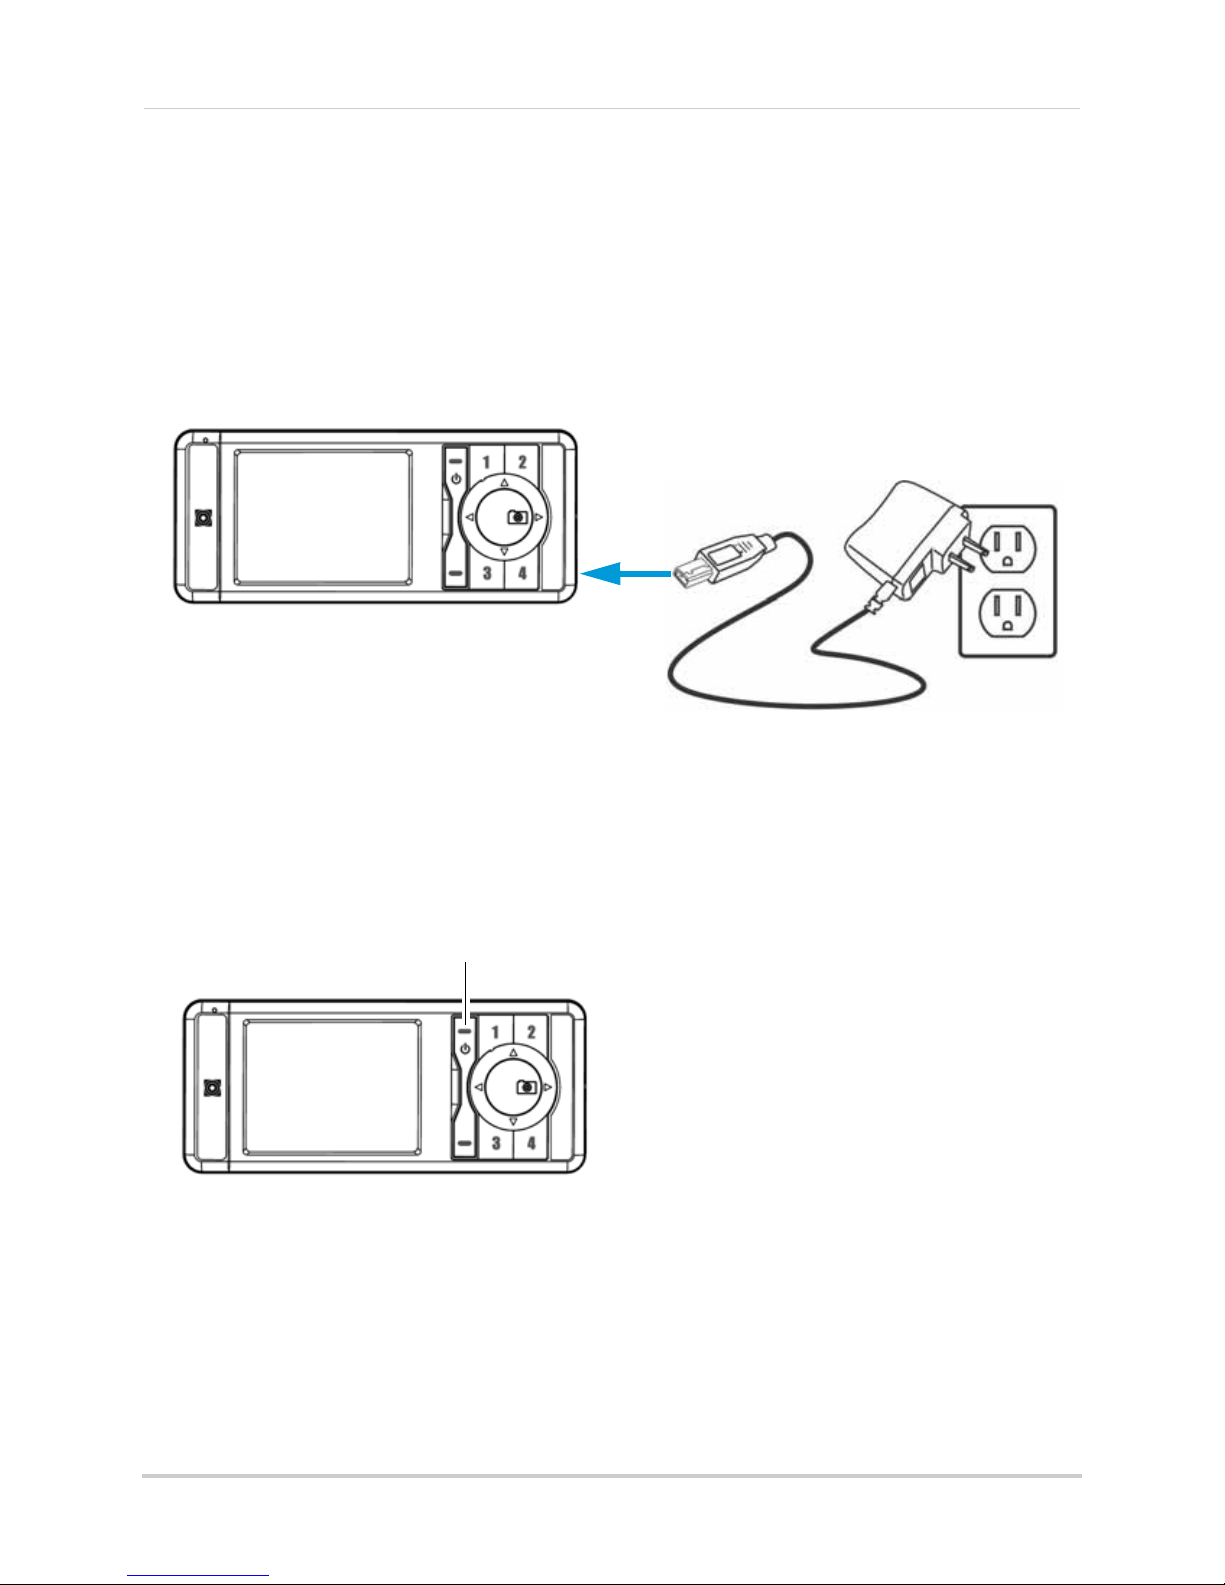
Handheld Monitor (LW2030 Series only)
Power button
Charging the handheld monitor
Before connecting to the camera, it is recommended to charge the handheld monitor for 6
consecutive hours to ensure a full charge on the battery.
To charge the handheld monitor:
1 Con
nect the power adapter to the handheld monitor. Connect the other end of the power
adapter to a power outlet.
Connecting to the camera
To connect to your camera:
1 Tu
rn on a camera.
2 Pr
ess the power button on the handheld monitor. The camera image should automatically
appear.
NOTE: If you have more than one camera, you must pair them to the handheld receiver.
See page 8 for details.
7
Handheld Monitor (LW2030 Series only)
Channel buttons (1~4)
Place 1 ft apart
Menu
OK
Pairing
By default, the camera is pre-paired to channel 1 on the handheld monitor. If you purchase
additional cameras, you will have to pair them to the handheld monitor. You can pair a
maximum of 4 cameras.
To pair a camera to the handheld monitor:
rn off the camera that you wish to pair.
1 Tu
2 S
elect the channel that you wish to pair up the camera by pressing 1, 2,3 or 4 on the handheld
monitor.
Place the camera that you wish to pair one feet apart from the handheld receiver.
3 Pr
ess the Menu button on the monitor.
4 Press or and select Pair, and then press the OK button.
5 Turn on the camera and wait 15 seconds for the camera to pair up. When the camera has
been successfully paired with the monitor, a "Device Found" message appears.
8
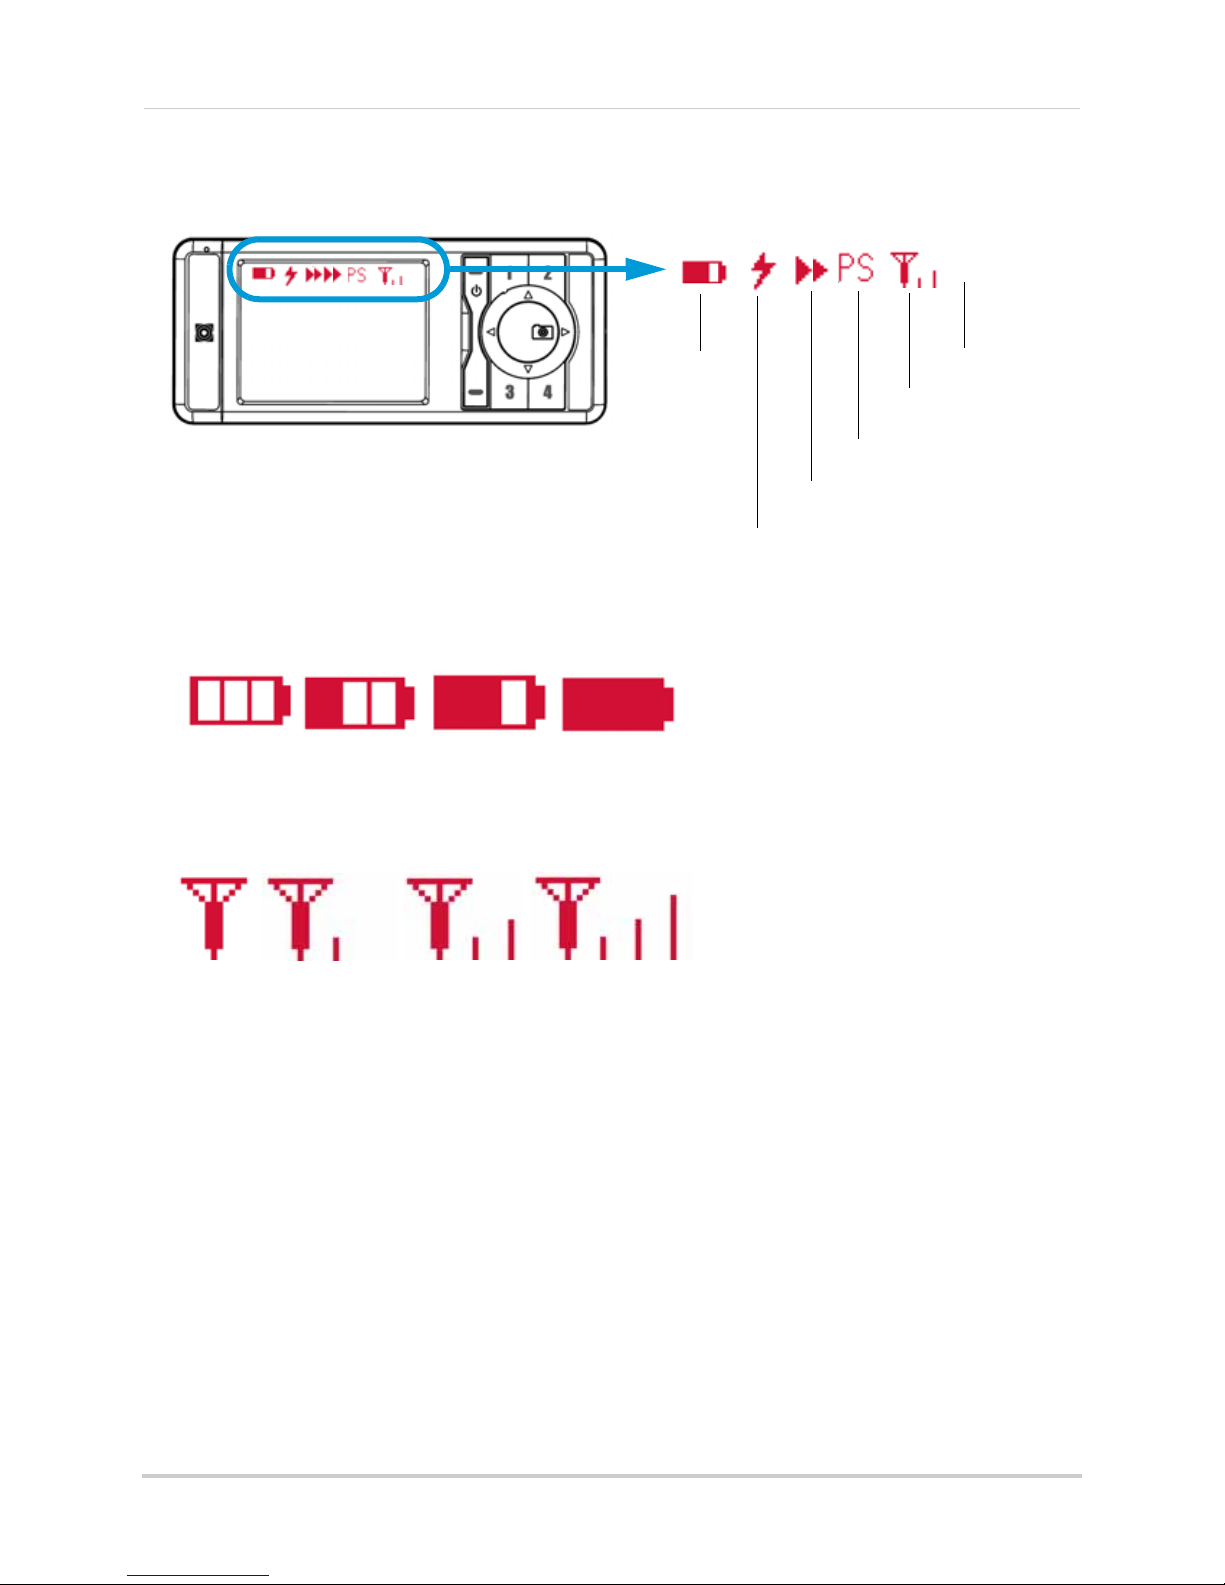
Interface Overview
1
1
Battery life
indicator
Charging indicator
Audio indicator
Power Save mode
Camera signal
strength
Channel number
Low battery
Full battery
Low signal
Full signal
Reading the battery indicator
Handheld Monitor (LW2030 Series only)
Reading the signal indicator
9
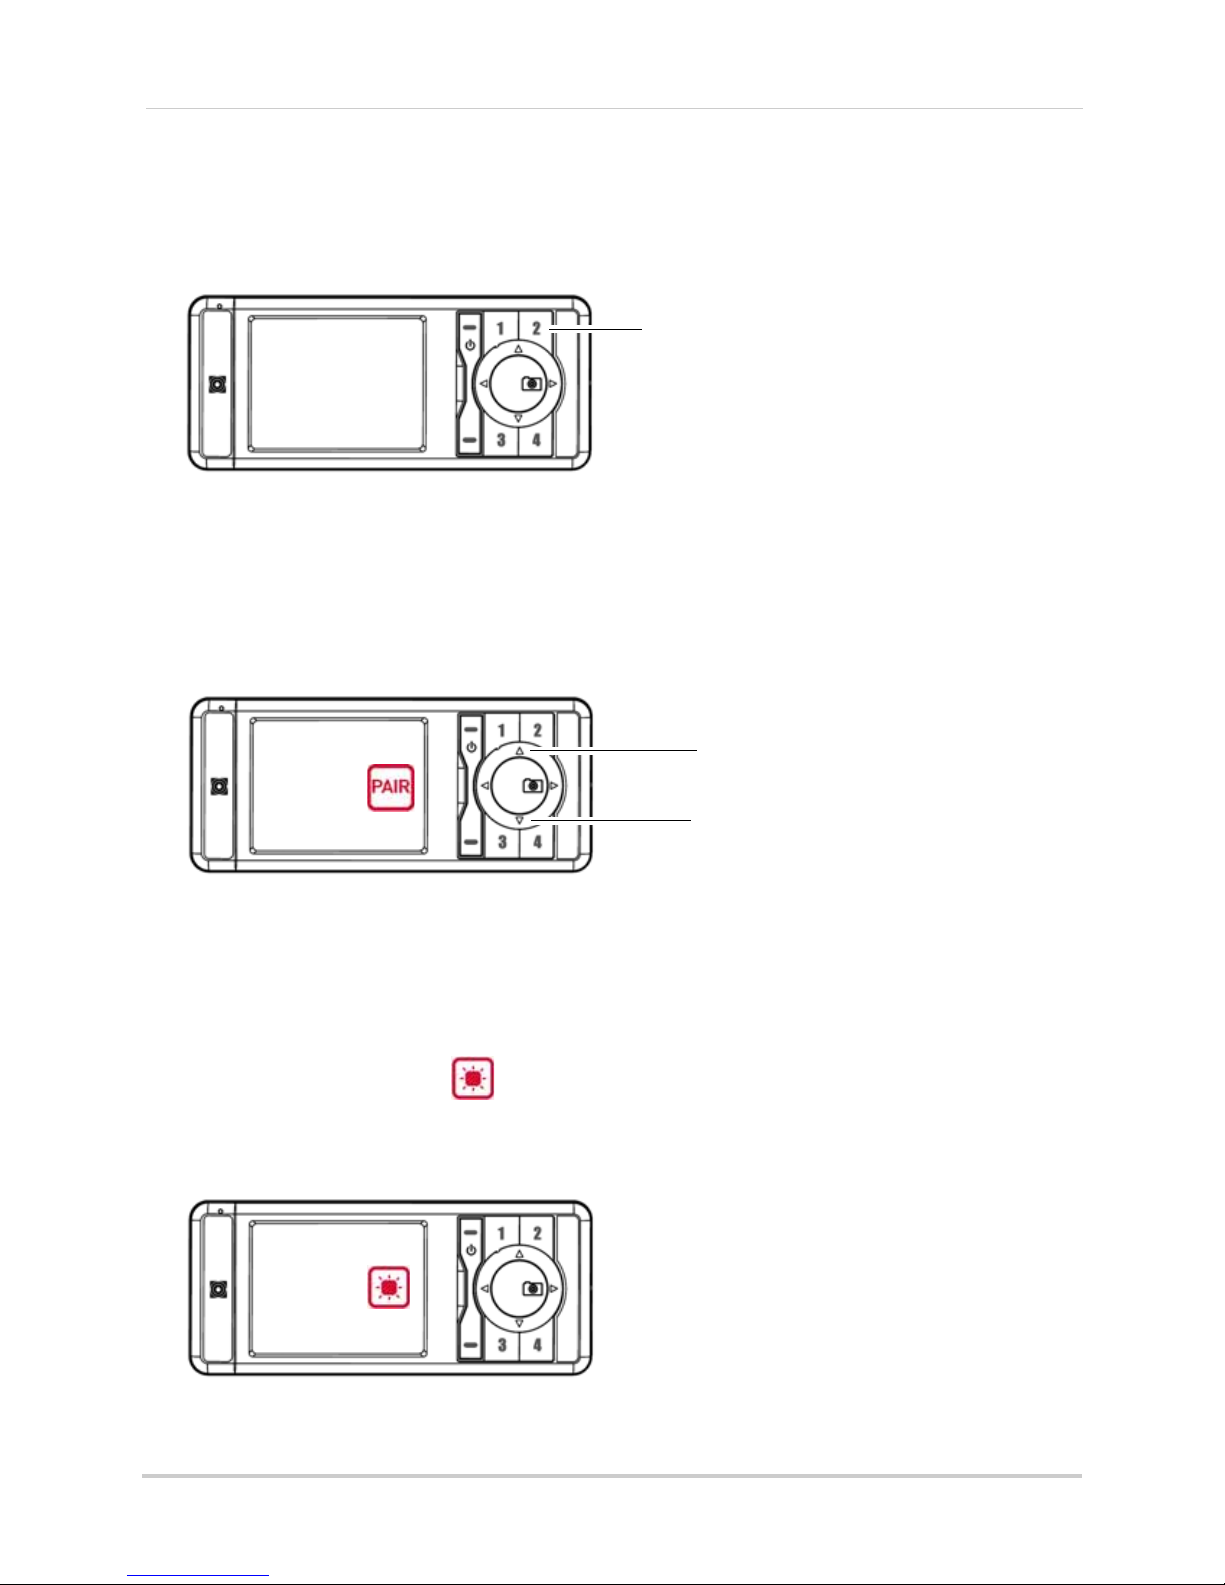
Handheld Monitor (LW2030 Series only)
Channel buttons (1~4)
Changing camera views
To change between cameras:
1 Pr
ess 1,2,3 or 4 to view the desired camera.
Adjusting the volume
You can listen to audio captured by the camera.
To adjust the handheld monitor volume:
ess or to increase or decrease the volume.
1 Pr
Adjusting monitor brightness
To adjust the monitor brightness:
1 Pr
ess the Menu button
ess or and select .
2 Pr
3 Pr
ess orto select the desired brightness level.
10
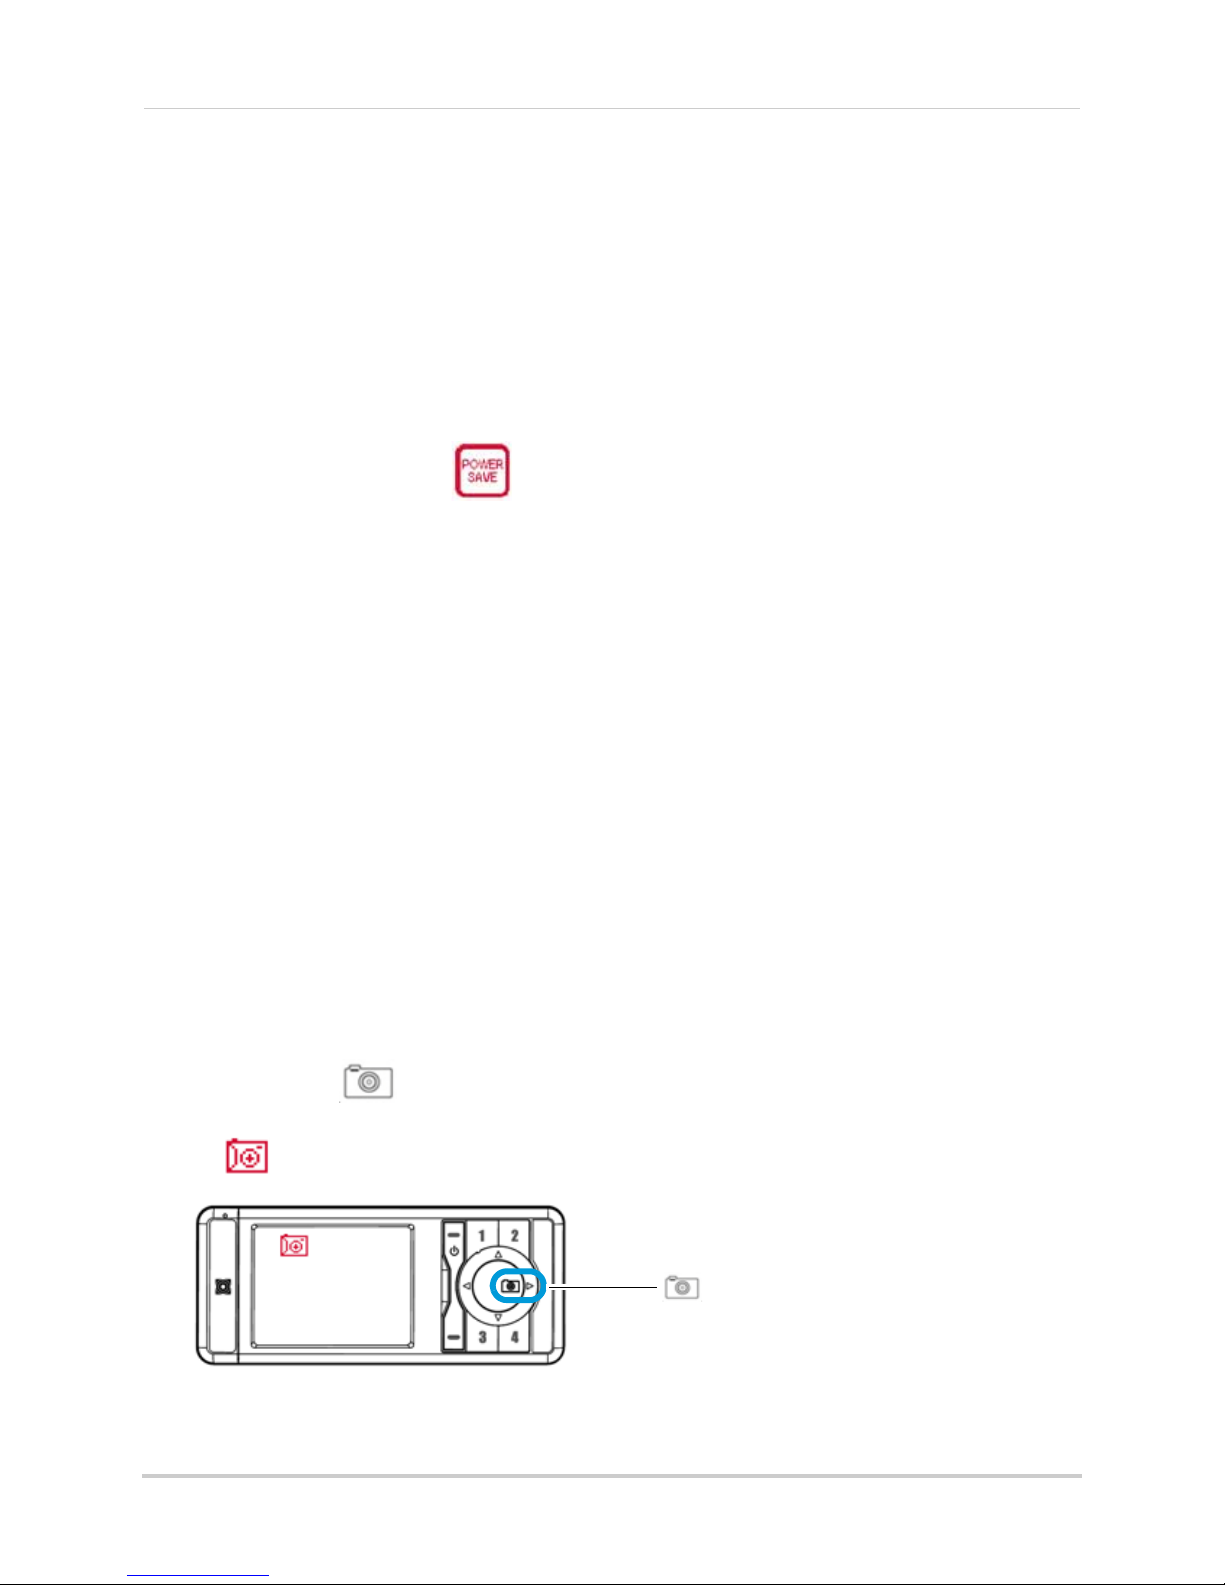
Handheld Monitor (LW2030 Series only)
Configuring the Power Save feature
Power Save mode allows the monitor display to be turned off while continuing audio
monitoring. This allows you to conserve battery power for extended handheld monitor
operation. You will still be able to listen to your cameras during Power Save mode. Press
any button to turn the display back on.
To enable Power Save mode:
ess the Menu button.
1 Pr
ess or and select .
2 Pr
3 Pr
ess orto change the duration of how long the monitor display remains on before
turning off.
4 Pr
ess the Menu button to exit and save your settings.
After the selected duration (i.e. 15 seconds),
will continue to broadcast audio.Press any button on the monitor to turn on the display. The
displays shuts off after the pre-set period of time.
the monitor’s display turns off. The monitor
Taking a picture
The Snapshot function lets you take pictures of what you see on screen. The pictures are
stored on a microSD memory card. See label on product box for microSD card size. Note
that one (1) microSD card is included.
To take a picture:
1 Sel
2 Pr
ect the desired channel you want to take a Snapshot picture from by pressing 1, 2, 3, or 4
on the monitor.
ess the / ( ) button to take a picture.
• A icon momentarily appears on the display when a picture is being taken.
11
 Loading...