

Lorex LW1740 SERIES, LW2740 SERIES Quick Start Manual
www.lorextechnology.com
LW1740_LW2740_SERIES_QSG_EN_R1 Page 1
Time
Under 20
minutes*
NOTE: AVOID INSTALLING IN A LOCATION
THAT REQUIRES THE WIRELESS SIGNAL TO
PASS THROUGH CEMENT, CONCRETE, OR
METAL STRUCTURES. THIS WILL REDUCE THE
TRANSMISSION RANGE.
WIRELESS VIDEO MONITORING SYSTEM
LW1740 / LW2740 SERIES
QUICK START GUIDE
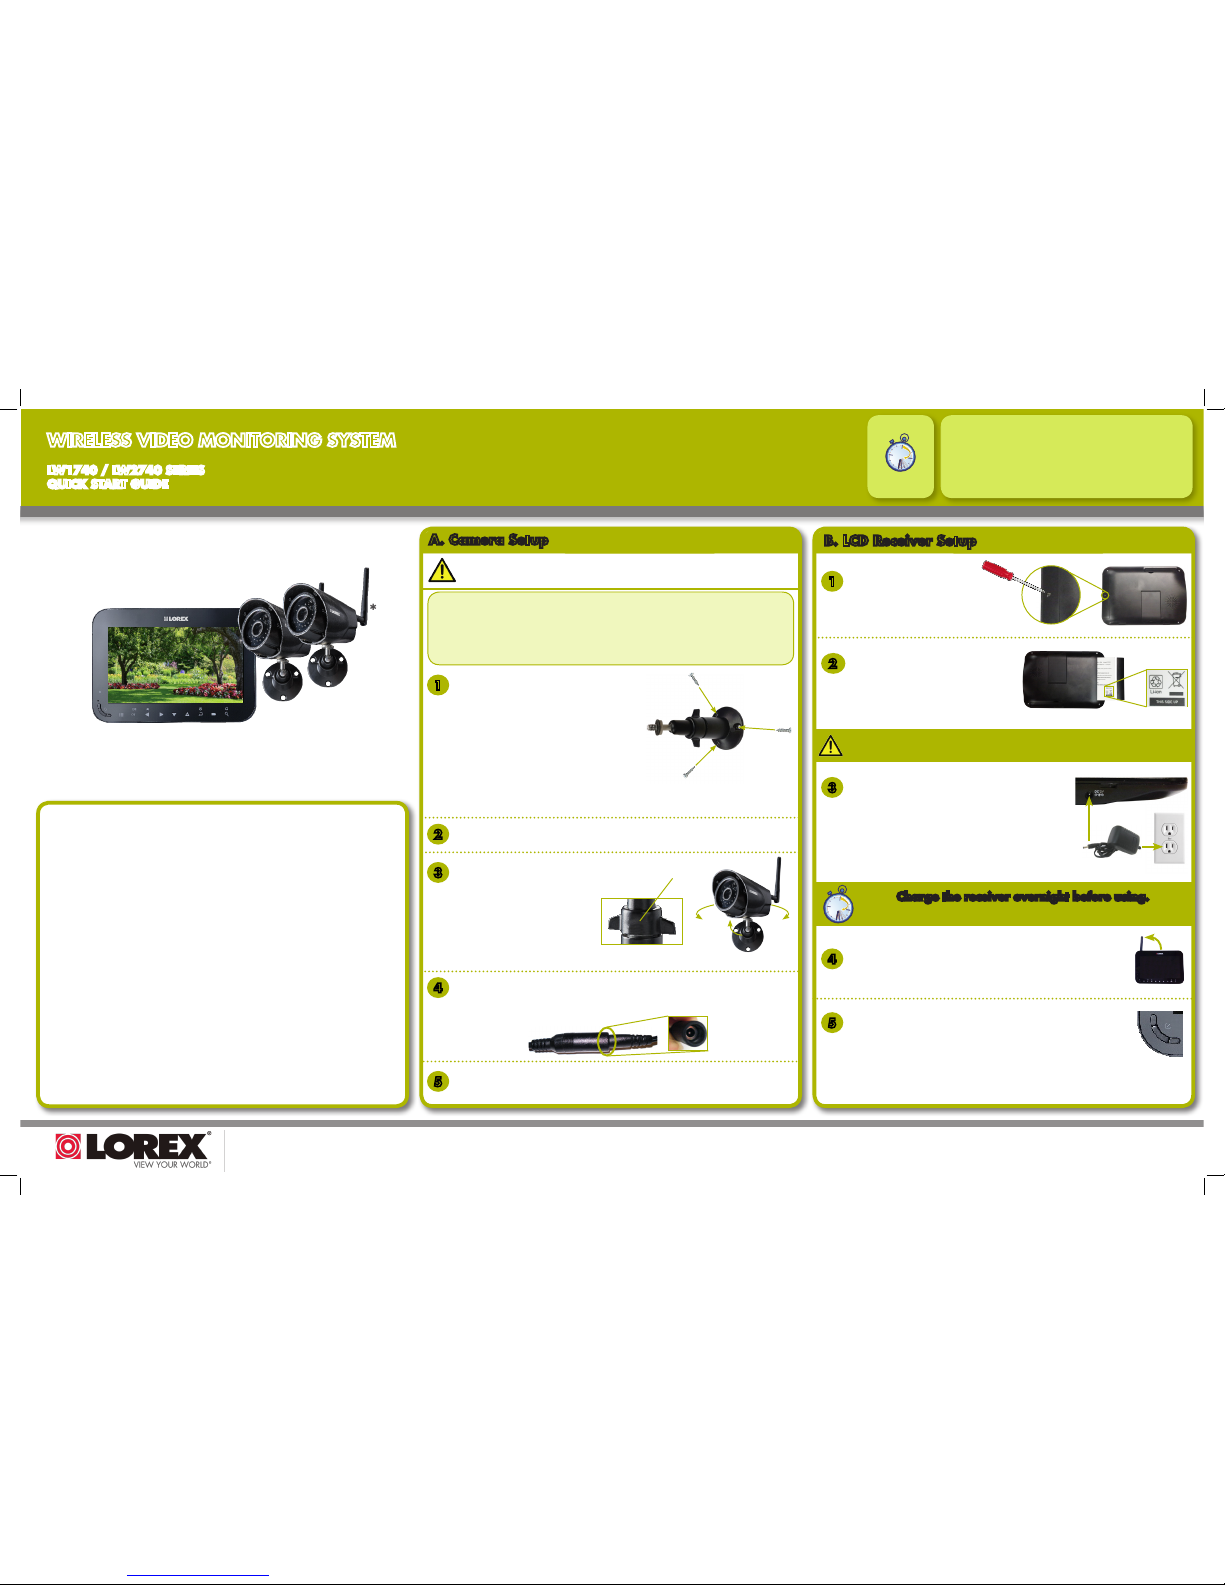
Loosen the adjustment ring
on the metal camera stand(s)
and move the camera to the
desired position.
Tighten the adjustment ring
when finished, holding the
camera firmly in position.
3
1
Use the included mounting screws to attach
the camera stand(s) to the mounting surface:
a. Mark the positions of the screw holes on the
mounting surface with the base of the mounting
stand.
b. Drill holes and insert the drywall anchors
(included) as needed.
c. Firmly attach camera(s) to the surface using the
included screws.
A. Camera Setup
Before installing camera(s), carefully plan where and how it will be positioned,
and where you will route the cable that connects the camera to the power adapter.
4
Connect one end of the camera’s power adapter to the camera and the other
end to an electrical outlet or surge protector. Make sure the power connector is
fully inserted to avoid water getting in the plug.
5
Remove the protective film from the front of the camera(s). If the film is not
removed, it will affect picture quality.
B. LCD Receiver Setup
Connect the included power adapter to the
receiver and to an electrical outlet.
3
4
Pull up the antenna on the back of the LCD receiver.
5
Press and hold the power button on the front panel for
2 seconds. The startup screen appears, followed by live
video from your camera(s).
This system comes with the following components:
• 7” wireless LCD video monitor
• Rechargeable battery
• Indoor / outdoor color camera(s)*
• Metal camera stand(s)*
• microSD memory card**
• Mounting hardware kit(s)*
• Power adapters*
*Number of cameras, camera stands, and antennas, as well as the
microSD card capacity may vary by model. Check your package for
specific content information.
**Optional memory card. Consult your package for content details.
• Cameras are rated for indoor/outdoor installation, but are not intended for direct exposure
to rain or snow. For outdoor applications install under shelter protected from the elements.
• Wireless cameras require a power source to operate.
• Ensure power outlets are sheltered from the elements.
Installation Tips
Charge the receiver overnight before using.
The receiver’s rechargeable battery provides up to 5 hours of portable use.
NOTE: If you run the power cable through the mounting surface, connect
power before attaching the camera to the wall.
*
Use a Phillips screwdriver
(not included) to open the
battery compartment on the
back panel.
1
Insert the included battery so the
statement “THIS SIDE UP“ is visible,
and the clear plastic tabs on the side of
the battery face outwards. Replace the
battery compartment cover.
2
NOTE: Make sure to first connect the
camera(s) to an electrical outlet before
powering on the receiver. This will ensure a
proper connection.
If you do not plan to use the unit for a prolonged period of time, remove the
battery or ensure you charge it at least once every 3 months.
2
Attach the camera stand(s) to the camera(s.)
Adjustment ring
NOTE: If one or more cameras do not appear when selected (i.e.,
Camera 2 is plugged in but does not appear on channel 2), follow the
pairing process described in the user’s guide.
www.lorextechnology.com
LW1740_LW2740_SERIES_QSG_EN_R1 Page 2
WIRELESS VIDEO MONITORING SYSTEM
LW1740 / LW2740 SERIES
QUICK START GUIDE
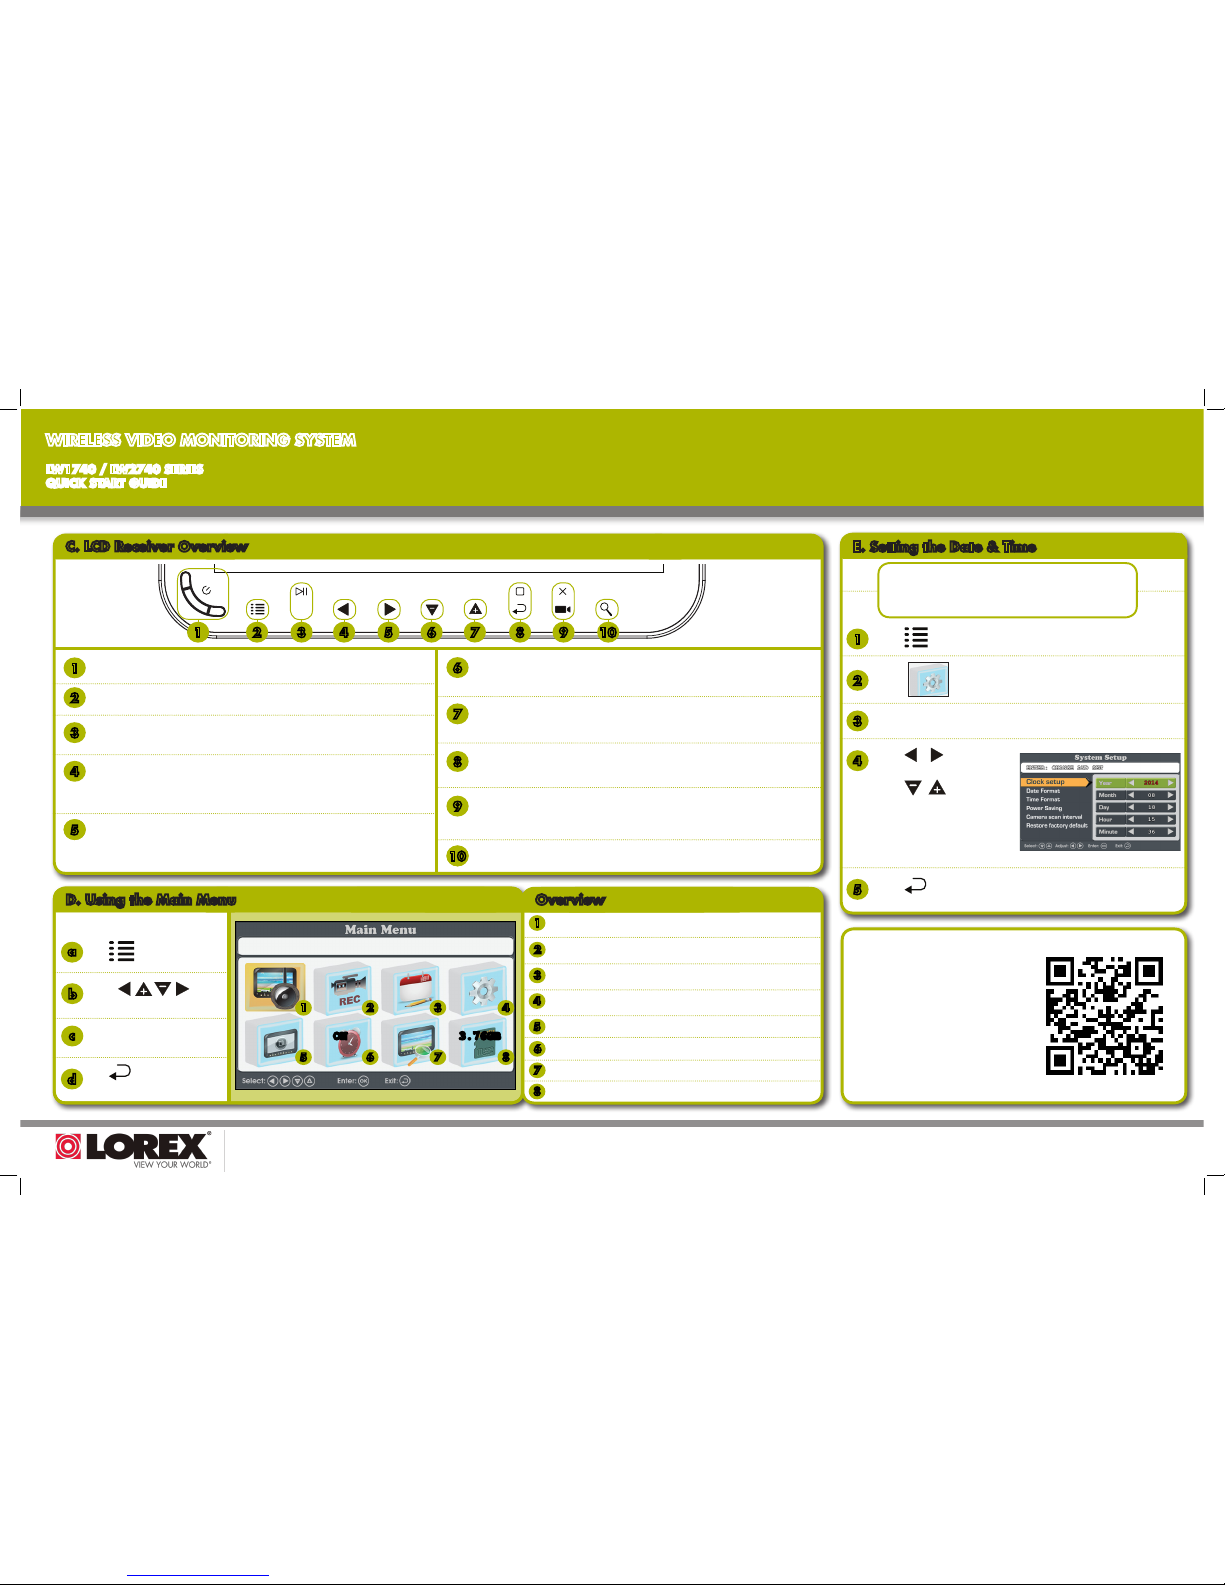
Power: Press and hold for 2 seconds to turn the receiver on or off.
Press to enter the main menu.
E. Setting the Date & Time
Scan the QR code or go to the
address below for the complete
user’s guide.
lorex.ca/LW1740
It’s all on the Web
C. LCD Receiver Overview
OK
1 2 3 8 9 10
1
Menu: Press to enter the system menu.
2
Enter: In menus, press to confirm a selection.
3
Change View: During live view, press repeatedly to change the view to a different
channel or to see all channels in quad or sequence mode.
4
Play/Pause: During video playback, press to play/pause video.
4 5 6
7
Left Arrow: In menus, press to move menu selection to the left.
Rewind: During video playback, press and hold to rewind video.
5
Change View: During live view, press repeatedly to change the view to a different
channel or to see all channels in quad or sequence mode.
5
Right Arrow: In menus, press to move menu selection to the right.
Fast-forward: During video playback, press and hold to fast-forward video.
6
7
Back: In menus, press to return to the previous menu.
8
Snapshot: During live view, press to save an image of the video display.
9
Stop: During video playback, press to stop video.
Record Video: During live view, press and hold to begin recording video.
Delete: Press while an image or video file is selected to delete the file.
10
Zoom: During live viewing, press to zoom in. Press again to zoom out.
Decrease Volume: During live view and playback, press to decrease the volume
of the receiver.
Down Arrow: In menus, press to move menu selection down.
Increase Volume: During live view and playback, press to increase the volume
of the receiver.
Up Arrow: In menus, press to move menu selection up.
Use the
keys to make a selection.
b
Press OK to confirm a selection.
c
To use the main menu:
Press to enter the menu.
a
Press to exit or return to
the previous menu.
d
2
3
Camera Settings: Configure motion detection, brightness, and
pair additional cameras to the monitor.
1
4
Recording: Configure recording settings such as date stamps, recording file
size, file overwrite and more.
Schedules: Set schedules to have the system record continuously or just
motion-events during specific times each day.
System Settings: Configure system time, date & time format, power
saving mode, or restore default system settings.
6
7
Playback: View and manage saved images and videos.
5
8
Alarm: Enable / disable alarm buzzer for motion-detection events.
Monitor: View live video.
SD Capacity: Displays the size of the inserted microSD card.
1 2
5
3
4
6 7 8
1
2
3
4
5
NOTE: It is important to set the date and time
to ensure that they are properly captured on
recordings.
D. Using the Main Menu Overview
NOTE: See user guide for complete details.
3.76GBON
Select using the arrow keys, then press OK.
Select Clock setup, then press OK.
Press / to configure
the current date and time.
Press / to move
between items.
When finished, press
OK
to save your settings.
Press to close any remaining menu windows.
 Loading...