

Lorex LW1001 Series Quick Start Manual
Color Wireless Surveillance System
with Indoor/Outdoor Night Vision Camera(s)
1 x Wireless Receiver
1 x Power Adaptor (for receiver)
1 x RCA Video Cable
Camera Battery Adaptor Cable(s)*
Wireless Camera(s)*
Power Adaptor(s) (for camera*)
Includes:
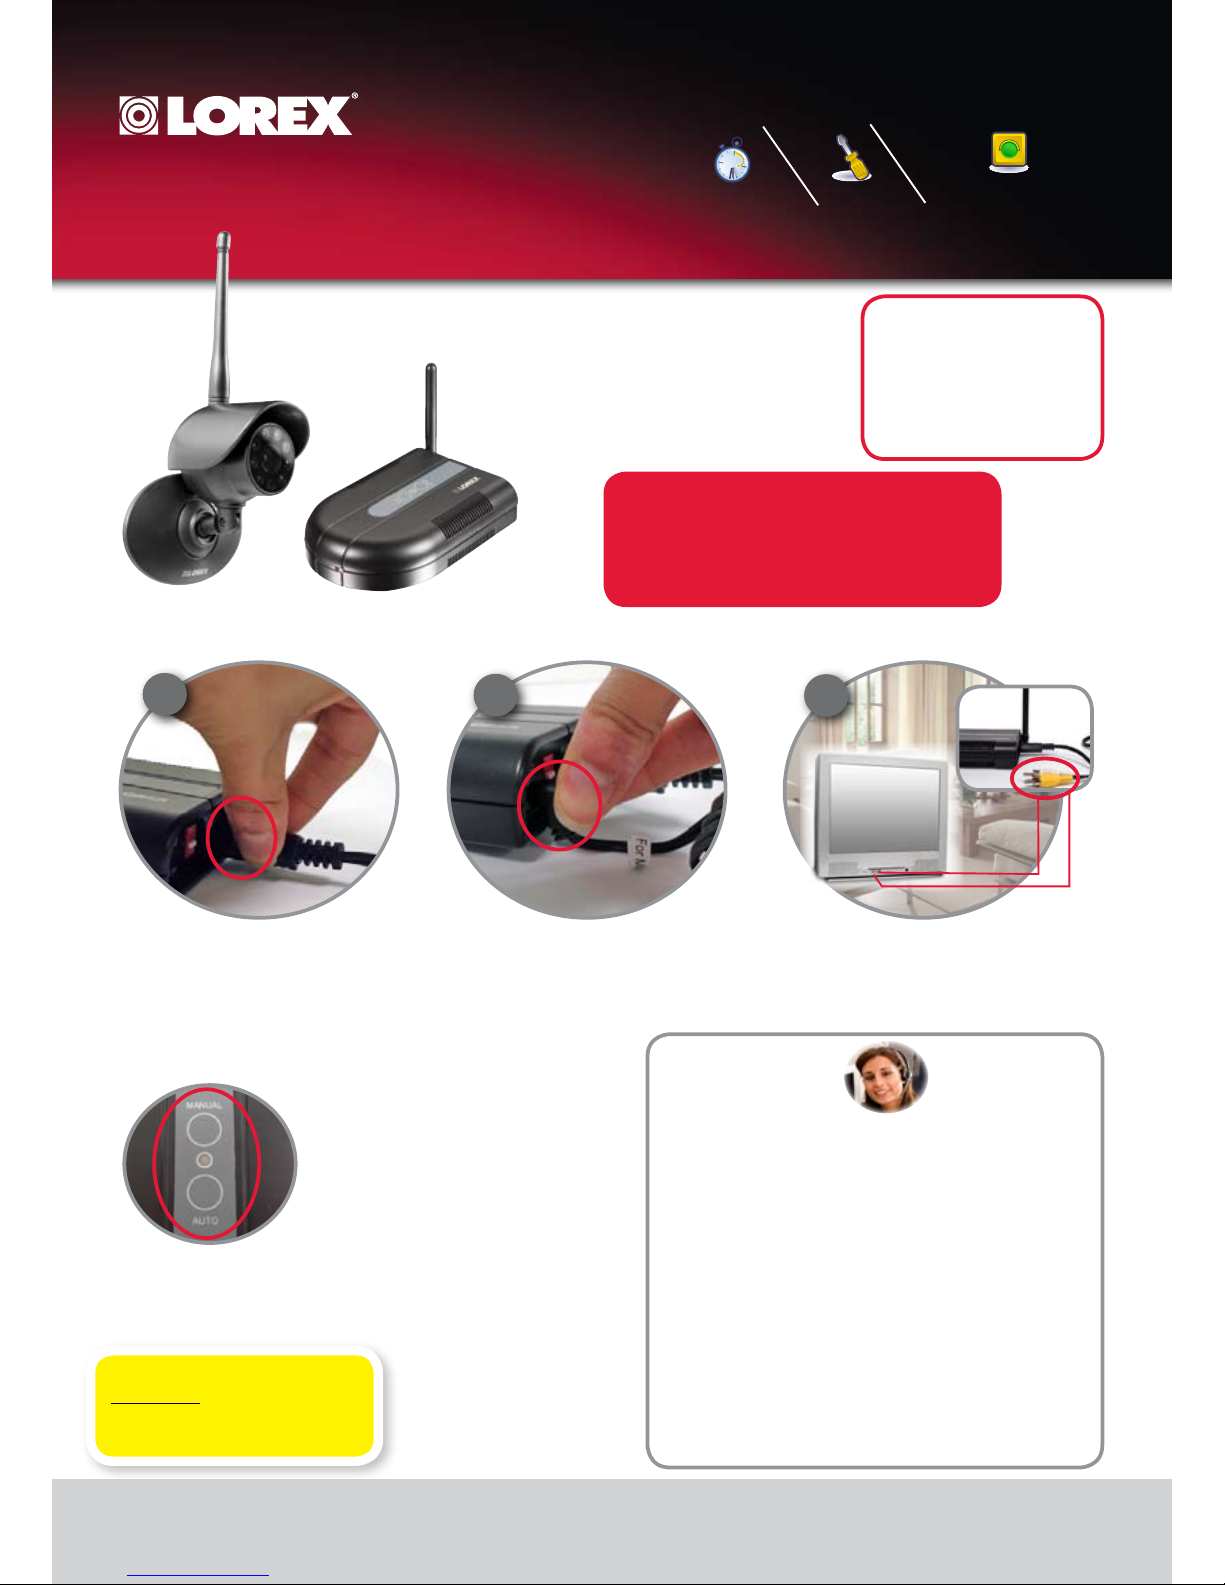
How to use the Control Buttons:
AUTO BUTTON – When the receiver is set to AUTO
Mode, it will continuously switch between the cameras
that are set to ON. The dwell time is set to 4 seconds per
camera (by default), however this can be adjusted to 2~30
seconds. To adjust the dwell time, press and hold both
the AUTO and MANUAL buttons at the same time – this
will produce beeps indicating one second increments (i.e.
each beep represents one second in dwell time). Once the
desired dwell time has been reached, release the buttons.
MANUAL BUTTON – Press the MANUAL button to
switch between available cameras. The Receiver will
switch to a different camera (if available and configured)
each time the MANUAL button is pressed.
* Number of cameras may vary by model. Check your
package for specific content information.
* Connect power adaptor to local AC power outlet
* 1 of each provided with the LW1001 System/ 2 of each
provided with the LW1002 System.
** Requires viewing/recording device with RCA. Viewing/Recording device sold separately
***Additional receivers and/or cameras sold separately. See product manual for details
Connect one end of the AV Cable to the back
of the receiver. Connect the other end to the
Video IN (Yellow) and Audio IN (White) ports
on the TV or Monitor for viewing and VCR or
DVD Recorder for recording
Step 1 - Wireless Receiver Set-up Installation
Plug the Receiver power cable into the
9V POWER input. Plug the power adaptor
into a wall outlet or surge protector.
Place the receiver in a place that will have
clear reception to your camera(s). Try to
avoid placing the receiver near other 900MHz
devices (such as older cordless phones, etc.)
LW1001 Series
Quick Start Guide_EN_R1 - Page 1
1
2
3
TV (not included)
Helpful Tips:
• Use of other 900MHz products (including older model cordless phones) may
cause interference with the picture quality. Try changing the channels on
the Receiver and Camera, or moving the interfering device to another area.
• Better reception can often be accomplished by changing the position of the
Receiver unit -or-changing the position of the Camera.
• The Receiver is a wireless product, and is subject to a number of
environmental conditions. Walking between the receiver and camera may
cause temporary interference.
• The optimal distance of the camera (during low light / nighttime use) from
the person or object is 4~6 feet (up to 2 meters). The picture may become
grainy beyond this distance due to lack of light –an additional light source
in the room, such as a night light or illuminator may improve the picture
quality.
• During low light / night use, the closer the Receiver is to the Camera, the
better the picture quality. The picture may become grainy at farther
distances. The optimal distance for normal home use is 15~60 feet (3~18
meters), however the MAXIMUM RANGE is up to 300feet in optimal
conditions.
• Audio feedback may appear when the receiver and cameras are too close
(under 15 feet / 3 meters).
*
The LW1001 series product is
expandable. To order additional
cameras please visit our website
at www.lorexcctv.com
under 30 minutesunder 15 minutes under 60 minutes
Hand Tools Hardware
Router
Hi Speed
over 60 minutes
Skill Level
Time
under 30 minutesunder 15 minutes under 60 minutes
Hand Tools Hardware
Router
Hi Speed
over 60 minutes
Time
Tools
Skills - Easy
Under 15 Minutes*
Hand Tools
Plug & Play connectors,
On screen set up
* Installation time may vary based on
application and camera cabling
NOTE: AVOID INSTALLING IN
A LOCATION WHICH REQUIRES
THE WIRELESS SIGNAL TO PASS
THROUGH CEMENT, CONCRETE
AND METAL STRUCTURES. THIS
WILL REDUCE THE
TRANSMISSION RANGE.
©2008 Lorex Technology Inc.
As our product is subject to continuous improvement, Lorex Technology & subsidiaries reserve the right to
modify product design, specifications & prices without notice and without incurring any obligation. E&OE
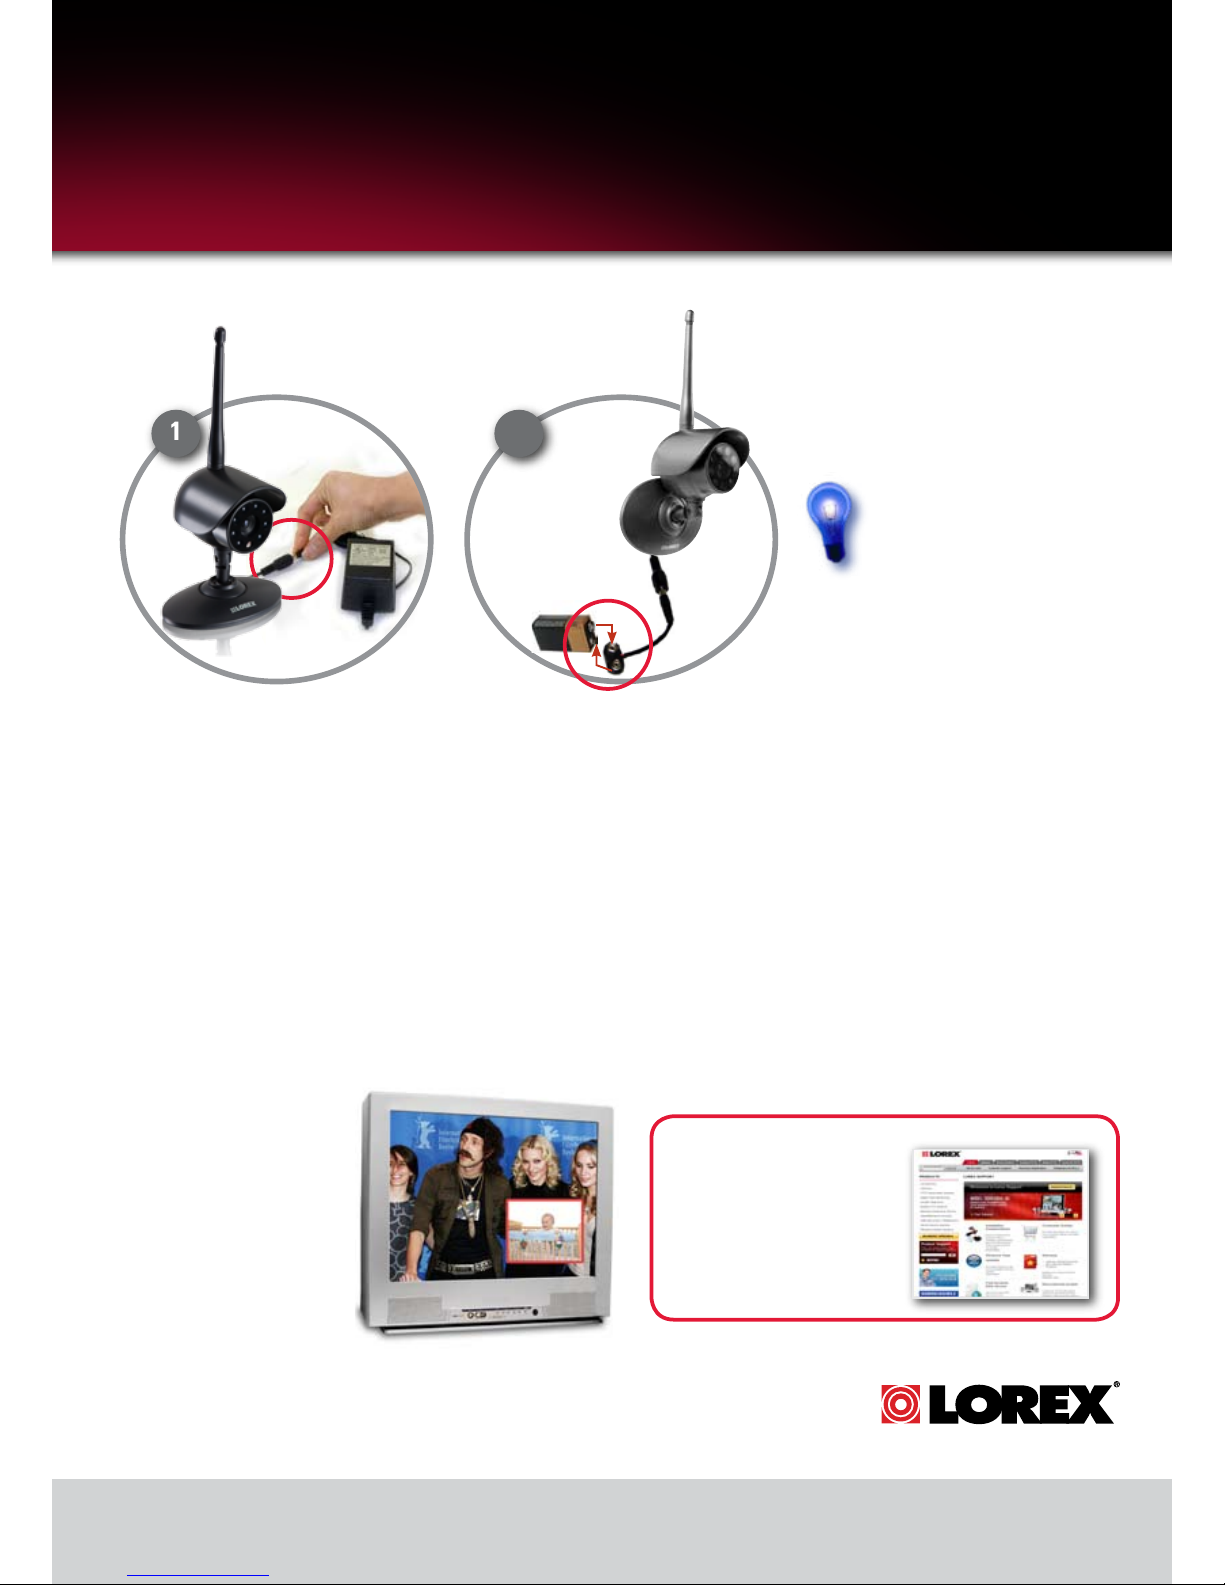
Step 2 - Wireless Camera Installation
The Camera can be powered either by using
the provided Power Adaptor, or using a 9V
battery (not included) in combination with the
Battery Adaptor Cable.
Connecting Camera to Power
Adaptor
Connect the Power Adaptor to the Female
Barrel Power termination on the camera.
Connecting Camera to the
Battery Adaptor Cable (optional)
Connect the Camera Battery Adaptor
cable to the Female Barrel Power
termination on the camera. Connect a
battery to the cable.
NOTE: A new 9V battery should last
for approximately 4 hours without the
IR LEDs in use.
LW1001 Series
Quick Start Guide_EN_R1 - Page 1
ww w .l o re x cc t v. c om
Color Wireless Surveillance System
with Indoor/Outdoor Night Vision Camera(s)
Step 3 - Viewing your System
Turn on TV or Observation
Monitor, and switch the video
channel that the receiver has
been connected to.
Tip: If your TV has a PIP
feature, you can have the
camera images displayed in
the PIP window. Check your
TV manual for info on PIP
feature (if available).
It ’s a ll o n t h e W eb
For detailed setup information,
please refer to your User’s Manual.
For additional information, please
visit our website
www.lorexcctv.com/support
www.lorex c c t v . c o m
NOTE: Before you install the camera(s),
carefully plan where and how it will be
positioned, and where you will route
the cable that connects the camera to
the power adaptor or battery adaptor.
Before starting permanent installation,
verify its performance by observing the
image on a monitor. When camera is
positioned in same location/position
where it will be permanently installed.
NOTE: Wireless cameras require a
power source (either an electrical outlet
or battery power) to operate. If you plan
to permanently mount the camera in
a location, it is recommended to use
the included Camera Power adaptor
to prevent interruptions in the image,
as the battery adaptor is intended as a
temporary power solution.
Did you know?
You can move your camera around
the house or from one room to
another with the use of the
included battery adaptor cable.
21
 Loading...