

Page 1
ve rs io n: 1 4/ 21 I P: 0 6: 01
WWW.LOREXCCTV.COM
PAGE 1
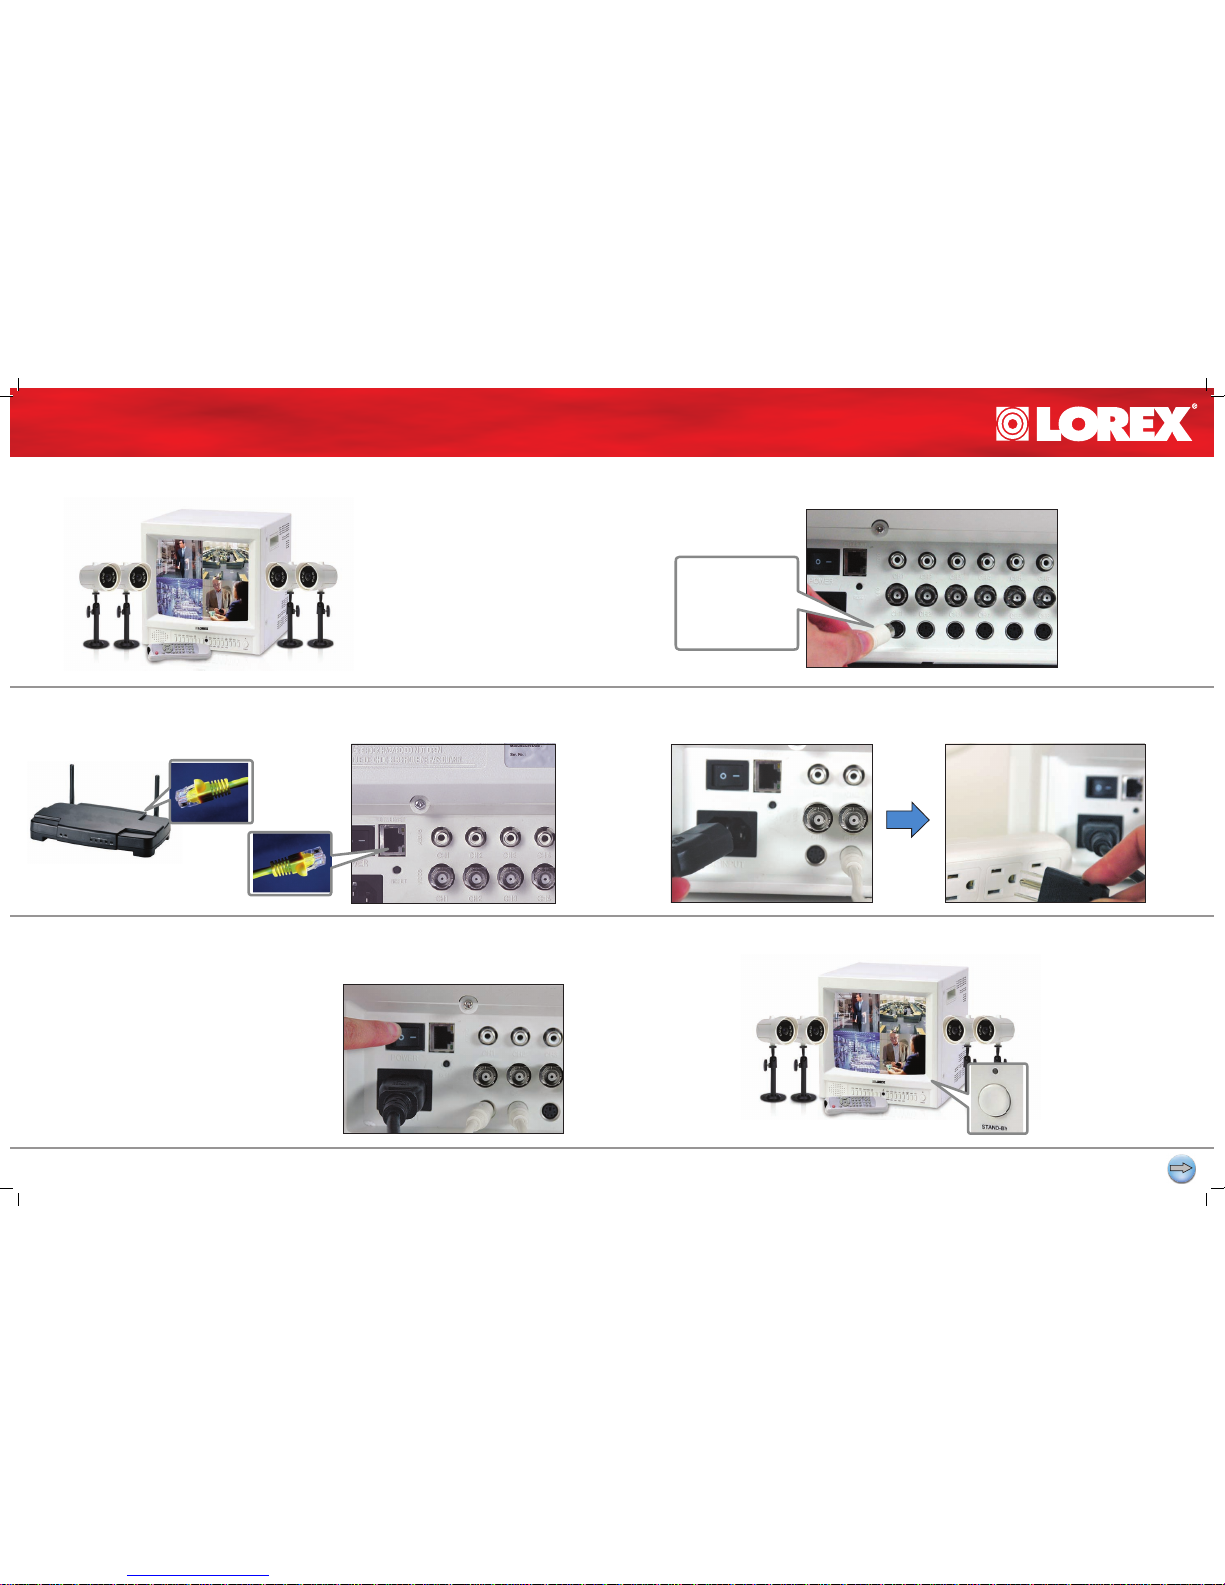
2| CONNECT THE ETHERNET CABLE TO A BROADBAND ROUTER
(NOT INCLUDED) FOR REMOTE VIEWING CAPABILITY
5| PRESS STAND-BY BUTTON TO VIEW PICTURE IMAGES4| TURN THE MASTER POWER SWITCH ON
(LOCATED ON THE BACK OF THE MONITOR)
3| CONNECT ONE END OF THE POWER CORD TO THE MONITOR;
THE OTHER END TO AN ELECTICAL OUTLET
1| CONNECT CAMERAS TO MONITOR
PACKAGE CONTENTS
SET UP YOUR MONITOR FIRST
STEP 1
1 - 14” Color Quad Monitor
4 - Color Cameras
4 - 57 ft. Extension Cables
4 - Camera Brackets
1 - Remote Control with Batteries
1 - Ethernet Network Cable
1 - Set-up CD ROM
1 - Quick Installation Guide
1 - Owner’s Manual
1 - Power Cord
Connect the rst camera
to the CH1 input. Follow
the same steps to
connect the other three
cameras to the CH2,
CH3, CH4 camera
inputs.
STAND-BY BUTTON
ROUTER NOT INCLUDED
Page 2
ve rs io n: 1 4/ 21 I P: 0 6: 01
WWW.LOREXCCTV.COM
PAGE 1
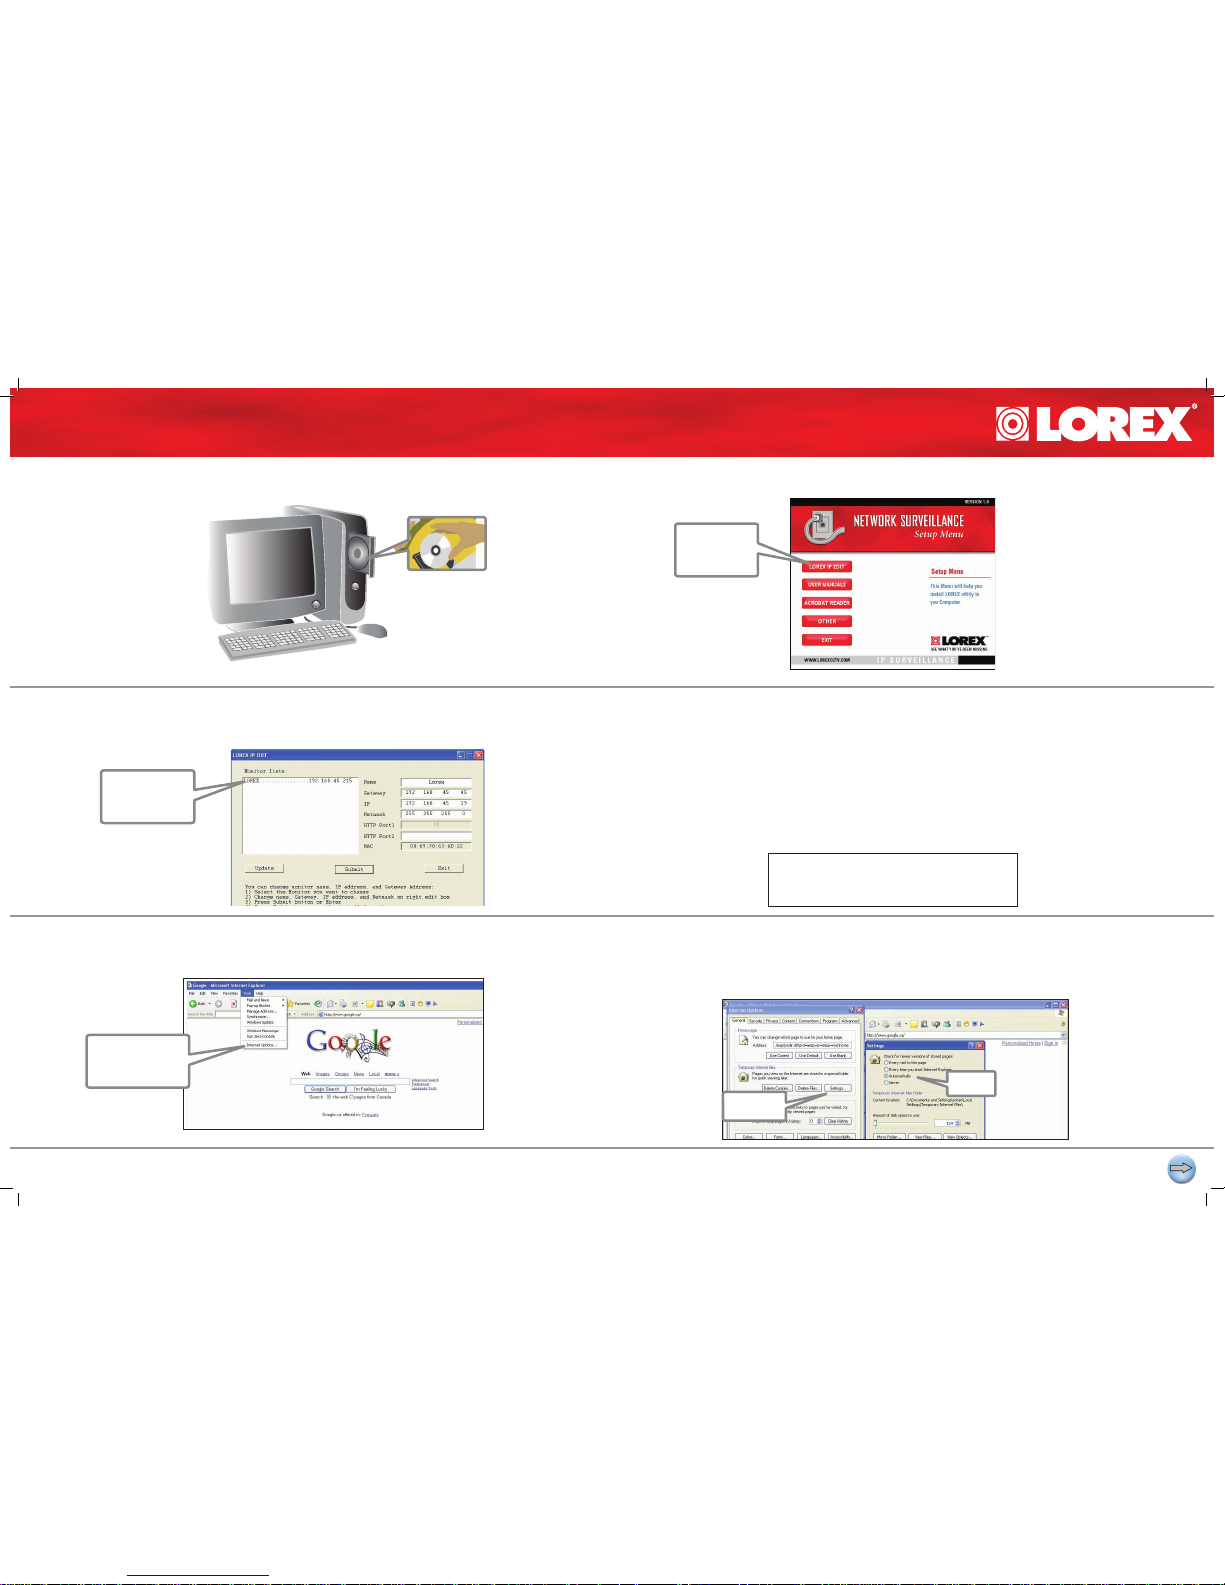
SET UP LOCAL VIEWING ON YOUR PC SECOND
3| DOUBLE CLICK ON THE ITEM LISTED UNDER ‘MONITOR LISTS’ TO
AUTOMATICALLY SET LOCAL VIEWING SETTINGS
5b| SECOND, CLICK THE SETTINGS BUTTON IN THE TEMPORARY
INTERNET FILE OPTION AND CHECK ‘AUTOMATICALLY’ FOLLOWED
BY OK. CLOSE THE ‘SETTINGS WINDOW’
5a| ENABLE ACTIVE X
FIRST OPEN YOUR WEB BROWSER TO ENABLE ACTIVE X
4| RECORD THE IP AND MAC ADDRESS
2| SELECT LOREX IP EDIT PROGRAM OPTION1| INSERT LOREX NETWORK SETUP SOFTWARE INTO THE COMPUTER’S
CD ROM
IP Address ____ . ____ . ____ . _____
MAC Address _________________________
NOTE: Active X must be enabled to set up
the system. If it is not already set up proceed
to Step 6, otherwise continue to Step 5.
record the period (.) it is
part of the IP Address
First, click “Tools”
and select “Internet
Options”
Do not record the colon (:)
for the MAC Address
STEP 2
STEP 1
STEP 2
Click here to
automatically set
viewing settings
Click the
Lorex IP EDIT
option
Page 3

ve rs io n: 1 4/ 21 I P: 0 6: 01
WWW.LOREXCCTV.COM
PAGE 2
6| OPEN THE WEB BROWSER AND ENTER ON THE ADDRESS BAR YOUR
COMPUTER’S IP ADDRESS TO VIEW THE PICTURE
FOR ADVANCED VIEWING OPTIONS, REFER TO OUR OWNER’S MANUAL.
TO SET UP THE INTERNET REMOTE MONITORING OPTION, PROCEED TO
STEP 3.
5c| THIRD, SET THE SECURITY LEVEL TO RUN ACTIVE X BY CLICKING
THE SECURITY TAB
Information in this document is subject to change without notice. As our products are subject to continuous
improvement, SVII and our subsidiaries reserve the right to modify product design, specications and prices,
without notice and without incurring any obligation. E&OE © 2006 SVII. All rights reserved.
SET UP LOCAL VIEWING ON YOUR PC CONTINUED
HELP AND SUPPORT
FOR ADDITIONAL INFORMATION OR TROUBLESHOOTING HELP, REFER TO YOUR OWNERS
MANUAL FOR ASSISTANCE. YOU CAN ALSO CALL OR EMAIL FOR FURTHER SUPPORT
TOLL FREE TECHNICAL SUPPORT
1-888-42 LOREX (1-888-425-6739)
EMAIL SUPPORT
SUPPORT@LOREXCCTV.COM
WEBSITE
WWW.LOREXCCTV.COM
Third, click the
security tab
Fourth, select the
“Custom Level”
button
Finally, enable all
Active X settings in
the security settings
window followed
by pressing the OK
button
Enter your
computer’s IP
Address you
recorded in Step 2
Section 4
STEP 2
Page 4

ve rs io n: 1 4/ 21 I P: 0 6: 01
WWW.LOREXCCTV.COM
PAGE 1
SET UP INTERNET REMOTE MONITORING THIRD
3| CLICK CREATE ACCOUNT OPTION
6| OPEN YOUR WEB BROWSER AND
ENTER THE MONITOR’S IP ADDRESS
5| PRINT AND SAVE AUTOMATED EMAIL
REGISTRATION CONFIRMATION
4| COMPLETE NEW ACCOUNT INFORMATION
2| OPEN YOUR WEB BROWSER TO REGISTER FOR THE DDNS SERVICE
1| PORT FORWARD YOUR ROUTER (PORT 80)
ALL ROUTERS ARE DIFFERENT. TO PORT FORWARD YOUR ROUTER:
A. REFER TO YOUR ROUTER’S MANUAL FOR SPECIFIC INSTRUCTIONS ON PORT
FORWARDING OR
B. CHECK THE ROUTER COFIGURATION GUIDE SUPPORT DOCUMENT IN THE
CONSUMER GUIDE SECTION OF OUR WEBSITE. WWW.LOREXCCTV.COM/ SUPPORT
Enter ‘ddns.stegicvista.net’
in the address bar
Click the ‘Create
Account’ option
Enter the IP
Address
C. Enter your
unique URL name
A. Select the
L14Q684C option
from the drop down
menu
B. Enter your computer’s MAC
Address
(recorded in Step 2, Part 4
Service provider: ddns.lorexcctv.net
Domain name: house.strtegicvista.net
User name: John Doe
Password: <leavethiseldblank>
UsePublicIPtoRegister: Yes
STEP 3
7| CLICK THE CONFIGURATION OPTION
Page 5

ve rs io n: 1 4/ 21 I P: 0 6: 01
WWW.LOREXCCTV.COM
PAGE 2
9| ENABLE NETWORK SURVEILLANCE OPTION, ENTER USER NAME
AND DOMAIN NAME
10| OPEN YOUR WEB BROWSER AND ENTER YOUR DOMAIN NAME TO
VIEW THE PICTURE REMOTELY
8| CLICK DDNS OPTION
SET UP INTERNET REMOTE MONITORING CONTINUED
Enter your Domain Name
(i.e john.strateicvista.net )
to View Picture
STEP 3
1. Enable: Click on the radio button (circle)
2. UserName: Enter the user name
from your conrmation of registration email
3. Password: < leave blank >
4. DomainName: Enter the domain name
from your conrmation of registration email
Information in this document is subject to change without notice. As our products are subject to continuous
improvement, SVII and our subsidiaries reserve the right to modify product design, specications and prices,
without notice and without incurring any obligation. E&OE © 2006 SVII. All rights reserved.
HELP AND SUPPORT
FOR ADDITIONAL INFORMATION OR TROUBLESHOOTING HELP, REFER TO YOUR OWNERS
MANUAL FOR ASSISTANCE. YOU CAN ALSO CALL OR EMAIL FOR FURTHER SUPPORT
TOLL FREE TECHNICAL SUPPORT
1-888-42 LOREX (1-888-425-6739)
EMAIL SUPPORT
SUPPORT@LOREXCCTV.COM
WEBSITE
WWW.LOREXCCTV.COM
 Loading...