

Page 1
ww w. lo re xc ct v. co m
L114V Series Quick Start Guide_R1 Page 1
Tools
Skill Level
Time
under 30 minutesunder 15 minutes under 60 minutes
Hand Tools Hardware
Router
Hi Speed
over 60 minutes
Skills - Easy
under 30 minutesunder 15 minutes under 60 minutes
Hand Tools Hardware
Router
Hi Speed
over 60 minutes
Time
Under 20 Minutes*
Hand Tools Plug & Play connectors,
On screen set up
* Installation time may vary based
on application and camera cabling
System Contents:
1 x Compact Digital Video Recorder
1 x Power Adaptor
1 x Power Adaptor Cable
1 x Remote Control
1 x Hardware Manual
1 x Quick Start Guide
1 x Software CD
*Channel/ Port configuration and HDD (hard disk drive) capacity may vary
by model. Check your package for specific content information.
PACKAGE CONTENTS:
For detailed setup information, please refer to your User’s manual.
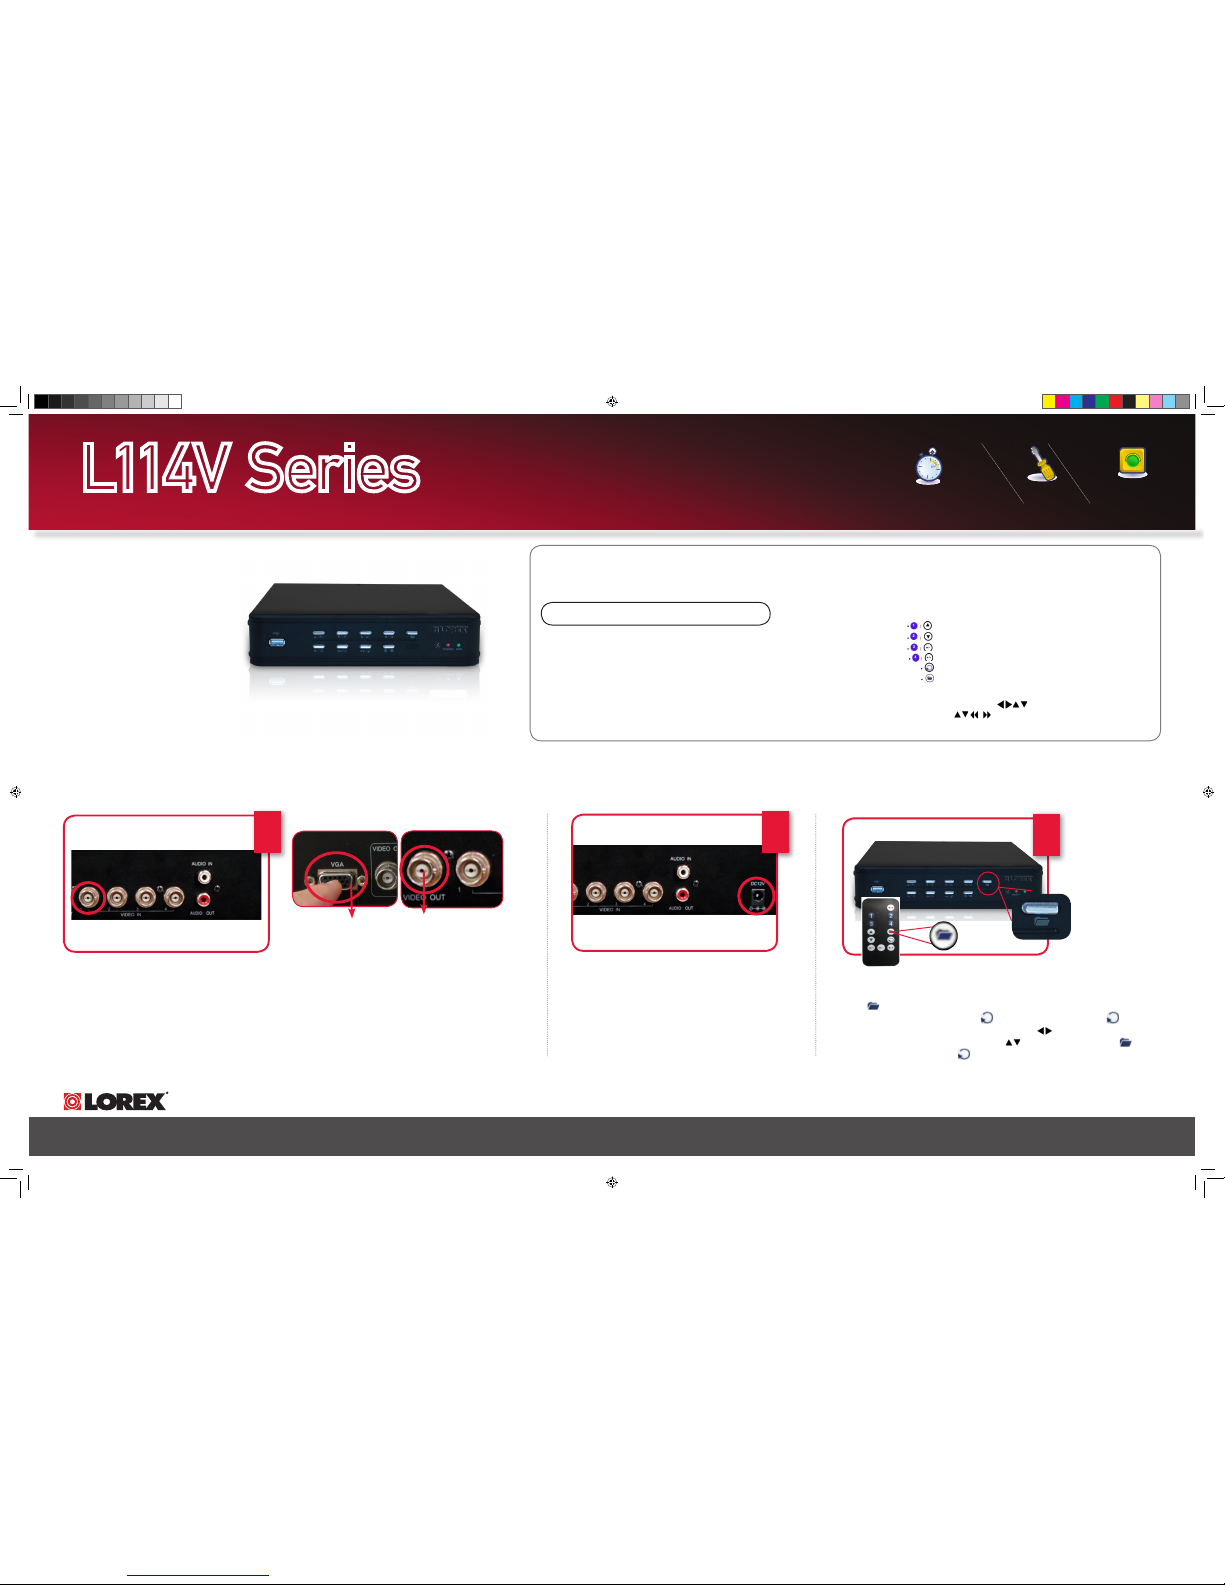
STEP 1 - SET UP YOUR DIGITAL VIDEO RECORDER FIRST
Connect one end of the Power cable to
the DVR, the other end to an electrical
outlet. This unit powers ON once it is
plugged in to the power outlet.
Connect Power Cable to the DVR:
2
Click to open the Setup Menu. Login with your system password (by default,
111111). Select System and press . Select Time Set and press . The
Time Set menu appears. Under Time Set, press to select the date and time
(yyyy/mm/dd and hh/mm/ss) and press to change values. Press and
then select Apply and press . The new time is saved. Press repeatedly to
exit all menus.
Set the Time and Date:
DVR - REMOTE CONTROL
Congratulations! You have completed Step 1 successfully.
You can now view (when connected to a monitor), record
and playback images on your DVR.
Connect the first camera (with BNC connection type.
Requires additional power adaptor) to the CH1 input.
Follow the same steps 1 to connect the additional
cameras*.
* NOTE: Test the cameras prior to selecting a permanent mounting
location by temporarily connecting the Cameras and Cables to your
DVR.
Connect Cameras & Monitor (not included)
to the DVR:
1
BNC VIDEO OUT
- Video Output port to
connect the unit to a
DVR or TV.
VGA VIDEO OUTPUT (L114V
SERIES ONLY) - Video Output
port to connect the unit to a
Computer Monitor.
3
DVR - FRONT PANEL
L114V Series
Quick Start Guide
When navigating the system menus with the remote
control, the following buttons are most commonly
used on the remote control:
• /: Move cursor UP
• /: Move cursor DOWN
• /: Move cursor RIGHT
• /: Move cursor LEFT
• : Confirm selection
• : Close/exit options/menus.
MENU NAVIGATION TIPS & TRICKS
ATTENTION: This QSG will refer to basic navigation
(up, down, left, right) as . You can use buttons
1~4 and the buttons for basic navigation.
Logging in to the System:
You must login to the system with a 6-character pass word
every time you access the system Se tup Menu.
The default system password is 111111
USB Backup:
You can backup recorded video data from the system to a USB
flash drive (not included). You can access USB Backup through
direct Playback, or through Search and Event List in the system
menus.
Note: You must connect a USB flash drive to the USB port on the front
panel in order to use USB Backup.
L114V Series_QSG_EN_R1.indd 1 12/22/2008 3:14:10 PM
Page 2
ww w. lo re xc ct v. co m
L114V Series Quick Start Guide_R1 Page 2
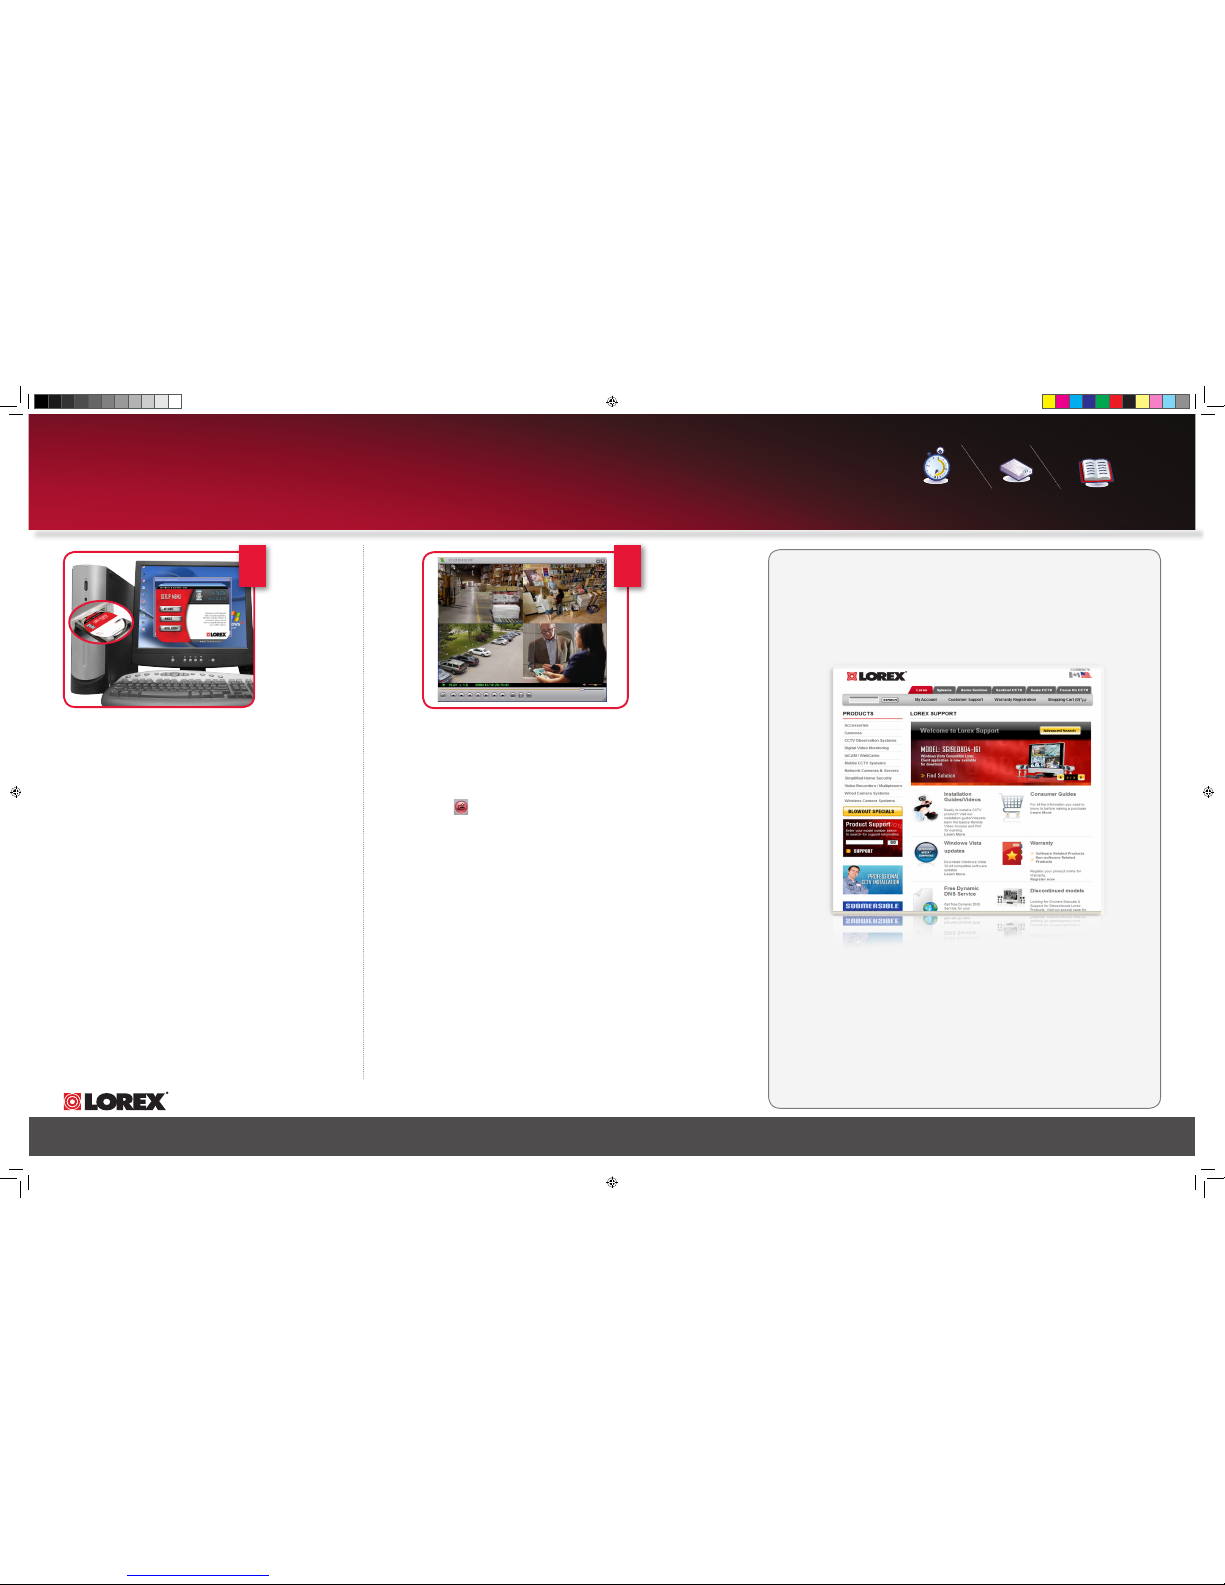
STEP 2 - USING THE LOREX CLIENT SOFTWARE
1. Insert the software CD included with your system into your PC’s
CD-ROM or DVD-R/RW drive.
2. Click the LOREX CLIENT icon and right click to save the
VVF Player.exe file to your desktop.
3. Double click and execute the VVF player.exe file. DVR Viewer opens.
Note: You can also copy this file to your PC.
Run the Lorex Client Software CD:
Use Lorex Client to playback saved/backed up video files copied from the
system a USB flash drive.
1. Connect a USB flash drive with saved video data to your PC.
2. Launch Lorex Client.
3. Click . In the new window, select the .VVF file and click Open. The file
immediately begins playing (at 1X speed) in DVR Viewer.
Note: You can also right-click anywhere on the DVR Viewer main window and
select Open file... or press F2 on your keyboard.
Playing Saved Video Files:
2
Router
Hi Speed
over 60 minutes
Time Skills - Intermediate
Plug & Play connectors,
On screen set up
Under 30 Minutes*
* Installation time may vary
based on application
Hi Speed
over 60 minutes
Hardware
Computer &
Router*
* Minimum System Requirement: Windows XP, Pentium IV, 256MB Ram (512MB
Recommended), 200MB Storage, Internet, DSL or Cable Modem
Computer - not included
1
Congratulations! You have completed
Step 2 successfully. You can now view
DVR images on your PC.
It’s all on the Web
For detailed setup information, please refer to your User’s Manual. For additional
information, please visit our website www.lorexcctv.com/support
Email Support: support@lorexcorp.com
Toll Free Technical Support - North America: 1-888-42 LOREX (1-888-425-6739)
Toll Free Technical Support - International (outside of North America): 00-800-425-6739-0
Lorex International Website - www.lorexinternational.com
PRODUCT SUPPORT
www.lorexcctv.com
NOTE: Prior to using
Lorex Client, make
sure you have copied
video data from the
system to a USB flash
drive (not included).
L114V Series_QSG_EN_R1.indd 2 12/22/2008 3:14:34 PM
 Loading...