

Page 1
Step 1: Setting up the Camera
This section will help you in setting up and conguring your Camera(s) and
PC(s) to be able to view the video images from within your Local Area
Network (LAN).
You should verify a few things at this point:
Follow the
onscreen
instructions to
install the program
to your computer’s
hard drive. When
nished, remove
the CD. You do
NOT need to reboot
the computer.
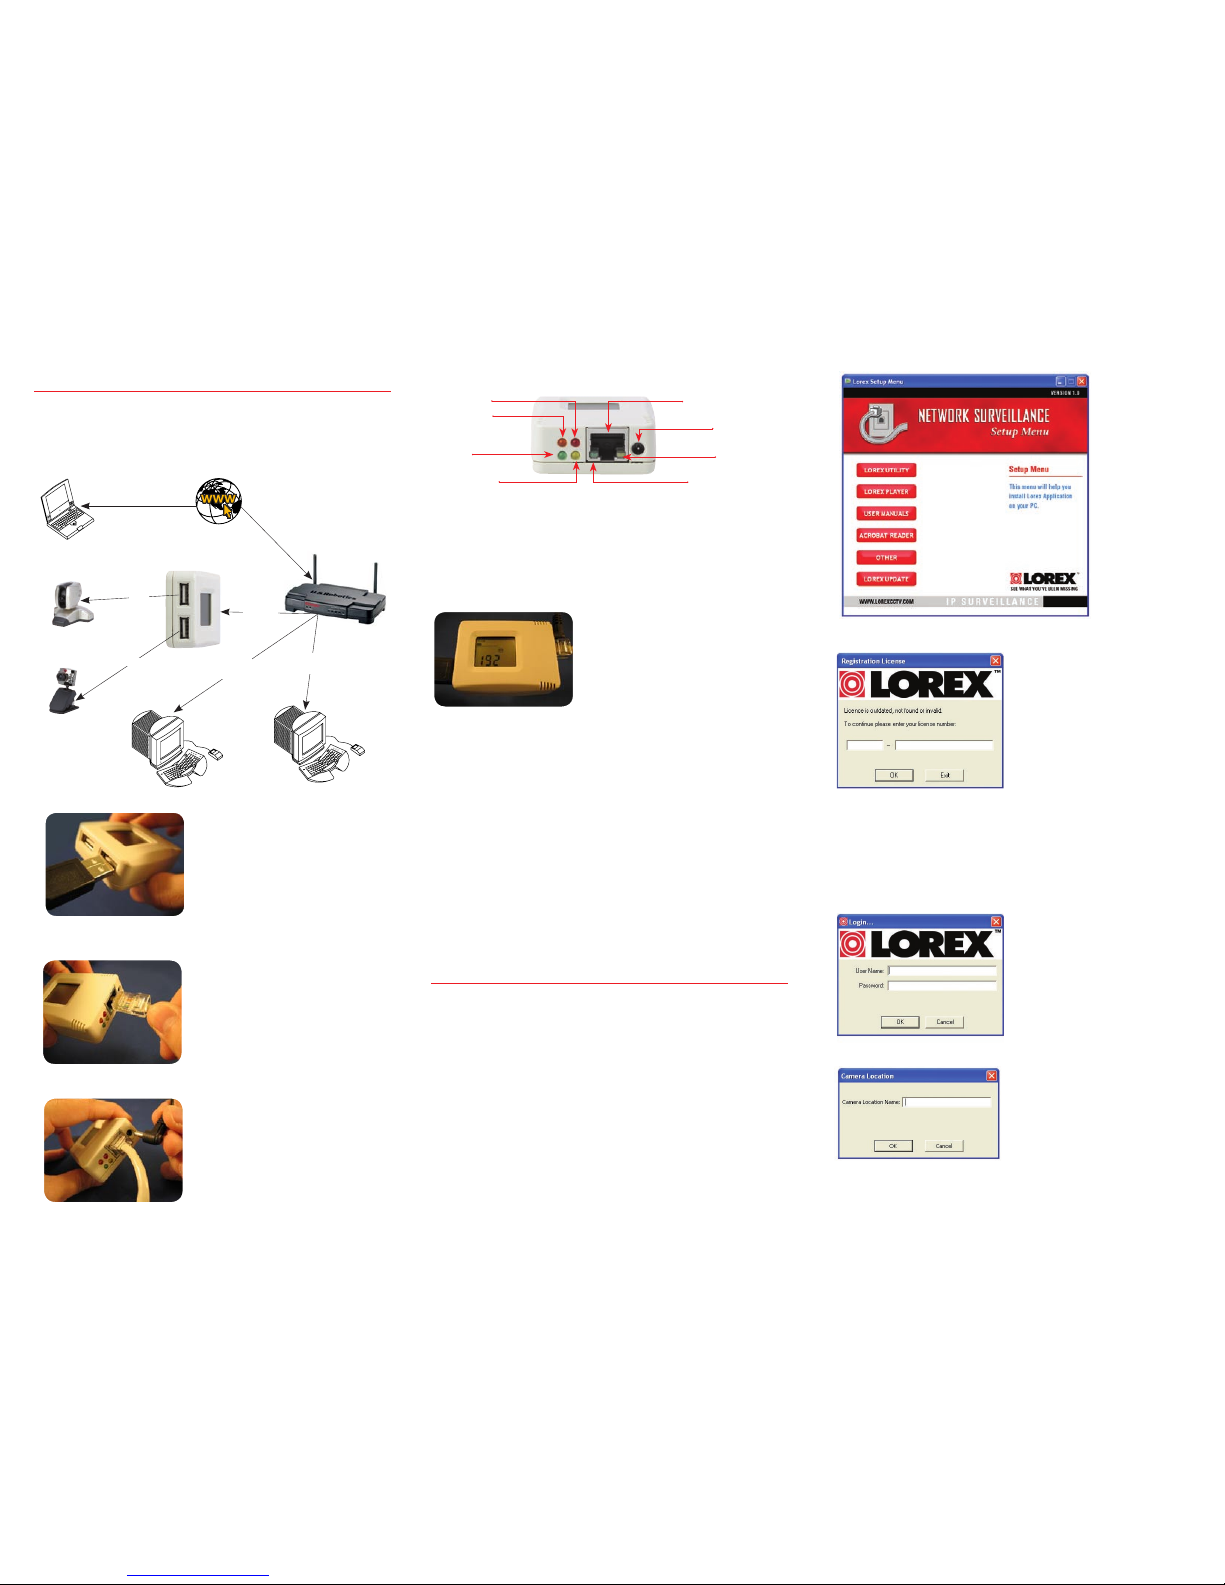
Step 1A :
Connect the USB camera into
one of the USB ports. Note
that you must use the supplied
camera as it will not work with
a generic USB camera.
Step 1B:
Connect your Lorex module to a
spare LAN port on your Broadband
Router using the network cable
supplied with the device ( or an
equivalent cat5 network cable).
Step 1C:
Connect the power plug to the
device and insert the power
adapter into a 110V AC socket.
• The green Power LED will light up showing that power is connected.
• One or both Link LEDs will ash showing that the network is connected.
• The Error LED and the Login LED will remain off.
• The USB Data LED will ash showing the camera is connected.
If these are not correct, check your cabling and power connections.
Step 1D:
Verify the Network connection.
The Lorex module provides an LCD
display. This display will show you:
• How many cameras are connected – at this stage you should see one
round icon for the single connected camera.
• The network parameters: IP Address, Subnet Mask and Gateway Address in
a succession of digits. Typically, the addresses will look something like this:
IP Addr: 192.168.1.123 (where 1 and 123 are network dependent numbers)
Mask: 255.255.255.0
Gateway: 192.168.1.1
• If your broadband router is congured for dynamic host control protocol(dhcp) then these parameters will be set up automatically, and all you need to
do is write them down for future reference. If not, then refer to the manual on
using the Lorex Utility to congure the network addresses before continuing
on to Step 2.
Step 2: Setting up the Lorex Player
The Lorex Player is a Windows PC application that allows you to view and
record the video images from the Lorex module cameras on your PC.
For this you will need the Lorex CD supplied with your Lorex modules as well
as your product model number and MAC address. This number can be found
on the back of the hardware module. Take note of this number as you will
need it every time you install or upgrade the application, when you want to
set up a remote Internet connection or when you call in for technical support.
Step 2 A: Ins tall from CD
Insert the CD into CD-reader of your Windows 2000 or Windows XP computer.
Wait for the CD to start automatically. Click on the ‘Lorex Player’ button
on the screen. (If it does not start automatically you can manually run the
LorexPlayer.exe program found in the LorexPlayer directory on the CD).
Step 2B : Register the
applica tion
Run the application from the
Start menu (you will nd it under
Programs->Lorex->Player) or by
using the desktop shortcut. The
rst thing you will see will be the
registration screen.
The license number is made up of:
• 8-character model number found on the outside of the package(ie:IPSC2230)
• 12-character MAC number that is displayed on the underside of the Lorex module.
Enter your license number into the appropriate eld and select OK.
Step 2C: Log in to t he
Applic ation
The login screen will appear next.
The default login name is ‘admin’
and the default password is ‘admin’
(note the use of lower case letters).
Enter these and select ‘OK’.
Step 2D : Setting up a Camera
Location
You will now be prompted to set
up a new Camera Location. Select
‘Yes’ to proceed.
When the Camera Location dialog appears, enter the name you wish to give
the location. Select ‘OK’ to proceed.
Power LED
USB Data Transmitting
10Mbps Link LED
100Mbps Link LED
10/100Mbps
Fast Ethernet Connector
Power Connector
User Login LED
Error LED
LOREX MODULE
Pan/Tilt
Camera- A
Remote viewing using
Internet Explorer
USB
Internet Connection
Day/Night
Camera - B
USB
Ethernet
Cable
Ethernet
Cable
Ethernet
Cable
Router/IP Share
Local Viewer - A
Local Viewer - B
Page 2
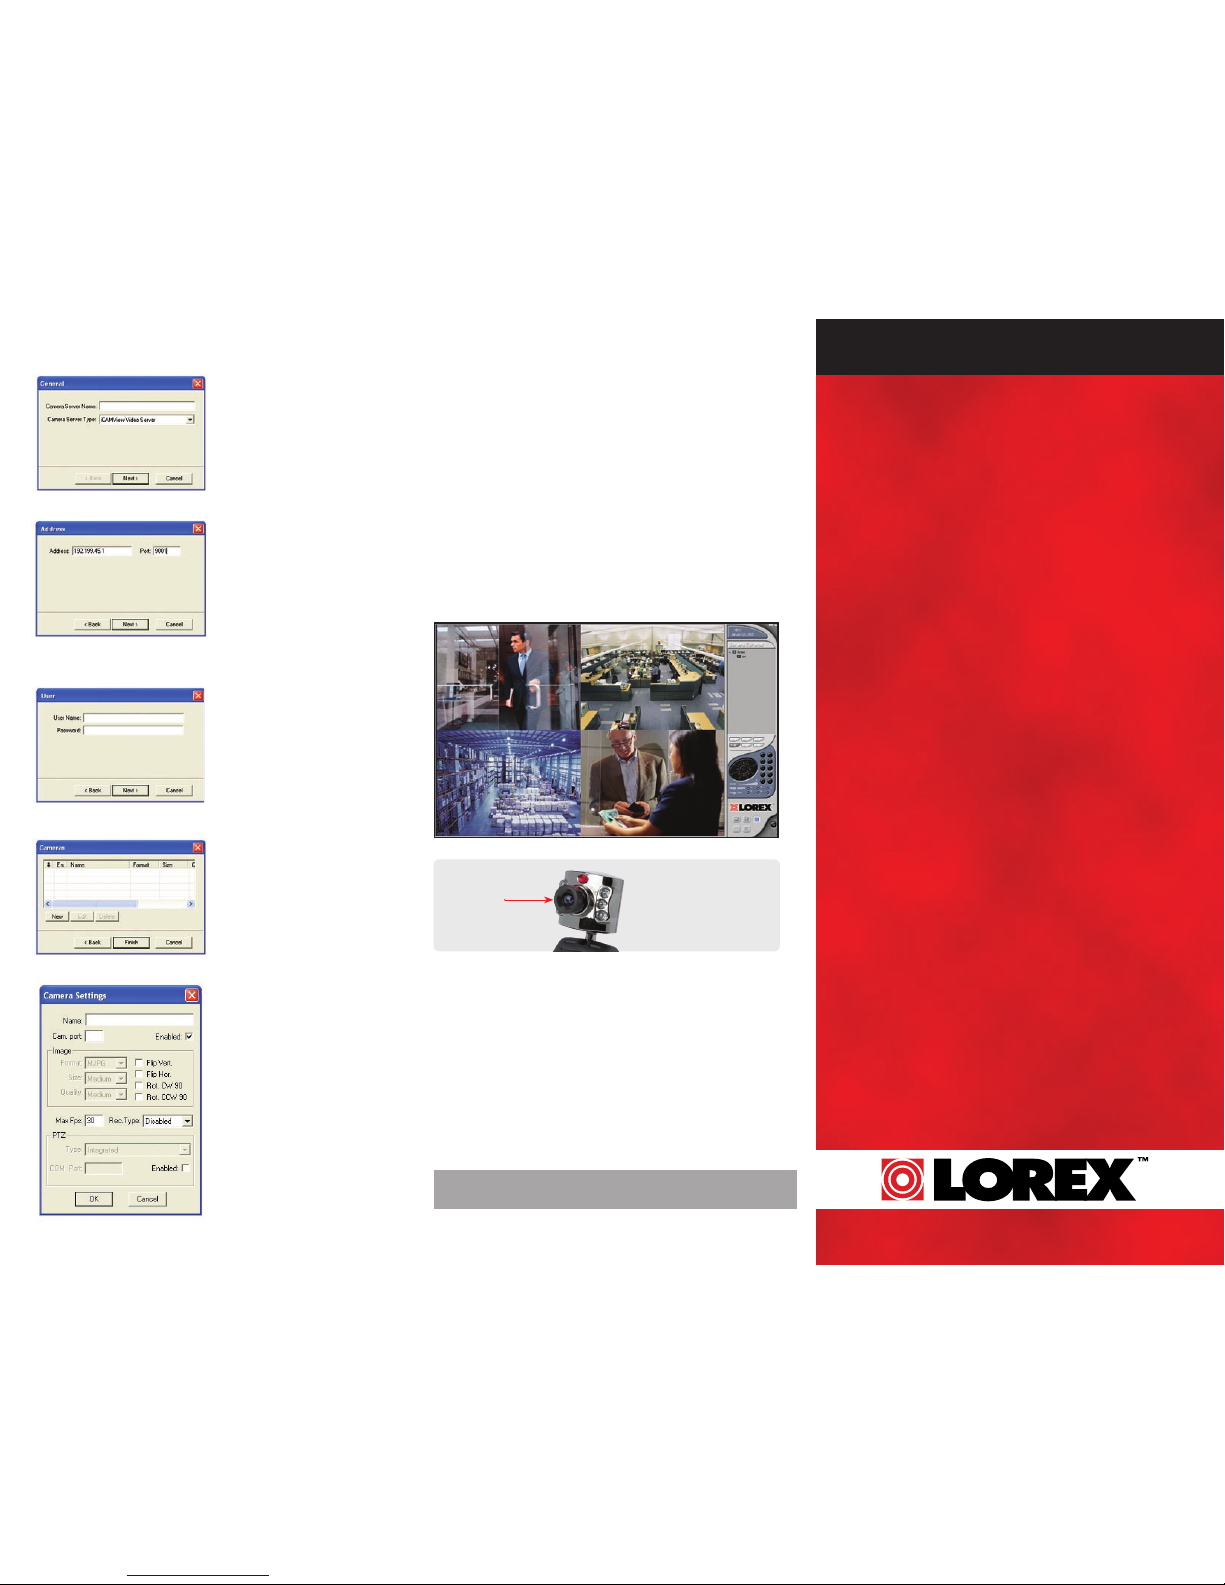
Step 2D : Setting up a
Camera Serve r
You will now be prompted to
set up a new Camera Server.
Enter a name for the server
and select ‘Next’ to proceed.
Name: Choose a descriptive name to identify which camera this is
Cam Por t: This is 1 for the 1st camera or 2 for the 2nd camera
Enabled: Check this to enable the camera
Image: Parameters are xed for the Lorex module
Recording Options: Select ‘Motion’ to enable motion detection
PTZ (Pan-Tilt-Zoom): Enable this if you know your camera supports this feature.
Select ‘OK’ to save the camera settings.
Now enter the IP Address of
the Lorex module that you
recorded in step 1D. (If you
didn’t take it down, look at the
LCD display again). The Port
should be specied as 9001,
unless you have a very good
reason to change it. Select
‘Next’ to proceed.
The User name and password
to enter in the next dialog is
the name dened for the Lorex
module. Unless you have
previously dened a name
within the Lorex module, you
should leave this blank. Select
‘Next’ to proceed.
The Camera screen will appear
showing no cameras. You can
set up to 2 cameras for each
Lorex module by clicking on
the ‘New’ button. When you
are done, select the ‘Finish’
button.
Step 2E : Setting up a
Camera
The Camera Setting dialog
sets a number of parameters
appropriate to the camera.
Step 2F : Viewing t he video
To display the video of a particular camera, double-click on the camera icon
in the Servers/Cameras area.
QUICK
SETUP
GUIDE
I P S U R V E I L L A N C E
LOREX MODULE & LOREX PLAYER
For additional information including technical support, FAQs, updated user
manuals surveillance software, visit our web site:
www.lorexcctv.com/ips
Lorex Technology Inc.
300 Alden Road, Markham, Ontario L3R 4C1 Canada.
As our product is subject to continuous improvement, SVII & subsidiaries reserve
the right to modify product design, specications & prices without notice and
without incurring any obligation. E&OE
©2007 Lorex Technology Inc.
If the image appears to
be fuzzy ,try turning the
camera ring to adjust
the focus.
Camera Ring
 Loading...