

Lorex ECO3 series Quick Mobile Manual
Quick Mobile Guide
Mobile Connection
Smartphones (iOS &Android™)
f
h
You will be prompted to change the NVR password. Enter a
new 6 character password and tap Confirm. This password
will be used to connect to your system from now on.
This guide will show you how to
set up your new Lorex system for
connection over the Internet using
a PC, Mac, Smartphone, or Tablet.
Before You Start:
Make sure you have:
• A router and high-speed Internet
access (not included).
• Connected your NVR to your router
using an Ethernet cable (see the Quick
Connection Guide for details).
• Upgraded your NVR firmware and
client software or mobile app to
the latest versions. The latest versions
of firmware and software are required to
connect to the system.
C ONNECTIVITY
This system features connectivity using the exclusive Lorex
Stratus solution. This cloud-enabled service allows for Internet
connectivity without requiring any network configuration. Each
system includes a Device ID, a unique code that allows your
system to handshake with Lorex’s servers for a secure connection
over the Internet.
Please note that an upload speed of 1Mbps is required for remote
video access. Up to 3 devices* may connect to the system at the
same time.
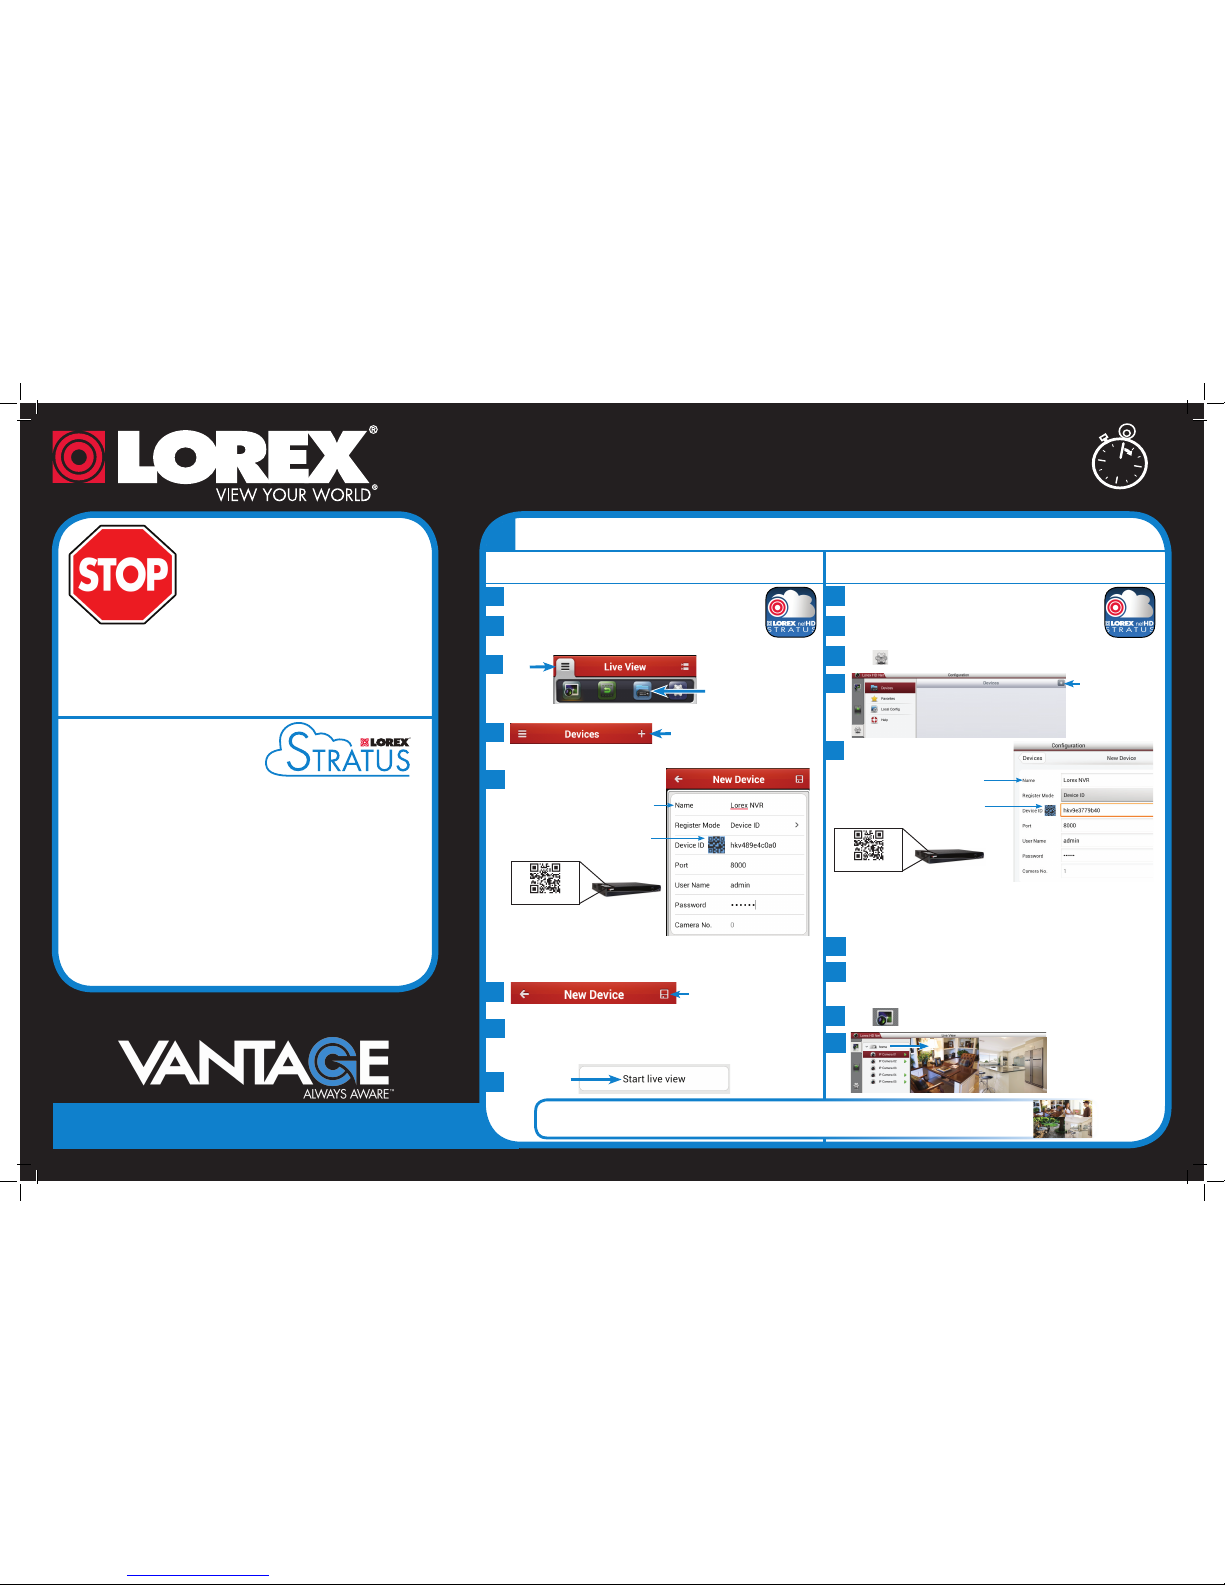
LNR300 netHD SERIES
Install the free Lorex netHD Stratus app
from the Google Play Store or App Store.
a
b
c
Tap the Lorex netHD Stratus
icon to open the app.
d
e
Install the free Lorex netHD Stratus Plus
app from the Google Play Store or App Store.
a
b
c
Tap the Lorex netHD Stratus Plus
icon to open the app.
d
e
1
Congratulations! You can now view video from your cameras on your smartphone or tablet.
3 Minutes
Tap +
Enter a name for your
NVR of your choice.
Press the QR code icon next to Device ID
and line up the QR code on top of the
NVR with the camera on your device.
Device ID: xxxxxxxxx
OR If your device does not have a
camera, manually enter the Device ID
printed on the label.
NOTE: If you have changed the User Name, Password, or Client Port
from the defaults, you will need to update them.
Tap
Tap Start
live view
g
Tablets (iOS & Android™)
Tap .
Tap +
Enter a name for your
NVR of your choice.
Press the QR code icon next to Device ID
and line up the QR code on top of the
NVR with the camera on your device.
Device ID: xxxxxxxxx
OR If your device does not have a
camera, manually enter the Device ID
printed on the label.
NOTE: If you have changed the User Name, Password, or Client Port
from the defaults, you will need to update them.
f
Tap Save.
You will be prompted to change the NVR password. Enter a
new 6 character password and tap Confirm. This password
will be used to connect to your system from now on.
g
h
Tap .
i
Press and drag the NVR to
the viewing area to open
all connected cameras.
* Connecting multiple devices may affect performance depending
on available upload bandwidth.
Tap
Then, tap
Find your Device ID
Record your information below:
DEVICE ID:
Quick
Reference
Default access information:
• Default user name: admin
• Default password: 000000
Default system ports:
• HTTP Port: 80
• Client Port: 8000
• Mobile Port: 1025
Information in this document is subject to change without notice. As our products are subject
to continuous improvement, Lorex Technology Inc. and our subsidiaries reserve the right to
modify product design, specifications and prices, without notice and without incurring any
obligation. E&OE © 2013 LOREX. All rights reserved.
www.lorextechnology.com
It’s all on the Web
Need Help?
Visit www.lorextechnology.com/support
LNR300 netHD Series Quick Network Guide - English - R1
If you have forgotten your
password, contact
Lorex technical support.
2
b
a
d
c
3
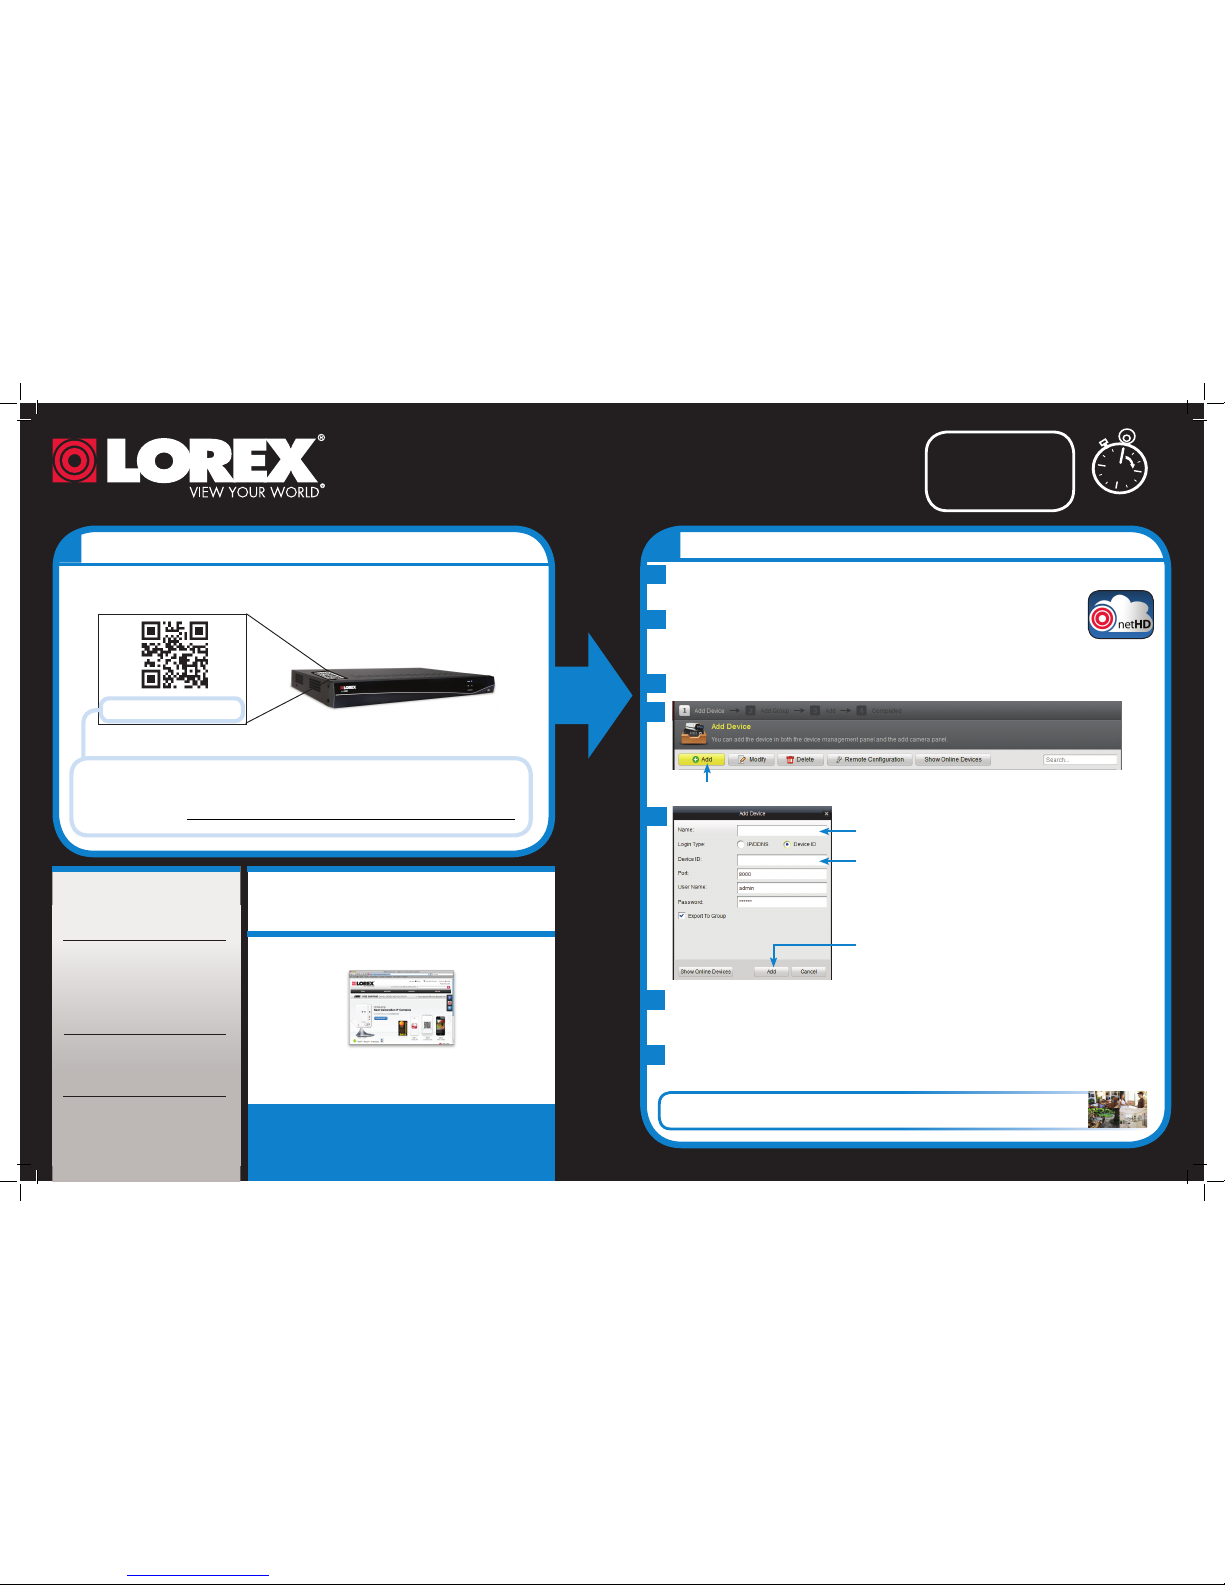
PC/Mac Users
Quick PC/MAC Guide
15 Minutes
The Device ID is printed on a label on the top panel of the NVR.
Device ID: xxxxxxxxxxx
See the label on top of
your NVR for your
Device ID.
NOTE: PC/Mac setup is
not required to connect on
a smartphone or tablet.
See reverse for
smartphone/tablet setup.
Click Add
Double-click on the Lorex netHD Stratus Client icon on your
desktop. The Client Software opens to the Add NVR Wizard.
Install Lorex Client Software from the CD or from www.lorextechnology.com.
NOTE: If the Add NVR Wizard doesn’t open, click Help>Open Wizard.
Click Enter Wizard.
e
Enter a name for your NVR of your choice
Enter the Device ID
Lorex NVR
xxxxxxxxxxx
NOTE: If you have changed the Client Port, User
Name, or Password from the defaults, you must
update them to connect to the NVR.
g
Click Add
Click Next 3 times, then click Finished.
The NVR opens in Main View and streams video from your cameras.
f
If this is the first time connecting to the system, you will be prompted to change
the NVR password. Enter a new 6 character password and click Yes . This
password will be used to connect to your system from now on.
Congratulations! You can now view video from your cameras on your computer.
Software and complete
instruction manual available on:
 Loading...