

Lorex DVM2050 Owner's Manual

INTERNET
VIDEO
SECURITY
MONITORING
OWNER’S MANUAL
Document Version 1.20.145
Application Version 1.20.145 06/04
NOTE: THIS MANUAL IS DESIGNED FOR
SOFTWARE VERSION 1.20.145. YOU MAY BE
ASKED UPON INSTALLATION TO DOWNLOAD A
NEWER SOFTWARE VERSION WHICH WILL
INCLUDE UPDATED FEATURES AND
INFORMATION. FOR THE MOST UP TO DATE
STARTER’S GUIDE, PLEASE PRINT THE START UP
GUIDE FROM THE HELP MENU.
Digital Video Security System is undergoing continuous improvement
to the software. You may be prompted to update the DVM software
upon installation.
Note: This document is designed as a Starter’s Guide. For a more
complete Digital Video Security System manual, please print it from
the Help menu.
Under the copyright laws, neither the documentation nor the software may be
copied, photocopied, reproduced, translated, or reduced to any electronic medium
or machine-readable form, in whole or part without the prior written consent of
Strategic Vista Corp., except in the manner described in the documentation.
© Copyright 2002 Strategic Vista Corp.
300 Alden Road
Markham, Ontario
L3R 4C1 CANADA
All rights reserved. Printed in Canada.

Table of Contents
1
Read Me First ............................................................................... 2
1.1 Steps to Get Going............................................................................................ 2
1.2.1 User’s Manual Layout......................................................................... 2
1.2.2 Symbols Used in This Manual.......................................................... 2
1.3 System Contents............................................................................................... 2
1.4 Minimum System Requirements...................................................................... 2
1.5 Windows Help File ............................................................................................ 2
1.6 Support .............................................................................................................. 2
1.7 FCC Compliance ............................................................................................... 2
2 Installing Digital Video Security System ...............................................2
2.1 Installing the Software Application .................................................................2
2.2 Connecting the Hardware................................................................................. 2
2.3 Setting Up/ Installing Your Video security Camera........................................... 2
2.4 Connecting your PC to a DVR using the Video Grabber………………….……16
2.5 To Uninstall.......................................................................................................... 2
3 Tutorial.......................................................................................2
3.1 Launching the Application............................................................................... 2
3.2 Quick Overview of the Interface ...................................................................... 2
3.2.1 The Main Application Window: An overview........................................ 2
3.3 Getting Started .................................................................................................. 2
3.3.1 Setting up a Local Surveillance Connection ................................2
3.3.2 Opening the Local Video Surveillance Connection .......................2
3.3.3 Viewing Video Locally ................................................................2
3.3.4 Adding Alarms ............................................................................2
3.3.6 Setting Actions in Response to an Alarm ............................................ 2

3.3.7 Adding Scheduled Events .......................................................... 2
3.3.8 Enabling Local Surveillance to be Viewed Remotely ............................ 2
3.3.9 Setting up a Remote Surveillance Connection..................................... 2
3.3.10 Viewing Live Video Remotely ......................................................... 2
3.3.11 Video Playback ......................................................................2
3.3.12 Additional information on remotely connection & viewing
How to setup the local system:
.......................................................................2
How to test a Remote IP connection: ..............................................................2
How to update the DVS software: ................................................................... 2
How to configure basic firewall features: ........................................................2
Advanced Connection settings:...................................................................... 2
Alternate Video Test Method: ......................................................................... 2
Troubleshooting: ...........................................................................................2
4 Camera Specifications ....................................................................2
5 Glossary ..................................................................................... 2
6 Support ......................................................................................2

Chapter 1: Read Me First
Digital Video Security System Start Up Guide 2
1 Read Me First
Digital Video Security System enables you to monitor and protect your business, home or
office from across the hall or around the world. The video grabber software provided with
Digital Video Security System, allows you to set up a PC based security system in minutes
that can:
• Stream Live Full-Motion Video – Watch what is going on in the next room, or around
the world via the internet or dial up option
• Detect Motion – When the alarm feature is activated, the system will automatically
dial a telephone or pager number that you have selected and play an emergency
message. You can also have the system send an email.
• Record Digital Video – Manage digital recording sessions or save the video as a
streaming file that can be replayed.. Review the video using still frame, forward, fast
forward and other video management capabilities.
• Control Home Automation – Use any X10 Home Automation and Wireless devices
to control lighting and other features available with X10-compatible systems
• Schedule Events – Schedule video recording, e-mail notification, X10 Home
Automation and more based on a user-defined schedule
1.1 Steps to Get Going
Listed below are the recommended steps for installing Digital Video Security System:
• Check your package using the list on the next few pages to make sure you received
the complete system.
• Confirm that your computer meets the system requirements for Digital Video Security
System.
• Install Digital Video Security System
1.2 How to Use This Manual
This user’s manual describes the contents of Digital Video Security System and system
requirements. It also provides installation instructions and tells you where to go for more
information.
1.2.1 User’s Manual Layout
This manual is designed to get you started quickly, while providing you with a full reference.
Each chapter is self-contained so that the manual does not have to be read in sequence.
The manual is divided into the following chapters:
Chapter Title Description
2
Installation Describes installation and setup of hardware and
software
3 Tutorial Overview of the main software features

Chapter 1: Read Me First
Digital Video Security System Start Up Guide
3
4 Specifications Describes specifications for computer and camera
5 Glossary Definitions of common terms used in this manual
6
Support Outlines available support to Digital Video Security
system users
Screen shots in this manual have been taken on a system running Windows 2000.
There will be small differences to the external appearance of the application
windows and dialogs running on Windows XP. The layout of the windows and
dialogs and their content are identical for all Windows systems supported.
1.2.2 Symbols Used in This Manual
Throughout this manual a set of comments are employed to provide emphasis to certain
points. A left-hand icon indicates the type of comment as follows:
This type of comment represents a feature or aspect of the Digital Video
Security System that is particularly beneficial to the user. Text in this
note is italicized and bold.
This type of comment represents information that you will find useful,
such as a shortcut or a “how-to” to avoid common mistakes. Text in
this note is bold.
THIS TYPE OF COMMENT REPRESENTS SOMETHING TO BE AWARE
OF OR BE CAUTIOUS ABOUT. TEXT IS BOLD AND UPPERCASE.
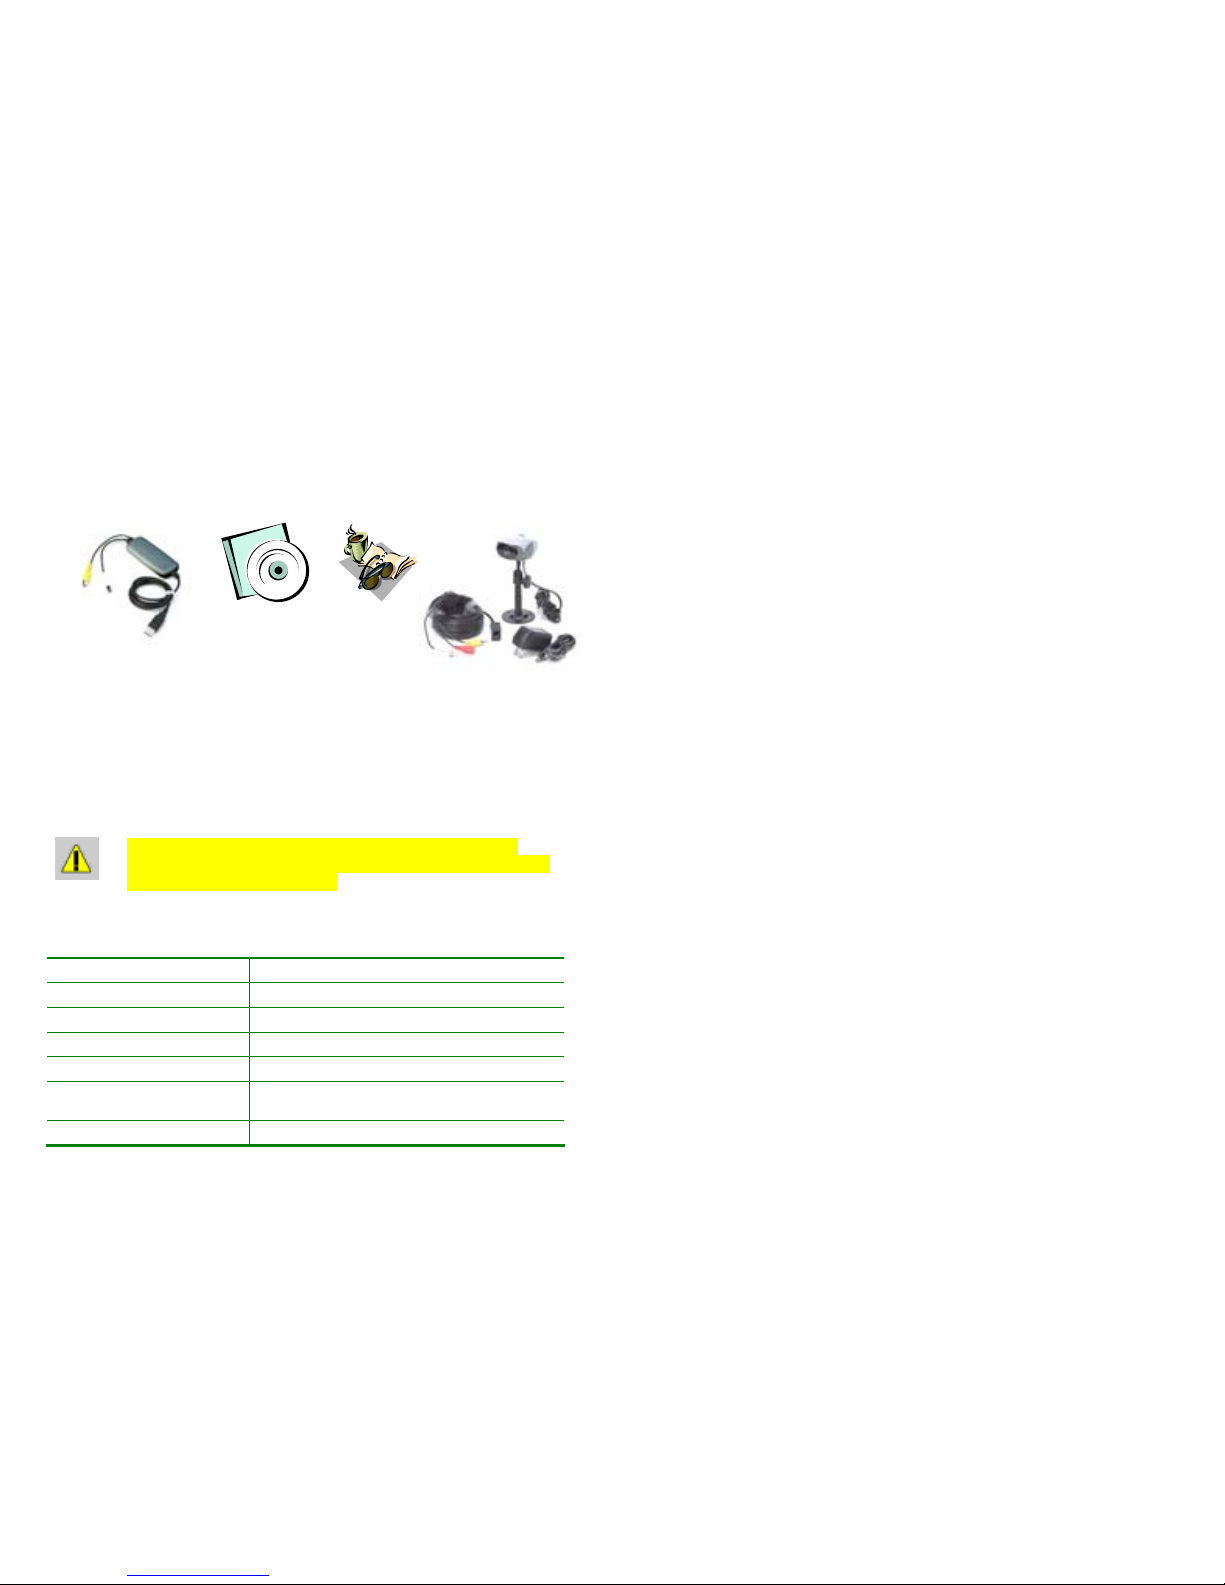
1.3 System Contents
! Video Grabber with USB cable – A PC interface that allows you to connect
a video device, such as a security camera, to your PC.
! Software – The Digital Video Security System software application enables
you to monitor and protect your business, home or office from across the
hall or around the world.
! Color Video Security Camera (included with the DVM2101-A &
DVM2051-A system) – A high-quality color video security camera with
cable and 9 V DC power supply. Note: if you purchased DVM2100 or
DVM2050, you will need to purchase a video security camera.
Chapter 1: Read Me First
Digital Video Security System Start Up Guide
4
! User’s Manual – Full reference to the features of Digital Video Security
System.
Video Grabber
with USB Cable
Application
Software
Owners
Manual
Color Video Camera with
57ft extension cable,
camera bracket and power
supply - Included with
Model DVM2101-A,
DVM2051-A
DO NOT PLUG THE VIDEO GRABBER INTO THE USB
PORT OF YOUR COMPUTER. YOU MUST FIRST RUN THE
INSTALLATION SOFTWARE.
1.4 Minimum System Requirements
The minimum system requirements for the Digital Video Security System are:
Processor Pentium II or higher
RAM 32 MB Ram
Windows O/S Windows 2000 or Windows XP
Video Card Any VGA Compatible Video Card
Display 800 x 600 VGA
Sound Card Built into Color Camera with DVM2101-A, and
DVM2051-A; Built in sound Card to most computers
Disk Space 40 MB available hard disk space

Chapter 1: Read Me First
Digital Video Security System Start Up Guide
5
Modem 28 bps or higher modem
CD-ROM Drive Required for software installation
Computer Connection USB
Camera Included with DVM2101-A and DVM2051-A (not
included with DVM2100 or DVM2050)
1.5 Windows Help File
The Digital Video Security System User’s Manual is available in modified form as a
Windows Help file. To access the online Help file, click first on Help, then Help topics, and
finally the Contents section from the Digital Video Security System application itself.
1.6 Support
The following 3 options are available for technical support:
Type Contact Hours
On-line Support
Please visit our website at
www.strategicvista.com
for free
technical information anytime and
weekly updates to the most
frequently asked questions
24 Hours / 7 days a
week
Email Support
Please email your queries to us
at support@strategicvista.com
If you are experiencing a
technical problem, you can also
send the configuration file to us
for assistance
Allow 24 Hours (Mon-Fri)
for a technical support
person to respond to
your query
Telephone Support Should you need to talk with a
customer support representative
please visit our website at
www.strategicvista.com
for the
most up to date telephone
customer support phone number.
Note that a fee may apply for this
service.
Support available 7 Days
a week

Chapter 1: Read Me First
Digital Video Security System Start Up Guide
6
1.7 FCC Compliance
This equipment has been tested and found to comply with the limits for a class B digital
device, pursuit to Part 15 of the FCC rules. These limits are designed to provide
reasonable protection against harmful interference in a residential installation. This
equipment generates, uses and can radiate radio frequency energy and, if not installed and
used in accordance with the instructions, may cause harmful interference to radio
communication. However there is no guarantee that interference will not occur in a
particular installation. If this equipment does cause harmful interference to radio or
television reception, which can be determined by turning the equipment off and on, the user
is encouraged to try to correct the interference by one or more of the following measures:
• Reorient or relocate the receiving antenna increases the separation between the
equipment and receiver
• Connect the equipment into an outlet on a circuit different from that to switch the
receiver is connected
• Consult the dealer or an experience radio or television technician for help.
This device complies with Part 15 of the FCC rules. Operation is subject to the following
two conditions:
1. This device may not cause harmful interference, and
2. This device must accept any interference received, including interference that
may cause undesired operation
This digital apparatus does not exceed the Class B limits for radio noise emissions from
digital apparatus set out in the Radio Interference Regulations of the Canadian Department
of Communications.
ALWAYS USE DISCRETION WHEN INSTALLING VIDEO AND AUDIO SURVEILLANCE
EQUIPMENT ESPECIALLY WHEN THERE IS PRECEIVED PRIVACY. INUQIRE
REGARDING FEDERAL, STATE AND OR LOCAL REGULATIONS APPLICABLE TO
THE LAWFUL INSTALLATION OF VIDEO AND OR AUDIO RECORDING OR
SURVEILLANCE. PARTY CONSENT MAY BE REQUIRED

Digital Video Security System Start Up Guide
7
2 Installing Digital Video Security System
This chapter describes how to install Digital Video Security System. You will need a video
security camera (included with DVM2101-A and DVM2051-A) to operate this system.
Screen shots in this manual have been taken on a system running Windows 2000.
There will be small differences to the external appearance of the application
windows and dialogs running on Windows XP. The layout of the windows and
dialogs and their content are identical for all Windows systems supported.
DO NOT PLUG THE VIDEO GRABBER INTO THE USB PORT OF YOUR
COMPUTER. YOU MUST FIRST RUN THE INSTALLATION SOFTWARE.
2.1 Installing the Software Application
To install the Digital Video Security System software application, simply insert the Software
Application CD into your computer’s CD-ROM. After a few seconds the Setup application
will automatically run.
On some systems the Windows auto-start is turned off. If the Setup application does not
run within a few seconds after you place the installation CD in the CD-ROM drive, go to the
Start - Run option. Select browse to find the CD-ROM drive and double-click the Setup.exe
file.
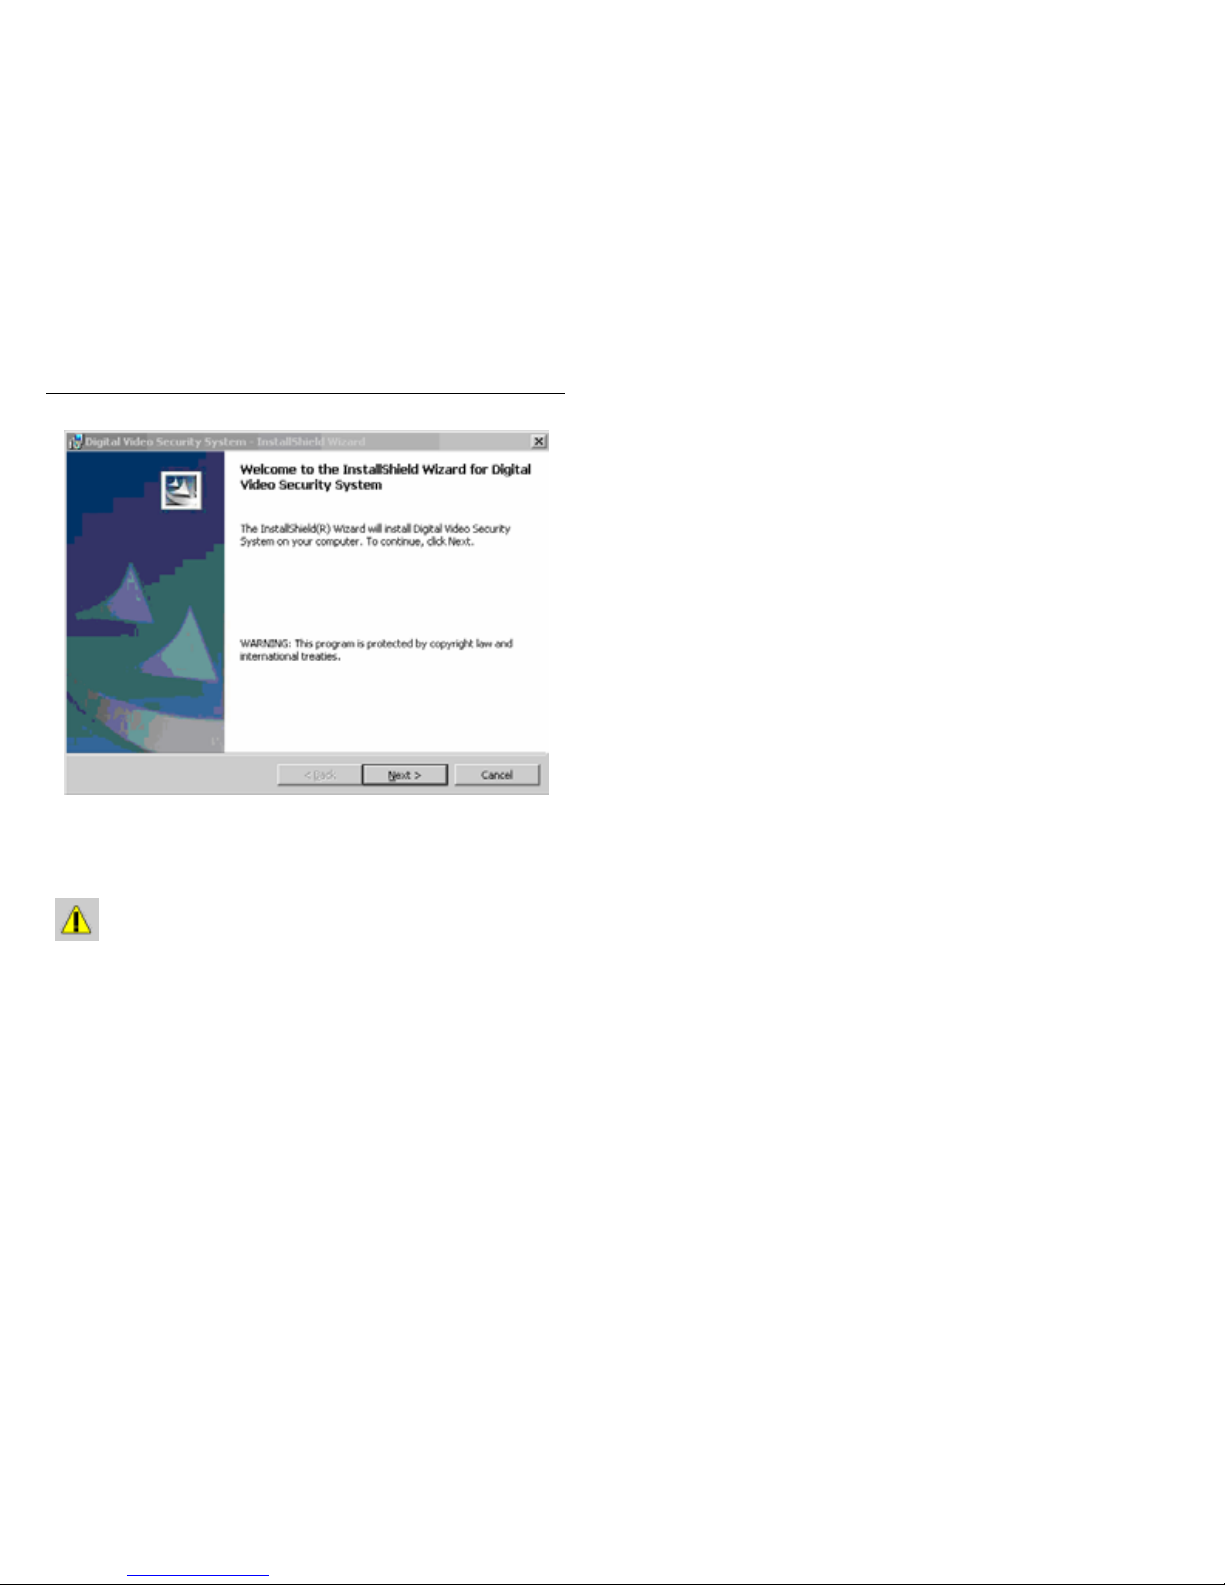
When the Setup starts up you will see the Windows Installer main window:
Digital Video Security System Start Up Guide
8
Follow the instructions of the standard Windows installation dialog, which will guide you
through the installation process.
YOU MUST ACCEPT THE LICENSE AGREEMENT PANEL OR THE
INSTALLATION WILL NOT CONTINUE.
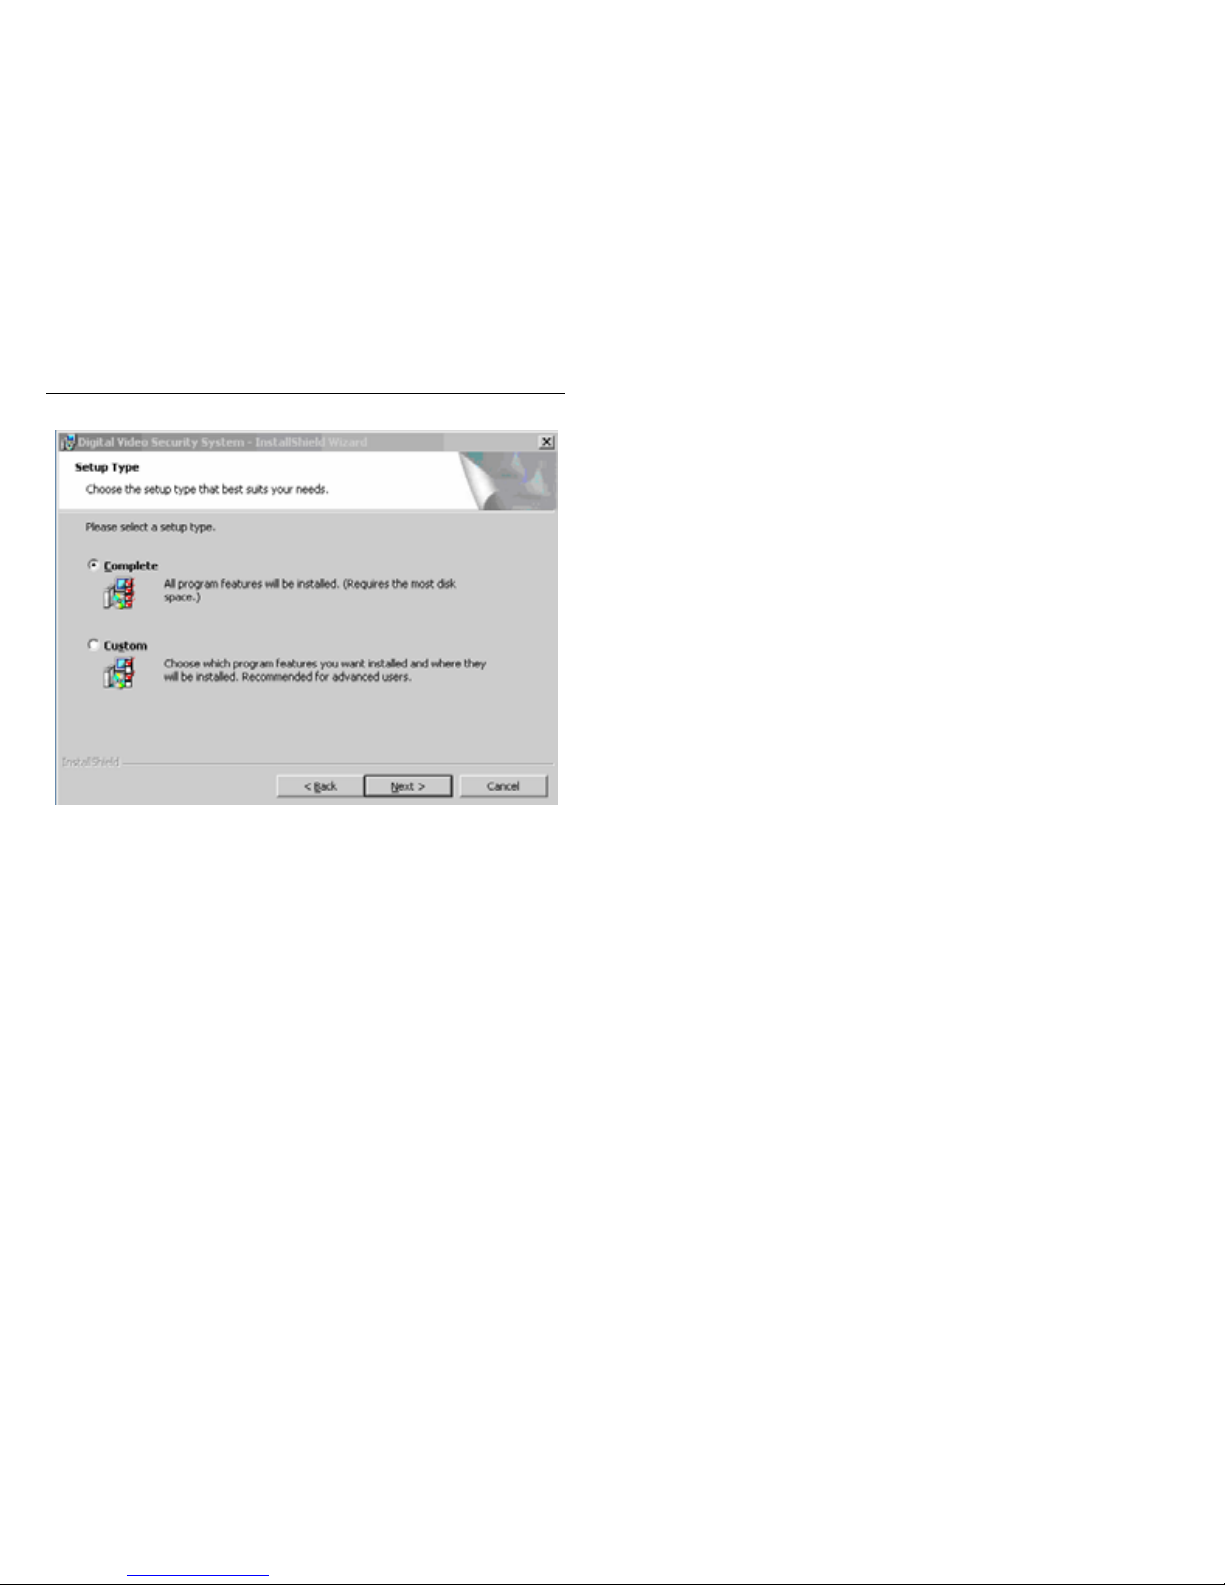
The next two panels will require you to accept the license agreement, and enter your
customer information. You will then be prompted with the following Setup Type panel:
Digital Video Security System Start Up Guide
9
Select the Complete Setup option and click on Next. The installation may appear to pause
during the installation process. If this happens let the installation software proceed. It is
automatically configuring your Windows environment to determine what it needs to install in
order for the Digital Video Security System software application to operate properly. The
following window will update you as to the progress of the installation:
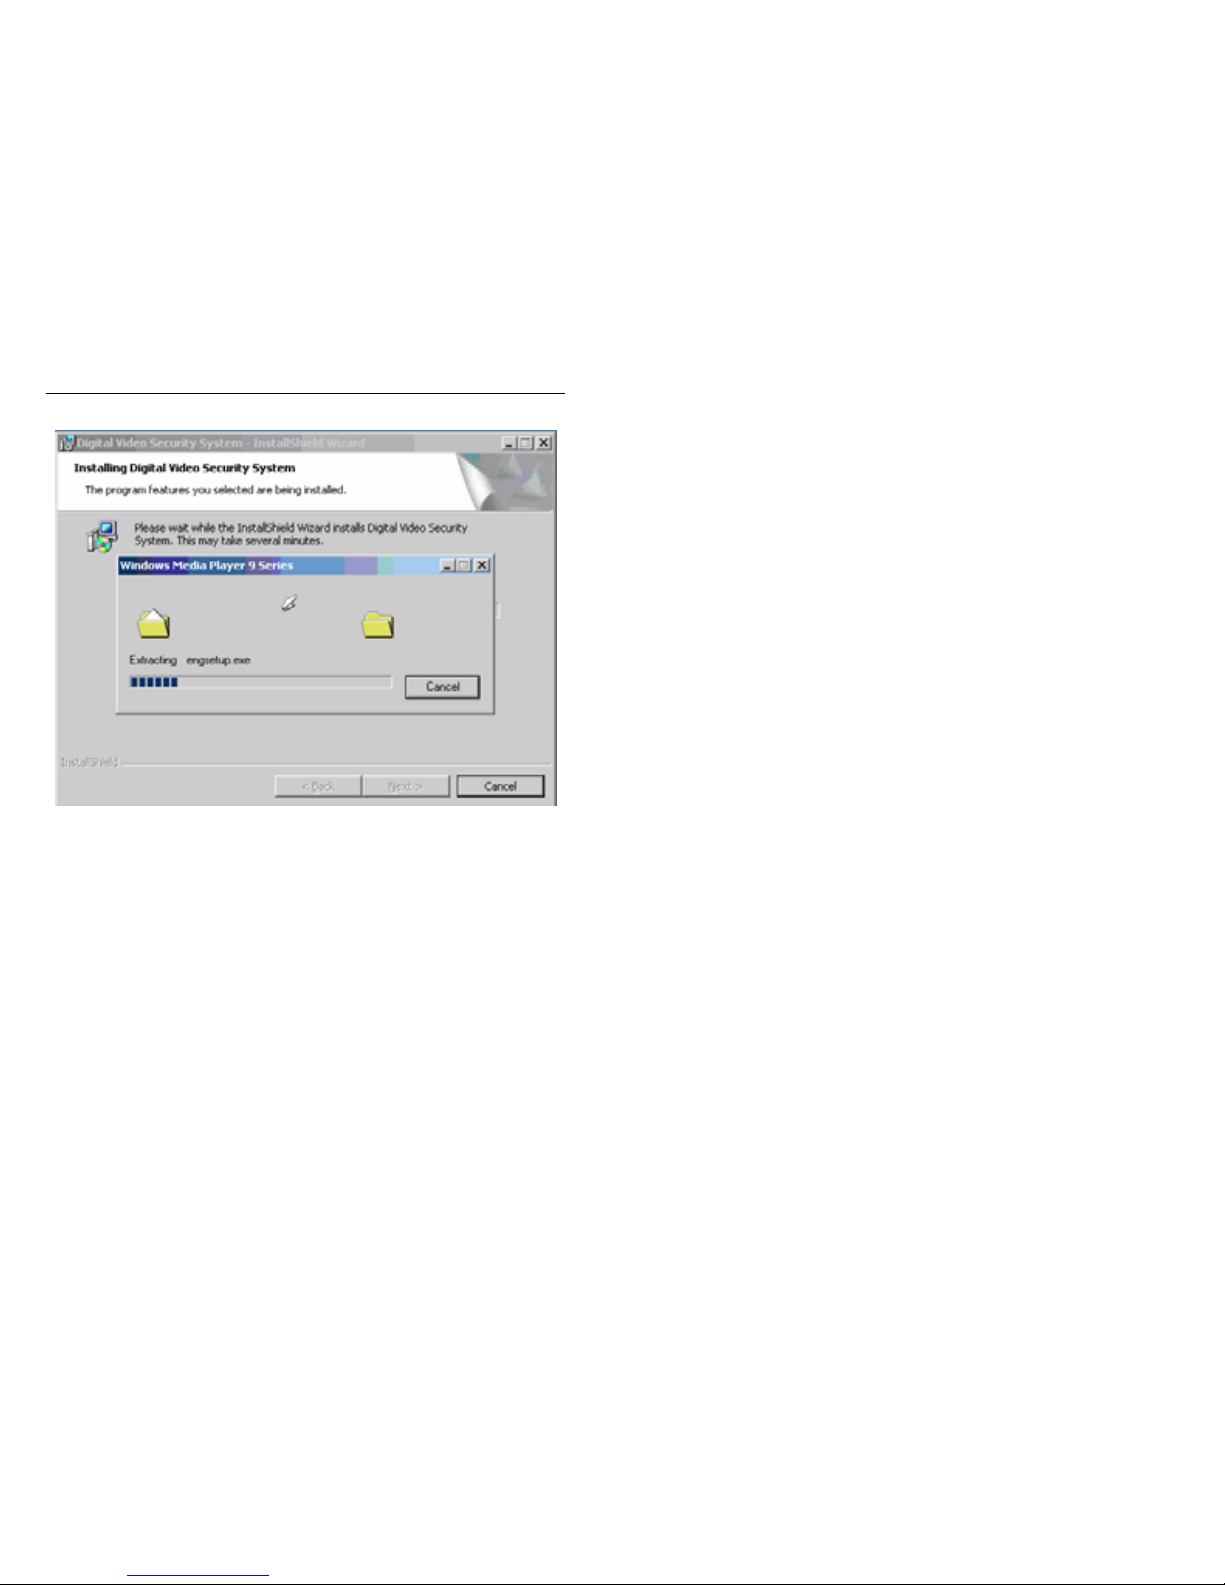
Digital Video Security System Start Up Guide
10
The installation automatically installs Windows Media Player 9 Series if it is not already on
your system. The Digital Video Security System is based on a Widows Media platform, and
WM9 offers improved streaming audio/video performance from previous versions of the
software.
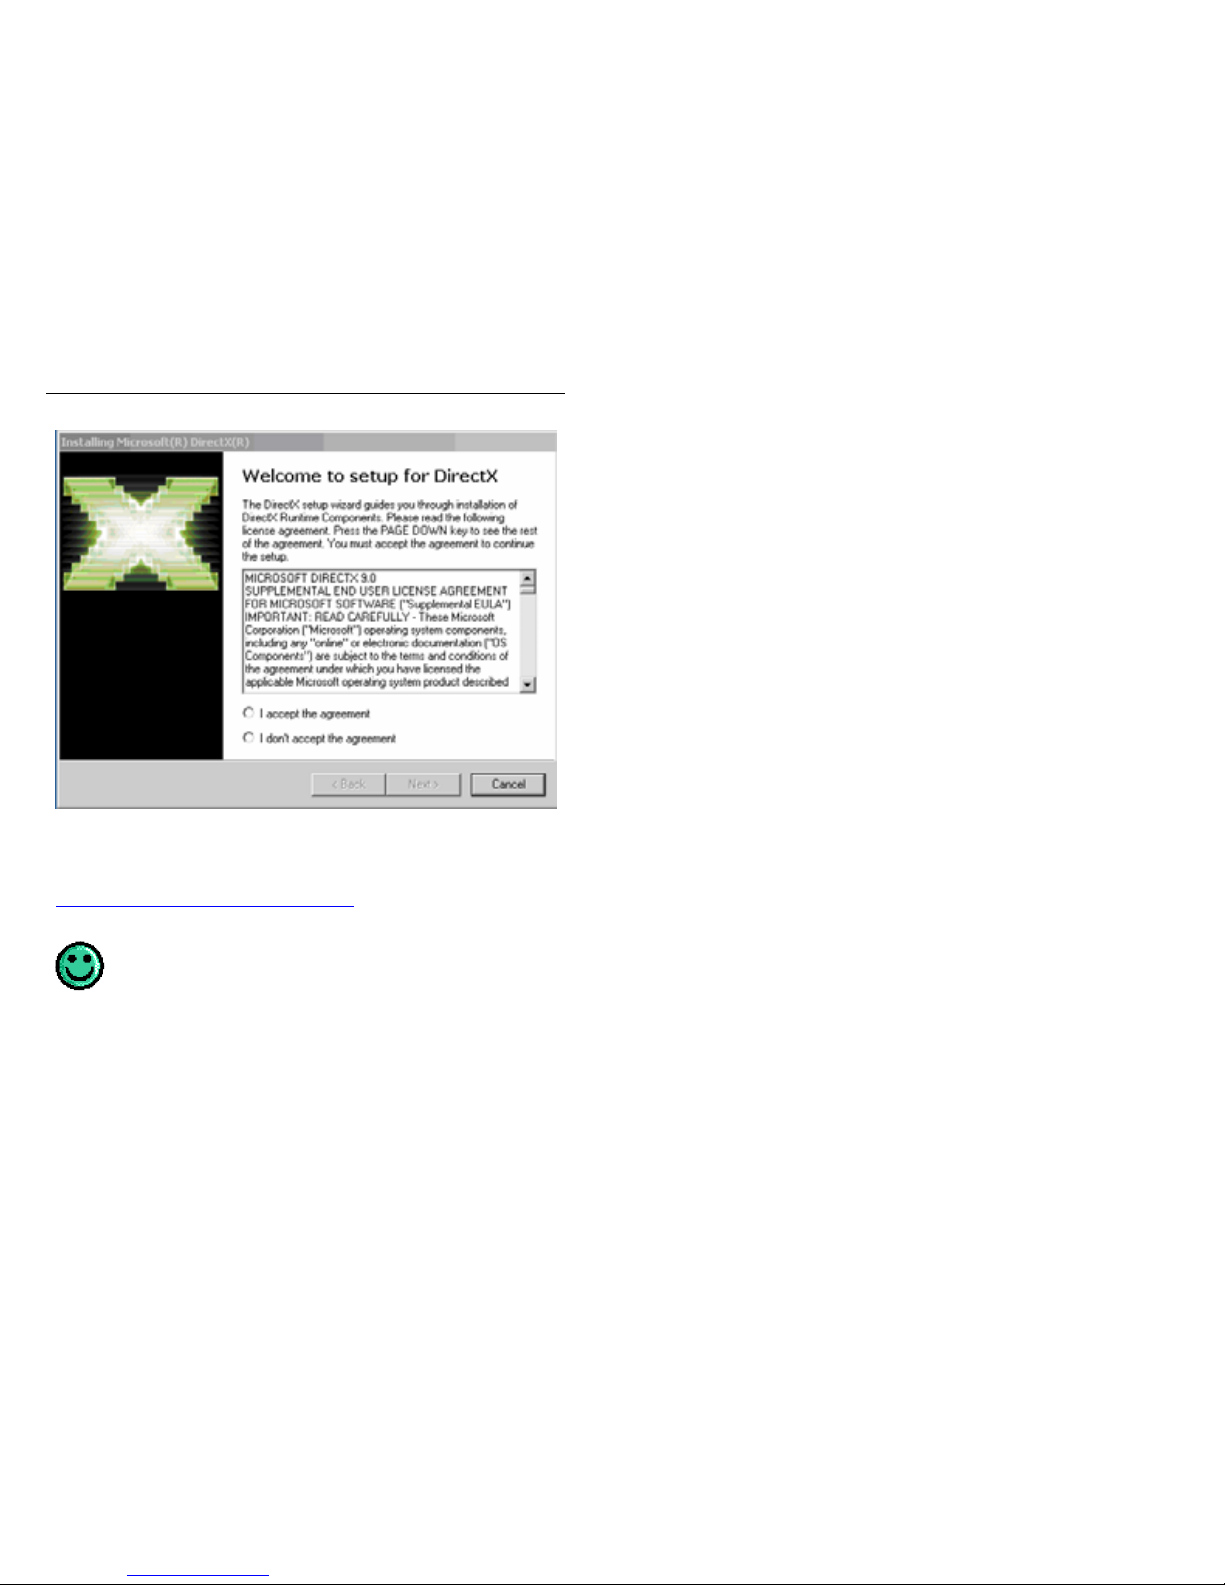
Digital Video Security System Start Up Guide
11
Once Windows Media 9 is installed, you will be prompted with a setup dialog for DirectX.
DirectX is the core Windows® technology that drives high-speed multimedia and games on
the PC. For more information on the features of DirectX, please refer to the following link:
http://www.microsoft.com/windows/directx/default.aspx
An advantage of having a Windows Media platform is that Windows
Media software is constantly being improved. As Windows Media
improves, the audio and video streaming quality of the Digital Video
Security System improves as well!
Follow the instructions of the standard DirectX 9.0 installation dialog, which will guide you
through the installation process.
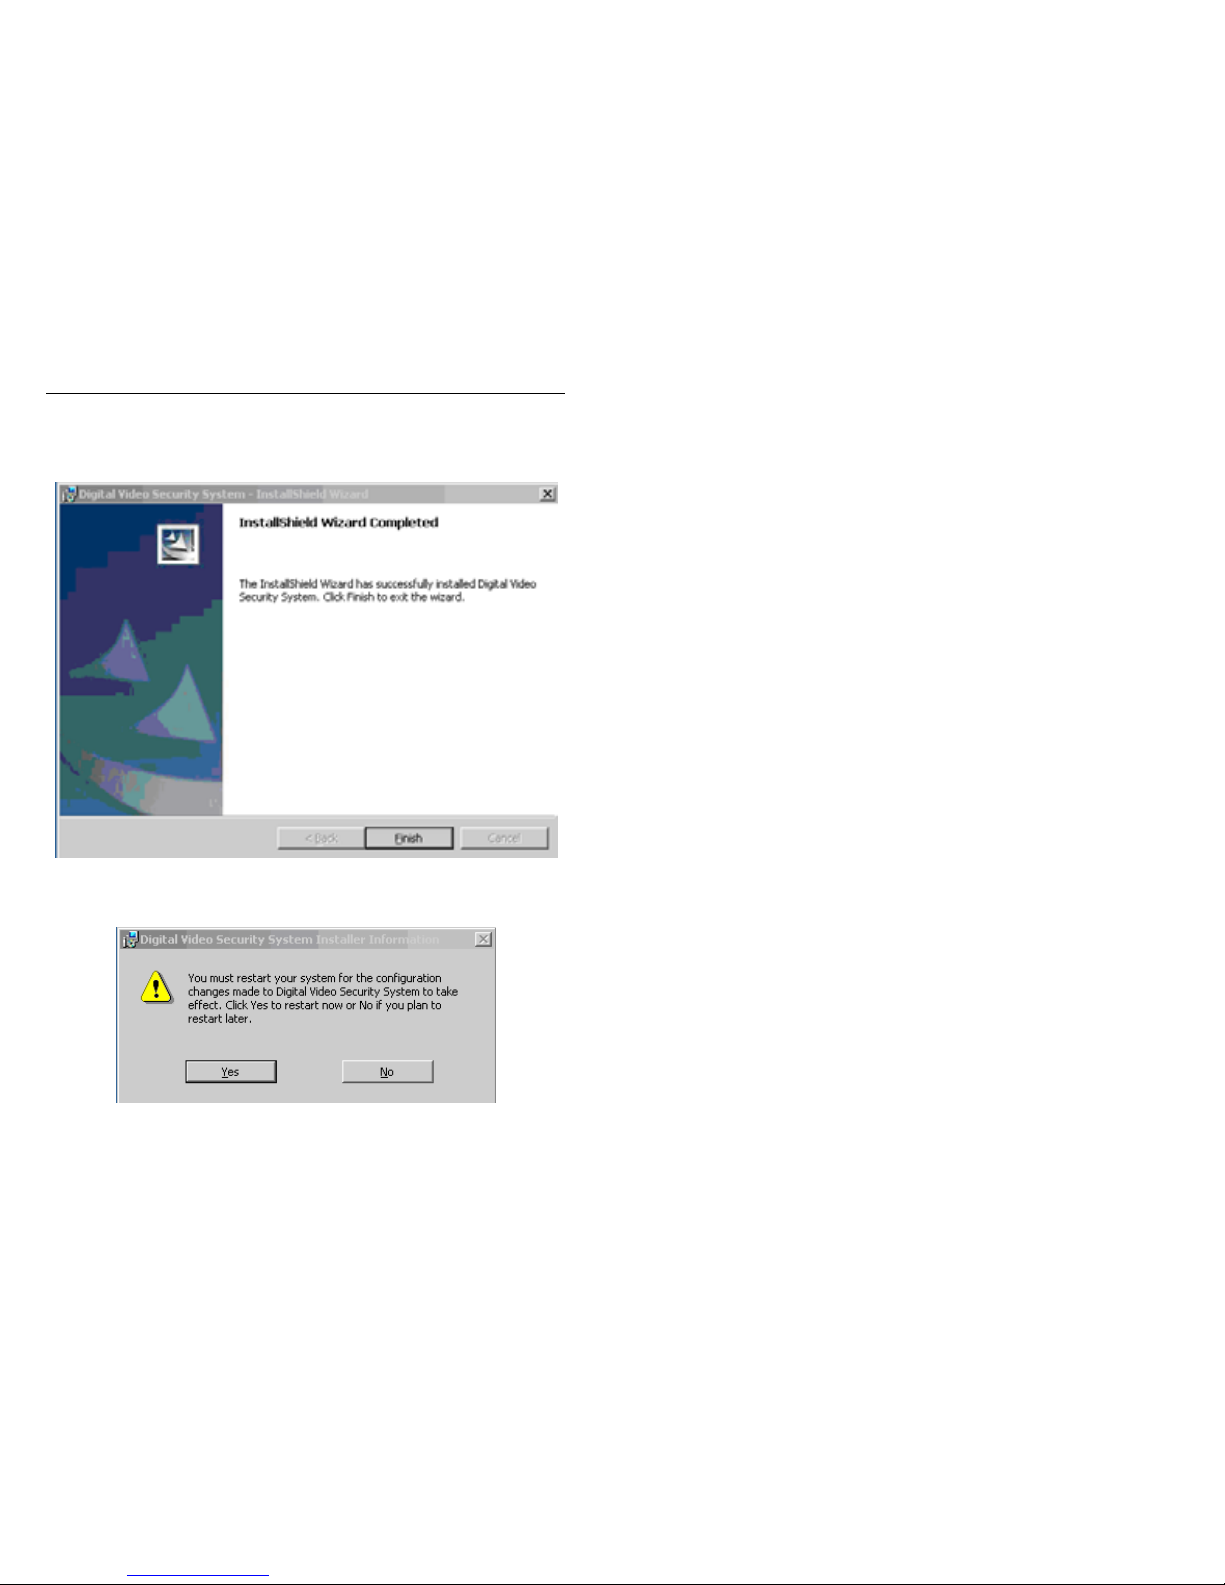
Digital Video Security System Start Up Guide
12
After DirectX 9.0 is installed, the installing process for the Digital Video Security System
application software will resume. When the installation is completed you will see the
following window.
Once the installation of the Digital Video Security System application is complete, you must
Restart your system in order for the new settings to take effect.
Digital Video Security System Start Up Guide
13
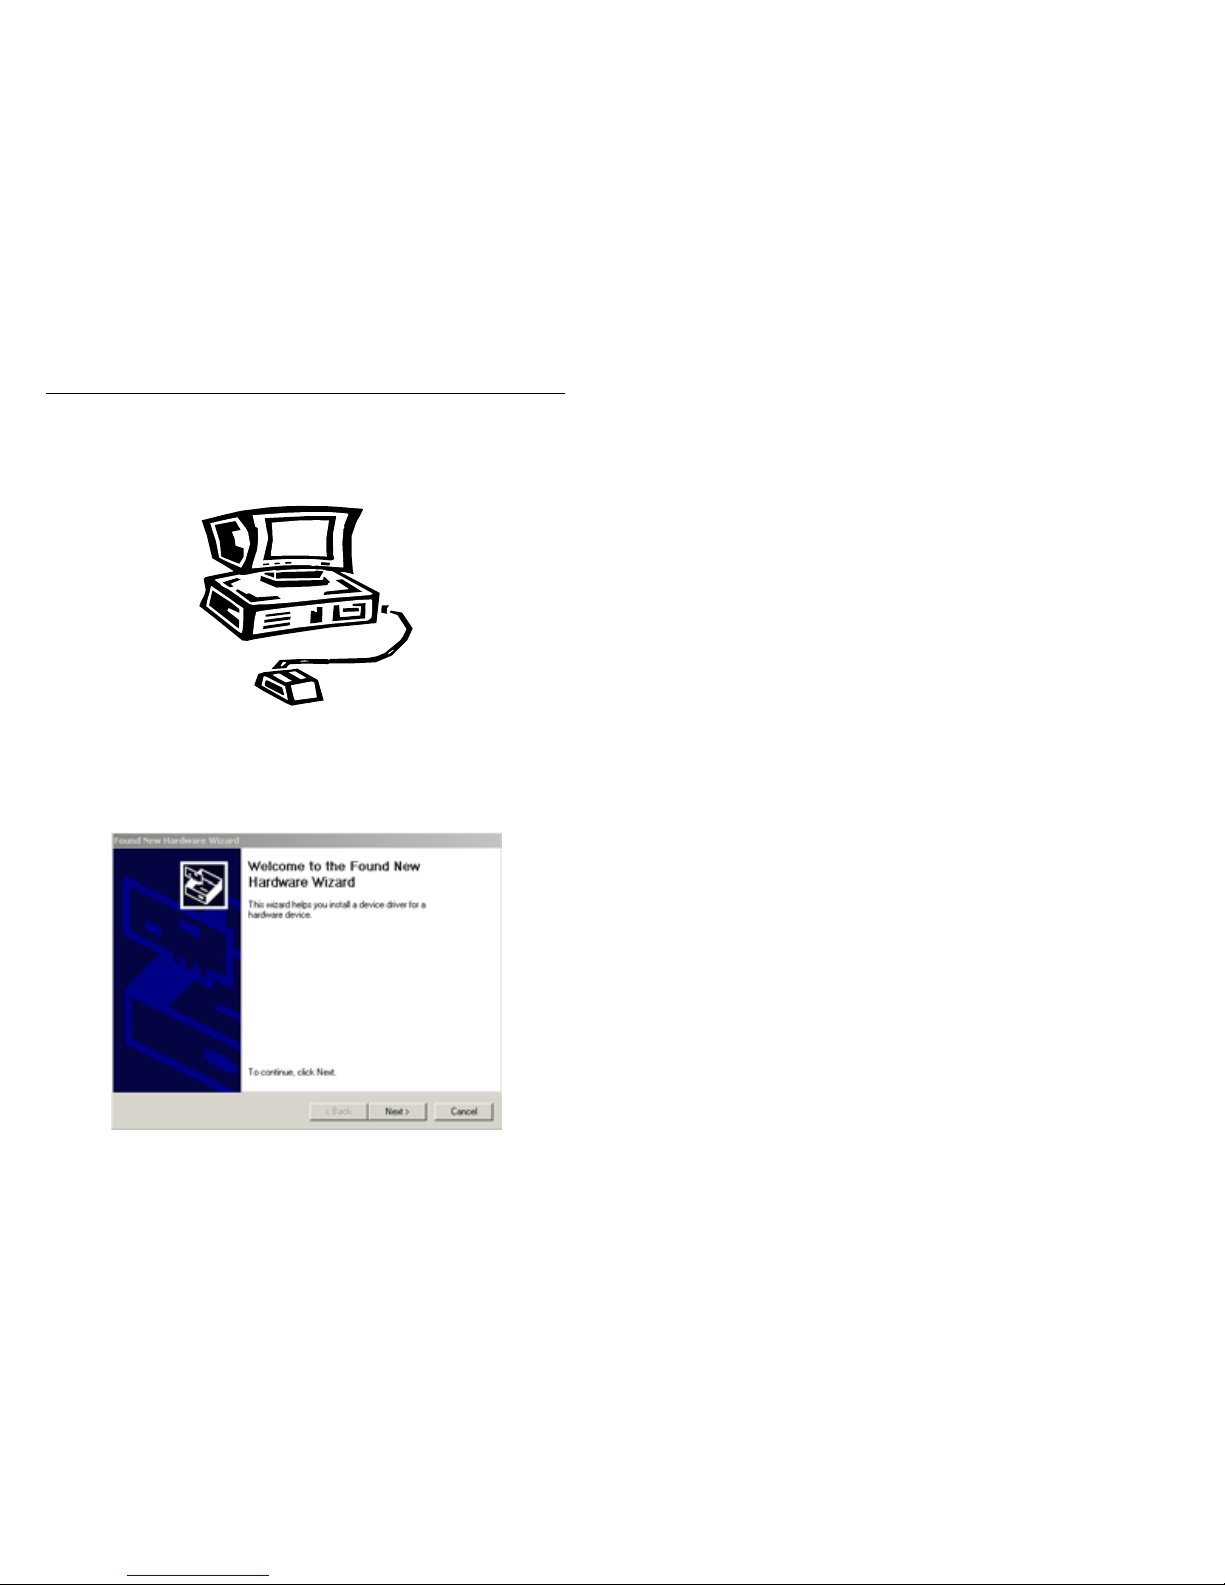
2.2 Connecting the Hardware
Once the installation of the Software Application and Video Drivers is completed, connect
the Video Grabber to the USB port on your computer using the supplied cable.
The Video Grabber is designed as a Plug-and-Play device. The Windows device manager
will automatically finds and recognizes the Video Grabber with the Found New Hardware
Wizard.
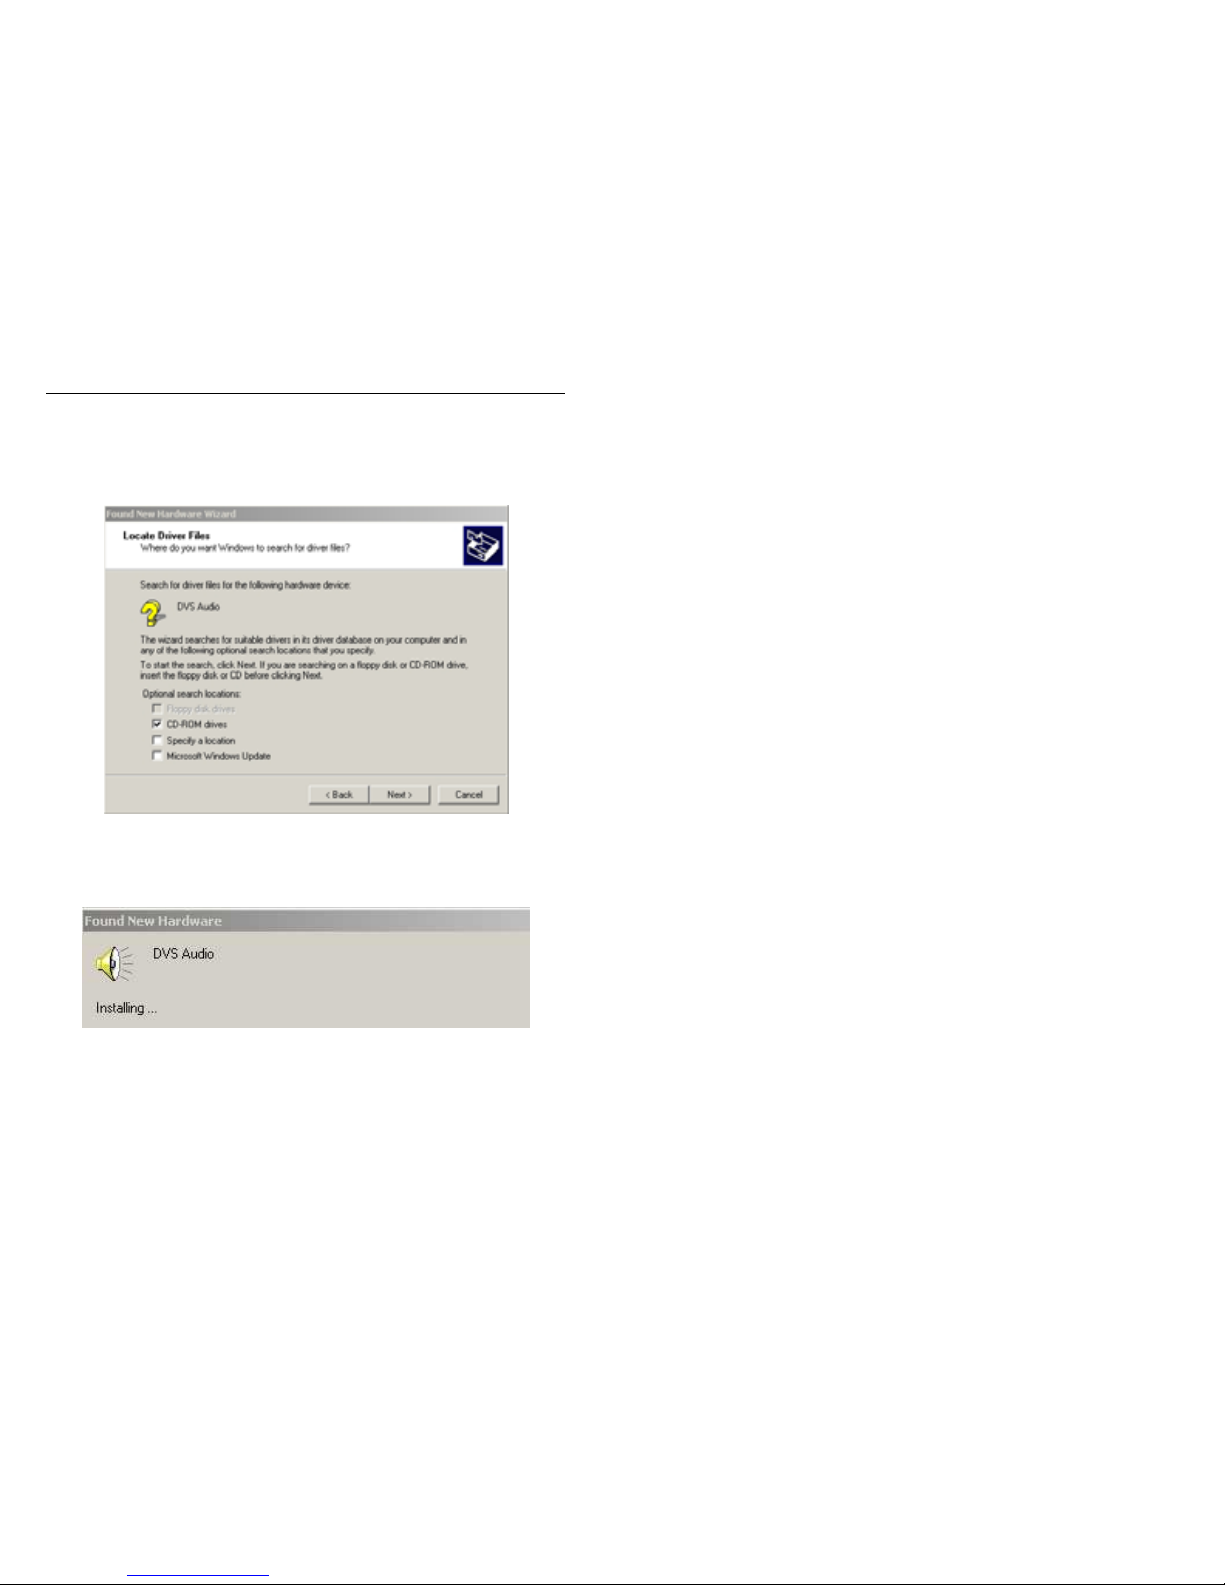
The following image depicts the Video driver being automatically detected and installed by
the Found New Hardware Wizard.
Digital Video Security System Start Up Guide
14
Your system may ask you to specify the location of both the Audio and Video Drivers.
Select the CD-ROM drive. The New Hardware Wizard will locate the Drivers on the
software CD.
The Audio and Video Drivers with both install sequentially one after the other. You may be
asked to restart your system between the Audio Driver and Video Driver installation.
Digital Video Security System Start Up Guide
15
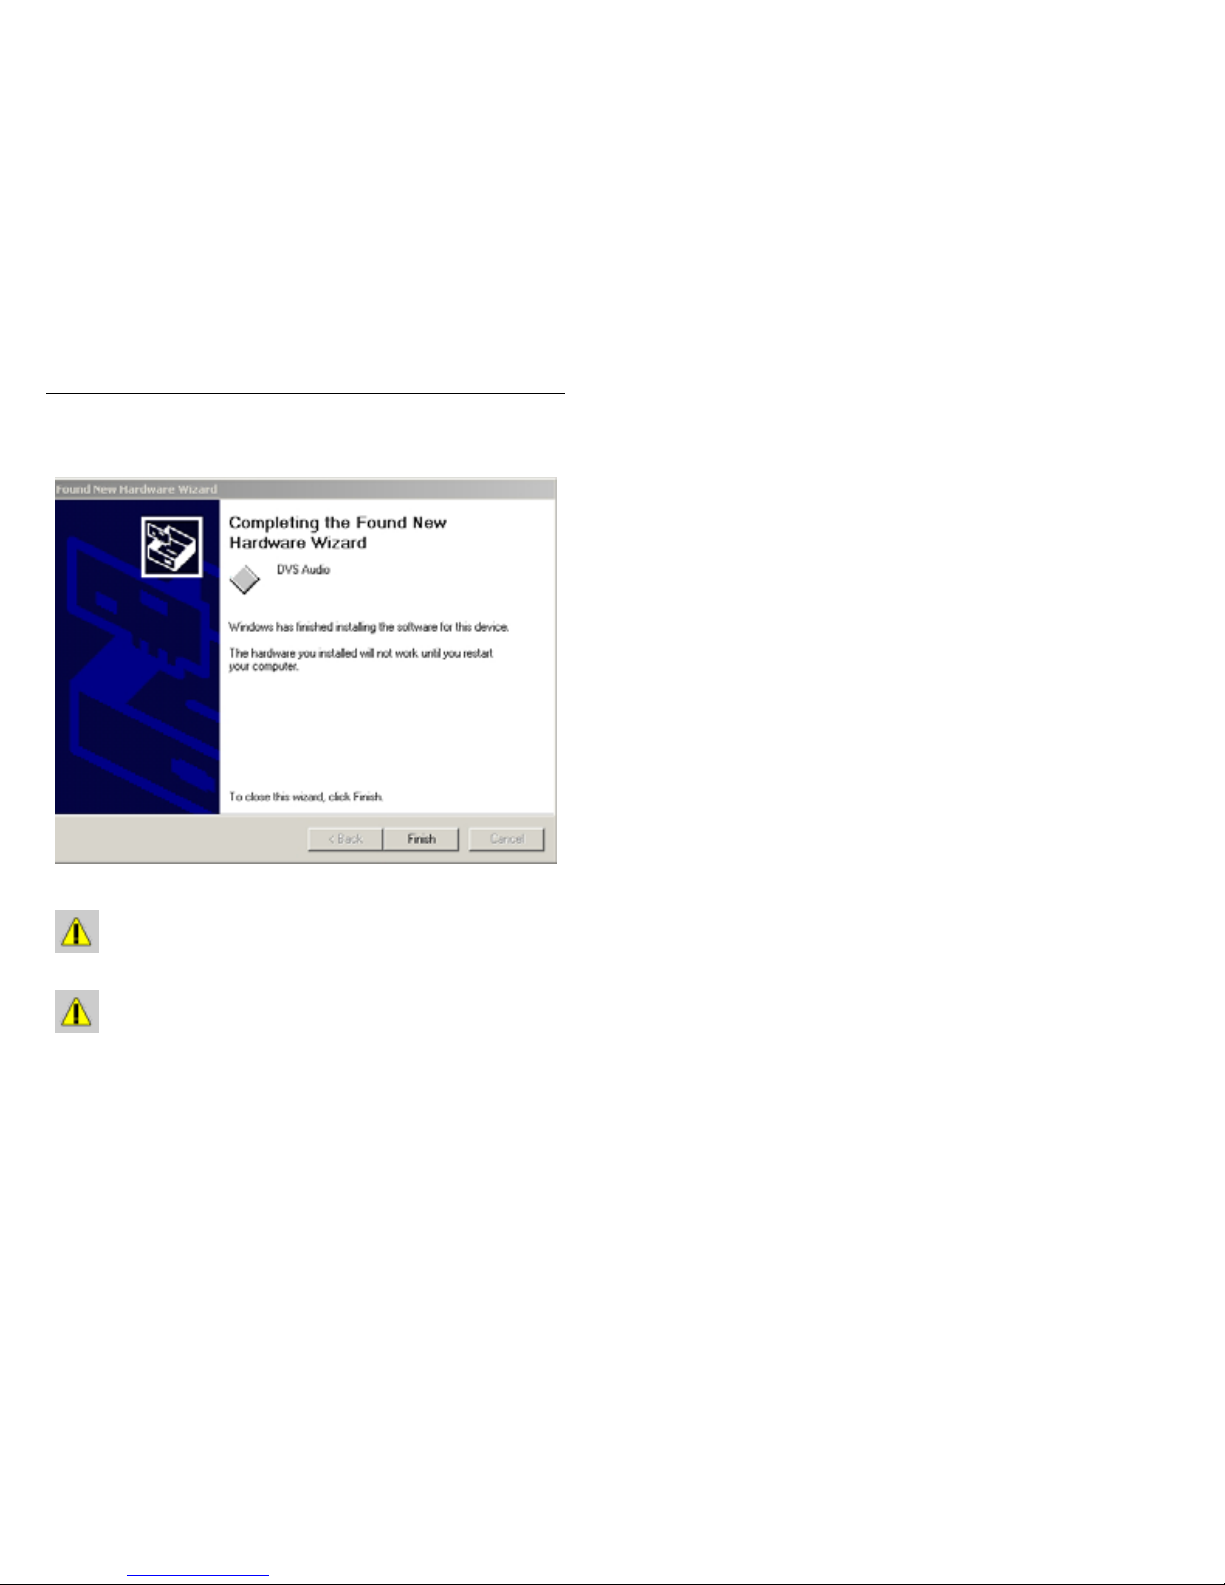
The next image shows the installation of the Audio driver being completed.
DEPENDING ON YOUR SYSTEM, THE VIDEO AND AUDIO DRIVERS MAY
NOT BE DETECTED AND INSTALLED IMMEDIATELY AFTER PLUG-IN OF
THE HARDWARE. IF ONE OF THE TWO DRIVERS ISN’T BEING
DETECTED, TRY UNPLUGGING AND REPLUGGING THE USB DEVICE,
OR RESTART YOUR PC.
SINCE DRIVERS ARE INSTALLED IT IS RECOMMENDED TO RESTART
YOUR SYSTEM EVEN IF THE INSTALLATION DOES NOT REQUIRE IT,
PRIOR TO PLUGGING IN YOUR VIDEO CAMERA.
You can now plug any video security camera into the Video Grabber (included with
DVM2101-A or DVM2051-A). This security camera should have an RCA audio/video
connection along with a 9V power supply. You can now start monitoring your business,
home or office.

Digital Video Security System Start Up Guide
16
2.3 Setting Up/ Installing Your Video security Camera
For users who purchased model DVM2100 or DVM2050, refer to your Video Security
Cameras owners’ manual for installation of your security camera. Once the security
camera has been set up, simply connect the RCA audio/video cable from the camera to the
Video Grabber.
For users who purchased model DVM2101-A or DVM2051-A, proceed with the following
steps:
1. Attach the camera bracket to the camera. Position the security camera in the
desired viewing location. Note: A color camera requires a certain level of light.
You may need to adjust the camera position and/or the amount of light in the
room for optimum viewing.
2. Run the supplied 17-meter (57ft) cable from the camera to the video grabber.
Connect the audio and video RCA leads to the Video Grabber and plug the
camera into an electrical outlet using the supplied 9 V DC power supply.
Refer to the Technical Specifications at the back of this manual for detailed information on
this camera.
If this was your first time setting up a security system, congratulations!
You just set up a sophisticated digital video monitoring system in
minutes! Continue to the next chapter and you will be watching video in
another couple of minutes.
2.4 Connecting your PC to a DVR (Digital Video Recorder) using the supplied
Video Grabber (Optional)
By connecting a DVR to your existing PC, using the supplied Video Grabber, and a camera
connected to the DVR (using a BNC connection), you are able to transfer recorded video
from the DVR to your PC. Please follow the following steps:
1. Do the necessary connections as depicted in the connection diagram below
2. Any video that was recorded by the DVR through the local camera (BNC
connection) should be rewinded back to the beginning for playback to
commence. Press “Play” on the DVR followed by the “Pause” button.
3. Assuming that your Application Software is installed on your PC, double click on
the DVM icon on your desktop to start the application
4. Press the “Play” button on the DVR to continue the playback
5. Click on the “Recording” button in the DVM application software window
6. Click on the “Stop” button in the DVM application software when the video
transfer is complete. Press the “Stop” button on the DVR
Later, this information stored on your PC’s Hard drive can be transferred or burned on a
CDRW/DVDRW/PC Media, etc. This enables the user to have back-up recorded
information on both the DVR and PC.
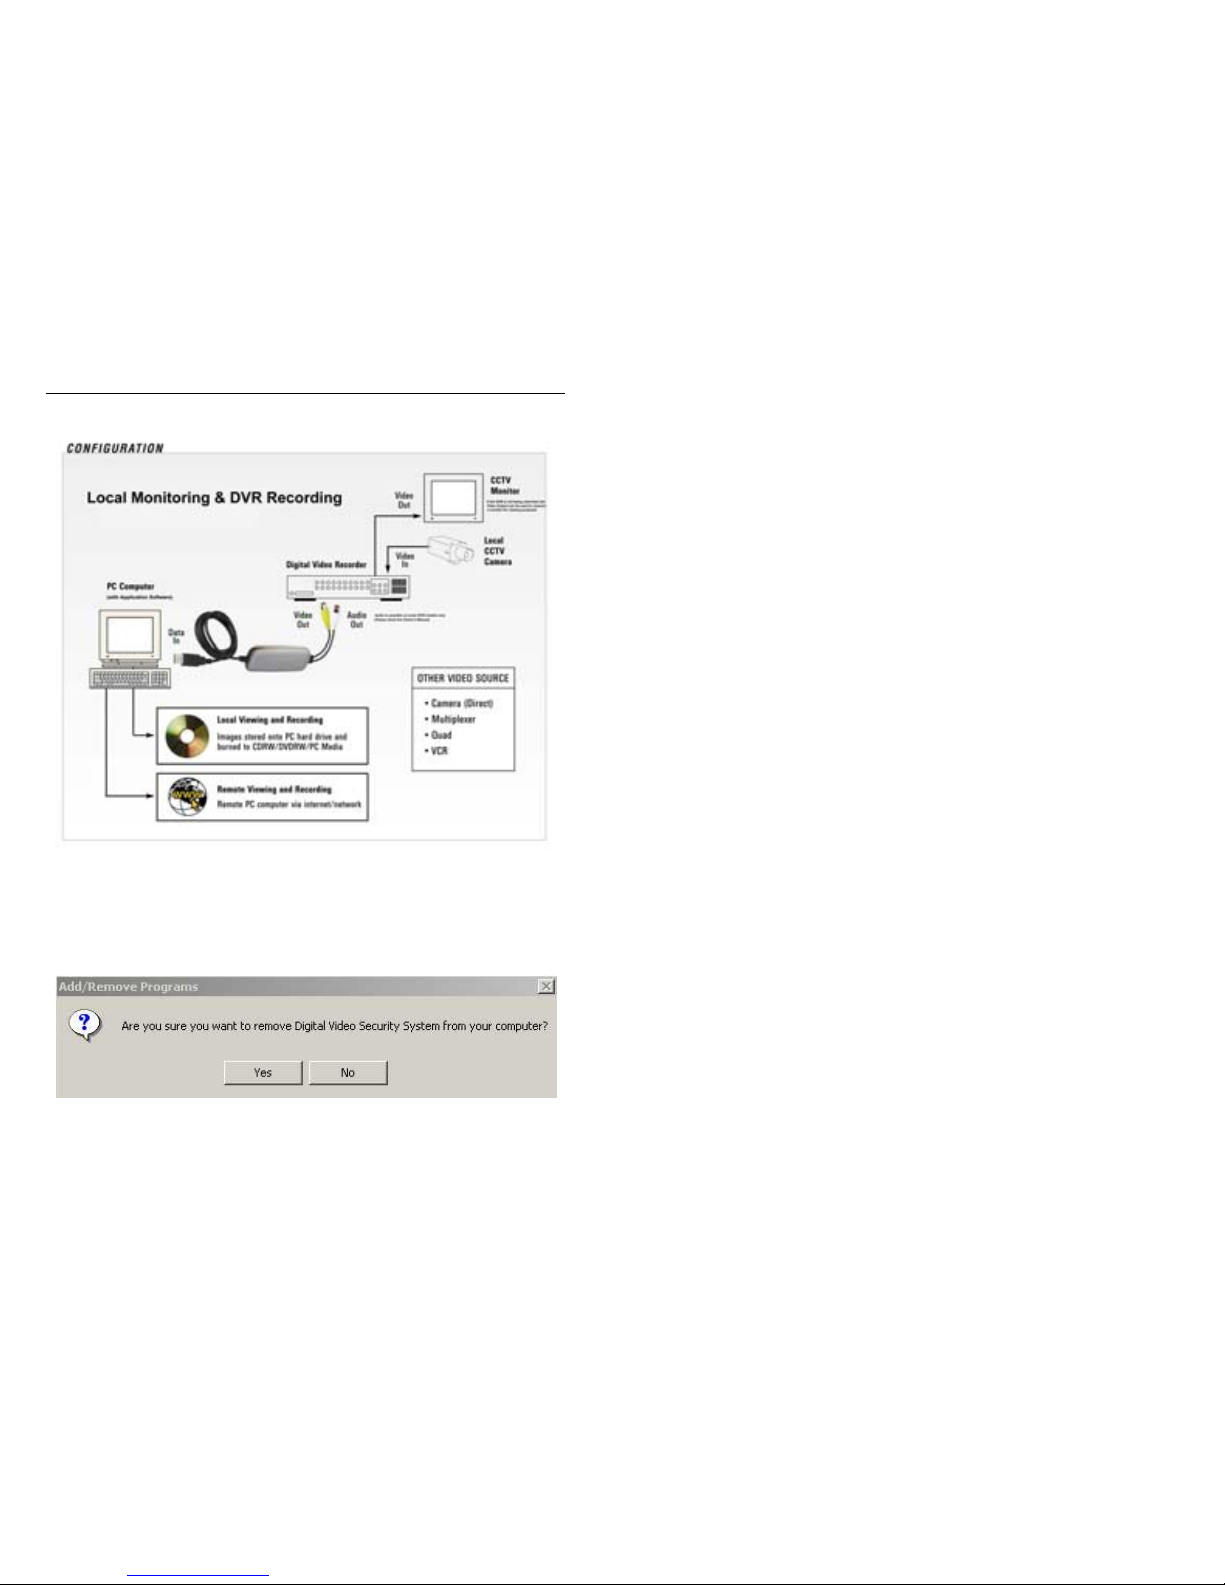
Below is a local monitoring and recording configuration:
Digital Video Security System Start Up Guide
17
2.5 To Uninstall
To uninstall the Digital Video Security System go to the Add/Remove Program options in
the Control Panel of Windows. Click on the DVM System item to uninstall the main Digital
Video Security System application. The Digital Video Security System Uninstall program
will prompt you with the following window:
Select “Yes” to remove the Digital Video Security System application from your computer.

Digital Video Security System Start Up Guide
18
3 Tutorial
This tutorial will introduce you to the basic concepts of the Digital Video Security System
application, with the goal of getting you up and running quickly in 30-45 minutes. It will
provide you with an understanding of how to navigate through the Digital Video Security
System software to set up a basic security system with minimum effort. A more complete
description of all of the powerful features of the Digital Video Security System application is
contained in the Reference section of the Help menu.
This tutorial uses a case study approach that assumes you are the owner of a thriving
store. You have hired a new employee to manage the store in your absence. You are
working out of your home office and would like to do the following:
• Monitor how the cash register is closed down for the day;
• Check on your store at random during the day from your home office;
• Ensure that there are no intruders after business hours.
You can use the Digital Video Security System software for all these capabilities, and more.
Let’s get started!
3.1 Launching the Application
To launch the Digital Video Security System application, select it from the Programs | DVS
menu option, or click on the DVS System icon.
Upon entering the program, you will immediately see live video from the camera! Please
close this window for now in order to follow the Tutorial and gain a better understanding of
the software.
3.2 Quick Overview of the Interface
Digital Video Security System is comprised of a main application window from which you
launch and control the specific features of the application
3.2.1 The Main Application Window: An overview
The main window contains four areas and appears as follows:
• The menu bar;
• The toolbar;
• The status bar;
• The main window or work area;
Digital Video Security System Start Up Guide
19
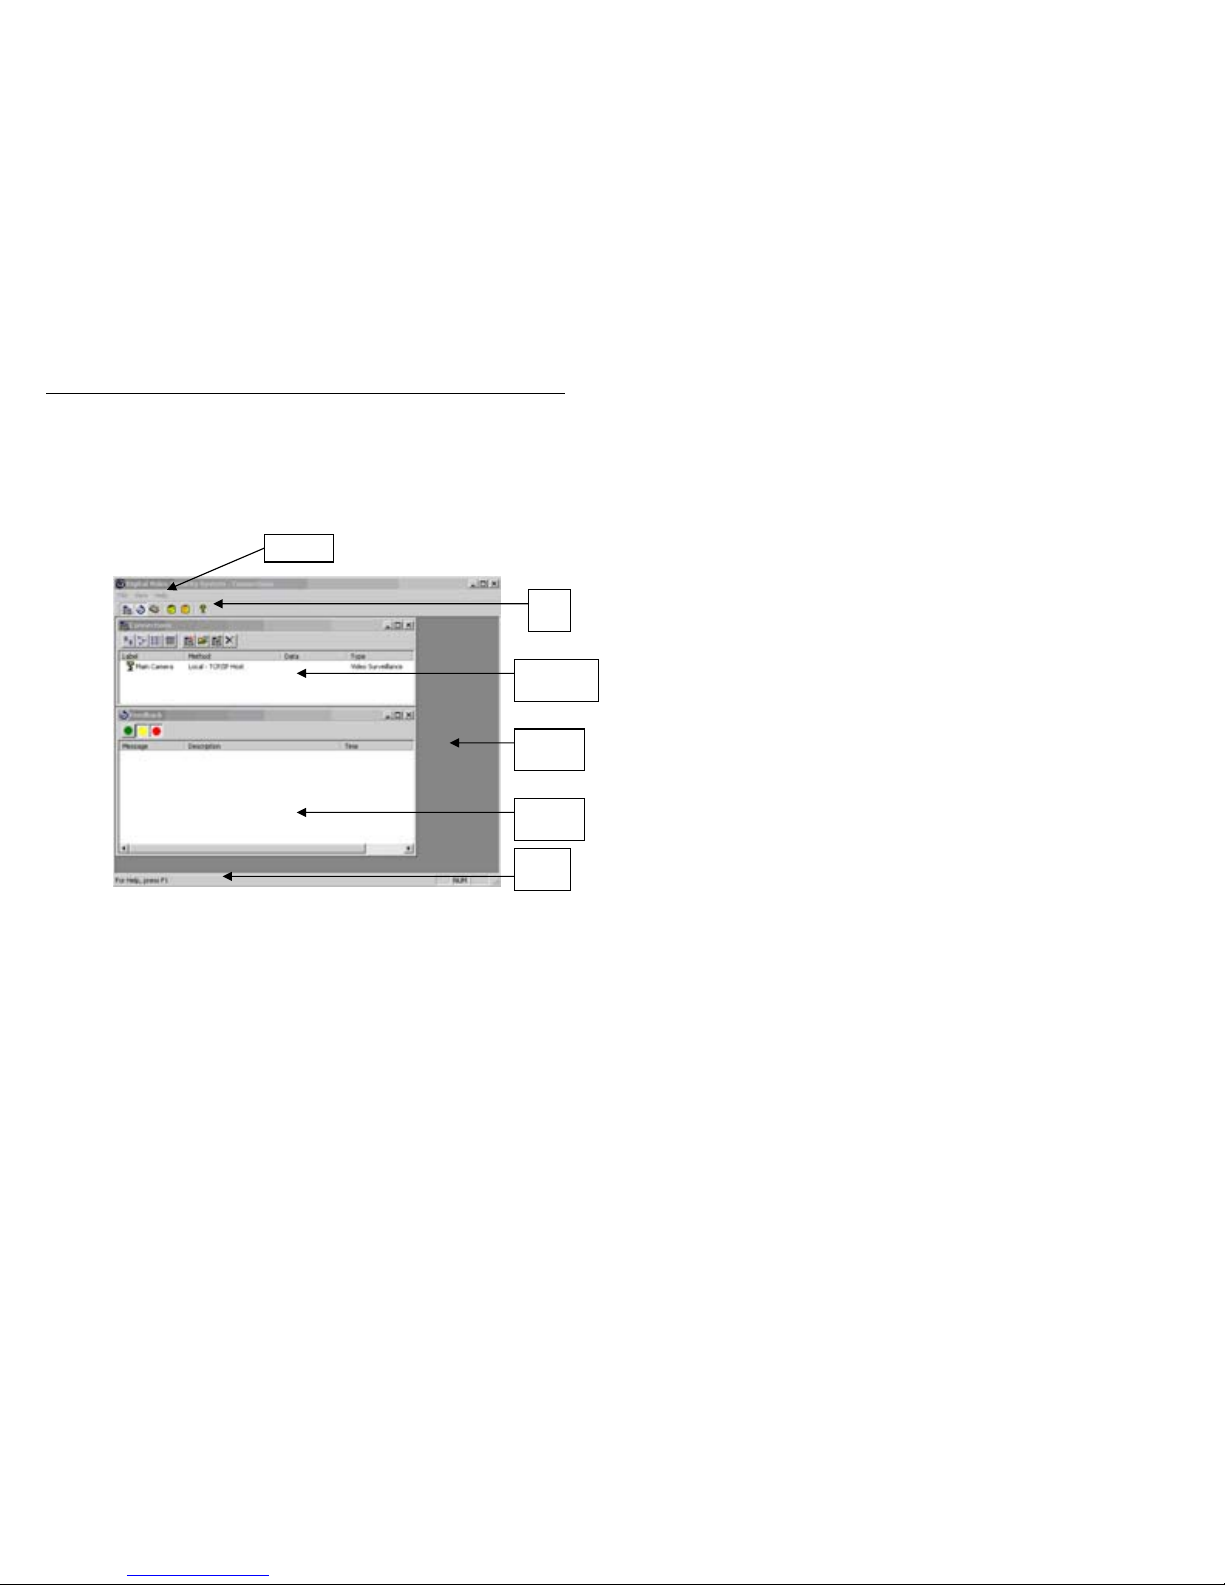
Upon launching the Digital Video Security System, the default layout of the application will
appear as follows:
The menu and tool bars provide you with access to the feature set of the Digital Video
Security System application. The main window is where all launched windows will open,
and the status bar provides you with feedback on any operation Digital Video Security
System is carrying out. By default, a Connections window and a Feedback window will be
opened in the main Digital Video Security System window. By default, the layout is
designed to fit an 800 x 600 pixel screen. Whether you maintain the default layout, or
modify it to one that better suits your needs, Digital Video Security System will maintain
your layout between sessions. That is, if you shut down the application and re-launch it at a
later time, the main application window will appear just as you last left it. This is referred to
as persistence – all values, such as the layout, connection information, and configuration
settings, persist between sessions.
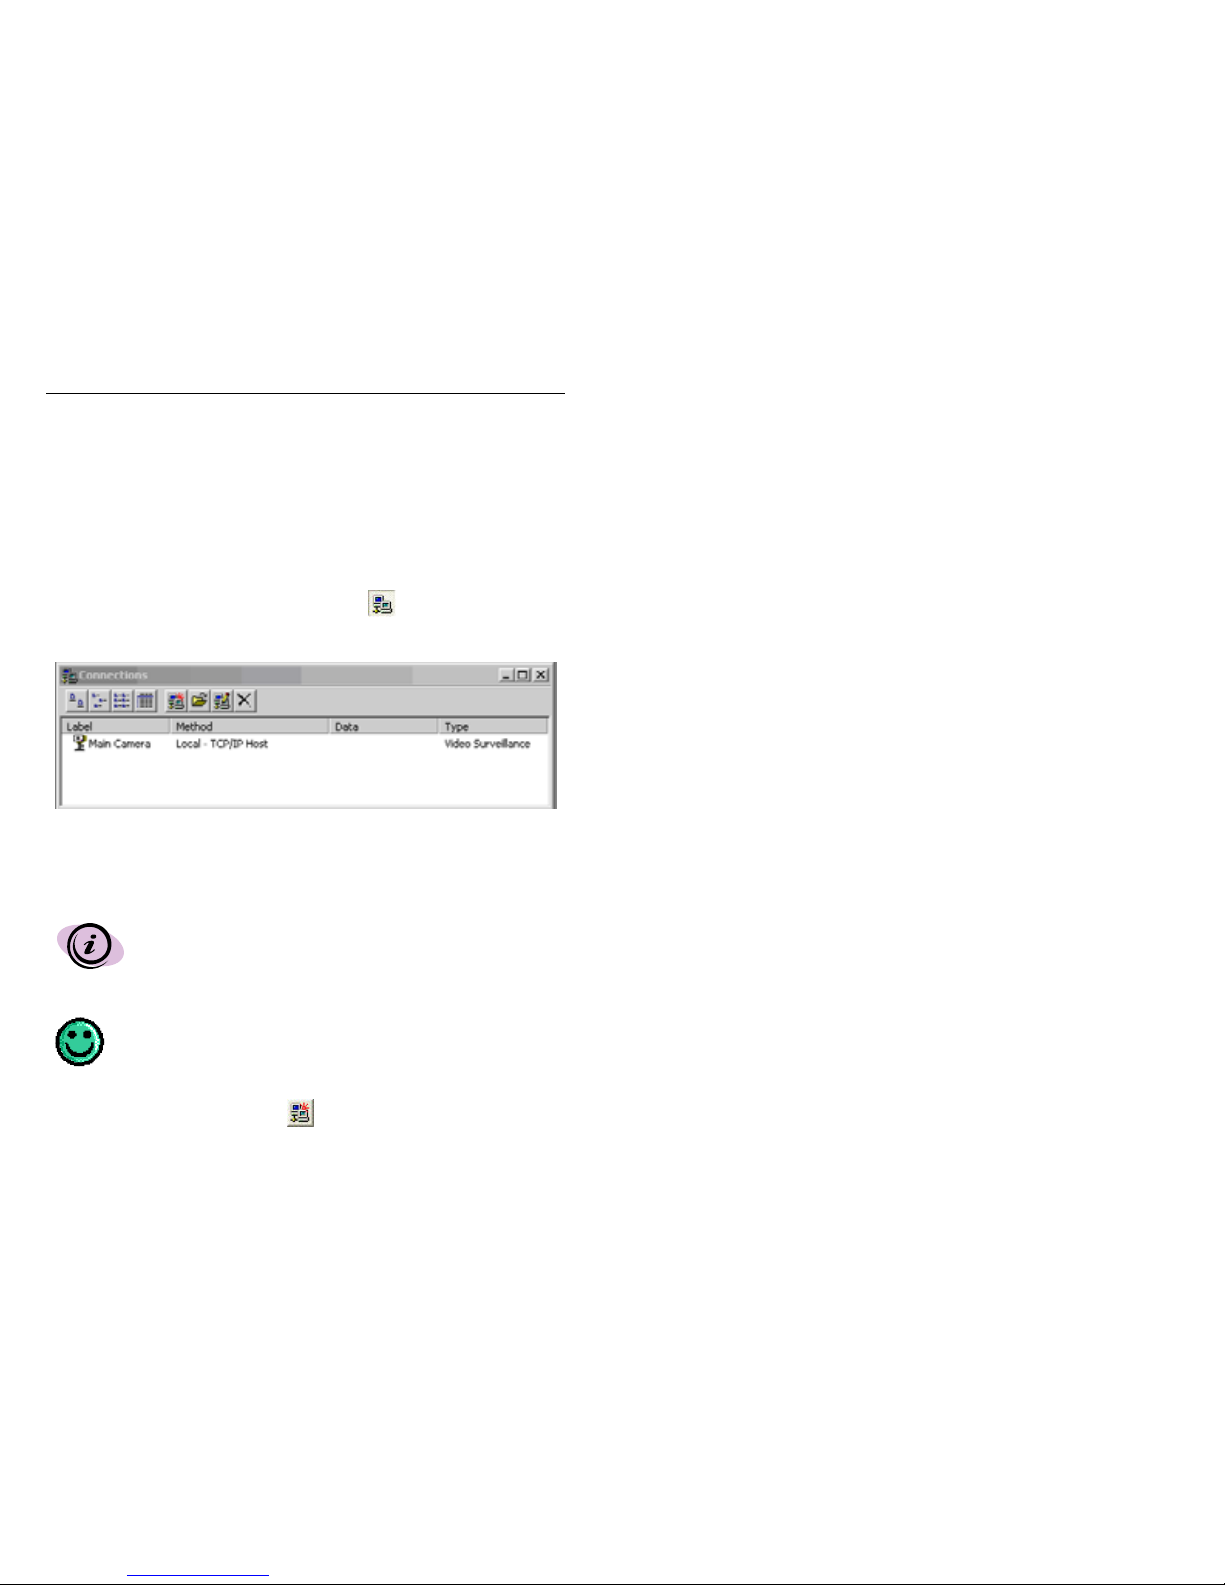
A camera connection called Main Camera has already been set up for you.
Menu Bar
Tool
Bar
Connections
Window
Main
Window
Feedback
Window
Status
Bar
Digital Video Security System Start Up Guide
20
3.3 Getting Started
Using the case study scenario described in the introduction to the tutorial, your store will be
set up as the local surveillance connection. The local surveillance is always the location of
the video camera. Later in this tutorial you will set up your home office as the remote
surveillance connection. The remote surveillance is the location from which you will
remotely monitor and control the security at the store.
3.3.1 Setting up a Local Surveillance Connection
You will use this window to set up the local connection to the video camera in your store.
A preset default Connection has already been created for you. Please refer to the next two
sections for instructions on Opening Connections and Viewing Video Locally. However,
before proceeding, it is important to practice setting up your own connection.
A local connection is set up at the computer that has the Video
Grabber, camera and Digital Video Security System software installed.
It is referred to as Local Video because the security camera is
connected directly to this computer. The Digital Video Security
System will stream video from this location to the internet, thus it is
sometimes also referred to as the host computer.
Note that the Connections Window has its own toolbar. All windows
have their own toolbar for added convenience and ease-of-use.
To set up your own connection, select the
New Connection icon. You will be
presented with the following Add Connection dialog box:
 Loading...