

Page 1
DMC2161 Components
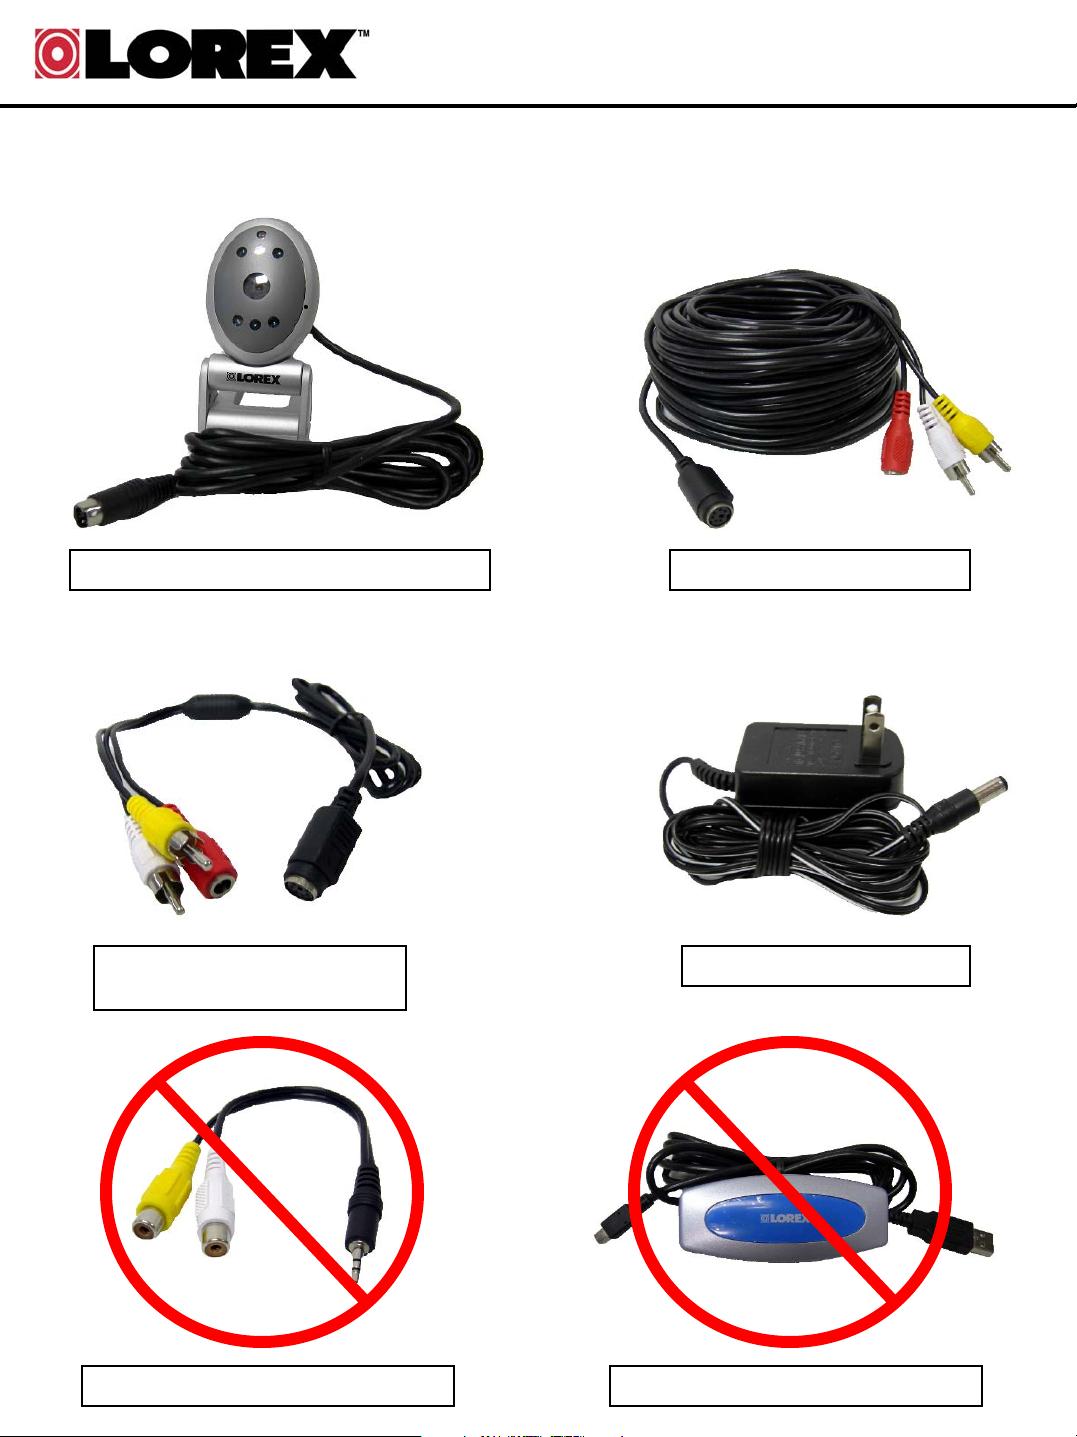
Getting Started: The DMC2161 Cameras come with the following components. The
components marked with a red slash are not needed for your connection to the QLR Card:
1 x Camera (with 6-PIN DIN Connection) 1 x Long DIN to RCA Cable
1 x Short DIN to RCA Cable
(optional)
1 x RCA to USB Adaptor Box Cable 1 x USB Adaptor Box & USB Cable
1 x Camera Power Adaptor
Page 2
DMC2161 Components
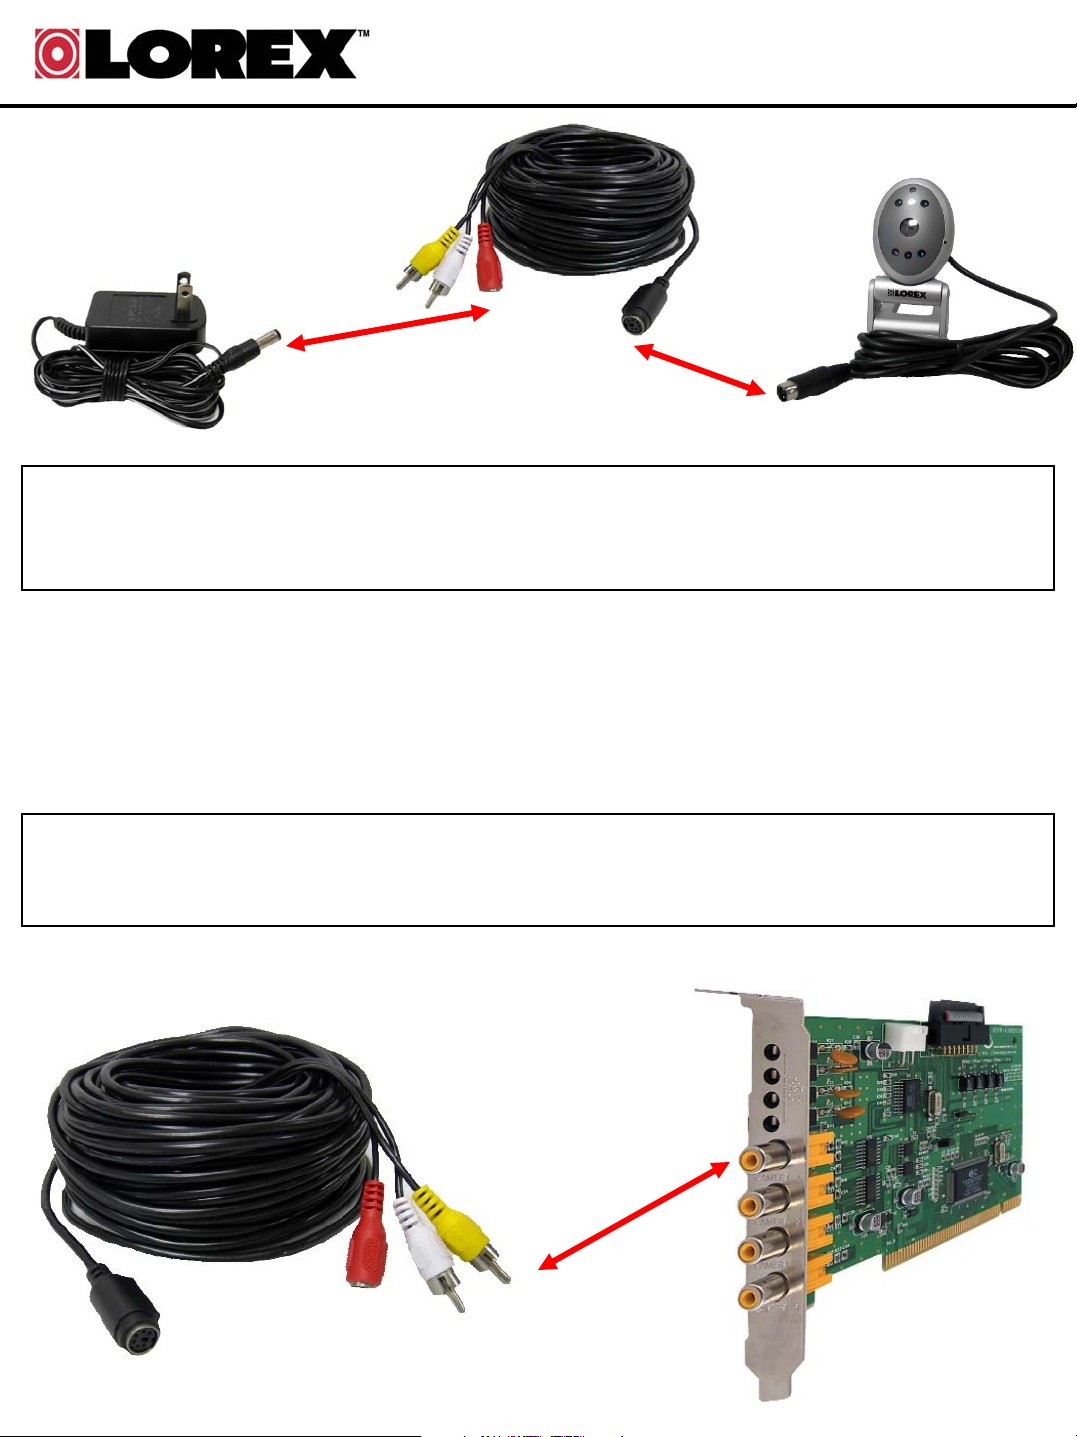
Camera Connections:
1. Connect the DIN end of the camera to the DIN end of the RCA-to-DIN Cable – you can choose to use
either the Long or Short RCA-to-DIN cable for this depending on the distance the camera will be from
your DVR.
2. Connect the AC Power Adaptor to the Power Port on the RCA-to-DIN Cable.
Connecting the Camera to the QLR Card:
1. Install your QLR Card and software onto your PC. Make sure that the application successfully loads.
2. Connect the YELLOW VIDEO end of the cable into one of the channel ports on the QLR Card.
NOTE: You do not need to connect the WHITE AUDIO cable to the card.
 Loading...