

Page 1
+
™
DIGIMERGE TOUCH
H.264 DIGITAL VIDEO RECORDER WITH
TOUCH SENSITIVE CONTROL
FREQUENTLY ASKED QUESTIONS
English Version 1.0
Copyright © 2011 Digimerge Technology Inc.
DH200+ SERIES
Right For Business
www.digimerge.com
™
Page 2
FREQUENTLY ASKED QUESTIONS:
Motion-only recording
enabled for channel 1
DH200+ SERIES
How do I enable motion-only recording?
You must configure the system’s recording parameters in the system’s Main menu. During
motion-only recording, the system only records when the system detects motion. When the
motion event finishes, the system pauses recording until the system detects motion again.
ENABLING MOTION-ONLY RECORDING
Step 1 of 3: Enable Motion recording in the Recording schedule
1. Press the MENU button on the front panel, remote control, or virtual remote to open the main menu.
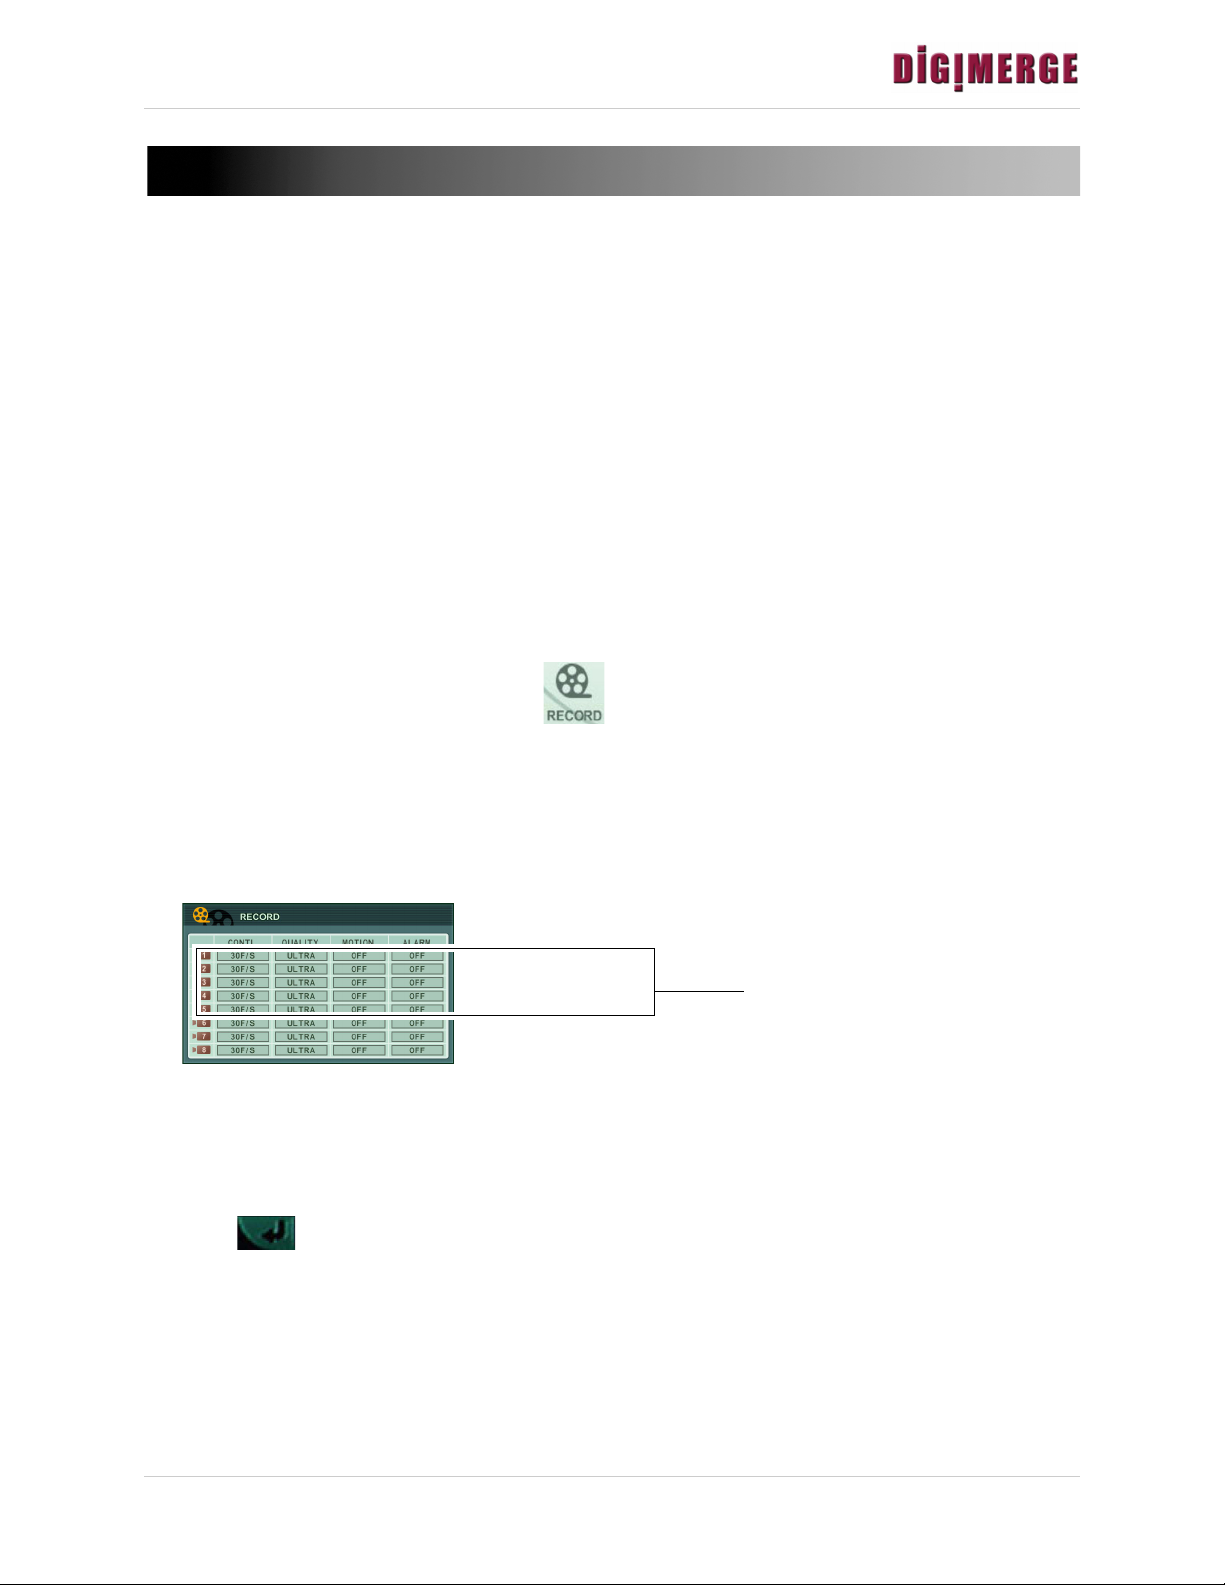
2. From the main menu, click RECORD ( ).
3. Configure the following for the channel you wish to enable motion:
• RATE (Continuous recording): Select OFF
• MOTION: Select ON.
• QUALITY: Select the desired video quality.
• ALARM: Select ON if you wish to enable Alarm recording.
4. Click to save your settings.
1
Page 3
Frequently Asked Questions: DH200+ Series
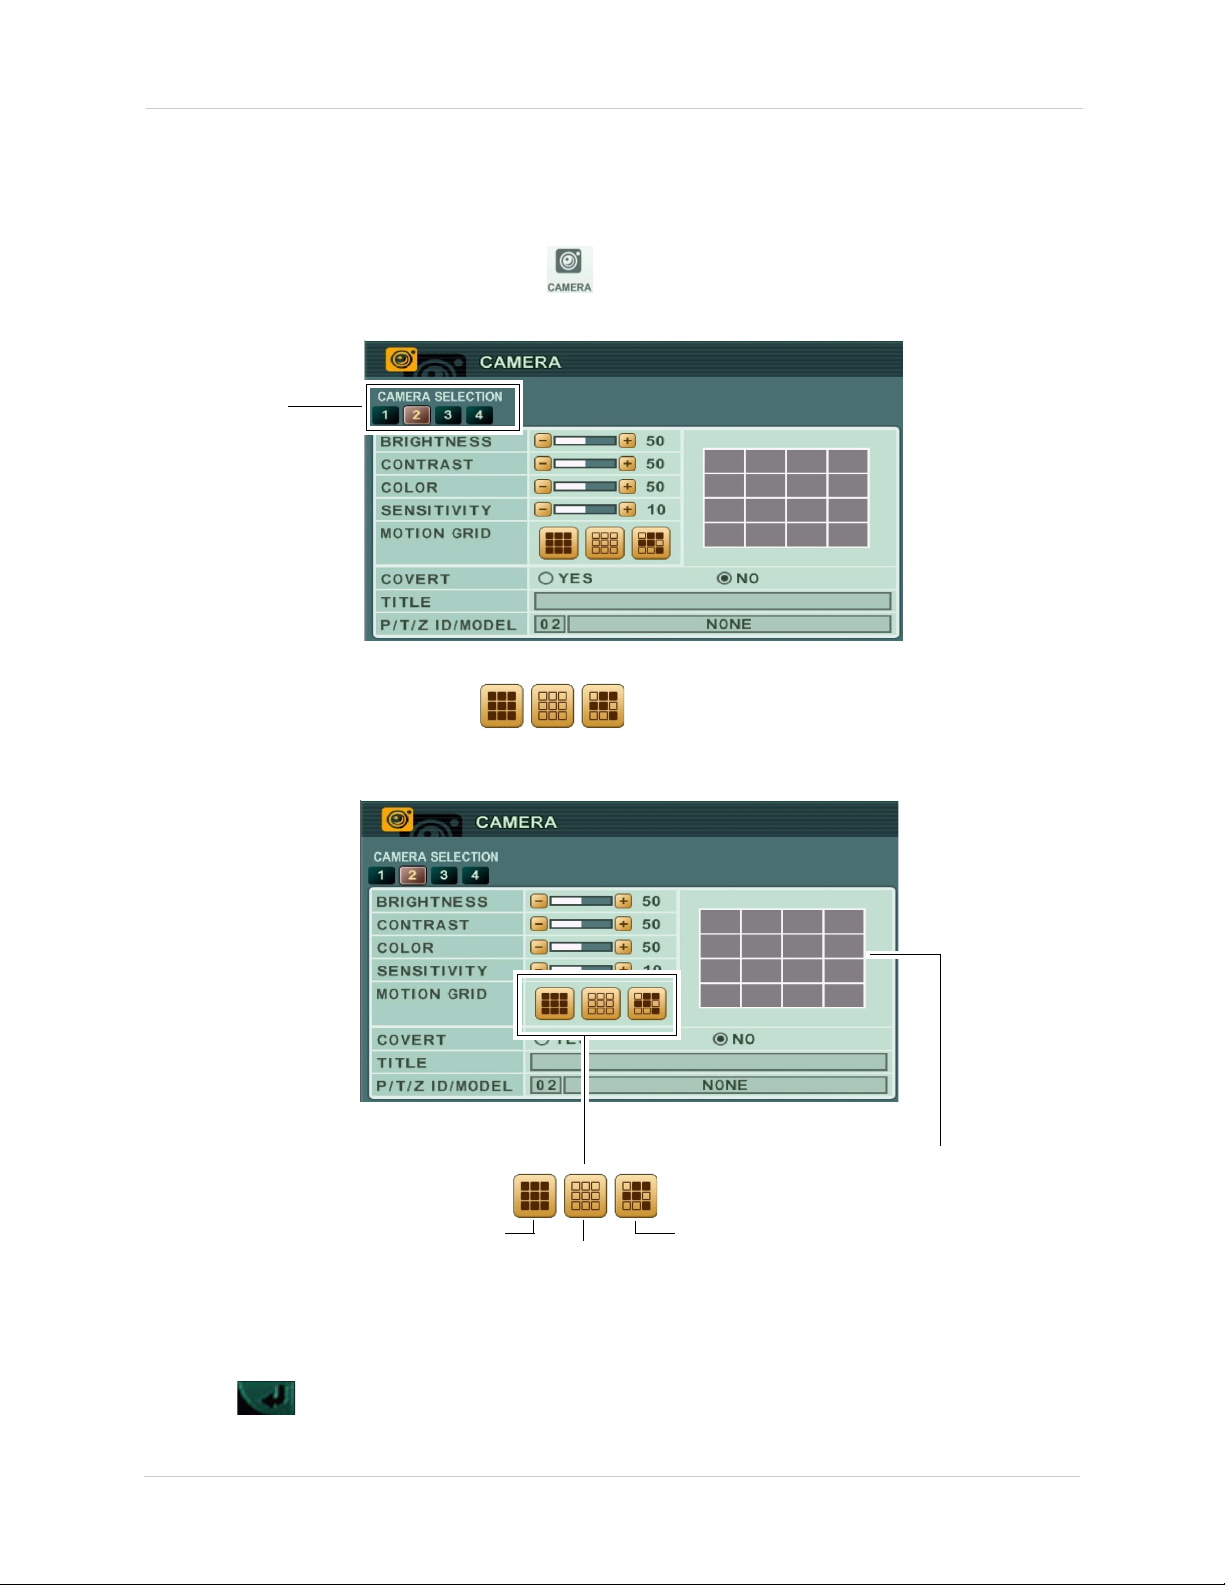
Select camera
Select all
Custom Select
De-select all
Motion Grid
Step 2 of 3 (OPTIONAL): Configure motion detection areas
By default, the entire channel area is selected for motion recording. Follow the steps below to
customize the area of the channel that you wish to enable motion recording.
1. From the main menu, click CAMERA ( ).
2. From the camera section tab, click on the camera that has motion enabled.
3. Beside MOTION GRID, use the buttons to select all, or select a certain portion of the screen that will detect motion. In the motion grid, you can select the areas that you wish to monitor for motion.
NOTE: If you use Custom Select, double-click the Motion Grid on the area that you wish to enable motion. Motion activated areas highlight with a blue grid.
4. Click to save your settings.
2
Page 4

Frequently Asked Questions: DH200+ Series
Step 3 of 3: Configuring Motion Recording frame rates
You can configure the recording frame rate when the system detects motion. For example, you
may want the system to record in a higher frame rate (30FPS) during motion recording.
1. From the Main Menu, click EVENT ( ).
2. Configure the following beside the channel that has motion enabled:
• MOTION: Select the frame rate the system will record at when it detects motion (i.e 30F/S)
• Select the recording quality (LOW, MIDDLE, SUPER, HIGH, ULTRA)
Final Results
• When the system detects motion, the system begins recording as a "Motion" event. The system
records at a specific frame rate designated by the user.
• When the post-recording alarm ends, the system pauses recording in the particular channel
where motion-only recording was enabled.
• The system resumes motion-recording when it detects motion.
3
Page 5

Frequently Asked Questions: DH200+ Series
"RATE" is set to 15 F/S. This means the system will record at 15 FPS during continuous recording.
Motion is set to ON. This means the system will start motion recording when the system detects motion.
Enter the desired reco rdin g fr ame rate during Motion recording
Enter the image
quality during
Motion recording
Enabling Continuous and Motion recording (C+M)
In Continuous and Motion recording mode, the system records 24 hours a day. But as soon as a
camera detects motion, the system records in Motion recording mode. This allows the system to
record at higher frame rates during motion recording, and mark the video as an "event".
Step 1 of 2: Enable Continuous and Motion recording
1. From the RECORD menu configure the following:
• RATE (Continuous): Select the continuous recording frame rate (i.e. 15 F/S)
• MOTION: Select ON.
• QUALITY: Select the desired video quality during Motion and Alarm recording.
• ALARM: Turn ON/OFF to enable/disable Alarm recording.
• ALARM: Select ON if you wish to enable Alarm recording.
2. Click to save your settings.
Step 2 of 2 : Configure Motion Recording frame rates
1. From the Main Menu, click EVENT ( ).
2. Configure the following beside the channel that has motion enabled:
• MOTION: Select the frame rate the system will record at when it detects motion (i.e 30F/S)
3. Click to save your settings
4
• Select the recording quality (LOW, MIDDLE, SUPER, HIGH, ULTRA)
Page 6

Frequently Asked Questions: DH200+ Series
For example:
http://tomsmith.digimerge.net:80
URL name
DVR port number
Final Results
• The system records continuously with the assigned parameters. In this example, the system
will record at 15 FPS during continuous recording.
• When the system detects motion, Motion recording begins. In this example, the system will
record at 30 FPS when motion is detected (Motion Recording).
• When the post-alarm recording ends, Motion recording stops, and continuous recording
resumes at 15 FPS.
How do I access the DVR using a DDNS address?
After you have port forwarded the required port, created a DDNS account, and enabled DDNS on
your system, you must enter the DDNS URL into Internet Explorer to access your DVR.
The DDNS URL must include http:// , the name of your DDNS URL, followed by a colon, then the
port number of your DVR.
NOTE: If you change your default port number a different port, you still need to enter your port
number after the DDNS address.
5
Page 7

Frequently Asked Questions: DH200+ Series
How do I access the DVR’s Web Server feature?
To access the system’s Web Server feature, add : /webserver to the end of your DDNS address.
For example, if your DDNS address is http://tomsmith.digimerge.net:80 , you will have to enter
the following to access the Web Server feature: http://tomsmith.digimerge.net:80/webserver
The Web Server feature allows you to configure your DVR menus and settings remotely.
Web Server Installation Steps
1. In Internet Explorer, enter your DVR’s DDNS address, followed by /webserver
2. Enter the DVR’s user name and password and then click OK.
3. Click on the ActiveX toolbar, and click Install ActiveXControl.
4. At the Security Warning prompt, click Install.
6
Page 8

Frequently Asked Questions: DH200+ Series
Up arrow
Cancel/ESC
5. Click Next to install the Web Server software. Click Close to complete the installation.
How do I remove the Video Loss icon that appears on screen?
When the Video Loss icon appears ( ), press the Cancel/ESC button on the remote, or press
the UP arrow on the front panel of the system to remove the Video Loss icon.
7
 Loading...