

Page 1
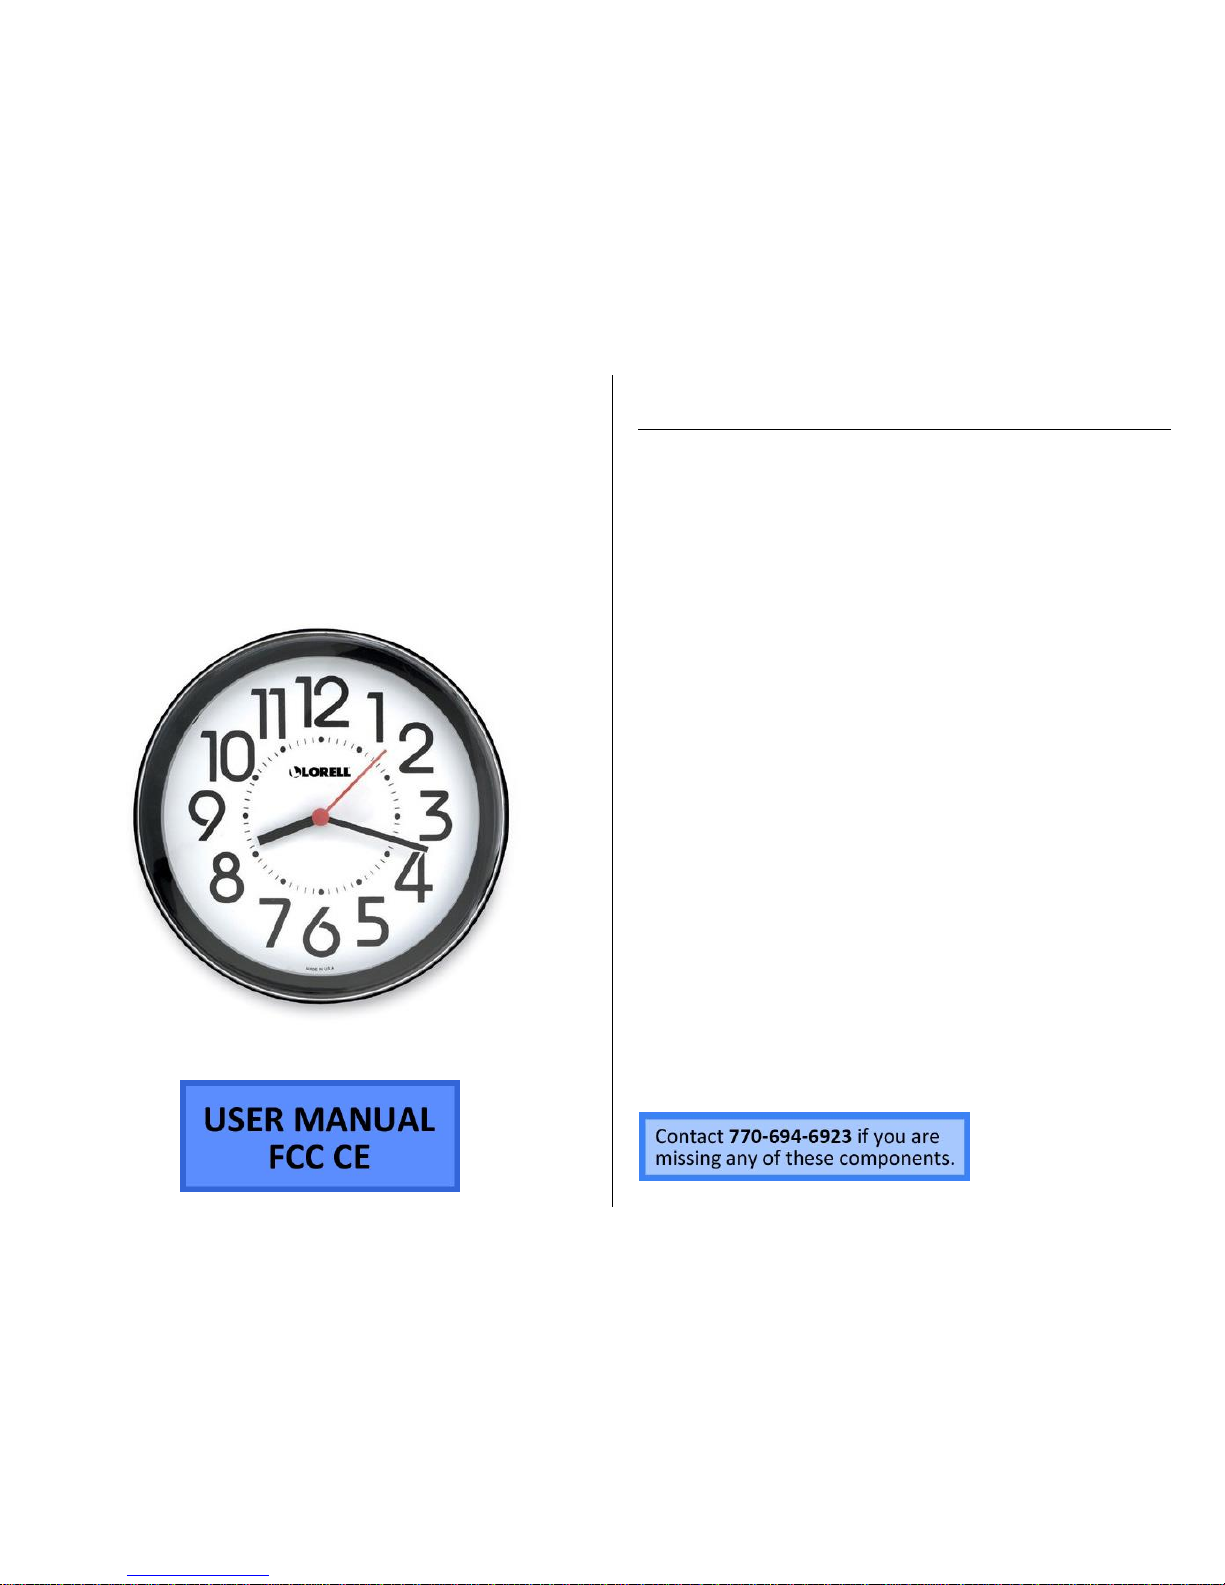
BB2 CLOCK HIDDEN
CAMERA
SKU: BB2Clock
THANK YOU FOR PURCHASING THE BB2 CLOCK HIDDEN
CAMERA
Please read this manual before operating hidden camera.
The BB2Clock is a clock with a built-in camera you can hide in plain
sight. It is a great choice whether you're keeping watch on your
child's nanny, someone coming in to work on your home, or adding a
bit more home security while you're away. Its simple design is
attractive and unobtrusive.
Motion detection
Functioning clock
Your purchase should include:
1 x BB2 Clock Hidden Camera
1 x Remote Control
1 x USB Cable
1 x User Manual
Page 2
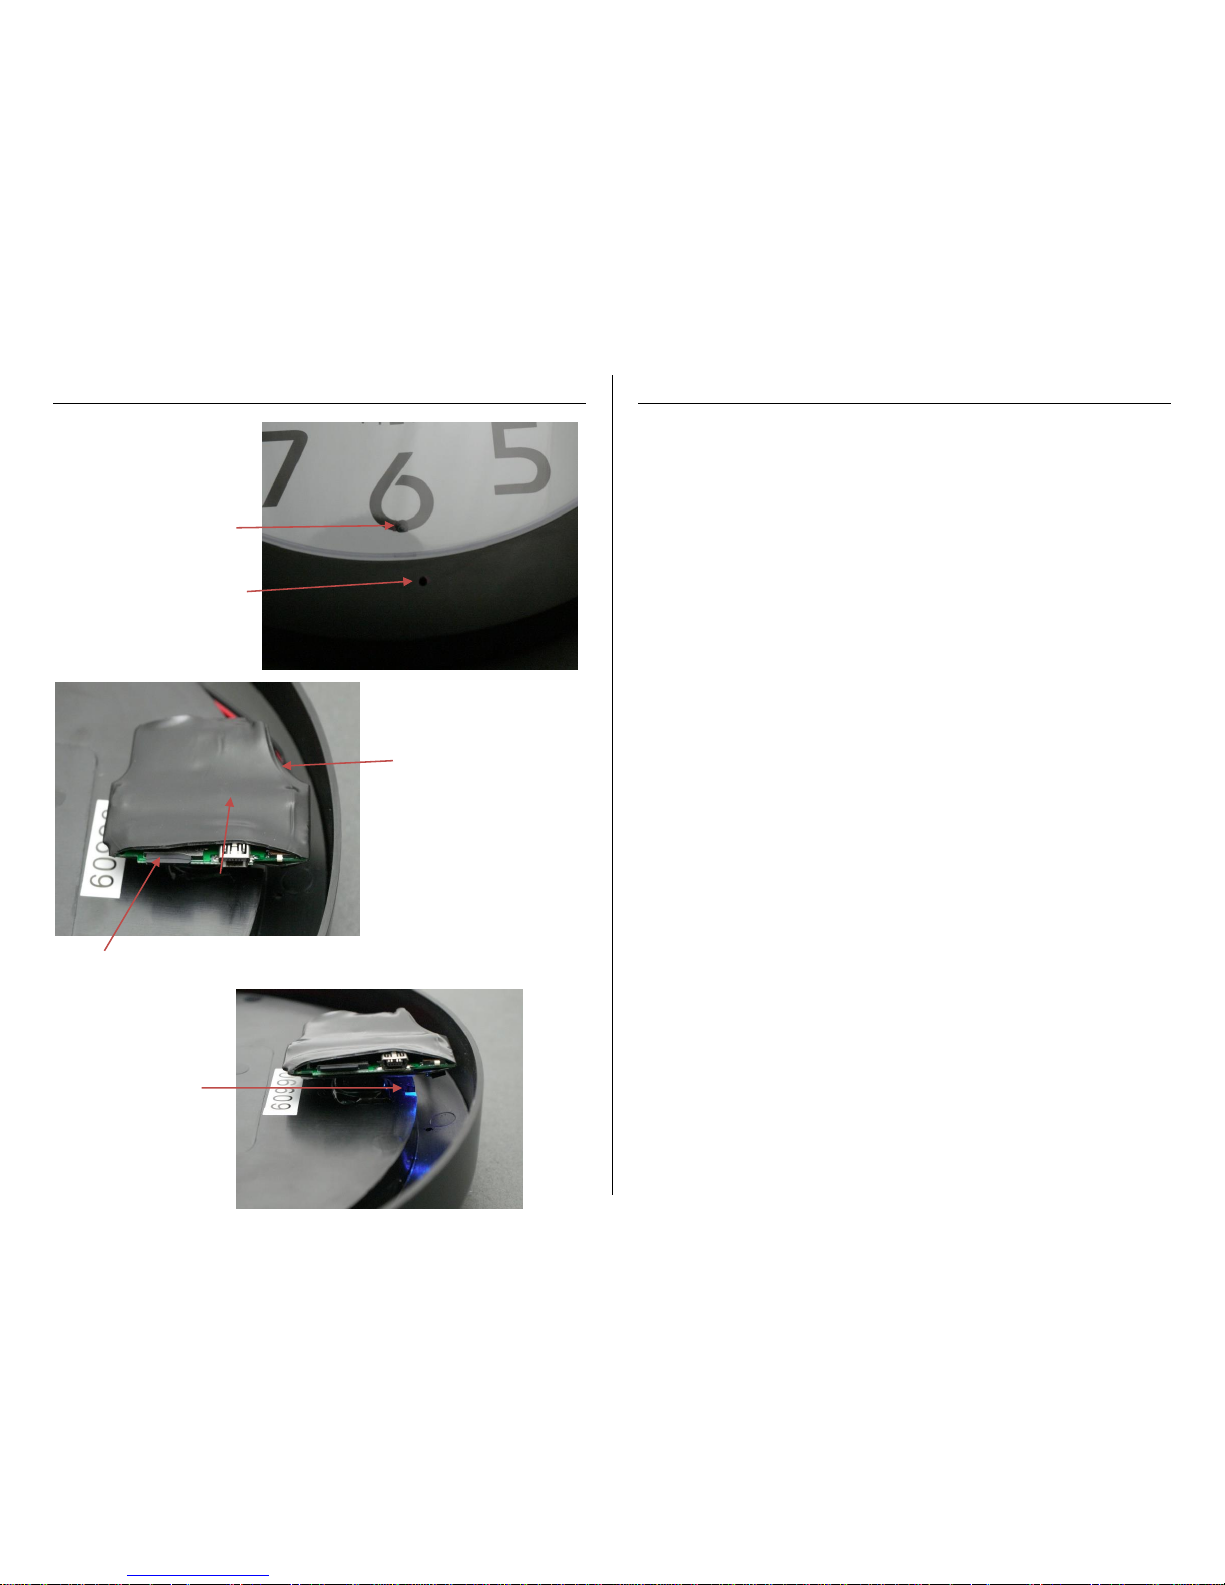
GET FAMILIAR WITH YOUR BB2 CLOCK HIDDEN CAMERA
OPERATING THE CAMERA
IMPORTANT NOTICE: Allow the device to charge 4 – 6 hours before
using.
HOW TO TURN ON THE CAMERA
1. Make sure that the “On and Off Switch” is all the way to the
right and in the on position.
2. Point the remote control towards the “Camera Sensor” and
press the “Power Button.” (The Blue Indicator Light will turn
on)
3. The camera is now in Standby Mode
HOW TO TURN OFF THE CAMERA
1. Press the “Power Button” on the remote control. (The Blue
Indicator Light will turn off)
2. Leave the “On and Off Switch” on, unless you are storing the
device unused for an extended period of time.
3. The camera is now off.
HOW TO RECORD VIDEO
1. When the camera is in Standby Mode press the “Video
Button.” (The Blue Indicator Light will flash three times)
2. Once the Blue Indicator Light turns off the camera is now
recording video.
Camera Lens
Micro SD Card Slot
USB Port
Camera Sensor
On and Off Switch
Blue Indicator Light
Page 3
HOW TO STOP RECORDING VIDEO
1. While the camera is recording video press the “Video Button”.
(The Blue Indicator Light will turn on)
2. The camera has now stopped recording and is now in Standby
Mode.
HOW TO TAKE PICTURES
1. When the camera is in Standby Mode press the “Photo
Button.” (The Blue Indicator Light will flash once)
2. Once the blue indicator light flashes the picture has been
taken.
HOW TO RECORD MOTION DETECTION
1. When the camera is in Standby Mode press the “Motion
Detection Button.” (The Blue Indicator Light will flash several
times then turn off)
2. Once the blue indicator light is done flashing, the camera is
now recoding motion detection.
HOW TO STOP RECORDING MOTION DETECTION
1. While the camera is recording motion detection press the
“Motion Detection Button”. (The Blue Indicator Light will turn
on)
2. The camera has stopped recording motion detection and is
now in Standby Mode.
RETRIEVE THE FILES TO YOUR PC
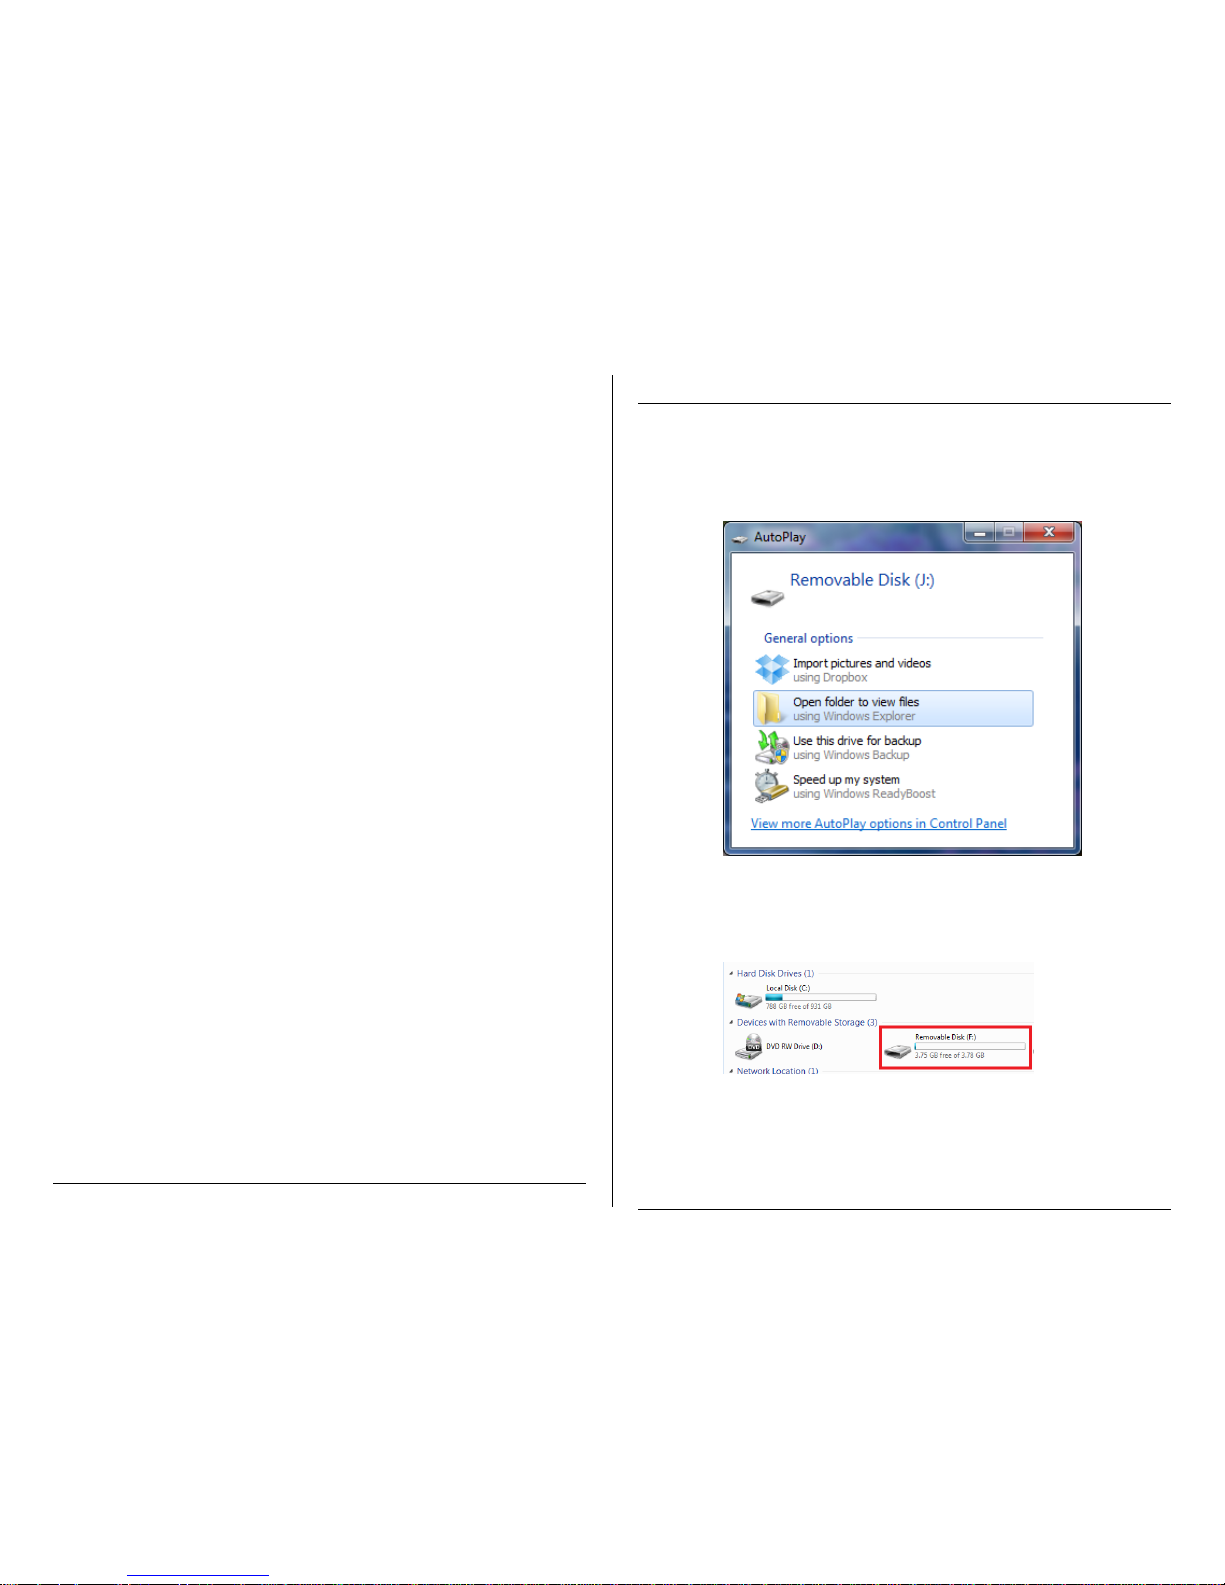
1. Plug the device into your PC using the USB cable
2. Locate “Removable Disk” inside the (My) Computer folder
AutoPlay Removable Disk > Open folder to view files
Or…
Go to Start > Computer > Removable Disk
3. Open the Removable Disk drive
4. Open the [folder name] folder
5. Double click the file you want to view
VLC Player is recommended for watching videos
Page 4
TROUBLESHOOTING
THE DEVICE WILL NOT TURN ON
Charge the device for at least 4 hours before the first use
Make sure the charging cable is securely inserted into the
device and into the power source
THE DEVICE IS NOT CHARGING
Replace the battery or charging cable
If you are charging via a wall power source, you may need to
charge via your PC. The AC adapter may not work
THE DEVICE HAS CRASHED
You need to reset the device
MY COMPUTER DOESN’T RECOGNIZE THE DEVICE
Unplug the device from your PC and reboot the device
Unplug the device from your PC and reboot your PC
Try using a different USB slot on your PC
Replace the USB cable
THE SOUND OR VIDEO IS UNCLEAR
The device needs charging
OTHER PROBLEMS
Call our technical support at 770–694–6923
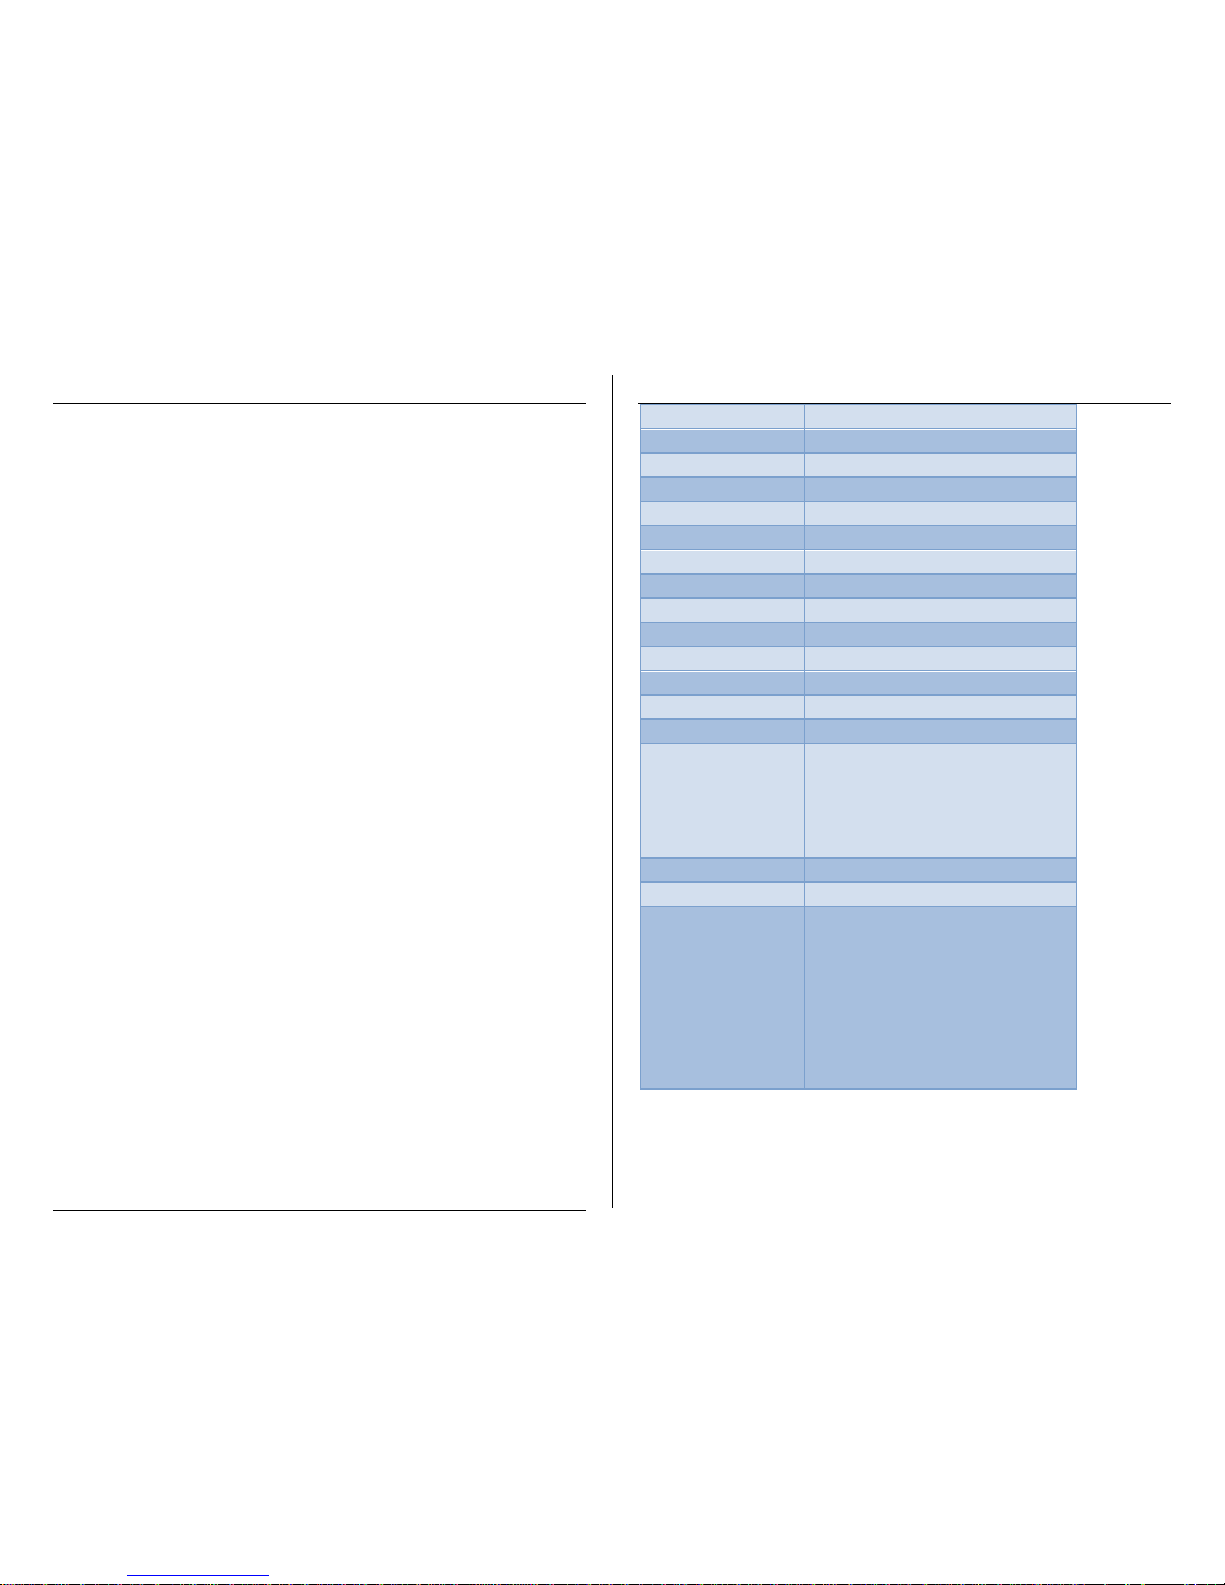
SPECIFICATIONS
Video Resolution
1280 x 960
Video Format
.AVI
Frames per Second
Up to 30 fps
Recording Time
Up to 10 or 30 hours
Vision Angle
72 degrees
Motion Detection
6 meters for straight-line distance
Photo Resolution
Photo Format
.JPG
Audio Quality
Audio Format
.MP3
Water Resistant
Battery Life
Up to 10 or 30 hours
Type of Memory
Micro SD Card
Memory Capacity
Up to 64 GB
Recording Capacity
2GB ≈ 1 hour
4GB ≈ 2 hours
8GB ≈ 4 hours
16GB ≈ 8 hours
32GB ≈ 16 hours
USB Interface
2.0 USB
Player Software
VLC recommended
Operating Systems
Windows 2000
Windows Me
Windows XP
Windows Vista
Windows 7
Windows 8
Mac OSX
Linux
 Loading...