

Lorell 69399, 69563, 69433, 69972 Assembly Instructions Manual
Two-Drawer Lateral File With Central Lock
Assembly Instructions
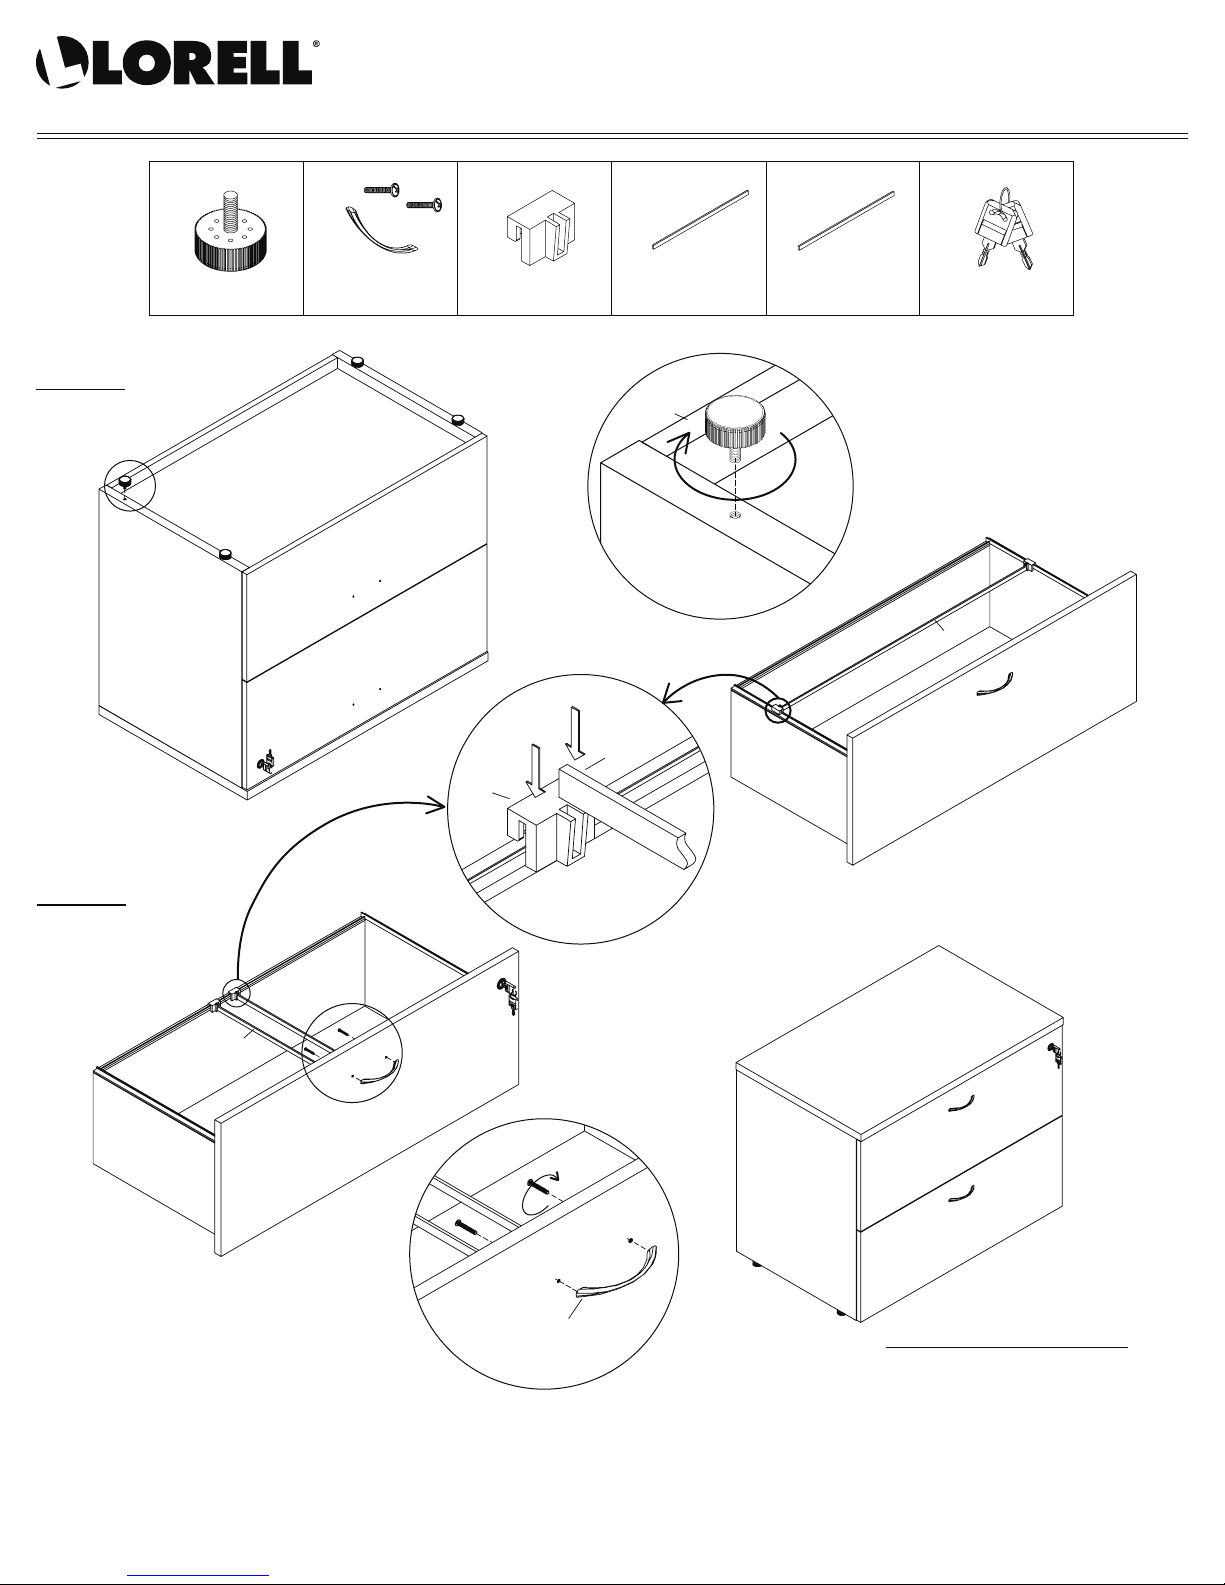
TUN021AG TUN001FC
A C
Adjustable Glide
4 Pcs
STEP 1
a
B
96mm Metal Scallop
Shape Handle
2 Sets
File Clip
8 Pcs
D
(792 x 16 x 3 mm)
Metal Bar
2 Pcs
Tighten
A
69399/69433/69972/69563
E
(378 x 16 x 3 mm)
Metal Bar
4 Pcs
a
F
Keys
1 Set
D
STEP 2
c
E
C
c
c
E
b
Tighten
B
COMPLETED ASSEMBLY
b
IMPORTANT NOTE:
• Place all laminated parts on a clean and smooth surface such as a rug or carpet to avoid the parts from being scratched.
• Check to be sure you have all parts and hardware.
• Remove all wrapping materials, including staples & packing straps before you start to assemble.
• Don't tighten all screws/bolts until all completely assembled.
• Keep all hardware parts out of each of children.
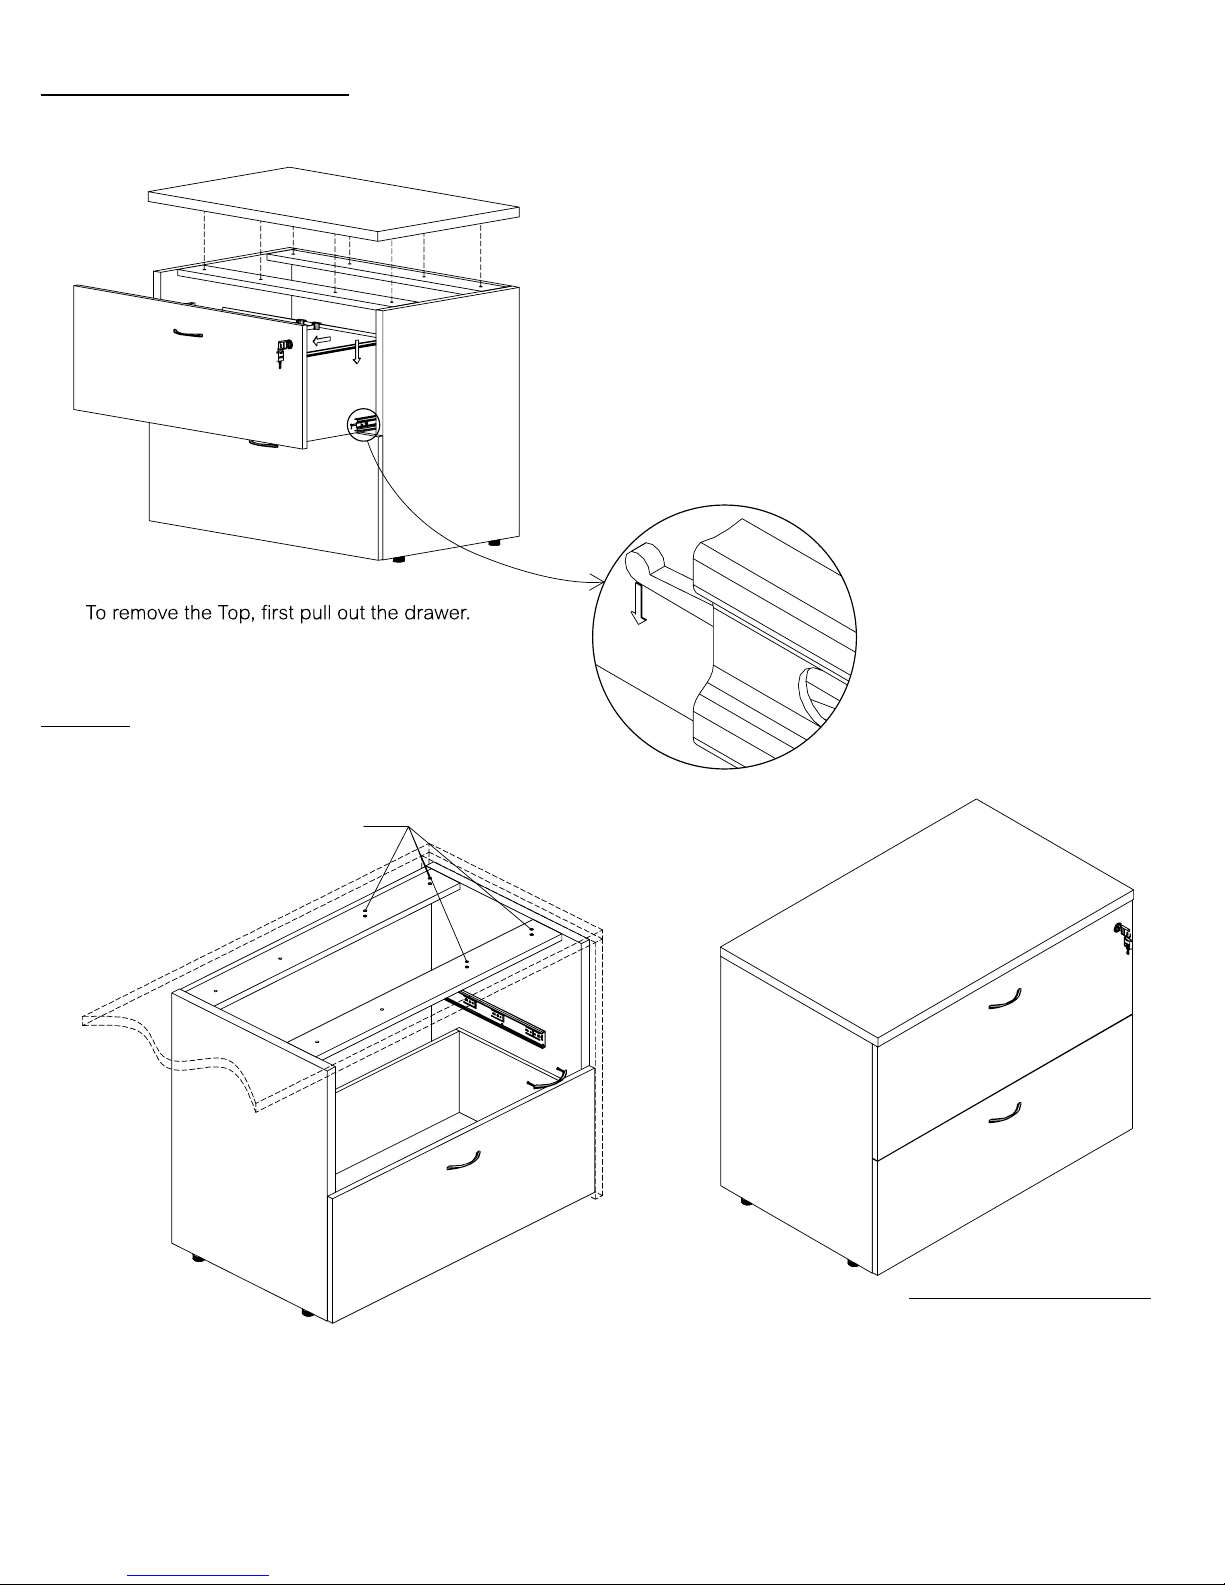
STEP 3 – Removable Top
Installing Lateral File Underneath Desk:
If you remove the Drawer please pull the
drawer all the way out, then push the plastic
tab of the ball bearing slide up on one side
and down in the other side, and then pull the
drawer completely out. See detail #A.
#A
Follow Detail # A instruction as shown on the right.
Then loosen screws under the Top.
STEP 4
Use the Removable Screws (M6 x 40), 4 pcs from
Lateral Top to install to the Desk Top. When installing
the Lateral File to the left of the Desk, use the Left
four pre-drilled holes to attach.
Detail #A
COMPLETED ASSEMBLY
IMPORTANT NOTE:
• Place all laminated parts on a clean and smooth surface such as a rug or carpet to avoid the parts from being scratched.
• Check to be sure you have all parts and hardware.
• Remove all wrapping materials, including staples & packing straps before you start to assemble.
• Don't tighten all screws/bolts until all completely assembled.
• Keep all hardware parts out of each of children.
 Loading...