

Lorell 60114 Assembly Instructions Manual
Model Number 60114
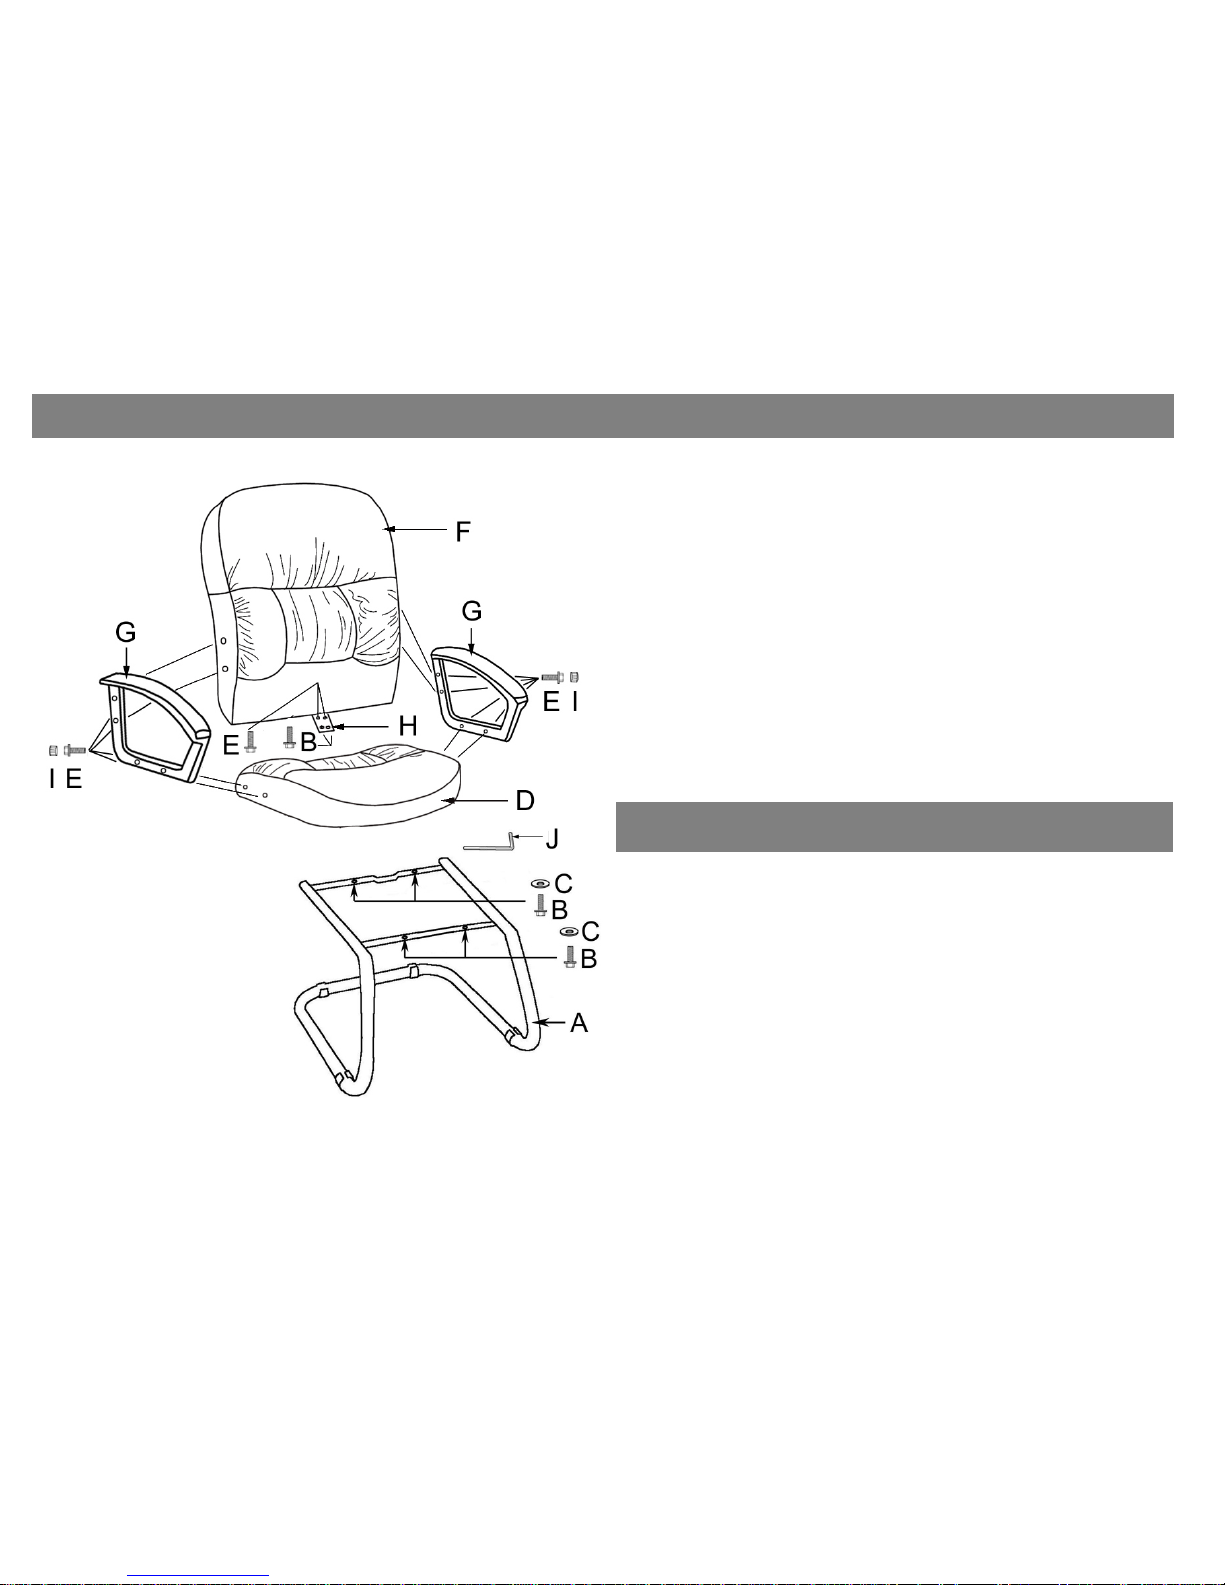
Assembly Instructions
Carefully unpack all parts and identify them with parts list before
attempting to assemble.
IMPORTANT: DO NOT TIGHTEN ALL SCREWS UNTIL YOU HAVE
COMPLETED ASSEMBLY.
1. Attach BACK CUSHION (F) to SEAT CUSHION (D) by positioning
BACK SUPPORT PLATE (H) with 2 SCREWS (E) and 2
SCREWS (B).
2. Attach left and right ARMRESTS (G) by inserting 4 SCREWS (E)
through each ARMREST (G) and into left and right side of BACK
CUSHION (F) and SEAT CUSHION (D) USING ALLEN KEY (J).
Then place 8 CAPS (I) onto armrest holes.
3. Attach the pre-assembled seat unit to STEEL FRAME (A) by
using 4 SCREWS (B) and 4 FLAT WASHERS (C).
4. Be sure that all the screws are fully tightened before using.
Parts List
Description Quantity
A. STEEL FRAME
1
B. SCREWS(Ф1/4”X 1-1/4”)
6
C. FLAT WASHERS
4
D. SEAT CUSHION
E. SCREWS(Ф1/4”X 1”)
F. BACK CUSHION
G. ARMRESTS (L&R)
H. BACK SUPPROT PLATE
I. CAPS
J. ALLEN KEY
1
10
1
2
1
8
1
 Loading...