

Lorell 44552 Operating Instructions Manual
2 SPEED 6" CLIP FAN
Model: 44552
Operating Instructions (Read and Save These Instructions)
CAUTION
Read Rules for Safe Operation and Instructions Carefully.
WARNING
If the power cord is damaged, it is strongly recommended that you contact a
qualified electrician for repairs.
RULES FOR SAFE OPERATION
1. Never insert fingers, pencils or any other object through the guard when
fan is running.
2. Disconnect fan when moving from one location to another.
3. Disconnect fan when removing guards for cleaning.
4. Be sure fan is clipped onto correct place as indicated in
clipping instruction below.
5. DO NOT use fan in window. Rain may create electrical
hazard.
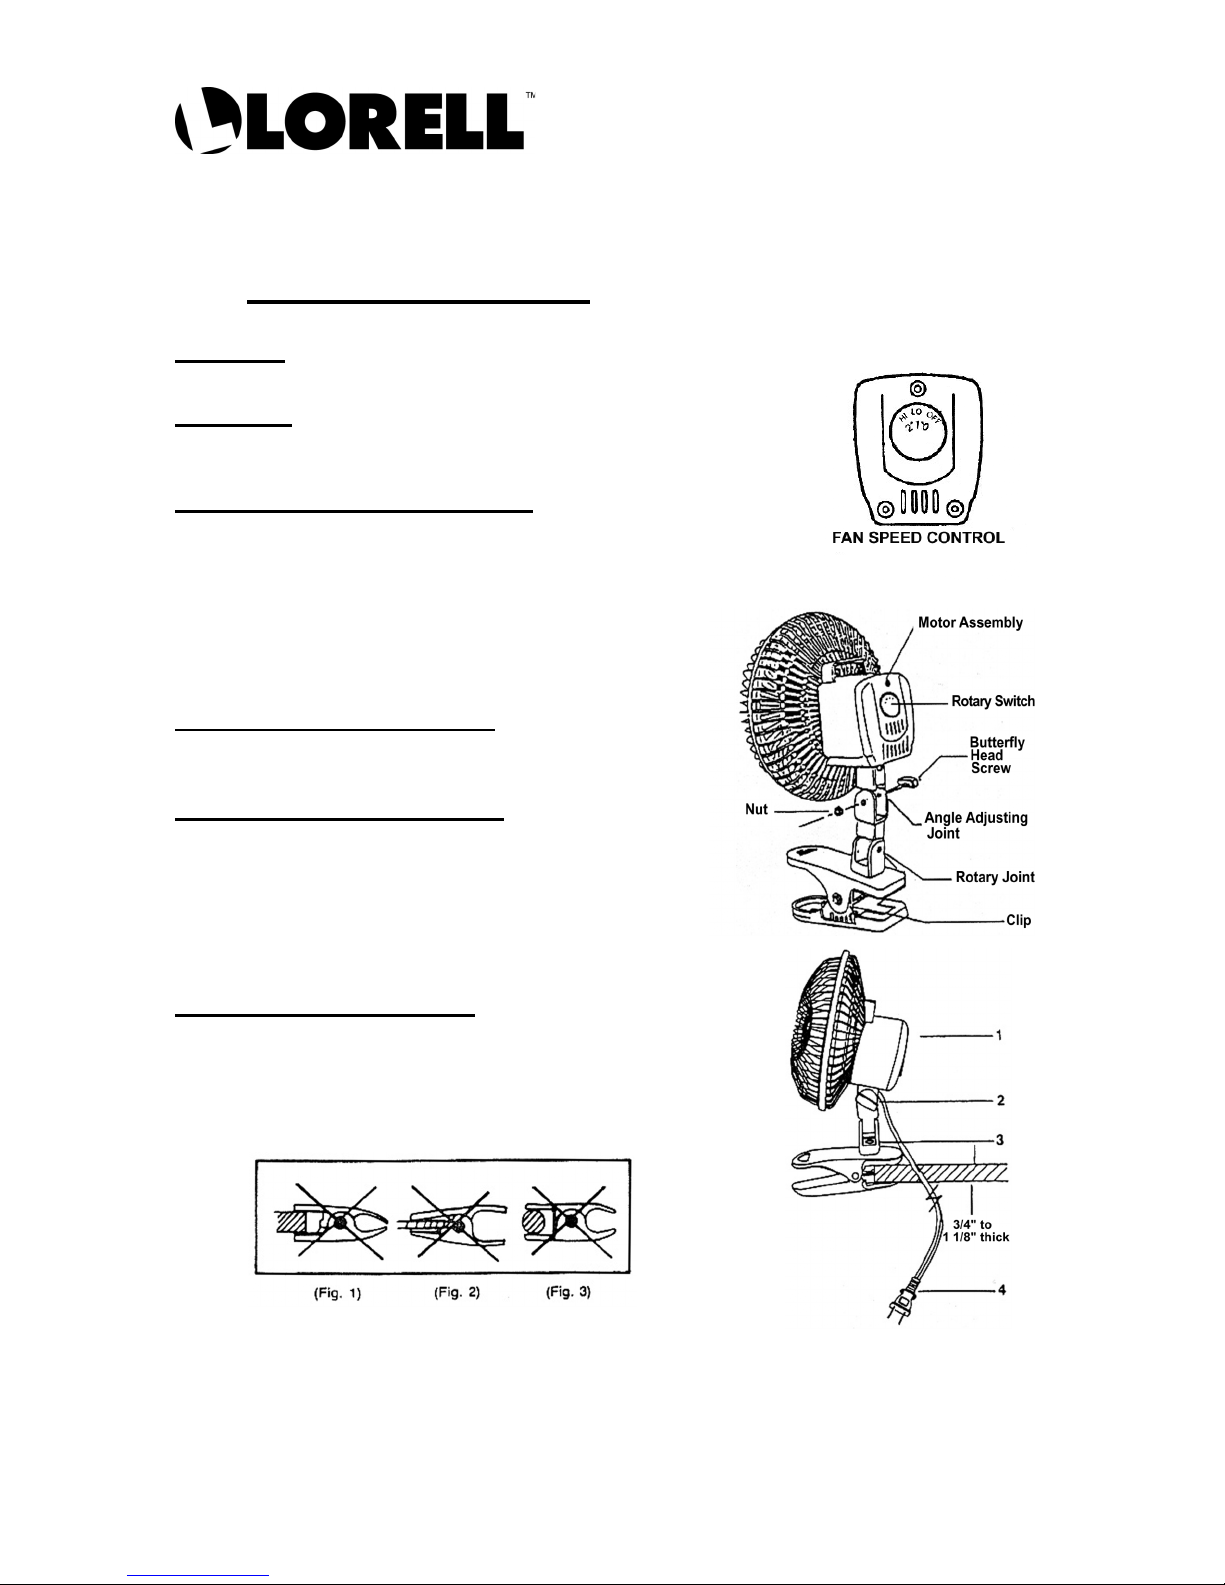
ASSEMBLY INSTRUCTIONS
Attach the Motor assembly to the angle-adjusting joint of the clip
with the butterfly head screw and nut.
OPERATING INSTRUCTIONS
Fan speed is controlled by the rotary switch
(OFF – LOW – HI) 0 – 1 – 2.
1. The airflow can be adjusted upward or downward by
loosening the angle-adjusting joint. Retighten knob securely.
2. The direction of airflow can be adjusted by turning the rotary
joint.
3. Plug the power supply cord into a wall outlet.
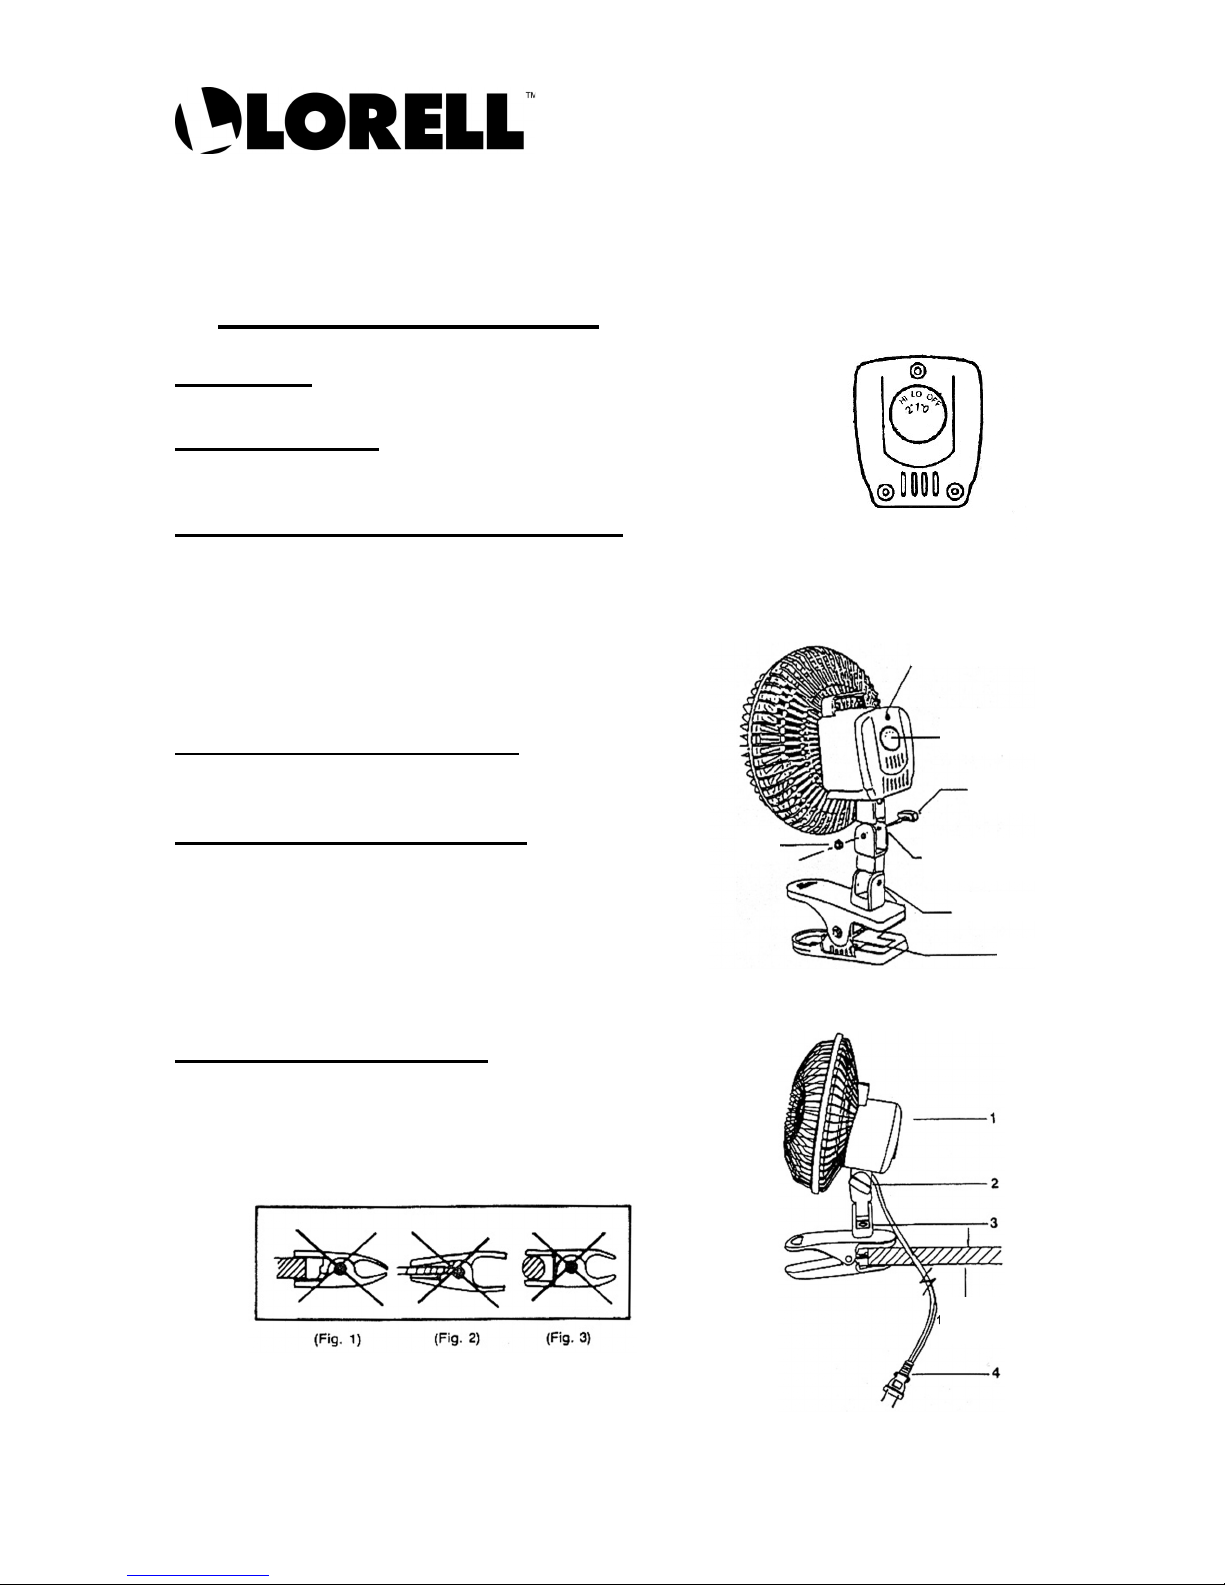
CLIPPING INSTRUCTIONS
1. Place the clip onto a secure structure. The clip can accommodate
a 3/4" to 1-1/8" thick structure.
2. Fig.1 through Fig.3 illustrate the wrong way to clip to a structure and
the wrong kind of structures to clip onto. Clip as shown to reduce the
risk of damage.
VENTILATEUR ENCLIPSABLE À DEUX
VITESSES DE 15.2 CM
Modèle : 44552
Consignes d’exploitation (À lire et à conserver)
ATTENTION
Lisez les Règles d’utilisation sécuritaire et les instructions attentivement.
AVERTISSEMENT
Si le cordon d’alimentation est endommagé, nous vous recommandons
fortement de contacter un électricien qualifié pour des réparations.
RÈGLES D'UTILISATION SÉCURITAIRE
1. N’insérez jamais les doigts, des crayons ou d’autres objets
quelconques à travers la protection quand le ventilateur tourne.
2. Débranchez le ventilateur pour le déplacer.
3. Débranchez-le aussi quand vous enlevez les protections pour nettoyer.
4. Assurez-vous que le ventilateur est clipsé au bon endroit,
comme l’indiquent les consignes de clipsage ci-dessous.
5. Ne l’employez PAS dans une fenêtre. La pluie comporte un
danger d'électrocution.
CONSIGNES D’ASSEMBLAGE
Attachez l’ensemble moteur au joint régleur d'angle du clip au
moyen de la vis à oreilles et de l’écrou.
CONSIGNES D’EXPLOITATION
La vitesse du ventilateur est contrôlée par le commutateur rotatif
(OFF / LOW / HI) 0 / 1 / 2.
1. Le flux d'air peut être orienté vers le haut ou le bas en
desserrant le joint régleur d'angle. Resserrez bien le
bouton.
2. La direction du flux d’air se règle en actionnant le joint
tournant.
3. Branchez le cordon d’alimentation dans une prise murale.
CONSIGNES DE CLIPSAGE
1. Placez le clip sur une structure solide. Le clip peut s’adapter à une
structure de 19.1 mm à 28.6 mm d’épaisseur.
2. Les fig. 1 à 3 illustrent la mauvaise façon d’enclipser sur une
structure et les types de structures d’appui inadéquates. Enclipsez
comme dans l’illustration pour réduire le risque de dommages.
COMMANDE DE VITESSE
Ensemble moteur
Commutateur
Vis à oreilles
Écrou
Joint régleur d'angle
Joint tournant
Clip
19.1 mm à 28.6 mm
d'épaisseur
 Loading...