

Page 1
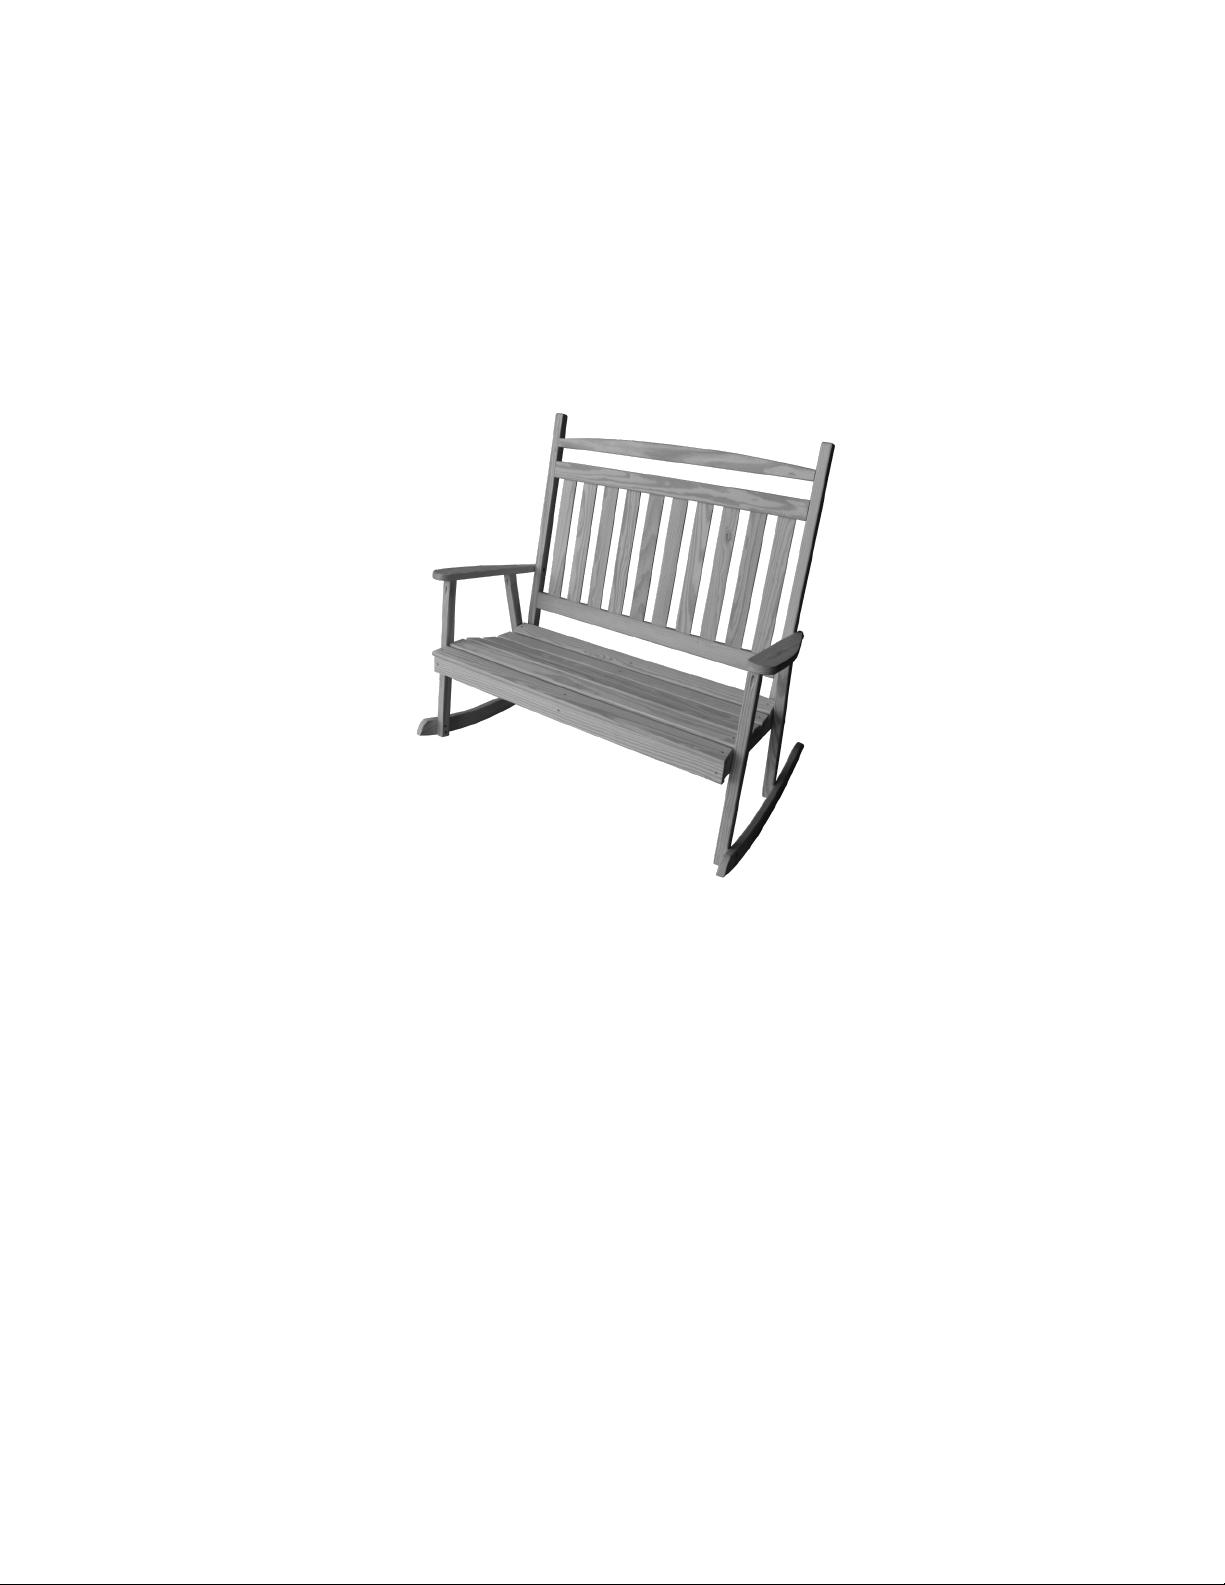
Assembly Instructions
Double Classic Rocker
Thank you for choosing
our product.
We hope that this piece brings you many years of enjoyment!
For help with assembling your furniture,
or if you have missing hardware, please email us.
Page 2
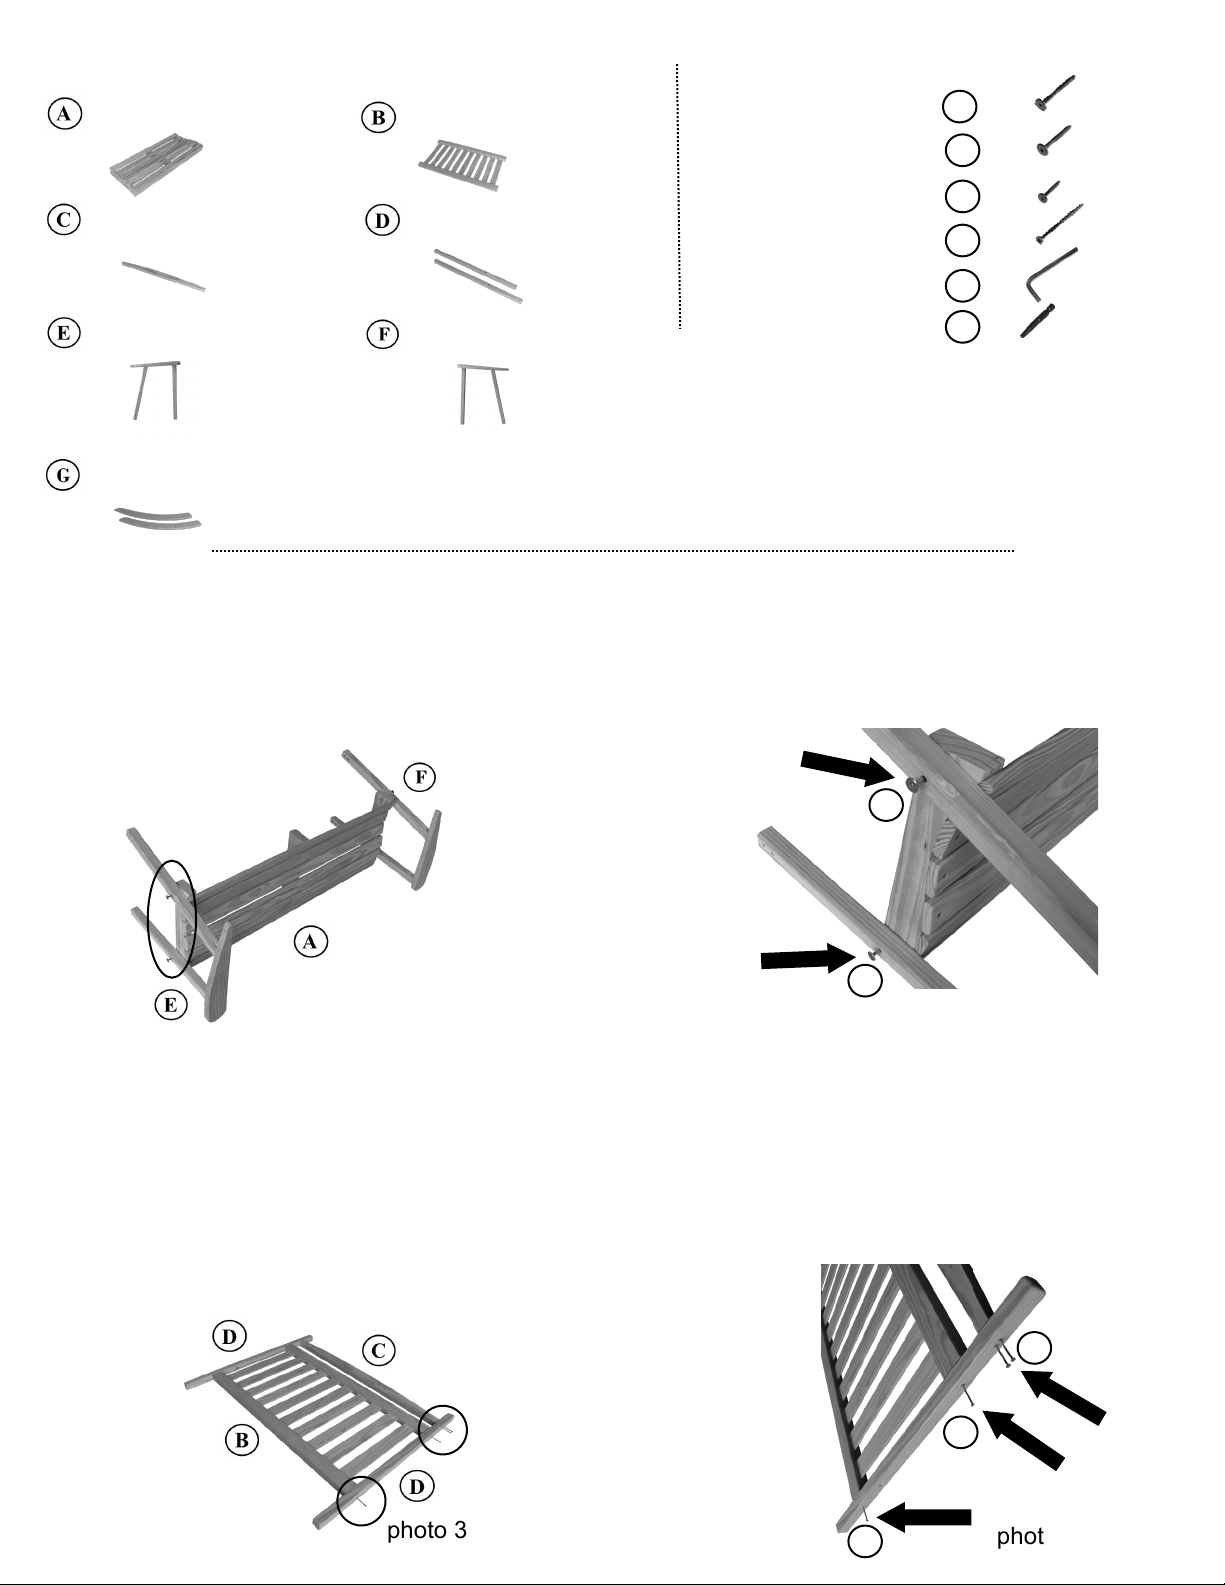
PARTS (included)
TOOLS NEEDED
Power drill or screwdriver
b
c
a
photo 2
photo 3
photo 1
STEP 2
Take the back assembly, top rail & back sidepieces and layout as shown in photo 3. The threaded insert in
the back sidepieces should be turned in toward the back assembly. Find the predrilled holes in the back
sidepiece, align with the pilot holes in the back assembly & top rail and fasten with four 3” screws per side.
(See photo 4.)
photo 4
Seat Assembly (1)
Back Assembly (1)
Top Rail (1) Back Sidepieces (2)
Right Arm Assembly (1)
Left Arm Assembly (1)
e
d
f
Rockers (2)
STEP 1
Place the seat on a clean surface with the front slat on the seat facing down. Attach the arm assemblies to
each side of the seat. The curved side of the arm belongs on the outside. Insert two 2¾” bolts through the
holes in the legs & turn into the threaded inserts in the seat. (See photo 1.) Do not fully tighten any bolts
until the chair is fully assembled.
a
a
d
d
d
x 2
HARDWARE (included)
2¾” Bolts (4)
2½” Bolts (8)
2” Bolts (2)
3” Screws (12)
Allen Wrench (1)
Square Drive Bit (1)
Page 3
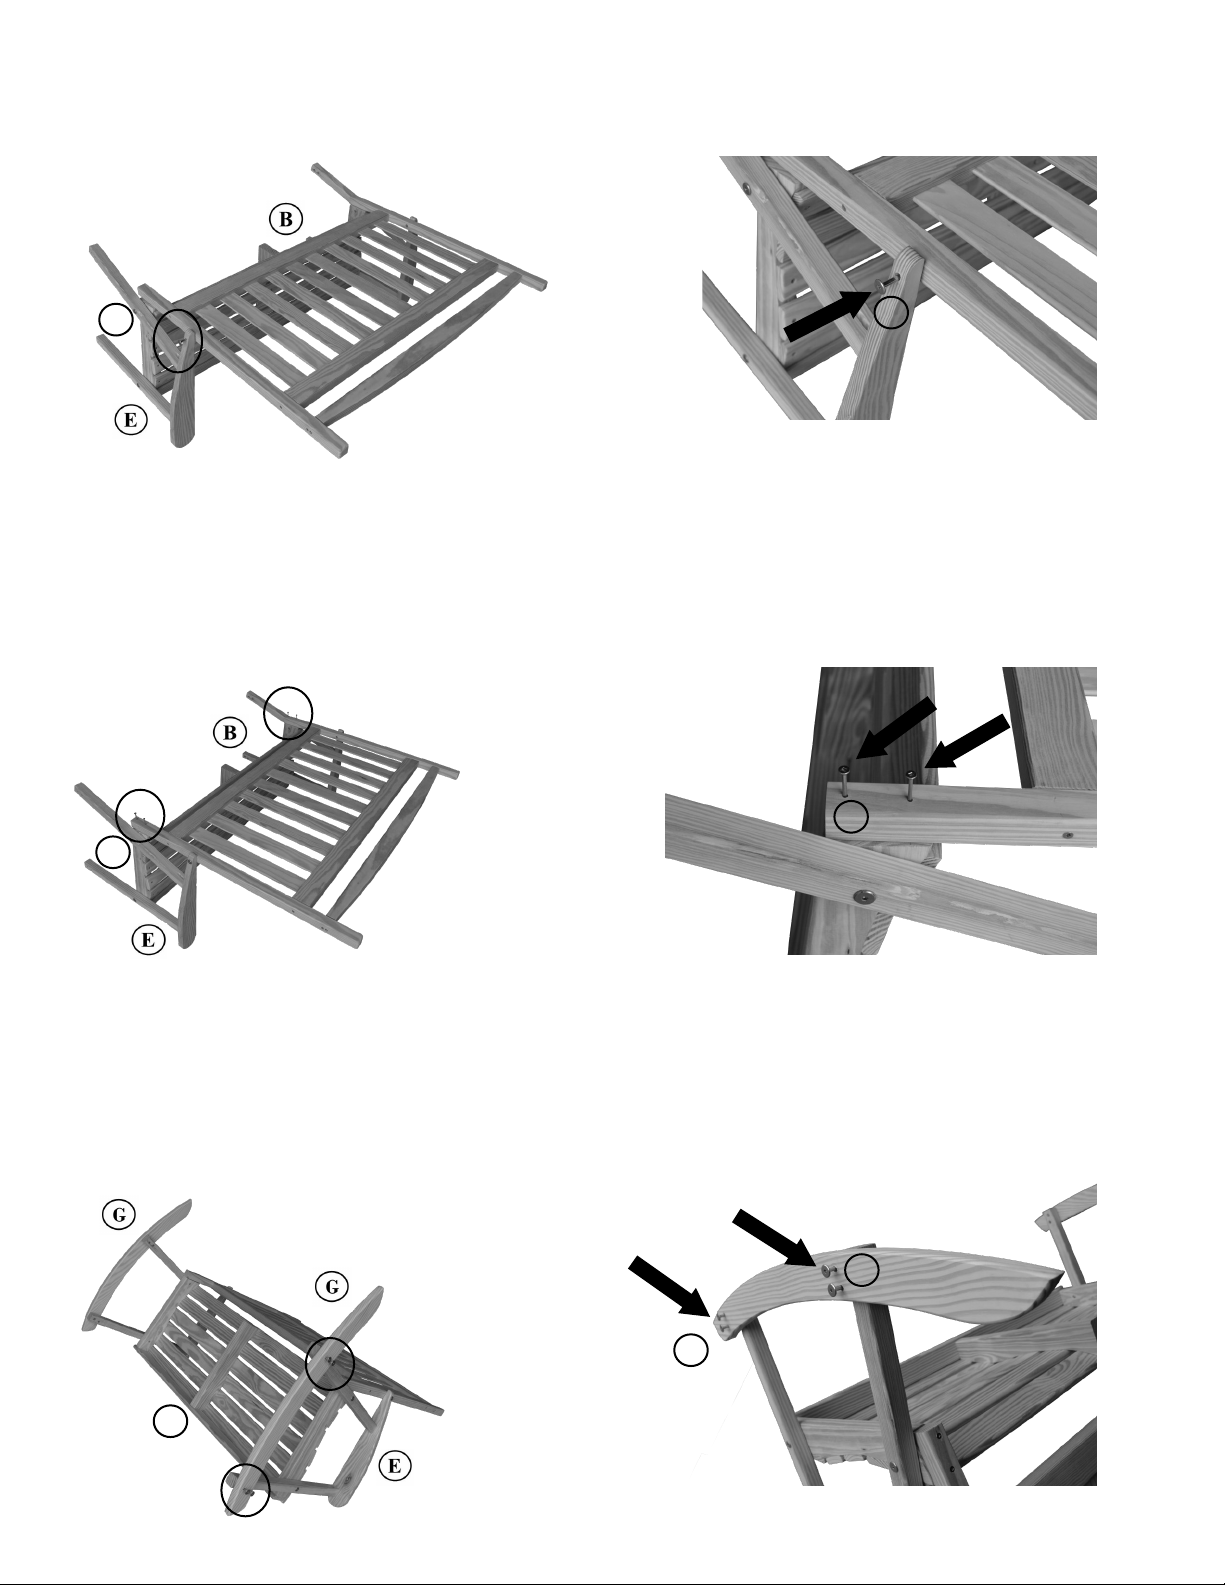
photo 6
photo 7
STEP 4
Attach the bottom of the back sidepieces to the back of the seat. Place two 3” screws in the predrilled
holes on each side & turn into the seat. There are no predrilled holes in the seat as the screws are self
drilling. (See photos 7 & 8.) If the back does not fit between the arms, loosen the bolts on the back of the
arms.
STEP 3
Place the assembled back assembly unit between the arms of the chair. Align the hole in the back of the
arm with the hole in the back sidepiece. Insert a 2” bolt & turn into the threaded insert. (See photos 5 & 6.)
photo 5
STEP 5
Attach the rockers to the bottom of the legs. Put four 2½” bolts through the predrilled holes in each rocker
& turn into the inserts in the legs. The holes closest to the end of the rocker belong on the front of the chair.
(See photos 9 & 10.) Set the chair upright & fully tighten all bolts with the Allen wrench.
photo 8
photo 9 photo 10
A
c
A
d
x 2
A
b
b
x 2
x 2
 Loading...