

Page 1

Assembly Instructions
Caution: You must read this before you proceed
Stool
Page 1 OF 9
Page 2
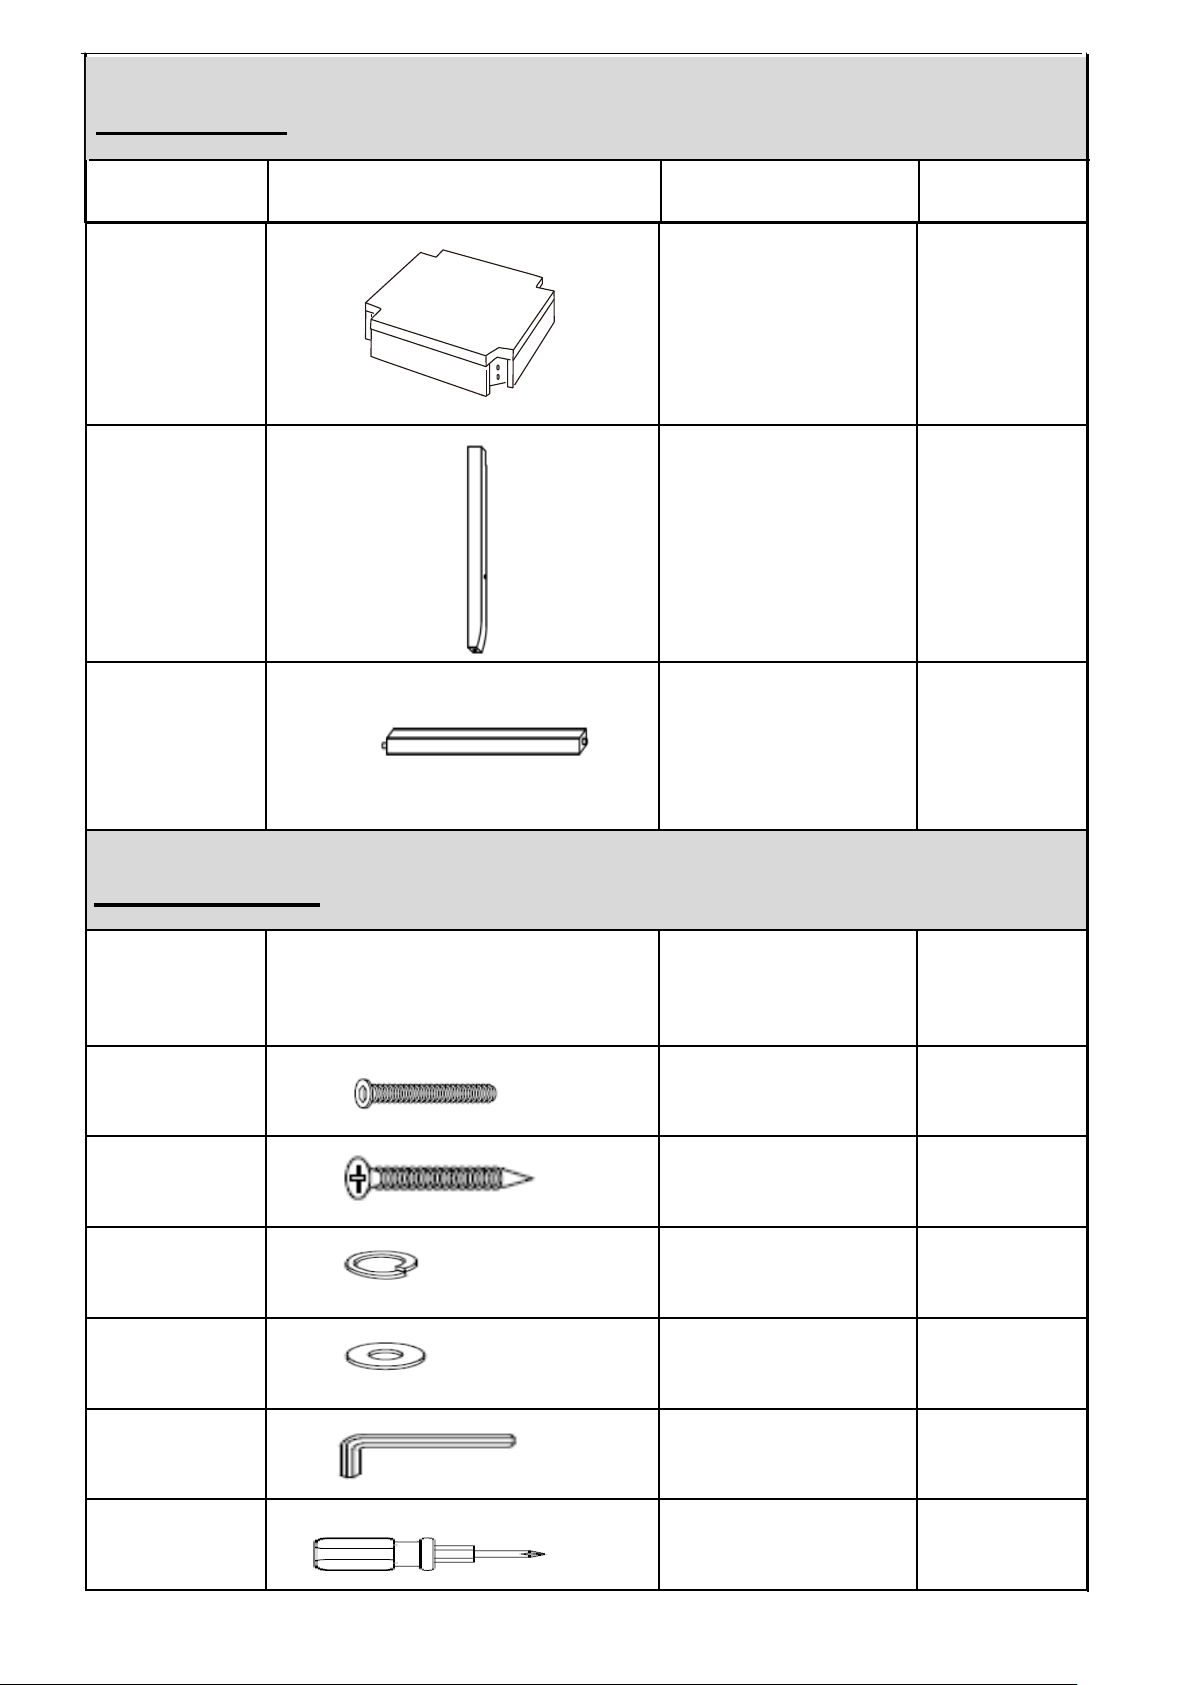
A Stool Seat 1
B Stool Leg 4
C Support 4
Label Picture Description QTY
① Bolt (M6x60mm) 9
②
Screw
(M4x38mm)
9
③ Spring Washer 9
④ Washer 9
⑤ Allen Key 1
⑥
Screwdriver
(Not provided)
1
Hardware
Page 2 OF 9
Label Picture Description QTY
Part List
Page 3
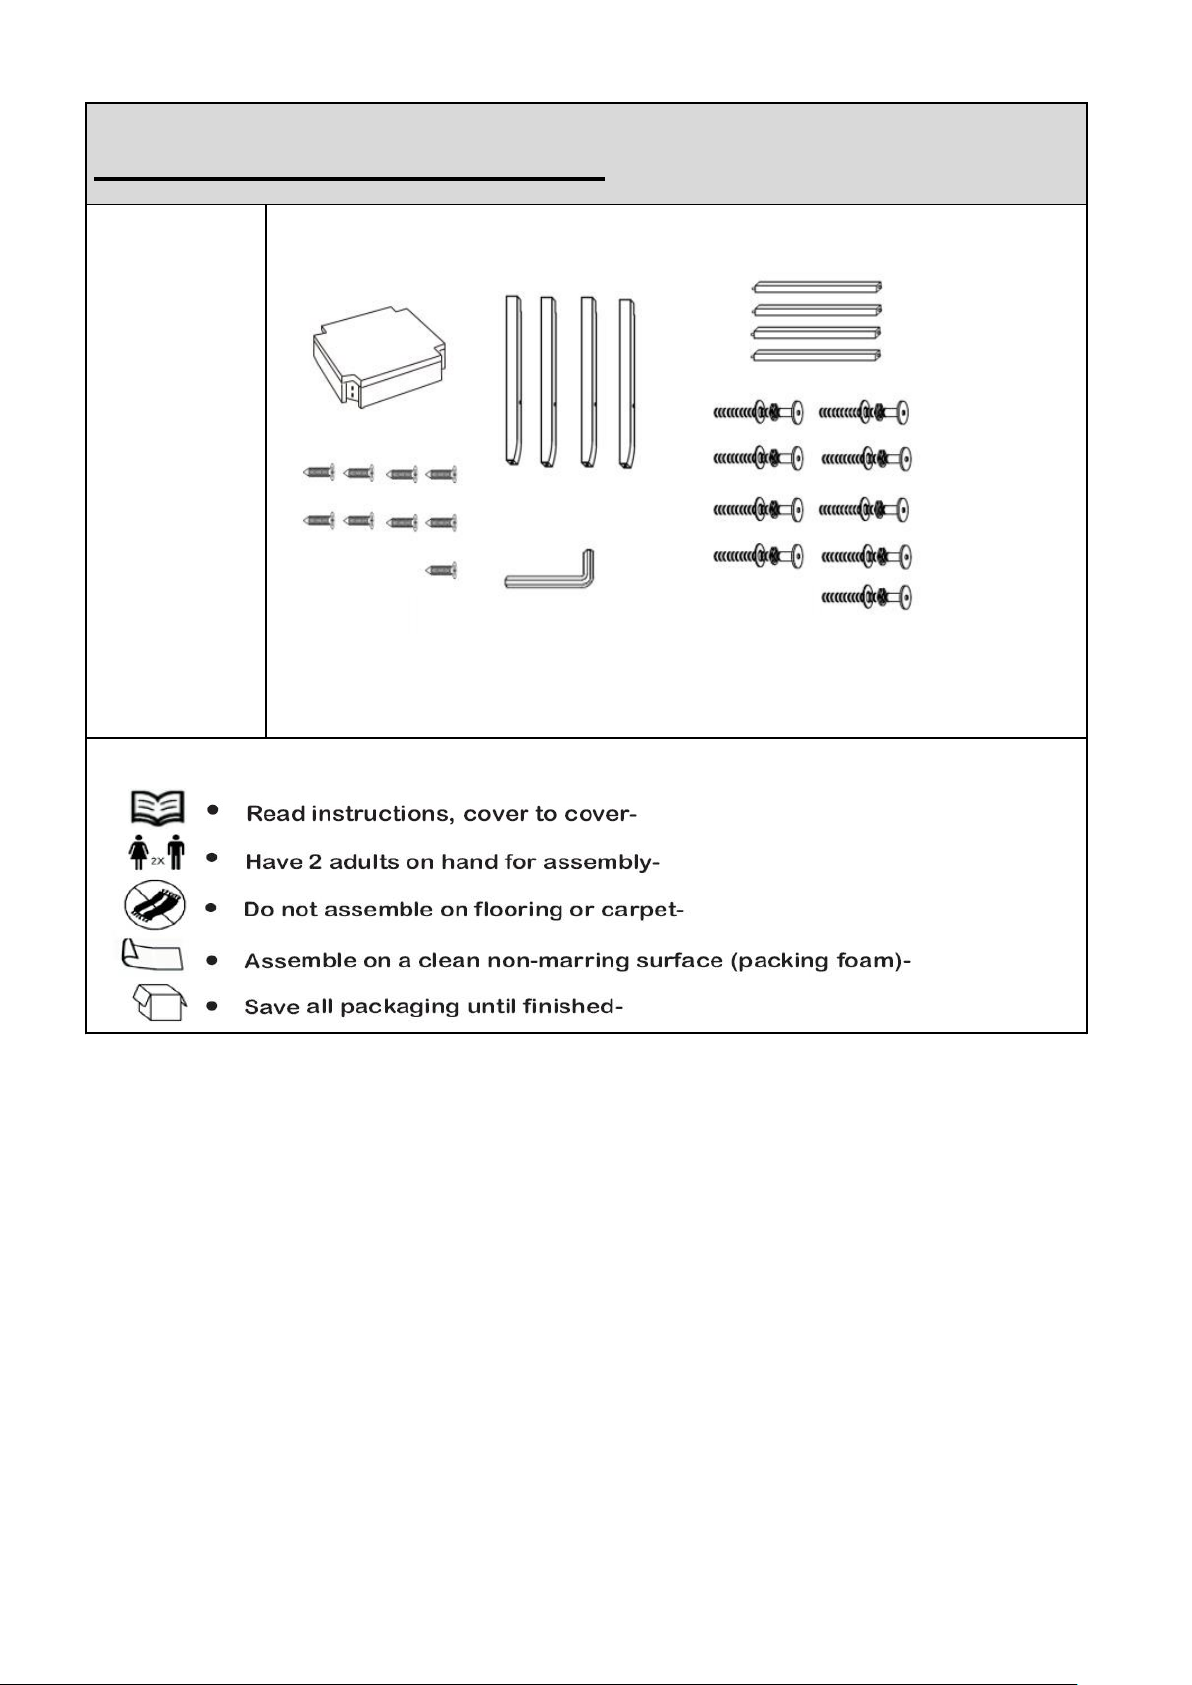
Assembly Preparation
Before
Beginning
Assembly:
Page 3 OF 9
Page 4

Assembly Steps
Overview
This Stool has multiple parts and may require up to 30 minutes to assemble. To
give you an overview of the Stool parts, the above picture is to help you put the
various parts into perspective. Please read through the instructions below to
familiarise yourself with the parts and steps before assembly.
Stool Seat (A)
Stool Leg (B)
Support (C)
Page 4 OF 9
Page 5
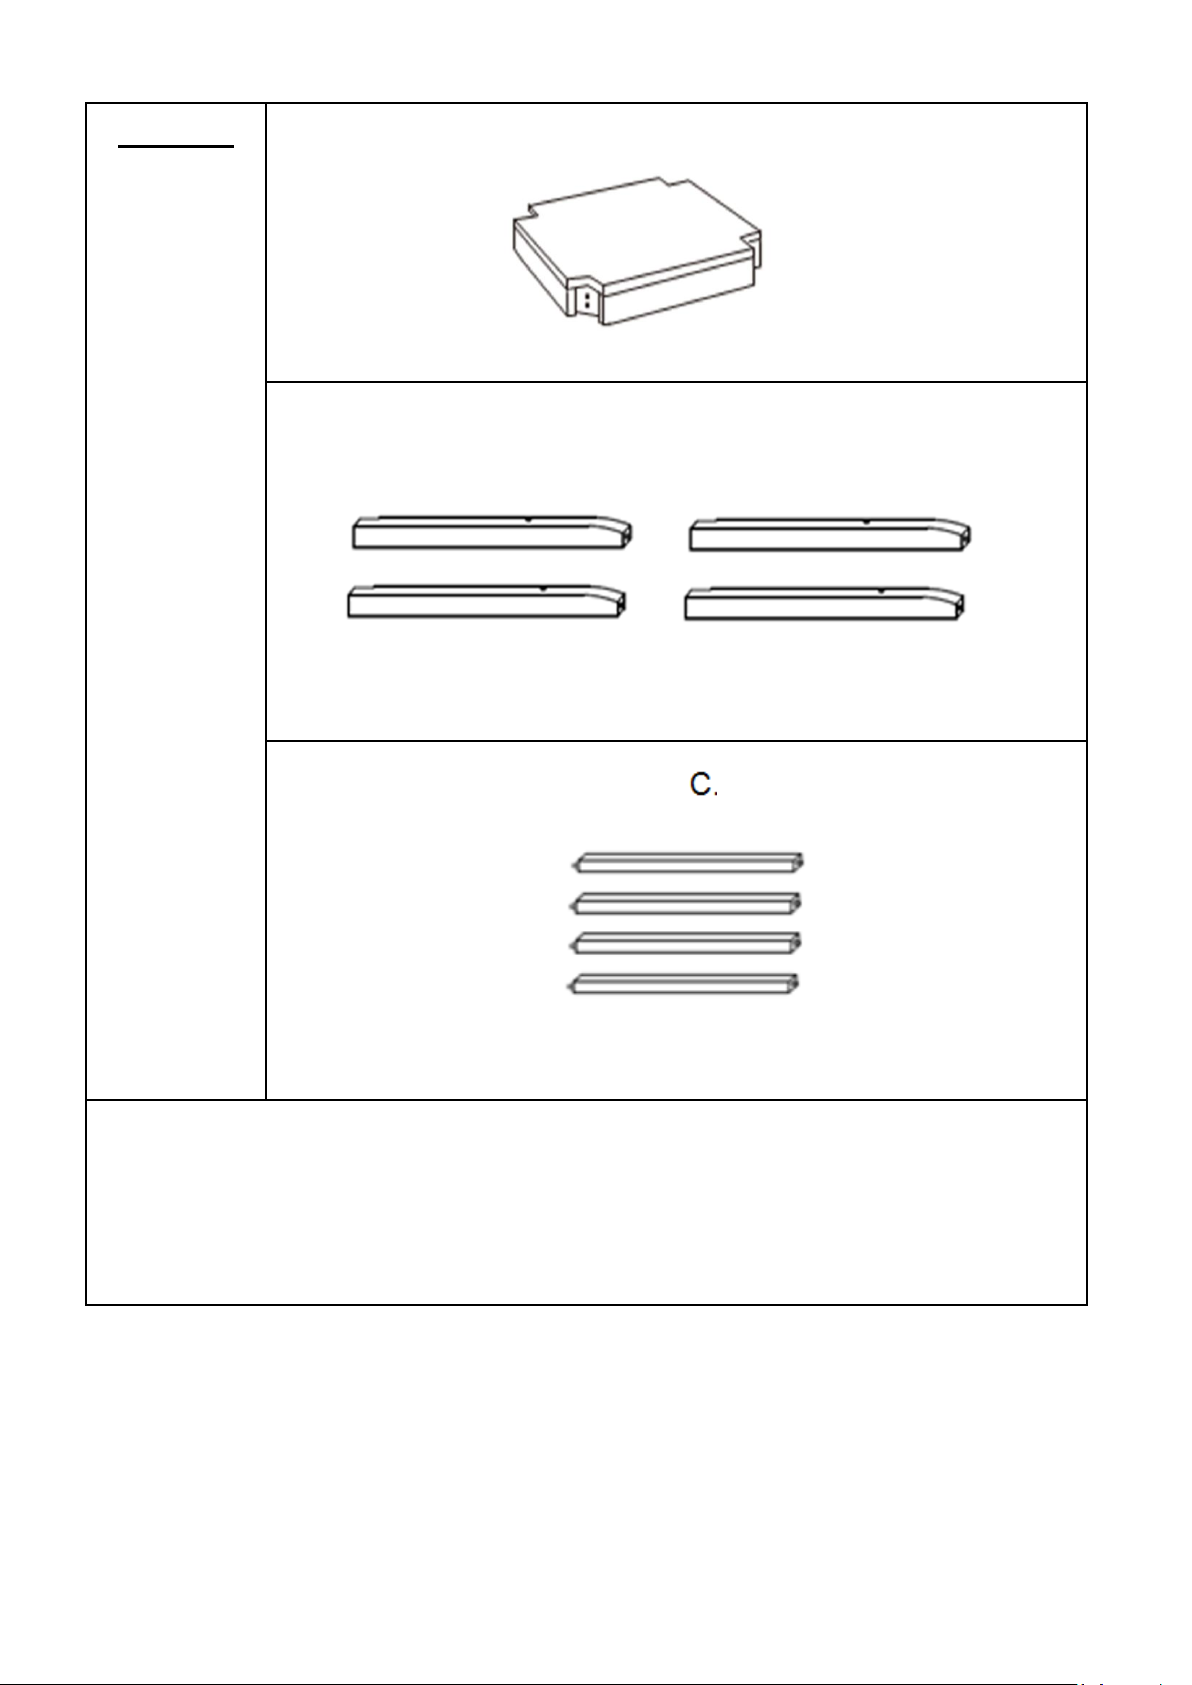
Step 1
Place the Stool Seat(A), Stool Legs(B) and Supports(C) onto a clean,
non-marring surface.
Stool Seat (A)
Stool Leg (B)
Support (C)
Page 5 OF 9
Page 6
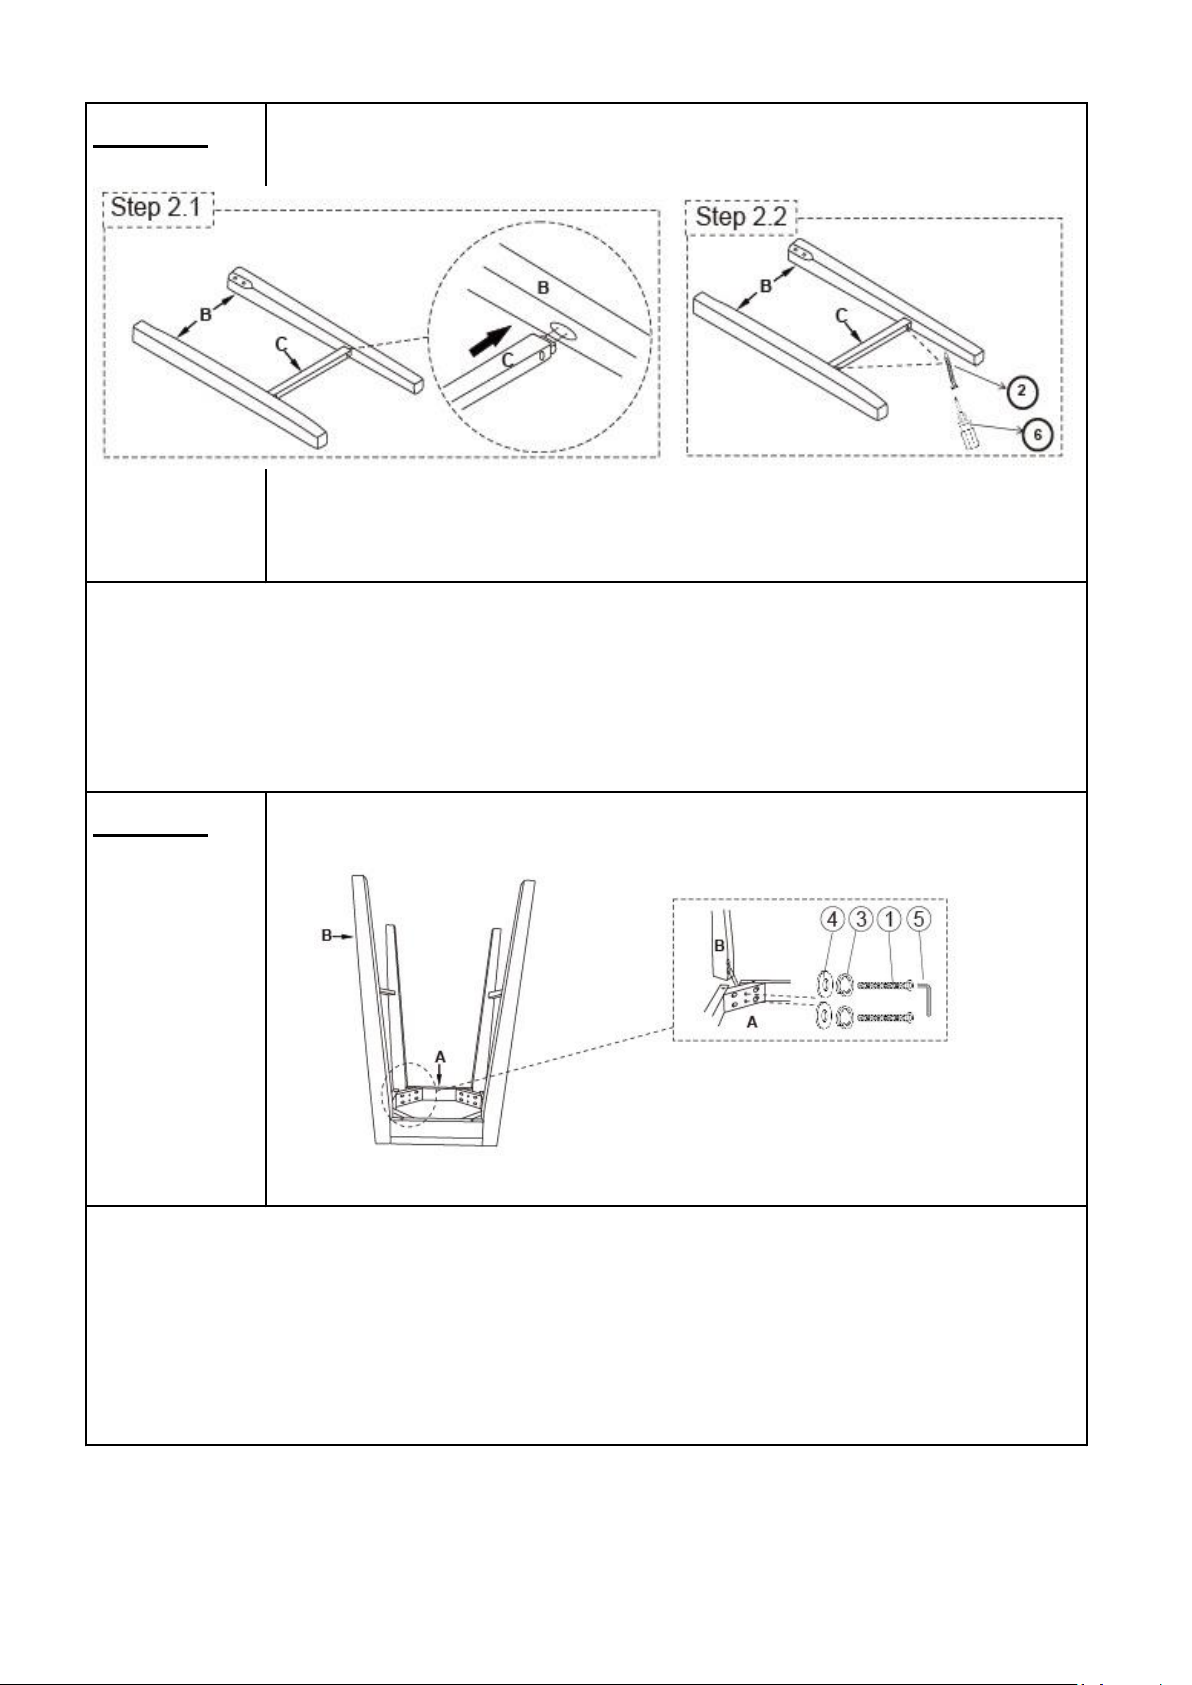
Step 2
Step 3
2.1) Insert the Supports(C) into the oval housing of Stool Legs(B) as shown
above.
2.2) Attach Supports(C) to Stool Legs(B) using Screws(②) with
Screwdriver(⑥).
Do not fully tighten the Screws.
Place the Stool Seat(A) facedown on a clean, non-marring surface.
Insert Stool Legs(B) into Stool Seat(A).
Attach Stool Legs(B) to Stool Seat(A) using Bolts(①), Spring Washers(③), and
Washers(④) with Allen Key(⑤).
Do not fully tighten the Bolts.
Page 6 OF 9
Page 7
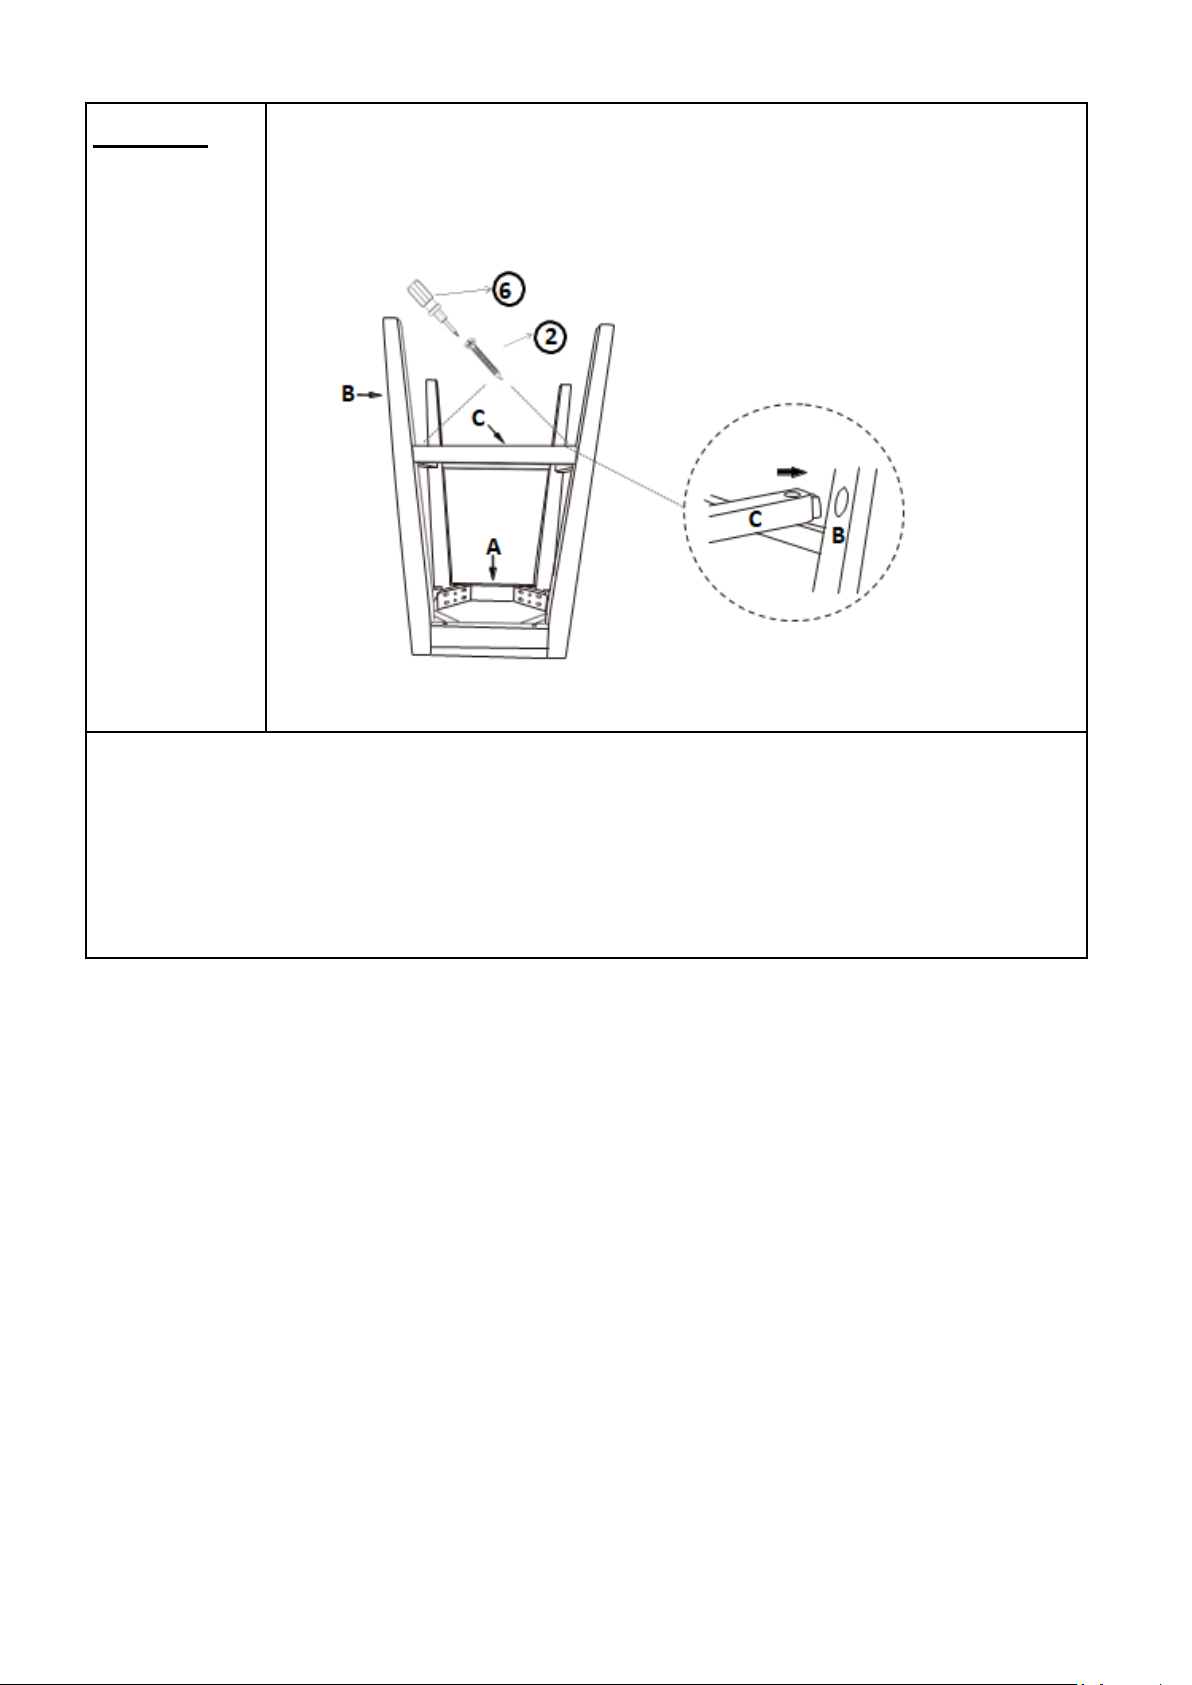
Step 4
Place Supports(C) into housing between the Stool Legs(B) and attach using
Screws(②) with Screwdriver(⑥).
Note: You may need to apply a little pressure to the Stool Leg, pulling
outwards, to enable the Support to be slotted into position.
Do not fully tighten the Screws.
Page 7 OF 9
Page 8

Step 5
Step 6
Place the Stool on a Level Surface to check if it wobbles.
If it wobbles, lift the Stool some 30cm to 50cm high from the ground, keep your
feet and toes well away from the drop zone, and drop the Stool freely and
vertically with the four legs, hitting the ground at the same time.
This Drop Test will help to ensure that all parts and gaps reach full alignment.
Test again for evenness on a Level Surface.
If no wobbles are found, proceed to tighten all the Bolts and Screws.
When tightening the Bolts and Screws, tighten sequentially.
Do not tighten any Bolt or Screw fully and then move on towards the next
one, this could cause the frame to warp.
If it still wobbles, loosen the Bolts and execute this same drop test.
Your Stool is ready for use.
This Stool can only be used on a flat, level surface.
Page 8 OF 9
Page 9
Page 9 OF 9
 Loading...