

Page 1
Printed in Vietnam
Description
ASSEMBLY INSTRUCTIONS
- 1 -
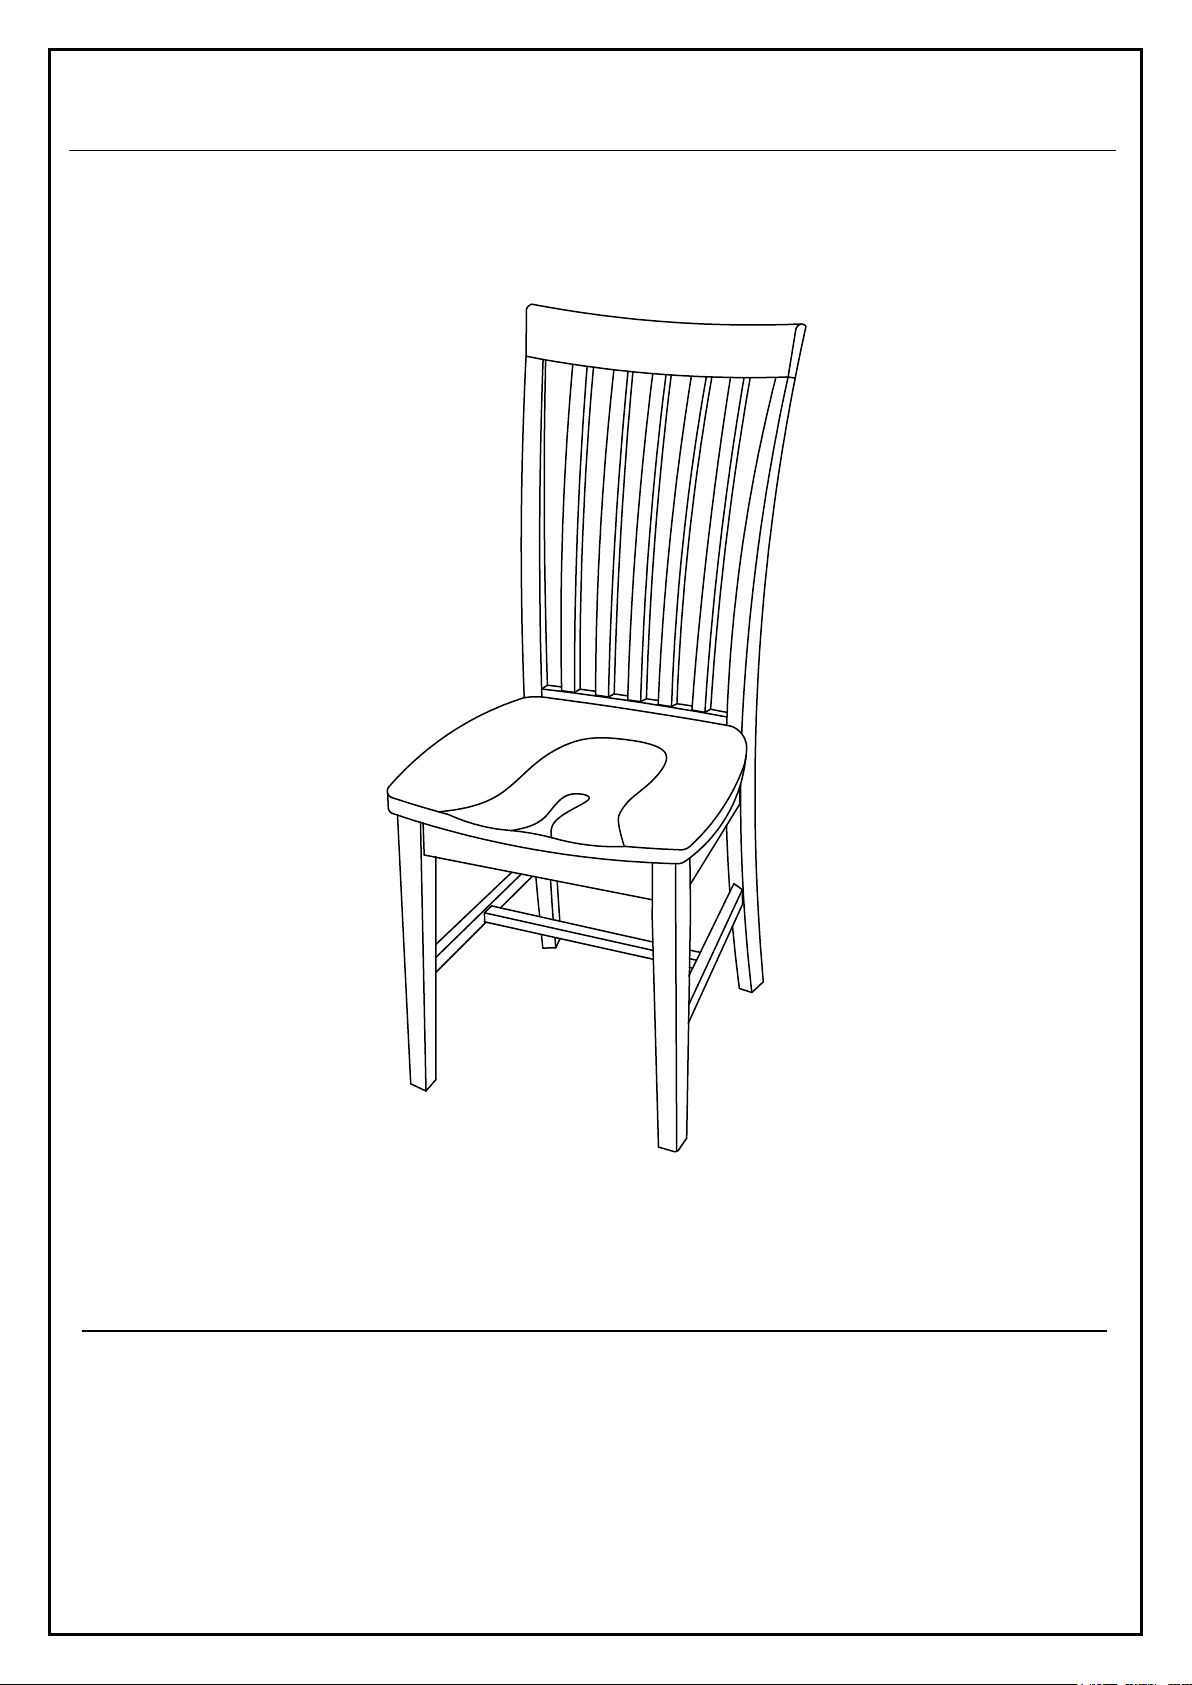
: TALL MISSION SIDE CHAIR
Page 2
BEFORE ASSEMBLY
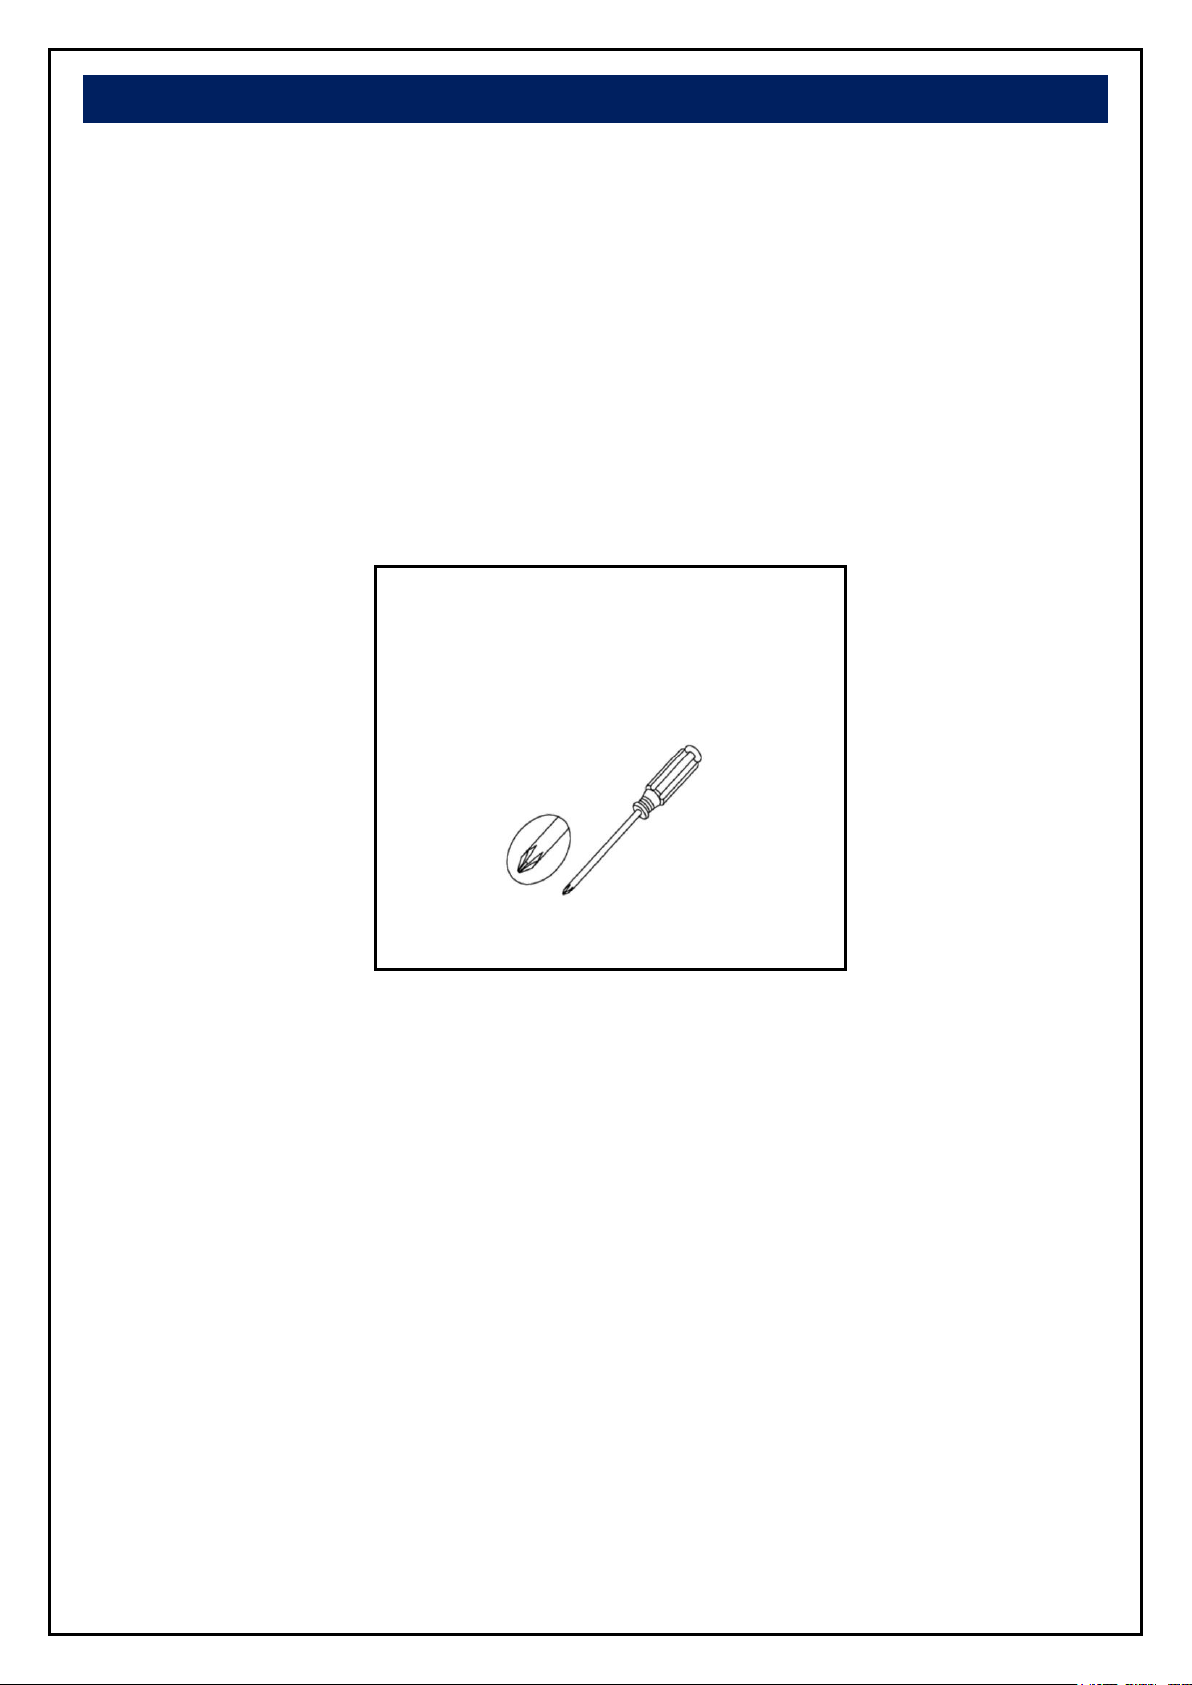
ASSEMBLY TOOLS REQUIRED
NOT INCLUDED
Thank you for purchasing this quality product. T
and constructed for durability. All parts were checked prior to packaging to insure quality. Prior to
beginning assembly, however, make sure all parts and hardware are included and free of obvious
defect. If a part is missing or defective, please contact the store where purchased. If hardware is
missing, or you need help with assembly, please call toll free.
IMPORTANT NOTE:
- Place all wooden parts on a clean and smooth surface such as a rug or carpet to avoid the
parts from being scratched.
- Remove all wrapping material, including staples & packing straps before you start to
assemble.
- DO NOT tighten all screws, bolts until completely assembled.
- Keep all hardware parts out of reach of children.
his product has been designed for easy assembly
Printed in Vietnam
- 2 -
Page 3
Printed in Vietnam
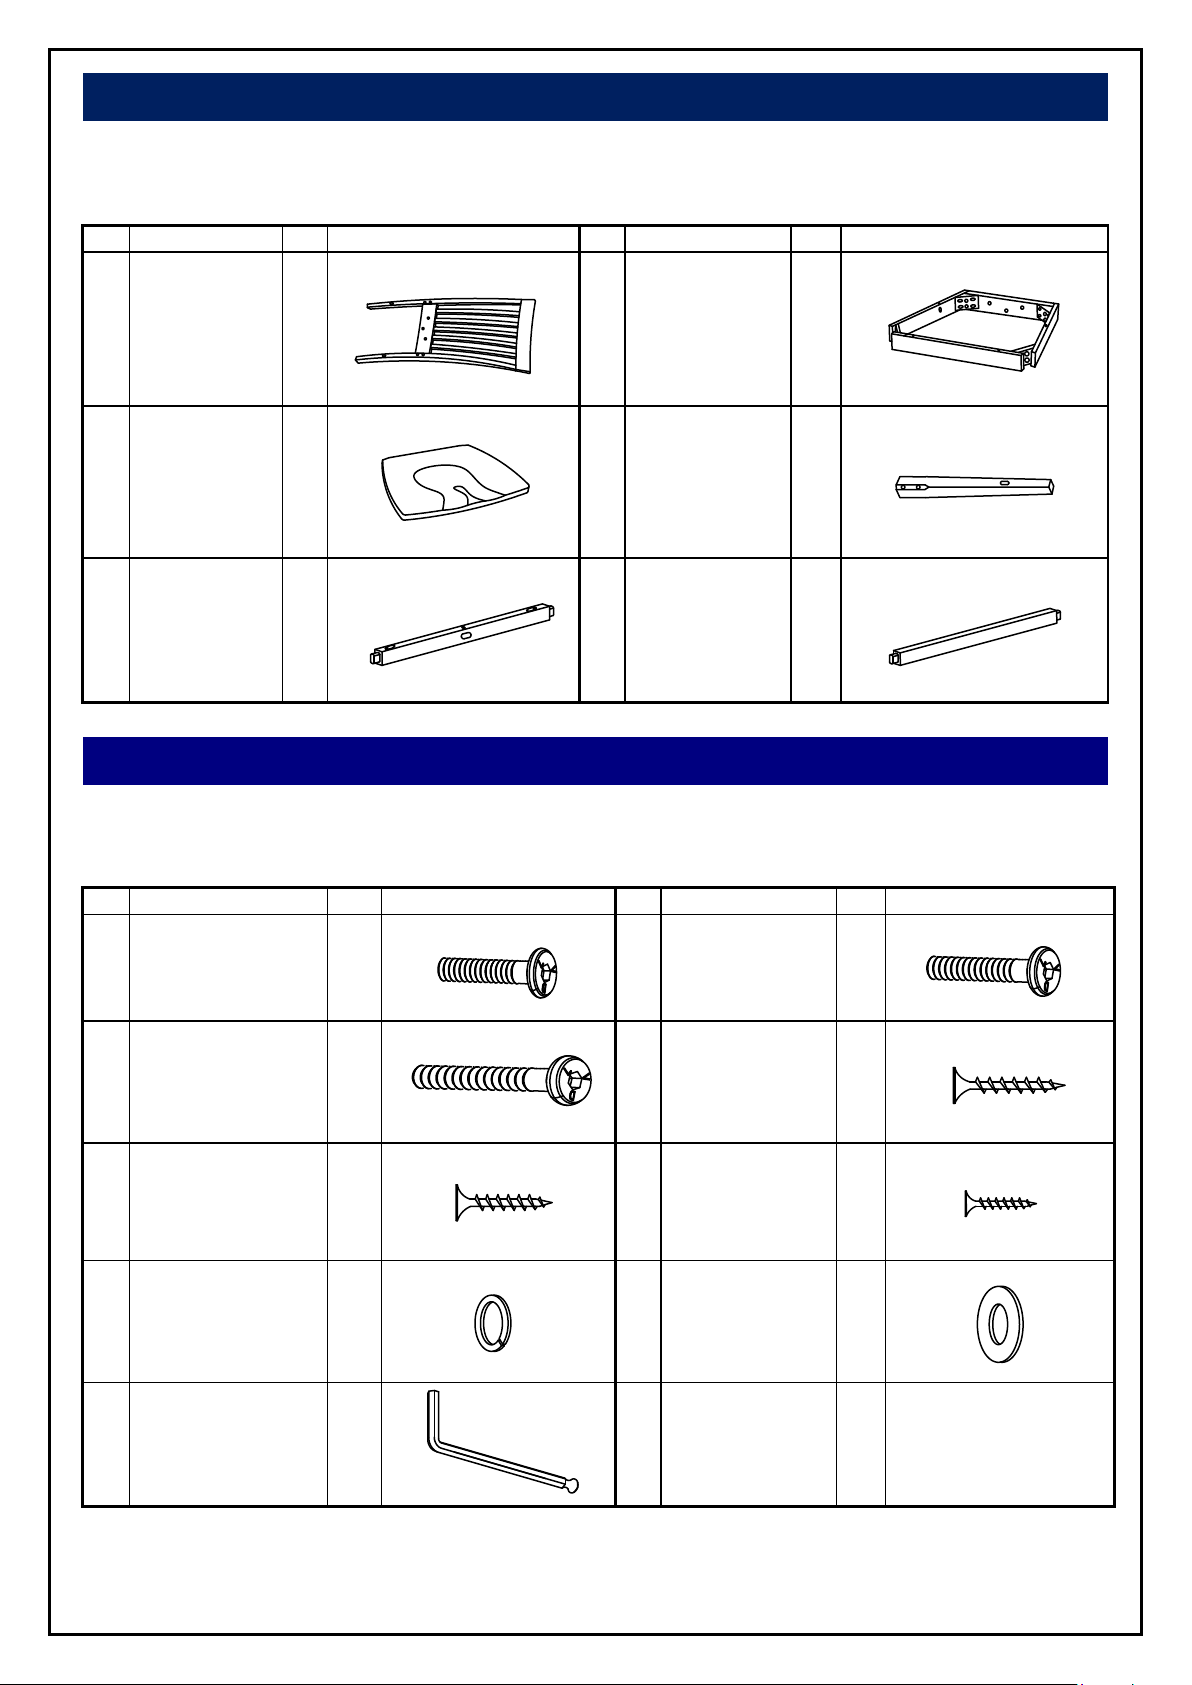
PART LIST
NO
Description
Qty
Sketch
NO
Description
Qty
Sketch
A
Chair back
1
B
Seat Frame
1
C
Chair Seat
1
D
Front Leg
(L-R)
2
E
Side Stretcher
(L-R)
2
F
Middle
Stretcher
1
HARDWARE LIST
NO
Description
Qty
Sketch
NO
Description
Qty
Sketch
1
Short bolt
(M6 x 40mm)
3
2
Medium bolt
(M6 x 60mm)
4
3
Long bolt
(M6 x 80mm)
4
4
Long screw
(M4 x 50mm)
4
5
Medium screw
(M4 x 35mm)
4
6
Short screw
(M3.5 x 15mm)
2
7
Lock Washer
(6.5 x11mm)
11
8
Flat Washer
(6.5 x19mm)
11
9
Allen Key
(M4 x 30mm x110mm)
1
When unpacking, please be careful not to discard any parts with the packaging. Before continuing,
please make sure you have the following parts:
When unpacking, please be careful not to discard any parts with the packaging. Before continuing,
please make sure you have all of the following hardware:
- 3 -
Page 4
Printed in Vietnam
STEP 1
STEP 2
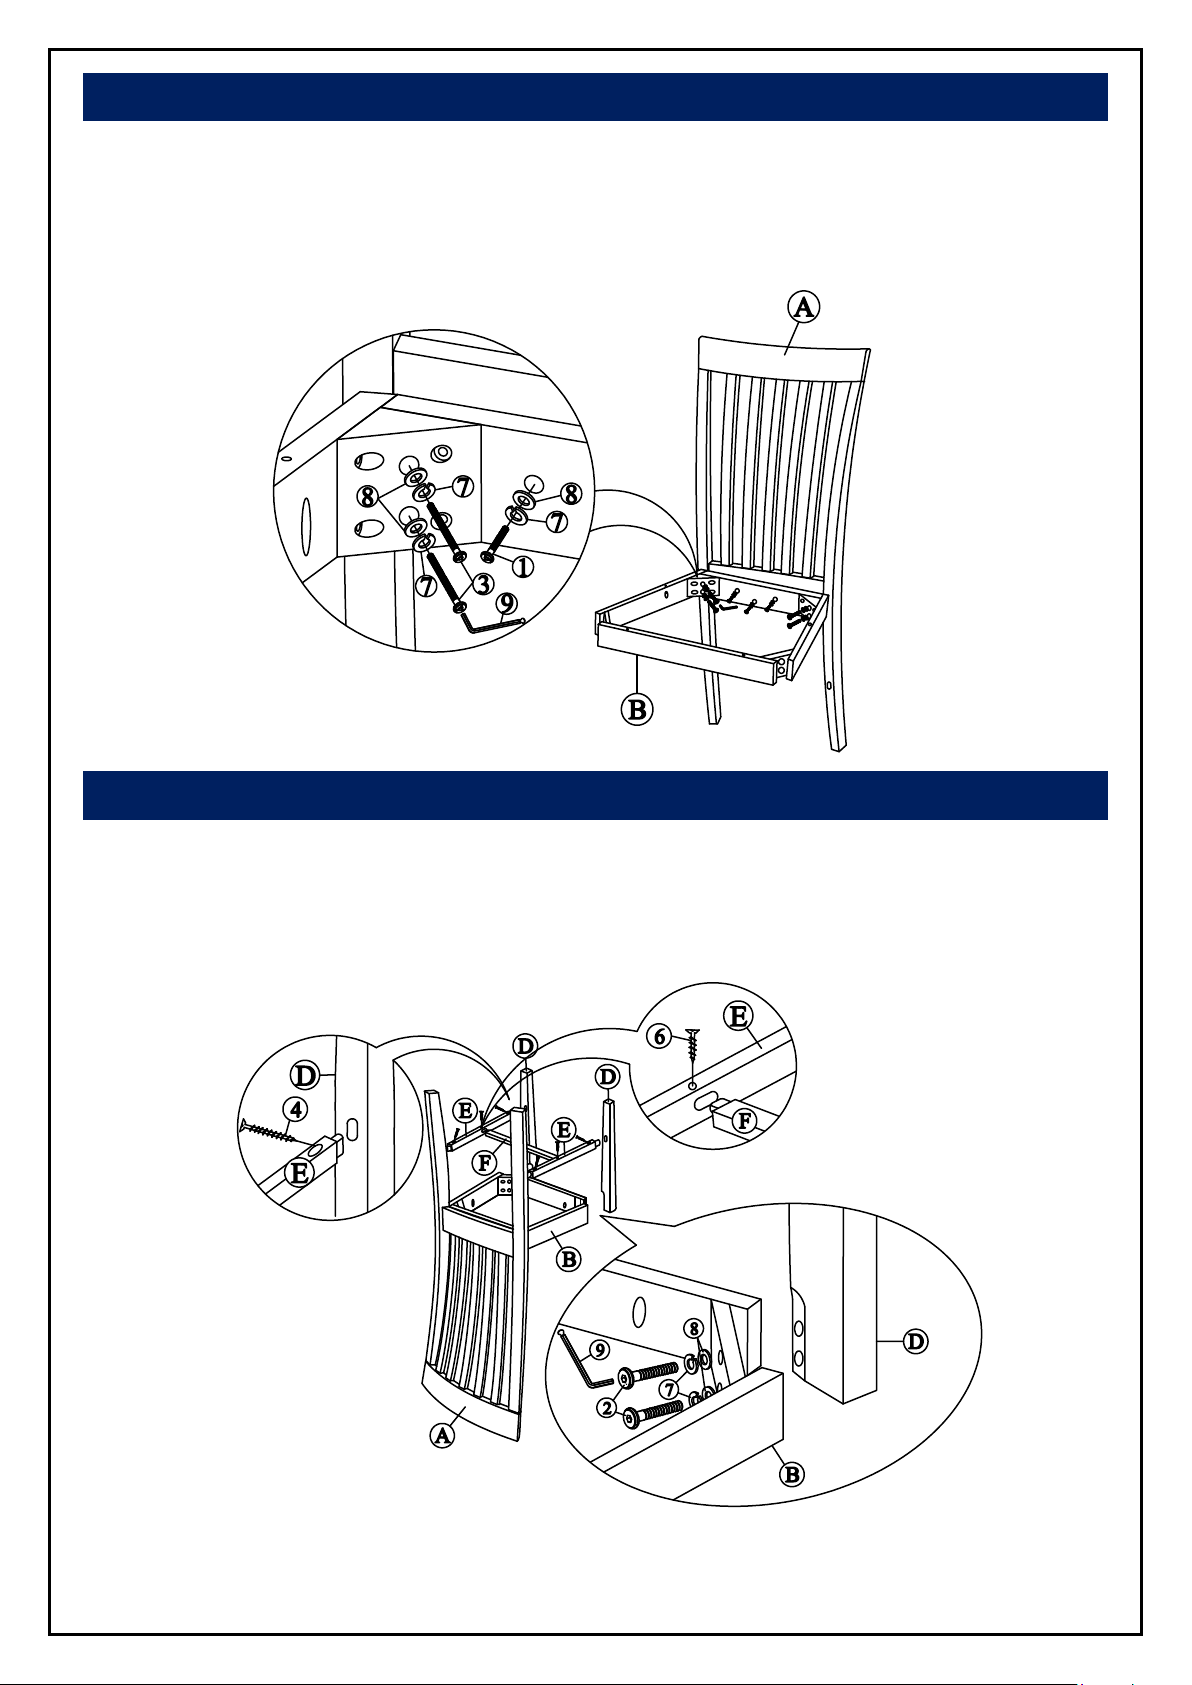
Attach seat frame (B) to the back (A) with bolts (3) and (1), and washers (7) and (8) as shown below.
Tighten with Allen key (9).
Note: DO NOT tighten any of the bolts, until the chair is assembled, then put on a flat level surface to
make sure the chair is level and then tighten the bolts.
Attach front legs (D) to the seat frame (B) with bolts (2), and washers (7) and (8) as shown below.
Tighten with Allen key (9).
Attach middle stretcher (F) to side stretchers (E) with screws (6). Then attach side stretchers (E) to
front and back legs with screws (4) as shown below. Tighten with a screwdriver.
- 4 -
Page 5
Printed in Vietnam
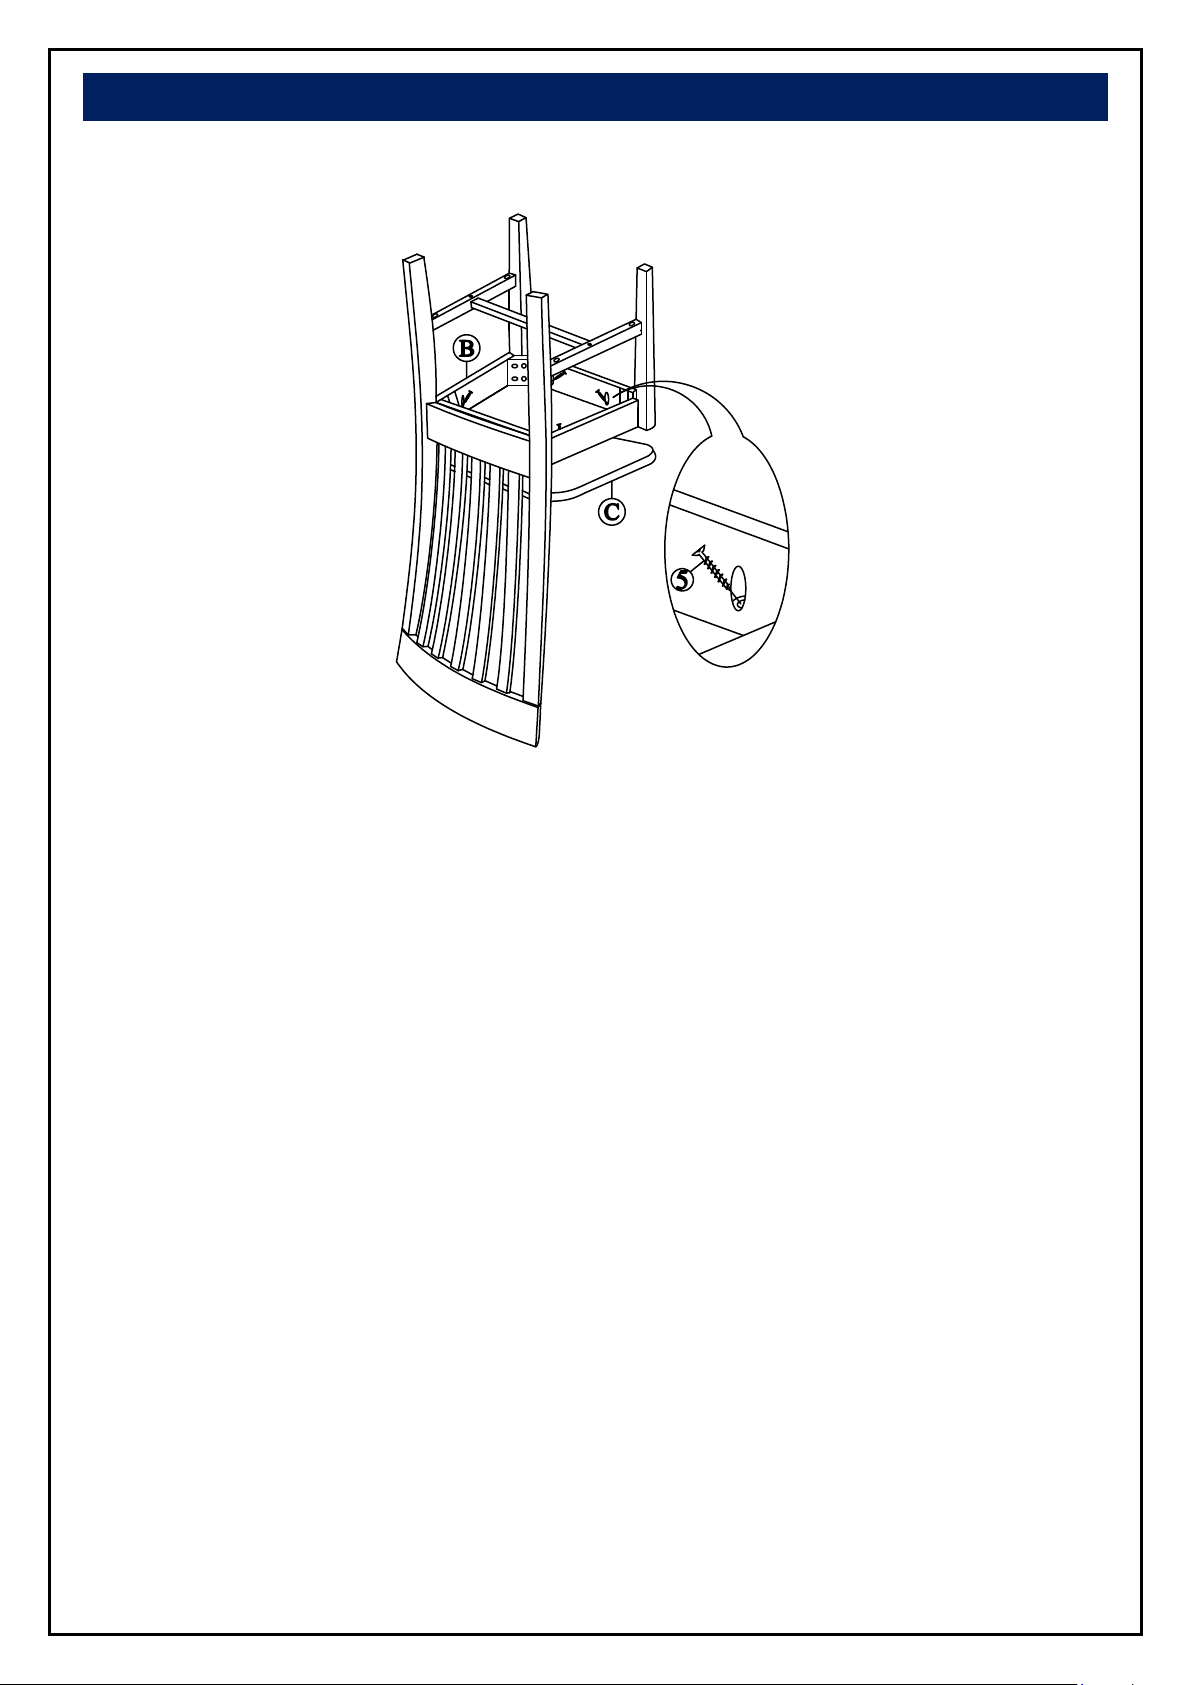
STEP 3
Attach the seat (C) to top of the seat frame (B) with screws (5) as shown below. Tighten with a screwdriver.
- 5 -
 Loading...