

Page 1

Assembly Instructions
Bench
Page 2
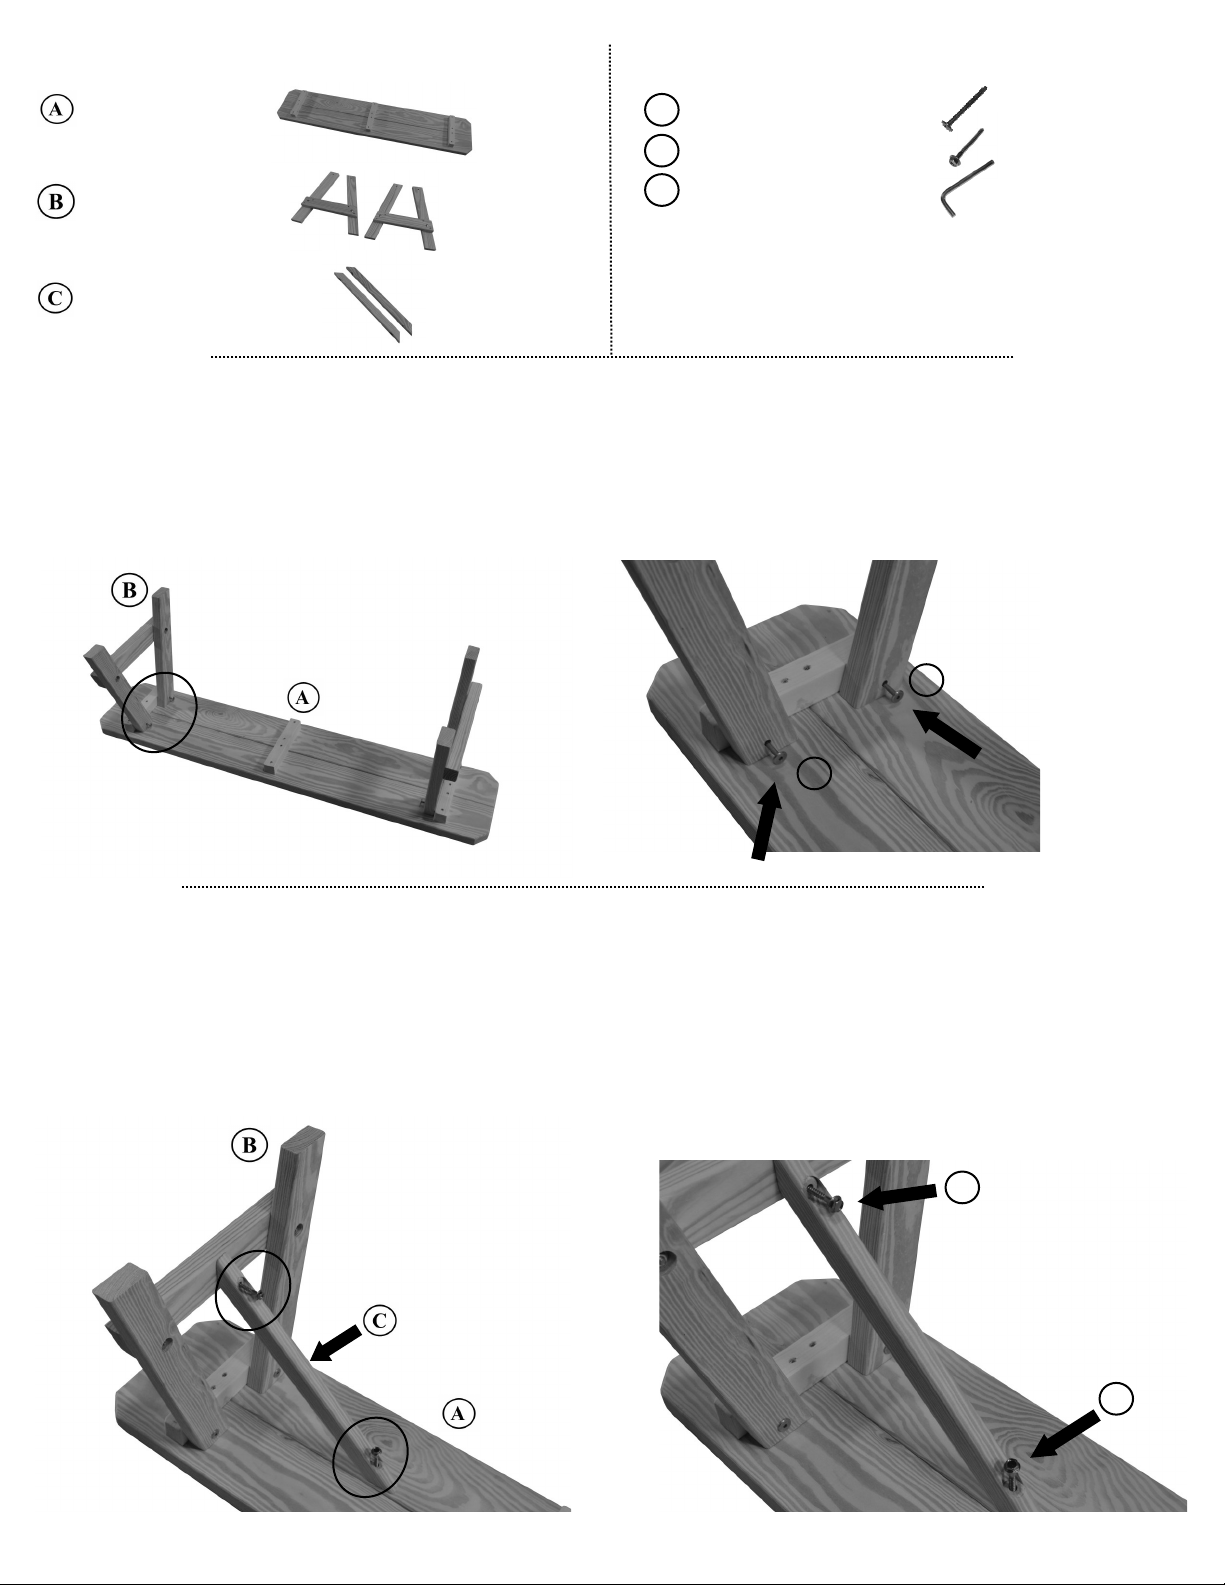
PARTS (included)
Bench Top (1)
Bench Legs (2)
Leg Braces (2)
b
c
a
HARDWARE
a
a
photo 1 photo 2
TOOLS NEEDED
Hammer for light tapping
7
/
16
” Wrench or Socket
STEP 1
Lay bench top upside down on a clean flat surface. Attach bench legs to the inside of the 2x2’s (see
photo 1). Align the predrilled holes on the bench legs with the threaded inserts in the 2x2. (Note: If the
holes in the legs do not align with the inserts, the legs can be adjusted with your hands by pushing or
pulling at the top of the legs.) Now insert 2¾” bolts through the leg and turn into the inserts (see photo 2).
Tighten with the Allen wrench. Be sure horizontal brace on leg is turned toward the end of the bench.
photo 3 photo 4
b
b
STEP 2
Attach the braces to the bench by placing one end of the brace on the bench top (be sure to stay to one
side of the crack between the boards) and the other end against horizontal brace on legs (see photo 3).
Insert 2½” lag screw into the predrilled holes in the braces (see photo 4). Tap with hammer to get them
started then tighten with 7/16” wrench or socket. The lags are self drilling and will not crack the wood. (Do
not over tighten as this may cause them to break.) If the bench rocks or seems unstable loosen bolts. Set
bench upright on floor and put some weight on it before tightening bolts again.
2¾” Bolts (4)
2½” Lag Screws (4)
Allen Wrench (1)
 Loading...