

Page 1
Assembly Instruction Sheet
ToolsRequired: None.
Light Source:
EstimatedAssembly Time:
Preparation:
present.Ifany partsaremissing ordamaged,do notattemptto assemble,install,or operatethefixture. Contactcustomerservice forreplacement
parts.
Warnings and Cautions
Turn off electricity at circuit breaker or main fuse box before installation. Consult a licensed electrician if in doubt.
These instructions are provided for your safety. It is very important you read them completely before installing the fixture. We strongly
recommend that a licensed, professional electrician perform the installation.
Disconnect fixture from power source before replacing bulbs. Make sure bulbs are given sufficient time to cool before removal.
Care of Tiffany Style Shade
A new tiffany lamp shade has an oil film applied to the shade that protects the tiffany shade from scratches during shipment. If the oil applied is
too heavy you can remove the excess oil film with a paper towel. Gently wipe away the excess oil.
For general cleaning of tiffany shades use a gentle lemon oil-based furniture polish applied to a soft cloth and wipe gently.
If a white powder appears on the soldered joints of the tiffany shade this is a normal oxidation process. Use a small amount of lemon oil or
mineral oil applied directly to oxidized areas and the soldered area will return to like new.
(2)A19 MediumBaseBulbs 75WMaximum
20-30minutes
Identifyandinspect allpartsbefore beginninginstallation.Check packagecontentlist anddiagramsbelow tobesure allpartsare
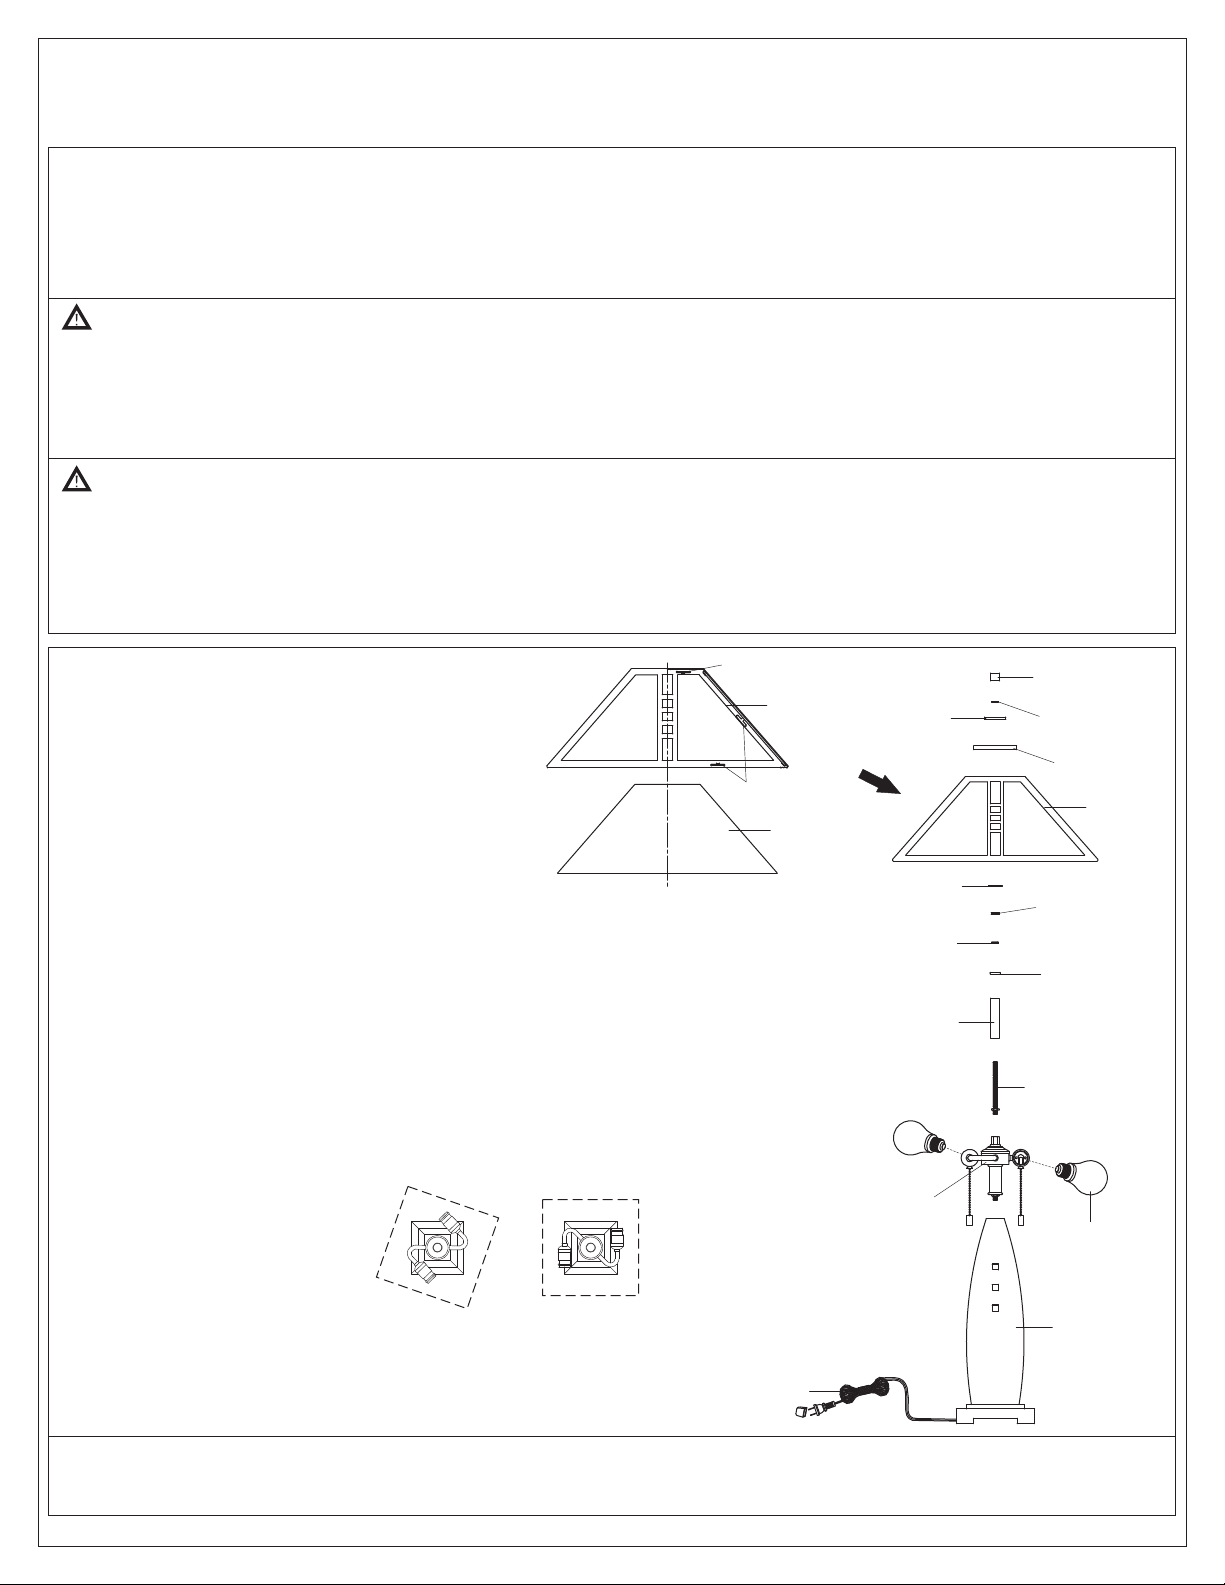
A. Insert the Glass Panel into the Frame and secure the
Glass Panel with Tabs at the edges of the Frame.
B. Thread the Socket Assembly onto the Base and make sure
sockets are parallel with Base. Hand tighten until snug.
C. Thread the hex nut end of the Nipple with Hex Nut into the
hex coupling on the top center of the SocketAssembly. By
using the pliers, thread the hex nut against the hex
coupling and hand tighten until snug.
D. Place the Spacer Tube and the Check Ring over the top
end of the Nipple and secure with the Small Knurled Nut.
Hand tighten until snug.
E. Thread the Big Knurled Nut onto the top end of the Nipple
and adjust it to proper location for rest components. Place
the Flat Washer, the Shade, the Big Cap, the Small Cap
and the Rubber Washer over the top end of the Nipple.
Make Shade is parallel with Base. Secure with the Finial
and hand tighten until snug.
F. Insert bulbs onto sockets and screw snugly into place.
Your fixture is now assembled and ready to use. Enjoy!
Tab
Tab
Frame
x1
Glass Panel
x4
Small Cap
x1
Flat Washer
Small
Knurled Nut
x1
3.5”L
Spacer Tube
x1
Socket
Assembly
x1
x1
Finial
x1
Rubber Washer
x1
Big Cap
x1
Shade
x1
Big Knurled
Nut x 1
Check Ring
x1
4”L Nipple
with Hex Nut
x1
Bulb (not
included)
Incorrect
base/ socket/
shade Orientation
Correct
base/ socket/
shade Orientation
1of2
Base
x1
Cord
Page 2
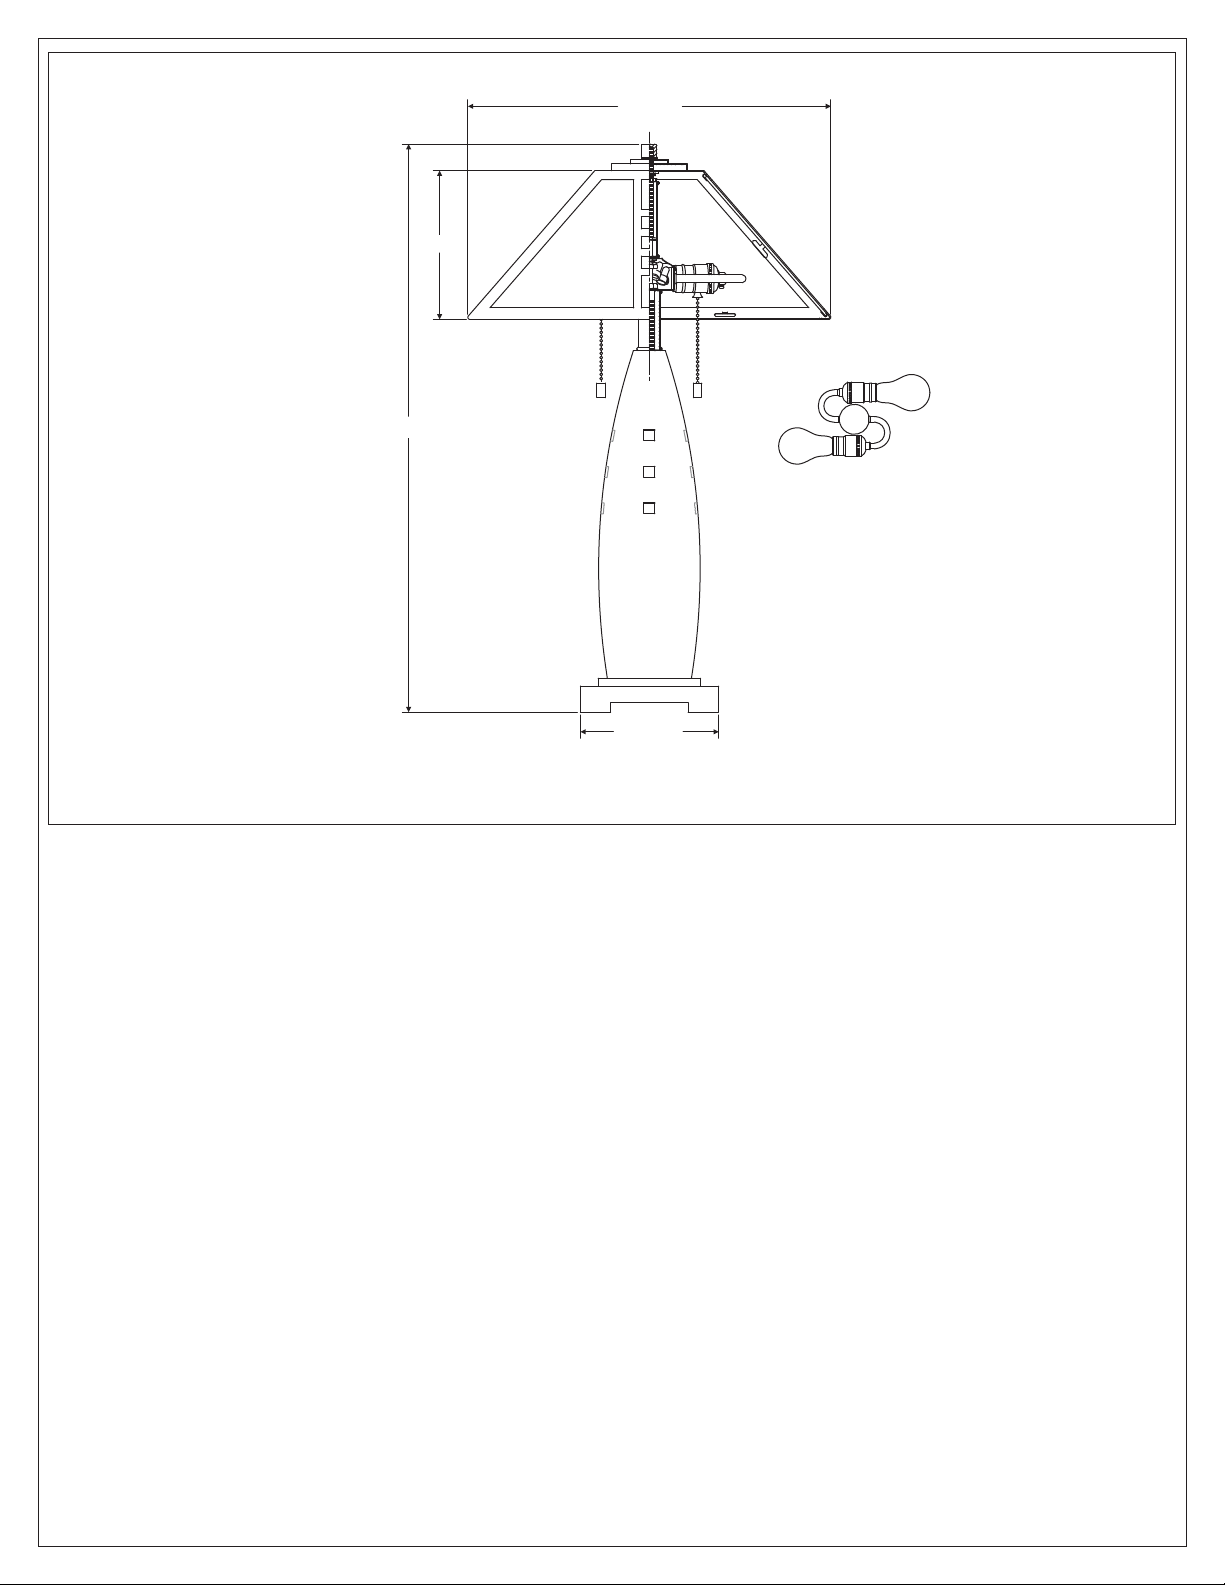
26.5”
17” SQ.
7”
6.5” SQ.
NOTE: ALL DIMENSIONS ARE ROUNDED UP TO THE NEAREST 1/4"
2of2
 Loading...