

Page 1
1
Operating manual
a Look Solutions product
USA
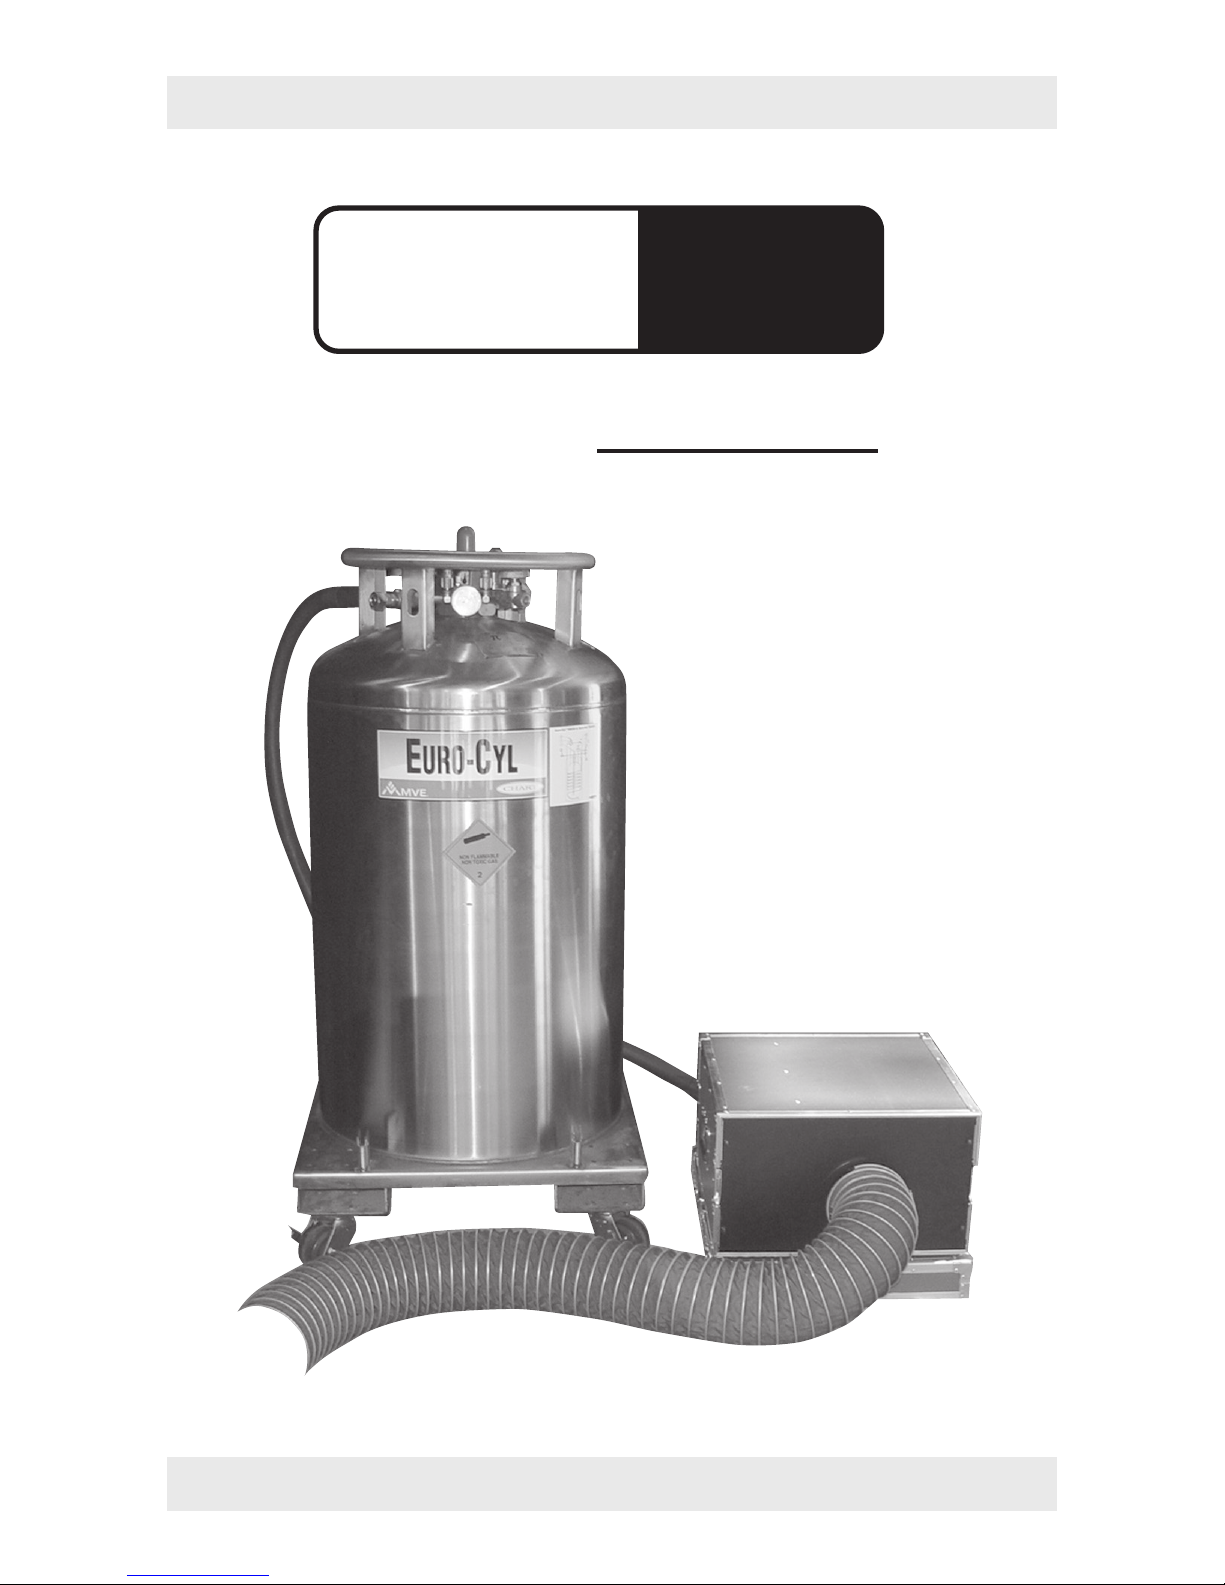
Low fog generator
to be used with low pressure tank
FOG
CRYO
LOW PRESSURE
Page 2

2
Set of Equipment supplied
– 1 Cryo-Fog Low Pressure
– 1 Connecting tube complete with connectors to link the machine
with the CO
2-Tank, 5 m
– 1 Tank lid with Quick coupling
– 1 Operating manual
Please check whether all the products you ordered are supplied.
Original operating manual, version 02/2016
Page 3

3
Content
1. Introduction 4
2. Safety instructions 5
3. Description of the parts 6
4. Liquid 8
4.1 General notes 8
4.2 Changing the fluid container 8
5. Operating the Cryo-Fog 9
5.1 Selecting the location 9
5.2 Putting into operation 9
5.3 Switching the device off 10
5.4 Disconnect the machine from the tank 11
5.5 Control choices 13
5.5.1 Control via DMX 512
5.5.1.1 Adjusting the DMX start address
5.5.1.2 Operation
5.5.2 Control via 0 - 10 Volt (+) DC
5.5.3 Stand alone mode
5.6 Wiring of the connectors 15
6. Cleaning, Care and Maintenance 16
7. Troubleshooting 17
8. Specifications 18
9. Warranty Conditions 19
Page 4

4
1. Introduction
The Cryo-Fog is a powerful 1800 Watt low fog machine.
The Cryo-Fog is a fog generator, a fan and a cooling chamber built into a compact
flightcase (26.5 x 20 x 12 in) with space next to the fog generator to held a 5 L bottle
of fluid.
To produce the low fog, it is necessary to use a low pressure tank (20 - 24 bar) with liquid
CO
2. Do not use tanks or bottles with higher pressure for this machine.
We do not recommend extending the connecting tube from the tank to the machine.
A longer distance means that the liquid CO
2 will be delayed in reaching the cooling
chamber. It will then take the cooling chamber longer to reach the correct temperature
to produce low fog.
The Cryo-Fog can be used as a „normal“ fog machine as well as a low fog machine.
When using it as a normal fog machine, the Cryo-Fog can be controlled via DMX 512
only. A Stand-Alone control or control with analog remote is not possible.
The internal fog generator has a powerful output, producing every desired effect from
a tiny puff of smoke to the thickest fog.
Digital technology makes fine adjustments of the pump possible. The output can be
adjusted from 1 - 99% in steps of 1%.
Thus, the machine can be used in small and large places.
Please read the manual carefully to ensure a proper operation!
Page 5

5
2. Safety instructions
A fog machine is not a toy!
• Make sure, that all persons who work with the tank and the gas are professionals.
Incorrect use can cause the risk of suffocation!
• Carbon dioxide is not toxic but may cause asphyxiation in high concentrations.
• Carbon dioxide is heavier then air. The highest concentration is therefore at floor
level. The maximum allowed concentration is 0.5 Vol% (MAK: 5.000 ppm).
• Ensure adequate ventilation.
• Ensure all national/local regulations for handling and storage of liquid carbon dioxide
(CO
2) are observed.
• Extreme temperatures at the nozzle (hot/cold)! Danger of burning/frostbite.
• Occasionally very hot droplets of fluid may escape when in operation. Never aim at
persons directly and keep a minimum distance of 3 m from the nozzle.
• Never touch the nozzle when in operation. Danger of getting burnt.
• The location of the machine must be non-flammable, non-combustible and not
sensitive to heat. It must be twice as big as the machine.
• Keep a minimum distance of 24 in to all flammable, combustible objects and objects
sensitive to heat.
• Glycol is alcohol and burns with a slightly bluish, almost invisible flame. Never point
the fog at strong sources of ignition like fire or pyrotechnic effects.
• Never open the machine and leave the machine unattended when connected to a
power supply.
• The visibility must be more than 6 ft in rooms where people walk around.
• Do not swallow the fog liquid. Keep it away from children. In case of eye contact,
rinse with a lot of water. Consult a doctor should you accidentally swallow some
fluid.
• Spilled liquid or splashed liquid droplets can cause slip hazard. Mop up the fluid and
dispose of it according to regulations.
• Fog may activate smoke detectors.
Page 6
6
2. Safety instructions
Artificially-made fog can be produced in many different ways. The method used here
to produce fog, with a device which works according to the vaporizer principle, is the
most harmless one.
No case has so far been reported in which a healthy human being has been harmed because of using our device to produce artificial fog. However, this can only be guaranteed
if the professional fog generators are used appropiately, i.e. at the correct vaporization
temperatures as well as with the correctly mixed fog fluid.
We, however, recommend:
People with health problems or problems of the respiratory tract or with an inclination
for allergies should avoid any contact with artificially-made fog.
3. Description of the parts
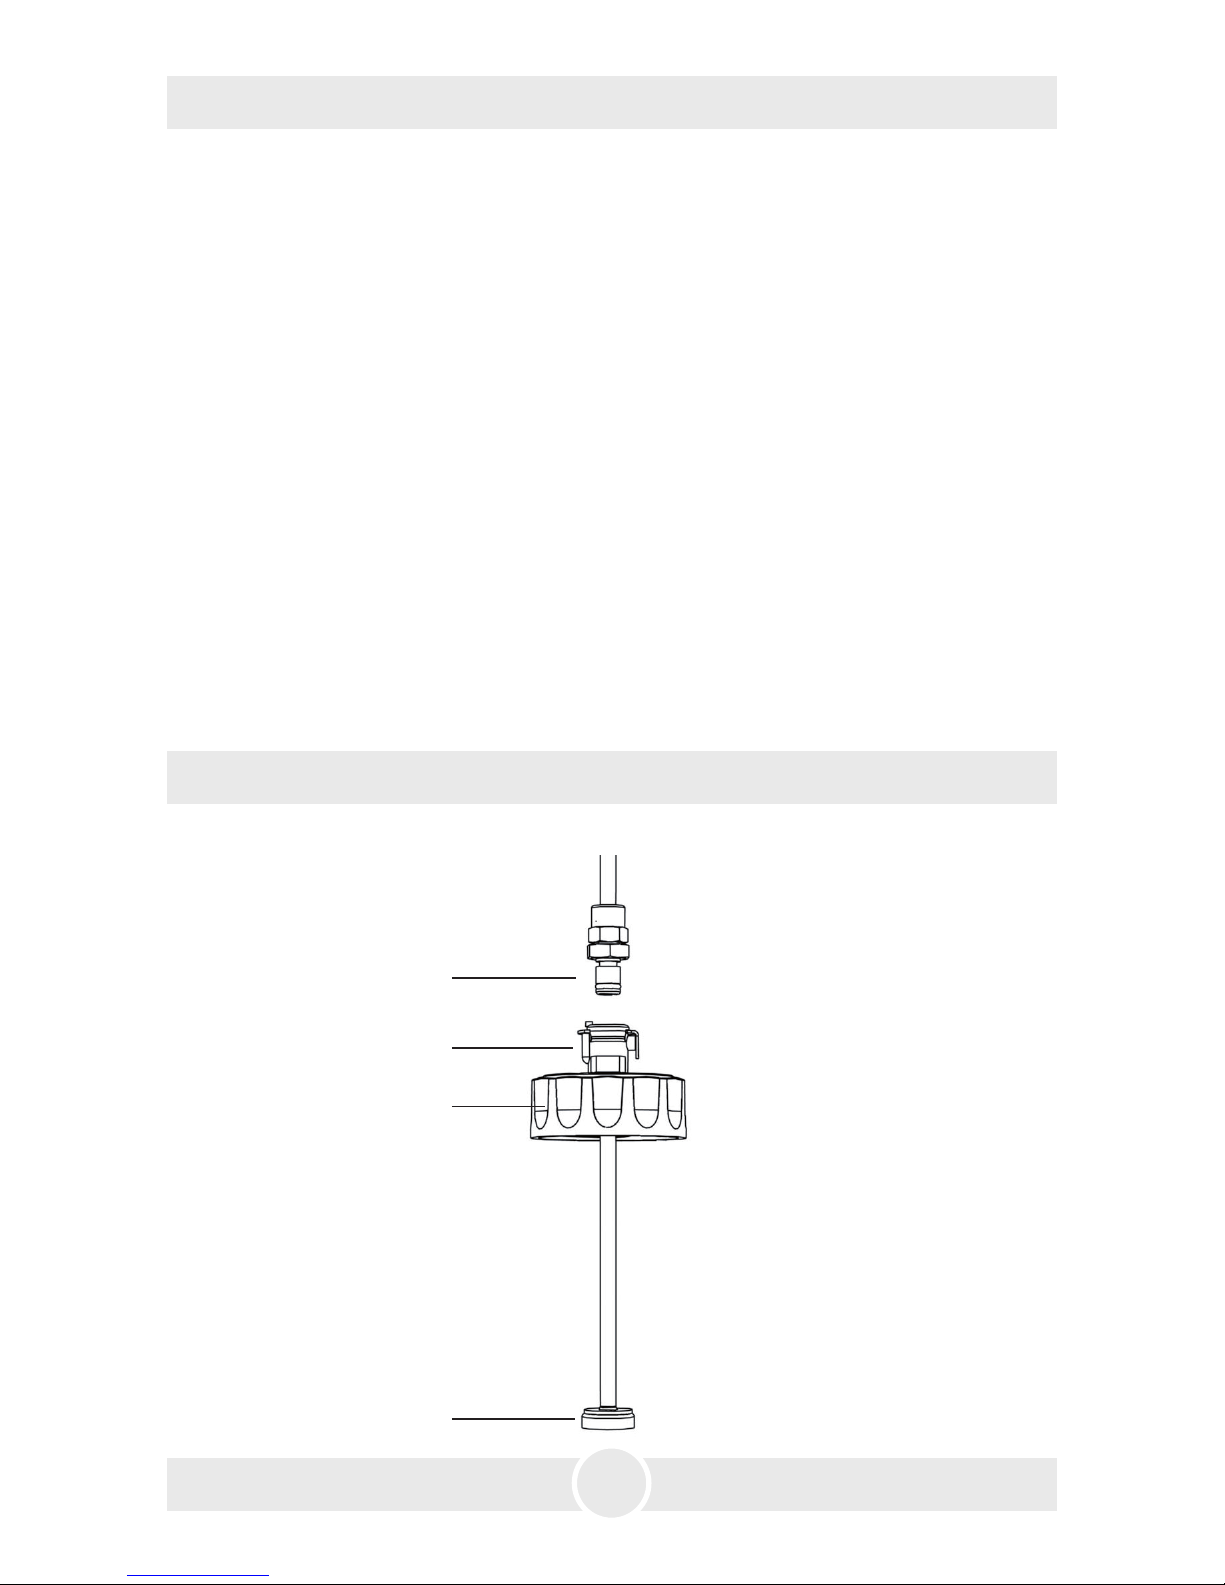
Tank lid
9
11
· Brass coupling
· Brass collar
· Tank lid
· Check valve
10
12
9:
10:
11:
12:
Page 7
7
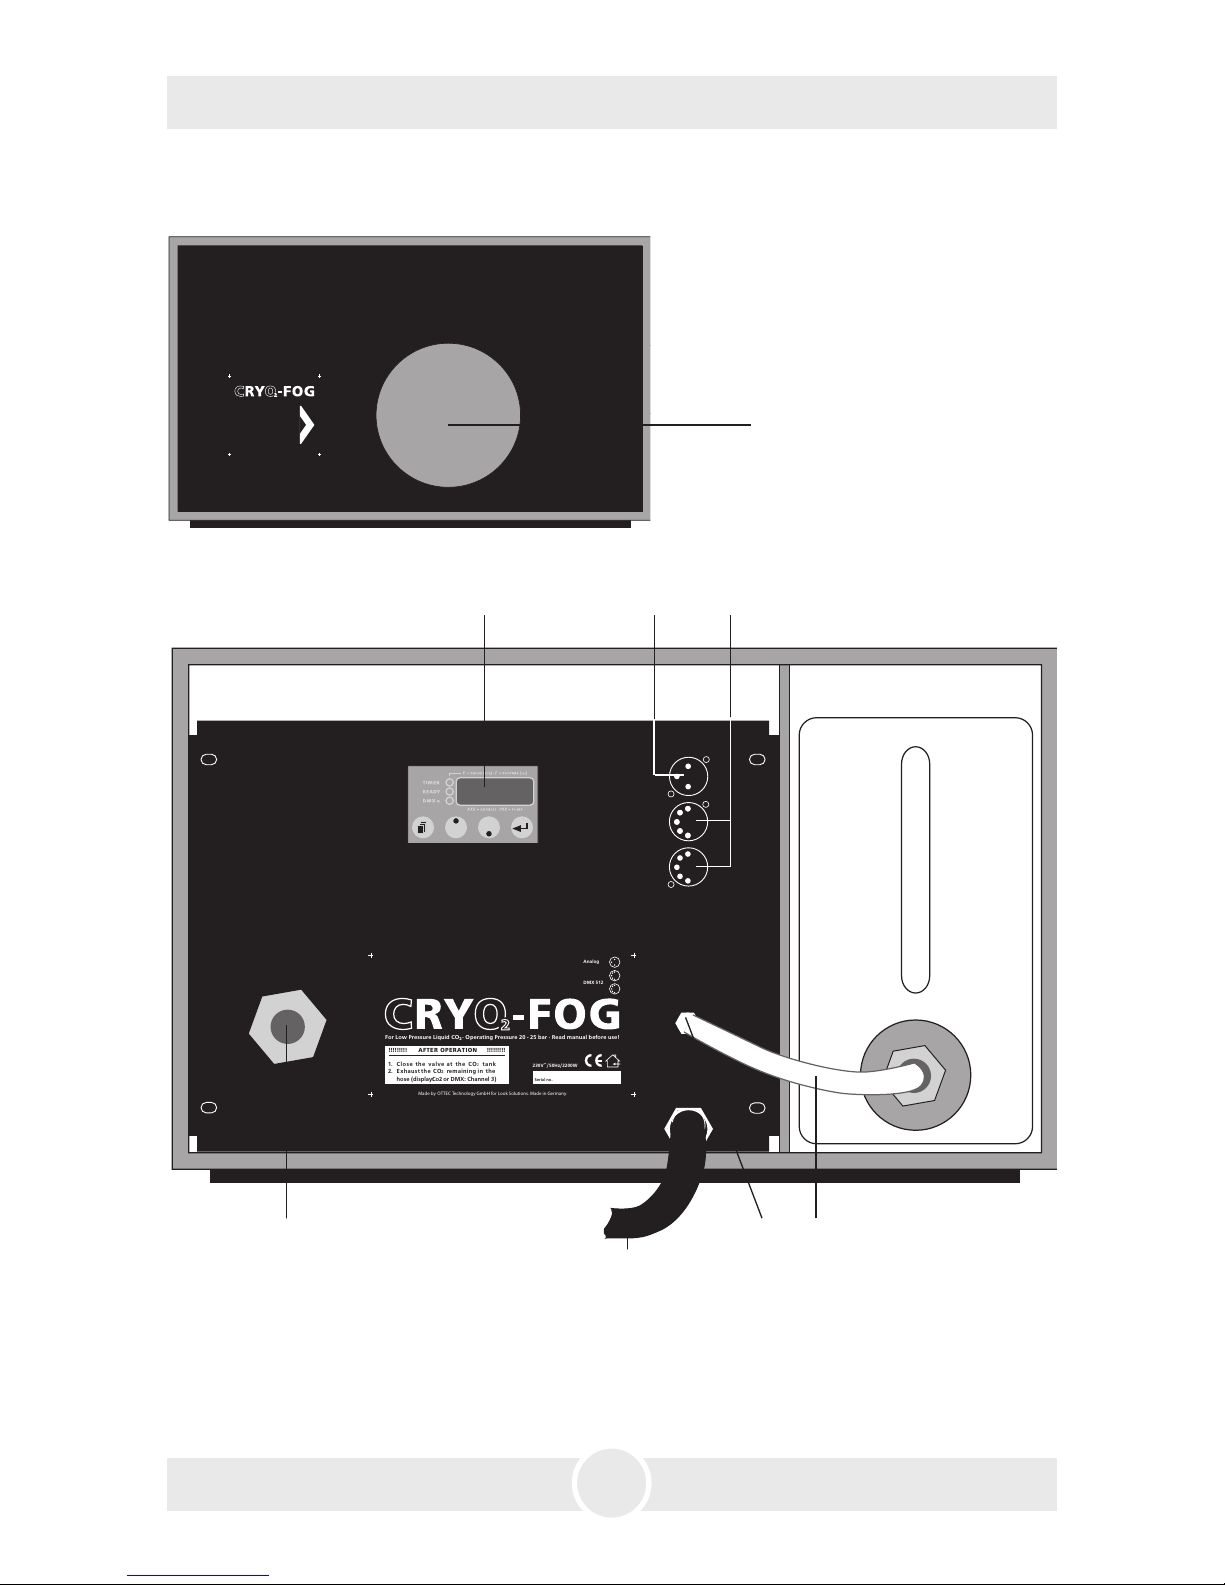
6: · DMX in/out
7: · Control panel for adjusting
the DMX start address and
the output
8: · XLR socket for 0 - 10 V (+) DC
Rear view
Front view
1: · Fog nozzle
2: · Fluid tube
3: · Fluid tube inlet
4: · Main cable
5: · Connector for
liquid CO
2-tube
3. Description of the parts
Extrem temperatures
(hot & cold)
CAUTION!
Do not touch
vapour and nozzle area!
Serial no.
2
For Low Pressure Liquid CO · Operating Pressure 20 - 25 bar · Read manual before use!
Made by OTTEC Technology GmbH for Look Solutions. Made in Germany.
230V~/50Hz/2200W
!!!!!!!!! AFTER OPERATION !!!!!!!!!
1. Close the valve at the CO
2
tank
2. Exhaust the CO
2
remaining in the
hose (display: Co2 or DMX: Channel 3)
Analog
DMX 512
This machine has been designed to be used with
original Look CRYO-FOG-fluid.
Use of other liquids will void the manufacturer's
warranty and can be dangerous to your health.
Never use cleaner or fragrances with this
machine!
23
4
5
687
Page 8

8
4. Liquid
4.2 Changing the fluid container
– Disconnect the fluid tube from the lid by pressing the brass collar [10] and removing
the coupling [9].
– Remove the empty canister from the tank housing.
– Unscrew the tank lid [11] of the empty container and screw it onto the new contai-
ner.
– Place the full container into the tank housing.
– Push the brass coupling [9] into the brass collar [10] until you hear a click. The brass
collar is now locked firmly.
4.1 General notes
The Cryo-Fog can be used with the following Look fog liquids:
For low fog use only the recommended Cryo-Fog Fluid. This is a special, high concentrated and quick disappearing liquid.
For use as a normal fog machine:
Quick-Fog thick, quick disappearing fog liquid
Regular-Fog thick, long lasting fog liquid
Use of liquids other than Look fog fluids will invalidate warranty on parts that have
been in contact with the fluid.
Please note: The vaporizers of our machines does not have to be cleaned! Cleaners,
available on the market, can damage the vaporizer. Use of cleaners will invalidate
warranty.
Please note: After using the Cryo-Fog as a normal fog machine, all Quick- or Regular
fog must be removed from the fluid tube!
Page 9
9
5.1 Selecting the location
The location, in which the Cryo-Fog is to be operated, must
– be dry,
– be free from dusty or polluted air,
– be free from vibrations,
– be a non-flammable place or surface,
– be well-ventilated with fog-free air keeping the ambient operating temperature
between 5° C and 45° C and the relative air humidity below 80%.
5. Operating the Cryo-Fog Low Pressure
5.2 Putting into operation
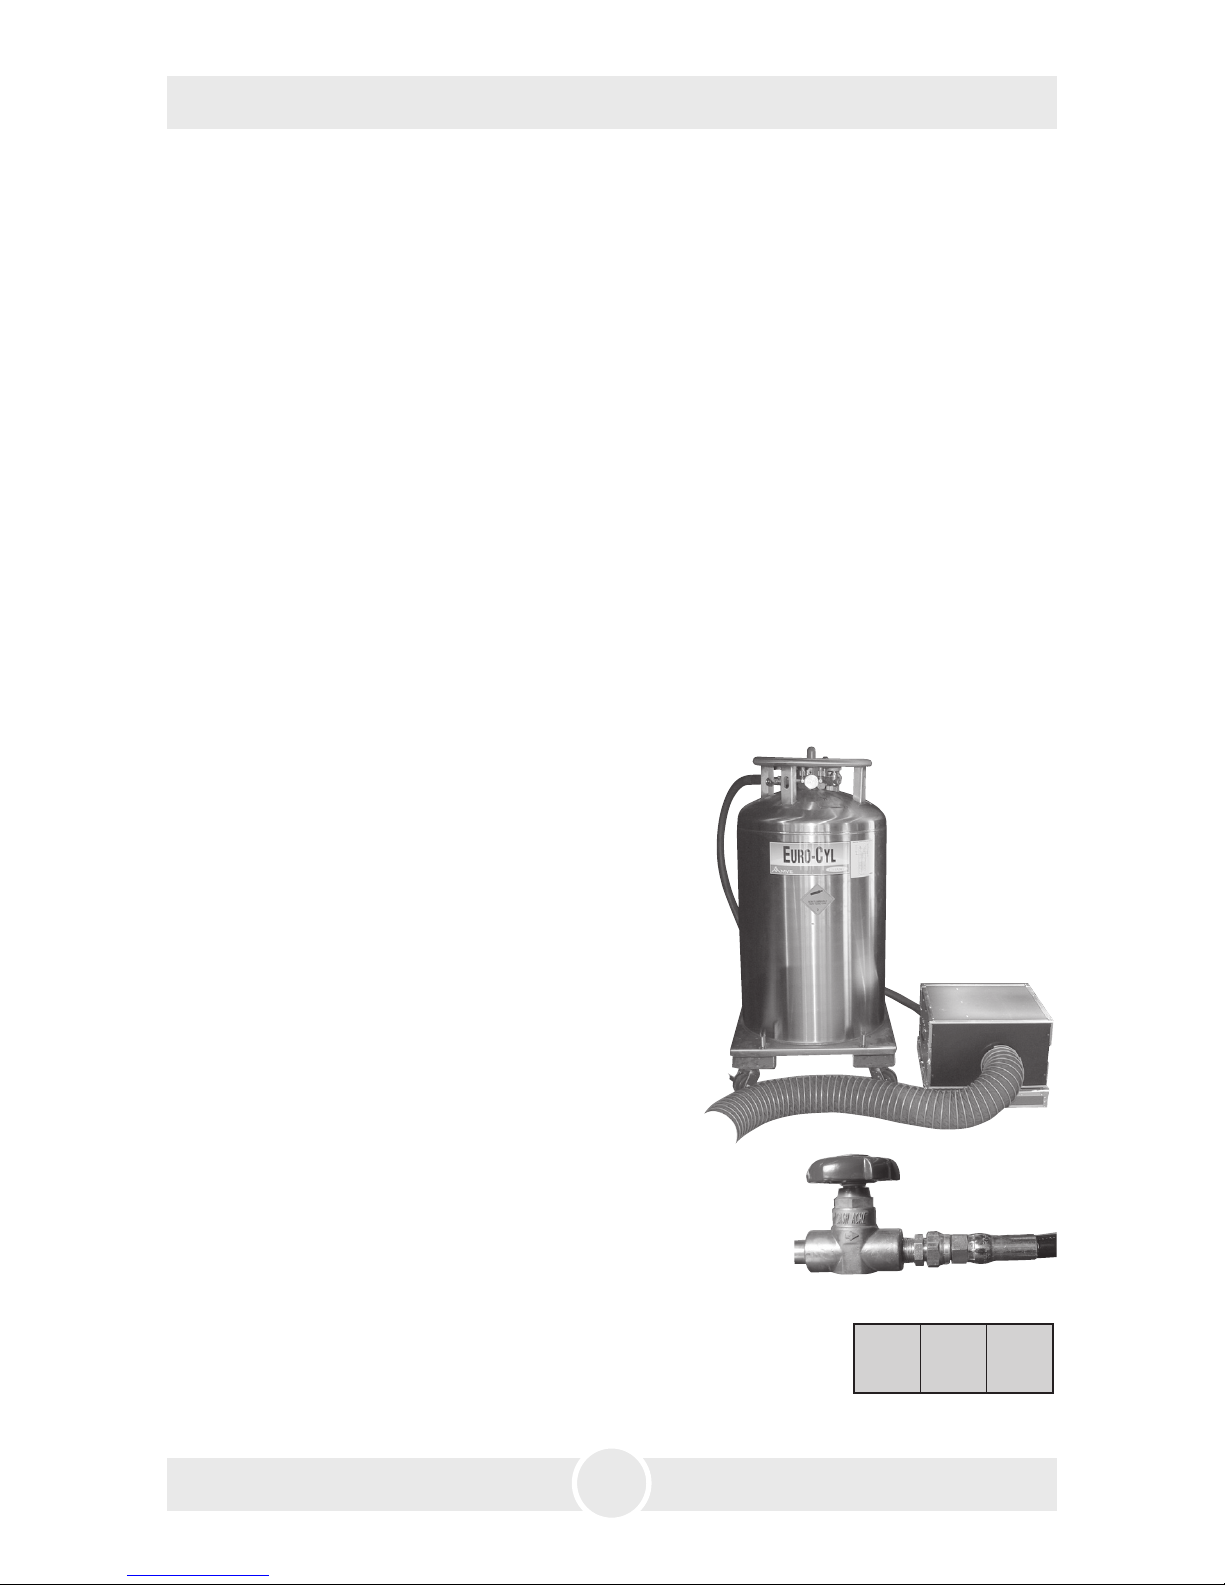
a. Connect the delivered safety tube for liquid CO2
with the liquid valve at the tank.
Make sure that the tank is a low pressure tank
(20 - 24 bar/300 - 350 psi) like the picture shows.
Do not use tanks or bottles with higher pressure
with this machine!
Tighten the connection to make sure that
no gas can escape.
b. Open the liquid valve to exhaust fittings and
connecting tube, then close the valve before
you connect the tube to the machine.
c. Connect the tube to the machine [5].
Avoid dust or dirt particles in the connectors.
d. Open the liquid valve completely.
e. Connect to the mains supply. Make sure the correct
voltage is selected (115 V/60 Hz).
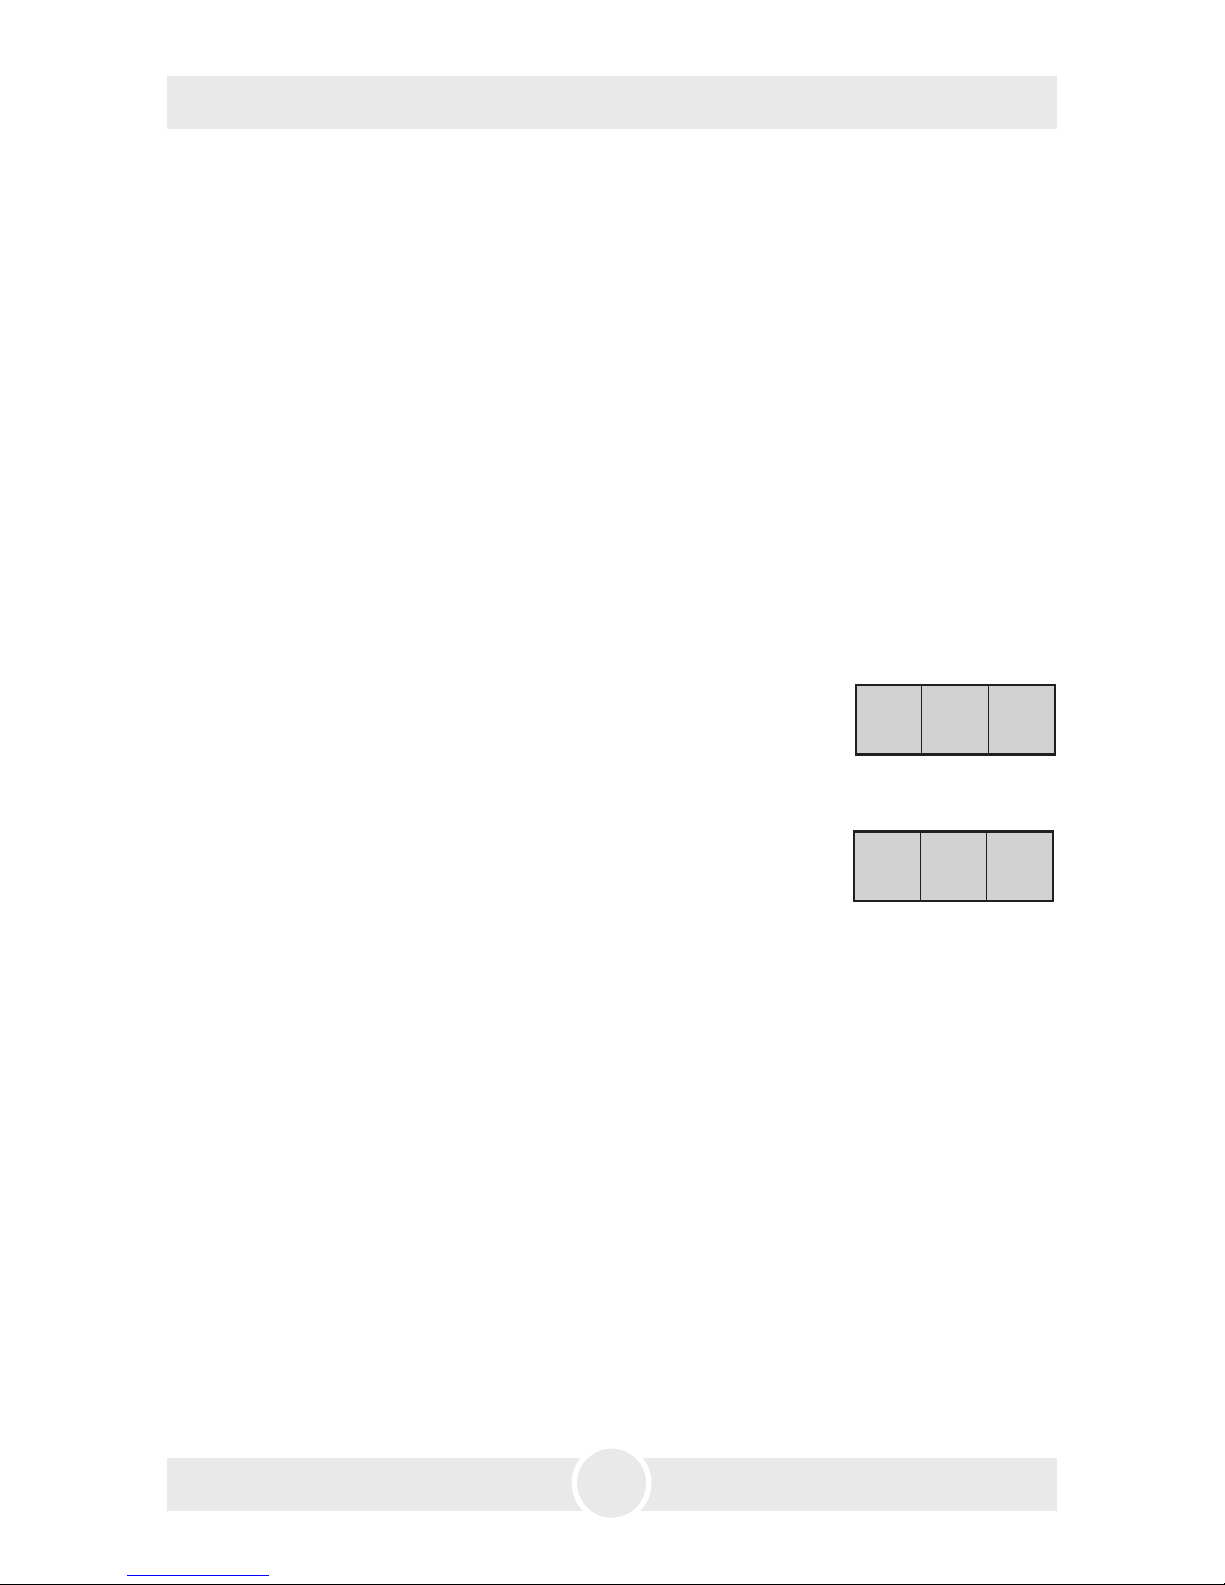
A “P“ and two figures appear on the display.
Please note:
– Avoid dust or dirt particles inside the CO
2-tube
– Always ensure complete purity of all CO
2-connectors and fittings
– Exhaust fittings and connecting tube with CO
2 before connecting to the Cryo-Fog.
P25
Page 10
10
5.3 Switching the device off
a. Press the Mode button [14] til “OFF” appears on the display. After 15 seconds the
machine switches into the post-run-mode automatically.
You can also switch the machine into the post-run-mode within these 15 seconds by
pressing the Enter button [16].
The fan increases to the maximum output to dry the cooling chamber and switch off
automatically after three minutes. During this time lines appear on the LED display
which move from the upper left edge down to the lower right edge.
Then a little red point in the lower right edge of the display appears to show that a
voltage is present.
b. When you switch off the DMX signal, the machine will be switched into the post-
run-mode automatically after 15 seconds.
Note:
Please make sure that the Cryo-Fog is not disconnected too early to allow the fan
to run until the cooling chamber is dry.
.
5. Operating the Cryo-Fog Low Pressure
_
_
_
f. After a warm up time of approx. 7 minutes the machine is ready to start. The green
Ready-LED [20] blinks when the working temperature is reached. As soon as the
final temperature is reached, the LED illuminates permanently.
The machine is now ready to use. For adjustments please see chapter 5.5.
Page 11

11
5.4 Disconnect the machine from the tank
Important:
Before you disconnect the tube, the CO
2 in the tube must ALWAYS be removed!
a. Close the liquid valve at the CO
2-tank. Make sure that the valve is closed properly.
b. Remove the CO
2 completely from the tube by doing the following:
At operation via DMX:
The Cryo-Fog needs three channels on your desk (first channel = Pump, second
channel = Fan, third channel = Cooling).
Run the cooling channel (third channel) at full until no noise can be heard from the
machine - at a minimum for one minute.
Put the fader of your desk back into position “0“ and switch off the machine or your
desk.
At Stand-Alone mode or operating via analog XLR-remote:
Press the Mode button [14] until „Co2“ appears at the display.
Press the Enter button [16] once. The fan starts to run automatically and three se-
conds later the valve will open. The CO
2 is now expelled.
After all CO
2 is expelled, press the Mode button again to close the valve. Switch off
the machine as described (point 5.3).
5. Operating the Cryo-Fog Low Pressure
Page 12
12
5. Operating the Cryo-Fog Low Pressure
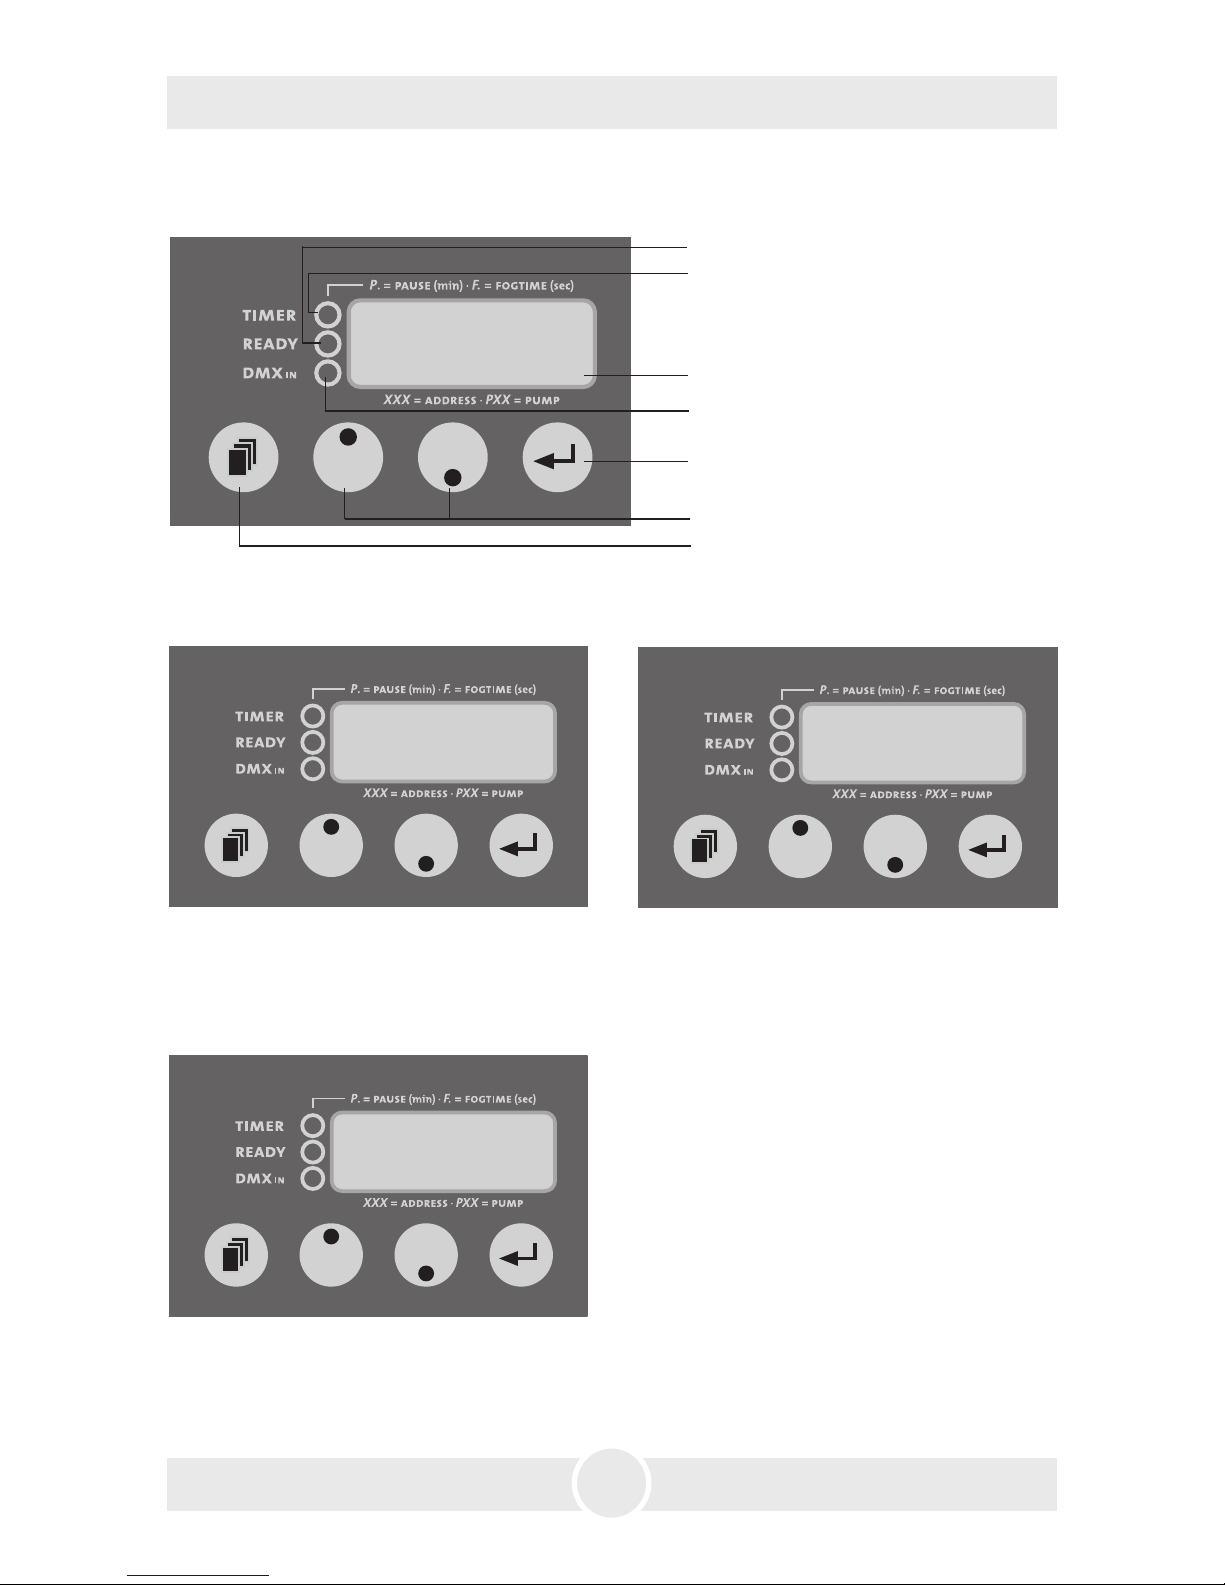
275
OFF
P15
Menue
Fig. 1:
Display shown for adjusting the pump output
Fig. 2: Display shown for adjusting the DMX
start address
Fig. 4: Display shown for switching off the
device
14: Mode button
15: Up/Down buttons
16: Enter button
18: Display
17: DMX-LED, yellow
20: Ready-LED, green
19: Cooling-ready-LED, red
Co2
Fig. 3:
Display shown when the CO2 is expelled
Page 13

13
5. Operating the Cryo-Fog Low Pressure
5.5 Control choices
You may control the Cryo-Fog externally through the XLR sockets [6 and 8].
Please note: DMX takes proirity. That means: when the machine is controlled via DMX
512 this data takes priority over 0 - 10 V (+) DC and Stand-alone operation.
5.5.1 Control via DMX 512
Connect the Cryo-Fog to a DMX desk using the 5pin XLR socket [8] on the back of the
machine. As soon as the machine receives a correct DMX signal, the yello DMX-LED
[17] is illuminated.
a. Press the Mode button [14] at the control panel, until three figures appear on the
LED display.
b. Adjust the requested start address by pressing the Up/Down buttons [15].
c. Save the start address by pressing the Enter button [16] once. The start address will
also be saved when you disconnect the machine from the mains supply.
Please note: The Cryo-Fog needs three channels on your desk (first channel = Pump,
second channel = Fan, third channel = Cooling (CO
2)).
5.5.1.1 Adjusting the DMX start address
5.5.1.2 Operating
When operating via DMX, the fan run automatically on minimum as soon as the pump
or cooling channel is opened.
a. Put the cannel for the cooling to the maximum (it depends on the adjusted DMX
start address which channel this will be. The channel for the cooling is always the
next but one channel from the DMX start address. For example: Start address and
pump = 350, fan = 351, cooling = 352).
The fan starts to run and after three seconds the CO
2-valve opens. The CO2 flows
into the cooling chamber. As soon as the chamber is cold enough, the red LED lights
[19] at the display.
Please note: When first started there is a small delay until the red LED is lit. This is be-
cause the tube from the tank to the machine has to be filled with liquid CO
2. This is
also the reason why the tube should not be extended, because this will cause delay
in operation.
b. Turn the channel for the pump on to start the fogging process.
Page 14

14
5. Operating the Cryo-Fog Low Pressure
5.5.2 Control via 0 - 10 Volt (+) DC
a. Connect the cable from the desk or the cable remote into the 3pin XLR socket [8]
at the back of the machine.
b. Switch the XLR remote on. The cooling process starts as soon as the cooling chamber
is cold enough and the red LED [19] illuminates.
c. The knob on the cable remote or the fader on the analog desk will control the level
of the pump.
The machine will start the fogging process as soon as the cooling chamber is cold
enough.
Connect the Cryo-Fog to an analog desk or to a cable remote (available as an optional
extra), using the 3pin XLR socket [8] at the back of the machine.
The fan will be adjusted automatically in this mode.
Please note: Although the channel for the pump is fully opened, the machine will not
start the fogging process until the cooling chamber has reached the right cooling
temperature.
c. If necessary, also the fan can now be regulated via the desk.
Important: If you activate the pump first - before you start the cooling process - the
machine will produce normal, warm fog that goes up. If you start the cooling process
afterwards, the machine will continue to fog, although the cooling chamber is not
cold enough!
The DMX mode is the only modewhere the Cryo-Fog can be used as a normal fog machine. In this case, use only the first two channels for pump and fan and leave the third
one in position “0“. Please take a look at the liquid recommendation (see 4.1)!
5.5.3 Stand alone mode
In the Stand alone mode the control of the pump must be adjusted at the machine.
The fan will be adjusted automatically.
a. Press the Mode button [14] until a “P“ and two figures appear on the display [18].
Adjust the pump outputwith the Up/Down buttons [15].
Page 15

15
5.6 Wiring of the connectors
5pol XLR (DMX):
Pin 1 = Ground, Pin 2 = DMX –, Pin 3 = DMX +, Pin 4 u. 5 = nc
3pol XLR (analog):
Pin 1 = Ground, Pin 2 = 0-10 V + DC in, Pin 3 = 12 V + DC out, max. 50 mA
5. Operating the Cryo-Fog Low Pressure
b. Press the Enter button [16] once. The fan start to run and after approx. three seconds
the valve for the CO
2 opens. The machine now starts cooling the chamber but will
not start to fog. As soon as the cooling chamber is cold enough, the red LED [19]
illuminates and the fogging process starts.
The machine will produce low fog at the adjusted output until the Enter button [16]
is pressed again.
The pump can be adjusted during the fogging process by pressing the Up/Down
buttons [15].
Page 16

16
6. Cleaning, Care and Maintenance
– Avoid dust or dirt particles inside the CO2-tube.
– Always ensure complete purity of all CO
2-connectors and fittings.
– Exhaust fittings and connecting tube with CO
2 before connecting to the Cryo-Fog.
– Take care that the machine can not get overheated.
– Do not run the Cryo-Fog without any liquid, as the pump will run dry.
– Wipe up spilled fluid immediately. Moisture - also fluid - can destroy the electric parts
of the machine.
– If the Cryo-Fog High Pressure is been used with a tube, there will be some residues
in the tube and also the machine after a while.
Please disconnect the tube from the duct adaptor from time to time and wipe the
machines inside with an absorbant cloth while the machine is disconnected from the
mains.
– Check the state of the air valve filter from time to time and clean or replace it when
necessary. Always replace the whole fluid canister rather than pouring new fluid
into the new tank. This reduces the chances of the machine clogging up.
– If the Cryo-Fog is used for a fixed installation, make 100% sure that permanent
fog-free air supply for the unit is guaranteed. Cooling air with too high fog concentration (very often in Clubs or Discos) can condense inside the machine and cause
moisture damage.
– For cleaning the surface of the device use a suitable, solvent-free cleaner.
– Please note: The vaporizers of our machines does not have to be cleaned! Cleaners,
available on the market, can damage the vaporizer. Use of cleaners will invalidate
warranty.
Page 17
17
7. Troubleshooting
The machine does not produce low fog
• Cooling chamber will not get cool enough
– CO
2 tank is empty or the pressure is too low
– CO
2 tube is too long or too warm (no liquid CO2 reach the machine)
The machine does not fog
– Check external control signals
– Check mains supply
– Check fluid tank (empty?)
– Check for correct connections at the fluid bottle
– Check for fluid in the fluid tube
– Check if fluid filter is clogged
– Check that pump setting on the machine is > 1
The machine fogs uncontrollably
– Check mains supply
– Check unit for moisture (moisture inside the machine, especially on the PCB can cause
fogging).
The machine switches off suddenly
• The “temperature cutout“ has switched off due to overheating.
– Remove external heat source (for instance projector shining right onto the housing)
and/or make sure sufficient fresh air supply. After 15 to 30 minutes the unit should
switch back to “on“ again.
Loud drouning sound during fogging
• The pump is running dry. Avoid this absolutely!
– Refill (or better: replace) fluid bottle
– Double check connection fluid tube and fluid bottle.
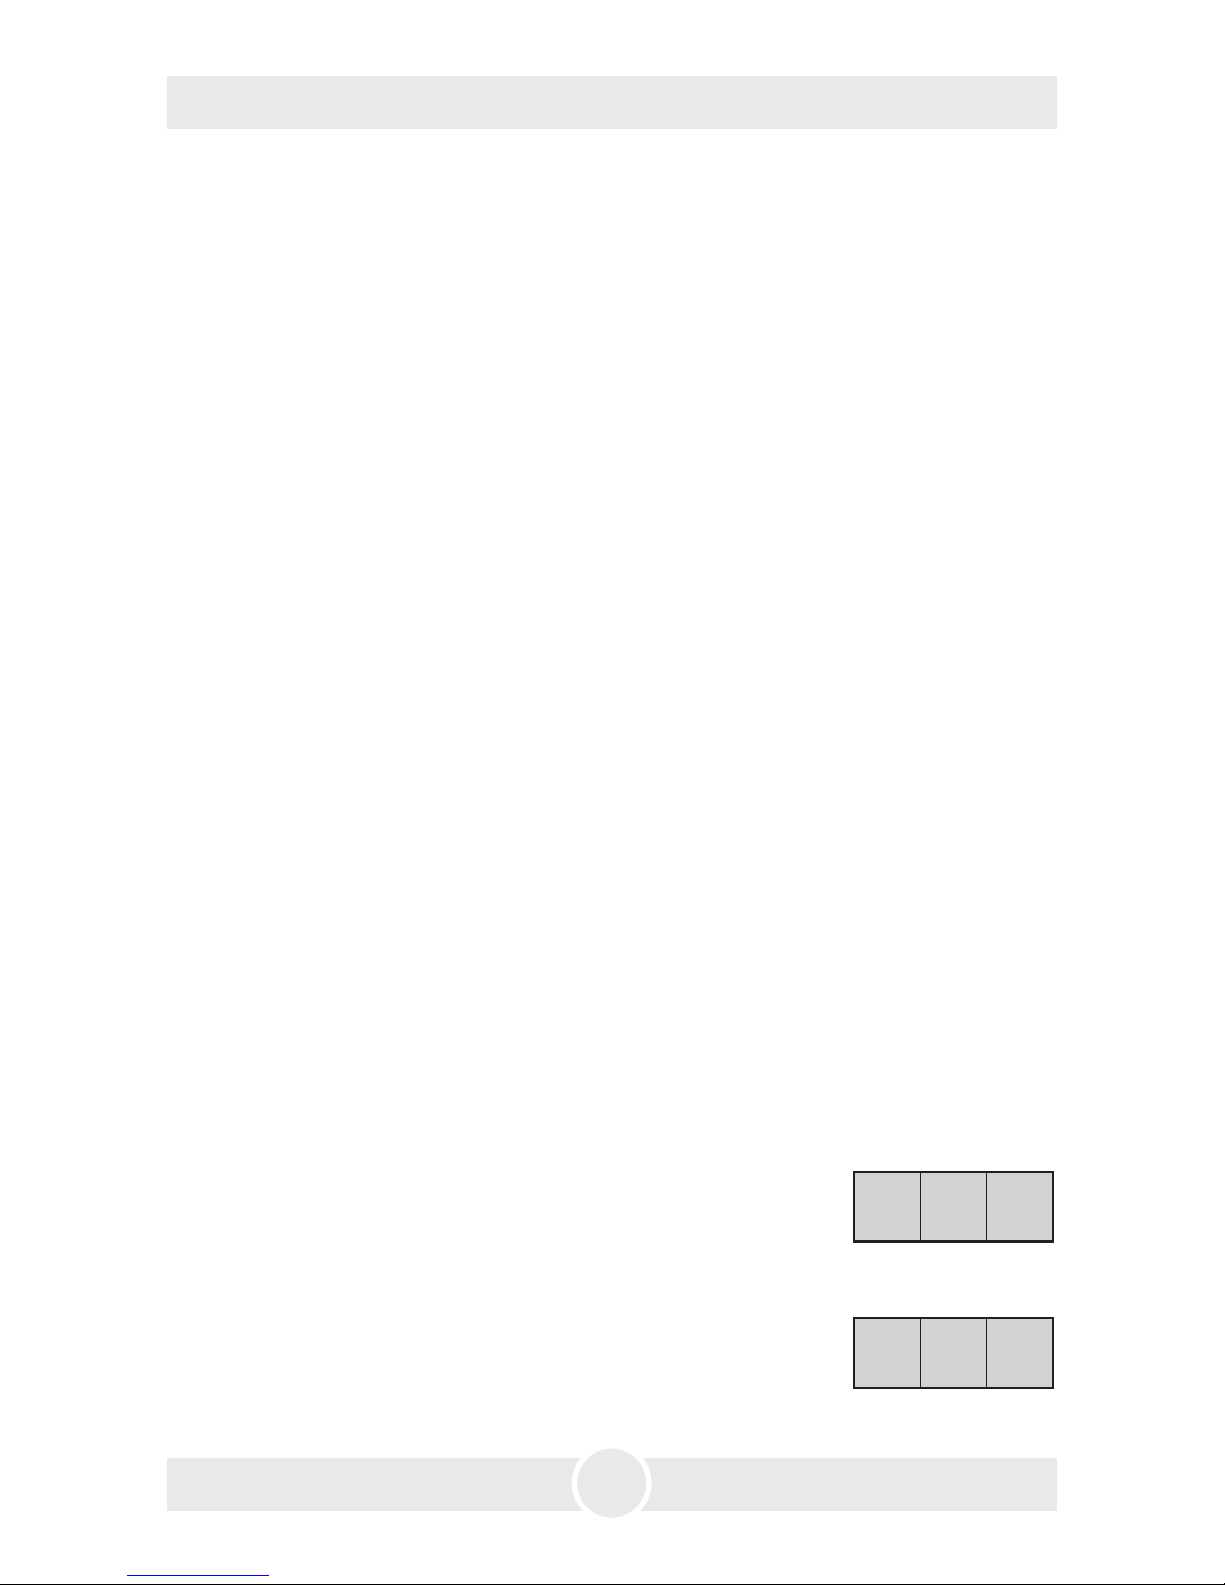
E-4 appears on the LED Display
• The machine is getting too hot. The heating switches off
and the machine cools down.
Solution: Disconnect the machine from the main supply
for a moment and then re-connect it.
E-1/E-2/E-3 appears on the Display
• Please send the machine to the servoce-station or your local dealer.
E–4
E–1
Page 18

18
8. Specifications
Procedure Vaporizing fog generator +
cooling system
Power requirement 1400 Watt
Voltage 115 V/ 60 Hz
Warm up time approx. 7 min.
Fluid tank capacity 5 Liter
Fluid consumption at max. output 100 ml/min
at 50% output 40 ml/min
Liquid CO
2
consumption
at max. output 4.4 lb/min.
Fog output adjustable in 99 steps, steps of 1%
Fogging time continuous
Control DMX 512
0 - 10 V analog
Stand alone mode
Temperature control Microprocessor controlled
Overheating protection Heater block/Thermostat
Pump/Thermal switch
Dimensions (L xW x H) 26.5 x 20 x 12 in
Weight without canister 62 lbs
Manufactured for
Look Solutions - Fog machines made in Germany · Bünteweg 33 · DE-30989 Gehrden
Page 19

19
9. Warranty conditions
For the low fog machine Cryo-Fog Look‘ warranty is:
1. Free of charge, subject to the following conditions (No. 2 - 6) we will repair any defect or fault
in the unit if it is caused by a proven factory fault and has been advised immediately after
identification and within 12 months of delivery to the end user. Insignificant deviations of the
regular production quality does not guarantee replacement rights, nor do faults or defects
caused by water, wrong fog fluid, by generally abnormal environment conditions or Force
Majeure.
2. Warranty Service will be done in the following way: Faulty parts will be repaired or replaced
(our choice) with correct parts. Faulty units have to be returned to us or our service centres
or to be sent to us or our service centres at customer‘s expense. The invoice and/or receipt
showing the purchase date and the serial number has to come with the faulty unit, otherwise
the repair will not be covered under warranty. Replaced parts become our property.
3. The customer loses all rights for warranty services if any repairs or adjustments are done to the
units by unauthorized persons and/or if spare parts are used which are not approved by us.
The right of warranty service is also lost if liquids/fluids other than the original Look fog fluids
have been used or if units are sent to us with full fluid bottles. Also non compliance with the
instructions in this manual or mistakes by incorrect handling/treating of the machine will lead
to a loss of warranty and also any faults and damages caused by undue force.
4. Any freight costs arrising in connection with the warranty services have to be born by the
customer.
5. Warranty services do not cause an extension of the warranty time or the start of a new warranty
time. The warranty for replaced parts ends with the guarantee time of the whole unit.
6. We may, at our opinion, replace the machine rather than repair it.
7. Further claims, especially for damages, losses etc. outside the unit are excluded.
Other guarantee regulations may be valid outside the USA. Please check with your dealer!
If you should send the unit for service, do not forget to remove any liquid from the fluid
bottle.
For warranty service in North America contact:
Look Solutions USA Ltd.
1-800-426-4189
[email protected]
Page 20

20
a Look Solutions product
 Loading...