

Page 1
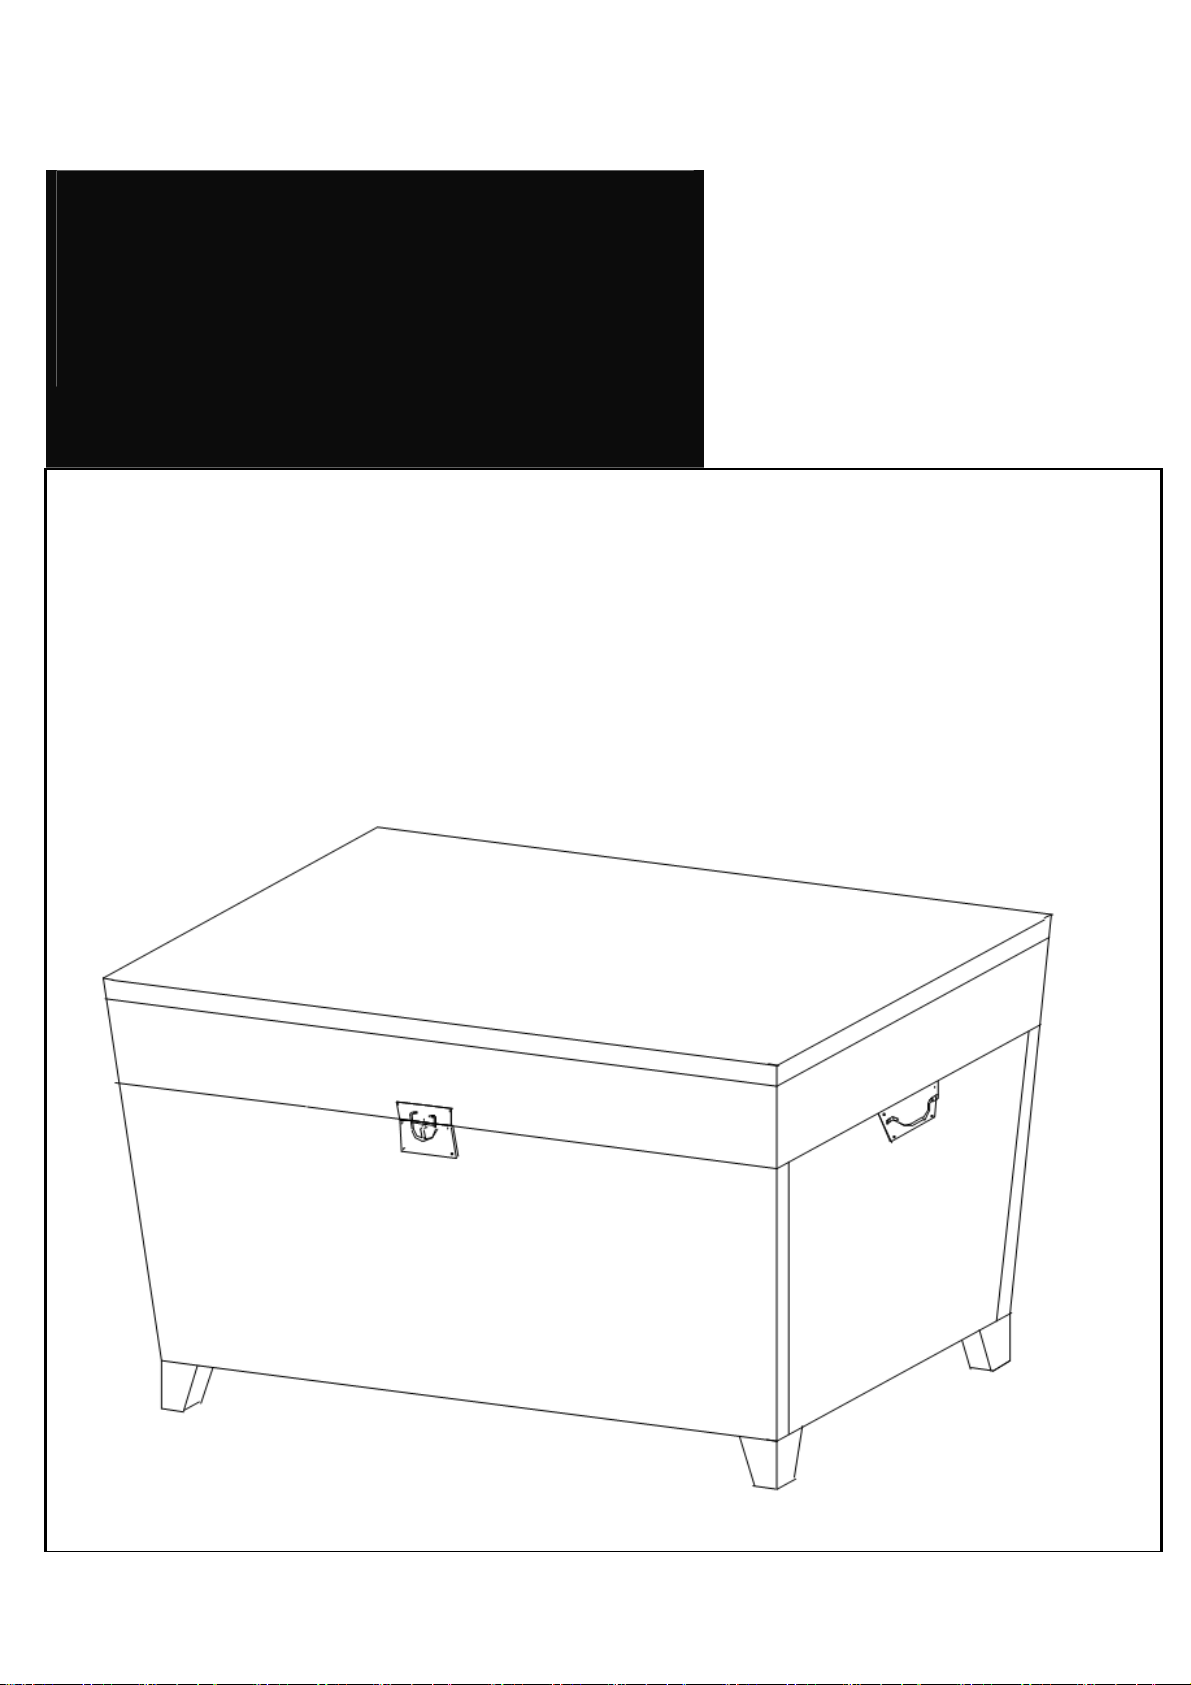
Assembly Instructions
Espresso Cocktail Table
Max Top Load 80 lbs.
Max Load Inside the Trunk 100 lbs.
Page 2
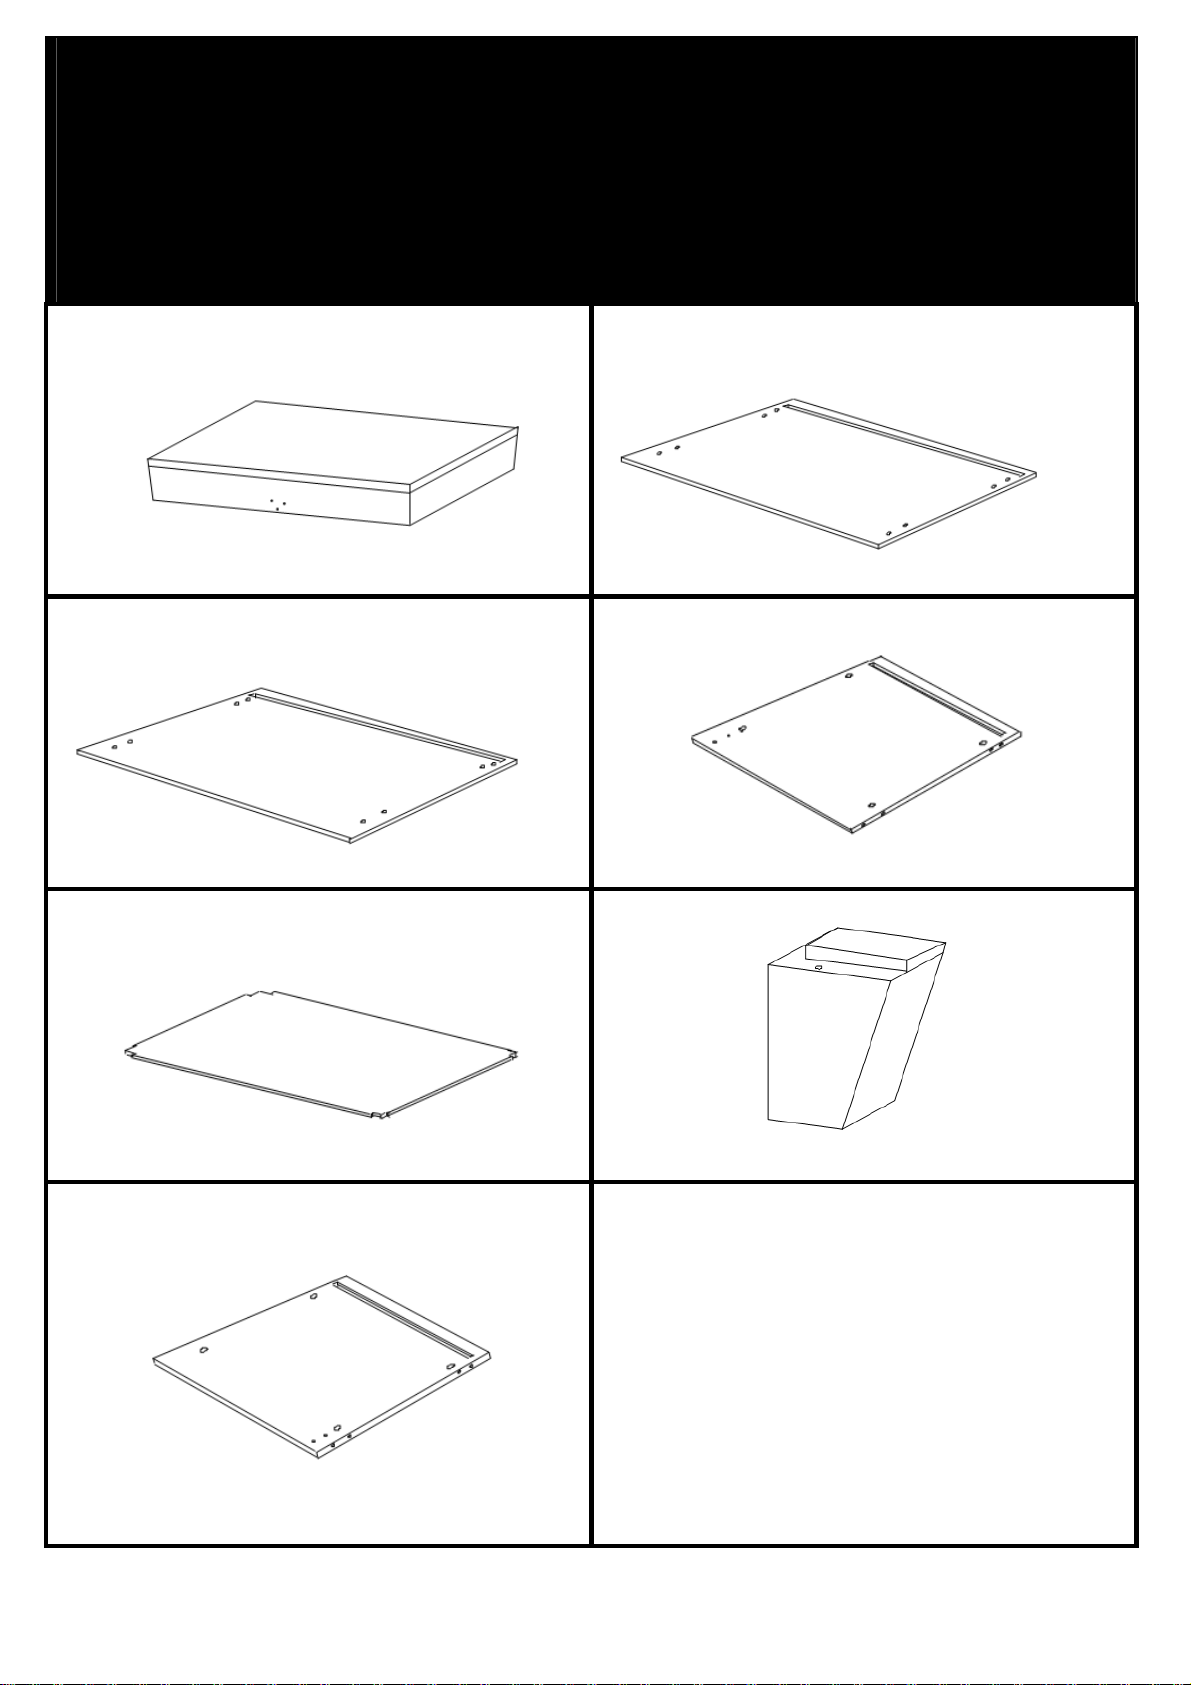
Espresso Cocktail Table
Parts List
Please review all parts and hardware before disposing of any packaging.
Call Customer Service if missing hardware. Do not return to store/retailer.
Using a screw that is too long will cause damage. Before beginning assembly,
separate each type of screw. Carefully study the screw diagrams below.
A
Top
C
Back Panel
1 PC
1 PC
B
Front Panel
D
Left Side Panel
1 PC
1 PC
E
Bottom Panel
G
1 PC
1 PC
F
4 PCS
Leg
Right Side Panel
Page 3
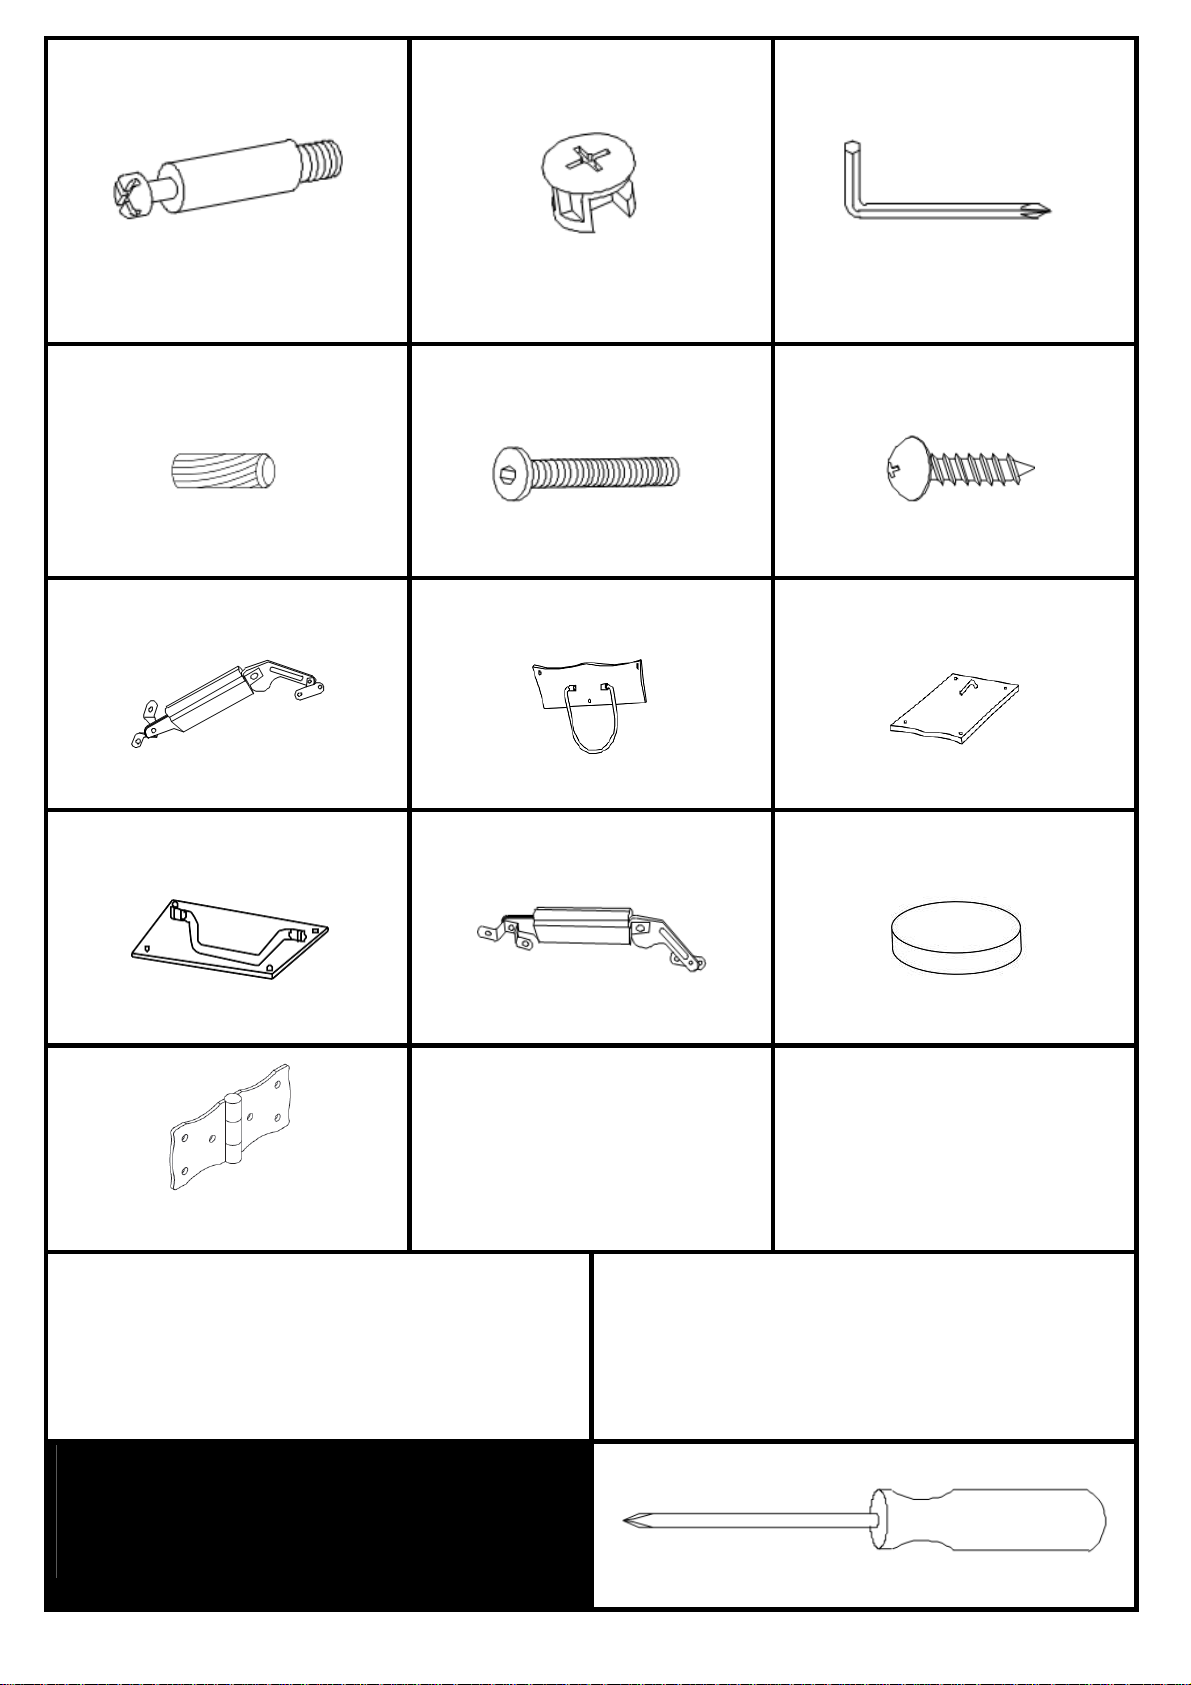
H
8 PCS
I
8 PCS
J
1 PC
Small Cam Screw
ϕ6.8 x 36mm
K
8 PCS
Dowel ϕ8 x 30mm
N
1 PC
Left-Support
Small Cam Lock
ϕ15 x 12mm
L
Bolt ϕ ¼” x 2 ¾”
O
Handle-A
8 PCS
1 PC
Wrench
M
Screw ϕ 3.5 x 16mm
P
Handle-B
35 PCS
1 PC
Q
2 PCS
R
Handle
T
2 PCS
Right Support
Hinge
Care and Cleaning Instructions:
Before using, wipe with a clean dry cloth.
Periodically apply furniture wax to renew
the finish. Avoid rubbing or scratching the
surface with rough or abrasive objects.
1 PC
S
Sponge Cushion
10 PCS
Assembly Tool Required
No.2 Phillips Screwdriver
Page 4
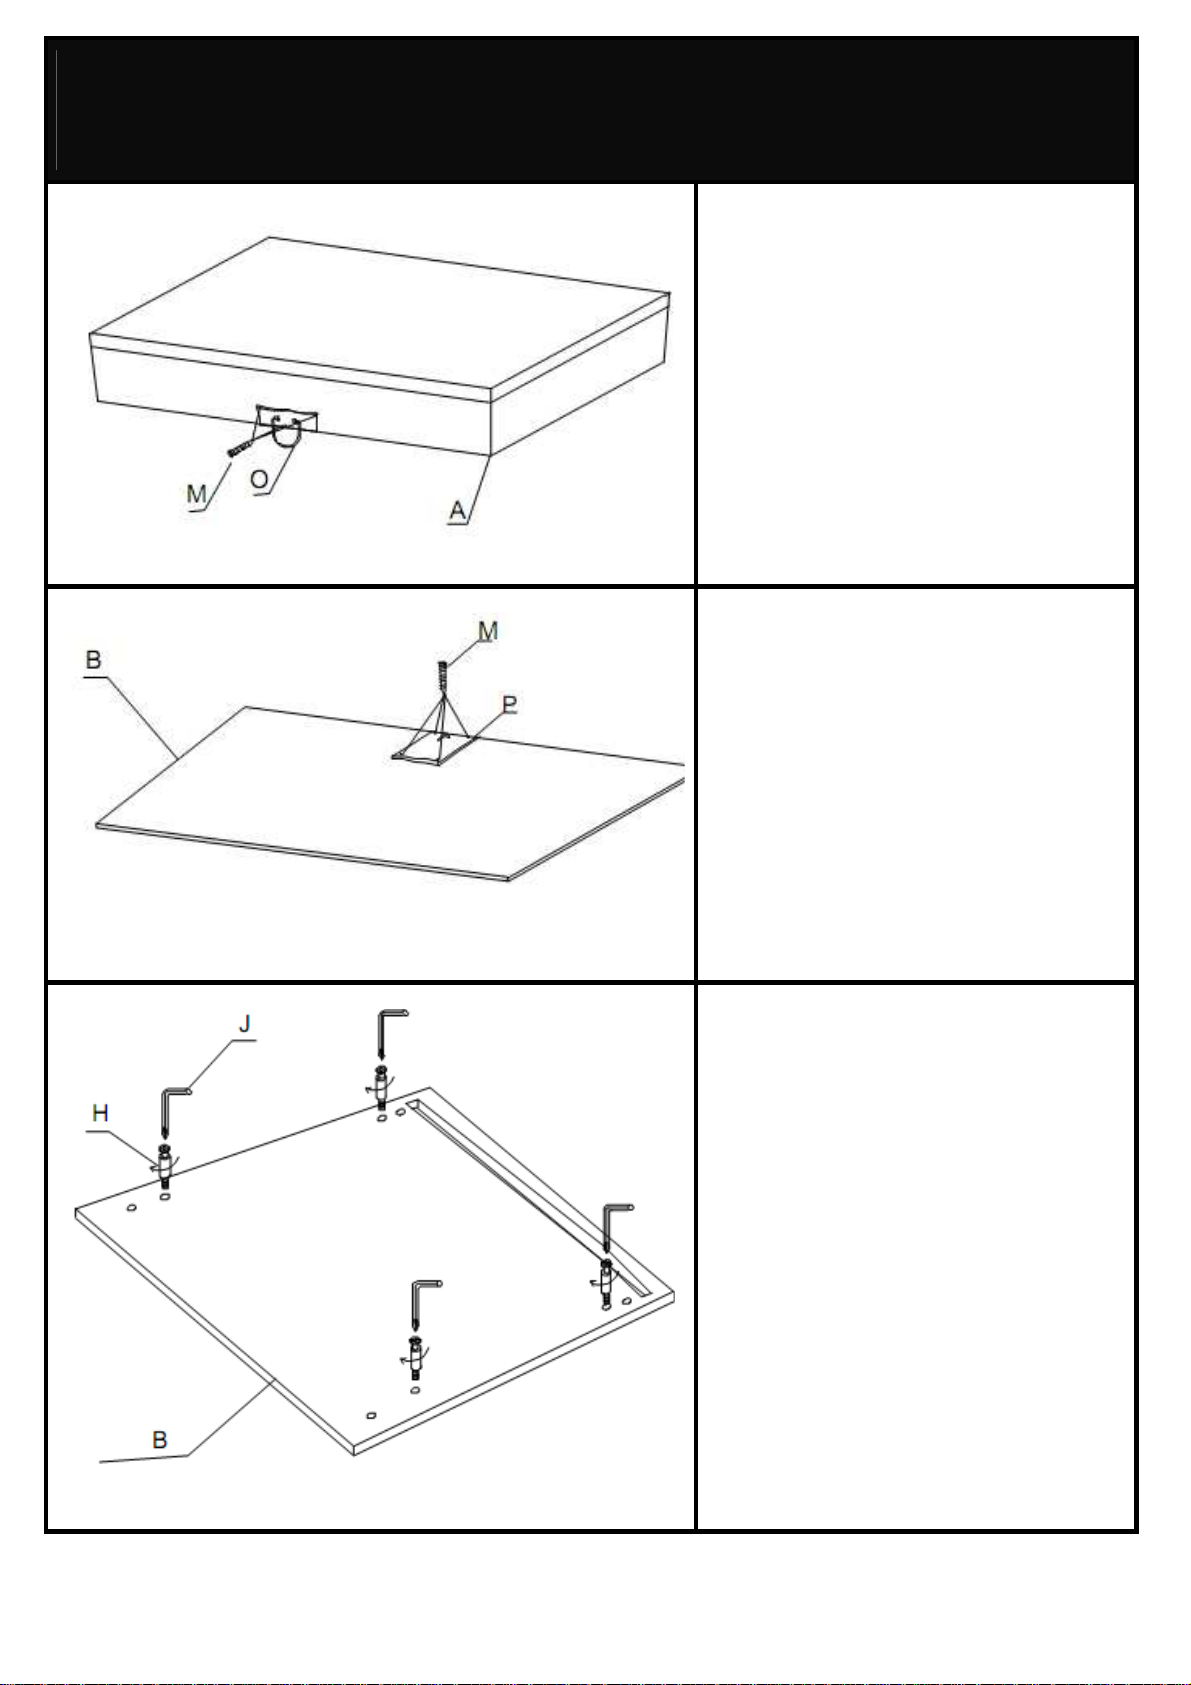
Espresso Cocktail Table
Assembly Instructions
PLEASE DO NOT OVER-TIGHTEN
CAMBOLTS. PLEASE STOP WHEN
YOU FEEL TIGHT
Step 1:
Put all parts on a soft surface
to prevent scratches.
Attach handle-A (O) to the
top (A) using screws (M) and
tighten with Phillips
screwdriver as shown.
Step 2:
Attach handle-B (P) to front
panel (B) using screws (M)
and tighten with Phillips
screwdriver as shown.
Step 3:
Screw small cam screws (H)
into front panel (B) as shown.
Page 5
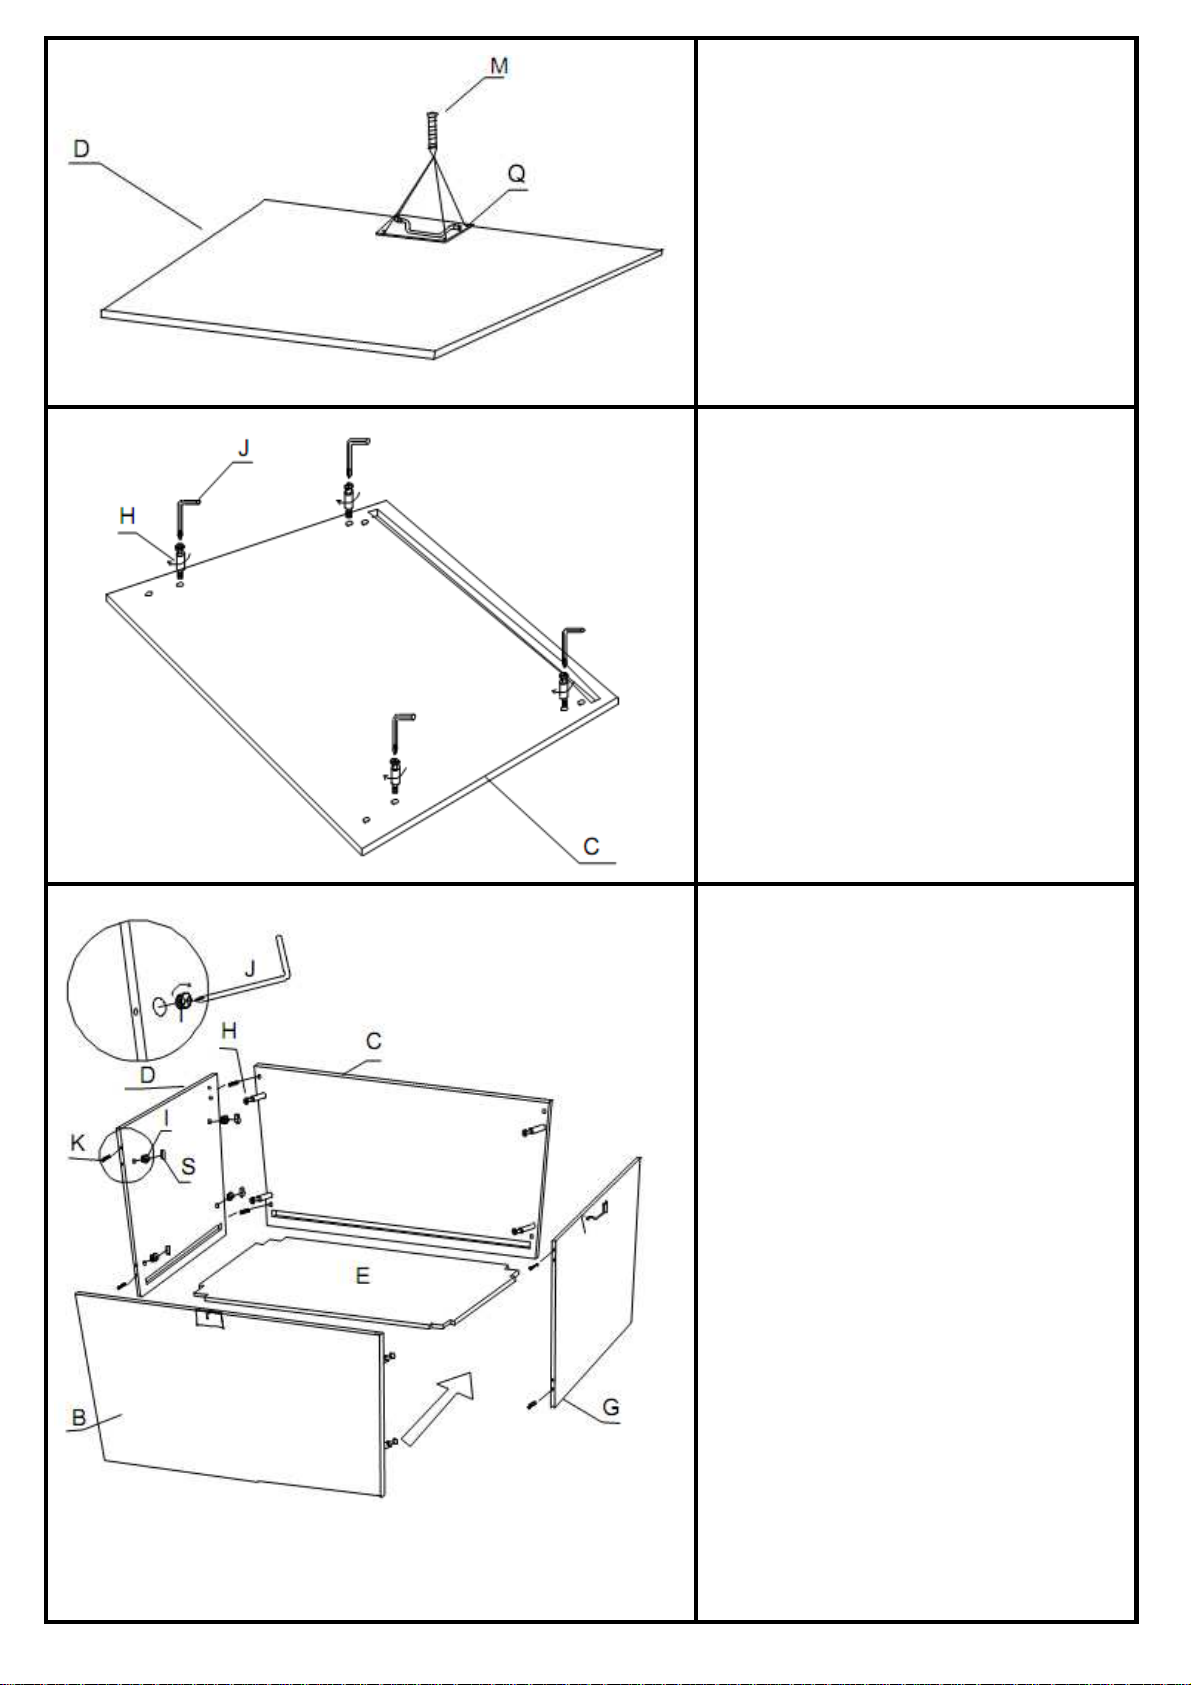
Step 4:
Attach handle (Q) to left side
panel (D) and right side panel
(G) using screws (M) and
tighten with phillips
screwdriver as shown.
Step 5:
Screw small cam screws (H)
into back panel (C) as shown.
Step 6:
Insert dowels (K) into left
side panel (D) and right side
panel (G) as shown.
Assemble left side panel (D),
right side panel (G), front
panel (B), back panel (C) and
bottom panel (E) together
using small cam screws (H),
small cam locks (I), dowels
(K) and sponge cushions (S)
as shown.
Make sure the edges of
bottom panel (E) are inserted
into the grooves of all panels.
Page 6
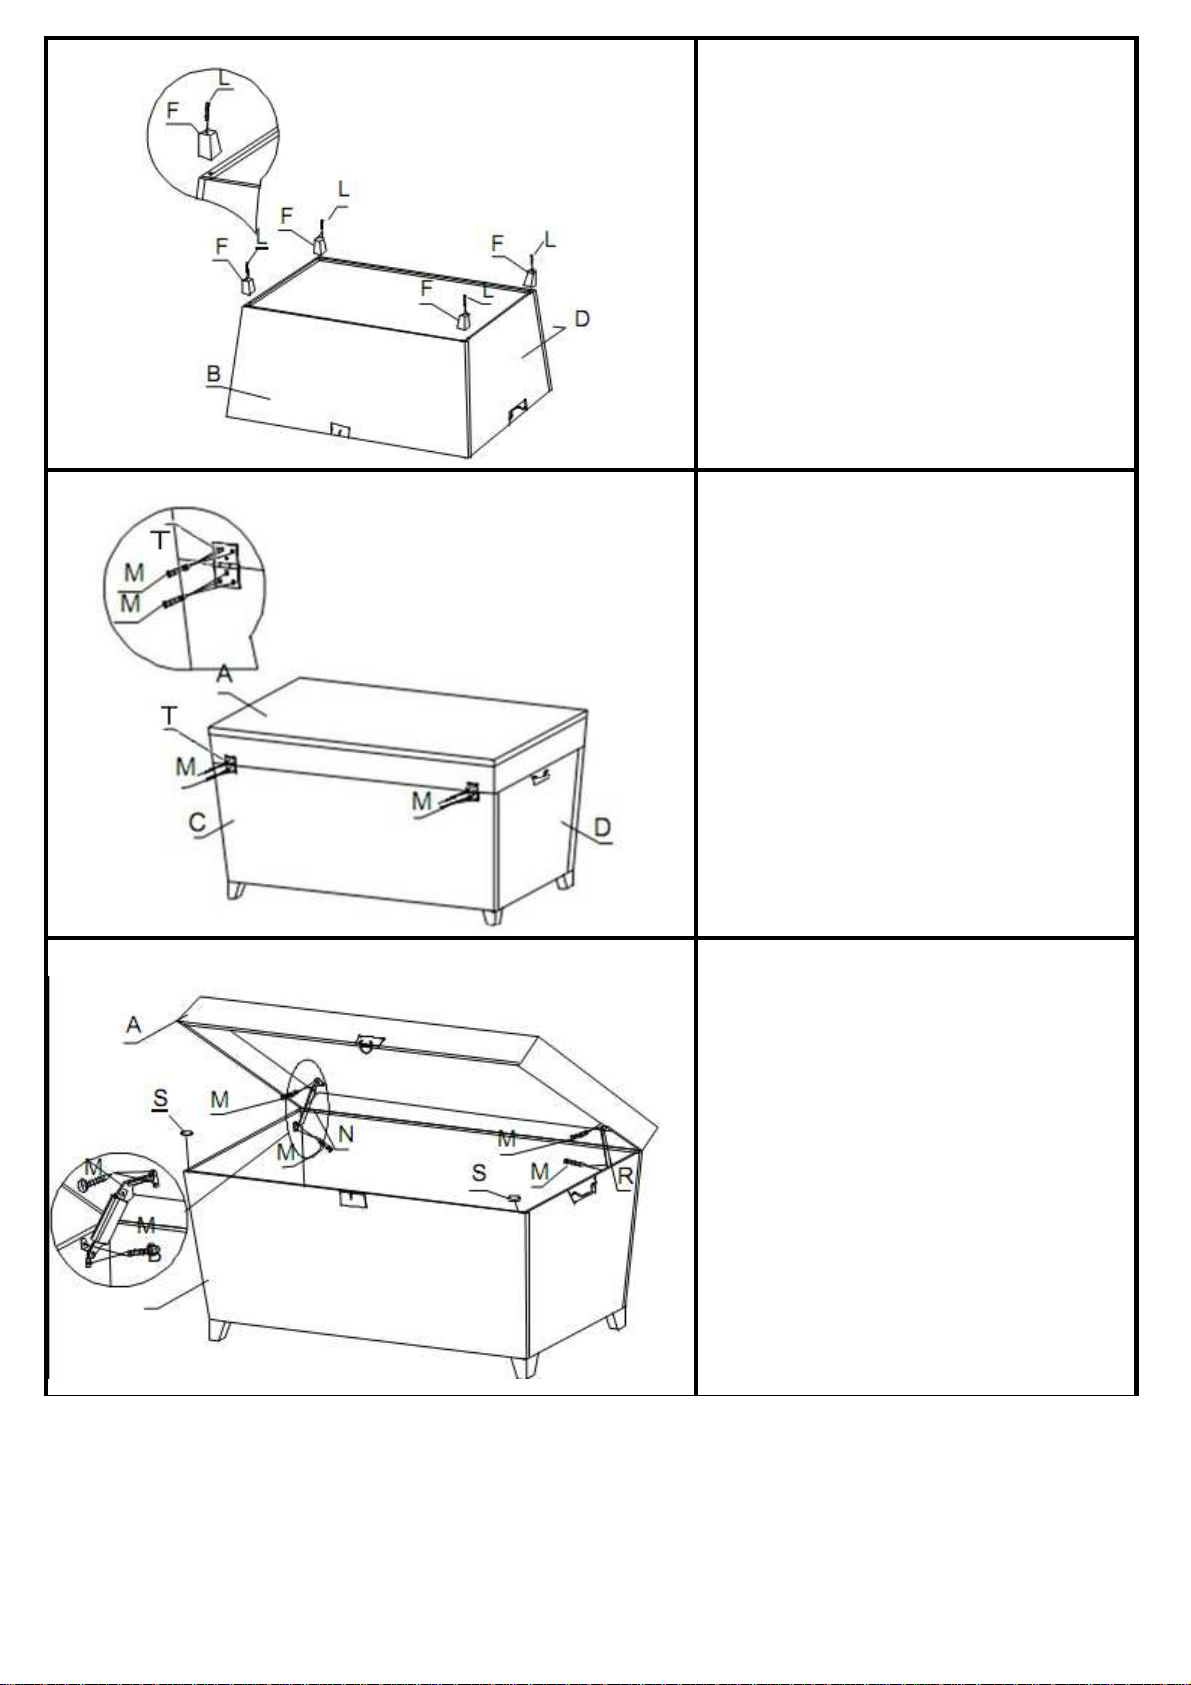
Step 7:
Turn the trunk base upside
down and attach legs (F) to
the bottom of trunk using
screws (L) as shown.
Step 8:
Attach Hinge (T) to back
panel (C) and top panel(A)
by using screws (M) as
shown and then tighten all
screw by phillips
screwdriver(not included)
Step 9:
Attach left support (N) and
right support (R) to the top
(A) and trunk base using
screws (M) and tighten with
Phillips screwdriver as
shown. Then put sponge
cushions (S) on front panel
(B) as shown. Close the
top. Top will close slowly.
Page 7

Parts Replacement Form
Parts Replacement Form
Customer Information
Name
Address
City/State/Zip Code
Phone Number
Please indicate where you purchased this item: Store/Website/Catalog
Please indicate color/size/style number:
Style No Parts Letter Parts Description Quantity Needed
Please immediately examine this product carefully. Any request for missing parts or damage replacement
must be received within 90 days of your receipt of the product. Replacement, if available, will be honored
within this time frame. Parts will not be available for items arriving fully assembled. We do not recommend
modifying product(s) and we are not responsible for any damages due to product modification(s). If
damages or missing parts are not reported within 90 days of your receipt, we are under no obligation to
provide parts or replacement merchandise.
 Loading...