

Page 1

IMPORTANT SAFETY INSTRUCTIONS
• To avoid injury or damage, mount only on a surface that is sturdy.
• To avoid electric shock, make sure the electricity is turned off at the main
circuit breaker panel. If you are replacing an existing fixture, turn off the
following in order: fixture, wall switch, and main fuse or breaker box.
Note: Some types of fuses must be unscrewed to shut the power off.
• If you are unclear as to how to proceed, please consult a licensed
electrician.
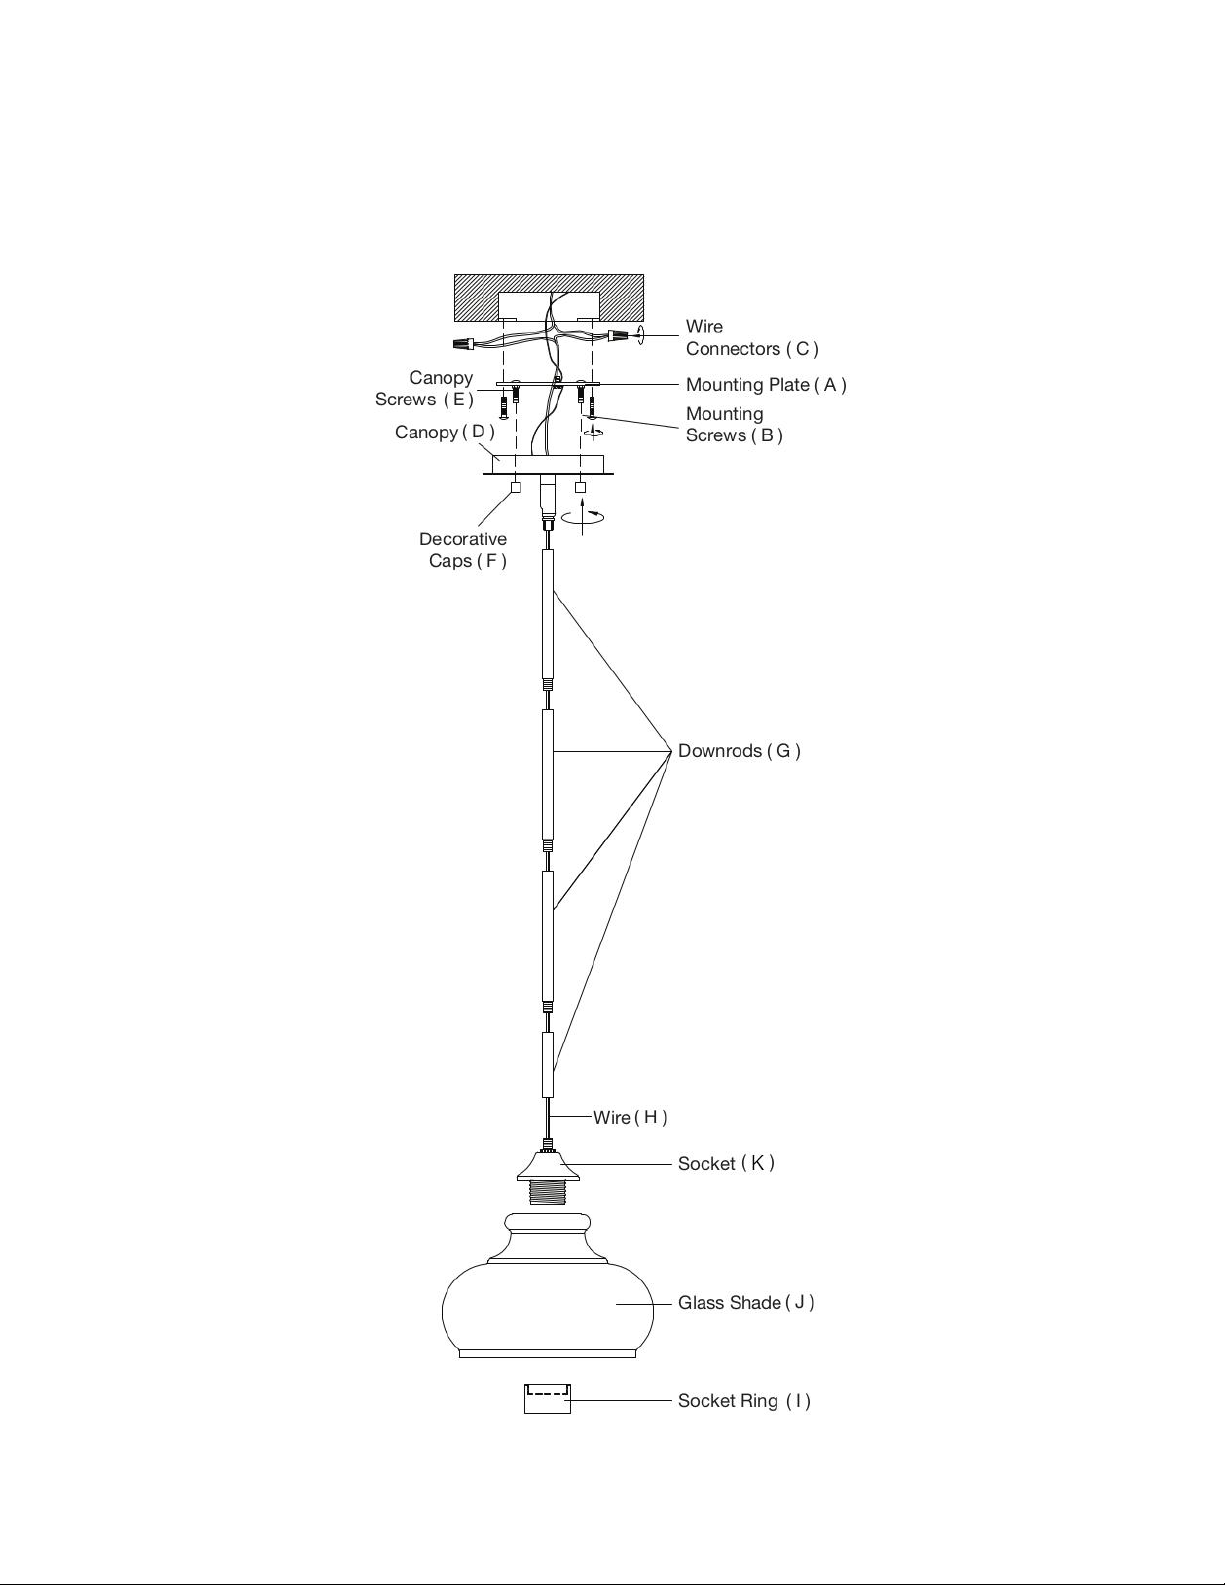
UNPACK THE FIXTURE: Check the contents of the box. Box should contain all items on the parts diagram.
INSTALLATION INSTRUCTIONS
1. Measure Canopy (D) height with measuring tape. Adjust Canopy Screws (E) on Mounting Plate (A) to the
height of measured Canopy (D) plus 1/4" to allow them to protrude through Canopy (D) during installation.
Lock Canopy Screws (E) in place with the hex nuts.
2. Secure Mounting Plate (A) to the junction box (not included) using Mounting Screws (B) provided. Ensure
Mounting Plate (A) is positioned with the threads of Canopy Screws (E) pointing down towards the floor.
3. Place Canopy (D) flush against the ceiling with Canopy Screws (E) protruding through the holes in Canopy
(D). Verify that 1/4” of the threaded portion of Canopy Screws (E) are visible. Remove Canopy (D) and set it
aside.
Note: If 1/4" of Canopy Screws (E) are not visible, remove Canopy (D) and re-adjust Canopy Screws
(E) to proper height and lock them in place with the hex nuts.
4. Determine hanging length by selecting desired Downrods (G). Secure them together.
5. Thread Wires (H) from top of Socket (K) up through Downrods (G). Secure Downrods (G) to top of Socket
(K).
6. Use wire cutters to cut Wire (H) 10” beyond the length of Downrods (G) to allow for easier wire connection.
7. Thread Wire (H) through bottom of Canopy (D). Secure Canopy (D) to the top of Downrods (G).
Page 2
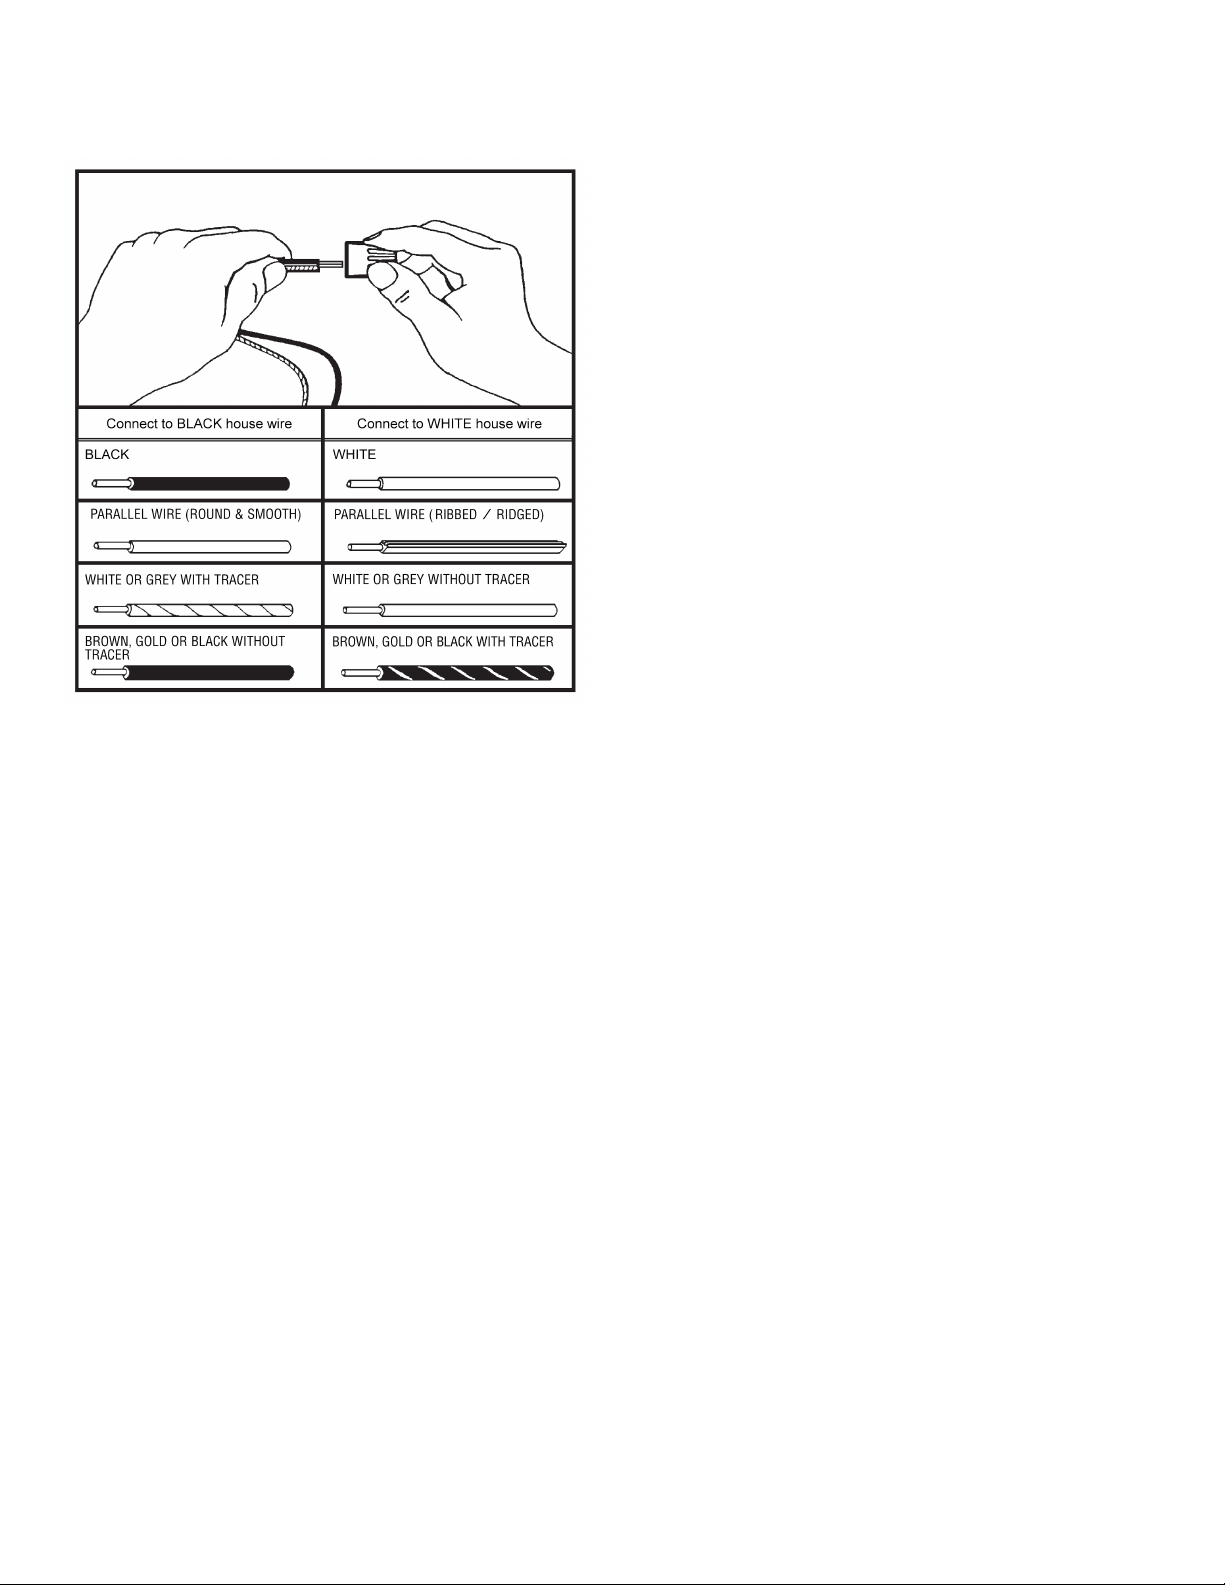
8. Using the wire graph below, connect the appropriate wires from the fixture to the corresponding wires in the
electrical junction box (not included) and secure Wire Connectors (C).
A. Connect the ground wire (bare copper or green) from
your fixture to the:
1) ground wire in the junction box, or
2) ground screw in the junction box
B. Connect the BLACK house wire to fixture hot wire
that corresponds to diagram (black, round &
smooth, white/grey with tracer, brown/gold without
tracer).
C. Connect the WHITE house wire to fixture neutral
wire that corresponds to diagram (white,
ribbed/ridged, white/grey without tracer, brown/gold
with tracer).
9. Place all Wires (H) and Wire Connectors (C) back into the junction box.
10. Place Canopy (D) against the ceiling, ensuring Canopy Screws (E) are protruding through the holes in
Canopy (D). Secure Canopy (D) and the fixture in place with Decorative Caps (F).
11. Secure Glass Shade (J) over Socket (K) with Socket Ring (I).
Note: Socket Ring (I) will be attached to Socket (K). Remove it before installing Glass Shade (J).
12. Install bulbs (not included) into Socket (K).
Enjoy your new fixture!
Page 3
HELPFUL TOOLS: Safety Goggles, Screwdriver, Wire Cutter/Stripper, Ladder, Measuring Tape
 Loading...