

Page 1
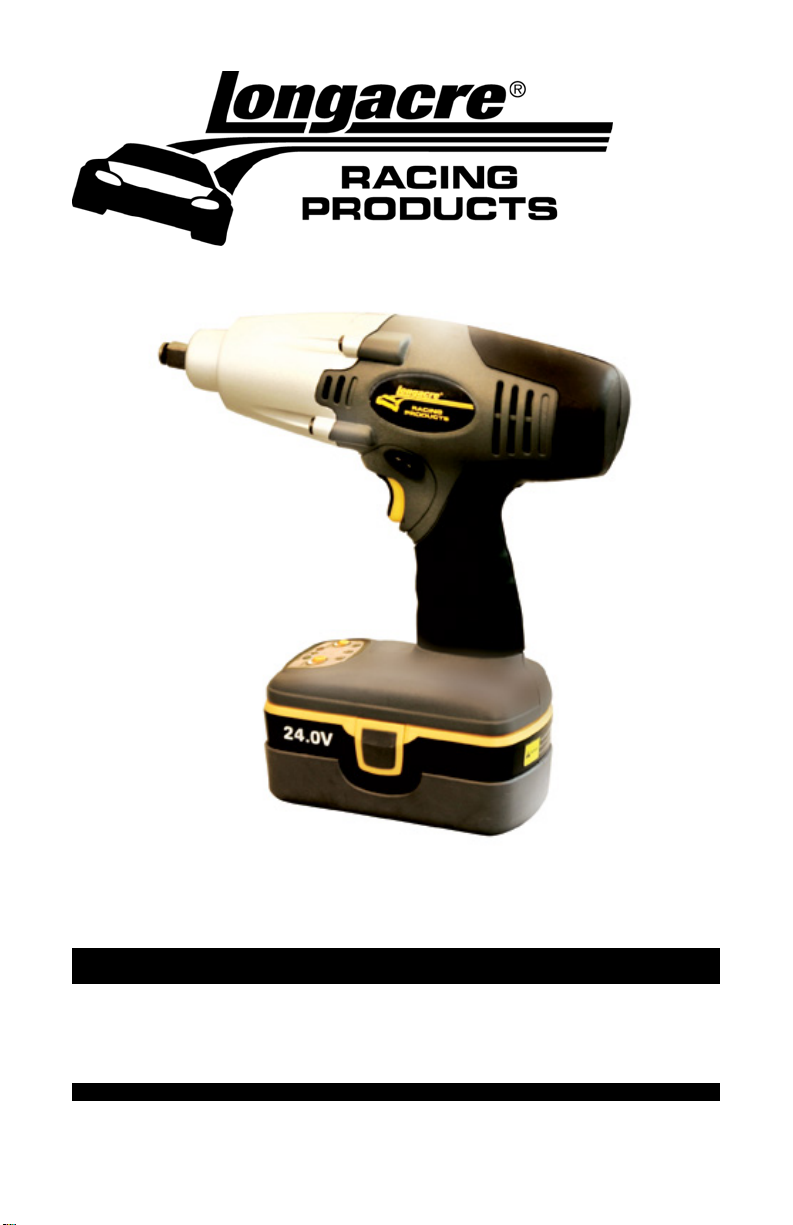
24V 1/2” Cordless Impact Wrench
Operator’s Manual
SAVE THIS MANUAL
You will need this manual for safety instructions, operating procedures and warranty.
Put it and the original sales receipt in a safe dry place for future reference.
Page 2

IMPORTANT SAFETY INSTRUCTIONS
WARNING: When using electric tools, machines or equipment, basic safety
Precautions should always be followed to reduce the risk of fire, electric
Shock, and personal injury.
READ ALL INSTRUCTIONS BEFORE USING THIS TOOL.
1. KEEP THE WORK AREA CLEAN. Clean areas prevent injuries.
2. CONSIDER THE WORK AREA ENVIRONMENT. Don’t use power tools in damp,
wet, or poorly lit locations. Don’t expose your tool to the rain. Keep the work area
well lit. Don’t use any tools in the presence of flammable gases or liquids.
3. KEEP CHILDREN AWAY. All children should be kept away from the work area.
Don’t let them handle machines, tools and extension cords.
4. STORE UNUSED EQUIPMENT. Store equipment in a dry area to inhibit rust.
Equipment also should be in a high location or locked up to keep out of reach of
children.
5. DON’T FORCE THE TOOL. It will do the job better and more safely at the rate for
which it was intended.
6. USE THE RIGHT TOOL. Don’t force a small tool or attachment to do the work of a
larger industrial tool. Don’t use a tool for a purpose for which it was not intended.
7. DRESS PROPERLY. Don’t wear loose clothing or jewelry, they can get caught in
moving parts. Protective, non-electrically conductive gloves and non-skid footwear
are recommended when working. Wear protective hair covering to contain long
hair and keep it from harm.
8. USE EYE PROTECTION. Use a full face mask if the work you’re doing produces
metal filings, dust or wood chips. Goggles are acceptable in other situations. Wear
a clean dust mask if the work involves creating a lot of fine or coarse dust.
9. DO NOT TOUCH BITS OR BLADES WITH HANDS AFTER USE. They can
become extremely hot after the job is completed.
10. SECURE WORK. Use clamps or a vise to hold the work of possible. It’s safer than
using your hands and it frees both hands to operate the tool.
11. DON’T OVERREACH. Keep proper footing and balance at all times. Do not reach
over or across machines which are running.
12. MAINTAIN TOOLS WITH CARE. Keep tools sharp and clean for better and safer
performance. Follow instructions for lubricating and safe performance. Follow
instructions for lubricating and changing accessories. Keep handles dry, clean and
free fro oil and grease.
13. REMOVE ALL ADJUSTING KEYS AND WRENCHES. Make it a habit to check
that keys and adjusting wrenches are removed from any rotating tool before using.
14. AVOID UNINTENTIONAL STARTING. Don’t carry tools with a finger on the
switch. Be sure the direction switch is in the STOP position when not in use or
when changing attachments.
15. STAY ALERT. Watch what you are doing & use common sense. Don’t operate
any tool when you are tired.
16. CHECK FOR DAMAGED PARTS. Before using the tool, any part that is damaged
should be carefully checked to determine that it will operate properly and perform
its intended function. Check for alignment of moving parts, binding of moving
parts, breakage of parts, mountings, and other conditions that may affect its operation. Check bits and blades to make sure they are sharp and not chipped.
Inspect screws and tighten any ones that are loose. Any part that is damaged
should be properly repaired or replaced by an authorized service center unless
otherwise indicated elsewhere in the instruction manual. Have defective switches
replaced by an authorized service center. Don’t use the tool if the switch does not
turn on and off properly.
17. GUARD AGAINST ELECTRIC SHOCK. Prevent body contact with grounded
surfaces such as: pipes, radiators, ranges, and refrigerator enclosures. When
drilling or cutting into walls, floors, or wherever “live” electrical wires may be, try to
ascertain whether there is a danger of shock.
18. REPLACEMENT PARTS. When servicing, use only identical replacement parts.
!
2
Page 3
PRECAUTION FOR BATTERY AND CHARGER
!
!
CHARGE BATTERY AT LEAST 1 HOUR before initial use.
1. CHARGE AT ROOM TEMPERATURE. Room temperature must be higher
than 32°F and lower than 122°F.
2. DO NOT CHARGE IF THE CHARGER’S CORD OR PLUG IS DAMAGED.
Charging with a damaged cord may result in a fire or electrical shock. If the
charger is damaged in any way, have it repaired by a qualified serviceman.
3. DO NOT SHORT ACROSS TERMINALS OF BATTERY. Take care that
metal such as paper clips, nails, the sides of a metal tool box do not cause
a short in your battery. Extremely high temperatures and fire can result.
4. DO NOT INCINERATE THE BATTERY.
WARNING! The warnings, cautions, and instructions detailed in this manual cannot
cover all possible conditions and situations that occur.
USE COMMON SENSE AND CAUTION WHEN OPERATING THE TOOL.
SPECIFICATIONS
Voltage: 24 volts DC
Variable Speed 0-2000 RPM
Impact Frequency: 0-4000 IPM
Max Torque: 300 FT LBS
Reversible / Electric Brake
Chuck: 1/2” Square Driver
Includes:
1 pc 24V wrench
1 pc 1 hour CUL & UL approved charger
2 pcs 24V Ni-Cd rechargeable battery
1 pc carrying case
1 pc 1” deep socket
1 pc 3” extension
1 pc 5” extension
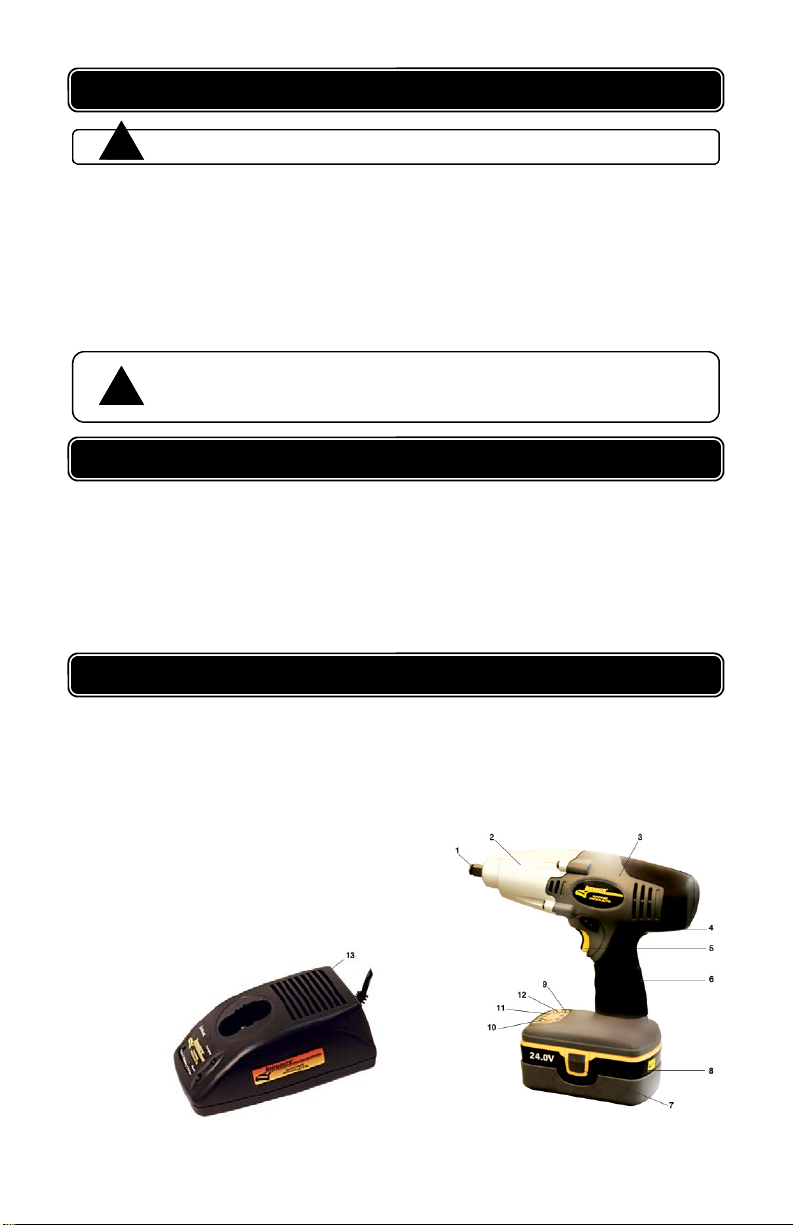
FUNCTION DESCRIPTION
1. 1/2” Square Socket Drive
2. Metal Gear Housing
3. Heavy Duty Motor #977
4. Direction Lever (Forward / Stop / Reverse)
5. Variable Speed Trigger Switch
6. Rubber Hand Grip
7. Battery Release Button
8. Rubber Protected Battery Pack
9. LED Working Light
10. LED Light Button
11. Battery Indicator light
12. Battery Indicator Button
13. Charger
3
Page 4
OPERATING NOTES FOR BATTERY PACK
1. Battery must be charged before using the tool for the first time. Batteries reach full
performance after about five charge / discharge cycles.
2. Always have the 3-position Forward / Reverse / Neutral Lock Switch in the center
position when removing or inserting the battery to avoid unintentional start.
3. Remove the battery from the tool. Press the Battery Release Button and remove the
battery.
4. Place battery on the charger.
5. To charge, plug the charger’s AC input plug into a 120V household current.
6. When the battery is charging, a red light is on. When the battery is finished charging,
a green light comes on.
7. IMPORTANT: Ensure that the charging takes place in a safe, secure location away
from liquids.
8. Normal charging time is approximately 1 hour.
9. To insert the battery into the tool, simply slide the pack in until Battery Release
Button lock spring clicks.
10. When charging more than one pack in succession, allow 15 minutes between
charges.
11. The battery discharges slowly over time, even when not used, and may require
recharging before you use the tool.
12. After many charge / discharge cycles, your batteries will lose their ability to hold a
charge. They should then be replaced. Dispose of batteries at an appropriate waste
disposal facility. They contain cadmium, so do not throw batteries away in common
trash receptacles.
13. Charge the battery 1 hour every 3 months even if you do not use it, as battery
discharges slowly over time.
14. Please disconnect the AC/DC adapter after the battery is charged, the charger and
AC/DC adapter may be damaged if plugged in the 120V outlet continuously for 24
hours.
WARNING! Never charge the battery until it is cooled down, charging the hot battery
may cause the battery to explode.
!
WARNING! Dispose of batteries at an appropriate waste disposal facility. They contain
cadmium, so do not throw batteries away in common trash receptacles.
OPERATING PROCEDURES
WARNING: When the machine is obstructed, please turn off the switch right away
and check if the work piece is right. An obstruction may cause the machine
motor to be burned.
REMEMBER: This tool is cordless and does not need to be connected to a
power supply.
CAUTION:
Do not expose either the electrical tool or charger to the rain or water
Do not overcharge the battery as this could damage the battery’s cells.
Do not force the tool If the tool is stalling, it is possible that the battery
power is low. If so, stop working and recharge the battery pack.
To prolong the life of the tool, do not continually work for more than 20
minutes at a time.
!
!
!
!
4
Page 5

OPERATING PROCEDURES
GENERAL
This tool is intended for use with 1/2” drive impact sockets for loosening
and tightening nuts and bolts.
To prolong the life of the tool, do not use it continuously for more than 20
minutes at a time.
If the tool shows signs of decreased power, stop and recharge the battery.
Using the tool to do heavy work when the battery is weak drains the battery
very quickly and can damage the battery.
To use the tool, first start the fastener on the thread by hand, making sure it
is not cross-threaded.
Choose a 1/2” drive socket of the correct size and mount it on the drive
shaft.
Place the socket over the fastener.
Use the variable speed only for starting.
Allow the tool to come up to full speed.
When you hear the sound of the impacts, stop after three or four. The
fastener is tight.
VARIABLE SPEED
You can vary the spindle rotation speed by modulating finger pressure on the
trigger.
ROTATION DIRECTION
Your tool is equipped with a 3-position Forward / Reverse / Stop Lock Switch
through the house above the trigger. When the knob is pushed toward the right,
the rotation is forward (clockwise). When pushed in from the right to the left side,
the rotation is reversed (counter-clockwise), and when in the center position, it is
locked into stop and the trigger is blocked. Do not push the rotation direction knob
until the drive stops turning.
BATTERY INDICATOR
Pressing the battery indicator button will display the level of charge remaining in
the battery. There are 3 levels of charges, red light is low, yellow light is medium,
and green light is high. When the battery indicator is showing a red light, the
battery should be removed and put on the charger after cooling.
LED WORKING LIGHT
The impact wrench has 3 LED lights to illuminate the work area and improve
vision when working in areas with insufficient light.
To turn the LED lights on and off depress the LED light switch.
MAINTENANCE
Keep the tool clean by using a soft damp (not wet) cloth. Do not use solvents
on the plastic parts.
Lubrication is not necessary. After long use, have an authorized service
center maintain and lubricate the tool.
To maintain the best performance of your rechargeable NiCd battery, protect
it from overheating, by overcharging and during storage. Occasionally charge
the battery for 6 hours. The battery may also benefit from a full discharge from
time to time.
5
 Loading...