

Lomanco 770D Installation Instructions Manual
1.800.643.5596 • Lomanco, Inc. • lomanco.com
Subscribe on
YouTube
Find us on
Facebook
IMPORTANT
• READ THESE INSTRUCTIONS CAREFULLY BEFORE
STARTING INSTALLATION.
• Installation of the Lomanco 770D Roof Vent should
comply with all local codes and standards.
• WARNING! Sharp edges are exposed during
installation. Use gloves and other appropriate safety
equipment to avoid injury.
INSTALLATION:
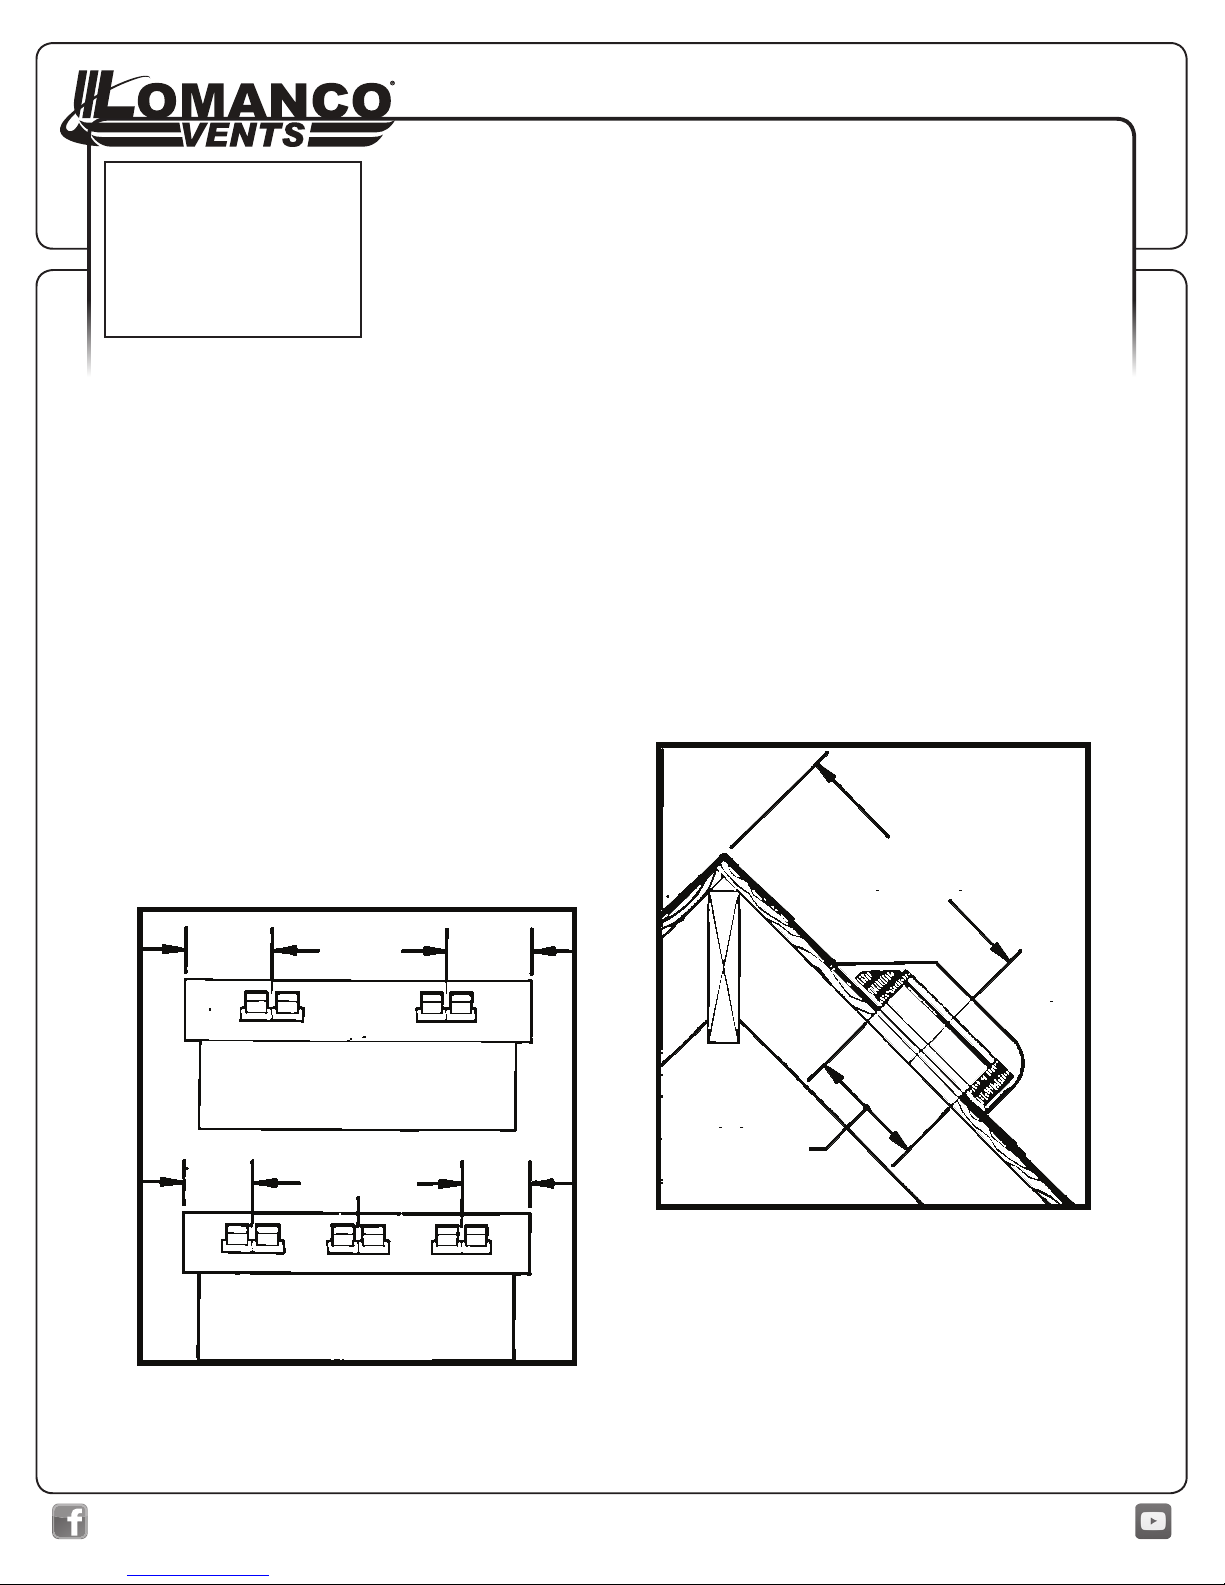
1. Vents should be evenly spaced on the rear slope of
the roof. You also want to center vents on the roof
length. (If you are installing two vents, locate each
one 1/4 the distance from each end of roof. When
installing three vents locate one in the center and
the other two 1/6 the distance from each end of
roof.)
2. The seam of base should be centered on rafter
centerline. Locate rafter by tapping roof with
hammer. Measure over 7-11/16" each side
of rafter centerline. Mark these positions.
3. Warm air rises; therefore, you want to locate roof
vents as near as possible to the ridgeline. Locate
the vent holes roughly 24" (36" Max.) down from
the ridgeline to keep the top of the roof vent
below the ridgeline. Mark this position. Vent
location position should now be approximately
24" down from ridgeline and centered over rafter.
4. Using marked positions as center point scribe two
9-1/2" diameter circles. Drill a starter holes inside
circles, a ½" drill bit should do this nicely.
5. Starting in the drill holes cut two 9 1/2' diameter
circular openings, using either a keyhole saw or
an electric saber saw with sharp coarse blade. If
you do not have a coarse blade, cut away shingles
inside the circle with utility knife before cutting
roof decking. Take care not to make the holes too
large or water leakage may occur.
LOMANCO 770D ROOF VENT
INSTALLATION INSTRUCTIONS
Thank you for purchasing the LOMANCO 770D Roof Vent. The 770D is an
exhaust vent that will help eliminate damaging heat and moisture from
your attic when properly installed with intake vents.
"ITEMS NEEDED FOR INSTALLATION"
KEYHOLE SAW OR SABER SAW
UTILITY KNIFE
DRILL WITH ½" BIT
HAMMER AND ROOFING NAILS
TAPE MEASURE
ROOFING CEMENT
COMPASS OR STRING
24" APPROXIMATELY
3'0" MAX.
91/2" DIA.
HOLE
PROPER SPACING
TWO VENTILATORS
REAR VIEW
PROPER SPACING
THREE VENTILATORS
REAR VIEW
CENTER1/6
1/4
1/4
1/6
22300_1016
1.800.643.5596 • Lomanco, Inc. • lomanco.com
Subscribe on
YouTube
Find us on
Facebook
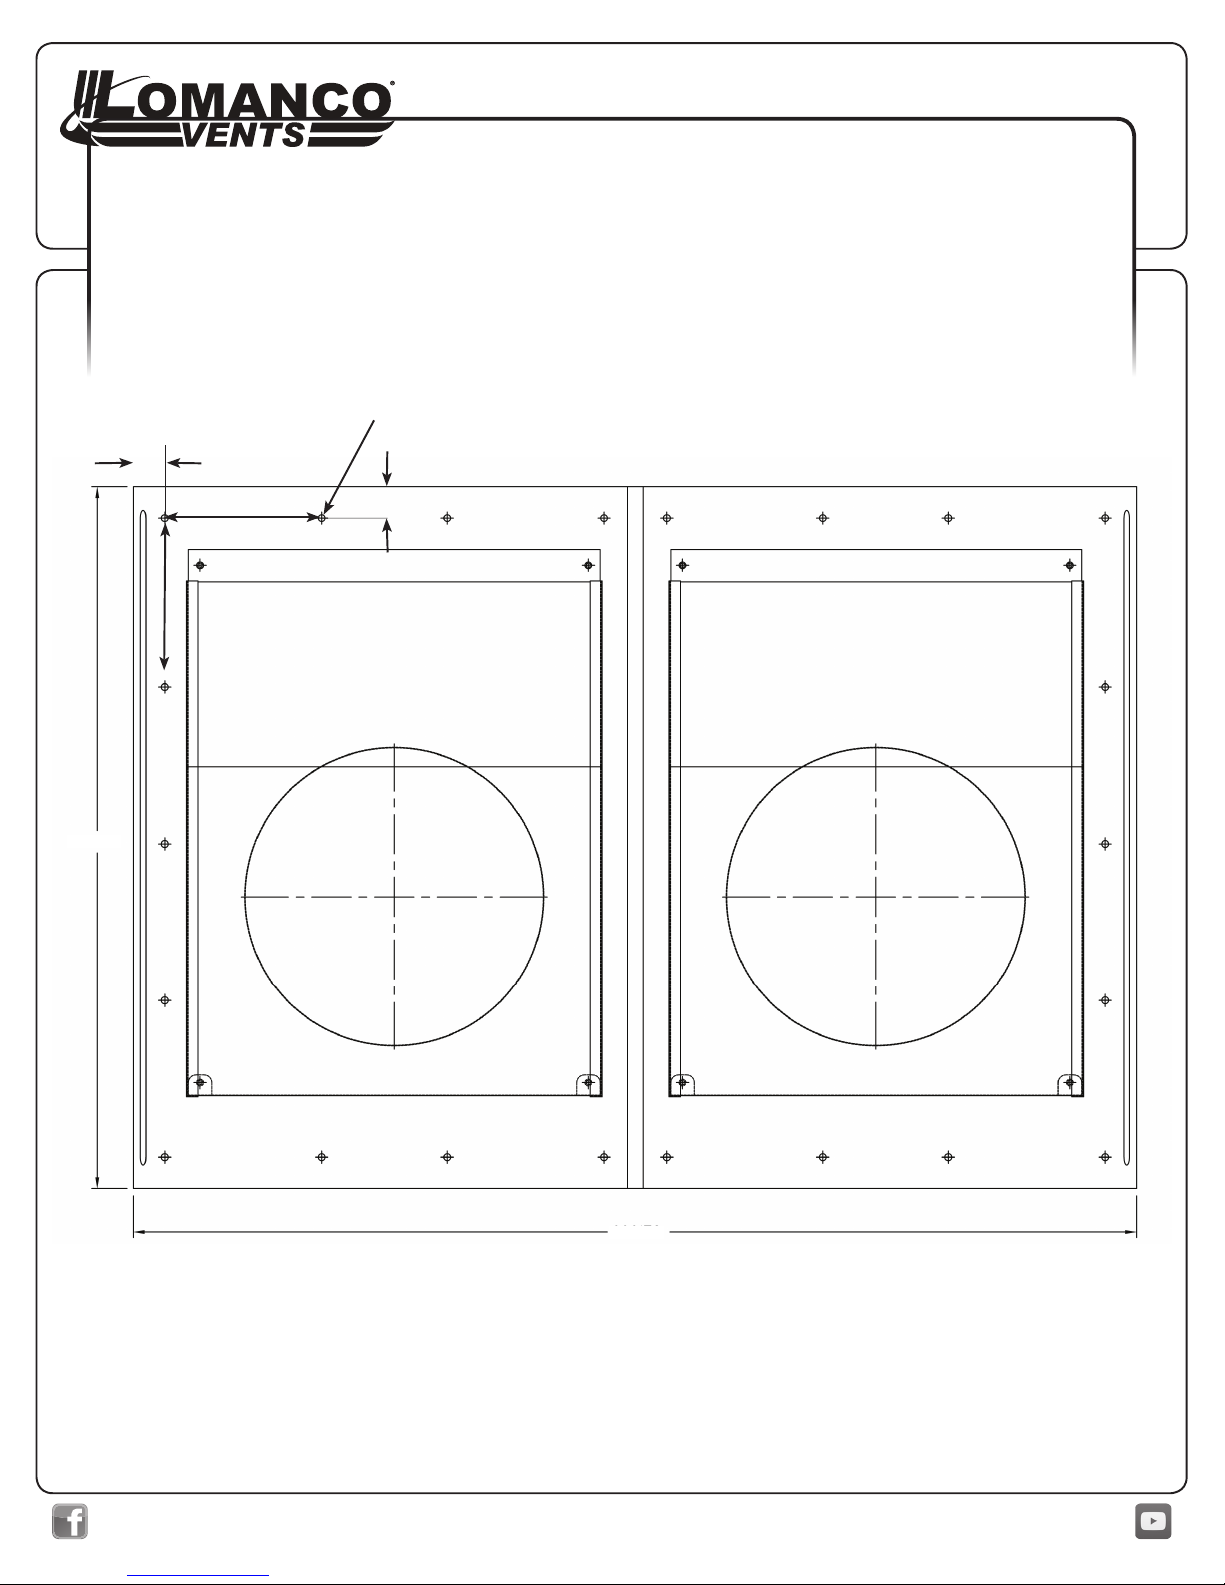
6. Carefully remove roong nails from top row of
shingles so that the ashing of the roof vent will
slide under top row. Trim shingles around vent to
allow ashing to slide under shingles and align
vent hole with the hole in roof.
7. Apply roong cement to the bottom of the vent,
around the hole.
8. Carefully slide vent into place with arrow pointing
up. Make sure throat of vent is centered over vent
hole. Fasten the base to roof decking with roong
nails as shown below. Keep heads of nails under
shingles to prevent water leakage.
9. Finish mounting by sealing all seams and nails
with roong cement. Also use roong cement to
fasten down loose edges of shingles.
5” TYPICAL
1” TYPICAL
Space Roofing Nails As Shown
1” TYPICAL
22.375"
32.000"
5” TYPICAL
22300_1016
LOMANCO 770D ROOF VENT
INSTALLATION INSTRUCTIONS
THREE
MUST
DO
Steps
to attic ventilation
Install all Exhaust Ventilation at the SAME
HEIGHT within a common attic area.
Installation of exhaust vents at more than one
level on a roof allows the upper exhaust vent to
pull air in from lower exhaust vents rather than
from the intake vents. Intake air must come
from intake vents located near the lower part of
the attic space to properly ventilate the total
attic area and eliminate weather infiltration.
Install ONLY ONE TYPE of Exhaust Ventilation
within a common attic area.
Exhaust Vents pull air from the easiest intake source.
Vent types cannot be mixed. The use of different types of
exhaust vents could make one of the vents act as intake
for the other. Intake air must come from intake vents
located near the lower part of the attic space to properly
ventilate the total attic area and eliminate weather
infiltration.
Install a BALANCED SYSTEM of Intake
and Exhaust Ventilation.
50% Intake Ventilation - Intake vents located
near the lower part of the attic area are required
to balance out your ventilation system.
50% Exhaust Ventilation - Use a Lomanco
Ventilation Selector guide, the calculators at
lomanco.com, or the Lomanco Vent Selector App
to determine the number of vents needed to
properly ventilate an attic to meet the minimum
code ventilation standard.
1
2
3
 Loading...